- Visit ExpressVPN’s website login page
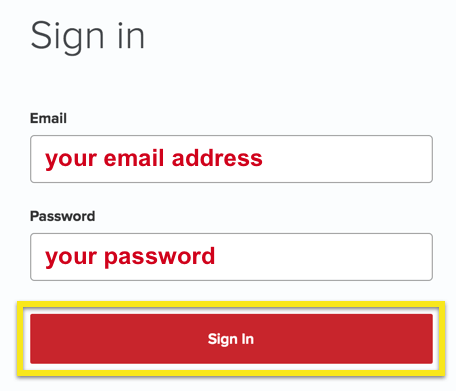
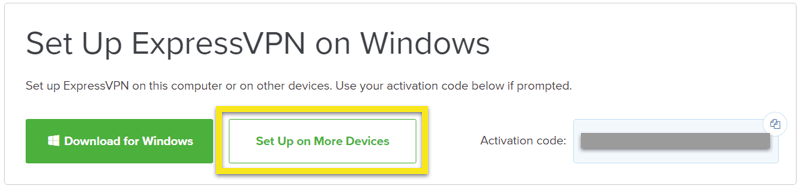
- Successfully log in with your account information. Select Setup on More Devices.
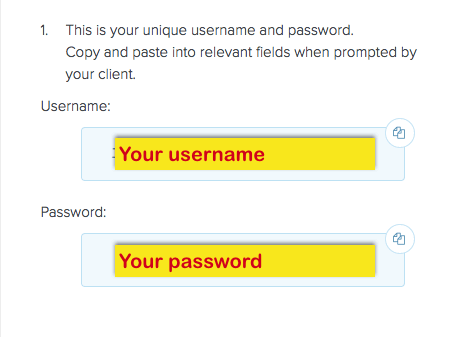
- Select Manual Config and copy the Username and Password that are displayed on the right hand side of the screen.
Search Results for: manual height a
Privacy Hero Activation and Setup
Follow this article when you receive your new Privacy Hero router to create your Privacy Hero account, connect your Privacy Hero to the Internet, and customize your network so it is ready to use.
Your Privacy Hero router uses Cloud Based router management which means you can access the router settings from anywhere on any device that has an internet connection. You can follow these steps while connected to your phone or your other Wi-Fi network.
Create your Privacy Hero account
1. From any device that has a browser such as a computer, smartphone, or tablet visit app.privacyhero.com

2. Select Create Account.
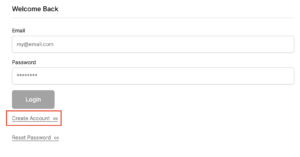
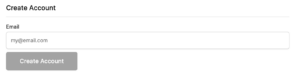
3. Enter the Email address you want to set for your Privacy Hero account. This will be your login to the Privacy Hero settings moving forward. Click Create Account.
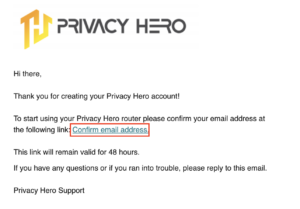
4. Go to your Email inbox and check for an email from Privacy Hero and click the Confirm email address link. This email may be in your Promotions or Spam inbox if it is not appearing in your main inbox.
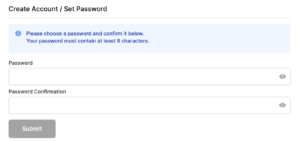
5. Enter the password that you want to use for your Privacy Hero account. Be sure to note this in a secure location so you do not forget. Click Submit.
6. You have now created your Privacy Hero account. You will use this login to access the Privacy Hero router settings.
Activate your Privacy Hero Internet and setup Wi-Fi
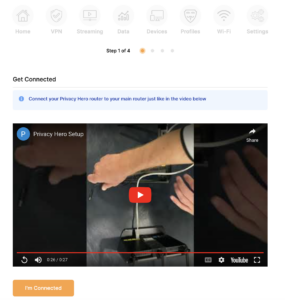
1. You will then be taken to the Router Activation steps. Connect the ethernet cable that the Privacy Hero came with from an open Ethernet port on your ISP modem or other router to the WAN/Internet (blue) port of the Privacy Hero.
Then power the Privacy Hero device on by connecting the power supply. This is shown in the video on the page as well. Wait about a minute or so for the Privacy Hero router to fully boot up and then click I’m Connected.
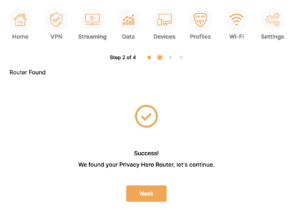
2. The next page may say Router Found or ask you to enter the Activation Code. If it asks for the Activation Code that will be the code printed on the bottom of the Privacy Hero. Enter this code and click Next.
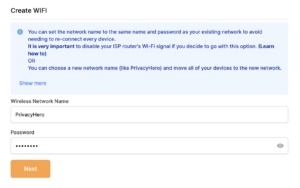
3. Set the Wi-Fi name and password for connecting your devices to the Privacy Hero network. Make sure it is not a duplicate name of an existing Wi-Fi network. Click Next.
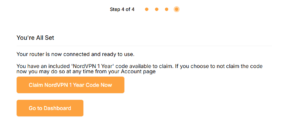
4. To activate your 1 Year NordVPN code:
Click on Claim NordVPN 1 Year Code Now
Go to the Account section of your router settings.

Copy the NordVPN code shown under Claim NordVPN 1 Year Code.
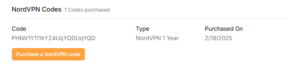
Go to the NordVPN activation page.
This code can be used with a new or existing NordVPN account.

5. You are now all set to begin joining your devices to the new Privacy Hero network with the Wi-Fi name and password you entered and setting up some of the Privacy Hero features.
Flint/Slate GL.iNet Repeater Setup
If you want to connect your FlashRouter to the Internet via Wi-Fi instead of an ethernet cable you can setup a FlashRouter as a Wireless Repeater. In Wireless Repeater mode the FlashRouter connects to an available network via WiFi and then creates a completely separate network segment for you.
1. Connect your computer, phone, or tablet to the GL.iNet router via wireless (FlashRouter24 / FlashRouter50) or via ethernet cable to one of the LAN ports on the router.
The FlashRouter WiFi password is printed on the sheet that came with the router and is set to Wireless#[First 5 characters of your router MAC]. The router MAC can be found on the bottom of your router if you cannot locate the sheet. For e.g. if your MAC is 1459C07E70A8 then your WiFi password is Wireless#1459C
Be sure to capitalize the W.
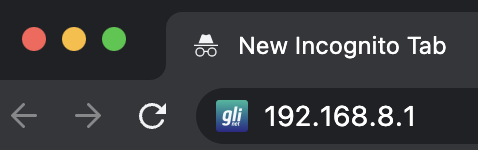
2. Once connected via wireless or ethernet on your device open your browser and go to 192.168.8.1
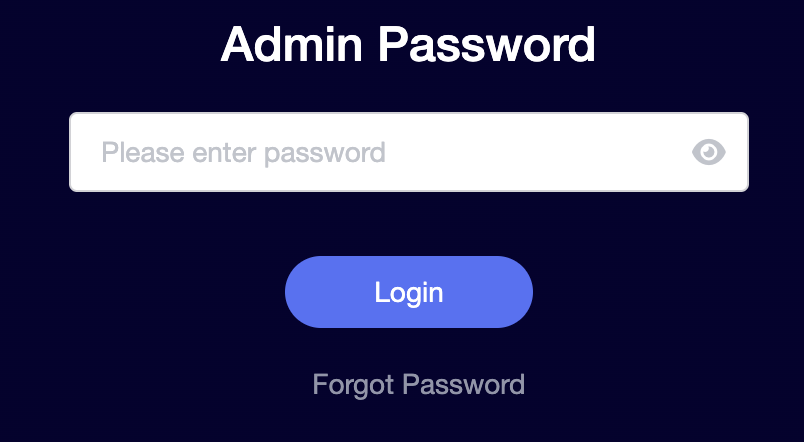
3. Enter openwrt as the admin password to access the GL.iNet firmware settings.
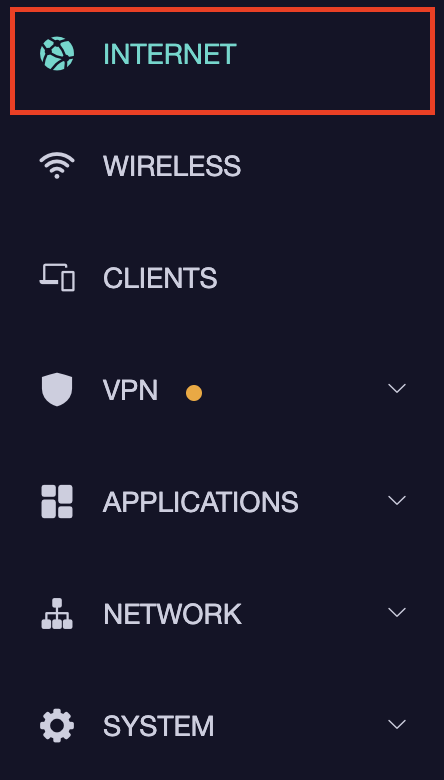
4. Select the Internet tab.
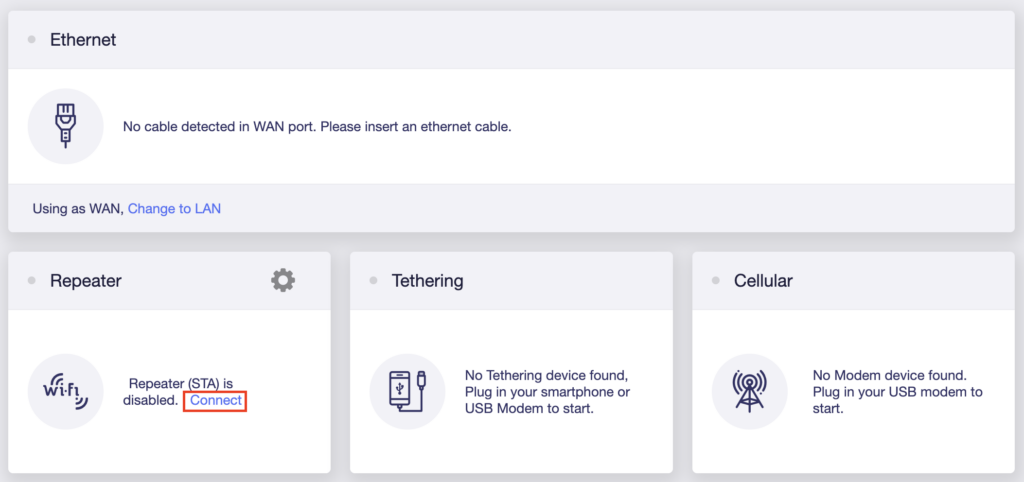
5. In the Repeater area select Connect.
6. Select the available Wi-Fi network you want the FlashRouter to use for Internet from the list. You can use a 2.4GHz and/or 5GHz network to connect.
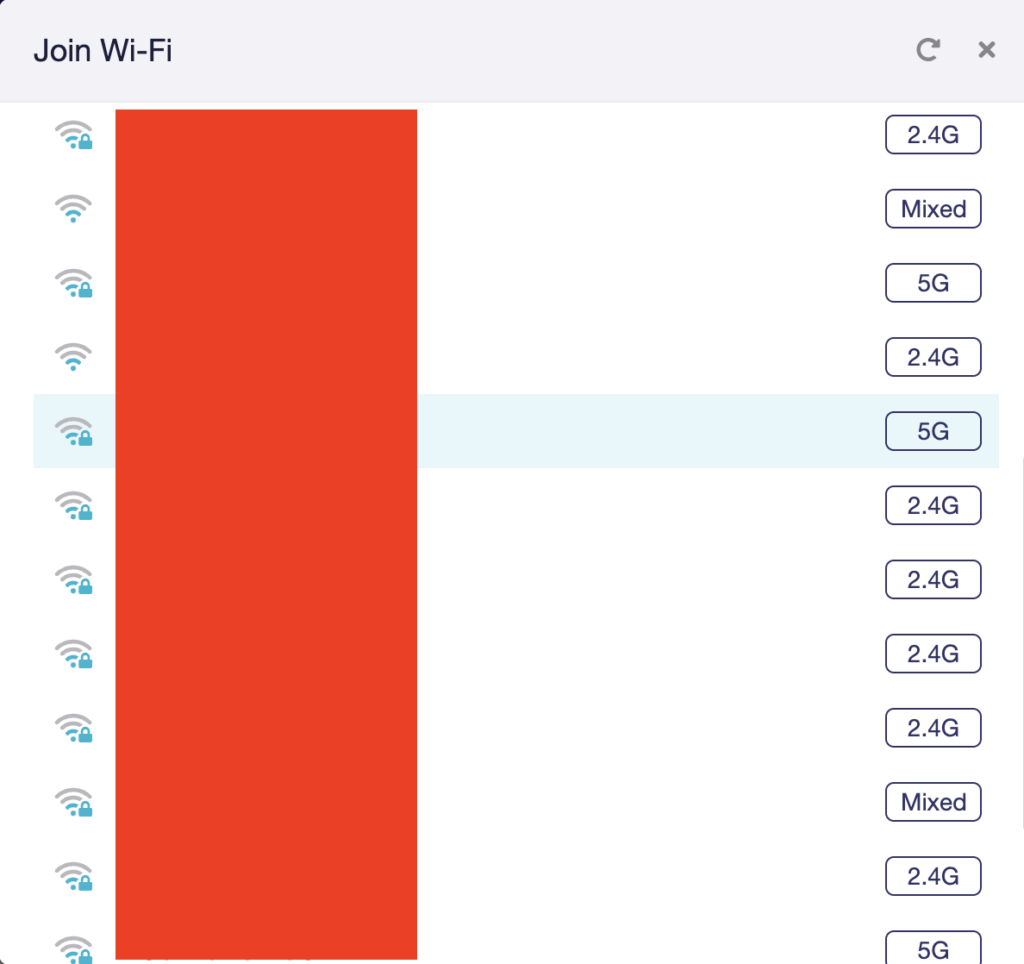
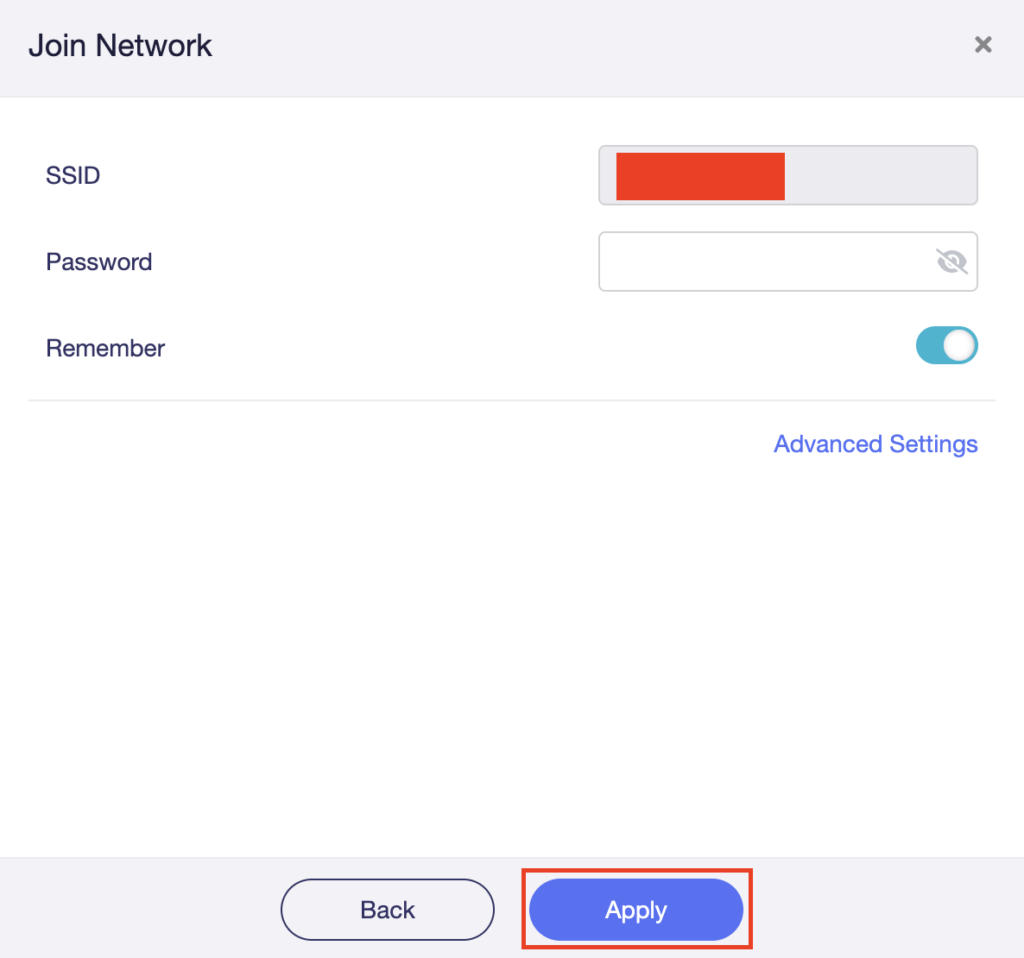
7. Enter the correct Wi-Fi password in the Password field for the network you selected. Then click Apply.
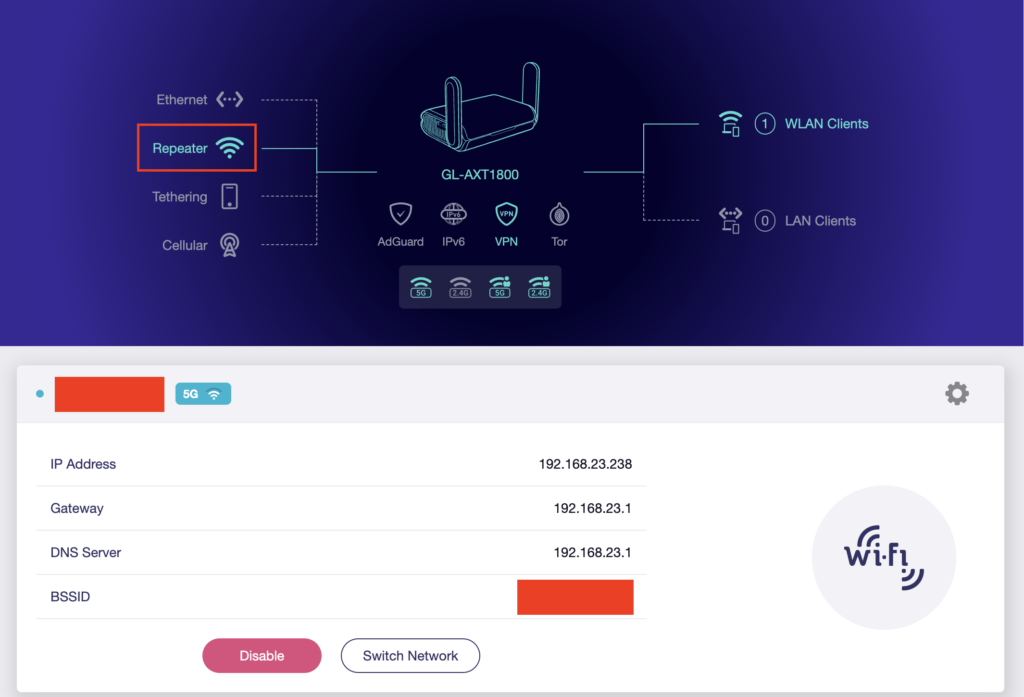
8. You are now setup with the GL.iNet FlashRouter receiving Internet via Wi-Fi. The Repeater area should now be filled in with the network information of the connection as shown below.
ExpressVPN Setup on Roqos
Preparing for ExpressVPN Setup
Obtain your ExpressVPN login information
If you are not already an ExpressVPN user Sign Up Now.
1. Visit ExpressVPN’s website login page.

2. Successfully log in with your account information. Select More.
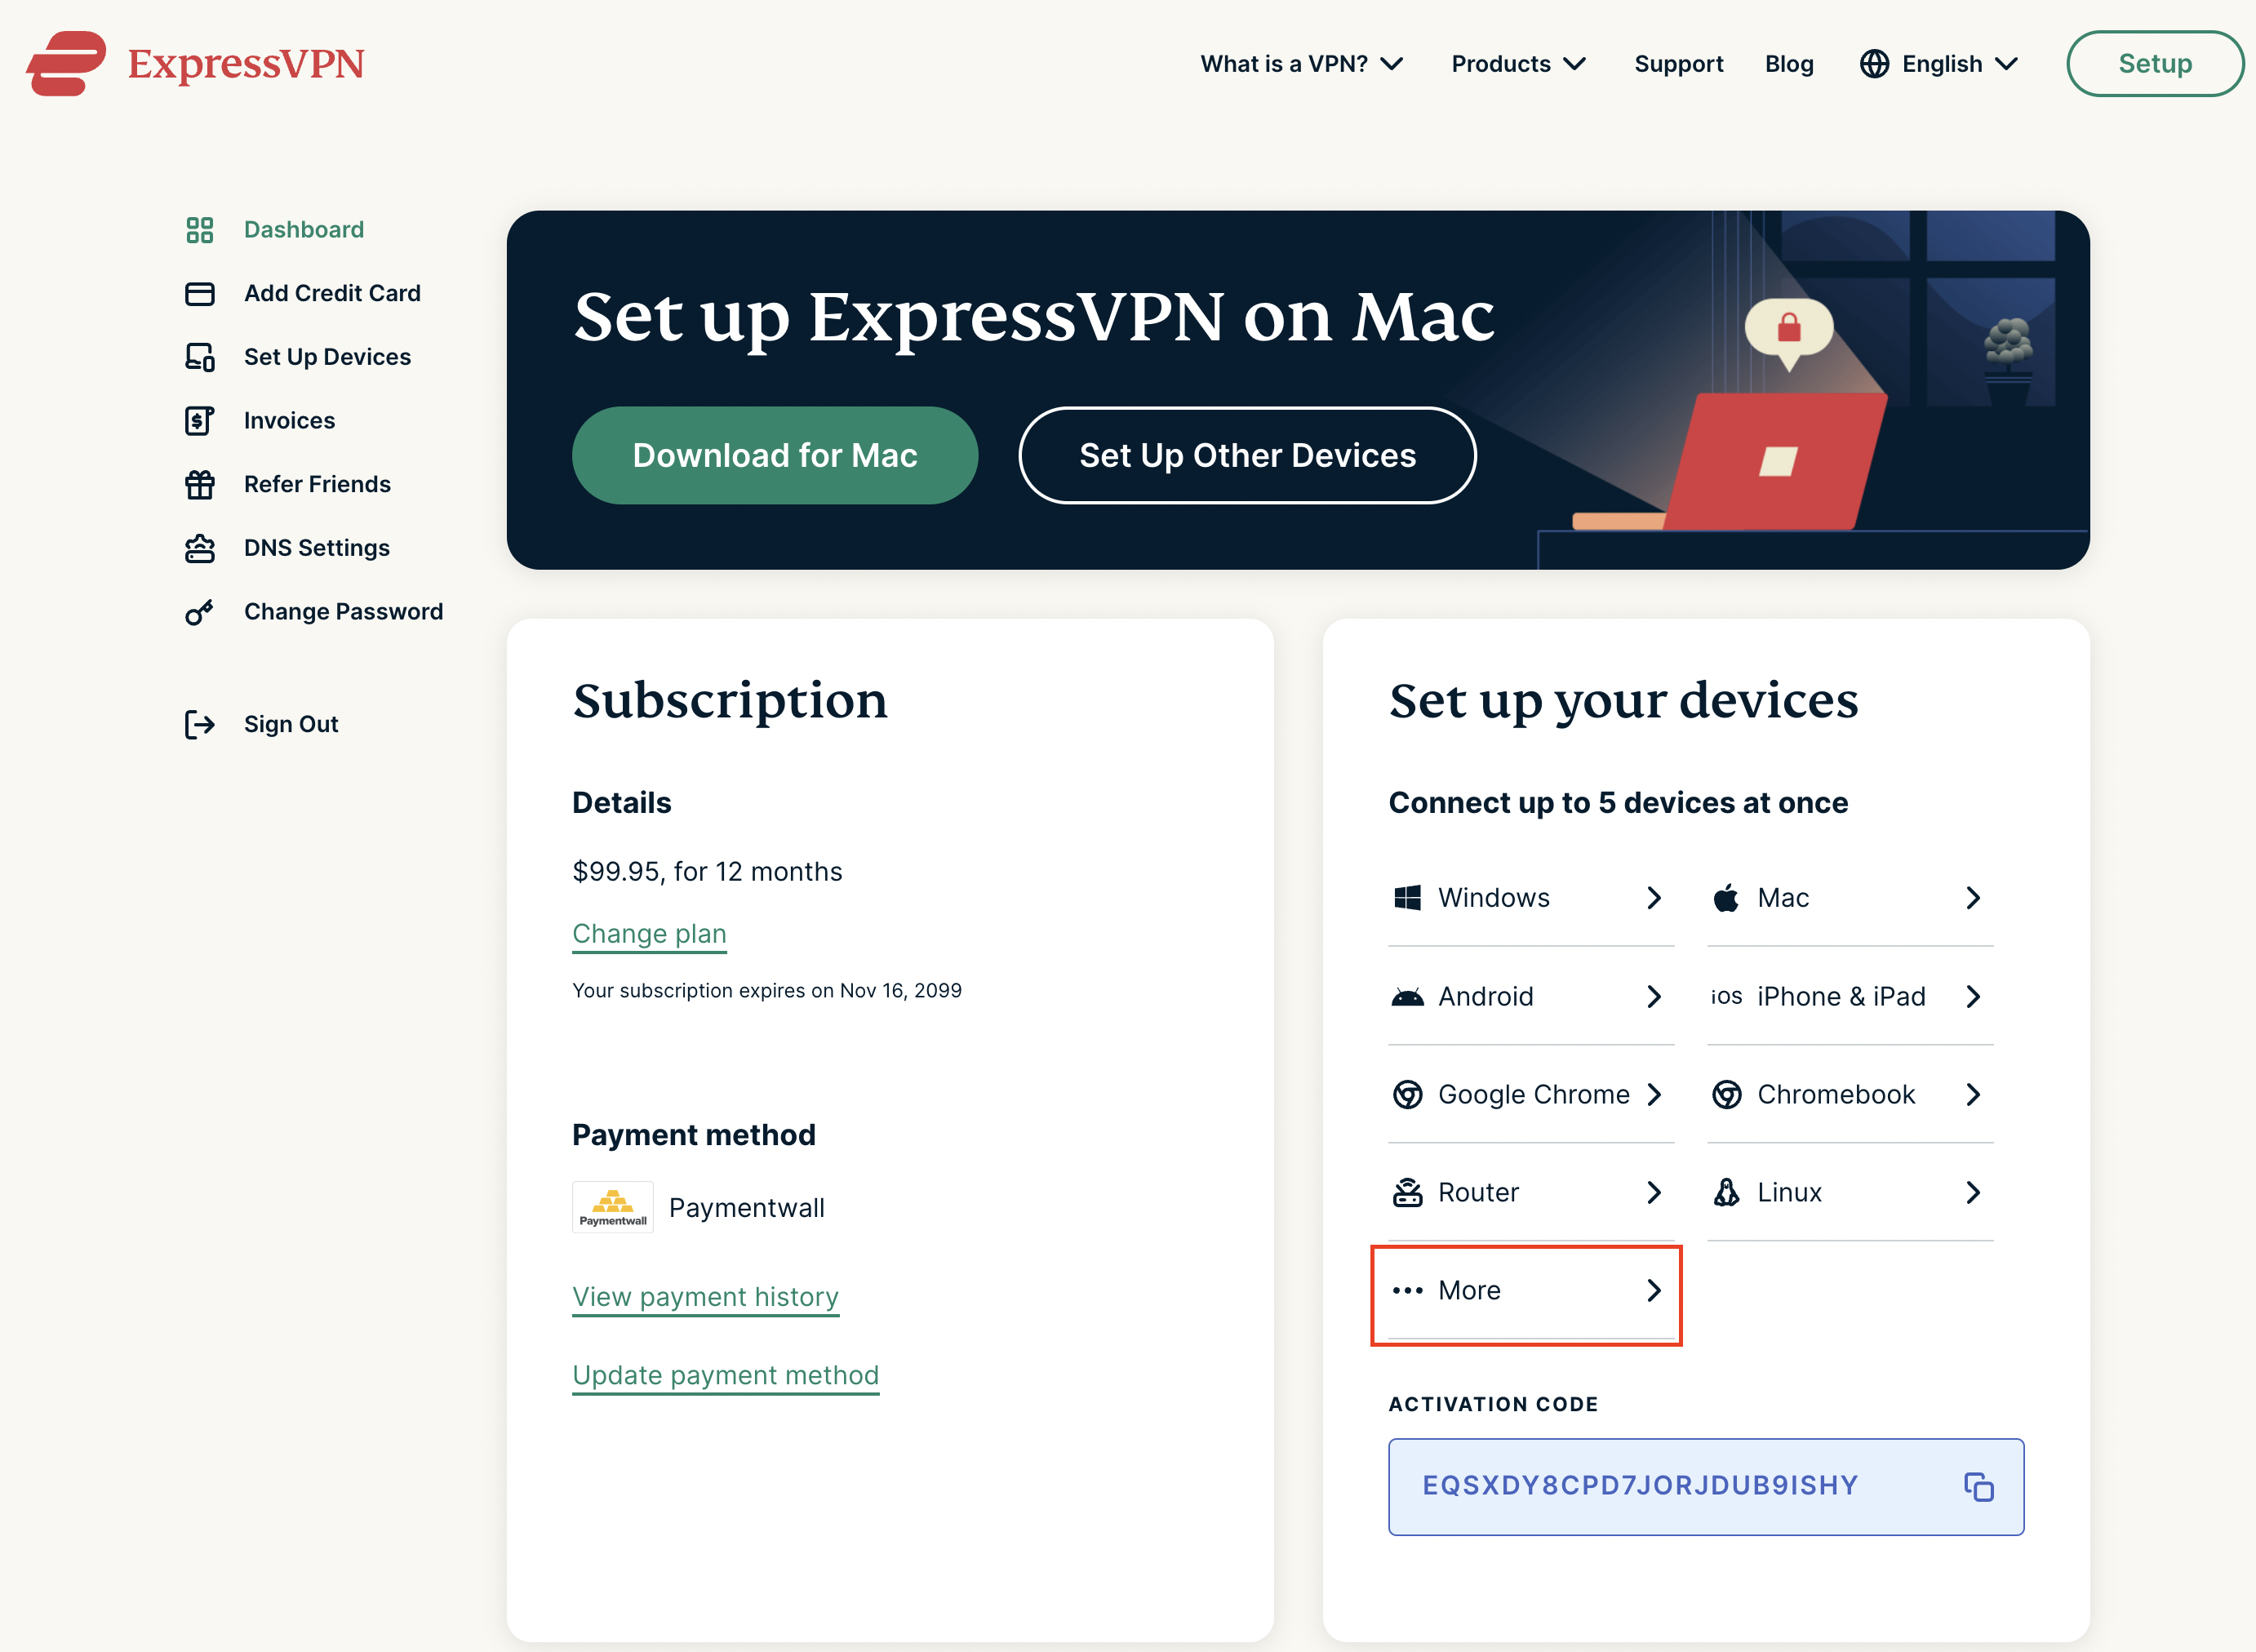
3. Select Manual Configuration and copy the Username and Password that are displayed on the right hand side of the screen.


Connecting to ExpressVPN in the Roqos Core
Access the Roqos Core UI
1. Login to the Roqos Core web app in a browser on any computer or smart device.
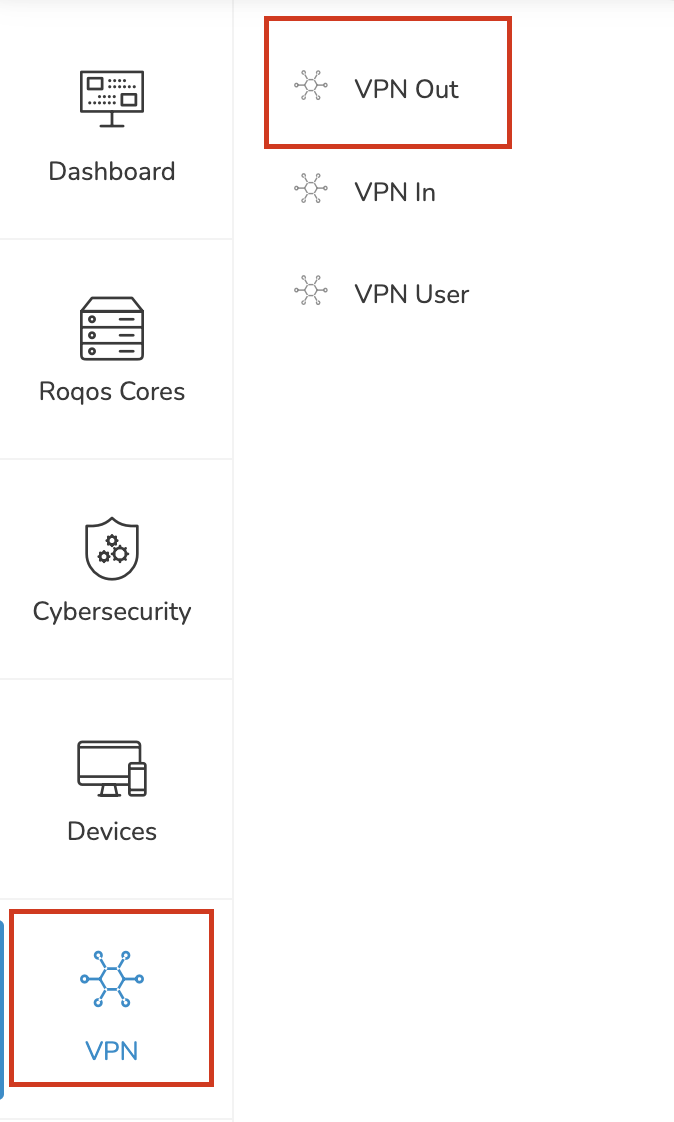
2. Click VPN from the navigation menu and then click VPN OUT.
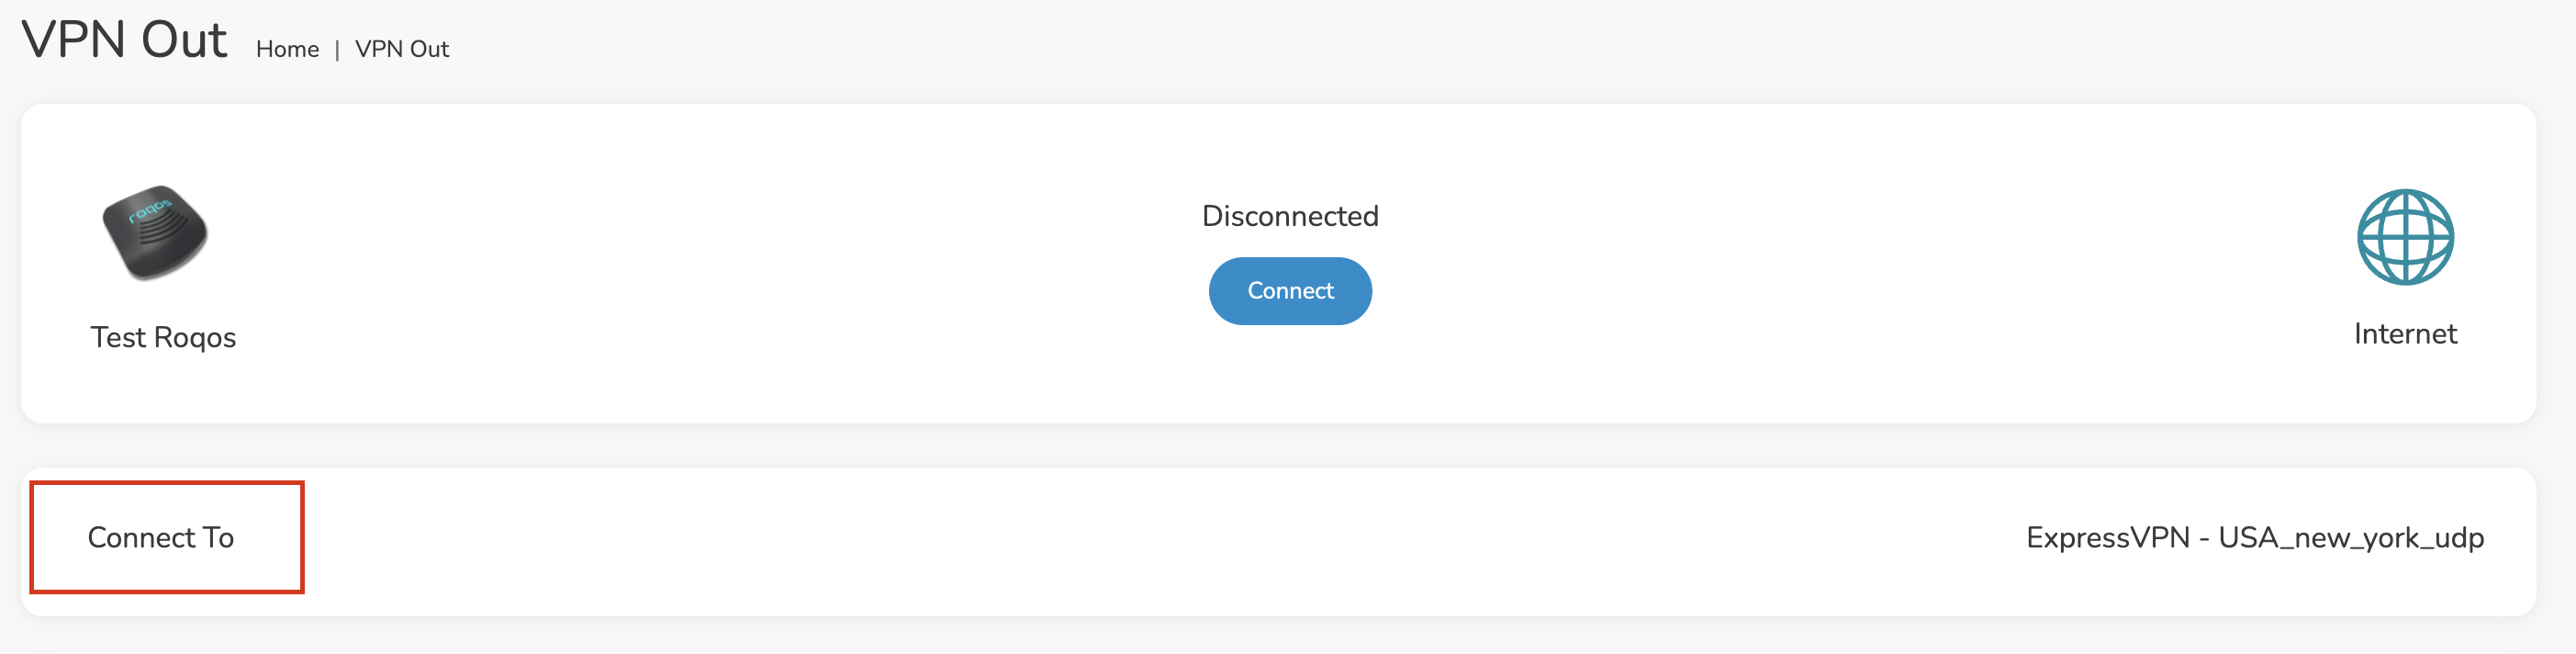
3. Click the Connect to box.
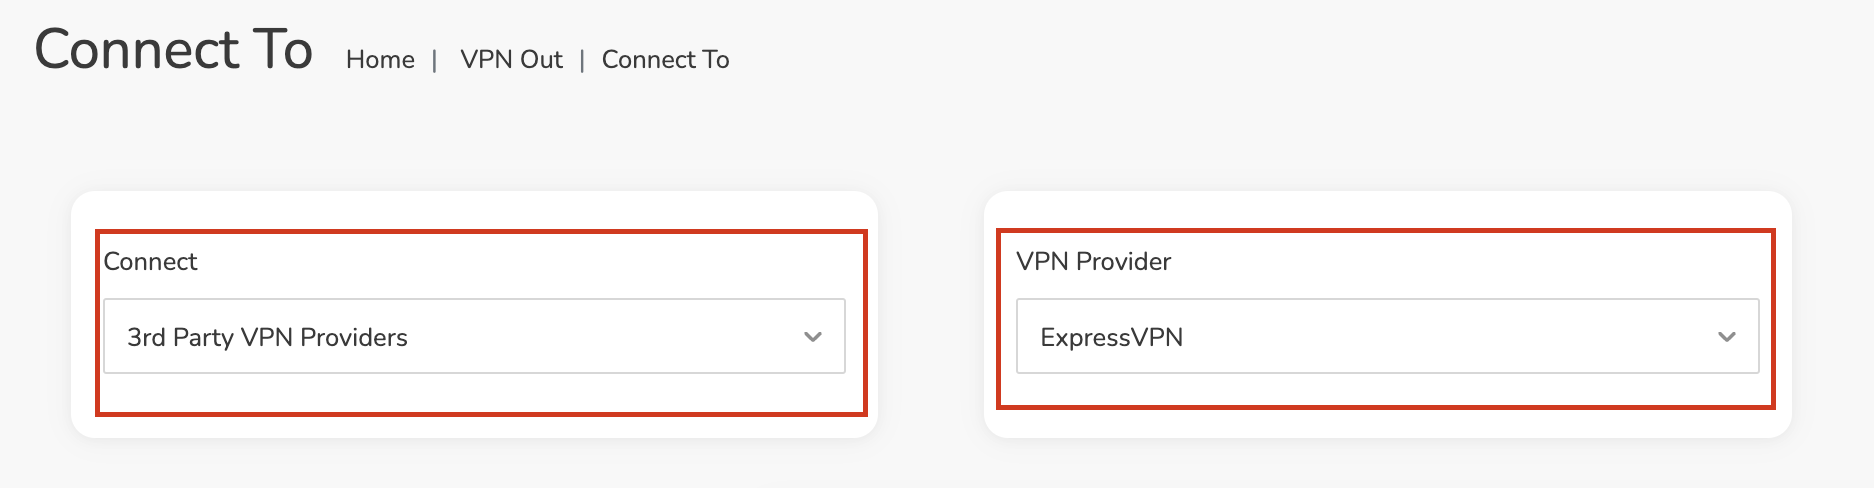
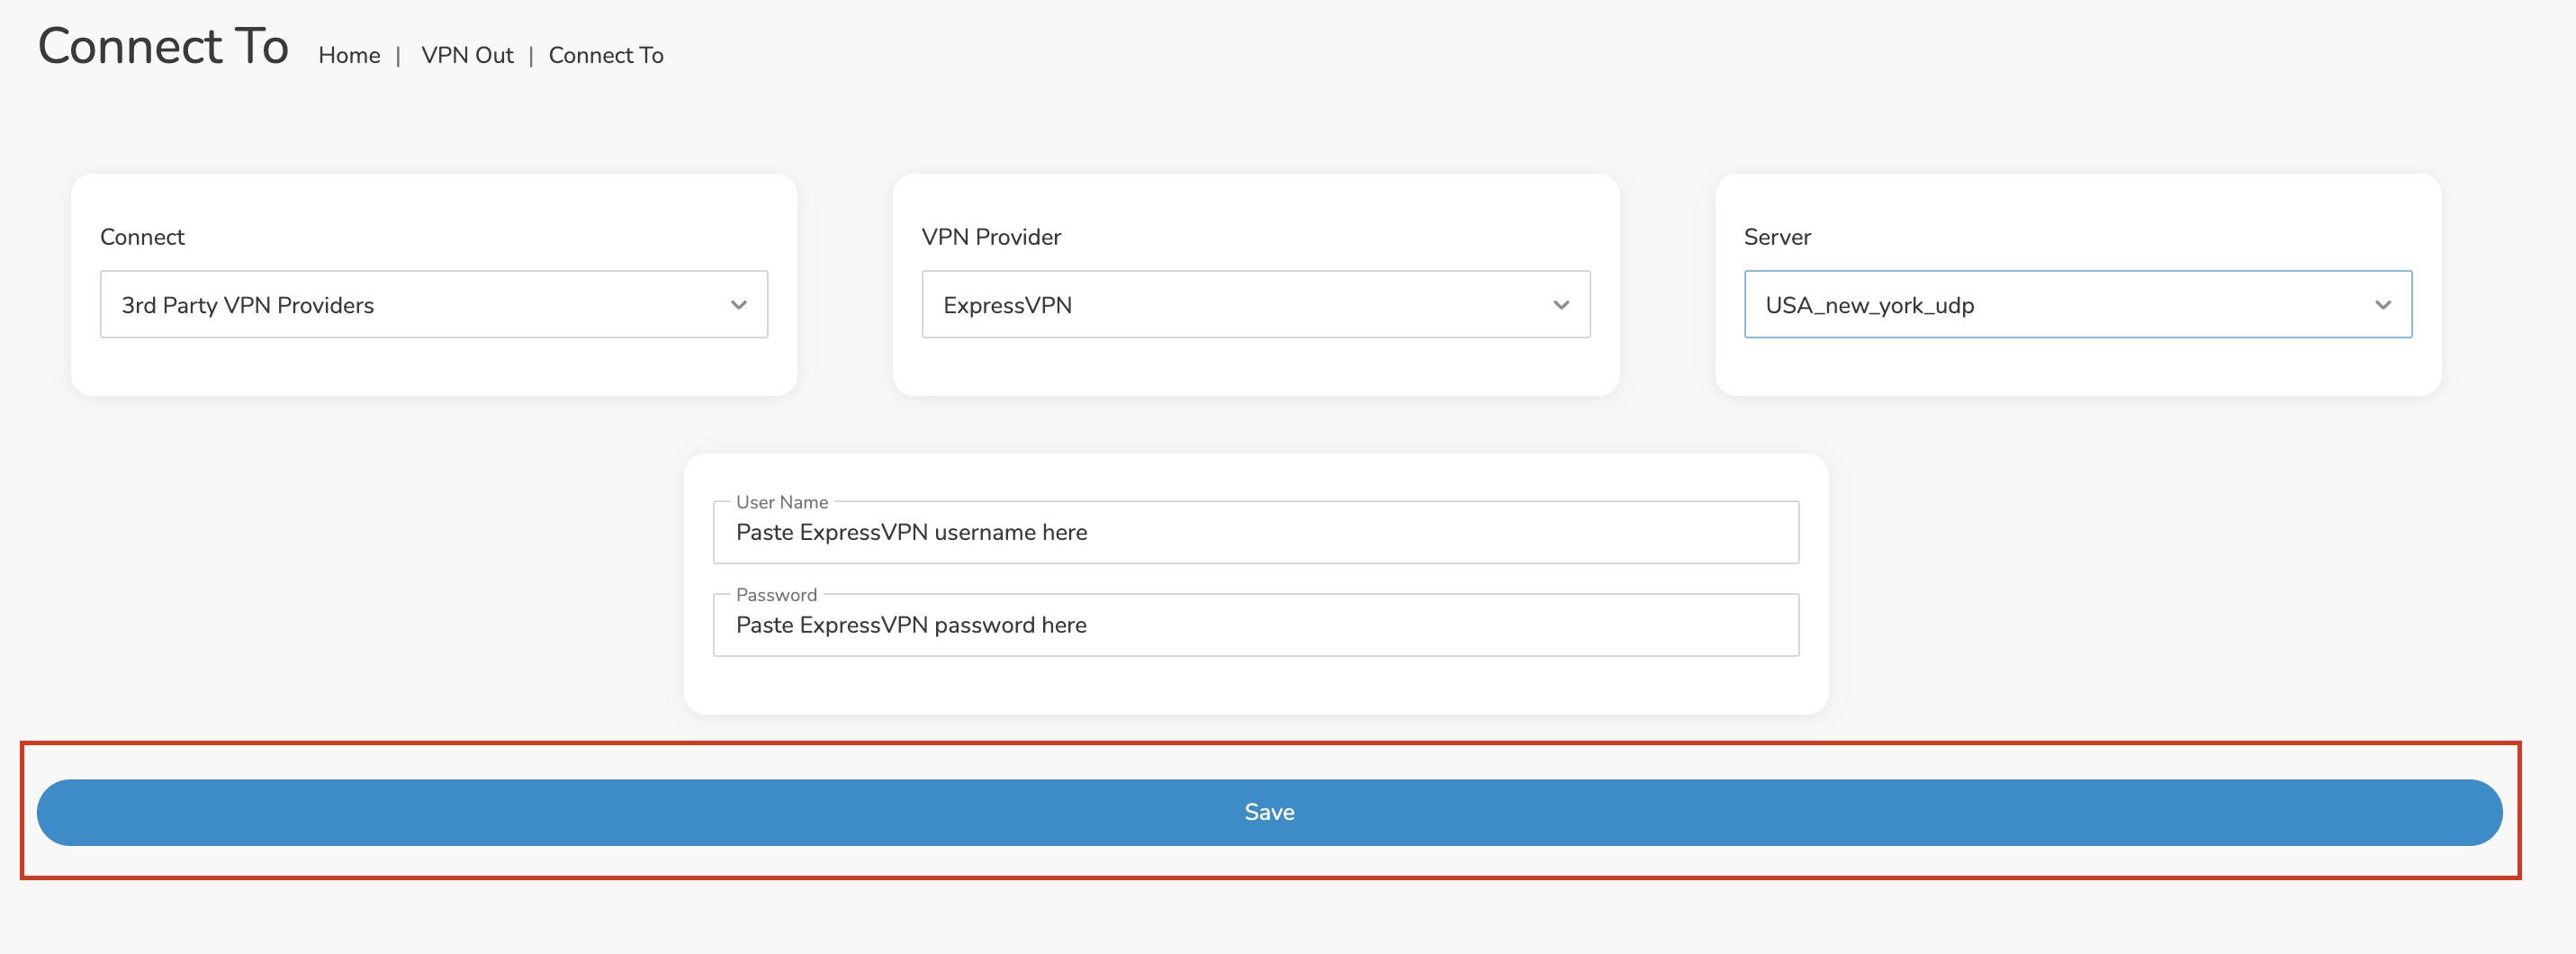
4. In the Connect dropdown choose 3rd Party VPN Providers and for the VPN Provider dropdown choose ExpressVPN.
Enter your ExpressVPN information
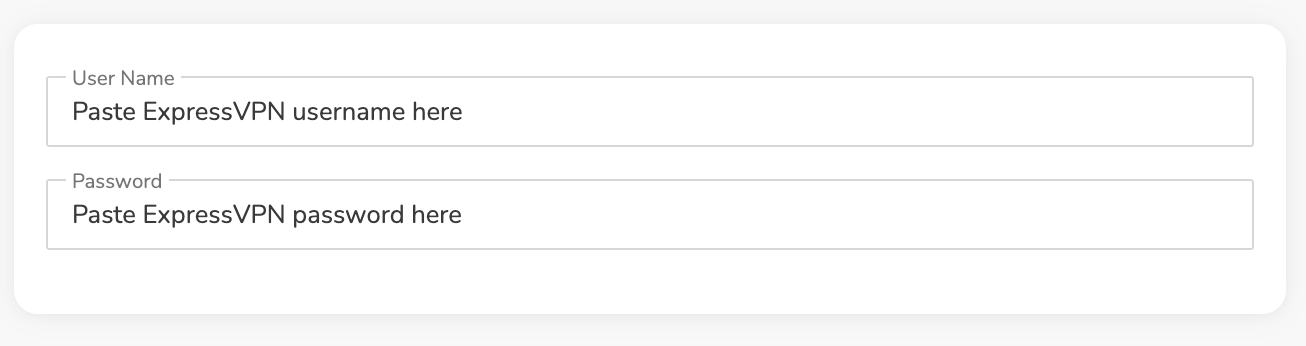
In the Username and Password field enter the ExpressVPN OpenVPN Username and Password that you obtained.
Select an ExpressVPN server
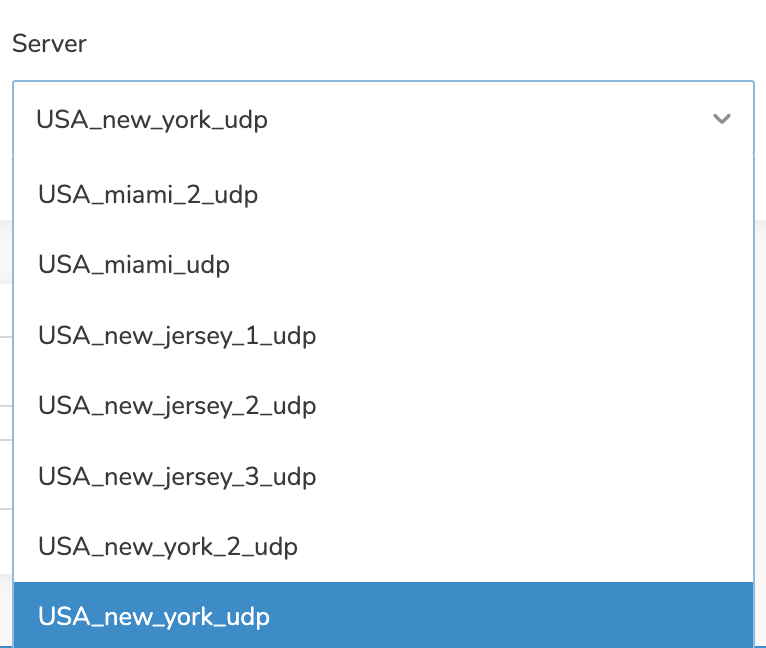
Click the Server dropdown and type in or scroll to your preferred server location.
Click the Save button.
Connect to ExpressVPN
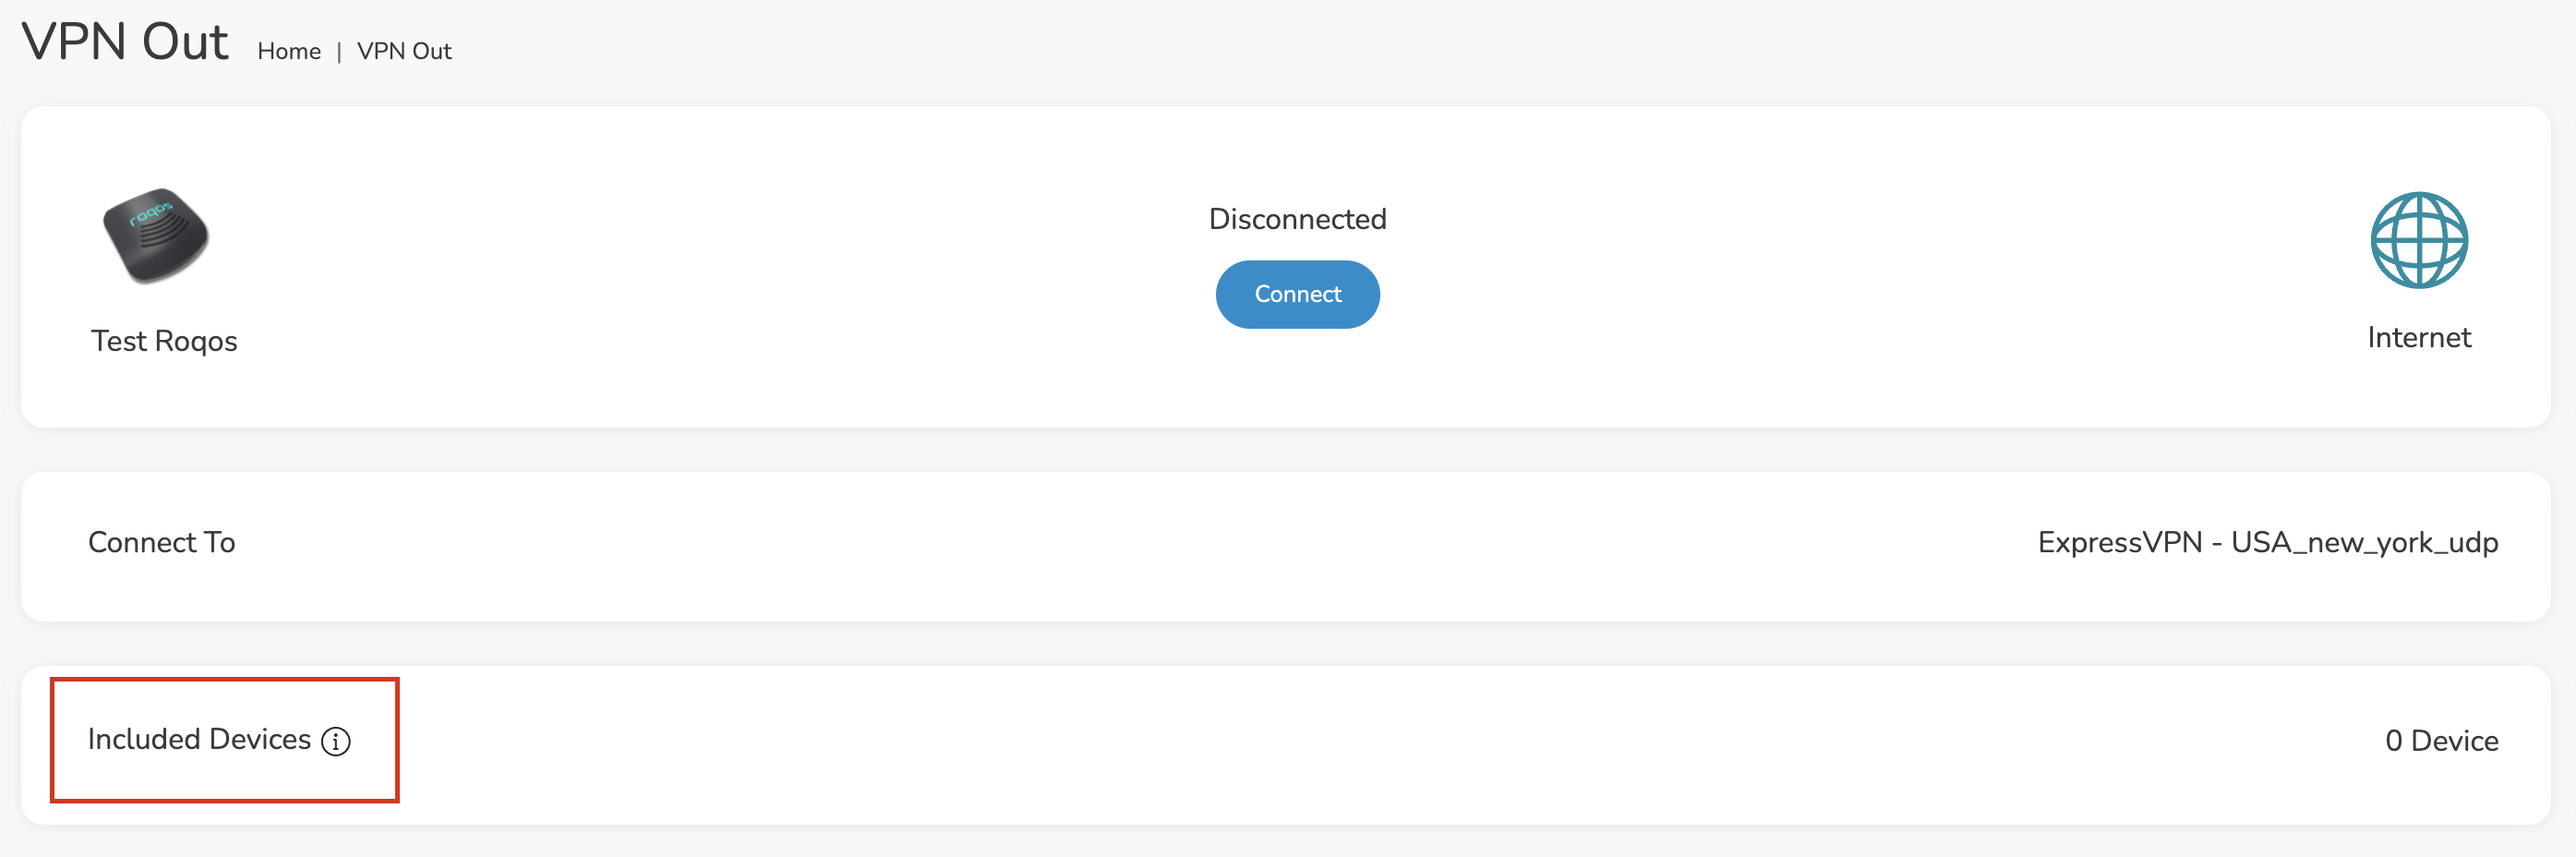
Once you click Save you will be returned to the VPN OUT menu.
Click the Connect button to start your ExpressVPN connection. Please be patient as the router connects your entire network through VPN.

Assign devices to connect to VPN
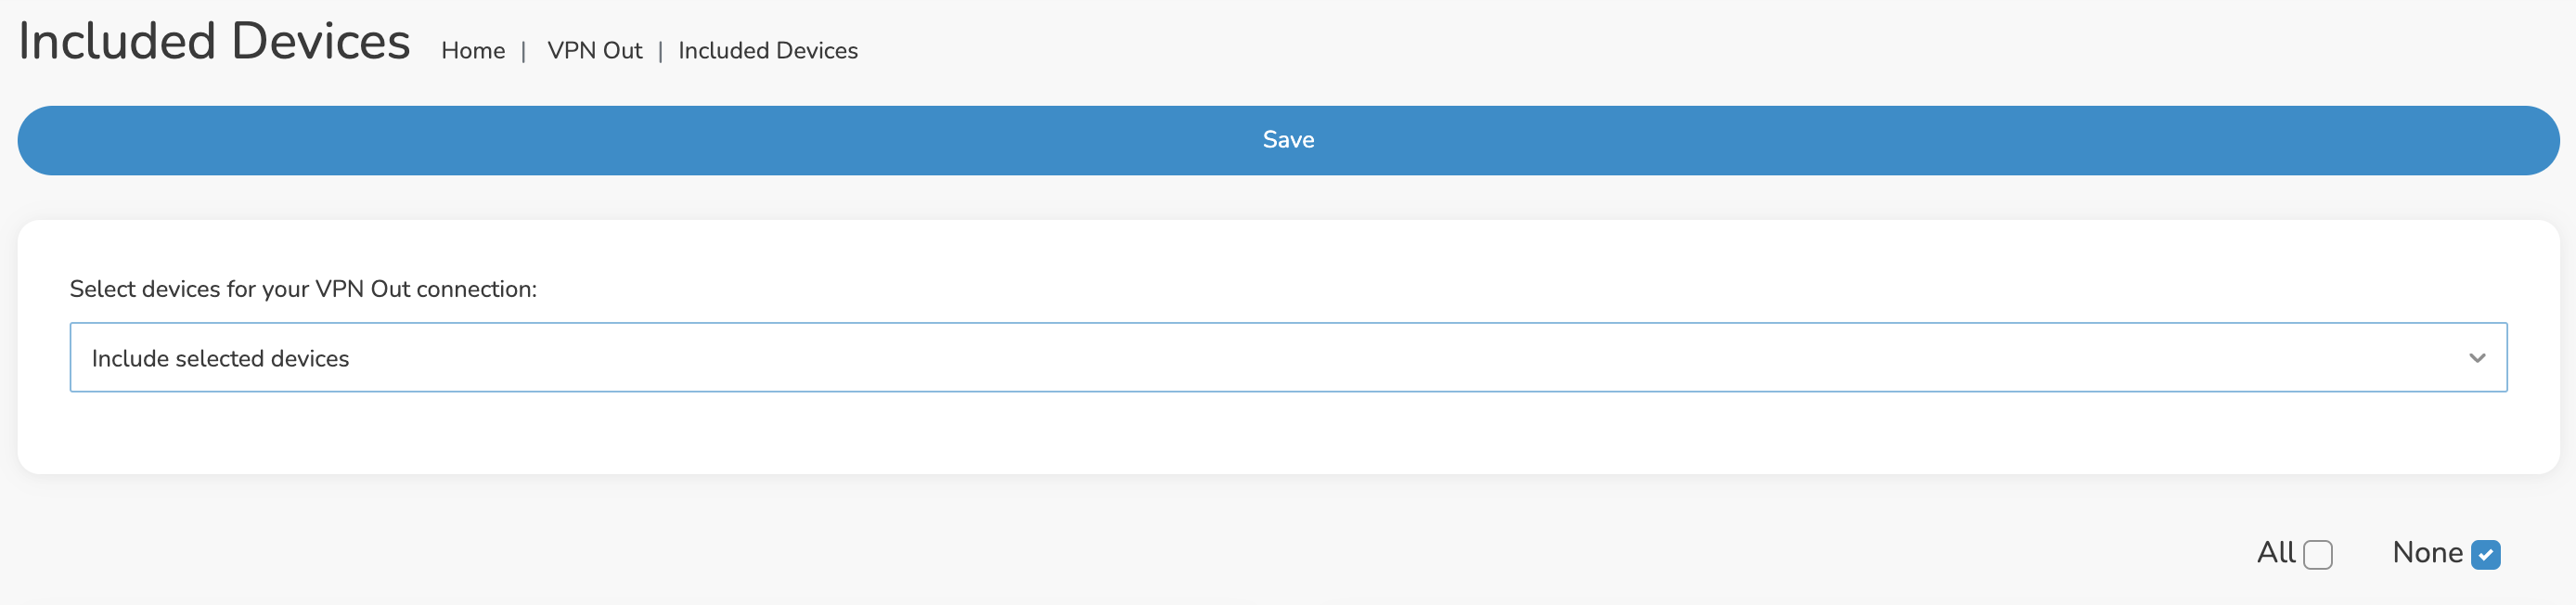
By default there are no devices assigned to the VPN tunnel. Click Included Devices. From this page you can choose if all devices should connect to ExpressVPN or only certain devices.
From the dropdown select Include all devices if you want every device that connects to the Roqos to connect to ExpressVPN. Then click Save.

If you only want specific devices to connect to ExpressVPN while others bypass the VPN connection select Include selected devices from the dropdown and then toggle the sliders for the devices you want connected to VPN. Click Save.
Verify a successful ExpressVPN connection
Make sure you are connected to the Roqos network via WiFi or ethernet connection on your device.
Visit ExpressVPN’s IP Check to verify your new IP Address and virtual location.
You should see Connected at the top of the page underneath ExpressVPN.
Connect to a different ExpressVPN server
To change your server click Disconnect on the VPN OUT page then return to the Connect To section to select a new server from the Server dropdown and click Save. Now click Connect once again on the VPN Out page.
Disconnect from ExpressVPN
To disconnect from ExpressVPN click the Disconnect button.
How do I save and load a backup file?
Why should I save a backup file?
Save a backup file of your correctly configured DD-WRT settings to ensure you can load the working settings in a few simple clicks instead of manually configuring each setting in the event of a reset.
Save a backup file
Navigate to Administration > Backup
- Click Backup and save / download the file.
- Name the backup file “FlashRouter Backup”
Load a backup file
Navigate to Administration > Backup
- Click Choose File and find the backup file you previously saved.
- Click Restore.

Why is my connection speed slower?
The encryption provided by a VPN connection almost always results in slower connection speed. In some cases you may have noticed that your computer or tablet was working faster when running a VPN client application or program, that is because a computer has a processor that is normally about 4-6x times as strong as a the processor on a router, and that is for managing a single VPN connection. A router has a smaller processor and is managing an entire network of devices. Encrypting an entire network does take considerable processing power.
Speed test results while connected to VPN are never going to be accurate. A speed test measures the rate at which a data packet travels from one server to another, however when you are connecting to VPN the data packets travel to an extra server where they are encrypted and then sent back into the route. We strongly recommend disabling the FlashRouter’s VPN connection when testing speeds to make sure there isn’t and issue with the router.
Connection Types
Ethernet: Wired ethernet connections will almost always be the most stable and reliable connection. To speed up your internet connection, use an ethernet cable to wire your devices to the FlashRouter.
Wireless (5.0GHz): The 5.0GHz WiFi frequency has less range than the standard 2.4GHz WiFi, but also transmits your internet connection at a significantly faster speed. If you were previously using the 2.4GHz network and experiencing slow speeds please connect to the 5GHz wireless network which should improve your speed.
Connect to the closest VPN server
Our supported VPN providers offer many servers in different countries and regions. If a server has slower connection speed we recommend connecting to the server closest to your actual location.
The process for changing servers is detailed in your provider’s setup instructions.
Select a UDP server
UDP servers do not authenticate every data packets the way TCP servers do which results in faster connection speeds.
VPN provider server recommendation
Contact your VPN provider for a server recommendation that should provide the fastest speeds for you.
Privacy Hero Access Router Settings
Your Privacy Hero router uses Cloud Based router management which means you can access the router settings from anywhere on any device that has an internet connection. You can follow these steps while connected to your phone, other Wi-Fi network, or the Privacy Hero network.
1. From any device that has a browser such as a computer, smartphone, or tablet visit app.privacyhero.com
2. Enter your Privacy Hero account email and password. Click Login.

If you have not created your Privacy Hero account yet please follow these instructions.
Why can’t I send emails while connected to VPN?
Can’t send or receive emails? Connecting to a VPN server can result in your email client not being able to send or receive emails. This can happen for several reasons:
- The VPN provider you are connected to is blocking the ports the email client is using (SMTP).
- Your email service is blocking access to datacenter IPs
- Your email service is only allowing access to residential IPs
- Your email service is only allowing access to IPs of its own country
- Your email service is only allowing access to certain ISPs
This issue will only occur with email client applications and not with web browser email.
Steps to take if your email is not working
Change SMTP port
Access the settings of your email client and change the SMTP port to 587 or 465.
Change the VPN server
Connect to a different VPN server. The process for changing servers is detailed in your provider’s setup instructions.
Disconnect from VPN
Disconnect from VPN on the FlashRouter and use your ISP Internet connection when using email.
Dual router setup users can leave the VPN running on the FlashRouter and simply connect to the other router’s network when using email.
Contact your VPN Service Provider
In some cases if you contact your VPN service provider they will be able to give you access to a specifically requested e-mail service.
Privacy Hero Change Wi-Fi Name and Password
Your Privacy Hero router uses Cloud Based router management which means you can access the router settings from anywhere on any device that has an internet connection. You can follow these steps while connected to your phone, other Wi-Fi network, or the Privacy Hero network.
Use these steps to change your Privacy Hero WiFi name and password.
1. From any device that has a browser such as a computer, smartphone, or tablet visit app.privacyhero.com
2. Enter your Privacy Hero account email and password. Click Login.
If you have not created your Privacy Hero account yet please follow these instructions.
3. Click the Wi-Fi symbol.
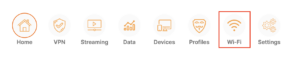
4. Click the edit box for the 5GHz network or the 2.4GHz network.
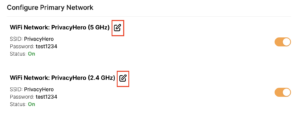
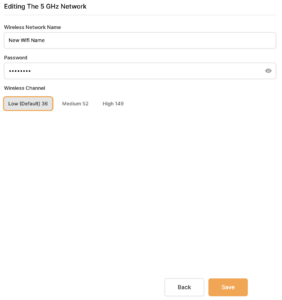
5. Enter the new Wi-Fi name and password you’d like to set. Click Save at the bottom of the page.
OpenWRT Setup Guide

Quick Start Guide for OpenWRT Routers
Find setup guides, FAQs and troubleshooting tips for the FlashRouters OpenWRT Routers.

Flint WiFi 6 AX1800 VPN Router
Internet Setup
WiFi Setup
VPN Setup
OpenWRT Features
Search Support Articles
Troubleshooting
More Ways to Get Help

Privacy Hero Change Wireless Channel
Your Privacy Hero router uses Cloud Based router management which means you can access the router settings from anywhere on any device that has an internet connection. You can follow these steps while connected to your phone, other Wi-Fi network, or the Privacy Hero network.
Use these steps to change your Privacy Hero wireless channel.
1. From any device that has a browser such as a computer, smartphone, or tablet visit app.privacyhero.com
2. Enter your Privacy Hero account email and password. Click Login.
If you have not created your Privacy Hero account yet please follow these instructions.
3. Click the Wi-Fi symbol.
4. Click the edit box for the 5GHz network or the 2.4GHz network.
5. Select the new Wireless Channel that you would like to use. Click Save at the bottom of the page.
How to Access Your GL.iNet FlashRouter Settings
This quick guide walk you through connecting to your GL.iNet FlashRouter (Flint, Slate, Beryl, or Marble) and logging into the admin settings page. You’ll use either WiFi or an Ethernet cable, then access the router dashboard through your browser.
Step 1. Connect Your Device to the Router
You can connect by WiFi or Ethernet:
- WiFi: Look for a network name like FlashRouter24 or FlashRouter50
- The WiFi password has been set to: Wireless#9483C
- ⚠️ Be sure to capitalize the “W” in
- Ethernet: Plug an Ethernet cable from your computer into one of the router’s LAN ports (usually marked or color-coded differently from the WAN port).
👉 Pro tip: Disconnect from any other WiFi networks during setup.
Step 2. Open the Router Login Page
- Open a web browser (Chrome, Safari, Firefox, Edge).
- In the address bar, type: 192.168.8.1
- Press Enter.
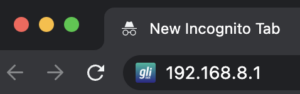
This is the local router dashboard address (not a public website). If the page doesn’t load:
- Try a different browser.
- Clear your cache.
- Ensure your device is connected to the FlashRouter network.
Step 3. Log In to the Router Settings
- Default password:
glopenwrt1oropenwrt - This is the factory default for all GL.iNet routers shipped by FlashRouters.
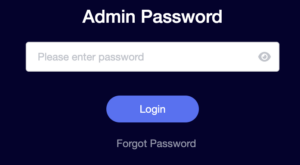
💡 Once you’re in, you can update your admin password in the settings for extra security.
Next Steps
Now that you’ve accessed your GL.iNet FlashRouter, you can:
- Set up your VPN service
- Customize your WiFi name and password
- Adjust device controls and security settings
Check our support library for your specific VPN setup guide.
Privacy Hero Disable Wi-Fi
Your Privacy Hero router uses Cloud Based router management which means you can access the router settings from anywhere on any device that has an internet connection. You can follow these steps while connected to your phone, other Wi-Fi network, or the Privacy Hero network.
Use these steps to disable your Privacy Hero Wi-Fi so only ethernet connections are active. This is not a required step just a preference.
1. From any device that has a browser such as a computer, smartphone, or tablet visit app.privacyhero.com
2. Enter your Privacy Hero account email and password. Click Login.
If you have not created your Privacy Hero account yet please follow these instructions.
3. Click the Wi-Fi symbol.
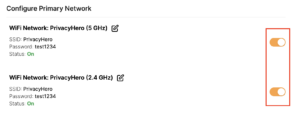
4. Set the toggle switches to the off position for the Wi-Fi bands you want to disable.
Cudy Internet Setup
Follow this article when you receive your new Cudy FlashRouter to connect it to the Internet.
1. Connect the ethernet cable that came with the router from an open LAN ethernet port on your ISP modem or other router to the WAN port if you purchased a Cudy AX3000 or to ethernet port #1 of the device marked Primary if you purchased a Cudy M1800 or Cudy M3000.

2. Connect the power to the router and wait about 2 minutes for the router to fully boot up.
3. Connect your computer, phone, or tablet to the Cudy router via wireless (FlashRouter24 / FlashRouter50) or via ethernet cable to one of the LAN ports on the router.
The FlashRouter WiFi password is printed on the sheet that came with the router and is set to Wireless#[First 5 characters of your router MAC]. The router MAC can be found on the bottom of your router if you cannot locate the sheet. For e.g. if your MAC is 1459C07E70A8 then your WiFi password is Wireless#1459C
Be sure to capitalize the W.
4. Once connected via wireless or ethernet on your device open your browser and go to 192.168.10.1

5. Enter openwrt as the admin password to access the Cudy firmware settings.

6. Verify that your Cudy FlashRouter is reporting as Internet and WAN Connected.

6. Verify that your Cudy FlashRouter is reporting as Internet and WAN Connected.
7. If you purchased a Cudy M1800 or Cudy M3000 mesh package you can now take the unit labeled Node to the location you want it connecting from and power it up. It will connect to the Primary network that was just setup automatically. You will then see the Mesh Units number increase according to the number that you have purchased shortly.

ASUS-WRT Router Setup Guide

Quick Start Guide for ASUS-WRT FlashRouters
Find setup guides, FAQs and troubleshooting tips for ASUSWRT configured FlashRouters.

- ROG series: GT-BE98 Pro
- GT series: GT6, GT-AXE16000, GT-AX11000 Pro, GT-AXE11000, GT-AX6000, GT-AX11000, GS-AX5400, GS-AX3000
- ZenWiFi: ZenWiFi Pro XT12, ZenWiFi Pro ET12, ZenWiFi XT9, ZenWiFi AX (XT8), ZenWiFi ET8, ZenWiFi XD6, ZenWiFi XD5
- RT series: RT-BE96U, RT-BE88U, RT-BE58U, RT-AXE7800, RT-AX88U Pro, RT-AX88U, RT-AX86U Pro, RT-AX86U, RT-AX86S, RT-AX68U, RT-AX82U, RT-AX58U, RT-AX3000, RT-AX59U, RT-AX92U
- TUF series: TUF-AX5400, TUF-AX3000_V2, TUF-AX3000, TUF Gaming AX6000, TUF Gaming AX4200

Internet Setup
WiFi Setup
VPN Setup
- CyberGhost AsusWRT OpenVPN Setup
- Surfshark AsusWRT WireGuard Setup
- NordVPN Setup for AsusWRT Firmware Routers
- IPVanish AsusWRT OpenVPN Setup
- PrivateInternetAccess (PIA) AsusWRT OpenVPN Setup
- ExpressVPN Setup for AsusWRT Firmware Routers
- PrivateInternetAccess (PIA) Asus AX1800S OpenVPN Setup
- IPVanish Asus AX1800S OpenVPN Setup
- ExpressVPN Asus AX1800S OpenVPN Setup
- NordVPN Asus AX1800S OpenVPN Setup
Asus-WRT Features
Search Support Articles
Troubleshooting
More Ways to Get Help
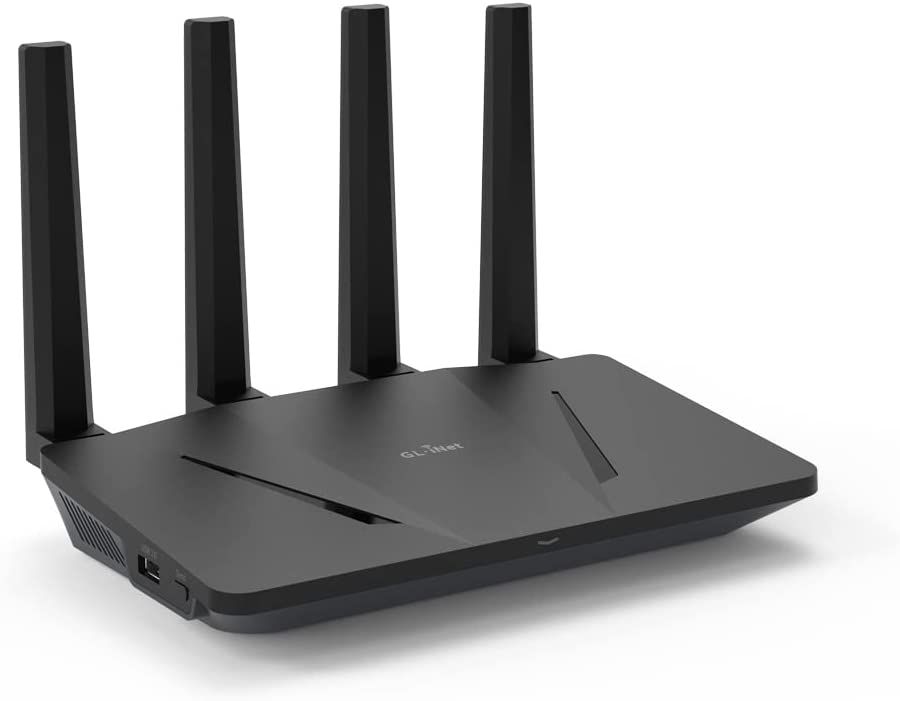
GL.iNet Router Setup Guide

Quick Start Guide for GL.iNet FlashRouters
Find setup guides, FAQs and troubleshooting tips for GL.iNet FlashRouters.

- Slate: GL-AX1800, GL-AXT1800, GL-BE3600
- Flint: GL-MT6000
- Other: Beryl GL-MT3000, Velica GL-B2200, Marble GL-B3000
Search Support Articles
Troubleshooting
More Ways to Get Help
Cudy Access Router Settings
Follow this guide to access the router settings of your Cudy FlashRouter.
1. Connect your computer, phone, or tablet to the Cudy router via wireless (FlashRouter24 / FlashRouter50) or via ethernet cable to one of the LAN ports on the router.
The FlashRouter WiFi password is printed on the sheet that came with the router and is set to Wireless#[First 5 characters of your router MAC]. The router MAC can be found on the bottom of your router if you cannot locate the sheet. For e.g. if your MAC is 1459C07E70A8 then your WiFi password is Wireless#1459C
Be sure to capitalize the W.
2. Once connected via wireless or ethernet on your device open your browser and go to 192.168.10.1
3. Enter openwrt1 or openwrt as the admin password to access the Cudy firmware settings.
Cudy Change Wi-Fi name and password
Follow this guide to change the Wi-Fi name and password on your Cudy FlashRouter.
1. Connect your computer, phone, or tablet to the Cudy router via wireless (FlashRouter24 / FlashRouter50) or via ethernet cable to one of the LAN ports on the router.
The FlashRouter WiFi password is printed on the sheet that came with the router and is set to Wireless#[First 5 characters of your router MAC]. The router MAC can be found on the bottom of your router if you cannot locate the sheet. For e.g. if your MAC is 1459C07E70A8 then your WiFi password is Wireless#1459C
Be sure to capitalize the W.
2. Once connected via wireless or ethernet on your device open your browser and go to 192.168.10.1
3. Enter openwrt as the admin password to access the Cudy firmware settings.
3. Click General Settings.

4. Click Wireless.

5. Change the SSID and Password fields for both 2.4GHz and 5GHz bands.The SSIDs should be unique and NOT a duplicate of an existing network. Click Save & Apply.

Roqos Core Internet Setup and Activation
Follow this article when you receive your new Roqos Core router to create your Roqos account, connect your Roqos to the Internet, and customize your network so it is ready to use.
Create your Roqos account
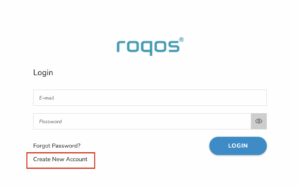
1. From any device that has a browser such as a computer, smartphone, or tablet visit login.roqos.com

2. Select Create Account.
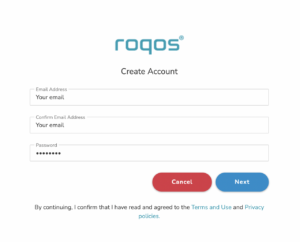
3. Enter the Email address and password you want to set for your Roqos account. This will be your login to the Roqos settings moving forward. Click Next.
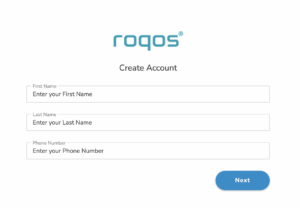
4. Enter the name and phone number you want associated with your Roqos. Click Next.
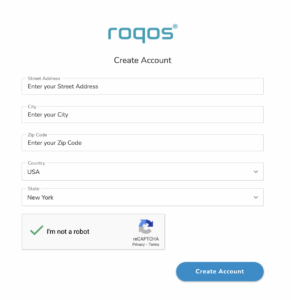
5. Enter the address where your Roqos is located. This section may require a CAPTCHA to be completed to authenticate you are human. Click Create Account.
6. You have now created your Roqos account. In a new tab proceed to open the email from Roqos and click the Activate account button.
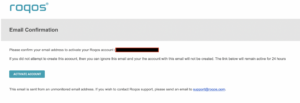
Activate your Roqos Internet
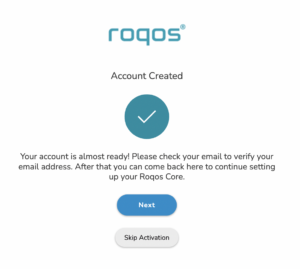
1. From the Account created page click Next to begin the Internet Setup of the Roqos.
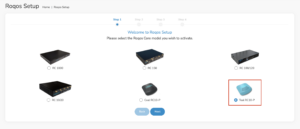
2. Select the Roqos model Teal RC10-P. Click Next.
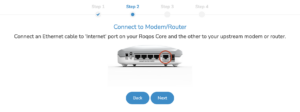
3. Connect the ethernet cable that came with your Roqos from the port labeled INTERNET on the back of your Roqos to an open ethernet port on your ISP Modem or other router in your network.
4. Then connect the power adapter that came with the Roqos to the back of the Roqos. Wait for the light on the Roqos to begin blinking blue. Once your see the blinking blue lights on the Roqos click Next.
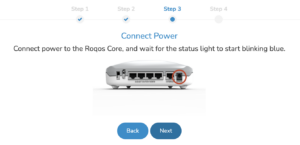
If your Roqos lights does not begin blinking blue after a long while please see the steps in this article and contact us.
5. Enter in the Roqos serial number found on the bottom of the device exactly as it appears there. Click Next.
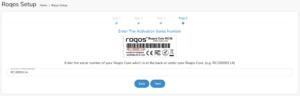
Setup your Roqos Network
1. Enter in a name that you would like to call the Roqos. This is just the Roqo’s device name and it is not the WiFi network name. Click Next.

2. Select the Time Zone of your actual location from the dropdown. Click Next.

3. Set the WiFi name and password for the Roqos. The WiFi name should be unique and not a duplicate of an existing wireless network. This will be the name that appears in your wireless devices available network list and the password to join the devices to the network. Click Next.
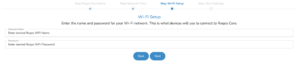
4. Select the custom alert settings as you best see fit using the toggle switches. We typically recommend having the first two toggles selected for Email Alerts and Consolidate Security Alerts. Click Next.
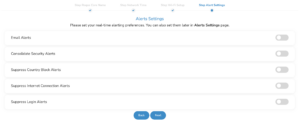
Begin connecting your devices to the Roqos network
You are now done setting up your Roqos to connect to the Internet and can begin joining your wireless devices to the Roqos network and exploring the Roqos Core Features.

TP-Link Access Router Settings
Follow this guide to access the router settings of your TP-Link FlashRouter.
1. Connect your computer, phone, or tablet to the TP-Link router via wireless (FlashRouter24 / FlashRouter50) or via ethernet cable to one of the LAN ports on the router.
The FlashRouter WiFi password is printed on the sheet that came with the router and is set to Wireless#[First 5 characters of your router MAC]. The router MAC can be found on the bottom of your router if you cannot locate the sheet. For e.g. if your MAC is 1459C07E70A8 then your WiFi password is Wireless#1459C
Be sure to capitalize the W.
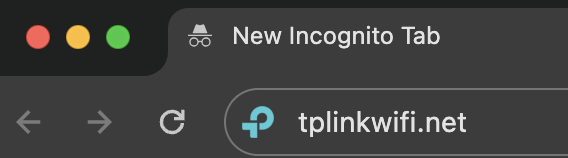
2. Once connected via wireless or ethernet on your device open your browser and go to tplinkwifi.net
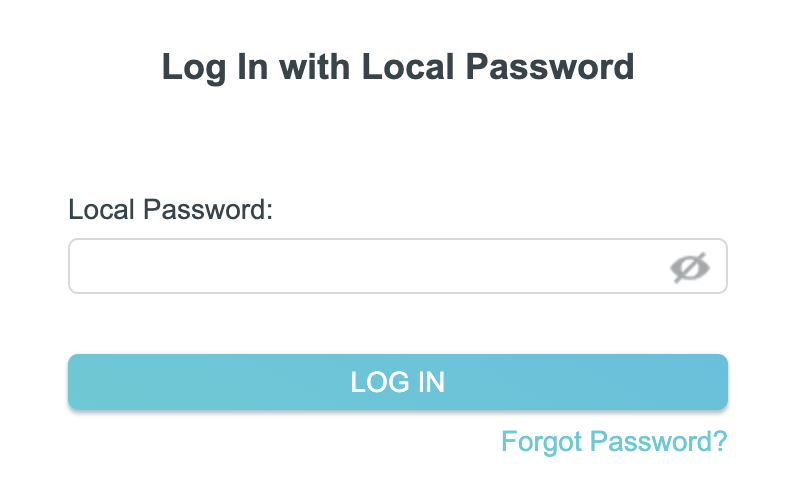
3. Enter tp-link as the admin password to access the TP-Link firmware settings.
TP-Link Internet Setup
Follow this article when you receive your new TP-Link FlashRouter to connect it to the Internet.
1. Connect the ethernet cable that came with the router from an open LAN ethernet port on your ISP modem or other router to the WAN port of the TP-Link.
2. Connect the power to the router and wait about 2 minutes for the router to fully boot up.
3. Connect your computer, phone, or tablet to the TP-Link router via wireless (FlashRouter24 / FlashRouter50) or via ethernet cable to one of the LAN ports on the router.
The FlashRouter WiFi password is printed on the sheet that came with the router and is set to Wireless#[First 5 characters of your router MAC]. The router MAC can be found on the bottom of your router if you cannot locate the sheet. For e.g. if your MAC is 1459C07E70A8 then your WiFi password is Wireless#1459C
Be sure to capitalize the W.
4. Once connected via wireless or ethernet on your device open your browser and go to tplinkwifi.net
5. Enter tp-link as the admin password to access the TP-Link firmware settings.
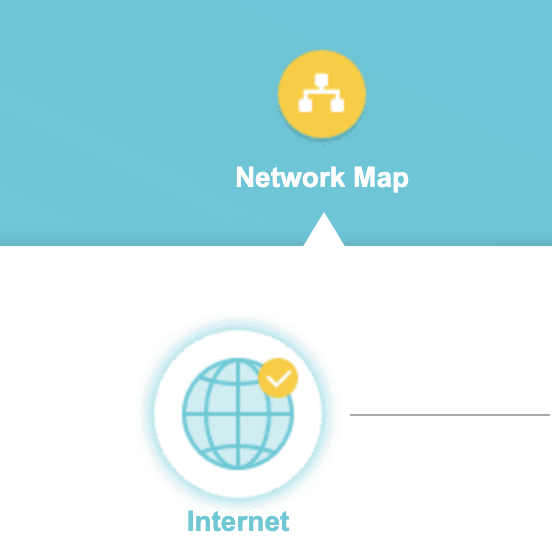
6. Verify that your TP-Link FlashRouter is reporting as Internet and WAN Connected.
Privacy Hero VPN Setup Guide for Privacy Hero
Your Privacy Hero router uses Cloud Based router management which means you can access the router settings from anywhere on any device that has an internet connection. You can follow these steps while connected to your phone, other Wi-Fi network, or the Privacy Hero network.
Use these steps to connect to Privacy Hero’s own WireGuard VPN servers. You will automatically be connected to the ideal USA or Canada server based on your location.
1. From any device that has a browser such as a computer, smartphone, or tablet visit app.privacyhero.com
2. Enter your Privacy Hero account email and password. Click Login.
If you have not created your Privacy Hero account yet please follow these instructions.
3. Click the VPN symbol.

4. Set the VPN toggle to On.

5. Connect to the Privacy Hero’s via wireless or ethernet connection on your device and visit What is my IP Address from a private/incognito browser to verify your new IP address and virtual location.
Privacy Hero’s cloud based router settings access makes it so you can change settings while not connected to the Privacy Hero network so if your IP Address has not changed be sure to double check that you are indeed connected to the Privacy Hero network on the device you are checking your IP from.
Keep in mind that the VPN connection will not change the location of the streaming services listed in the Streaming Relocation area of the Privacy Hero settings.
NordVPN Setup on Roqos
Preparing for NordVPN Setup
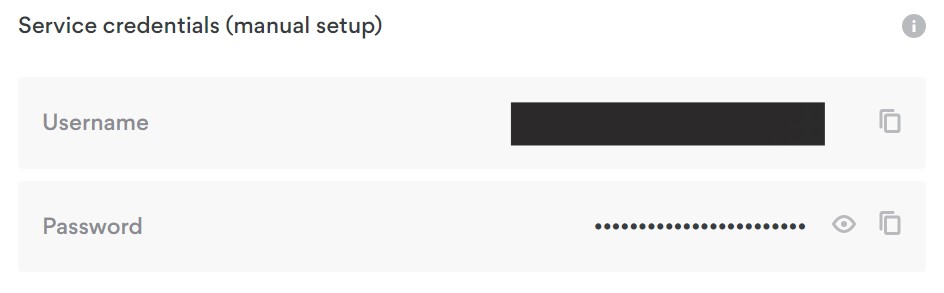
Obtain your NordVPN manual Username and Password
If you are not already a NordVPN user Sign Up Now.
1. Log in to your account on the NordVPN website.

2. Click NordVPN on the left hand side and then click Setup NordVPN manually.

3. Enter in the verification code that was sent to your email.

4. Copy and paste your NordVPN manual username and password to a secure location. This is the username and password you will enter into the router settings to connect to NordVPN.

Connecting to NordVPN in the Roqos Core
Access the Roqos Core UI
1. Login to the Roqos Core web app in a browser on any computer or smart device.
2. Click VPN from the navigation menu and then click VPN OUT.
3. Click the Connect to box.
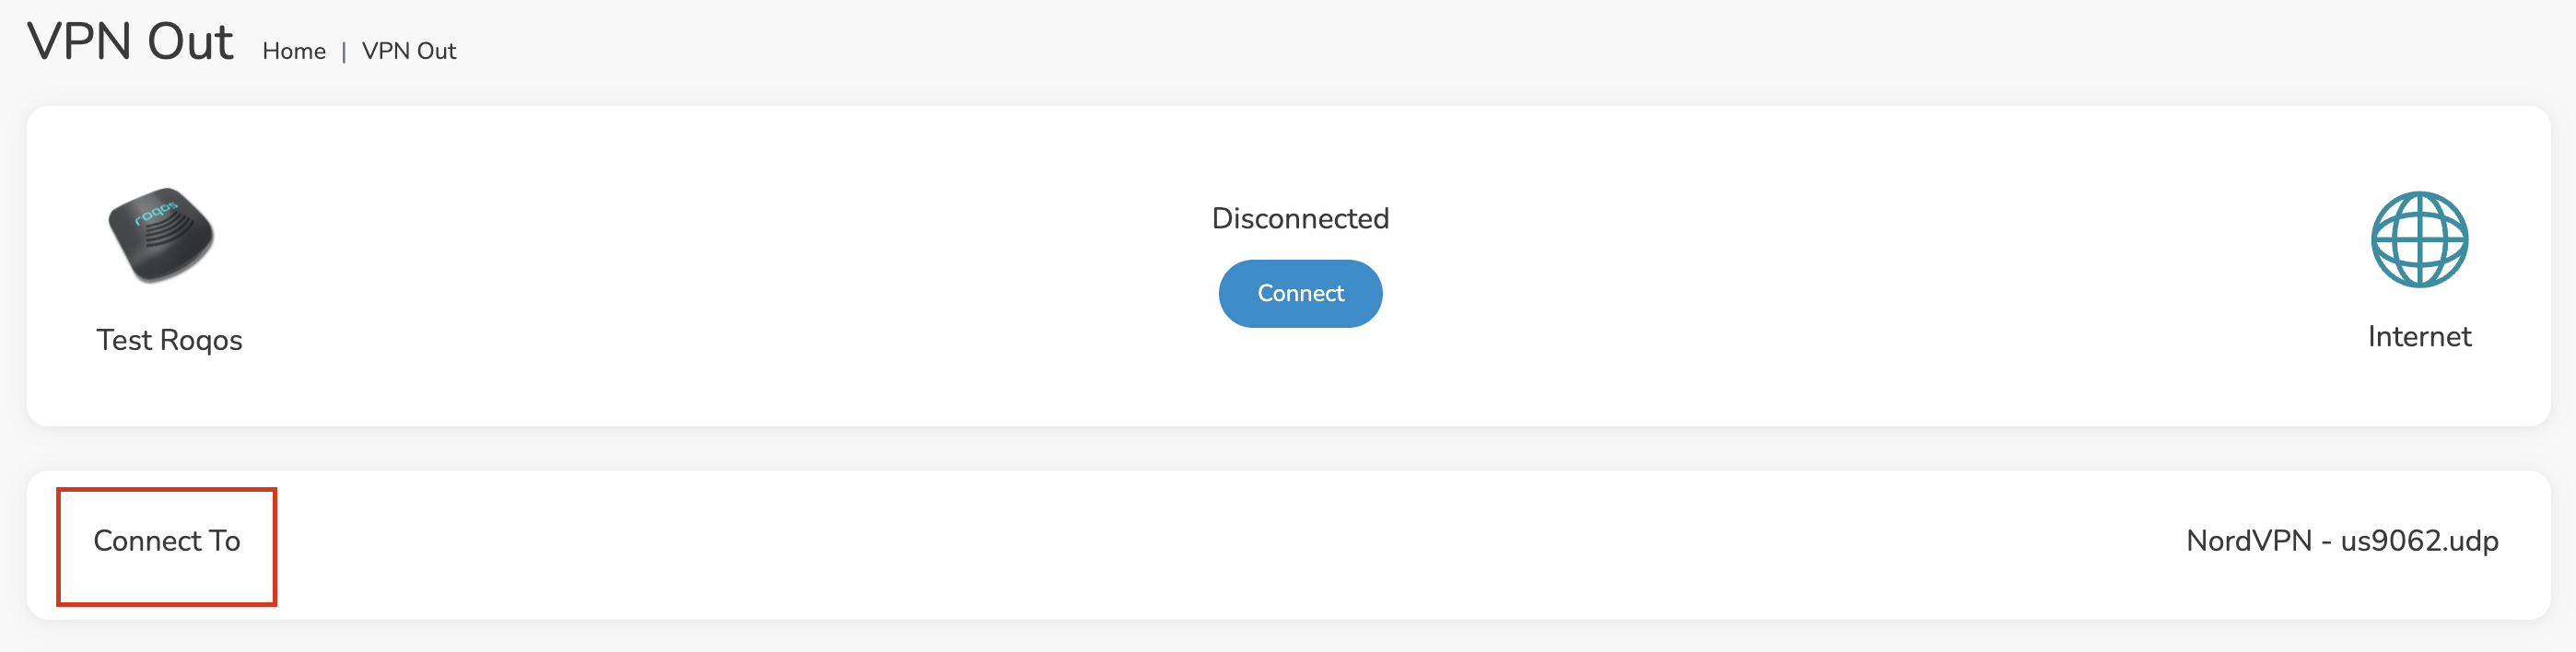
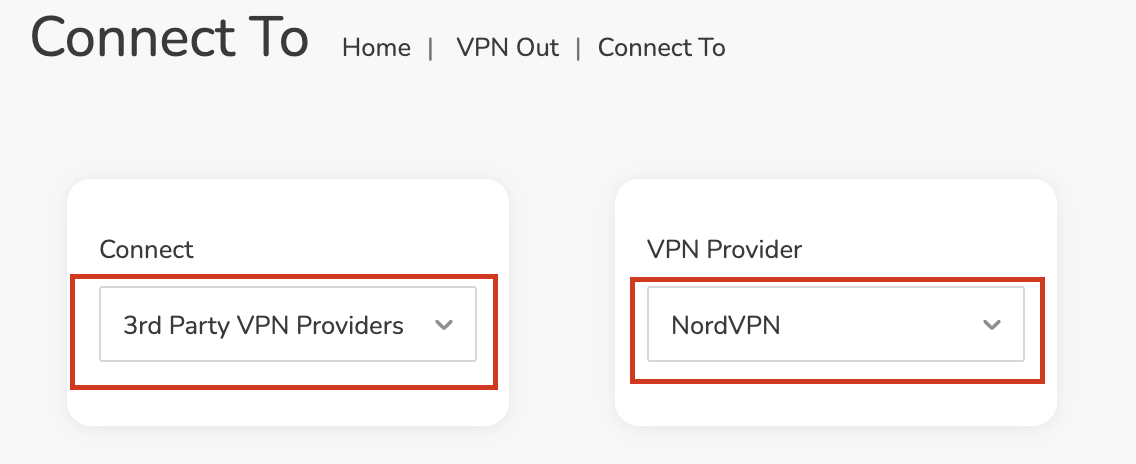
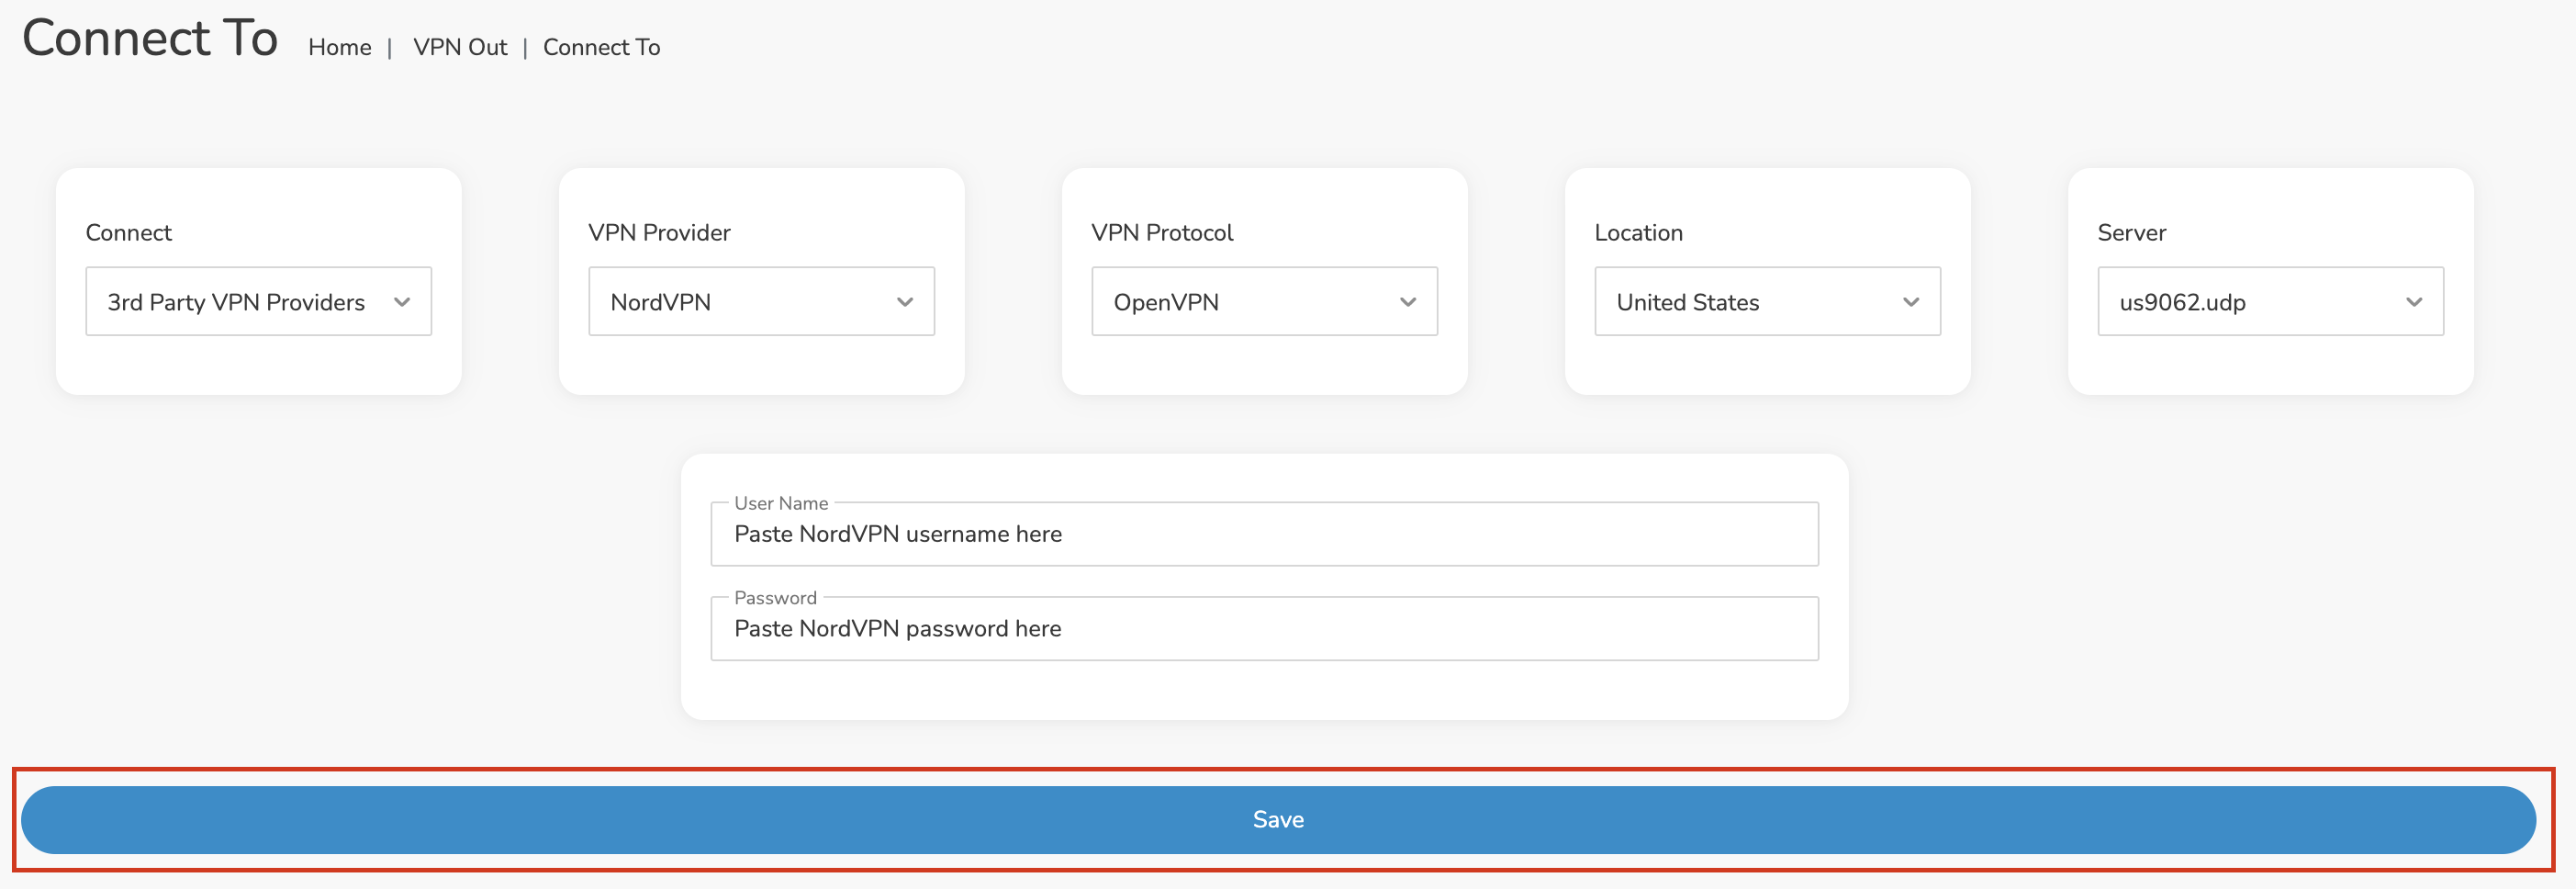
4. In the Connect dropdown choose 3rd Party VPN Providers and for the VPN Provider dropdown choose NordVPN.
Enter your NordVPN information
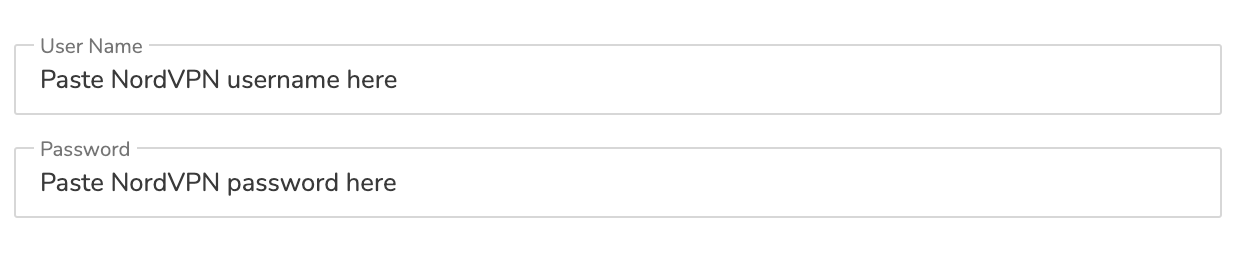
In the Username and Password field enter the NordVPN OpenVPN Username and Password that you obtained.
Select a NordVPN server
Navigate to NordVPN server recommendation page. Click Recommended server and select the country you want to connect to and note the server number that appears.
Click the Location dropdown and type in or scroll to the preferred server country.
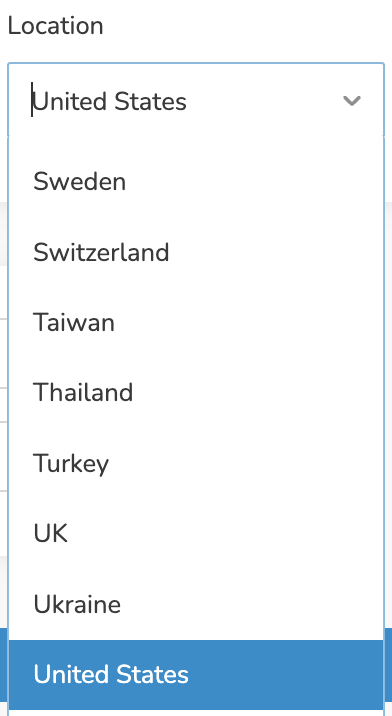
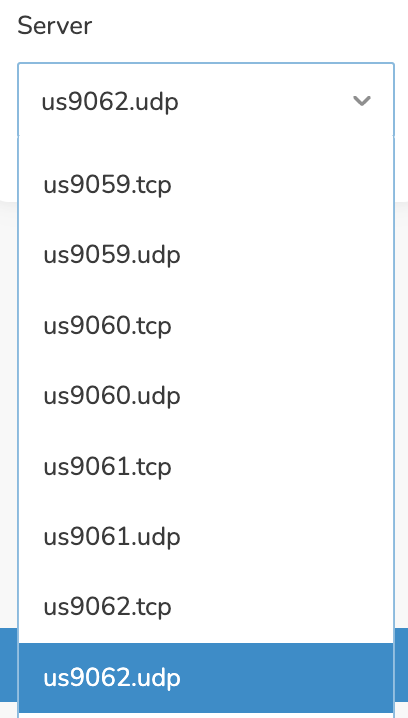
Click the Server dropdown and type in or scroll to the server number that was recommended. Select the UDP version of the server.
Click the Save button.
Connect to NordVPN
Once you click Save you will be returned to the VPN OUT menu.
Click the Connect button to start your NordVPN connection. Please be patient as the router connects your entire network through VPN.
Assign devices to connect to VPN
By default there are no devices assigned to the VPN tunnel. Click Included Devices. From this page you can choose if all devices should connect to NordVPN or only certain devices.
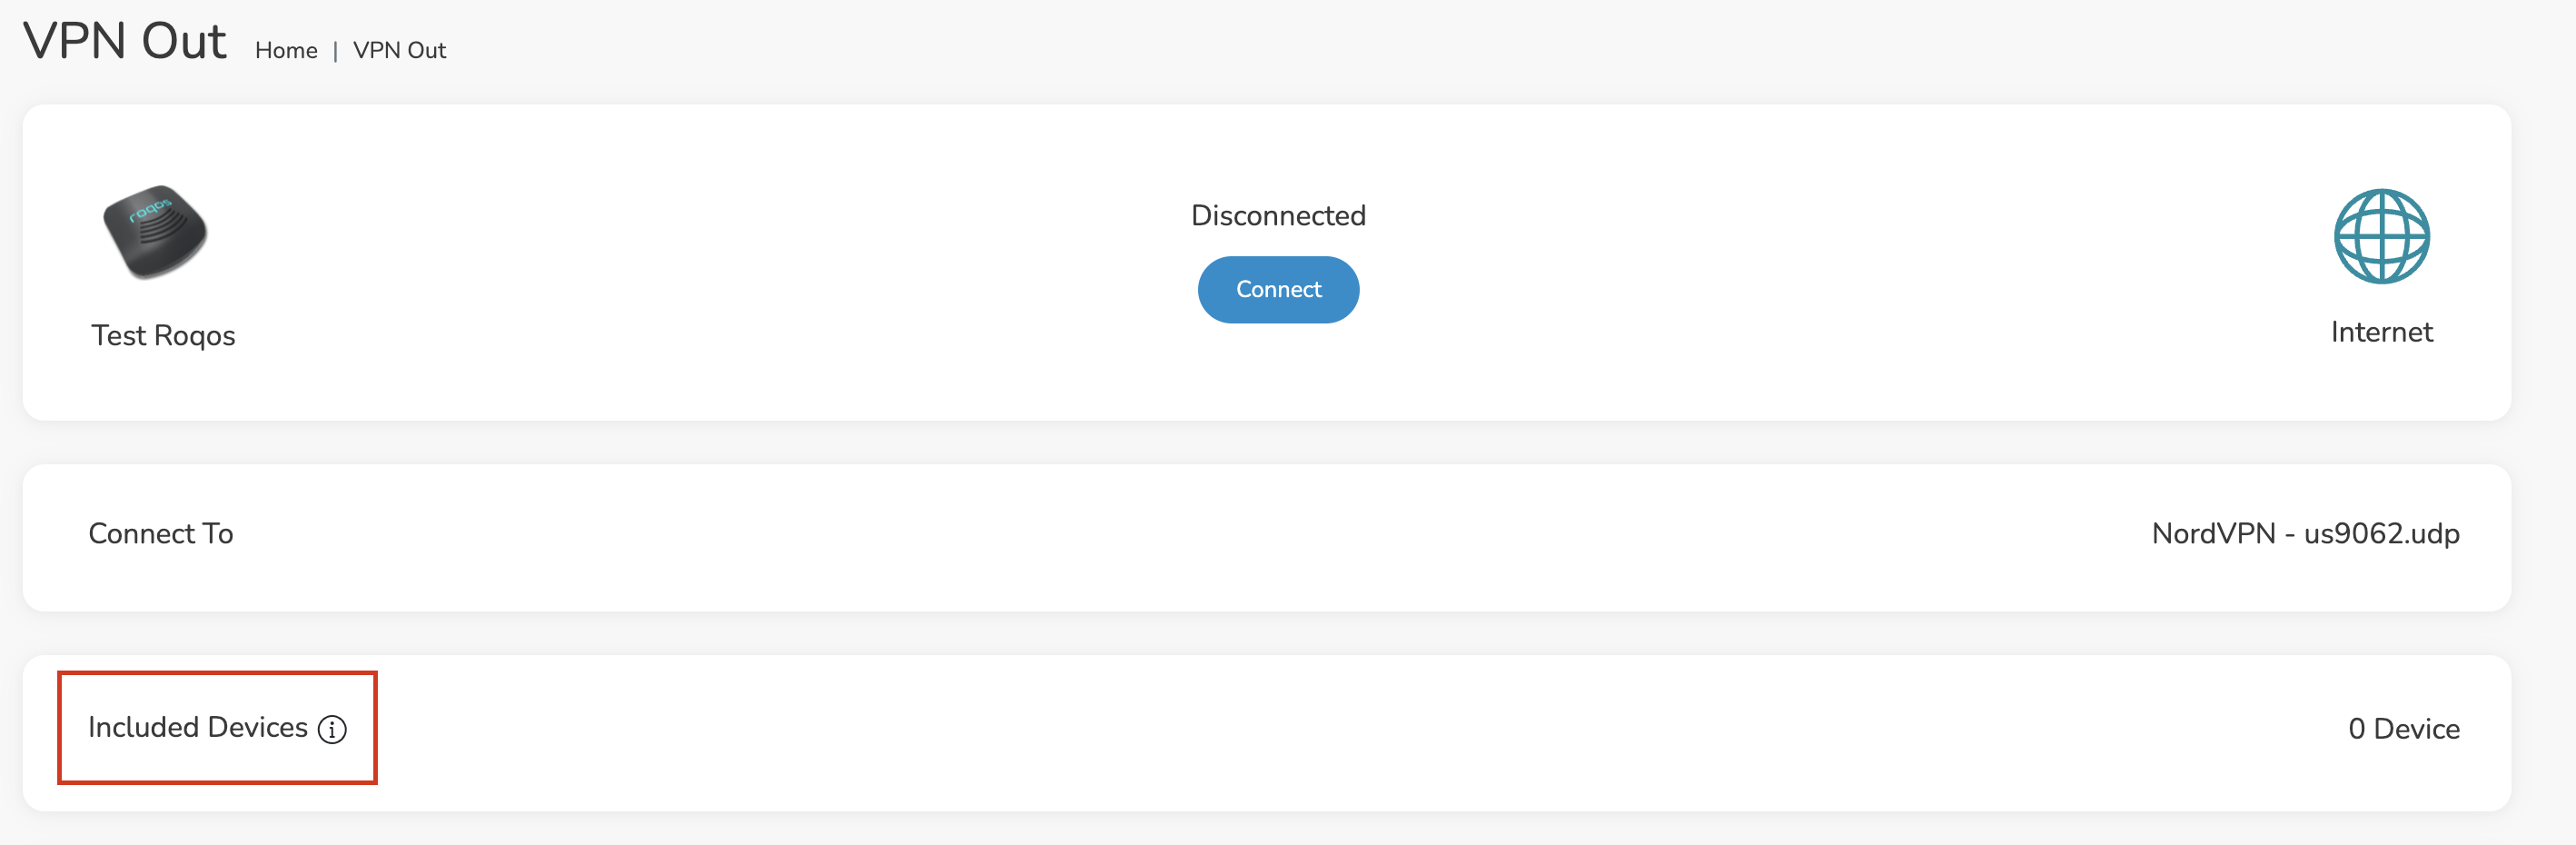
From the dropdown select Include all devices if you want every device that connects to the Roqos to connect to NordVPN. Then click Save.
If you only want specific devices to connect to NordVPN while others bypass the VPN connection select Include selected devices from the dropdown and then toggle the sliders for the devices you want connected to VPN. Click Save.
Verify a successful NordVPN connection
Make sure you are connected to the Roqos network via WiFi or ethernet connection on your device.
Visit NordVPN’s website to verify your new IP Address and Protected Status at the top of the page.
You should see Connected at the top of the page underneath NordVPN.
Connect to a different NordVPN server
To change your server click Disconnect on the VPN OUT page then return to the Connect To section to select a new server from the Server dropdown and click Save. Now click Connect once again on the VPN Out page.
Disconnect from NordVPN
To disconnect from NordVPN click the Disconnect button.
TP-Link Change Wi-Fi name and password
Follow this guide to change the Wi-Fi name and password on your TP-Link FlashRouter.
1. Connect your computer, phone, or tablet to the TP-Link router via wireless (FlashRouter24 / FlashRouter50) or via ethernet cable to one of the LAN ports on the router.
The FlashRouter WiFi password is printed on the sheet that came with the router and is set to Wireless#[First 5 characters of your router MAC]. The router MAC can be found on the bottom of your router if you cannot locate the sheet. For e.g. if your MAC is 1459C07E70A8 then your WiFi password is Wireless#1459C
Be sure to capitalize the W.
2. Once connected via wireless or ethernet on your device open your browser and go to the TP-Link firmware settings.
3. Enter tp-link as the admin password to access the TP-Link firmware settings.
4. Click Wireless.

5. Change the Network Name (SSID) and Password fields to what you want to use. The SSID should be unique and NOT a duplicate of an existing network. Click Save.
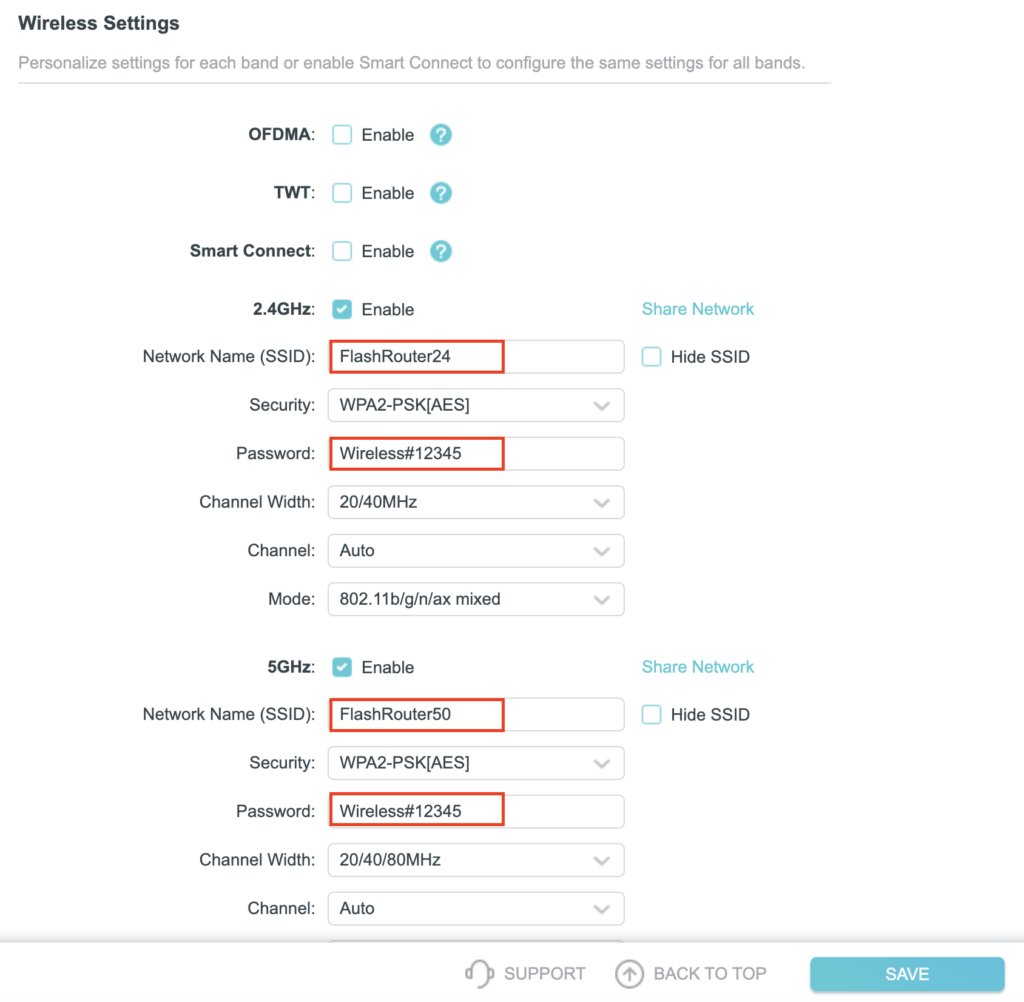
If you want both 2.4GHz and 5GHz networks to be bonded and have the same name click the Smart Connect checkbox.
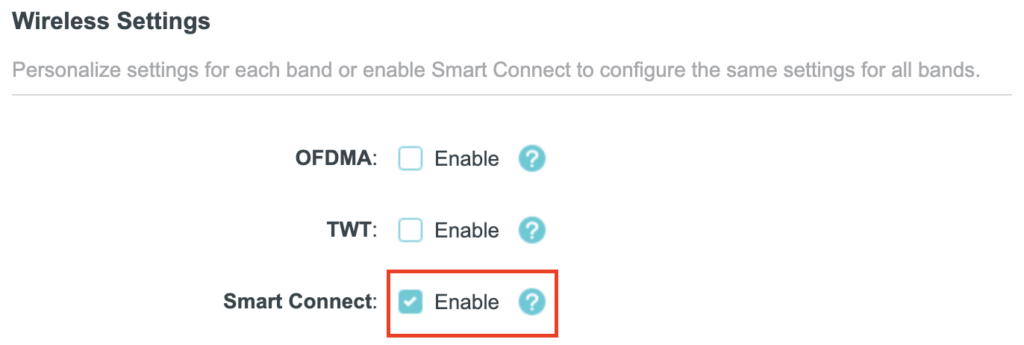
6. Connect your devices to the new wireless network.
Privacy Hero VPN Kill Switch Troubleshooting: No Internet or WiFi
If your Privacy Hero router suddenly loses internet access, devices report that WiFi has no internet, or devices will not stay connected after a VPN failure, the VPN Kill Switch may be blocking normal internet traffic.
The VPN Kill Switch is designed to prevent traffic from passing through Privacy Hero without VPN protection. If the VPN disconnects or fails while the Kill Switch is enabled, normal internet access is intentionally blocked.
Important: You can still access app.privacyhero.com to manage Privacy Hero, turn off the Kill Switch, or repair the VPN connection.
Privacy Hero is cloud-managed, so you do not need to be connected to the Privacy Hero WiFi to change these settings. You can also access the dashboard using cellular data, your main router’s WiFi, or another internet connection as long as Privacy Hero remains connected to the internet and Privacy Hero cloud.
Jump to a Section
Common Privacy Hero Kill Switch Symptoms
A failed VPN connection combined with an enabled Kill Switch can make the Privacy Hero network appear unavailable even though the router itself may still be functioning.
Common symptoms include:
- Your device connects to Privacy Hero WiFi but websites and apps will not load.
- Your phone, computer, television, or streaming device reports that WiFi has no internet.
- A device refuses to remain connected because it detects that the WiFi network does not currently provide normal internet access.
- Your phone automatically switches from Privacy Hero WiFi to cellular data or another saved WiFi network.
- Your computer displays “No Internet” or “Connected without Internet.”
- The VPN displays Failed, Disconnected, Connecting, or a timeout error.
- Privacy Hero was working normally and suddenly stopped providing internet access.
If the Privacy Hero WiFi network itself is completely missing and cannot be detected by any device, that is different from normal Kill Switch behavior. Continue with WiFi or router connectivity troubleshooting instead.
Restore Internet Access
The fastest way to determine whether the Kill Switch is responsible is to temporarily disable it and test Privacy Hero without VPN.
- Open app.privacyhero.com.
- Sign in to your Privacy Hero account.
- Open the VPN section.
- Check the current VPN status.
- If the VPN shows Failed or Disconnected, turn the VPN Kill Switch Off.
- Turn the failed VPN connection off.
- Connect a device to the Privacy Hero network.
- Test normal internet access.
If internet access returns with the VPN and Kill Switch disabled, Privacy Hero’s basic internet connection is working and the problem is isolated to the VPN connection.
Important: Disabling the Kill Switch allows normal non-VPN internet traffic through Privacy Hero. Leave it disabled only while troubleshooting if continuous VPN protection is required.
VPN Still Fails to Connect
Do not turn the Kill Switch back on until the VPN is connected and working.
If you are using NordVPN and the VPN shows Failed, Connecting, or a timeout error, continue with our dedicated Privacy Hero NordVPN Not Connecting or Showing Timeout Errors guide.
That guide covers:
- Selecting a different NordVPN server.
- Replacing a failed Auto Country connection with a specific NordVPN server.
- Generating a new NordVPN NordLynx access token.
- Verifying NordVPN OpenVPN manual service credentials.
- Avoiding double-VPN conflicts while testing.
If you use another VPN provider, try another available VPN server or protocol and verify that your VPN account and credentials remain active.
Verify the VPN Before Re-Enabling the Kill Switch
Once the VPN reconnects:
- Confirm Privacy Hero displays the VPN as Connected.
- Connect a device to the Privacy Hero WiFi.
- Make sure a separate VPN application is not connected directly on the testing device.
- Check your public IP address.
- Confirm the IP address and location reflect the VPN server you selected.
- Test normal websites and applications.
- Return to Privacy Hero and enable the VPN Kill Switch.
If you enable the Kill Switch while the VPN is still failing, normal internet access will be blocked again.
What If Privacy Hero Appears Offline?
If Privacy Hero shows Offline in the dashboard, the router may not currently be communicating with the Privacy Hero cloud.
- Confirm Privacy Hero is powered on.
- Confirm the Ethernet cable from your ISP gateway or primary router is connected to the Privacy Hero WAN/Internet port.
- Confirm your ISP gateway or primary router has working internet access.
- Restart Privacy Hero and allow it to finish booting.
- Using another internet connection, open app.privacyhero.com.
- Check whether Privacy Hero returns online.
If the router returns online, check the VPN and Kill Switch status before enabling the VPN again.
Privacy Hero Has a WAN IP but Devices Have No Internet
Privacy Hero can receive an IP address from your ISP gateway while the Kill Switch is still blocking normal internet traffic.
Before changing IP Passthrough, bridge mode, firewall settings, or other ISP gateway settings:
- Check the VPN status.
- Check whether the Kill Switch is enabled.
- Disable the VPN and Kill Switch temporarily.
- Test internet access again.
If internet access returns, troubleshoot the VPN connection rather than changing the ISP gateway configuration.
Kill Switch, WiFi, or WAN Problem?
WiFi Connects but There Is No Internet
If the VPN shows Failed or Disconnected and the Kill Switch is enabled, the Kill Switch is likely blocking normal internet traffic.
Device Will Not Stay Connected to Privacy Hero WiFi
Some devices automatically leave a WiFi network when they detect that it does not provide internet access. Use cellular data or another internet connection to access app.privacyhero.com and check the VPN and Kill Switch.
Privacy Hero WiFi Is Completely Missing
The Kill Switch does not normally cause the WiFi network itself to stop broadcasting. If no devices can detect the Privacy Hero WiFi network, troubleshoot the WiFi or router connection separately.
Privacy Hero Is Not Receiving a WAN IP Address
Check the Ethernet connection between Privacy Hero and your ISP gateway or primary router and confirm the upstream internet connection is working.
VPN Shows Connected but One Device Has the Wrong IP
If the VPN works correctly on other devices, the Kill Switch is probably not the issue. Check that device’s Privacy Hero VPN assignment and its own VPN, privacy, DNS, or security settings.
See Device Privacy, DNS, VPN, and Security Settings That Can Interfere With Your Router VPN.
Frequently Asked Questions
Why does Privacy Hero WiFi say no internet?
If the VPN has failed while the Kill Switch is enabled, normal internet traffic is intentionally blocked. Your device may therefore report that Privacy Hero WiFi has no internet.
Can I access Privacy Hero settings while the Kill Switch is blocking internet?
Yes. Open app.privacyhero.com. You can use the Privacy Hero network, cellular data, your main router’s WiFi, or another internet connection.
Do I have to be connected to Privacy Hero WiFi to change the settings?
No. Privacy Hero is cloud-managed and can be managed remotely while the router remains connected to the Privacy Hero cloud.
Why does my phone keep leaving the Privacy Hero WiFi?
Some phones automatically switch to cellular data or another saved WiFi network when the current WiFi connection does not provide normal internet access.
Should I turn the Kill Switch back on immediately?
Only after the VPN is connected and you have confirmed that your internet traffic is using the VPN.
Related Privacy Hero Guides
TP-Link Change Wireless Channel
Follow this guide to change the Wireless channel on your TP-Link FlashRouter.
1. Connect your computer, phone, or tablet to the TP-Link router via wireless (FlashRouter24 / FlashRouter50) or via ethernet cable to one of the LAN ports on the router.
The FlashRouter WiFi password is printed on the sheet that came with the router and is set to Wireless#[First 5 characters of your router MAC]. The router MAC can be found on the bottom of your router if you cannot locate the sheet. For e.g. if your MAC is 1459C07E70A8 then your WiFi password is Wireless#1459C
Be sure to capitalize the W.
2. Once connected via wireless or ethernet on your device open your browser and go to the TP-Link firmware settings.
3. Enter tp-link as the admin password to access the TP-Link firmware settings.
4. Click Wireless.
5. Change the Channel setting to the number that you want to use. Click Save.

6. Connect your devices to the wireless network again as they may have been disconnected when making this change.
TP-Link Merge or Separate 2.4GHz and 5GHz Wi-Fi
Your TP-Link router broadcasts a 2.4GHz and a 5GHz Wi-Fi network. These can be separated to allow you to assign your devices to the network that best suits them or merged into a single network so your devices automatically select the best band to use. Follow this guide to separate or merge your Wi-Fi bands.
1. Connect your computer, phone, or tablet to the TP-Link router via wireless (FlashRouter24 / FlashRouter50) or via ethernet cable to one of the LAN ports on the router.
The FlashRouter WiFi password is printed on the sheet that came with the router and is set to Wireless#[First 5 characters of your router MAC]. The router MAC can be found on the bottom of your router if you cannot locate the sheet. For e.g. if your MAC is 1459C07E70A8 then your WiFi password is Wireless#1459C
Be sure to capitalize the W.
2. Once connected via wireless or ethernet on your device open your browser and go to the TP-Link firmware settings.
3. Enter tp-link as the admin password to access the TP-Link firmware settings.
4. Click Wireless.
5. Check the Smart Connect checkbox to merge the two Wi-Fi bands. Uncheck the Smart Connect checkbox to separate the two Wi-Fi bands. If you have the two Wi-Fi bands separated make sure the Network Name (SSID) fields have different names for 2.4GHz and 5GHz bands. Click Save.
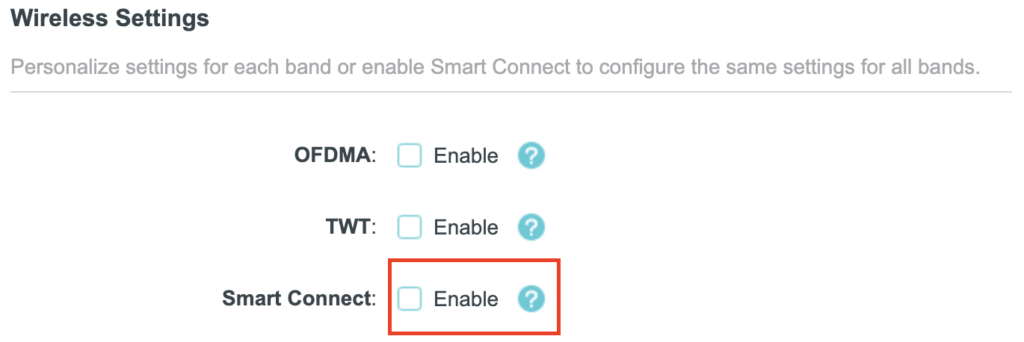
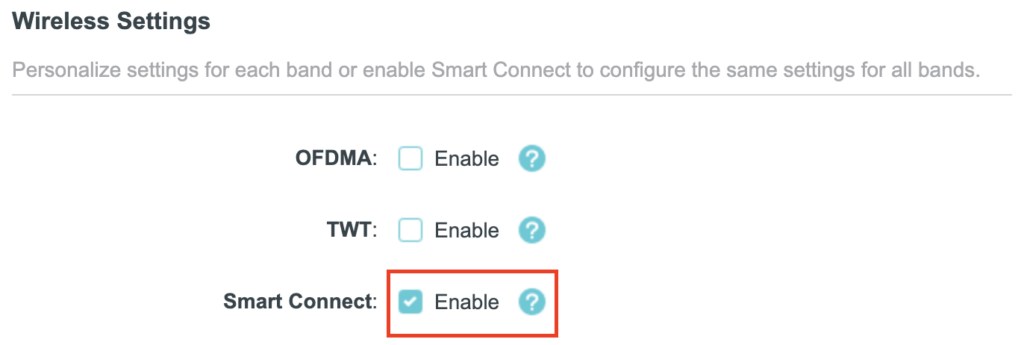
6. Connect your devices to the new wireless network.
Privacy Hero Adblocking Malware and Phishing Prevention Setup
Your Privacy Hero router uses Cloud Based router management which means you can access the router settings from anywhere on any device that has an internet connection. You can follow these steps while connected to your phone, other Wi-Fi network, or the Privacy Hero network.
Use these steps to enable Privacy Hero’s adblocking, malware, and phishing prevention settings to add extra security to your network.
1. From any device that has a browser such as a computer, smartphone, or tablet visit app.privacyhero.com

2. Enter your Privacy Hero account email and password. Click Login.

If you have not created your Privacy Hero account yet please follow these instructions.
3. Click the VPN symbol.

4. Toggle the Adblocking and Malware & Phishing switches to On.

Privacy Hero VPN Kill Switch Setup
The Privacy Hero VPN Kill Switch prevents regular internet traffic from passing through your router if its VPN disconnects or fails to connect. This helps prevent devices from using your normal ISP connection without VPN protection.
Before enabling: Make sure your VPN is already Connected and that internet access works through the VPN. The Kill Switch is optional, but useful if you prefer internet access to stop rather than continue unprotected when the VPN goes down.
Privacy Hero is managed at app.privacyhero.com. You can make changes using a computer, phone, or tablet.
How to Enable the VPN Kill Switch
- Open app.privacyhero.com and sign in using your Privacy Hero account. If the router has not been activated yet, follow the Privacy Hero Activation and Setup guide first.
- Open the VPN section of your Privacy Hero settings.
- Confirm that your selected VPN provider is active and its connection status shows Connected. If the VPN is failing, fix the connection before proceeding.
- Find VPN Killswitch (VPN Kill Switch) and move its toggle to On (orange). The setting is enabled when its toggle is On.
- Keep a device connected to the Privacy Hero WiFi or LAN and confirm that ordinary websites work with the VPN connected.
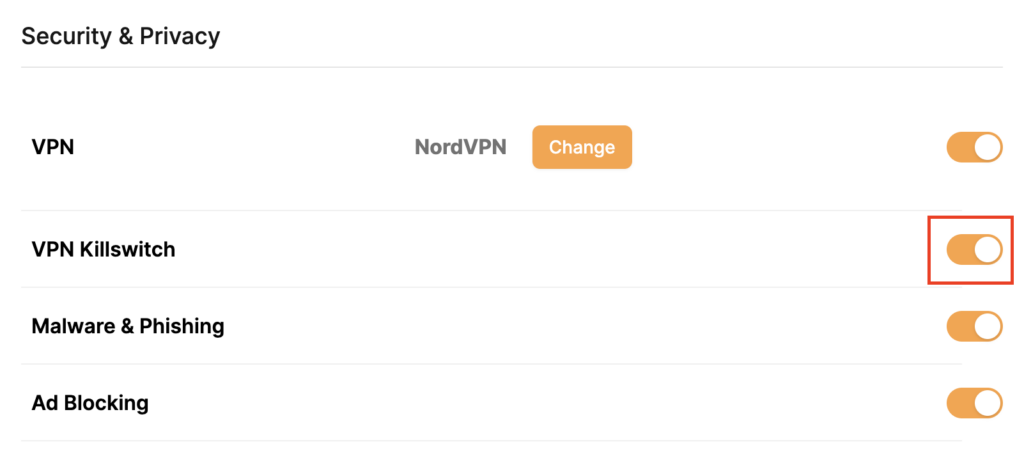
Tip: To check the router’s VPN IP address, use a browser on a device connected to Privacy Hero, not on a phone using cellular data or another WiFi network. Disable any separate VPN app on the test device so you can verify the router VPN independently.
What Happens When the Kill Switch Is On?
| VPN status | Kill Switch | Normal internet traffic |
|---|---|---|
| Connected | On | Allowed through the VPN |
| Disconnected or Failed | On | Blocked until the VPN reconnects or you turn the Kill Switch off |
| Disconnected or Failed | Off | May use the normal ISP connection without VPN protection |
The Kill Switch does not turn off the WiFi network. Your device may stay connected to Privacy Hero WiFi but report No Internet when the VPN is unavailable. Some phones and computers may automatically switch to cellular data or another saved WiFi network.
Access Privacy Hero Even When the Kill Switch Is Blocking Internet
Important: Privacy Hero includes a built-in exception for its cloud management dashboard. If the VPN is down and the Kill Switch blocks normal internet traffic, you can still access app.privacyhero.com while connected to the Privacy Hero WiFi or LAN network, provided the router itself still has its upstream/cloud connection.
This means you can sign in, check the VPN status, change the server or protocol, or switch off the Kill Switch without first leaving the Privacy Hero network.
You can also access the cloud dashboard through another working WiFi connection or cellular data. If the router shows Offline in the dashboard, that indicates a separate WAN or cloud-connectivity problem rather than normal Kill Switch behavior.
How to Turn Off the Kill Switch or Restore Internet
If your VPN has stopped connecting and you need to restore ordinary internet access temporarily:
- Open app.privacyhero.com, including from the Privacy Hero network if the Kill Switch is blocking regular internet.
- Open VPN and check the current VPN status.
- Move VPN Killswitch to Off.
- If the VPN remains Failed or Disconnected, temporarily switch the VPN connection Off and test internet access using a device on the Privacy Hero network.
- Repair the VPN connection, confirm Connected, and verify that ordinary internet traffic works through the VPN before turning the Kill Switch back On.
Security note: With the Kill Switch off, devices may access the internet without VPN protection if the VPN is disconnected. Re-enable it after testing if preventing non-VPN traffic is your goal.
VPN showing Failed? Privacy Hero includes a Reset option that removes all saved third-party VPN settings. With an active Privacy Premium subscription, the router reconnects using the built-in Privacy Hero VPN. With Privacy Core, it returns to your normal ISP connection without a router VPN.
Before using Reset, see our How to Reset a Failed VPN Connection on Privacy Hero guide.
For a complete diagnosis of WiFi connected but no internet, VPN failures, and router Offline status, follow the Privacy Hero VPN Kill Switch: No Internet or WiFi Troubleshooting guide.
Related Privacy Hero Guides
Privacy Hero Creating User Profiles and Adding Devices to Profiles
Your Privacy Hero router uses Cloud Based router management which means you can access the router settings from anywhere on any device that has an internet connection. You can follow these steps while connected to your phone, other Wi-Fi network, or the Privacy Hero network.
The Privacy Hero router allows for User Profile creation. Doing so allows you to group different user’s devices together to customize the following rules:
- Internet access scheduler (Bedtime settings)
- Internet Safe Search
- Youtube Safe Search
- Block Adult Content
This makes the Privacy Hero a great router option for families and internet addicts.
1. From any device that has a browser such as a computer, smartphone, or tablet visit app.privacyhero.com
2. Enter your Privacy Hero account email and password. Click Login.
If you have not created your Privacy Hero account yet please follow these instructions.
3. Click the Profiles symbol.

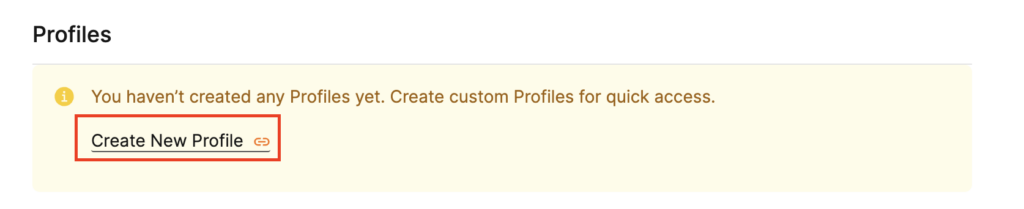
4. Click Create New Profile.
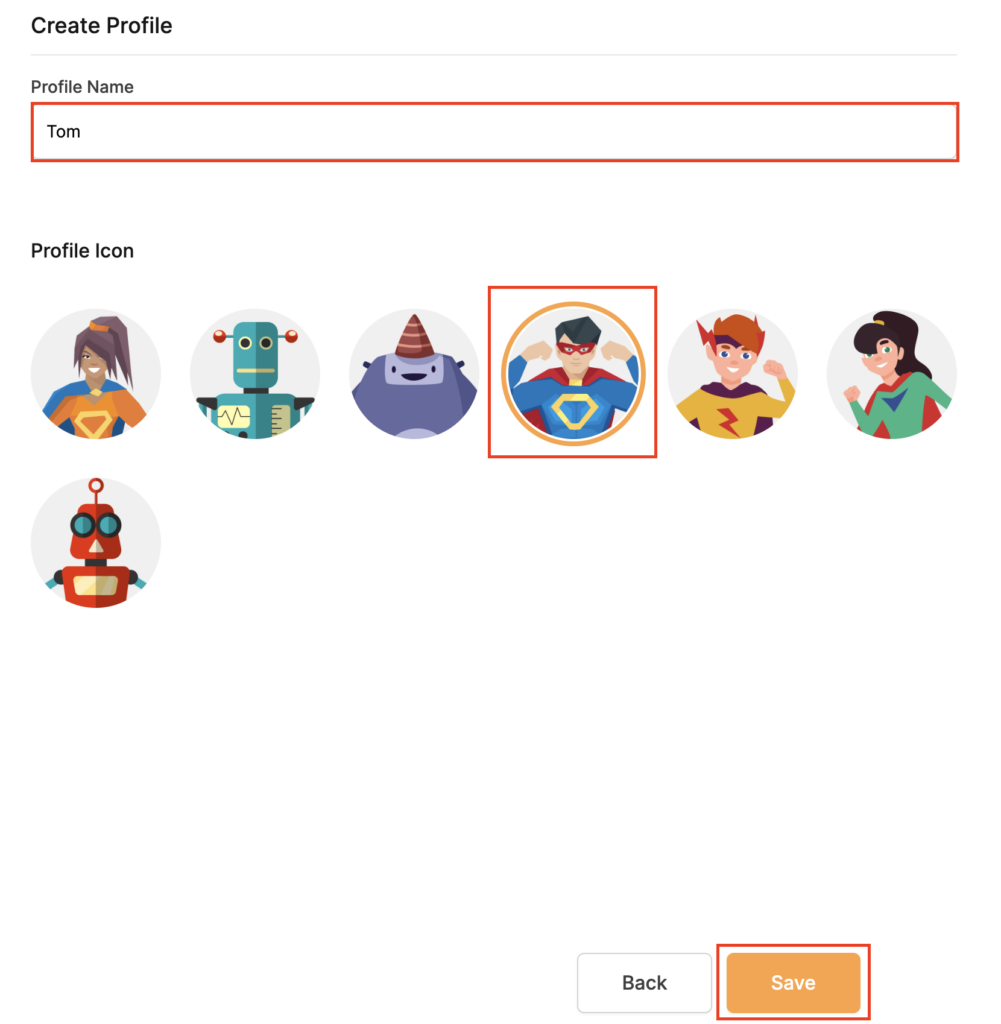
5. Set the Profile Name, select the Profile Icon, and click Save.
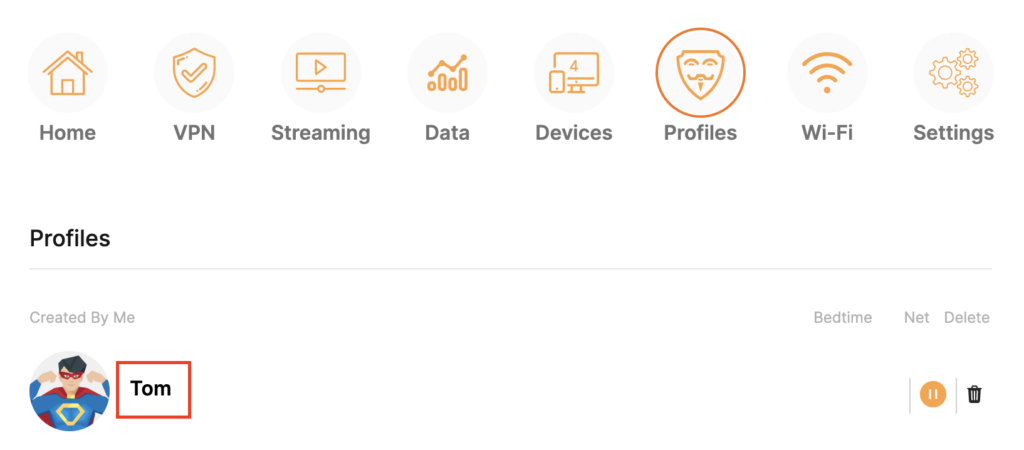
6. Click the name of the User Profile.
7. Select Devices.
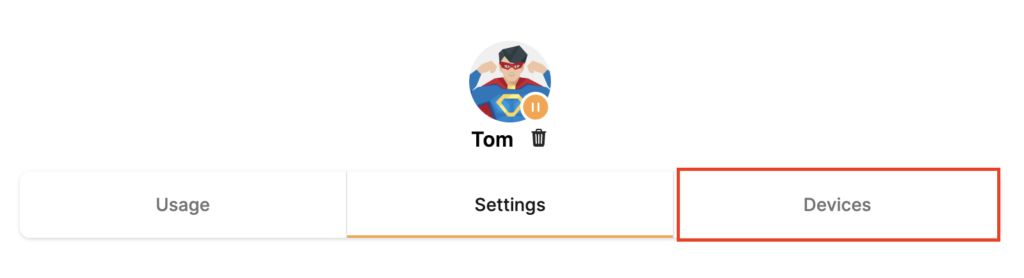
8. Select Manage Devices.
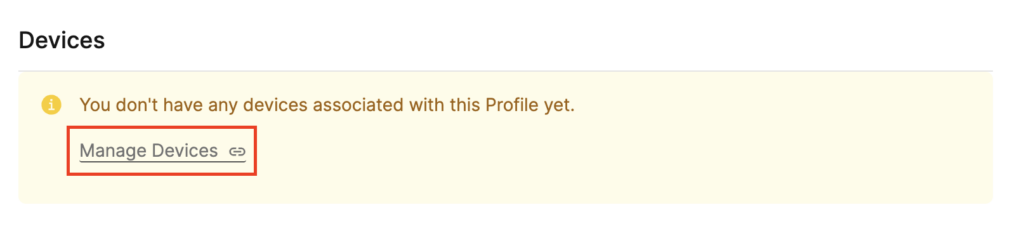
9. If you have not already connected your devices to the Privacy Hero network via wireless or ethernet you can do so now. Refresh the page after connecting a new device and it will appear in the list where you can select Move to “Profile Name” to move the device to the appropriate profile. By default new devices are in the Shared profile.
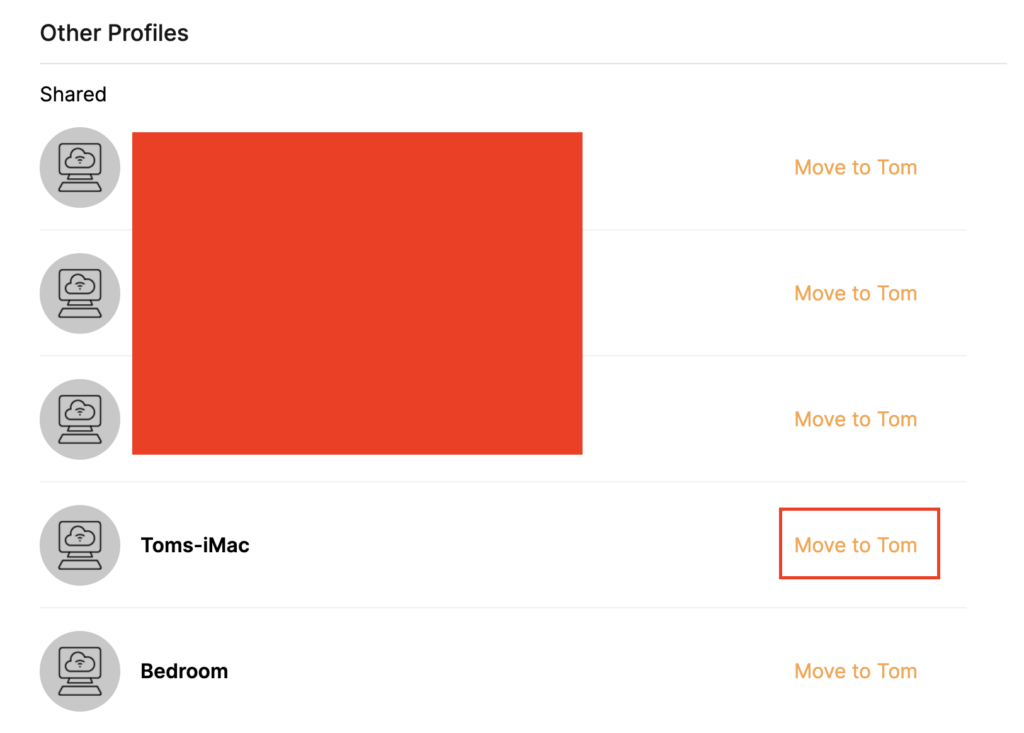
If your devices were already connected to the Privacy Hero network and you are having issues identifying them I would recommend the following steps:
- Click the Devices icon.
- Select the device in question.
- Click Nerd and note down the IP Address of the device.
- Go to the network settings of your device where it will display the local IP Address and match that to the IP Address noted in Privacy Hero.
This is how you can identify a device that is not properly named.
10. Now that your devices are assigned you can set the Bedtime Settings (Internet Scheduler) and Safe Surf settings for your new Profile.