Please note: HMA no longer allows router based integration, please visit our top recommended VPNs.
Search Results for: manual height a
PrivateInternetAccess (PIA) Manual OpenVPN Setup
Preparing for Manual PIA Setup
Verify your PIA login information
If you are not already a PIA user Sign Up Now.
Log in to your account on the PIA website.

PIA Server Addresses
The below servers are the only servers compatible with PIA router connections. Dedicated IP Addresses are not able to connect via routers.
United States
us-california.privacy.network
us-newjersey.privacy.network
us-chicago.privacy.network
us-texas.privacy.network
us-florida.privacy.network
us-seattle.privacy.network
us3.privacy.network
us-siliconvalley.privacy.network
us-newyorkcity.privacy.network
us-washingtondc.privacy.network
us-atlanta.privacy.network
us-houston.privacy.network
us-denver.privacy.network
United Kingdom
uk-london.privacy.network
uk-manchester.privacy.network
Canada
ca-toronto.privacy.network
ca-montreal.privacy.network
Australia
au-sydney.privacy.network
aus-melbourne.privacy.network
aus-perth.privacy.network
Germany
de-berlin.privacy.network
de-frankfurt.privacy.network
Rest of the World
ae.privacy.network
austria.privacy.network
dz.privacy.network
ad.privacy.network
ar.privacy.network
yerevan.privacy.network
bahamas.privacy.network
bangladesh.privacy.network
brussels.privacy.network
sofia.privacy.network
cambodia.privacy.network
china.privacy.network
cyprus.privacy.network
czech.privacy.network
denmark.privacy.network
egypt.privacy.network
fi.privacy.network
france.privacy.network
georgia.privacy.network
greenland.privacy.network
hungary.privacy.network
is.privacy.network
in.privacy.network
iran.privacy.network
ireland.privacy.network
man.privacy.network
israel.privacy.network
italy.privacy.network
japan.privacy.network
kazakhstan.privacy.network
liechtenstein.privacy.network
lu.privacy.network
macau.privacy.network
malta.privacy.network
mexico.privacy.network
md.privacy.network
monaco.privacy.network
mongolia.privacy.network
montenegro.privacy.network
morocco.privacy.network
nl-amsterdam.privacy.network
nz.privacy.network
nigeria.privacy.network
no.privacy.network
panama.privacy.network
philippines.privacy.network
poland.privacy.network
qatar.privacy.network
ro.privacy.network
rs.privacy.network
saudiarabia.privacy.network
spain.privacy.network
srilanka.privacy.network
sweden.privacy.network
swiss.privacy.network
sg.privacy.network
tr.privacy.network
taiwan.privacy.network
ua.privacy.network
venezuela.privacy.network
vietnam.privacy.network
za.privacy.network
DD-WRT Router Setup for PIA
Navigate to Services > VPN
PIA offers two different Encryption levels.
Default Encryption (AES-128) typically provides faster speeds.
Strong Encryption (AES-256) provides stronger encryption.
Follow the table below of the one that fits your needs.
Enter PIA settings (Default Encryption)
OpenVPN Client
Start OpenVPN Client
If you wish to disable your VPN connection simply set this to Disable at any time and click Apply Settings.
Server IP/Name
Copy and paste the server you would like to connect to from the server list above. Be sure there are no extra spaces or characters.
If you wish to change PIA connection locations, THIS IS THE ONLY FIELD YOU NEED TO CHANGE.
Port
1198
Tunnel Device
TUN
Tunnel Protocol
UDP
Encryption cipher
AES-128-CBC
Hash Algorithm
SHA1
First Data Cipher
Not set
Second Data Cipher
Not set
Third Data Cipher
Not set
Userpass Authentication
Enable
Username
Enter the Username you successfully logged in to your PIA account with.
Password
Enter the Password you successfully logged in to your PIA account with.
Advanced Options
Enable
TLS Cipher
None
LZO Compression
Disabled
NAT
Enable
Firewall Protection
Enable
Additional Config
persist-key
persist-tun
Policy Based Routing
This field can be used for split VPN and Dual Gateway routing.
CA Cert
-----BEGIN CERTIFICATE-----
MIIFqzCCBJOgAwIBAgIJAKZ7D5Yv87qDMA0GCSqGSIb3DQEBDQUAMIHoMQswCQYD
VQQGEwJVUzELMAkGA1UECBMCQ0ExEzARBgNVBAcTCkxvc0FuZ2VsZXMxIDAeBgNV
BAoTF1ByaXZhdGUgSW50ZXJuZXQgQWNjZXNzMSAwHgYDVQQLExdQcml2YXRlIElu
dGVybmV0IEFjY2VzczEgMB4GA1UEAxMXUHJpdmF0ZSBJbnRlcm5ldCBBY2Nlc3Mx
IDAeBgNVBCkTF1ByaXZhdGUgSW50ZXJuZXQgQWNjZXNzMS8wLQYJKoZIhvcNAQkB
FiBzZWN1cmVAcHJpdmF0ZWludGVybmV0YWNjZXNzLmNvbTAeFw0xNDA0MTcxNzM1
MThaFw0zNDA0MTIxNzM1MThaMIHoMQswCQYDVQQGEwJVUzELMAkGA1UECBMCQ0Ex
EzARBgNVBAcTCkxvc0FuZ2VsZXMxIDAeBgNVBAoTF1ByaXZhdGUgSW50ZXJuZXQg
QWNjZXNzMSAwHgYDVQQLExdQcml2YXRlIEludGVybmV0IEFjY2VzczEgMB4GA1UE
AxMXUHJpdmF0ZSBJbnRlcm5ldCBBY2Nlc3MxIDAeBgNVBCkTF1ByaXZhdGUgSW50
ZXJuZXQgQWNjZXNzMS8wLQYJKoZIhvcNAQkBFiBzZWN1cmVAcHJpdmF0ZWludGVy
bmV0YWNjZXNzLmNvbTCCASIwDQYJKoZIhvcNAQEBBQADggEPADCCAQoCggEBAPXD
L1L9tX6DGf36liA7UBTy5I869z0UVo3lImfOs/GSiFKPtInlesP65577nd7UNzzX
lH/P/CnFPdBWlLp5ze3HRBCc/Avgr5CdMRkEsySL5GHBZsx6w2cayQ2EcRhVTwWp
cdldeNO+pPr9rIgPrtXqT4SWViTQRBeGM8CDxAyTopTsobjSiYZCF9Ta1gunl0G/
8Vfp+SXfYCC+ZzWvP+L1pFhPRqzQQ8k+wMZIovObK1s+nlwPaLyayzw9a8sUnvWB
/5rGPdIYnQWPgoNlLN9HpSmsAcw2z8DXI9pIxbr74cb3/HSfuYGOLkRqrOk6h4RC
OfuWoTrZup1uEOn+fw8CAwEAAaOCAVQwggFQMB0GA1UdDgQWBBQv63nQ/pJAt5tL
y8VJcbHe22ZOsjCCAR8GA1UdIwSCARYwggESgBQv63nQ/pJAt5tLy8VJcbHe22ZO
sqGB7qSB6zCB6DELMAkGA1UEBhMCVVMxCzAJBgNVBAgTAkNBMRMwEQYDVQQHEwpM
b3NBbmdlbGVzMSAwHgYDVQQKExdQcml2YXRlIEludGVybmV0IEFjY2VzczEgMB4G
A1UECxMXUHJpdmF0ZSBJbnRlcm5ldCBBY2Nlc3MxIDAeBgNVBAMTF1ByaXZhdGUg
SW50ZXJuZXQgQWNjZXNzMSAwHgYDVQQpExdQcml2YXRlIEludGVybmV0IEFjY2Vz
czEvMC0GCSqGSIb3DQEJARYgc2VjdXJlQHByaXZhdGVpbnRlcm5ldGFjY2Vzcy5j
b22CCQCmew+WL/O6gzAMBgNVHRMEBTADAQH/MA0GCSqGSIb3DQEBDQUAA4IBAQAn
a5PgrtxfwTumD4+3/SYvwoD66cB8IcK//h1mCzAduU8KgUXocLx7QgJWo9lnZ8xU
ryXvWab2usg4fqk7FPi00bED4f4qVQFVfGfPZIH9QQ7/48bPM9RyfzImZWUCenK3
7pdw4Bvgoys2rHLHbGen7f28knT2j/cbMxd78tQc20TIObGjo8+ISTRclSTRBtyC
GohseKYpTS9himFERpUgNtefvYHbn70mIOzfOJFTVqfrptf9jXa9N8Mpy3ayfodz
1wiqdteqFXkTYoSDctgKMiZ6GdocK9nMroQipIQtpnwd4yBDWIyC6Bvlkrq5TQUt
YDQ8z9v+DMO6iwyIDRiU
-----END CERTIFICATE-----
CLICK APPLY SETTINGS
Leave all settings not mentioned above as their default setting.
Enter PIA settings (Strong Encryption)
OpenVPN Client
Start OpenVPN Client
If you wish to disable your VPN connection simply set this to Disable at any time and click Apply Settings.
Server IP/Name
Copy and paste the server you would like to connect to from the server list above. Be sure there are no extra spaces or characters.
If you wish to change PIA connection locations, THIS IS THE ONLY FIELD YOU NEED TO CHANGE.
Port
1197
Tunnel Device
TUN
Tunnel Protocol
UDP
Encryption cipher
AES-256-CBC
Hash Algorithm
SHA256
First Data Cipher
Not set
Second Data Cipher
Not set
Third Data Cipher
Not set
Userpass Authentication
Enable
Username
Enter the Username you successfully logged in to your PIA account with.
Password
Enter the Password you successfully logged in to your PIA account with.
Advanced Options
Enable
TLS Cipher
None
LZO Compression
Adaptive
NAT
Enable
Firewall Protection
Enable
Additional Config
persist-key
persist-tun
Policy Based Routing
This field can be used for split VPN and Dual Gateway routing.
CA Cert
-----BEGIN CERTIFICATE-----
MIIHqzCCBZOgAwIBAgIJAJ0u+vODZJntMA0GCSqGSIb3DQEBDQUAMIHoMQswCQYD
VQQGEwJVUzELMAkGA1UECBMCQ0ExEzARBgNVBAcTCkxvc0FuZ2VsZXMxIDAeBgNV
BAoTF1ByaXZhdGUgSW50ZXJuZXQgQWNjZXNzMSAwHgYDVQQLExdQcml2YXRlIElu
dGVybmV0IEFjY2VzczEgMB4GA1UEAxMXUHJpdmF0ZSBJbnRlcm5ldCBBY2Nlc3Mx
IDAeBgNVBCkTF1ByaXZhdGUgSW50ZXJuZXQgQWNjZXNzMS8wLQYJKoZIhvcNAQkB
FiBzZWN1cmVAcHJpdmF0ZWludGVybmV0YWNjZXNzLmNvbTAeFw0xNDA0MTcxNzQw
MzNaFw0zNDA0MTIxNzQwMzNaMIHoMQswCQYDVQQGEwJVUzELMAkGA1UECBMCQ0Ex
EzARBgNVBAcTCkxvc0FuZ2VsZXMxIDAeBgNVBAoTF1ByaXZhdGUgSW50ZXJuZXQg
QWNjZXNzMSAwHgYDVQQLExdQcml2YXRlIEludGVybmV0IEFjY2VzczEgMB4GA1UE
AxMXUHJpdmF0ZSBJbnRlcm5ldCBBY2Nlc3MxIDAeBgNVBCkTF1ByaXZhdGUgSW50
ZXJuZXQgQWNjZXNzMS8wLQYJKoZIhvcNAQkBFiBzZWN1cmVAcHJpdmF0ZWludGVy
bmV0YWNjZXNzLmNvbTCCAiIwDQYJKoZIhvcNAQEBBQADggIPADCCAgoCggIBALVk
hjumaqBbL8aSgj6xbX1QPTfTd1qHsAZd2B97m8Vw31c/2yQgZNf5qZY0+jOIHULN
De4R9TIvyBEbvnAg/OkPw8n/+ScgYOeH876VUXzjLDBnDb8DLr/+w9oVsuDeFJ9K
V2UFM1OYX0SnkHnrYAN2QLF98ESK4NCSU01h5zkcgmQ+qKSfA9Ny0/UpsKPBFqsQ
25NvjDWFhCpeqCHKUJ4Be27CDbSl7lAkBuHMPHJs8f8xPgAbHRXZOxVCpayZ2SND
fCwsnGWpWFoMGvdMbygngCn6jA/W1VSFOlRlfLuuGe7QFfDwA0jaLCxuWt/BgZyl
p7tAzYKR8lnWmtUCPm4+BtjyVDYtDCiGBD9Z4P13RFWvJHw5aapx/5W/CuvVyI7p
Kwvc2IT+KPxCUhH1XI8ca5RN3C9NoPJJf6qpg4g0rJH3aaWkoMRrYvQ+5PXXYUzj
tRHImghRGd/ydERYoAZXuGSbPkm9Y/p2X8unLcW+F0xpJD98+ZI+tzSsI99Zs5wi
jSUGYr9/j18KHFTMQ8n+1jauc5bCCegN27dPeKXNSZ5riXFL2XX6BkY68y58UaNz
meGMiUL9BOV1iV+PMb7B7PYs7oFLjAhh0EdyvfHkrh/ZV9BEhtFa7yXp8XR0J6vz
1YV9R6DYJmLjOEbhU8N0gc3tZm4Qz39lIIG6w3FDAgMBAAGjggFUMIIBUDAdBgNV
HQ4EFgQUrsRtyWJftjpdRM0+925Y6Cl08SUwggEfBgNVHSMEggEWMIIBEoAUrsRt
yWJftjpdRM0+925Y6Cl08SWhge6kgeswgegxCzAJBgNVBAYTAlVTMQswCQYDVQQI
EwJDQTETMBEGA1UEBxMKTG9zQW5nZWxlczEgMB4GA1UEChMXUHJpdmF0ZSBJbnRl
cm5ldCBBY2Nlc3MxIDAeBgNVBAsTF1ByaXZhdGUgSW50ZXJuZXQgQWNjZXNzMSAw
HgYDVQQDExdQcml2YXRlIEludGVybmV0IEFjY2VzczEgMB4GA1UEKRMXUHJpdmF0
ZSBJbnRlcm5ldCBBY2Nlc3MxLzAtBgkqhkiG9w0BCQEWIHNlY3VyZUBwcml2YXRl
aW50ZXJuZXRhY2Nlc3MuY29tggkAnS7684Nkme0wDAYDVR0TBAUwAwEB/zANBgkq
hkiG9w0BAQ0FAAOCAgEAJsfhsPk3r8kLXLxY+v+vHzbr4ufNtqnL9/1Uuf8NrsCt
pXAoyZ0YqfbkWx3NHTZ7OE9ZRhdMP/RqHQE1p4N4Sa1nZKhTKasV6KhHDqSCt/dv
Em89xWm2MVA7nyzQxVlHa9AkcBaemcXEiyT19XdpiXOP4Vhs+J1R5m8zQOxZlV1G
tF9vsXmJqWZpOVPmZ8f35BCsYPvv4yMewnrtAC8PFEK/bOPeYcKN50bol22QYaZu
LfpkHfNiFTnfMh8sl/ablPyNY7DUNiP5DRcMdIwmfGQxR5WEQoHL3yPJ42LkB5zs
6jIm26DGNXfwura/mi105+ENH1CaROtRYwkiHb08U6qLXXJz80mWJkT90nr8Asj3
5xN2cUppg74nG3YVav/38P48T56hG1NHbYF5uOCske19F6wi9maUoto/3vEr0rnX
JUp2KODmKdvBI7co245lHBABWikk8VfejQSlCtDBXn644ZMtAdoxKNfR2WTFVEwJ
iyd1Fzx0yujuiXDROLhISLQDRjVVAvawrAtLZWYK31bY7KlezPlQnl/D9Asxe85l
8jO5+0LdJ6VyOs/Hd4w52alDW/MFySDZSfQHMTIc30hLBJ8OnCEIvluVQQ2UQvoW
+no177N9L2Y+M9TcTA62ZyMXShHQGeh20rb4kK8f+iFX8NxtdHVSkxMEFSfDDyQ=
-----END CERTIFICATE-----
CLICK APPLY SETTINGS
Leave all settings not mentioned above as their default setting.
Verify a successful PIA connection
Navigate to Status > OpenVPN
- You should now see a CONNECTED SUCCESS message.
- Visit PIA’s IP Check to verify your new IP address and virtual location.
In some cases you may notice that the location is not showing the same location as the server you have input in your router settings; this is because geo tracking tools are often tricked by VPN connections. As long as you see an IP address that is not the same as your normal Internet IP address then you are indeed connected to PIA.
Back up your settings
Navigate to Administration > Backup
- Click the Backup button.
- A file named nvrambak.bin will be saved to your computer.
- You can load nvrambak.bin to restore your settings in the event of a reset.
How to change the PIA server
- Copy the new PIA server address from the above server list.
- Paste the server into the Server IP/Name field.
- Click Apply Settings.
ExpressVPN Setup for AsusWRT Firmware Routers
You can connect to ExpressVPN on your AsusWRT router using OpenVPN.
Quick Options
- OpenVPN: Download your preferred server .ovpn configuration file from the ExpressVPN website.
 If you are not already a ExpressVPN user Sign Up Now.
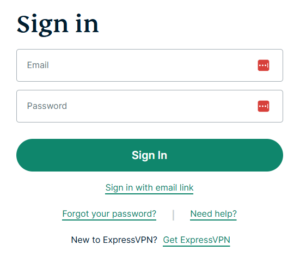
1. Log in to your account on the ExpressVPN website.
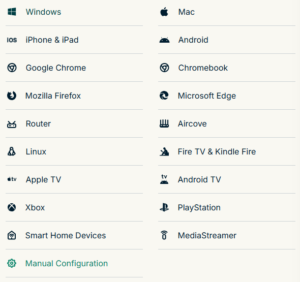
2. In the “Set up your devices” section, click More and select Manual Configuration from the menu options.
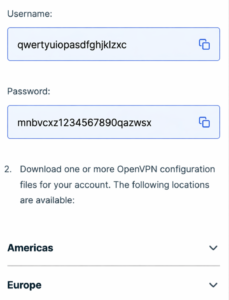
3. Copy the Username and Password that are displayed on the right
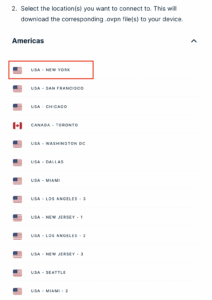
4. Download a server file from any of the available regions shown in the ExpressVPN Manual Configuration section (Americas, Europe, Asia Pacific, etc)
5. Log in to the Asus settings page by connecting to the Asus router’s WiFi (or wired LAN) on your computer. Then, enter 192.168.50.1 or asusrouter.com in the browser.
View our guide for more instructions on how to access AsusWRT firmware settings.
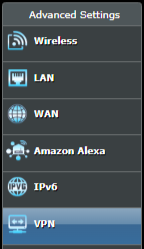
6. Navigate to the VPN tab and then click on the VPN Fusion tab, then click Add Profile
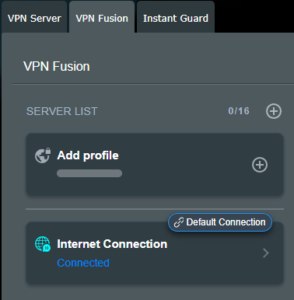
7. Fill in your NordVPN information then click Apply and Enable.
- Connection Name: Choose a name for your ExpressVPN OpenVPN connection.
- VPN Type: Select OpenVPN
- Import .ovpn File: Upload the OpenVPN file that you downloaded.
- Username and Password: Copy and paste your ExpressVPN manual service credentials from step 3.
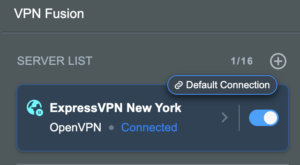
8. You should now see the Profile say Connected, indicating that the NordVPN server is successfully connected to your router.
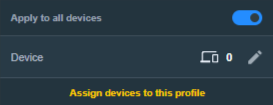
9. The VPN connection is automatically set to Apply to all devices.
If you only want certain devices to connect to the VPN, then turn off the VPN connection and switch off Apply to all devices.
Now click the pencil next to the Device section and select the devices (computer, phone, etc.) that you want to connect to VPN. Click OK and then click Apply all settings.
- Connect your devices to the Asus router network and visit the ExpressVPN website, at the top it should display Your Status: Protected.
- Visit ExpressVPN’s IP Check to verify your new IP address and virtual location.
🚫📱Do not run ExpressVPN apps on devices connected to your ExpressVPNrouter. Using the app at the same time as the router VPN may cause conflicts and connection issues.
IVPN Manual OpenVPN Setup
Preparing for Manual IVPN Setup
Verify your IVPN login information
If you are not already an IVPN user Sign Up Now.
Log in to your account on the IVPN website.
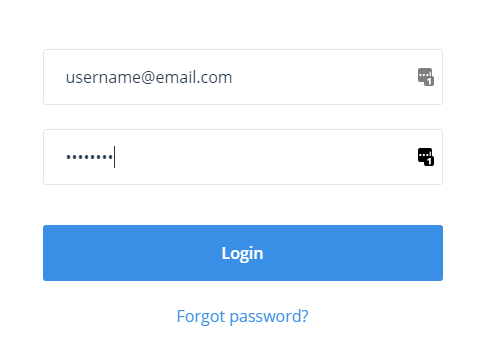
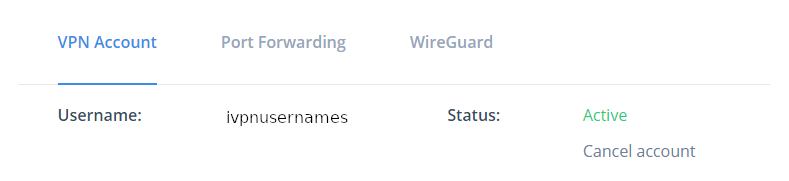
Locate and Copy the Username displayed on the VPN Accounts page.
IVPN Server Addresses
View a full list of IVPN servers.
United States
Atlanta:
us-ga.gw.ivpn.net
Dallas:
us-tx.gw.ivpn.net
Los Angeles:
us-ca.gw.ivpn.net
Miami:
us-fl.gw.ivpn.net
New Jersey:
us-nj.gw.ivpn.net
Salt Lake City:
us-ut.gw.ivpn.net
DD-WRT Router Setup for IVPN
Navigate to Services > VPN
Enter IVPN settings
OpenVPN Client
Start OpenVPN Client
If you wish to disable your VPN connection simply set this to Disable at any time and click Apply Settings.
Server IP/Name
Copy and paste the server you would like to connect to from the server list above. Be sure there are no extra spaces or characters.
If you wish to change PureVPN connection locations, THIS IS THE ONLY FIELD YOU NEED TO CHANGE.
Port
443 for TCP
2049 for UDP
Tunnel Device
TUN
Tunnel Protocol
TCP or UDP
Encryption cipher
AES-256-CBC
Hash Algorithm
SHA1
User Pass Authentication
Enable
Username
Enter the Username you noted from the Home page above.
eg. ivpn1234567
Password
Enter the Password you successfully logged in to your IVPN account with.
Advanced Options
Enable
TLS Cipher
None
LZO Compression
Adaptive
NAT
Enable
Firewall Protection
Enable
TLS Auth Key
-----BEGIN OpenVPN Static key V1-----
ac470c93ff9f5602a8aab37dee84a528
14d10f20490ad23c47d5d82120c1bf85
9e93d0696b455d4a1b8d55d40c2685c4
1ca1d0aef29a3efd27274c4ef09020a3
978fe45784b335da6df2d12db97bbb83
8416515f2a96f04715fd28949c6fe296
a925cfada3f8b8928ed7fc963c156327
2f5cf46e5e1d9c845d7703ca881497b7
e6564a9d1dea9358adffd435295479f4
7d5298fabf5359613ff5992cb57ff081
a04dfb81a26513a6b44a9b5490ad265f
8a02384832a59cc3e075ad545461060b
7bcab49bac815163cb80983dd51d5b1f
d76170ffd904d8291071e96efc3fb777
856c717b148d08a510f5687b8a8285dc
ffe737b98916dd15ef6235dee4266d3b
-----END OpenVPN Static key V1-----
Additional Config
tls-client
tls-cipher TLS-DHE-RSA-WITH-AES-256-CBC-SHA
resolv-retry infinite
keepalive 10 60
nobind
persist-key
persist-tun
persist-remote-ip
verb 3
Policy Based Routing
This field can be used for split VPN and Dual Gateway routing.
CA Cert
-----BEGIN CERTIFICATE-----
MIIGoDCCBIigAwIBAgIJAJjvUclXmxtnMA0GCSqGSIb3DQEBCwUAMIGMMQswCQYD
VQQGEwJDSDEPMA0GA1UECAwGWnVyaWNoMQ8wDQYDVQQHDAZadXJpY2gxETAPBgNV
BAoMCElWUE4ubmV0MQ0wCwYDVQQLDARJVlBOMRgwFgYDVQQDDA9JVlBOIFJvb3Qg
Q0EgdjIxHzAdBgkqhkiG9w0BCQEWEHN1cHBvcnRAaXZwbi5uZXQwHhcNMjAwMjI2
MTA1MjI5WhcNNDAwMjIxMTA1MjI5WjCBjDELMAkGA1UEBhMCQ0gxDzANBgNVBAgM
Blp1cmljaDEPMA0GA1UEBwwGWnVyaWNoMREwDwYDVQQKDAhJVlBOLm5ldDENMAsG
A1UECwwESVZQTjEYMBYGA1UEAwwPSVZQTiBSb290IENBIHYyMR8wHQYJKoZIhvcN
AQkBFhBzdXBwb3J0QGl2cG4ubmV0MIICIjANBgkqhkiG9w0BAQEFAAOCAg8AMIIC
CgKCAgEAxHVeaQN3nYCLnGoEg6cY44AExbQ3W6XGKYwC9vI+HJbb1o0tAv56ryvc
6eS6BdG5q9M8fHaHEE/jw9rtznioiXPwIEmqMqFPA9k1oRIQTGX73m+zHGtRpt9P
4tGYhkvbqnN0OGI0H+j9R6cwKi7KpWIoTVibtyI7uuwgzC2nvDzVkLi63uvnCKRX
cGy3VWC06uWFbqI9+QDrHHgdJA1F0wRfg0Iac7TE75yXItBMvNLbdZpge9SmplYW
FQ2rVPG+n75KepJ+KW7PYfTP4Mh3R8A7h3/WRm03o3spf2aYw71t44voZ6agvslv
wqGyczDytsLUny0U2zR7/mfEAyVbL8jqcWr2Df0m3TA0WxwdWvA51/RflVk9G96L
ncUkoxuBT56QSMtdjbMSqRgLfz1iPsglQEaCzUSqHfQExvONhXtNgy+Pr2+wGrEu
SlLMee7aUEMTFEX/vHPZanCrUVYf5Vs8vDOirZjQSHJfgZfwj3nL5VLtIq6ekDhS
AdrqCTILP3V2HbgdZGWPVQxl4YmQPKo0IJpse5Kb6TF2o0i90KhORcKg7qZA40sE
bYLEwqTM7VBs1FahTXsOPAoMa7xZWV1TnigF5pdVS1l51dy5S8L4ErHFEnAp242B
DuTClSLVnWDdofW0EZ0OkK7V9zKyVl75dlBgxMIS0y5MsK7IWicCAwEAAaOCAQEw
gf4wHQYDVR0OBBYEFHUDcMOMo35yg2A/v0uYfkDE11CXMIHBBgNVHSMEgbkwgbaA
FHUDcMOMo35yg2A/v0uYfkDE11CXoYGSpIGPMIGMMQswCQYDVQQGEwJDSDEPMA0G
A1UECAwGWnVyaWNoMQ8wDQYDVQQHDAZadXJpY2gxETAPBgNVBAoMCElWUE4ubmV0
MQ0wCwYDVQQLDARJVlBOMRgwFgYDVQQDDA9JVlBOIFJvb3QgQ0EgdjIxHzAdBgkq
hkiG9w0BCQEWEHN1cHBvcnRAaXZwbi5uZXSCCQCY71HJV5sbZzAMBgNVHRMEBTAD
AQH/MAsGA1UdDwQEAwIBBjANBgkqhkiG9w0BAQsFAAOCAgEAABAjRMJy+mXFLezA
Z8iUgxOjNtSqkCv1aU78K1XkYUzbwNNrSIVGKfP9cqOEiComXY6nniws7QEV2IWi
lcdPKm0x57recrr9TExGGOTVGB/WdmsFfn0g/HgmxNvXypzG3qulBk4qQTymICds
l9vIPb1l9FSjKw1KgUVuCPaYq7xiXbZ/kZdZX49xeKtoDBrXKKhXVYoWus/S+k2I
S8iCxvcp599y7LQJg5DOGlbaxFhsW4R+kfGOaegyhPvpaznguv02i7NLd99XqJhp
v2jTUF5F3T23Z4KkL/wTo4zxz09DKOlELrE4ai++ilCt/mXWECXNOSNXzgszpe6W
As0h9R++sH+AzJyhBfIGgPUTxHHHvxBVLj3k6VCgF7mRP2Y+rTWa6d8AGI2+Raey
V9DVVH9UeSoU0Hv2JHiZL6dRERnyg8dyzKeTCke8poLIjXF+gyvI+22/xsL8jcNH
i9Kji3Vpc3i0Mxzx3gu2N+PL71CwJilgqBgxj0firr3k8sFcWVSGos6RJ3IvFvTh
xYx0p255WrWM01fR9TktPYEfjDT9qpIJ8OrGlNOhWhYj+a45qibXDpaDdb/uBEmf
2sSXNifjSeUyqu6cKfZvMqB7pS3l/AhuAOTT80E4sXLEoDxkFD4C78swZ8wyWRKw
sWGIGABGAHwXEAoDiZ/jjFrEZT0=
-----END CERTIFICATE-----
CLICK APPLY SETTINGS
Leave all settings not mentioned above as their default setting.
Verify a successful IVPN connection
Navigate to Status > OpenVPN
- You should now see a CONNECTED SUCCESS message.
- Visit WhatIsMyIPAddress to verify your new IP address, virtual location, and status as Protected at the top of the page.
In some cases you may notice that the location is not showing the same location as the server you have input in your router settings; this is because geo tracking tools are often tricked by VPN connections. As long as you see an IP address that is not the same as your normal Internet IP address then you are indeed connected to IVPN.
Back up your settings
Navigate to Administration > Backup
- Click the Backup button.
- A file named nvrambak.bin will be saved to your computer.
- You can load nvrambak.bin to restore your settings in the event of a reset.
How to change the IVPN server
- Copy the new IVPN server address from the above server list.
- Paste the server into the Server IP/Name field.
- Click Apply Settings.
ProtonVPN Setup for Privacy Hero
Privacy Hero supports Proton VPN through WireGuard and OpenVPN using the Custom VPN provider option.
WireGuard is recommended for most users. It uses a downloadable .conf configuration file. OpenVPN uses a downloadable .ovpn file and a separate Proton VPN OpenVPN username and password (not your regular Proton Account login).
Privacy Hero is cloud-managed. You can configure the VPN from a computer, smartphone, or tablet connected to any internet network; you do not need to be on the Privacy Hero WiFi to change settings.
Proton VPN WireGuard Setup (Recommended)
WireGuard uses a configuration file generated by Proton VPN. You do not need an OpenVPN username and password for this method.
Generate Your Proton VPN WireGuard Configuration
- Open your Proton VPN account and sign in.
- Go to Downloads → WireGuard configuration.
- Enter a recognizable configuration name and select Router as the platform.
- Choose your preferred VPN options and an available server or country. For a straightforward setup, select a standard server configuration.
- Click Create, then Download to save the generated WireGuard .conf file to your device.
Important: A WireGuard configuration contains a private key. Keep the downloaded file private; do not paste its contents into public posts or unprotected support messages. For detailed Proton account instructions, see Proton VPN: Download WireGuard Configuration Files.
Upload WireGuard to Privacy Hero
- Open app.privacyhero.com and log in to your Privacy Hero account.
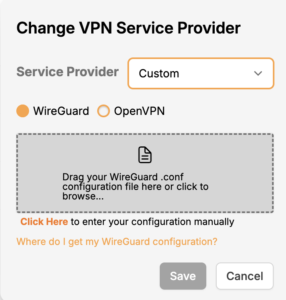
- Open the VPN section, click Change beside the VPN provider, and choose Custom.
- Select WireGuard and upload the Proton VPN .conf file you downloaded.
- Click Save to apply the configuration and connect. Confirm that Privacy Hero reports Connected.
Proton VPN OpenVPN Setup
OpenVPN is an alternative to WireGuard. You need a Proton VPN OpenVPN-specific username and password and a server .ovpn configuration file.
Get Your Proton VPN OpenVPN Credentials
- Sign in to your Proton VPN account.
- Open Account → OpenVPN username to find your separate OpenVPN username and password.
- Copy these credentials or keep the page open. Do not use your usual Proton Account email and password for the manual OpenVPN connection.
For help locating these credentials, see Proton VPN: How to Sign In / OpenVPN Credentials.
Download Your Proton VPN OpenVPN Server File
- In your Proton VPN account, go to Downloads → OpenVPN configuration files.
- Select Router as the platform and UDP as the protocol (recommended starting point). If UDP does not work on your network, you can try a TCP configuration later.
- Select an available country or individual server from the standard configuration list, then click Download to save its .ovpn file.
For additional details about the file download options, see Proton VPN: Download OpenVPN Configuration Files.
Upload OpenVPN to Privacy Hero
- Open app.privacyhero.com and sign in to your Privacy Hero account.
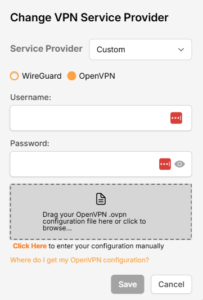
- Open the VPN section, click Change, and select Custom as the VPN provider.
- Choose OpenVPN and upload the Proton VPN .ovpn file you downloaded.
- Enter your separate Proton VPN OpenVPN username and password into the Custom VPN fields.
- Click Save, then confirm Privacy Hero displays Connected.
Verify Your Proton VPN Connection
After Privacy Hero reports Connected, confirm that a device on the router network is using your Proton VPN connection.
- Connect your testing device to the Privacy Hero WiFi or LAN network.
- Disable any Proton VPN app or other VPN application running directly on that device, so it does not create a second VPN connection.
- Open a private/incognito browser window.
- Visit Proton VPN’s IP Address Checker.
- Verify that the public IP address and approximate location correspond to the Proton VPN server configured in Privacy Hero.
Important: You can manage Privacy Hero from another WiFi network or cellular data. However, the device performing the VPN IP test must be connected to the Privacy Hero network.
Streaming Relocation and VPN Location
If Privacy Hero Streaming Relocation is enabled for a supported streaming service, that service may use its Streaming Relocation location rather than the country selected in your Proton VPN configuration. See Privacy Hero Streaming Relocation.
Proton VPN Not Connecting?
If Privacy Hero displays Failed, remains on Connecting, or reports a timeout, work through these checks:
- Confirm that you selected Custom as the VPN provider in Privacy Hero and chose the protocol that matches your configuration file.
- For WireGuard, create and download a fresh Proton VPN .conf file for an available server, then upload it again. Do not use an OpenVPN .ovpn file in the WireGuard section.
- For OpenVPN, verify that you entered Proton VPN’s separate OpenVPN username and password, not your regular Proton Account login.
- Download a fresh configuration for a different Proton VPN server and reconnect. Proton VPN occasionally changes server configurations.
- If using OpenVPN UDP and the connection still fails, download and try a TCP .ovpn configuration file to test for a protocol-related issue.
- Temporarily disable the VPN Kill Switch while checking whether internet works without the VPN. Re-enable your preferred Kill Switch setting once testing is complete.
VPN Disconnects and Devices Have No Internet?
The VPN Kill Switch may be intentionally blocking normal internet traffic when the VPN connection is unavailable. See Privacy Hero VPN Kill Switch: No Internet or WiFi Troubleshooting.
VPN Connected but One Device Shows the Wrong IP?
Check the affected device for a second VPN app, iCloud Private Relay, Private DNS, browser proxy settings, or filtering software. See Device Settings That Can Interfere With Your Router VPN.
Related Privacy Hero Guides
Surfshark TP-Link OpenVPN Setup
Preparing for Surfshark TP-Link Setup
Download your Surfshark .ovpn file
If you are not already a Surfshark user Sign Up Now.
1. Log in to your account on the Surfshark website.

2. Click VPN Manual Setup.

3. Select Router as the Setup method.
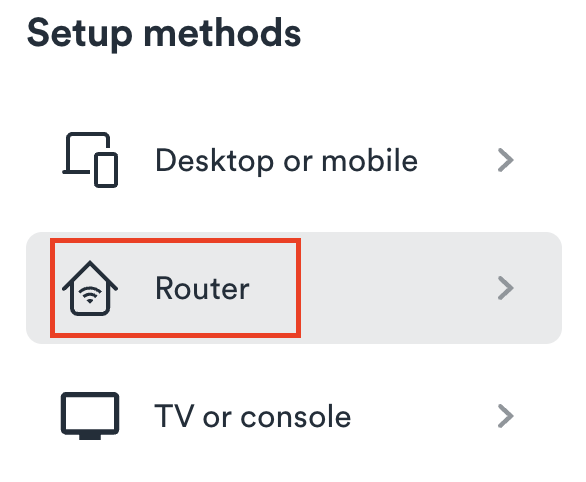
4. Select OpenVPN as the Protocol.

5. Copy and paste your Surfshark manual username and password to a secure location. This is the username and password you will enter into the router settings to connect to Surfshark.

6. Click Location and select the server location you want to connect to. Unless you need a specific location we recommend using Surfshark’s recommended Fastest server. Click Download to download the UDP .ovpn file for this Surfshark server location.

TP-Link Router Setup for Surfshark
Login to TP-Link firmware settings in a browser on any computer or smart device connected to the FlashRouter’s network.
1. Navigate to the Advanced tab.

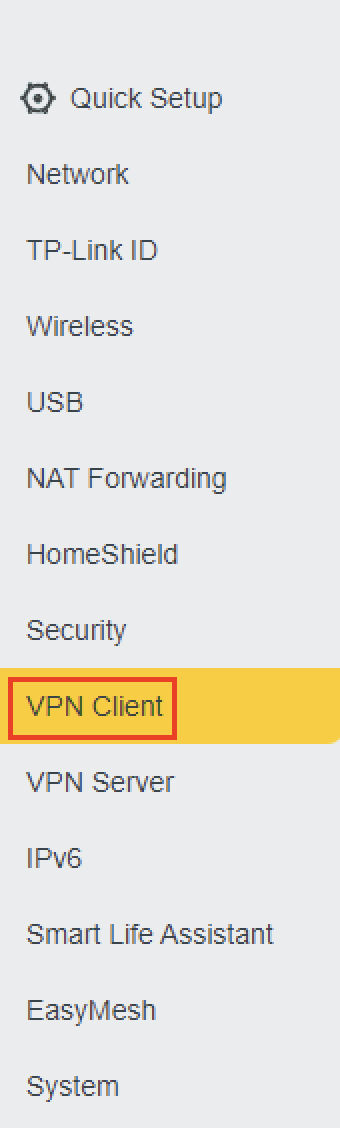
2. Navigate to the VPN Client tab.
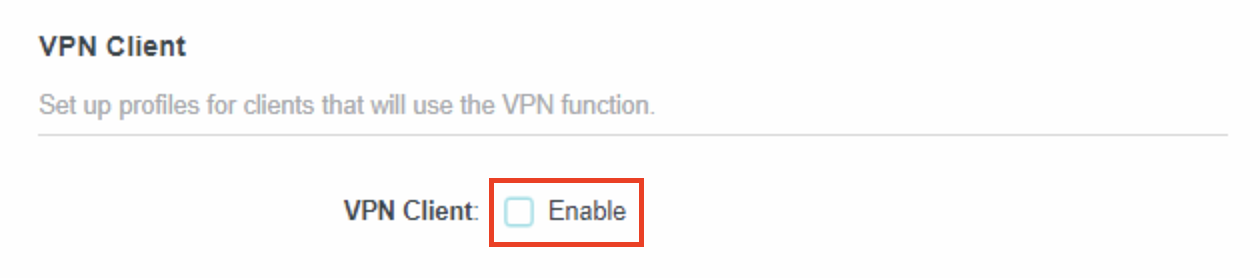
3. Check the Enable box next to VPN Client. Then click Save at the bottom of the page.
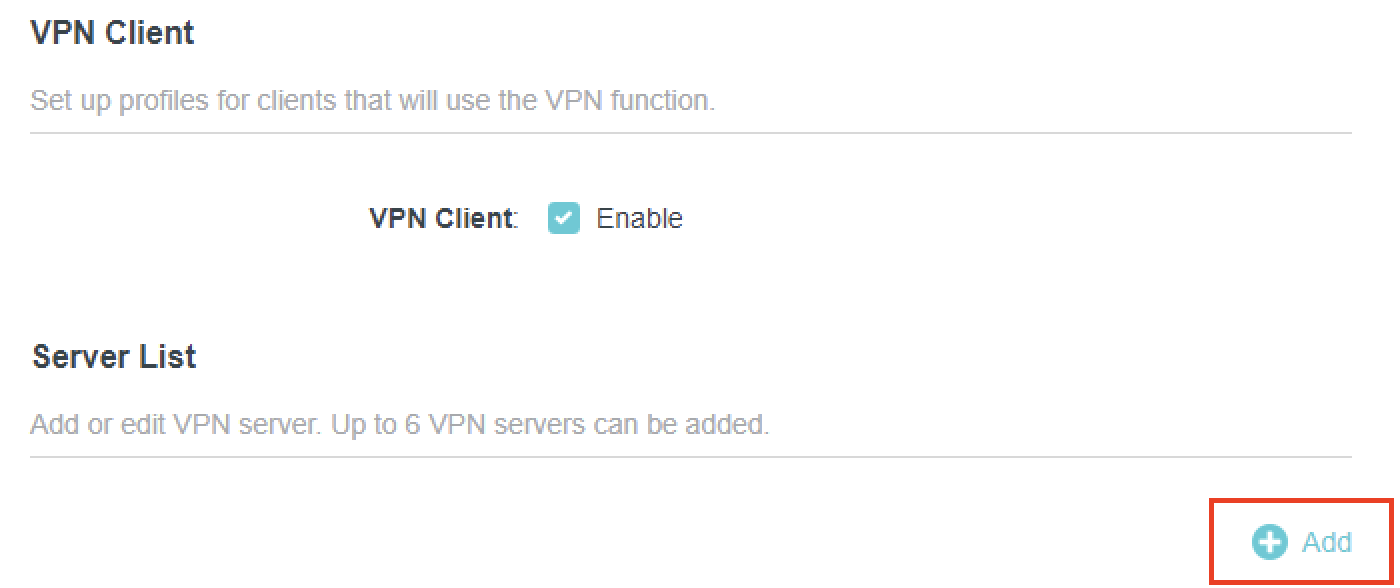
4. Click the Add button in the Server List area.
5. In the Description field enter in the name you’d like to use for this OpenVPN Client profile. We typically advise entering in the location. Our example server was New York so I have entered in Surfshark New York.
Set the VPN Type to OpenVPN.
In the Username and Password fields paste in the Surfshark username and password we obtained earlier.
Click Browse and select the .ovpn file you downloaded earlier. Then click Save.

By default no devices will be assigned to the VPN Tunnel. With TP-Link firmware you must manually assign the devices that you want connected to the VPN tunnel. Proceed with the next steps to do so for all devices you want connected to VPN.
6. Click the Add button in the Device List area.

7. A list of devices connected to the FlashRouter’s network will appear. Check the devices that you want to connect to VPN. Then click OK.
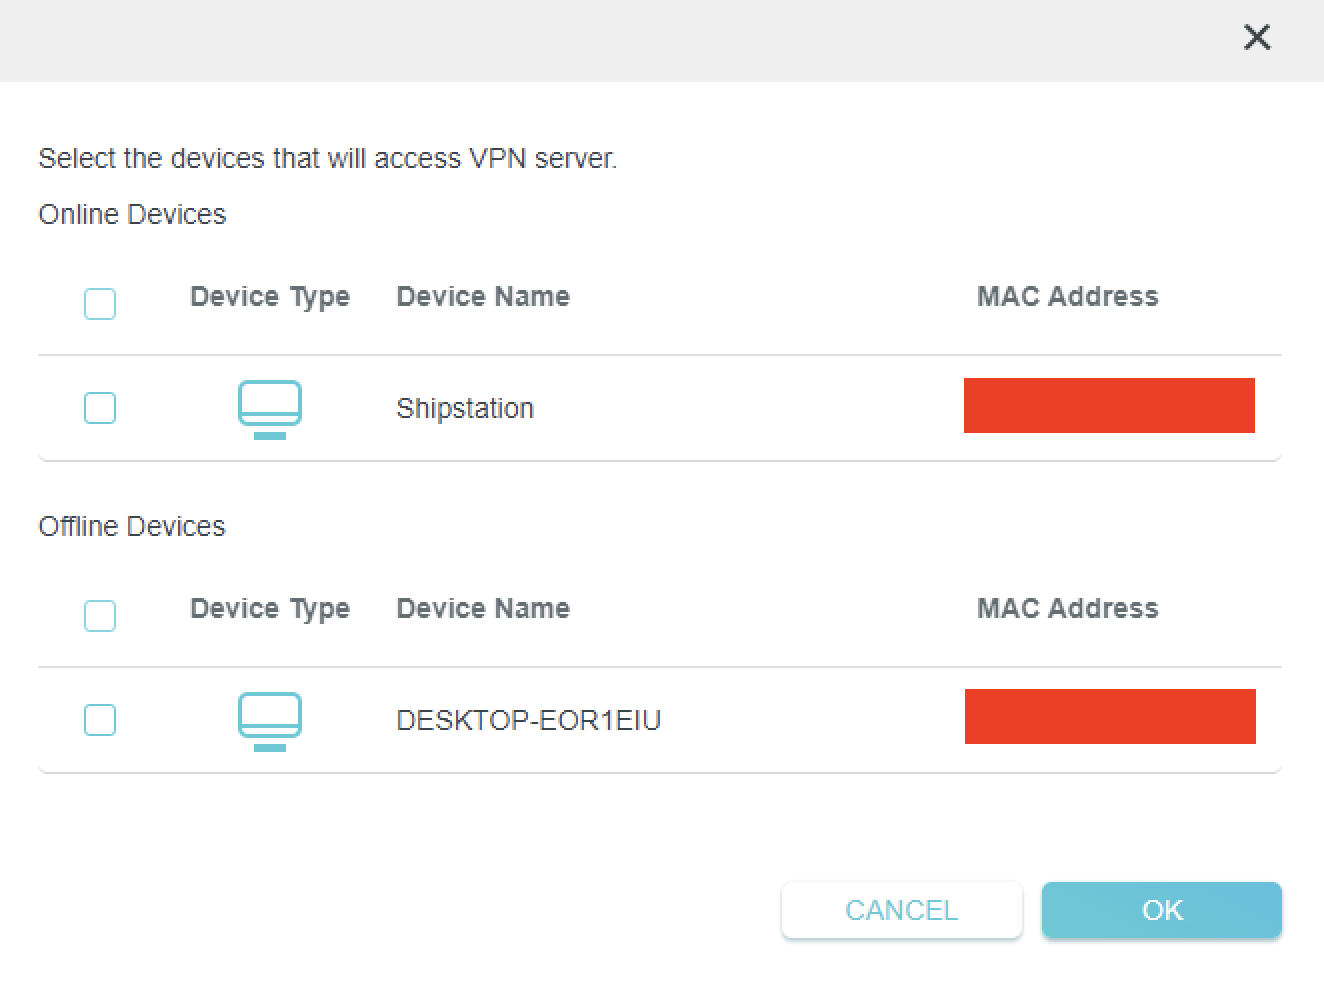
8. Now that the devices have been assigned to the VPN connection click the Enable toggle in the Server List area.

Verify a successful Surfshark connection
- You should now see a CONNECTED message.
- Visit Surfshark’s IP Check to verify your new IP address and virtual location.
In some cases you may notice that the location is not showing the same location as the server you have input in your router settings; this is because geo tracking tools are often tricked by VPN connections. As long as you see an IP address that is not the same as your normal Internet IP address then you are indeed connected to Surfshark.
How to change the Surfshark server
- Follow the steps at the top of the page to obtain a new .ovpn file.
- Then proceed with the settings same as initial setup.
IPVanish Setup for Privacy Hero
Privacy Hero supports IPVanish VPN through WireGuard (recommended) and OpenVPN. Both are configured in Privacy Hero using the Custom VPN provider option. You will need an active IPVanish VPN subscription and the configuration file for the protocol and server location you select.
Choose your method: WireGuard uses a generated .conf file and generally provides better performance. OpenVPN uses a downloaded .ovpn file plus your IPVanish VPN username and password.
Privacy Hero is cloud-managed. You can sign in and adjust VPN settings from a computer, phone, or tablet connected to any internet connection. You do not need to be on the Privacy Hero WiFi network to configure the router.
Download an IPVanish WireGuard Configuration (Recommended)
Use the WireGuard configuration generator in your IPVanish account to create a server file for your router. A generated WireGuard file contains the connection keys and server details, so keep it private.
- Open the IPVanish account sign-in page and log in.
- Open WireGuard in the account navigation to access the WireGuard Configuration Generator.
- Select your preferred IPVanish server location and choose Generate to download the WireGuard configuration file. Save the downloaded .conf file to the device you are using for setup.
Important: Do not publicly share your WireGuard configuration file. To switch server locations later, generate and upload a new configuration.
Add IPVanish WireGuard to Privacy Hero
- Sign in to the Privacy Hero dashboard at app.privacyhero.com.
- Open the VPN section, select Change beside the provider, and choose Custom.
- Choose WireGuard and upload the IPVanish .conf file you just generated.
- Click Save to apply the settings. Wait for Privacy Hero to report Connected.
WireGuard authentication is contained in the generated configuration file; there is no separate OpenVPN username/password step in this method.
Download an IPVanish OpenVPN Configuration File
OpenVPN is a good alternative if WireGuard is unavailable or fails to connect on your network. It requires an IPVanish .ovpn configuration file and VPN login credentials.
- Open the IPVanish OpenVPN server configuration list.
- Download an .ovpn file for your preferred available server location. If IPVanish provides both UDP and TCP files, start with UDP and keep a TCP file as a fallback.
- Have your IPVanish account username and password available for the OpenVPN setup. Use the credentials accepted by your IPVanish VPN account; these are not Privacy Hero login credentials.
If the linked server directory has changed, check the latest manual OpenVPN configuration downloads offered by IPVanish before selecting a file.
Add IPVanish OpenVPN to Privacy Hero
- Sign in at app.privacyhero.com and open VPN.
- Select Change, choose Custom, and select OpenVPN.
- Upload the IPVanish .ovpn file you downloaded.
- Enter your IPVanish username and password in the Custom OpenVPN fields. Do not enter the Privacy Hero account login.
- Click Save and wait for the connection status to show Connected.
Tip: If OpenVPN UDP times out or cannot connect, try an available IPVanish OpenVPN TCP configuration or another server location.
Verify Your IPVanish VPN Connection
After Privacy Hero displays Connected, verify that a device on the router is actually using IPVanish.
- Connect the device you want to test to the Privacy Hero WiFi or LAN network.
- Temporarily disconnect any IPVanish app, other VPN app, or device-level VPN connection on that device so you test the router VPN alone.
- Open a new private/incognito browser window and visit IPVanish What Is My IP Address.
- Confirm that your public IP address and approximate location correspond to the VPN server you selected.
Note: Privacy Hero settings can be managed remotely, but the device used for this IP test must be on the Privacy Hero network.
Streaming Relocation and Your VPN Location
If Streaming Relocation is enabled for a supported streaming service, that service may use the configured Streaming Relocation location instead of the IPVanish server location. See Privacy Hero Streaming Relocation.
IPVanish Not Connecting?
If Privacy Hero remains on Connecting, displays Failed, or reports a timeout, check the following:
- Make sure your IPVanish subscription is active and that Custom is selected as the VPN provider in Privacy Hero.
- For WireGuard, generate a fresh configuration from your IPVanish account and upload that .conf file again.
- For OpenVPN, confirm your IPVanish username/password and upload a fresh .ovpn file for a different server.
- Try a different server location. With OpenVPN, also try switching between available UDP and TCP files.
- Temporarily disable the Privacy Hero VPN connection and test normal internet access. If enabled, temporarily turn off the VPN Kill Switch for this test, then restore your preferred Kill Switch setting.
- Check whether a device-level VPN app, private DNS, proxy, or security software is interfering with the router VPN connection.
VPN Disconnected and No Internet?
The VPN Kill Switch can intentionally block internet access when the VPN disconnects. Review Privacy Hero VPN Kill Switch Setup.
VPN Connected but One Device Shows the Wrong IP?
If only one device shows an unexpected IP address, look for another VPN app, iCloud Private Relay, Private DNS, browser proxy/DNS settings, or security software on that device. See Device Settings That Can Interfere With Your Router VPN.
Related Privacy Hero Guides
Privacy Hero Streaming Relocation
Your Privacy Hero router uses Cloud Based router management which means you can access the router settings from anywhere on any device that has an internet connection. You can follow these steps while connected to your phone, other Wi-Fi network, or the Privacy Hero network.
Use these steps change your location for popular streaming services allowing you to access to regionally restricted content. Privacy Hero uses DNS routing to change your location which is a great way around VPN streaming blocks.
1. From any device that has a browser such as a computer, smartphone, or tablet visit app.privacyhero.com

2. Enter your Privacy Hero account email and password. Click Login.

3. Click the Streaming symbol.

4. Set the Streaming Relocation toggle to On.
5. Click the flag of the country you would like the listed streaming service to use.
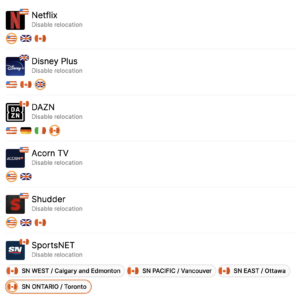
This streaming relocation feature will not change your IP address in the way that a VPN does. This is why it is not able to be blocked in the same way that a VPN connection can be.
The listed services on the streaming relocation page will not be connected to VPN even if the Privacy Hero has an active VPN connection. These services are set to bypass the router’s VPN tunnel to avoid streaming blocks.
Toggling the streaming relocation feature On will also relocate many other streaming services automatically. They will be automatically optimized for the best connection with no manual selection needed for:
ABC
Adult Swim
All 4
Apple TV Channels
BBC
Britbox
CBC Gem
CBS Sports
Crackle
DirecTV Stream
DSTV Now
Filmrise
Freeform
Freevee
Frndly TV
F1 TV
FX Now
ITV
MGM+
Molotov.TV
My 5
NBC
NBC Sports
Now E
Now TV
Pandora
Paramount+
PBS
Peacock
Philo
Pluto TV
Showmax
Sling
SonyLIV
S Sports Plus
Starz
Stirr
TBS
Tennis Channel
The CW
Tubi
TVPlayer
Vudu
Xumo
Zattoo
Private Internet Access (PIA) Setup for Privacy Hero
Privacy Hero supports Private Internet Access (PIA) with WireGuard (recommended) and OpenVPN. You need an active PIA subscription and your PIA VPN username and password.
Important difference: PIA WireGuard has a built-in provider integration in Privacy Hero. Choose Private Internet Access from the VPN provider list—not Custom WireGuard. No WireGuard configuration file or key generation is needed.
By default, Privacy Hero can automatically select an optimal available PIA server based on your location and server conditions. Alternatively, use Advanced Options to enter a specific PIA server hostname from the regional list below.
Privacy Hero is cloud-managed. You can configure your router from any device with an internet connection, whether or not you are on the Privacy Hero WiFi network.
Set Up PIA WireGuard in Privacy Hero (Recommended)
Unlike most other providers, PIA WireGuard does not use Custom VPN file uploads in Privacy Hero. The built-in PIA integration connects using your PIA account credentials and handles the WireGuard configuration for you.
- Open app.privacyhero.com and sign in to your Privacy Hero account.
- Open the VPN section. Select Change beside your current VPN provider.
- Choose Private Internet Access from the provider list. Do not select Custom for this WireGuard setup.
- Enter your PIA VPN account username and password (not your Privacy Hero dashboard credentials). You can check your account at PIA Client Control Panel.
- For automatic server selection, leave the optional server hostname unset, then click Save to connect. Wait until Privacy Hero displays Connected.

Choose the Automatic Server or a Specific PIA Location
Privacy Hero offers two ways to select the PIA WireGuard server:
- Automatic (recommended for most users): Leave the server hostname field blank. Privacy Hero selects an optimal available PIA location, generally favoring nearby servers and server conditions such as load. You do not need to manually maintain a server address.
- Specific location: Enter a PIA region hostname under Advanced Options. This is useful when you need an IP address from a particular country or city.
- To use a specific location, open the existing Private Internet Access connection and select Advanced Options.
- Enter a complete PIA server hostname from the list below, for example
us-newyorkcity.privacy.networkoruk-london.privacy.network. - Click Save, wait for Connected, then verify your new public IP address. If the selected location becomes unavailable, try another hostname or remove the hostname to return to automatic selection.

PIA Server Hostname List by Region
Use these hostnames in PIA > Advanced Options when you prefer a specific location. Expand a region below and copy the complete hostname, including .privacy.network. This list is retained from the existing FlashRouters guide.
Server availability can change. Some hostnames, particularly those ending in -pf or marked for streaming, are specialized locations and may not be available for every connection. If a hostname no longer works, use automatic selection or check PIA’s current location list for available locations. PIA’s location list names regions; it does not necessarily provide matching hostnames.
North America (65 locations)
bahamas.privacy.networkca-ontario.privacy.networkca-toronto.privacy.networkca-vancouver.privacy.networkca-montreal.privacy.networkgreenland.privacy.networkgt-guatemala-pf.privacy.networkmexico.privacy.networkpanama.privacy.networksanjose.privacy.networkus-alabama-pf.privacy.networkus-alaska-pf.privacy.networkus-arkansas-pf.privacy.networkus-atlanta.privacy.networkus-california.privacy.networkus-chicago.privacy.networkus-connecticut-pf.privacy.networkus-denver.privacy.networkus-florida.privacy.networkus-houston.privacy.networkus-idaho-pf.privacy.networkus-indiana-pf.privacy.networkus-iowa-pf.privacy.networkus-kansas-pf.privacy.networkus-kentucky-pf.privacy.networkus-lasvegas.privacy.networkus-louisiana-pf.privacy.networkus-maine-pf.privacy.networkus-massachusetts-pf.privacy.networkus-michigan-pf.privacy.networkus-minnesota-pf.privacy.networkus-mississippi-pf.privacy.networkus-missouri-pf.privacy.networkus-montana-pf.privacy.networkus-nebraska-pf.privacy.networkus-new-hampshire-pf.privacy.networkus-new-mexico-pf.privacy.networkus-newyorkcity.privacy.networkus-north-carolina-pf.privacy.networkus-north-dakota-pf.privacy.networkus-ohio-pf.privacy.networkus-oklahoma-pf.privacy.networkus-oregon-pf.privacy.networkus-pennsylvania-pf.privacy.networkus-rhode-island-pf.privacy.networkus-seattle.privacy.networkus-siliconvalley.privacy.networkus-south-carolina-pf.privacy.networkus-south-dakota-pf.privacy.networkus-texas.privacy.networkus-tennessee-pf.privacy.networkus-vermont-pf.privacy.networkus-virginia-pf.privacy.networkus-washingtondc.privacy.networkus-west-virginia-pf.privacy.networkus-wisconsin-pf.privacy.networkus-wyoming-pf.privacy.networkus3.privacy.networkus-baltimore.privacy.networkus-honolulu.privacy.networkus-newjersey.privacy.networkus-saltlakecity.privacy.networkus-streaming-2.privacy.networkus-streaming.privacy.networkus-wilmington.privacy.networkSouth America (9 locations)
ar.privacy.networkbo-bolivia-pf.privacy.networkbogota.privacy.networkbr.privacy.networkec-ecuador-pf.privacy.networkpe-peru-pf.privacy.networksantiago.privacy.networkuy-uruguay-pf.privacy.networkvenezuela.privacy.networkEurope (51 locations)
al.privacy.networkad.privacy.networkaustria.privacy.networkbrussels.privacy.networkba.privacy.networksofia.privacy.networkzagreb.privacy.networkczech.privacy.networkde-berlin.privacy.networkde-frankfurt.privacy.networkdenmark.privacy.networkdenmark-2.privacy.networkspain.privacy.networkes-valencia.privacy.networkee.privacy.networkfi.privacy.networkfi-2.privacy.networkfrance.privacy.networkgr.privacy.networkhungary.privacy.networkitaly.privacy.networkitaly-2.privacy.networkis.privacy.networkireland.privacy.networkman.privacy.networklv.privacy.networkliechtenstein.privacy.networklt.privacy.networklu.privacy.networkmalta.privacy.networkmd.privacy.networkmonaco.privacy.networkmontenegro.privacy.networknl-amsterdam.privacy.networkmk.privacy.networkno.privacy.networkpoland.privacy.networkpt.privacy.networkro.privacy.networksweden.privacy.networksweden-2.privacy.networkrs.privacy.networksk.privacy.networkslovenia.privacy.networkswiss.privacy.networktr.privacy.networkuk-london.privacy.networkuk-manchester.privacy.networkuk-southampton.privacy.networkuk-2.privacy.networkua.privacy.networkAsia (26 locations)
ae.privacy.networkbangladesh.privacy.networkcambodia.privacy.networkchina.privacy.networkcyprus.privacy.networkgeorgia.privacy.networkhk.privacy.networkin.privacy.networkisrael.privacy.networkjakarta.privacy.networkjapan.privacy.networkjapan-2.privacy.networkkazakhstan.privacy.networkkr-south-korea-pf.privacy.networkkualalumpur.privacy.networkmacau.privacy.networkmongolia.privacy.networknp-nepal-pf.privacy.networkphilippines.privacy.networkqatar.privacy.networksaudiarabia.privacy.networksg.privacy.networksrilanka.privacy.networktaiwan.privacy.networkvietnam.privacy.networkyerevan.privacy.networkOceania (7 locations)
au-adelaide-pf.privacy.networkau-australia-so.privacy.networkau-brisbane-pf.privacy.networkaus-melbourne.privacy.networkaus-perth.privacy.networkau-sydney.privacy.networknz.privacy.networkAfrica (5 locations)
dz.privacy.networkegypt.privacy.networkmorocco.privacy.networknigeria.privacy.networkza.privacy.networkSet Up PIA OpenVPN in Privacy Hero
OpenVPN is the alternative when you need a manually uploaded connection or if the built-in PIA WireGuard method does not work on your network. OpenVPN uses Custom in Privacy Hero, unlike the built-in PIA WireGuard setup.
Download a PIA OpenVPN Configuration File
- Sign in to the PIA Client Control Panel using your PIA VPN account.
- Open Downloads and scroll to OpenVPN Configuration Generator or OpenVPN Configurations.
- If using the generator, choose OpenVPN 2.4 or newer and Linux when these options are offered, then choose an available server location.
- Select your preferred configuration. UDP / 1198 (AES-128-CBC) is a standard default. UDP / 1197 (AES-256-CBC) is an alternative. Use a PIA-provided TCP configuration if UDP does not work on your network.
- Click Generate or download a suitable pre-made configuration and save the resulting .ovpn file. Each server file is tied to its selected location/settings.
PIA also provides pre-made OpenVPN configuration bundles; see PIA’s OpenVPN file instructions.
Add PIA OpenVPN as a Custom VPN
- Open Privacy Hero, go to VPN, click Change, and select Custom.
- Choose OpenVPN and upload the PIA .ovpn file downloaded in the previous section.
- Enter your PIA VPN username and password in the Custom OpenVPN authentication fields.
- Click Save and confirm Privacy Hero shows Connected.
Note: If OpenVPN UDP cannot connect, try a TCP profile from PIA or another server. When switching protocols, make sure you upload a matching PIA configuration file.
Verify Your Private Internet Access Connection
- Connect a device to the Privacy Hero WiFi or LAN network.
- Disconnect any PIA app or other VPN running directly on the device so the router VPN can be tested independently.
- Open a private/incognito browser window and visit PIA What Is My IP.
- Confirm that your public IP address reflects the VPN connection, and that the approximate location is consistent with either the selected hostname or Privacy Hero’s automatic server selection.
Privacy Hero VPN settings can be changed remotely, but the device used to verify the VPN IP must be connected to the Privacy Hero network.
Streaming Relocation and Your PIA Location
If Streaming Relocation is enabled for a supported service, that service may use the Streaming Relocation location instead of your PIA VPN server location. See Privacy Hero Streaming Relocation.
PIA VPN Not Connecting?
If Privacy Hero reports Failed, stays on Connecting, or connected devices lose internet access, try these checks:
- Confirm your PIA subscription is active and enter your PIA VPN login, not your Privacy Hero email/password.
- For built-in PIA WireGuard, verify the provider is Private Internet Access—not Custom. No downloaded WireGuard file is required.
- Remove any specific server hostname to test automatic server selection. If that connects, the previous hostname may be unavailable.
- For Custom OpenVPN, upload a fresh PIA .ovpn file, re-enter the PIA credentials, and try a different server or a TCP configuration.
- Turn off the router VPN temporarily to check that normal internet access works. If the VPN Kill Switch is blocking internet traffic, temporarily disable it for testing, then restore your preferred setting.
- Check whether a separate VPN app, iCloud Private Relay, Private DNS, proxy, or security software on the testing device is affecting your VPN IP results.
No Internet When the VPN Disconnects?
The Privacy Hero VPN Kill Switch may intentionally block internet access if the VPN goes down. See Privacy Hero VPN Kill Switch: No Internet or WiFi Troubleshooting.
VPN Connected but One Device Shows the Wrong IP?
If other devices show the expected VPN address, review device VPN apps, iCloud Private Relay, Private DNS, and security settings.
Related Privacy Hero Guides
Surfshark AsusWRT WireGuard Setup
Preparing for Surfshark AsusWRT Setup
Copy your Surfshark Private Key
If you are not already a Surfshark user Sign Up Now.
1. Log in to your account on the Surfshark website.
2. Click VPN Manual Setup.
3. Select Router as the Setup method.
4. Select WireGuard as the Protocol.

5. Select I don’t have a key pair.

6. Enter FlashRouter as the name of the connection and click Next.

7. Click Generate a new key pair.

8. A Public Key and Private Key will then appear. Use the copy box to copy the Private Key. You will not need the public key.

AsusWRT Router Setup for Surfshark
Login to AsusWRT firmware settings in a browser on any computer or smart device connected to the AsusWRT FlashRouter’s network.
1. Navigate to the VPN tab.

2. Navigate to the VPN Fusion tab.

3. Click Add profile.

4. In the Connection Name field enter in Surfshark.
5. In the VPN Type dropdown select Surfshark.
6. In the Region dropdown select the Surfshark location you want to connect to.
7. In the Private Key field paste in the Surfshark Private Key obtained earlier.
8. Click Apply and Enable at the bottom of the page.
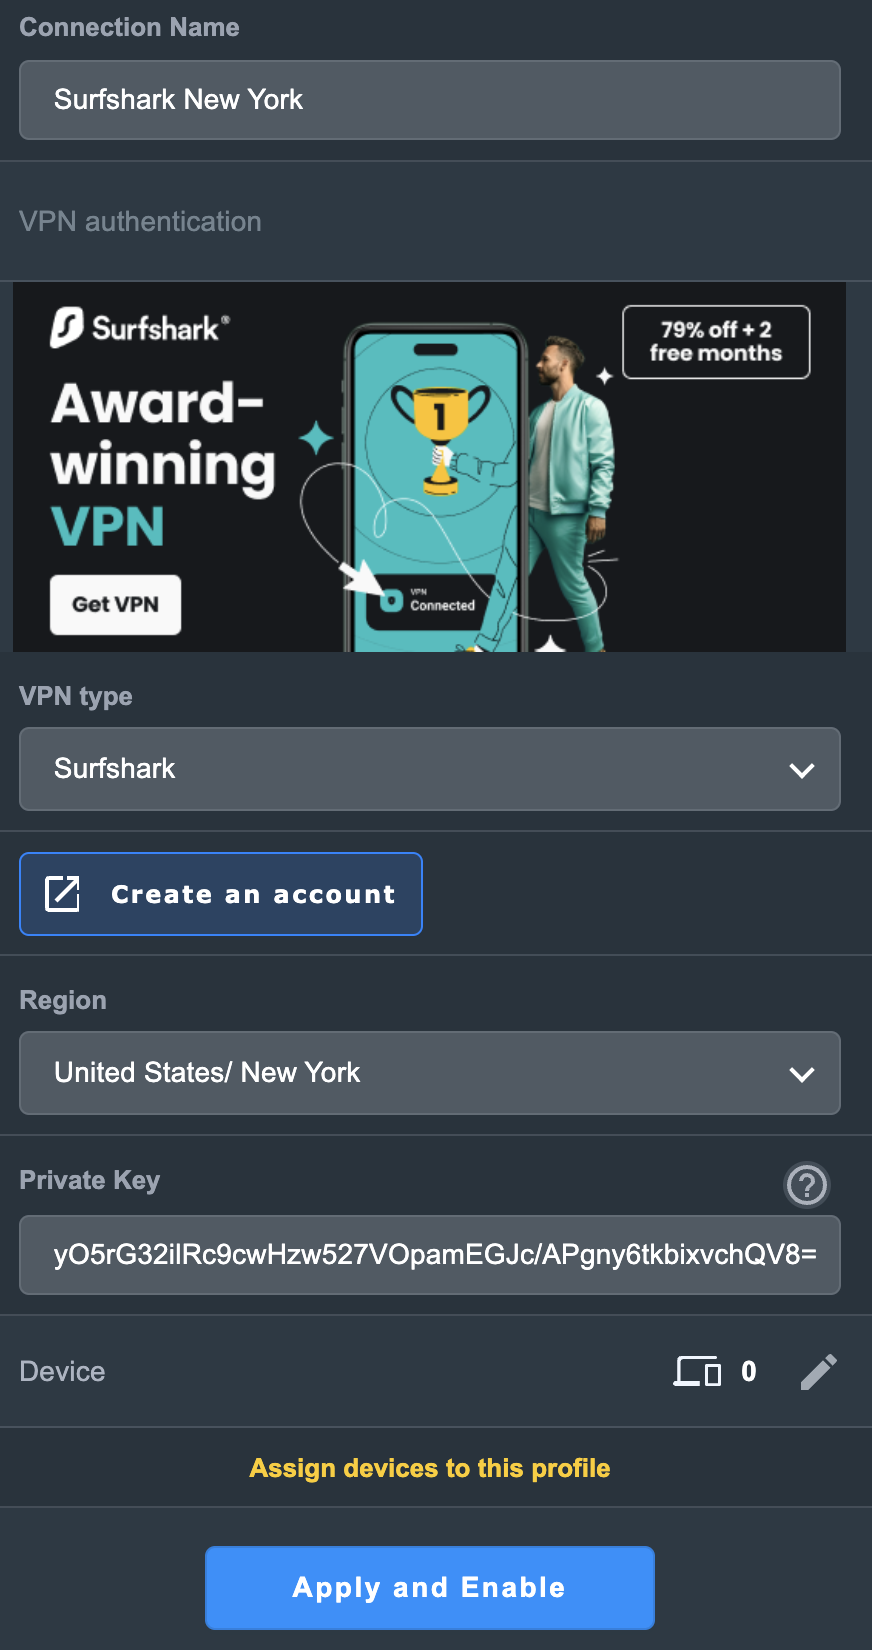
If you only want certain devices to connect to the Surfshark profile you are setting up instead of all the devices connected to the FlashRouter’s network click into the profile and disable Apply to all devices. Then click Devices and select the devices that you want to connect to VPN.


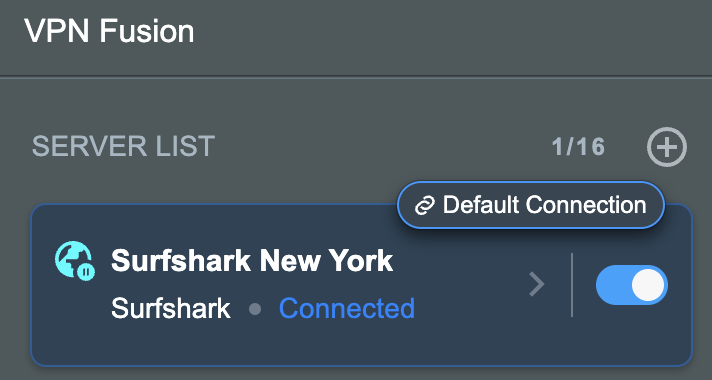
9. At the top of the page set the Service State toggle to ON to activate the VPN connection.
Verify a successful Surfshark connection
- You should now see a CONNECTED message.
- Visit Surfshark’s IP Check to verify your new IP address and virtual location.
In some cases you may notice that the location is not showing the same location as the server you have input in your router settings; this is because geo tracking tools are often tricked by VPN connections. As long as you see an IP address that is not the same as your normal Internet IP address then you are indeed connected to Surfshark.
How to change the Surfshark server
- Use the profile service state toggle to disconnect the currently connected location.
- Then click into the Surfshark profile in the router’s settings.
- Then adjust the Region dropdown to a new location.
- Click Apply all settings.
- Use the profile service state toggle to connect the new location.
ExpressVPN Merlin OpenVPN Setup
Preparing for ExpressVPN Merlin Setup
Obtain your ExpressVPN OpenVPN Information
If you are not already an ExpressVPN user Sign Up Now.
1. Log in to your account on the ExpressVPN website.

2. Successfully log in with your account information. Select More.

3. Select Manual Configuration and copy the Username and Password that are displayed on the right hand side of the screen.


4. Click the Server Location that you want to connect to. This will download a .ovpn file to your computer that we will use later on. There is no need to open the file. For this example I have selected New York but feel free to select any server listed there.
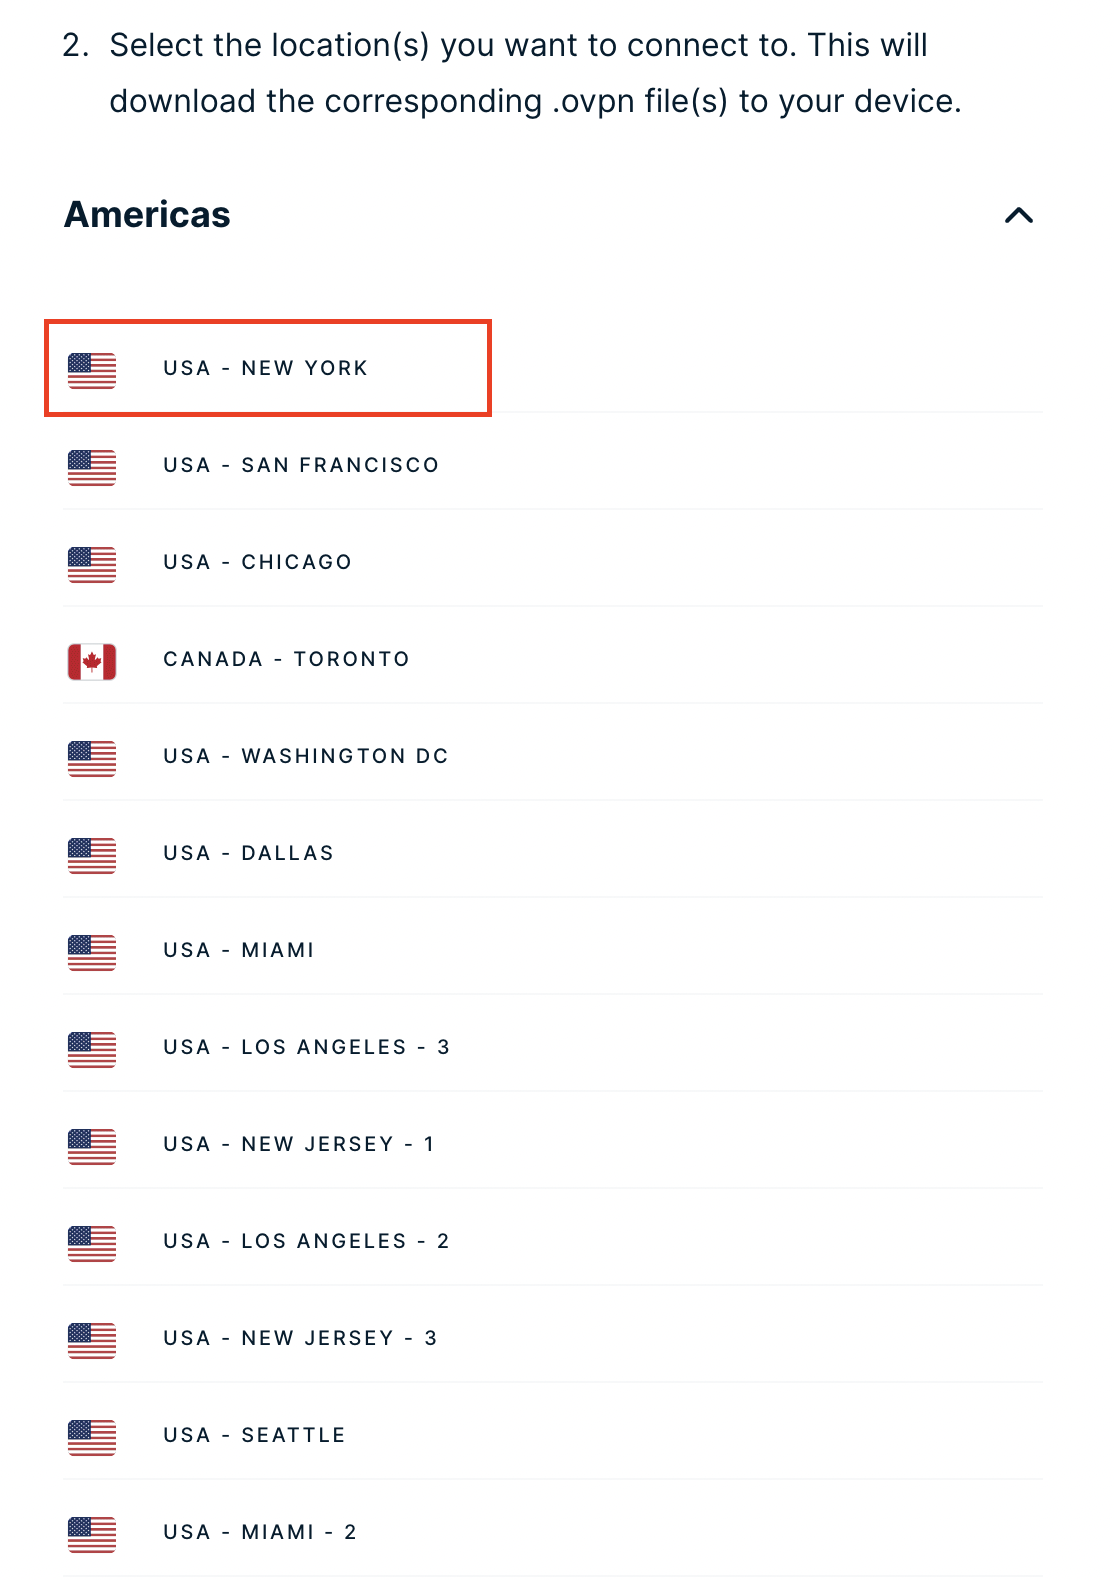
Merlin Router Setup for ExpressVPN
Login to Asus Merlin firmware settings in a browser on any computer or smart device connected to the Merlin FlashRouter’s network.
1. Navigate to the VPN tab.
2. Navigate to the VPN Client tab.

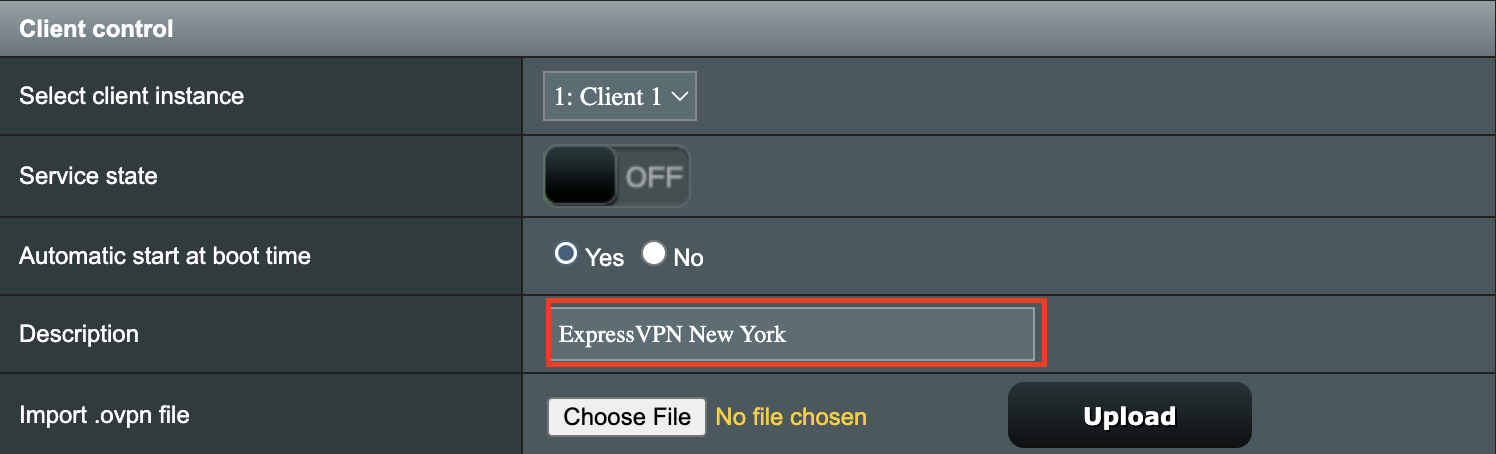
3. Click Choose file and select the .ovpn file you downloaded earlier. Then click Upload.
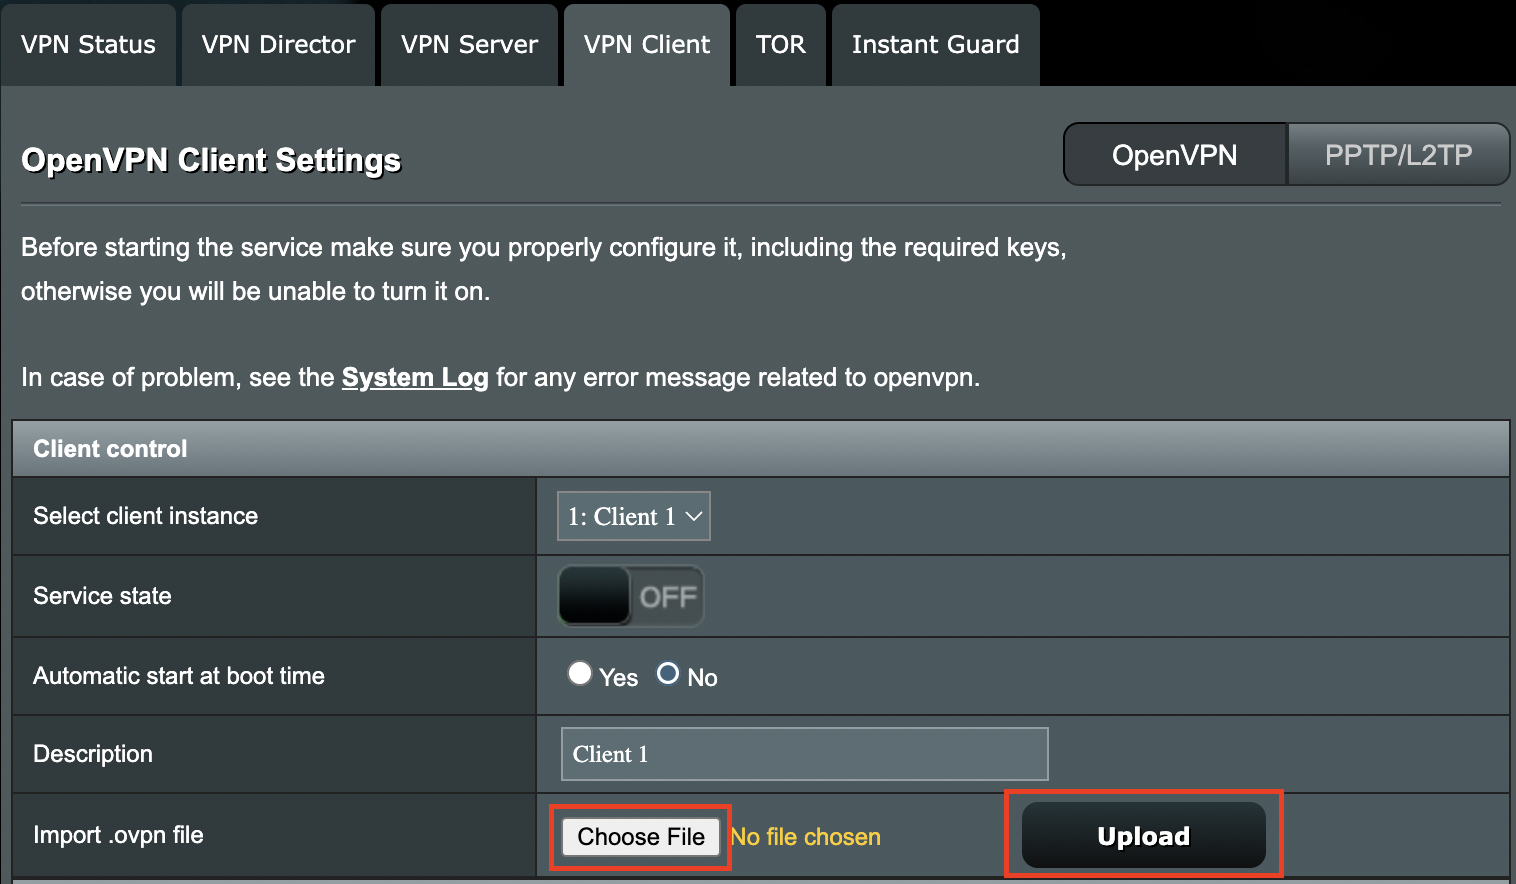
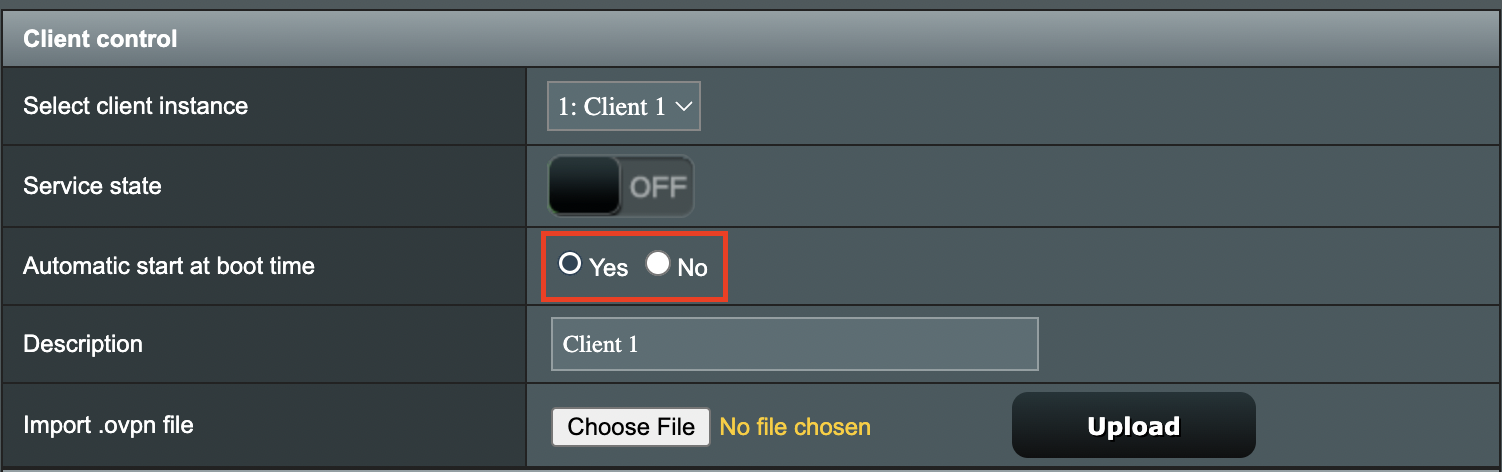
4. Set Automatic Start at boot time to Yes if you want the VPN connection to begin automatically when the router is powered off and back on.
5. In the Description field enter in the name you’d like to use for this OpenVPN Client profile. We typically advise entering in the location or server number here. Our example server was in New York so I have entered in ExpressVPN New York.
6. Set Accept DNS Configuration to Strict. Set Redirect Internet traffic through tunnel to Yes (all). Set Kill Switch to Yes or No depending on if you want the Internet to be killed if the VPN connection drops.
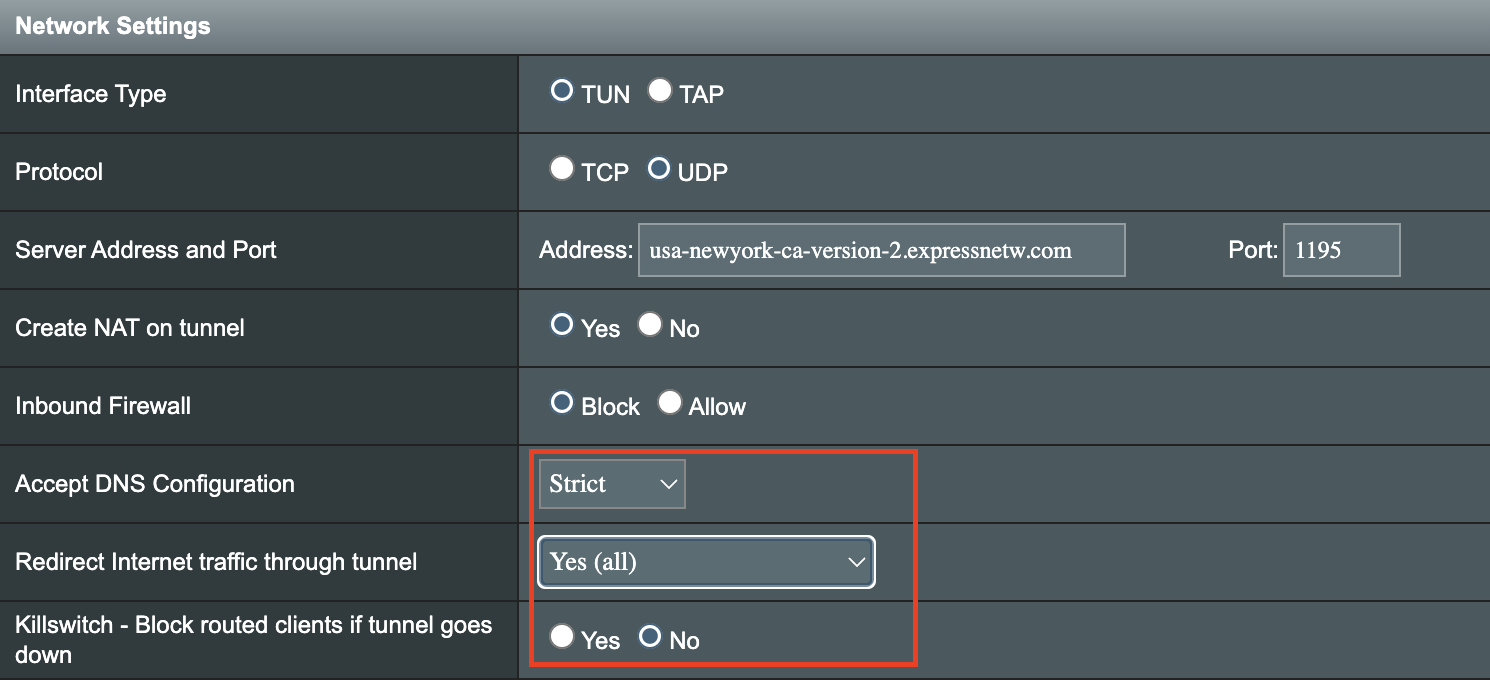
If you only want certain devices to connect to the OpenVPN Client profile you are setting up instead of all the devices connected to the FlashRouter’s network please set the Redirect Internet traffic through tunnel to VPN Director. Then complete the instructions on this page and then view our VPN Director guide.
7. Enter your ExpressVPN username and password that you obtained earlier in the Username and Password. Note that these are different from your ExpressVPN email login and password.
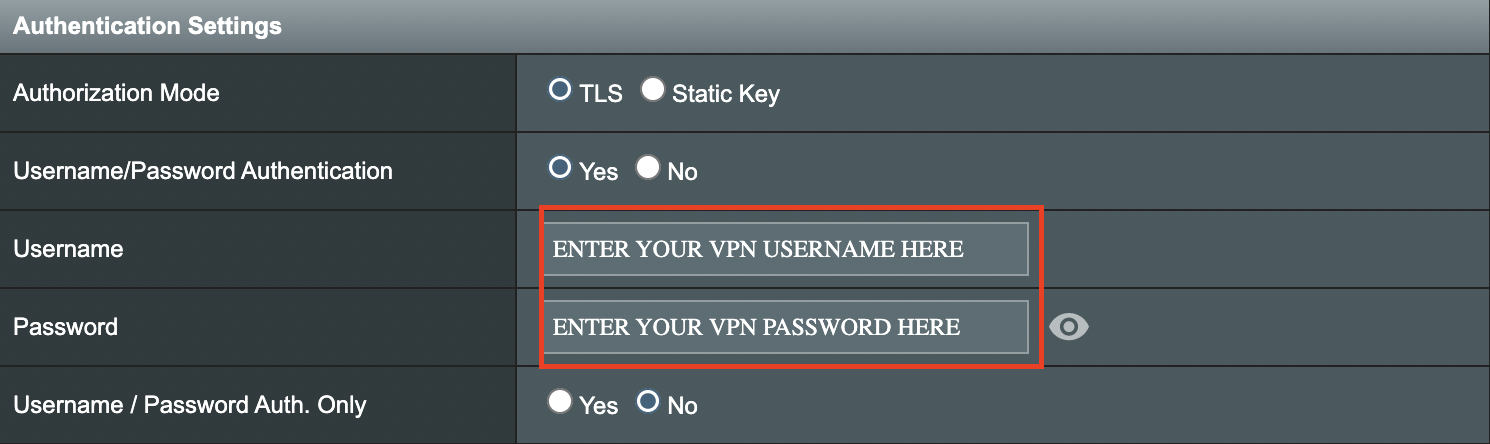
8. Click Apply at the bottom of the page.
9. At the top of the page set the Service State toggle to ON to activate the VPN connection.

Verify a successful ExpressVPN connection
- You should now see a CONNECTED message.
- Visit ExpressVPN’s IP Check to verify your new IP address and virtual location.
In some cases you may notice that the location is not showing the same location as the server you have input in your router settings; this is because geo tracking tools are often tricked by VPN connections. As long as you see an IP address that is not the same as your normal Internet IP address then you are indeed connected to ExpressVPN.
How to change the ExpressVPN server
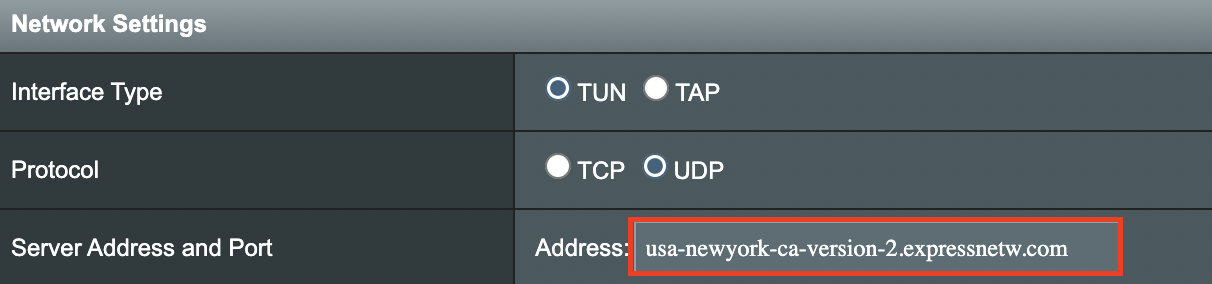
- Copy the new ExpressVPN server address from the below server list.
- Paste the server into the Server Address field.
- Click Apply at the bottom of the page.
ExpressVPN Server Addresses
Americas
usa-atlanta-ca-version-2.expressnetw.com
usa-boston-ca-version-2.expressnetw.com
usa-chicago-ca-version-2.expressnetw.com
usa-dallas-ca-version-2.expressnetw.com
usa-dallas-2-ca-version-2.expressnetw.com
usa-denver-ca-version-2.expressnetw.com
usa-kansascity-ca-version-2.expressnetw.com
usa-losangeles-ca-version-2.expressnetw.com
usa-losangeles-1-ca-version-2.expressnetw.com
usa-losangeles-2-ca-version-2.expressnetw.com
usa-losangeles-3-ca-version-2.expressnetw.com
usa-los-angeles-4-ca-version-2.expressnetw.com
usa-miami-ca-version-2.expressnetw.com
usa-miami-2-ca-version-2.expressnetw.com
usa-minneapolis-ca-version-2.expressnetw.com
usa-newjersey-1-ca-version-2.expressnetw.com
usa-newjersey-3-ca-version-2.expressnetw.com
usa-newyork-ca-version-2.expressnetw.com
us-new-york-2-ca-version-2.expressnetw.com
usa-phoenix-ca-version-2.expressnetw.com
usa-saltlakecity-ca-version-2.expressnetw.com
usa-sanfrancisco-ca-version-2.expressnetw.com
usa-sanjose-ca-version-2.expressnetw.com
usa-seattle-ca-version-2.expressnetw.com
usa-tampa-1-ca-version-2.expressnetw.com
usa-virginia-ca-version-2.expressnetw.com
usa-washingtondc-ca-version-2.expressnetw.com
usa-washingtondc-2-ca-version-2.expressnetw.com
canada-montreal-ca-version-2.expressnetw.com
canada-toronto-ca-version-2.expressnetw.com
canada-toronto-2-ca-version-2.expressnetw.com
canada-vancouver-ca-version-2.expressnetw.com
mexico-ca-version-2.expressnetw.com
argentina-ca-version-2.expressnetw.com
brazil-ca-version-2.expressnetw.com
brazil-2-ca-version-2.expressnetw.com
chile-ca-version-2.expressnetw.com
colombia-ca-version-2.expressnetw.com
costarica-ca-version-2.expressnetw.com
ecuador-ca-version-2.expressnetw.com
guatemala-ca-version-2.expressnetw.com
panama-ca-version-2.expressnetw.com
peru-ca-version-2.expressnetw.com
uruguay-ca-version-2.expressnetw.com
venezuela-ca-version-2.expressnetw.com
Europe
uk-berkshire-ca-version-2.expressnetw.com
uk-berkshire-2-ca-version-2.expressnetw.com
uk-docklands-ca-version-2.expressnetw.com
uk-east-london-ca-version-2.expressnetw.com
uk-kent-ca-version-2.expressnetw.com
uk-london-ca-version-2.expressnetw.com
france-paris-1-ca-version-2.expressnetw.com
france-paris-2-ca-version-2.expressnetw.com
france-strasbourg-ca-version-2.expressnetw.com
germany-darmstadt-ca-version-2.expressnetw.com
germany-frankfurt-1-ca-version-2.expressnetw.com
germany-frankfurt-2-ca-version-2.expressnetw.com
germany-nuremberg-ca-version-2.expressnetw.com
italy-cosenza-ca-version-2.expressnetw.com
italy-milan-ca-version-2.expressnetw.com
netherlands-amsterdam-ca-version-2.expressnetw.com
netherlands-rotterdam-ca-version-2.expressnetw.com
netherlands-thehague-ca-version-2.expressnetw.com
spain-barcelona-ca-version-2.expressnetw.com
spain-ca-version-2.expressnetw.com
sweden-ca-version-2.expressnetw.com
sweden-2-ca-version-2.expressnetw.com
switzerland-ca-version-2.expressnetw.com
switzerland-2-ca-version-2.expressnetw.com
albania-ca-version-2.expressnetw.com
andorra-ca-version-2.expressnetw.com
armenia-ca-version-2.expressnetw.com
austria-ca-version-2.expressnetw.com
azerbaijan-ca-version-2.expressnetw.com
belarus-ca-version-2.expressnetw.com
belgium-ca-version-2.expressnetw.com
bosniaandherzegovina-ca-version-2.expressnetw.com
bulgaria-ca-version-2.expressnetw.com
croatia-ca-version-2.expressnetw.com
cyprus-ca-version-2.expressnetw.com
czechrepublic-ca-version-2.expressnetw.com
denmark-ca-version-2.expressnetw.com
estonia-ca-version-2.expressnetw.com
finland-ca-version-2.expressnetw.com
georgia-ca-version-2.expressnetw.com
greece-ca-version-2.expressnetw.com
hungary-ca-version-2.expressnetw.com
iceland-ca-version-2.expressnetw.com
ireland-ca-version-2.expressnetw.com
isleofman-ca-version-2.expressnetw.com
jersey-ca-version-2.expressnetw.com
latvia-ca-version-2.expressnetw.com
liechtenstein-ca-version-2.expressnetw.com
lithuania-ca-version-2.expressnetw.com
luxembourg-ca-version-2.expressnetw.com
macedonia-ca-version-2.expressnetw.com
malta-ca-version-2.expressnetw.com
moldova-ca-version-2.expressnetw.com
monaco-ca-version-2.expressnetw.com
montenegro-ca-version-2.expressnetw.com
norway-ca-version-2.expressnetw.com
poland-ca-version-2.expressnetw.com
portugal-ca-version-2.expressnetw.com
romania-ca-version-2.expressnetw.com
serbia-ca-version-2.expressnetw.com
slovakia-ca-version-2.expressnetw.com
slovenia-ca-version-2.expressnetw.com
ukraine-ca-version-2.expressnetw.com
Asia Pacific
australia-brisbane-ca-version-2.expressnetw.com
australia-melbourne-ca-version-2.expressnetw.com
australia-perth-ca-version-2.expressnetw.com
australia-sydney-ca-version-2.expressnetw.com
australia-sydney-2-ca-version-2.expressnetw.com
australia-sydney-3-ca-version-2.expressnetw.com
hongkong-2-ca-version-2.expressnetw.com
hongkong4-ca-version-2.expressnetw.com
hongkong-1-ca-version-2.expressnetw.com
japan-tokyo-1-ca-version-2.expressnetw.com
japan-tokyo-2-ca-version-2.expressnetw.com
india-chennai-ca-version-2.expressnetw.com
india-mumbai-1-ca-version-2.expressnetw.com
singapore-cbd-ca-version-2.expressnetw.com
singapore-jurong-ca-version-2.expressnetw.com
southkorea-ca-version-2.expressnetw.com
southkorea2-ca-version-2.expressnetw.com
bangladesh-ca-version-2.expressnetw.com
bhutan-ca-version-2.expressnetw.com
brunei-ca-version-2.expressnetw.com
cambodia-ca-version-2.expressnetw.com
indonesia-ca-version-2.expressnetw.com
kazakhstan-ca-version-2.expressnetw.com
kyrgyzstan-ca-version-2.expressnetw.com
laos-ca-version-2.expressnetw.com
macau-ca-version-2.expressnetw.com
malaysia-ca-version-2.expressnetw.com
mongolia-ca-version-2.expressnetw.com
myanmar-ca-version-2.expressnetw.com
nepal-ca-version-2.expressnetw.com
newzealand-ca-version-2.expressnetw.com
pakistan-ca-version-2.expressnetw.com
ph-via-sing-ca-version-2.expressnetw.com
srilanka-ca-version-2.expressnetw.com
taiwan-3-ca-version-2.expressnetw.com
thailand-ca-version-2.expressnetw.com
vietnam-ca-version-2.expressnetw.com
Middle East and Africa
algeria-ca-version-2.expressnetw.com
israel-ca-version-2.expressnetw.com
kenya-ca-version-2.expressnetw.com
southafrica-ca-version-2.expressnetw.com
NordVPN Merlin OpenVPN Setup
Preparing for NordVPN Merlin Setup
Obtain your NordVPN manual Username and Password
If you are not already an NordVPN user Sign Up Now.
1. Log in to your account on the NordVPN website.

2. Click NordVPN on the left hand side and then click Setup NordVPN manually.

3. Enter in the verification code that was sent to your email.

4. Copy and paste your NordVPN manual username and password to a secure location. This is the username and password you will enter into the router settings to connect to NordVPN.

Download your NordVPN .ovpn file
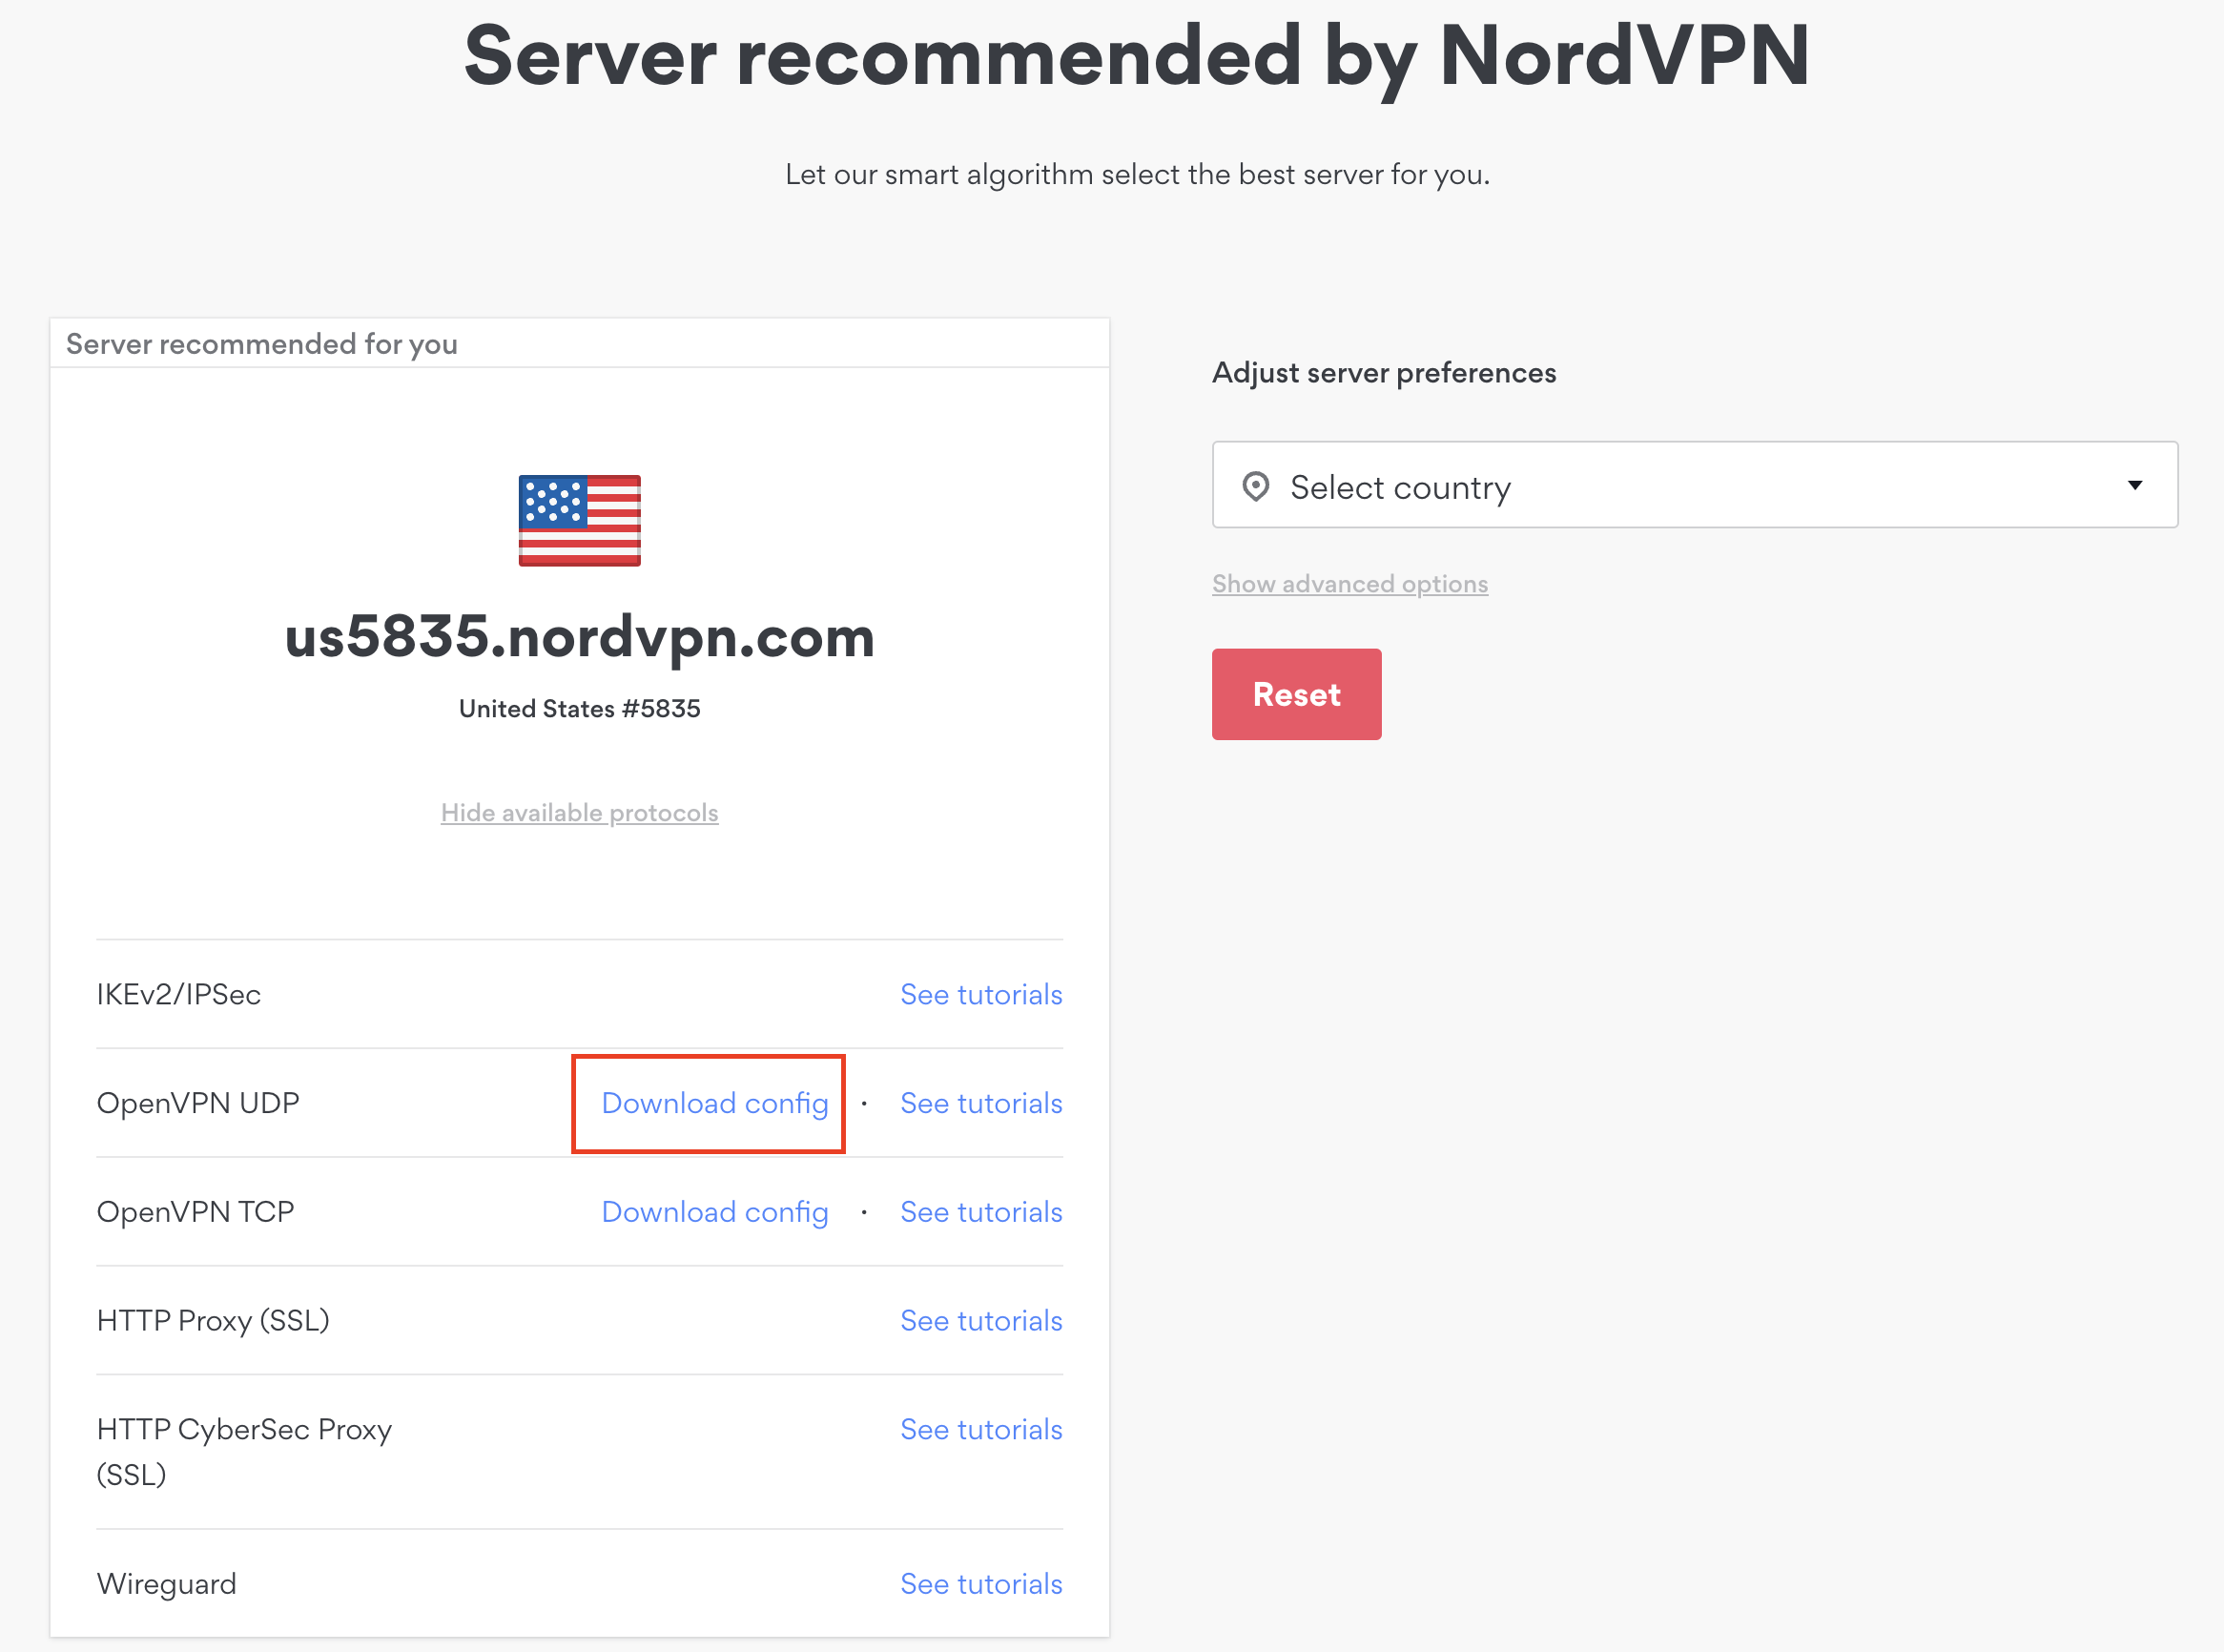
1. There are two options for obtaining the .ovpn file. The first and recommended is to navigate to NordVPN’s server recommendation page. Click Recommended Server to display the fastest server based on your actual location. You can adjust the country if you don’t want to connect to the recommended country.
Then click Show Available Protocols. Click Download Config next to OpenVPN UDP. This will download the .ovpn file to your computer for this server. Do not open this file.
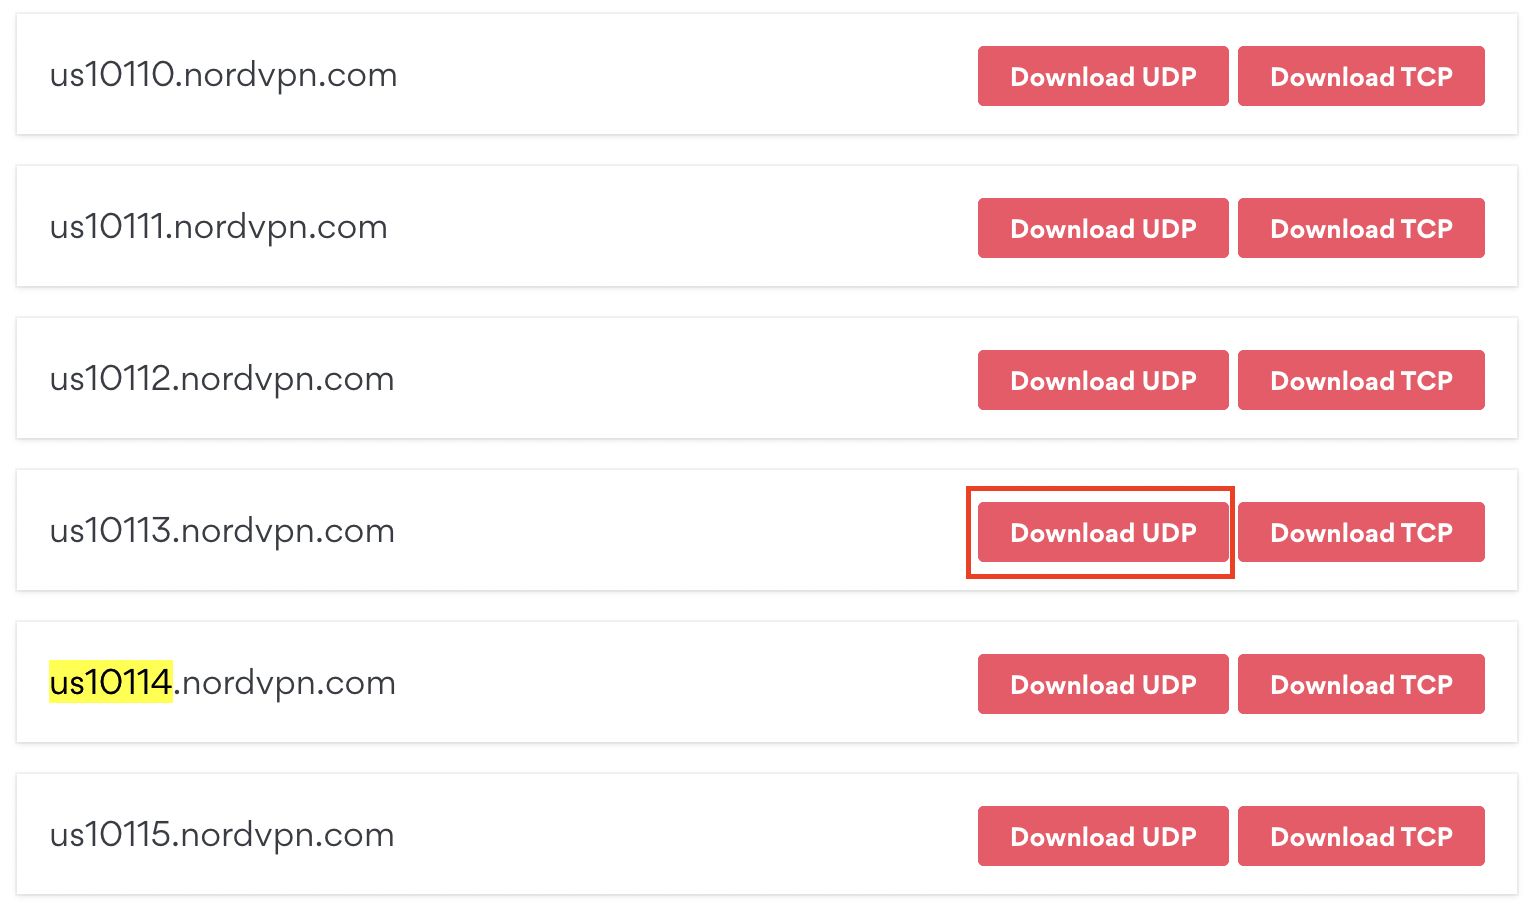
The second method to obtain a server is for connecting to a specific server number that you know you want to use. This applies to NordVPN Dedicated IP servers if you are signed up for that service. Go to NordVPN’s .ovpn file page. Then search for the server number that you want to use and click Download UDP.
Merlin Router Setup for NordVPN
Login to Asus Merlin firmware settings in a browser on any computer or smart device connected to the Merlin FlashRouter’s network.
1. Navigate to the VPN tab.
2. Navigate to the VPN Client tab.
3. Click Choose file and select the .ovpn file you downloaded earlier. Then click Upload.
4. Set Automatic Start at boot time to Yes if you want the VPN connection to begin automatically when the router is powered off and back on.
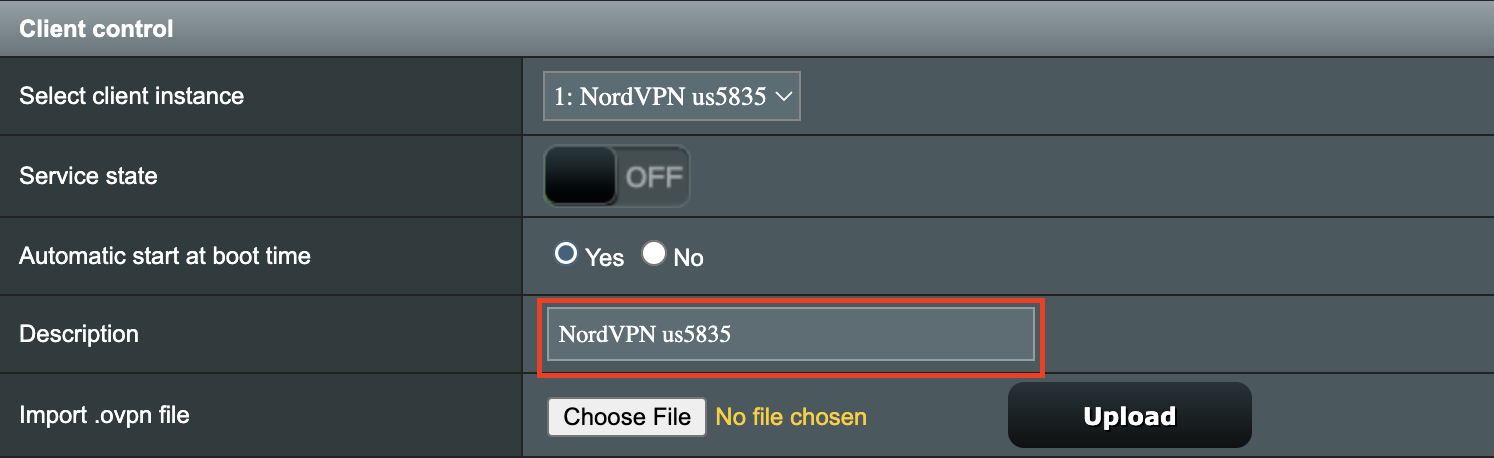
5. In the Description field enter in the name you’d like to use for this OpenVPN Client profile. We typically advise entering in the location or server number here. Our example server was in us5835.nordvpn.com so I have entered in NordVPN us5835.
6. Set Accept DNS Configuration to Strict. Set Redirect Internet traffic through tunnel to Yes (all). Set Kill Switch to Yes or No depending on if you want the Internet to be killed if the VPN connection drops.
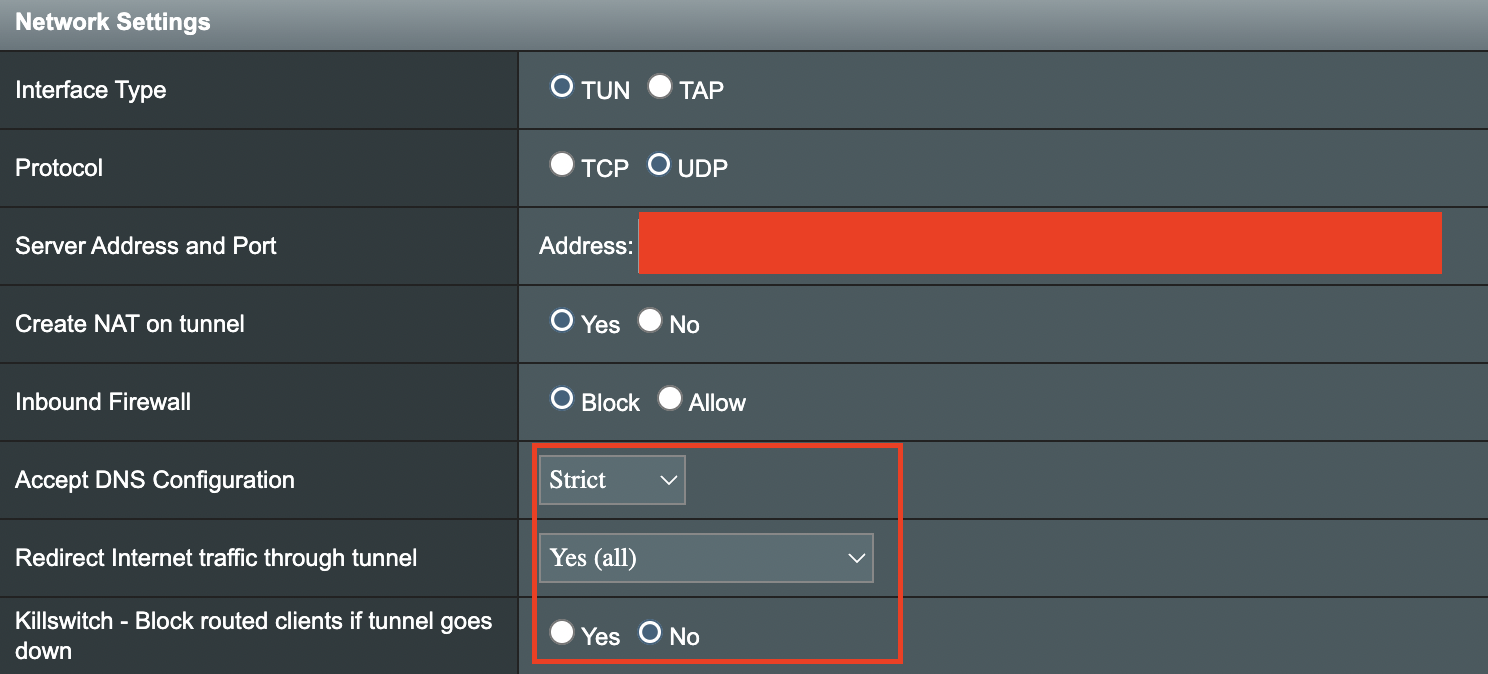
If you only want certain devices to connect to the OpenVPN Client profile you are setting up instead of all the devices connected to the FlashRouter’s network please set the Redirect Internet traffic through tunnel to VPN Director. Then complete the instructions on this page and then view our VPN Director guide.
7. Enter your NordVPN username and password that you obtained earlier in the Username and Password. Note that these are different from your NordVPN email login and password.
8. Click Apply at the bottom of the page.
9. At the top of the page set the Service State toggle to ON to activate the VPN connection.

Verify a successful NordVPN connection
- You should now see a CONNECTED message.
- Visit NordVPN’s IP Check to verify your new IP address and virtual location.
In some cases you may notice that the location is not showing the same location as the server you have input in your router settings; this is because geo tracking tools are often tricked by VPN connections. As long as you see an IP address that is not the same as your normal Internet IP address then you are indeed connected to NordVPN.
How to change the NordVPN server
- Follow the steps at the top of the page to obtain a new .ovpn file.
- Then proceed with the settings same as initial setup.
NordVPN Asus AX1800S OpenVPN Setup
Preparing for NordVPN Asus AX1800S Setup
Obtain your NordVPN manual Username and Password
If you are not already an NordVPN user Sign Up Now.
1. Log in to your account on the NordVPN website.
2. Click NordVPN on the left hand side and then click Setup NordVPN manually.
3. Enter in the verification code that was sent to your email.
4. Copy and paste your NordVPN manual username and password to a secure location. This is the username and password you will enter into the router settings to connect to NordVPN.
Download your NordVPN .ovpn file
1. There are two options for obtaining the .ovpn file. The first and recommended is to navigate to NordVPN’s server recommendation page. Click Recommended Server to display the fastest server based on your actual location. You can adjust the country if you don’t want to connect to the recommended country.
Then click Show Available Protocols. Click Download Config next to OpenVPN UDP. This will download the .ovpn file to your computer for this server. Do not open this file.
The second method to obtain a server is for connecting to a specific server number that you know you want to use. This applies to NordVPN Dedicated IP servers if you are signed up for that service. Go to NordVPN’s .ovpn file page. Then search for the server number that you want to use and click Download UDP.
Asus AX1800S Router Setup for NordVPN
Login to Asus firmware settings in a browser on any computer or smart device connected to the FlashRouter’s network.
1. Navigate to the VPN tab.
2. Navigate to the VPN Client tab.
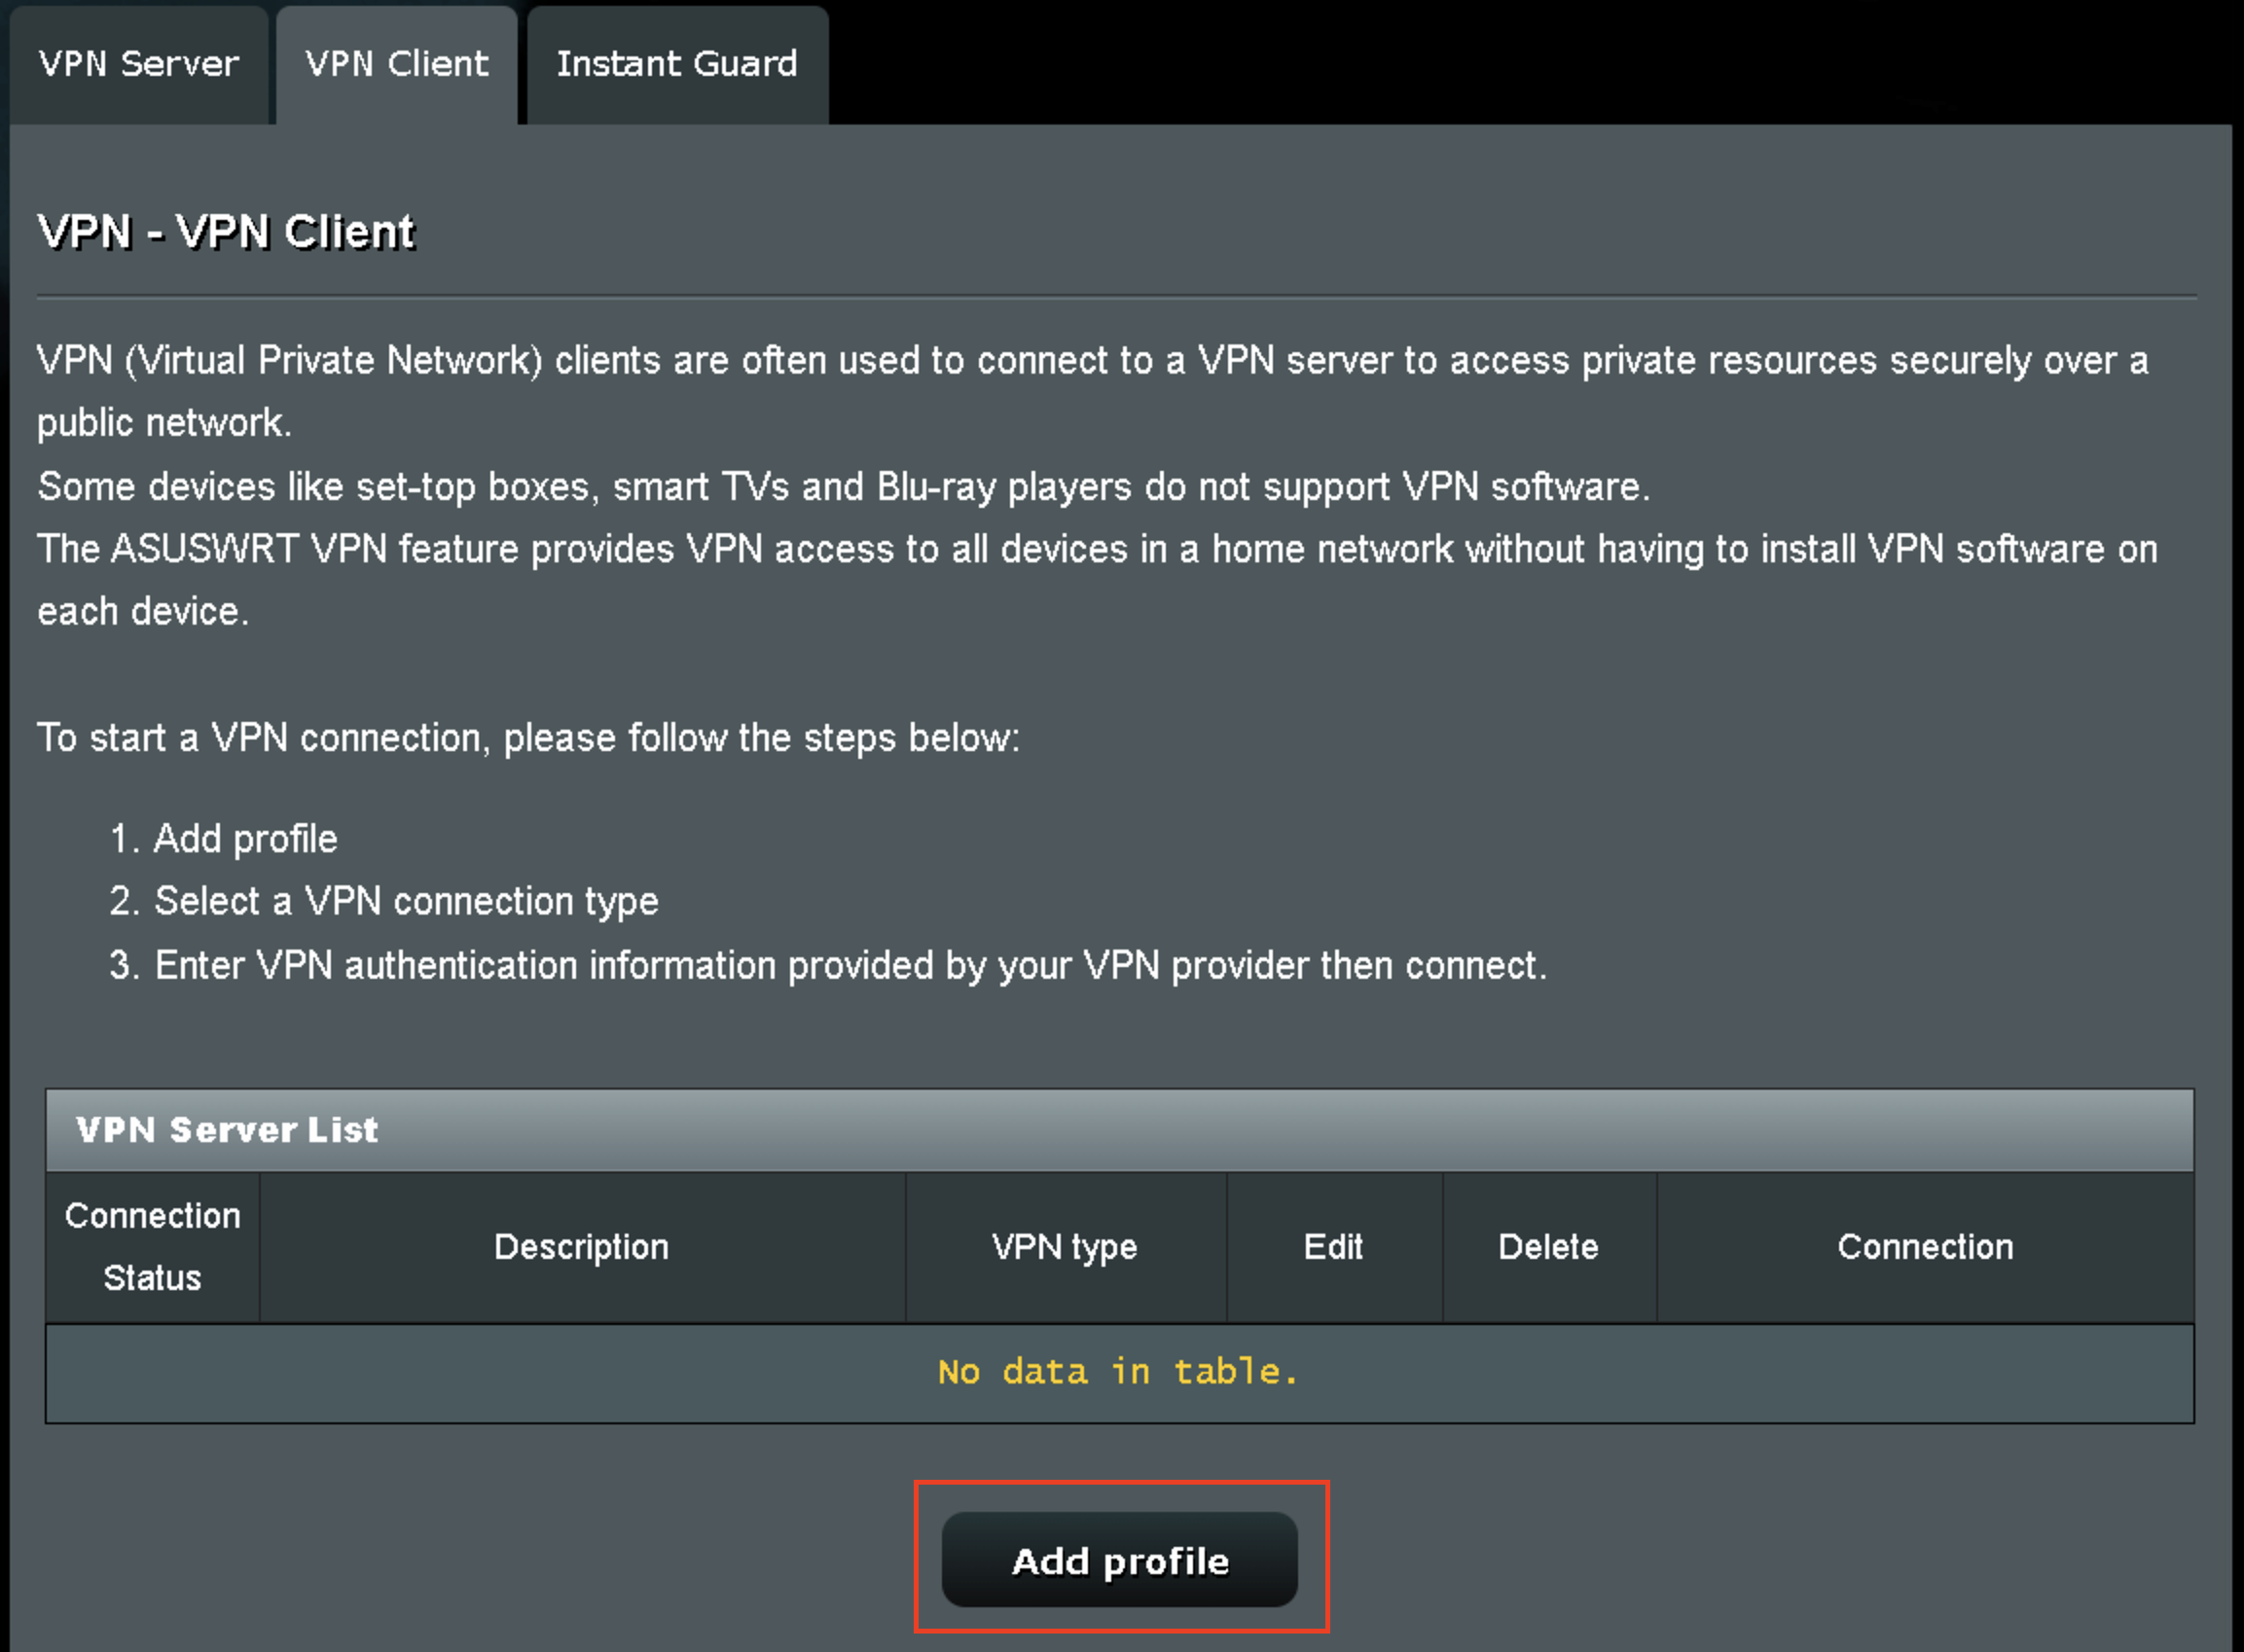
3. Click Add Profile.
4. Click Choose file and select the .ovpn file you downloaded earlier. Then click Upload.
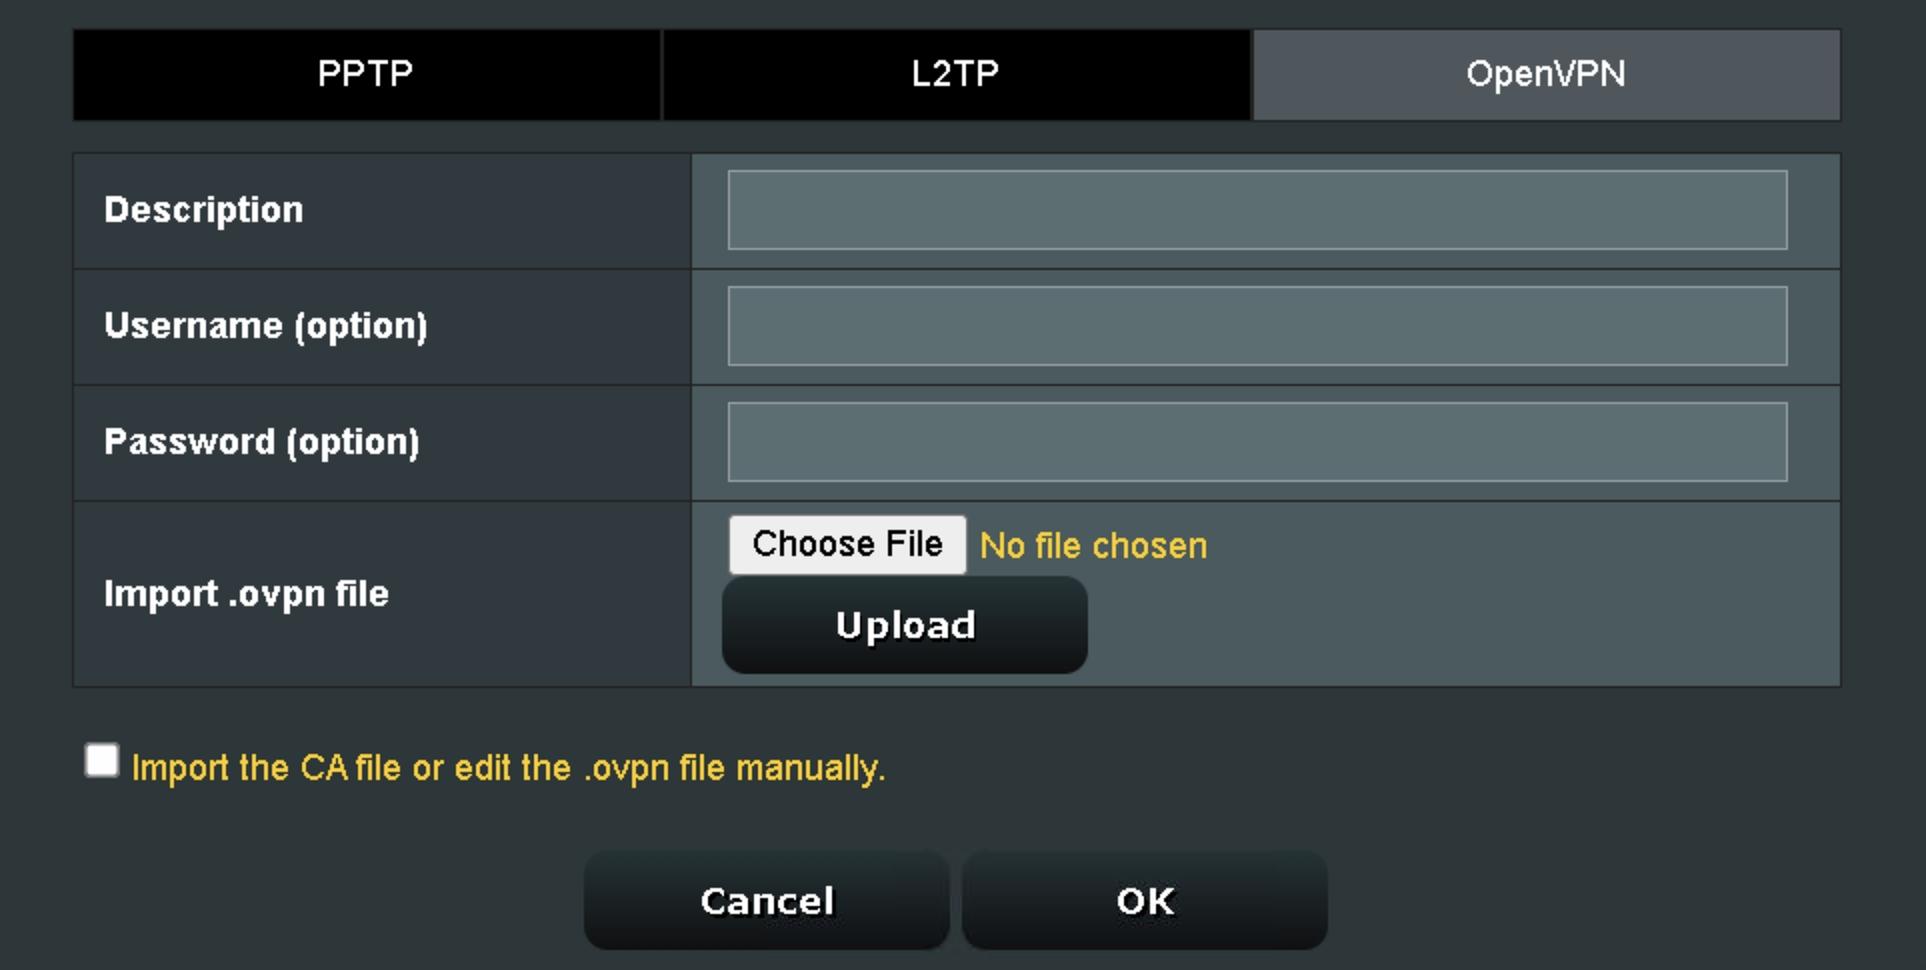
5. In the Description field enter in the name you’d like to use for this OpenVPN Client profile. We typically advise entering in the location or server number here.
6. Enter your NordVPN username and password that you obtained earlier in the Username and Password. Note that these are different from your NordVPN email login and password. Click OK.
7. Click the Activate button.
Verify a successful NordVPN connection
- You should now see a check mark in the Connection Status area.
- Visit NordVPN’s IP Check to verify your new IP address and virtual location.
In some cases you may notice that the location is not showing the same location as the server you have input in your router settings; this is because geo tracking tools are often tricked by VPN connections. As long as you see an IP address that is not the same as your normal Internet IP address then you are indeed connected to NordVPN.
How to change the NordVPN server
- Follow the steps at the top of the page to obtain a new .ovpn file.
- Then proceed with the settings same as initial setup.
- Be sure to deactivate a previously active connection before activating the new one. You do not want to connect to two at the same time.
ExpressVPN Asus AX1800S OpenVPN Setup
Preparing for ExpressVPN Asus AX1800S Setup
Obtain your ExpressVPN OpenVPN Information
If you are not already an ExpressVPN user Sign Up Now.
1. Log in to your account on the ExpressVPN website.
2. Successfully log in with your account information. Select More.
3. Select Manual Configuration and copy the Username and Password that are displayed on the right hand side of the screen.
4. Click the Server Location that you want to connect to. This will download a .ovpn file to your computer that we will use later on. There is no need to open the file. For this example I have selected New York but feel free to select any server listed there.
Asus AX1800S Router Setup for ExpressVPN
Login to Asus firmware settings in a browser on any computer or smart device connected to the FlashRouter’s network.
1. Navigate to the VPN tab.
2. Navigate to the VPN Client tab.
3. Click Add Profile.
4. Click Choose file and select the .ovpn file you downloaded earlier. Then click Upload.
5. In the Description field enter in the name you’d like to use for this OpenVPN Client profile. We typically advise entering in the location or server number here.
6. Enter your ExpressVPN username and password that you obtained earlier in the Username and Password. Note that these are different from your ExpressVPN email login and password.
7. Click the Activate button.
Verify a successful ExpressVPN connection
- You should now see a check mark in the Connection Status area.
- Visit ExpressVPN’s IP Check to verify your new IP address and virtual location.
In some cases you may notice that the location is not showing the same location as the server you have input in your router settings; this is because geo tracking tools are often tricked by VPN connections. As long as you see an IP address that is not the same as your normal Internet IP address then you are indeed connected to ExpressVPN.
How to change the ExpressVPN server
- Follow the steps at the top of the page to obtain a new .ovpn file.
- Then proceed with the settings same as initial setup.
- Be sure to deactivate a previously active connection before activating the new one. You do not want to connect to two at the same time.
Flint/Slate GL.iNet ExpressVPN OpenVPN Setup
Preparing for ExpressVPN GL.iNet Setup
Obtain your ExpressVPN OpenVPN Information
If you are not already an ExpressVPN user Sign Up Now.
1. Log in to your account on the ExpressVPN website.
2. Successfully log in with your account information. Select More.
3. Select Manual Configuration and copy the Username and Password that are displayed on the right hand side of the screen.
4. Click the Server Location(s) that you want to connect to. This will download a .ovpn file to your computer that we will use later on. There is no need to open the file. For this example I have selected New York but feel free to select any server listed there or multiple servers.
GL.iNet Router Setup for ExpressVPN
Login to GL.iNet firmware settings in a browser on any computer or smart device connected to the GL.iNet FlashRouter’s network. For more instructions on how to access the firmware settings view our guide here.
1. Navigate to the VPN tab and select OpenVPN Client.
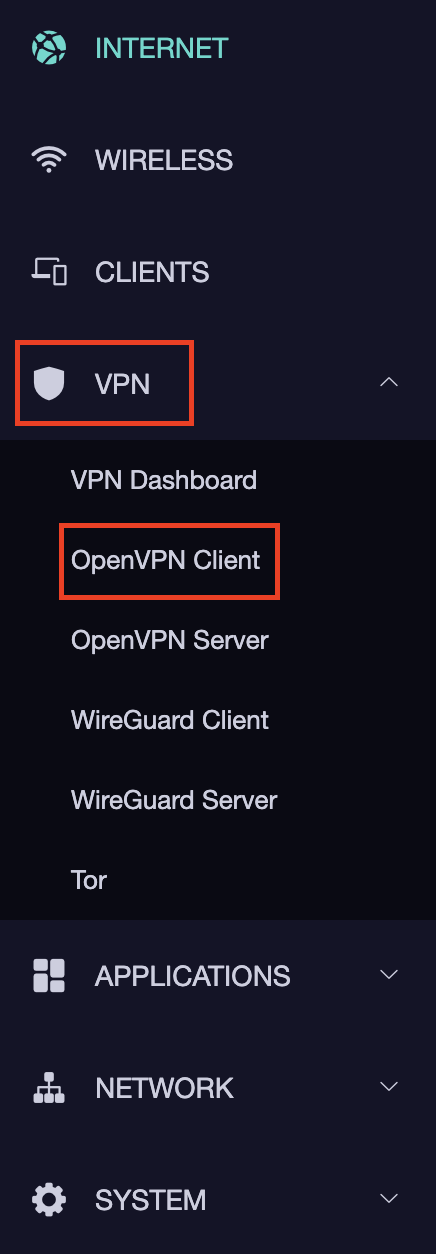
2. Click New Group.
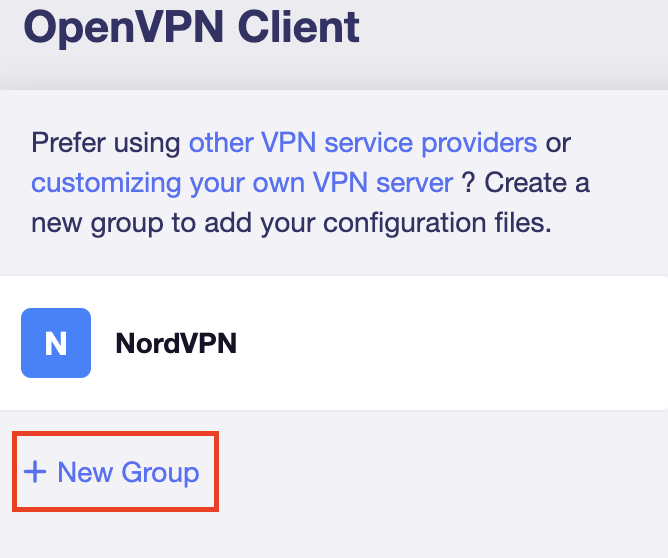
3. Enter ExpressVPN and click the check mark.

4. Select the .ovpn file(s) you downloaded earlier and upload them here.
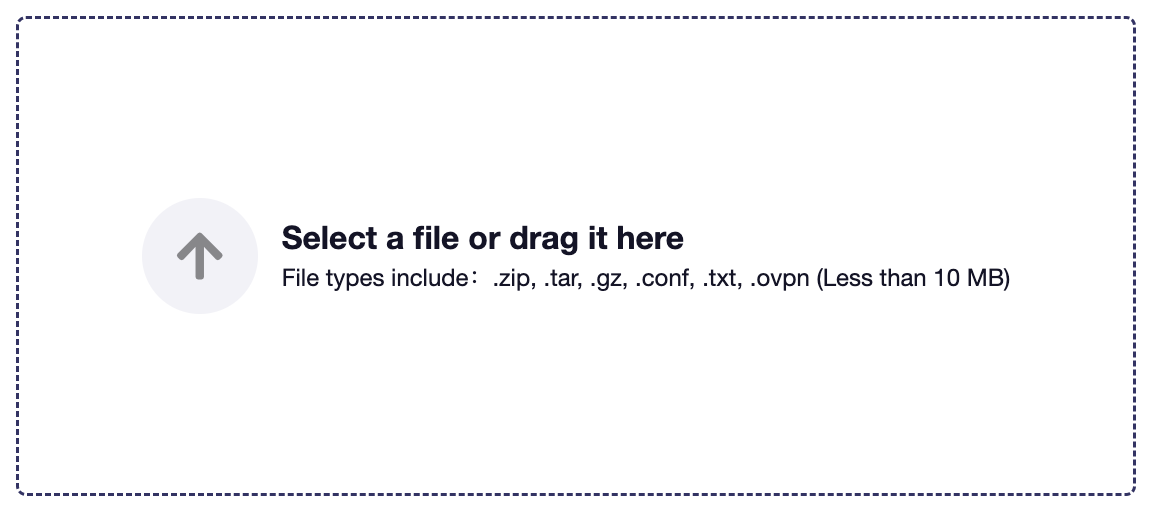
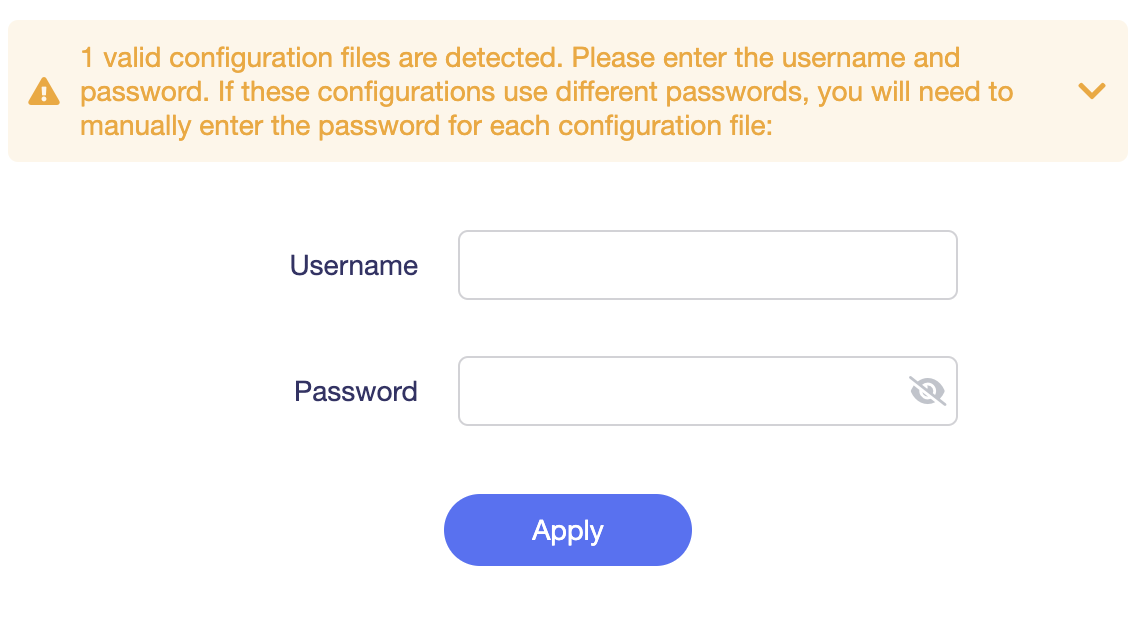
5. Enter in the ExpressVPN username and password that you obtained earlier. Do NOT enter your ExpressVPN account email and password login. Click Apply.
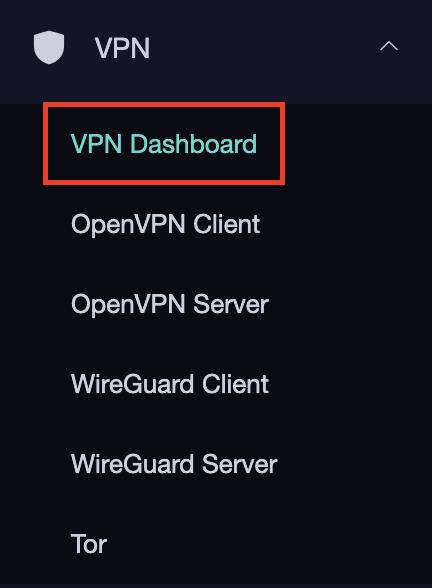
6. Select VPN Dashboard.
7. Set the Enable toggle to On to begin the ExpressVPN connection.
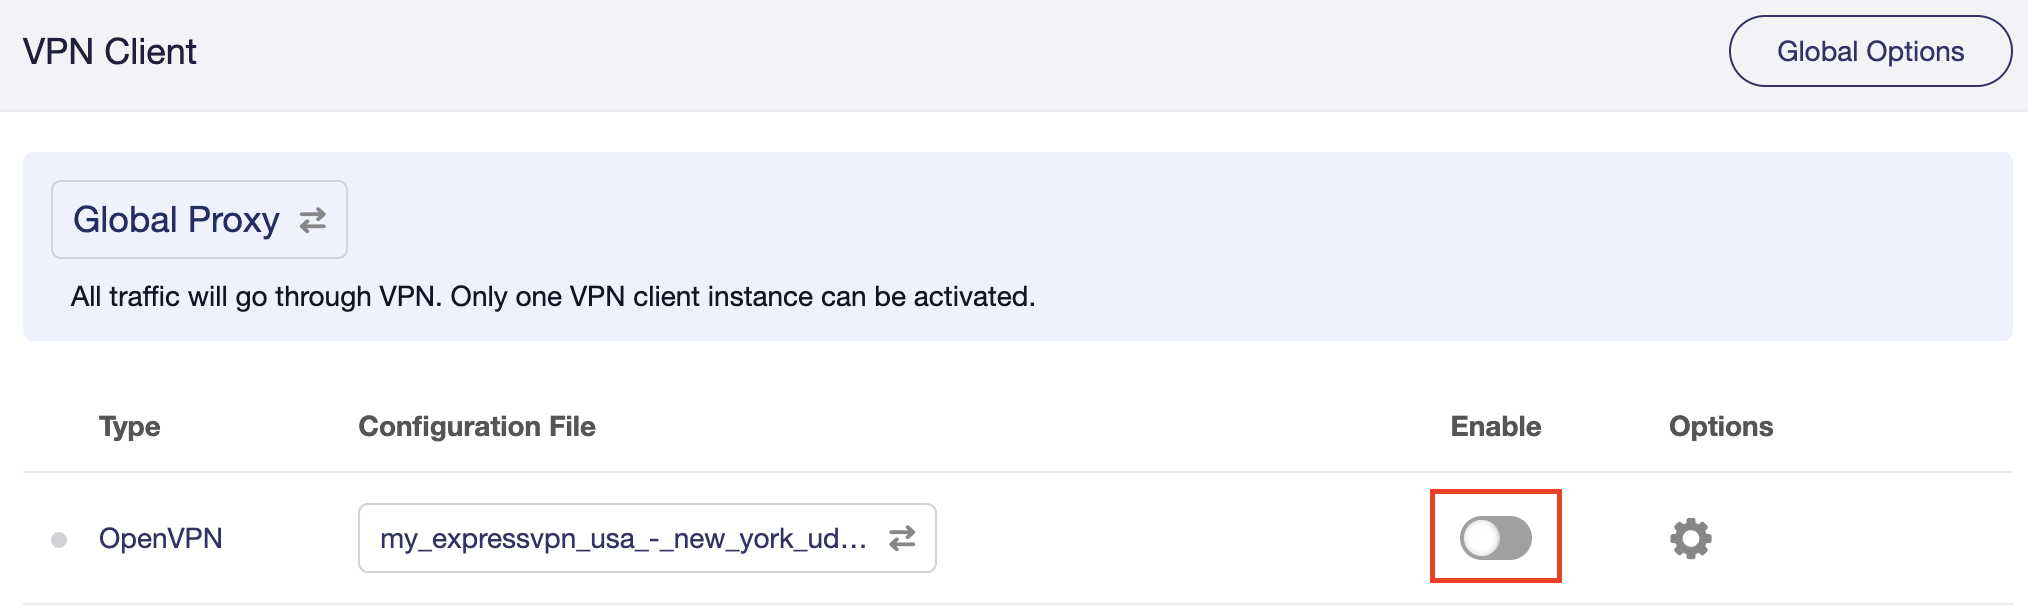
Verify a successful ExpressVPN connection
- You should now see information appear in the Server Address, Server Listen Port, Traffic Statistics, and Client Virtual IP areas.
- Visit ExpressVPN’s IP Check to verify your new IP address and virtual location.
In some cases you may notice that the location is not showing the same location as the server you have input in your router settings; this is because geo tracking tools are often tricked by VPN connections. As long as you see an IP address that is not the same as your normal Internet IP address then you are indeed connected to ExpressVPN.
How to change the ExpressVPN server
- Download a new .ovpn file location as detailed above.
- In the ExpressVPN Group on the OpenVPN Client area click Upload Configuration File and select the new .ovpn file.
- Click VPN Dashboard and then click the Configuration File area and select the new location that you added.
- Click Apply.
Flint/Slate GL.iNet PureVPN WireGuard Setup
Preparing for PureVPN GL.iNet Setup
Obtain PureVPN WireGuard file
If you are not already an PureVPN user Sign Up Now.
1. Log in to your account on the PureVPN website.
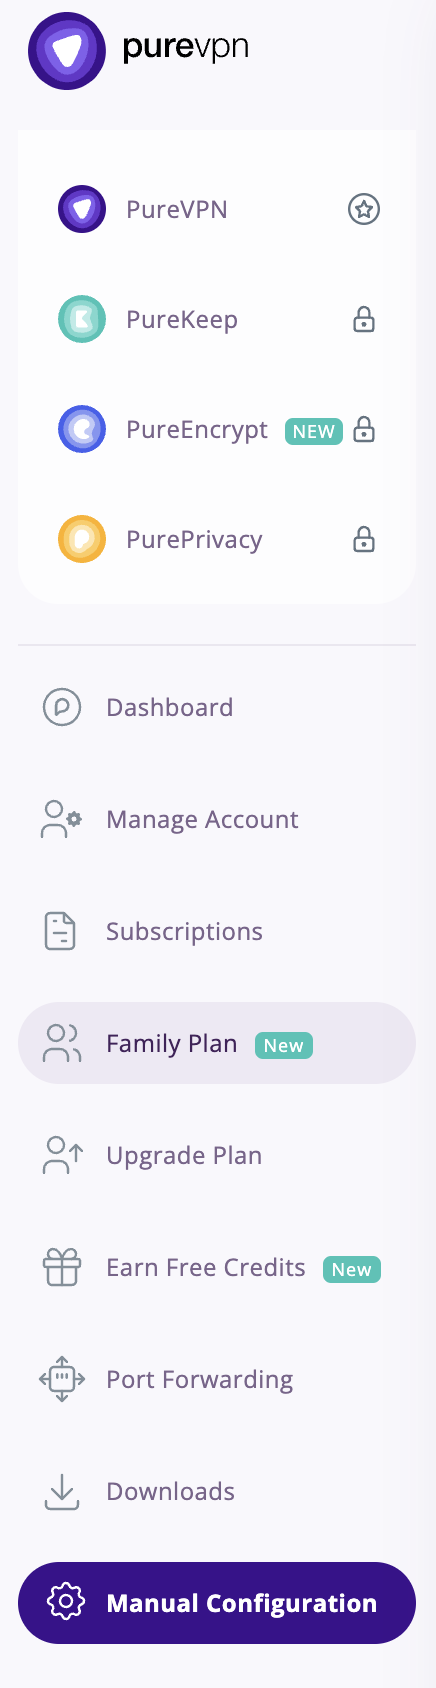
2. Select Manual Configuration.
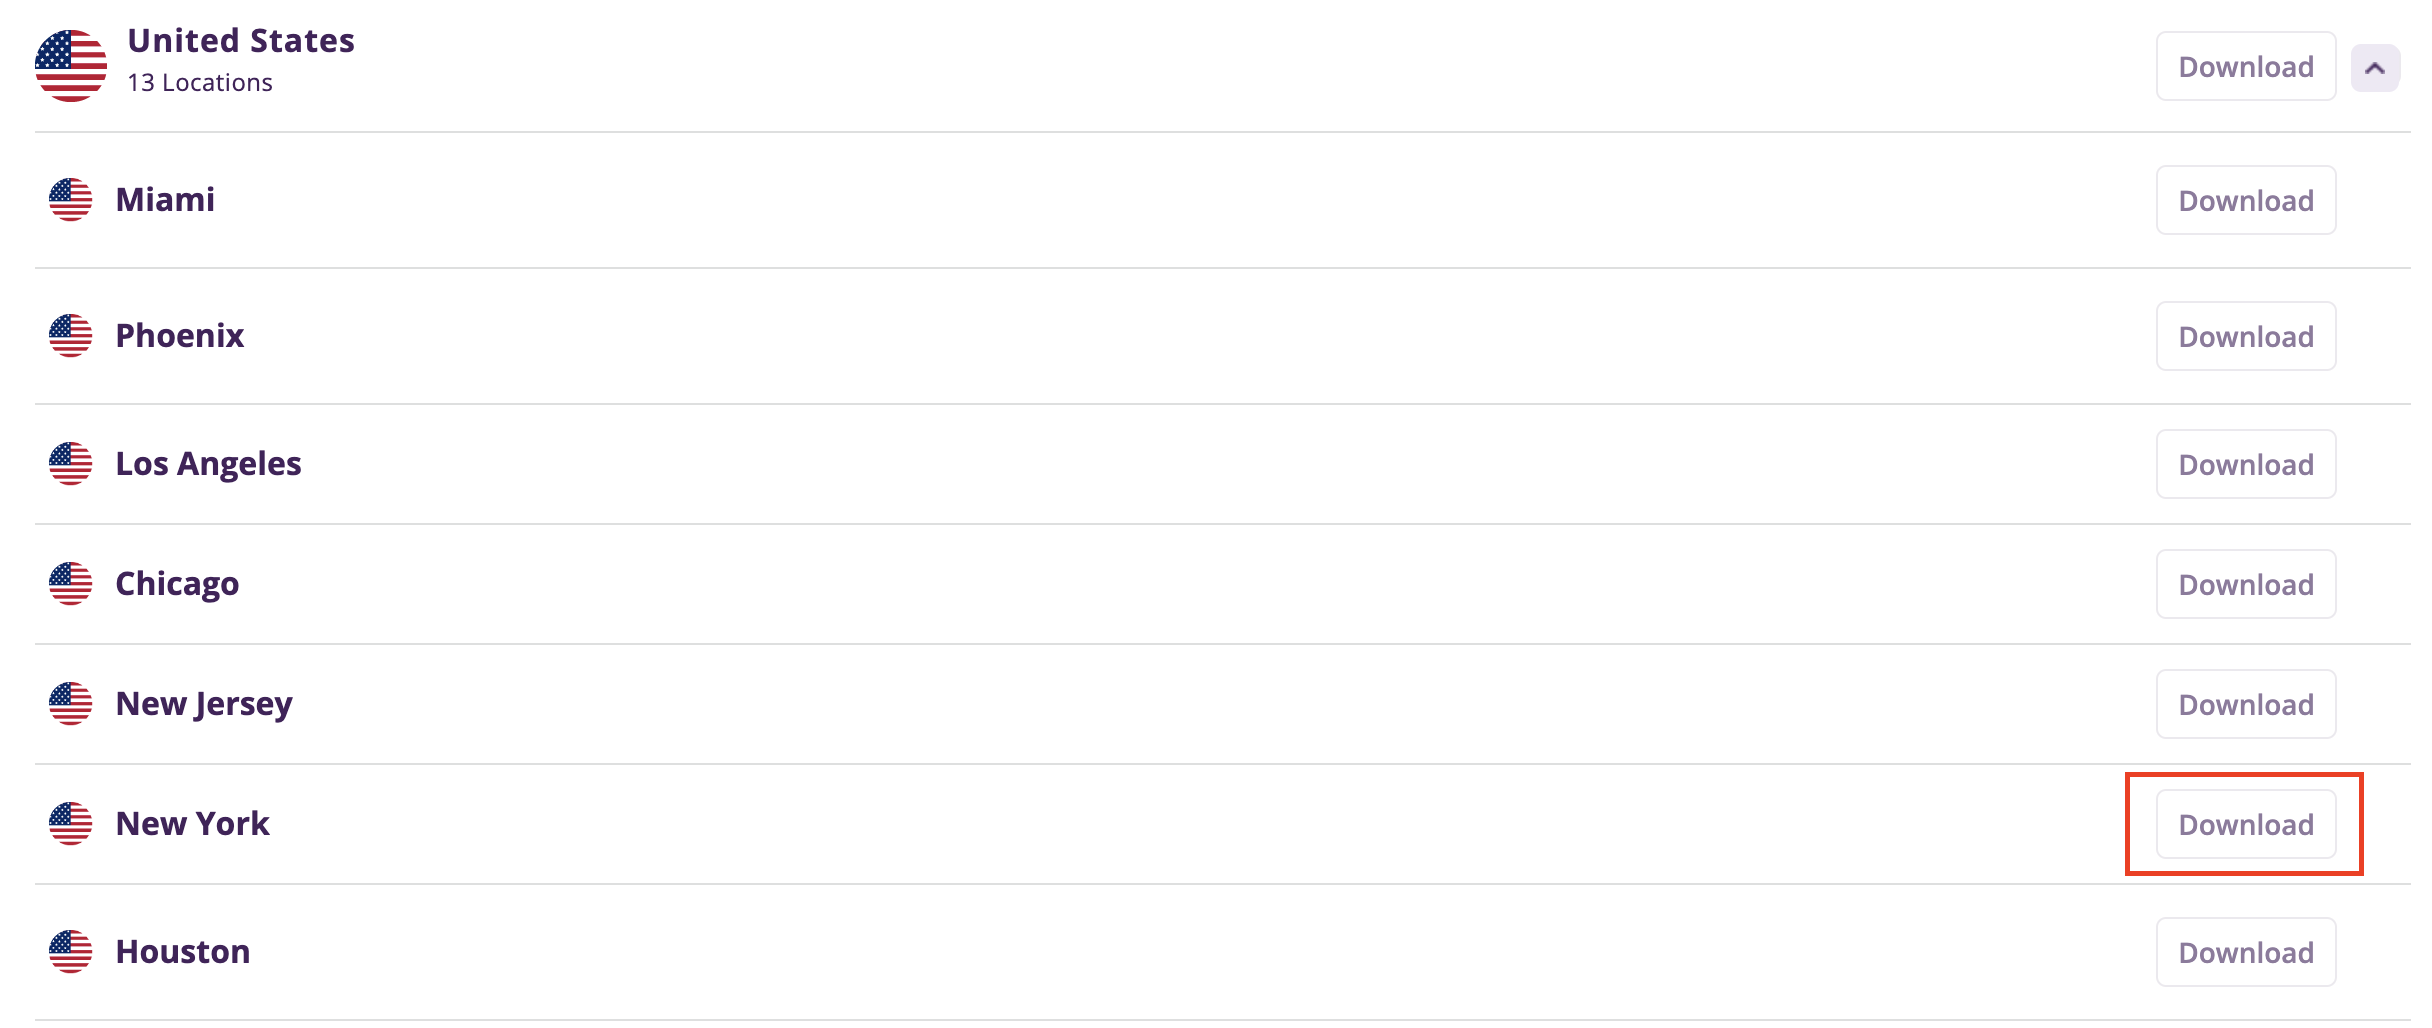
3. Select the Server Location you want to connect to and then click Download.
4. In the Select Protocol dropdown choose WireGuard.
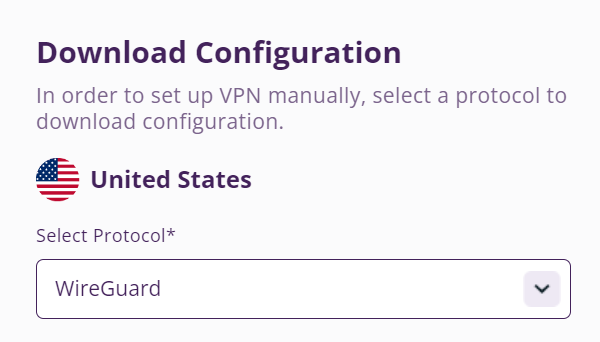
5. In the Select Device dropdown choose DD-WRT. Then click Generate Configuration. This will save a .conf file to your computer.
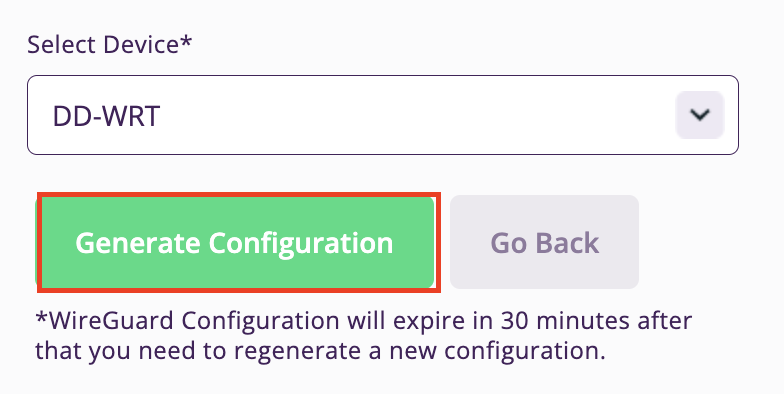
GL.iNet Router Setup for PureVPN
Login to GL.iNet firmware settings in a browser on any computer or smart device connected to the GL.iNet FlashRouter’s network. For more instructions on how to access the firmware settings view our guide here.
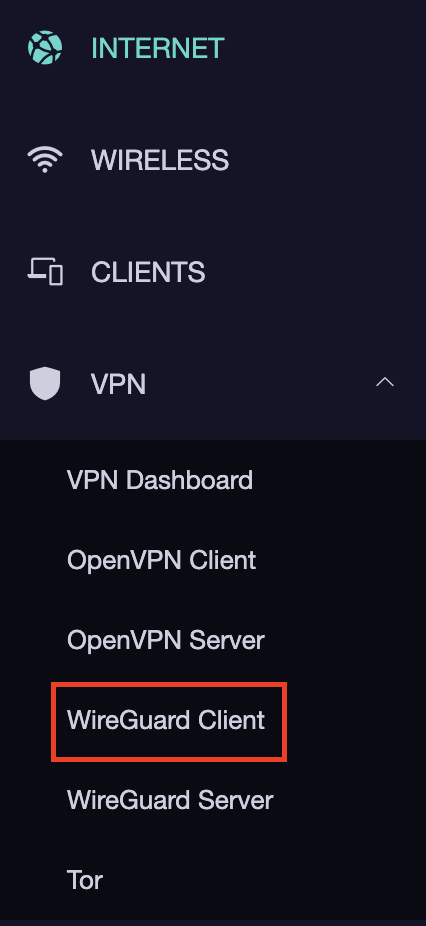
1. Navigate to the VPN tab and select WireGuard Client.
2. Click New Group.
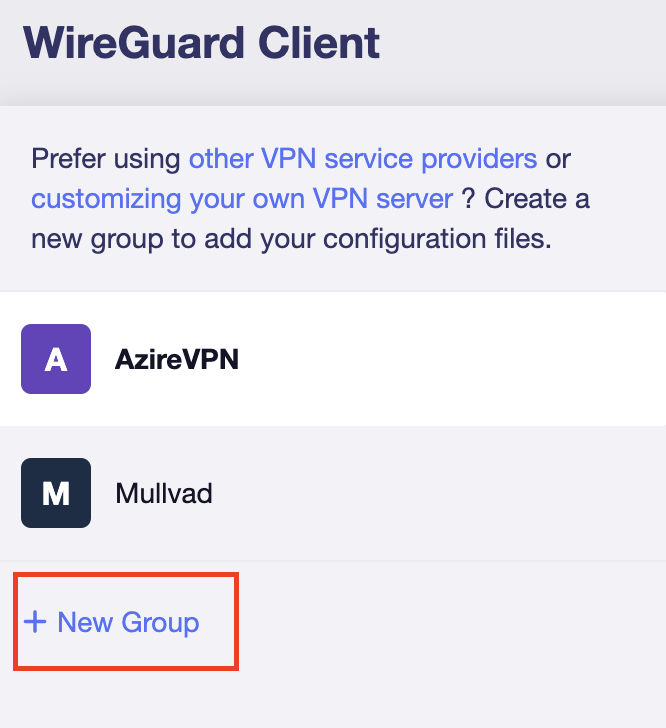
3. Enter PureVPN and click the check mark.

4. Select the .conf file you downloaded earlier and upload it here.
5. Click Apply.
6. Select VPN Dashboard.
7. Set the Enable toggle to On to begin the PureVPN connection.
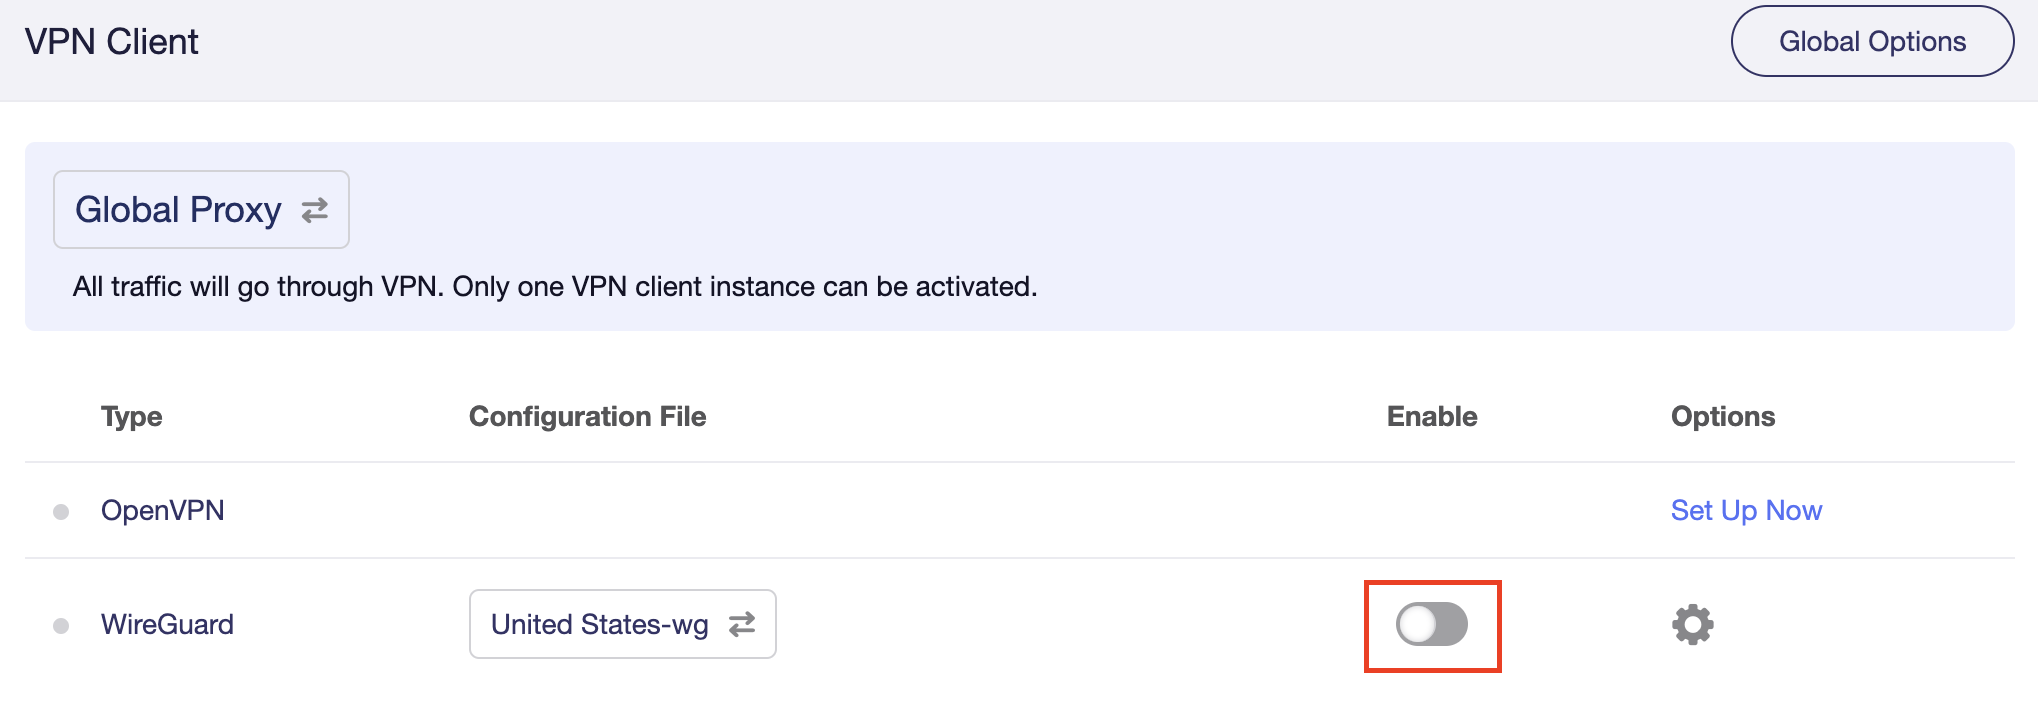
Verify a successful PureVPN connection
- You should now see information appear in the Server Address, Server Listen Port, Traffic Statistics, and Client Virtual IP areas.
- Visit PureVPN’s IP Check to verify your new IP address and virtual location.
In some cases you may notice that the location is not showing the same location as the server you have input in your router settings; this is because geo tracking tools are often tricked by VPN connections. As long as you see an IP address that is not the same as your normal Internet IP address then you are indeed connected to PureVPN.
How to change the PureVPN server
Replicate the steps above with a new location.
NordVPN Cudy OpenVPN Setup
Preparing for NordVPN Cudy Setup
Obtain your NordVPN manual Username and Password
If you are not already an NordVPN user Sign Up Now.
1. Log in to your account on the NordVPN website.
2. Click NordVPN on the left hand side and then click Setup NordVPN manually.
3. Enter in the verification code that was sent to your email.
4. Copy and paste your NordVPN manual username and password to a secure location. This is the username and password you will enter into the router settings to connect to NordVPN.
Download your NordVPN .ovpn file
1. There are two options for obtaining the .ovpn file. The first and recommended is to navigate to NordVPN’s server recommendation page. Click Recommended Server to display the fastest server based on your actual location. You can adjust the country if you don’t want to connect to the recommended country.
Then click Show Available Protocols. Click Download Config next to OpenVPN UDP. This will download the .ovpn file to your computer for this server. Do not open this file.
The second method to obtain a server is for connecting to a specific server number that you know you want to use. This applies to NordVPN Dedicated IP servers if you are signed up for that service. Go to NordVPN’s .ovpn file page. Then search for the server number that you want to use and click Download UDP.
Cudy Router Setup for NordVPN
Login to Cudy firmware settings in a browser on any computer or smart device connected to the Cudy FlashRouter’s network.
1. Click General Settings.

2. Click VPN.
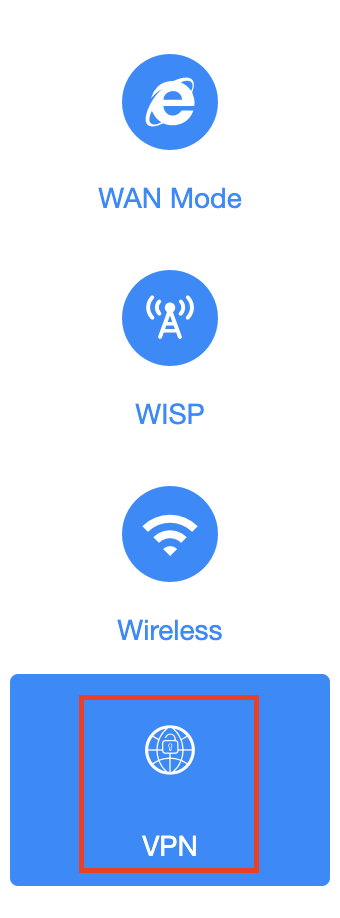
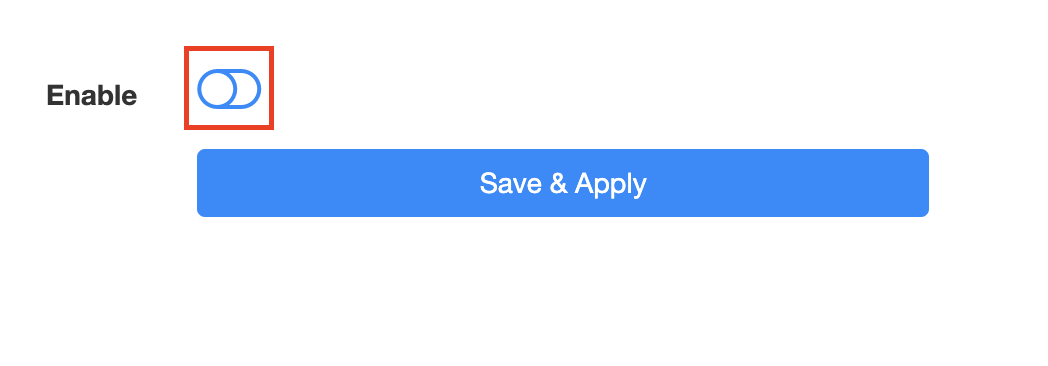
3. Toggle the Enable switch to On.
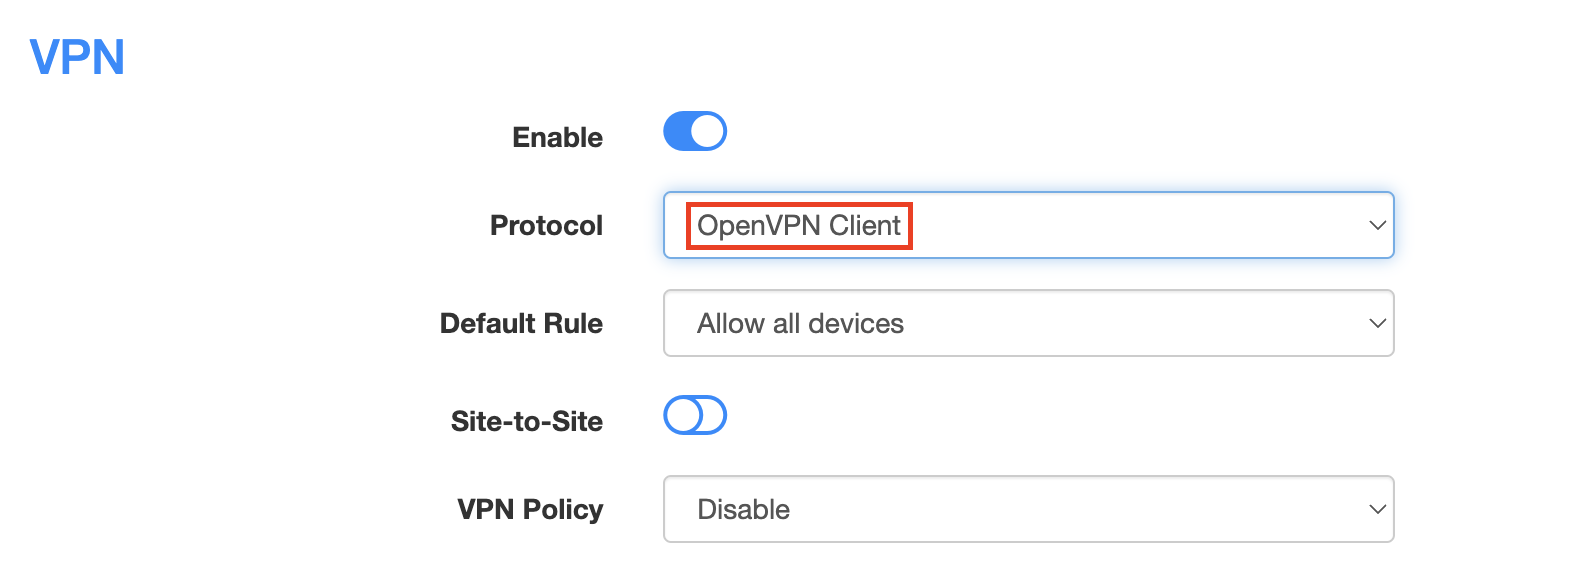
4. Select OpenVPN Client from the Protocol dropdown.
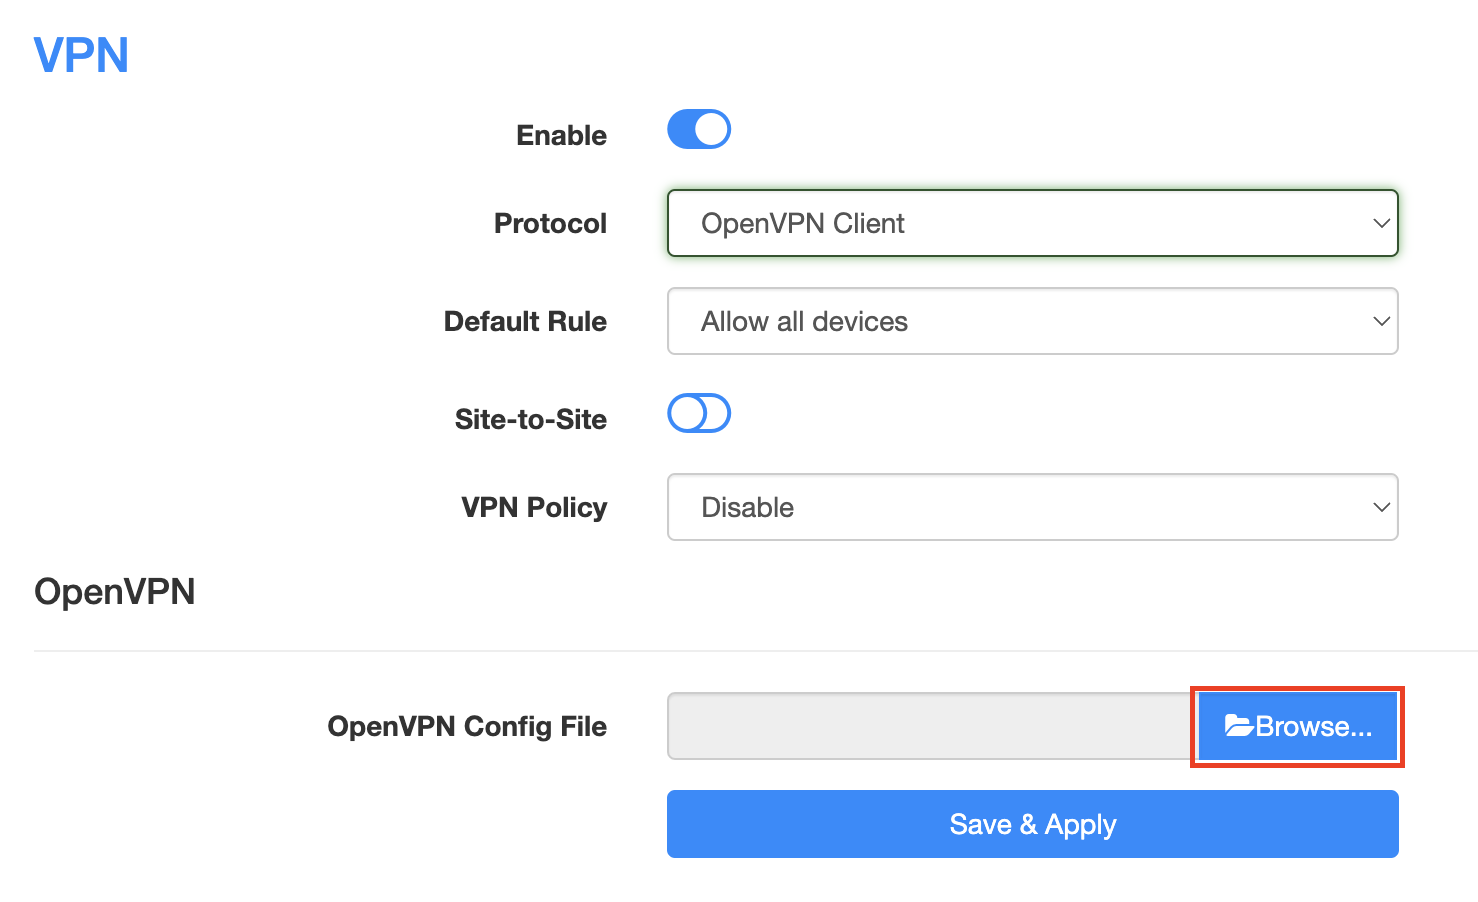
5. Click Browse and select the .ovpn file you downloaded earlier. You should see the server file name listed next to Current Config File after doing so.
6. Enter your NordVPN username and password that you obtained earlier in the Username and Password. Note that these are different from your NordVPN email login and password.
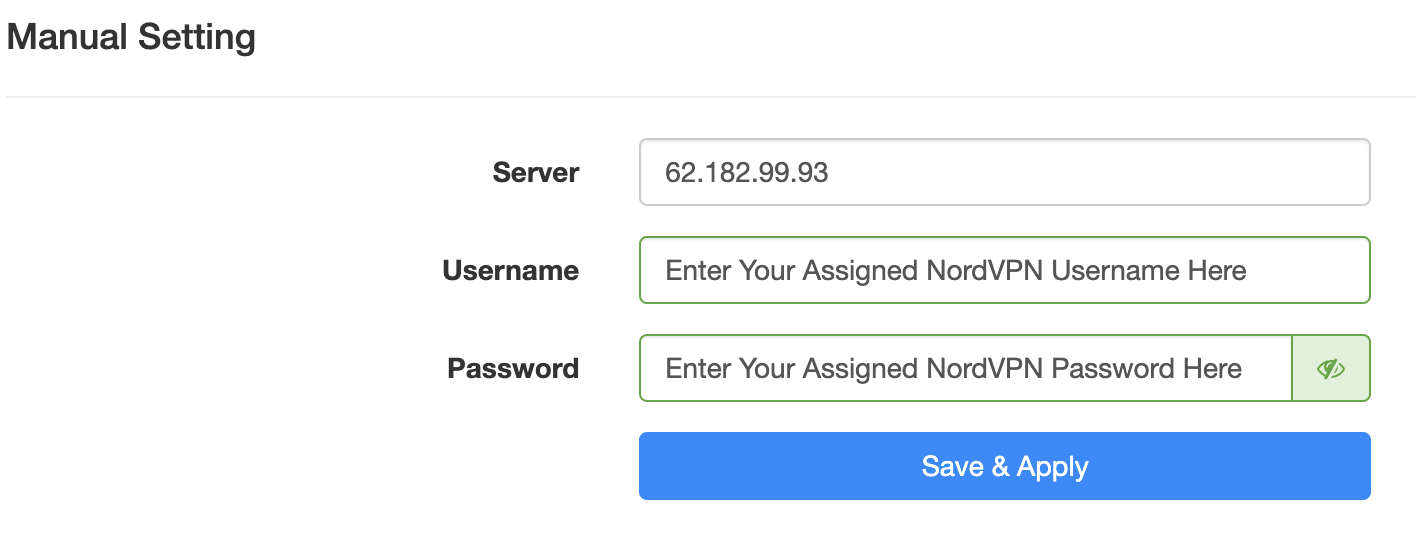
7. Click Save & Apply at the bottom of the page.
Verify a successful NordVPN connection
- You should now see a CONNECTED message.
- Visit NordVPN’s IP Check to verify your new IP address and virtual location.
In some cases you may notice that the location is not showing the same location as the server you have input in your router settings; this is because geo tracking tools are often tricked by VPN connections. As long as you see an IP address that is not the same as your normal Internet IP address then you are indeed connected to NordVPN.
How to change the NordVPN server
- Follow the steps at the top of the page to obtain a new .ovpn file.
- Then proceed with the settings same as initial setup.
ExpressVPN Cudy OpenVPN Setup
Preparing for ExpressVPN Cudy Setup
Obtain your ExpressVPN OpenVPN Information
If you are not already an ExpressVPN user Sign Up Now.
1. Log in to your account on the ExpressVPN website.
2. Successfully log in with your account information. Select More.
3. Select Manual Configuration and copy the Username and Password that are displayed on the right hand side of the screen.
4. Click the Server Location that you want to connect to. This will download a .ovpn file to your computer that we will use later on. There is no need to open the file. For this example I have selected New York but feel free to select any server listed there.
Cudy Router Setup for ExpressVPN
Login to Cudy firmware settings in a browser on any computer or smart device connected to the Cudy FlashRouter’s network.
1. Click General Settings.
2. Click VPN.
3. Toggle the Enable switch to On.
4. Select OpenVPN Client from the Protocol dropdown.
5. Click Browse and select the .ovpn file you downloaded earlier. You should see the server file name listed next to Current Config File after doing so.
6. Enter your ExpressVPN username and password that you obtained earlier in the Username and Password. Note that these are different from your ExpressVPN email login and password.

7. Click Save & Apply at the bottom of the page.
Verify a successful ExpressVPN connection
- You should now see a CONNECTED message.
- Visit ExpressVPN’s IP Check to verify your new IP address and virtual location.
In some cases you may notice that the location is not showing the same location as the server you have input in your router settings; this is because geo tracking tools are often tricked by VPN connections. As long as you see an IP address that is not the same as your normal Internet IP address then you are indeed connected to ExpressVPN.
How to change the ExpressVPN server
- Follow the steps at the top of the page to obtain a new .ovpn file.
- Then proceed with the settings same as initial setup.
ExpressVPN TP-Link OpenVPN Setup
Preparing for ExpressVPN TP-Link Setup
Obtain your ExpressVPN OpenVPN Information
If you are not already an ExpressVPN user Sign Up Now.
1. Log in to your account on the ExpressVPN website.
2. Successfully log in with your account information. Select More.
3. Select Manual Configuration and copy the Username and Password that are displayed on the right hand side of the screen.
4. Click the Server Location that you want to connect to. This will download a .ovpn file to your computer that we will use later on. There is no need to open the file. For this example I have selected New York but feel free to select any server listed there.
TP-Link Router Setup for ExpressVPN
Login to TP-Link firmware settings in a browser on any computer or smart device connected to the FlashRouter’s network.
1. Navigate to the Advanced tab.
2. Navigate to the VPN Client tab.
3. Check the Enable box next to VPN Client. Then click Save at the bottom of the page.
4. Click the Add button in the Server List area.
5. In the Description field enter in the name you’d like to use for this OpenVPN Client profile. We typically advise entering in the location or server number here. Our example server was in New York so I have entered in ExpressVPN New York.
Set the VPN Type to OpenVPN.
In the Username and Password fields paste in the ExpressVPN username and password we obtained earlier.
Click Browse and select the .ovpn file you downloaded earlier. Then click Save.

By default no devices will be assigned to the VPN Tunnel. With TP-Link firmware you must manually assign the devices that you want connected to the VPN tunnel. Proceed with the next steps to do so for all devices you want connected to VPN.
6. Click the Add button in the Device List area.
7. A list of devices connected to the FlashRouter’s network will appear. Check the devices that you want to connect to VPN. Then click OK.
8. Now that the devices have been assigned to the VPN connection click the Enable toggle in the Server List area.

Verify a successful ExpressVPN connection
- You should now see a CONNECTED message.
- Visit ExpressVPN’s IP Check to verify your new IP address and virtual location.
In some cases you may notice that the location is not showing the same location as the server you have input in your router settings; this is because geo tracking tools are often tricked by VPN connections. As long as you see an IP address that is not the same as your normal Internet IP address then you are indeed connected to ExpressVPN.
How to change the ExpressVPN server
- Follow the steps at the top of the page to obtain a new .ovpn file.
- Then proceed with the settings same as initial setup.
Surfshark Merlin WireGuard Setup
Preparing for Surfshark Merlin Setup
Download your Surfshark .conf file
If you are not already a Surfshark user Sign Up Now.
1. Log in to your account on the Surfshark website.
2. Click VPN Manual Setup.
3. Select Router as the Setup Method.
4. Select WireGuard as the Protocol.
5. Select I don’t have a key pair.
6. Enter FlashRouter as the name of the connection and click Next.
7. Click Generate a new key pair.
8. Click Choose a location.
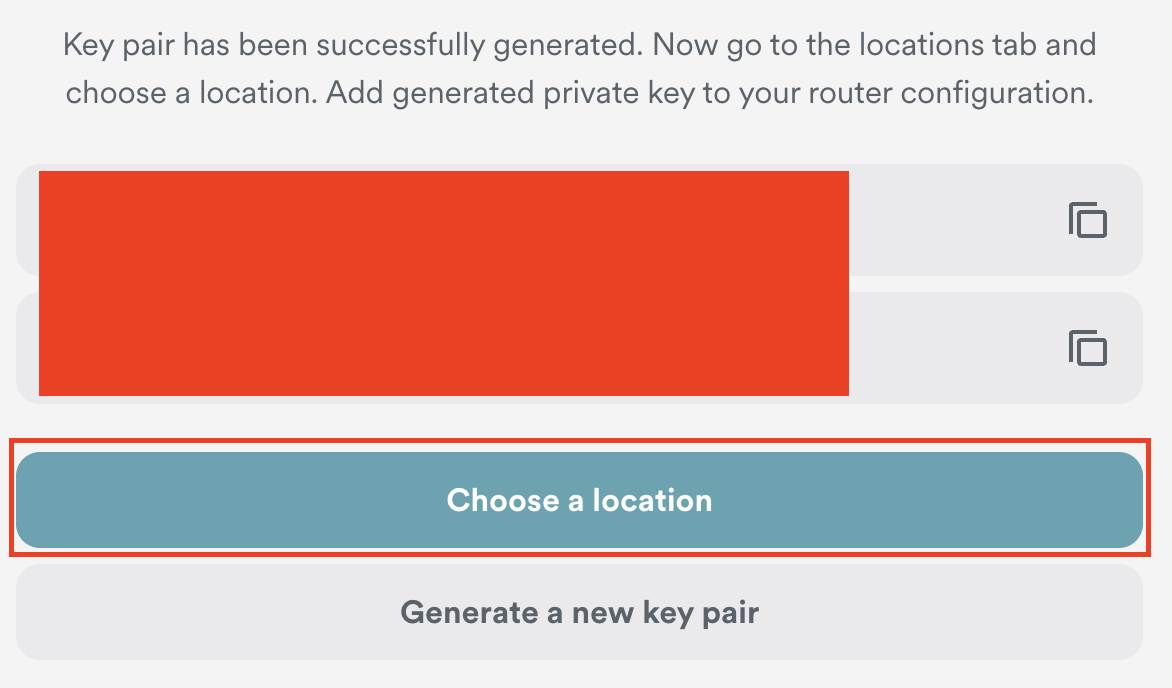
9. Select the server location you want to connect to. Unless you need a specific location we recommend using Surfshark’s recommended Fastest server. Click Download to download the .conf file for this Surfshark server location.
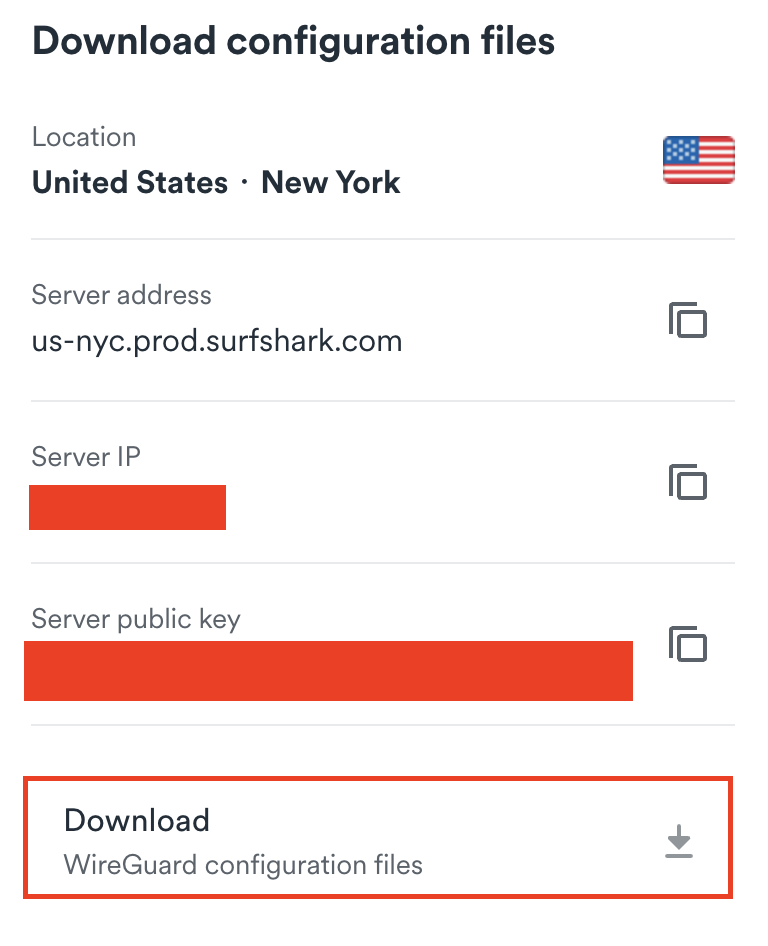
Merlin Router Setup for Surfshark
Login to Asus Merlin firmware settings in a browser on any computer or smart device connected to the Merlin FlashRouter’s network.
1. Navigate to the VPN tab.
2. Navigate to the VPN Client tab.
3. Select WireGuard as the VPN Protocol.

4. Click Choose file and select the .conf file you downloaded earlier. Then click Upload.
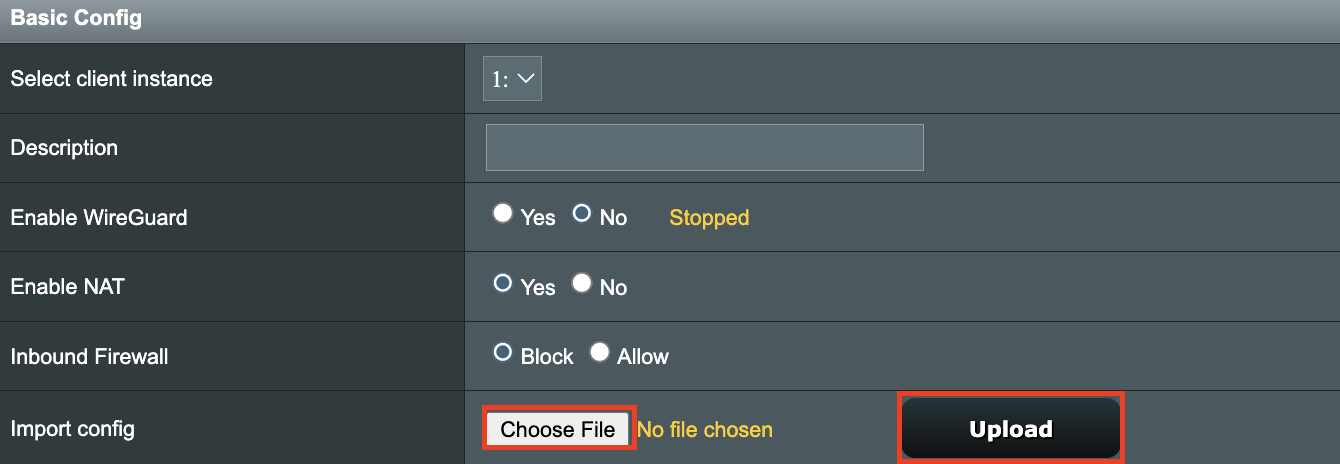
5. In the Description field enter in the name you’d like to use for this WireGuard Client profile. We typically advise entering in the location here. Our example server was in New York so I have entered in Surfshark New York.

6. Set Enable WireGuard to Yes.
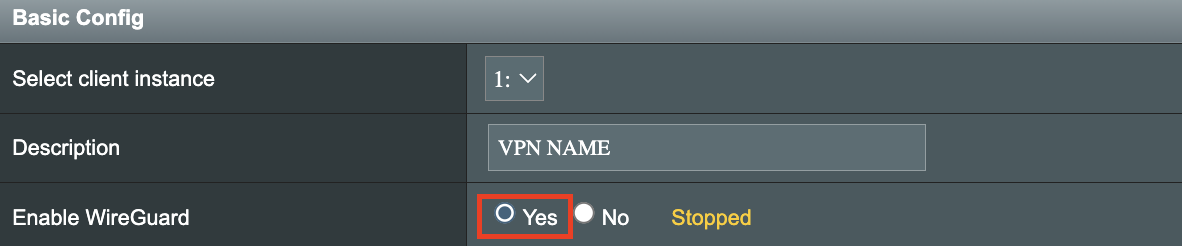
7. Click Apply at the bottom of the page and you should then see a Connected message appear.
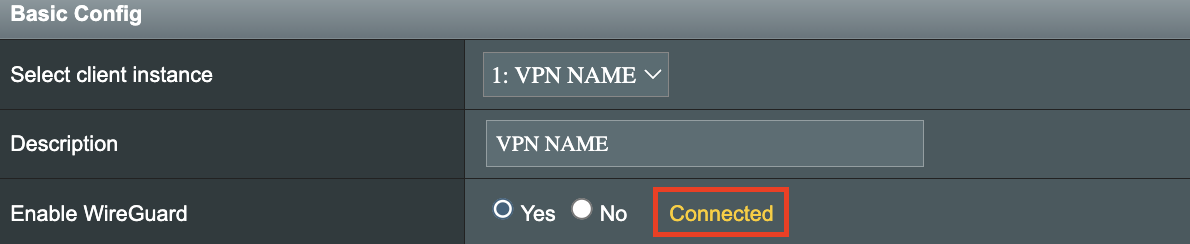
8. By default no devices are assigned to the new active WireGuard connection profile. Click the VPN Director tab to assign specific devices to the new WireGuard profile. Your IP will not be changed on your devices yet.

9. On the VPN Director page click the + symbol next to Add new rule.
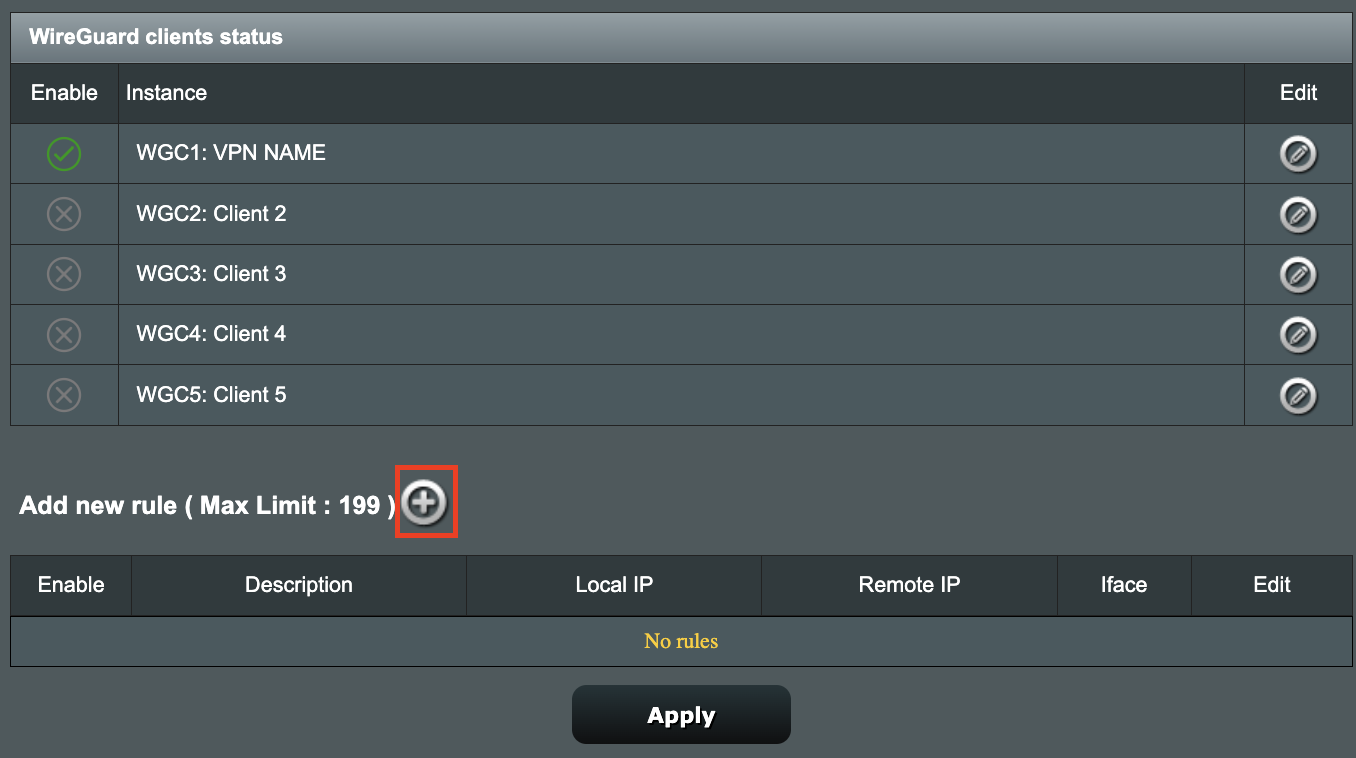
10. Select the new WireGuard profile in the Interface dropdown.
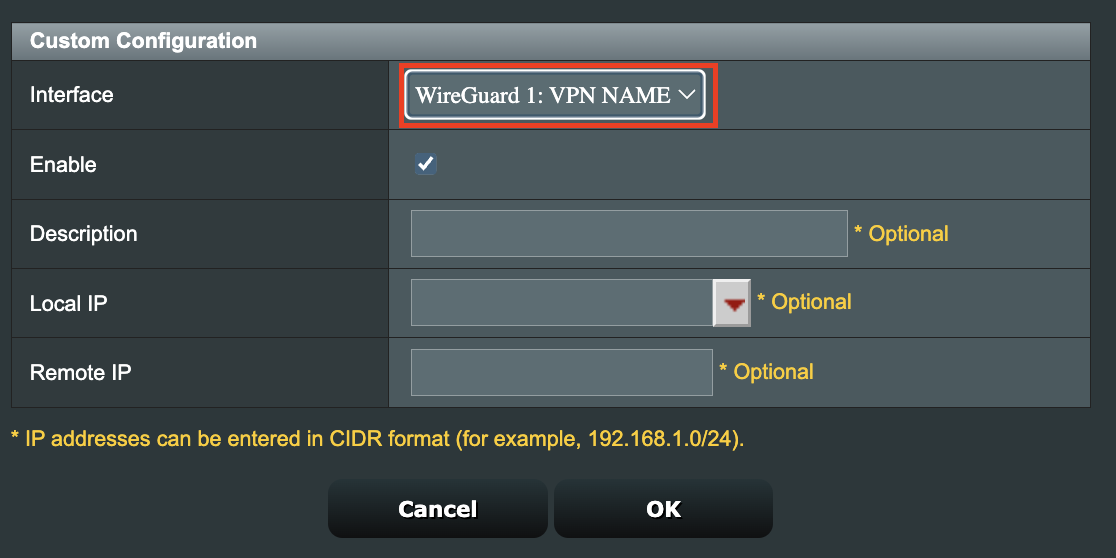
11. In the Local IP field enter in 192.168.50.0/24 if you want ALL devices connected to the FlashRouter’s network to use the WireGuard VPN connection. Click OK.
If you only want certain devices to connect to the WireGuard Client profile you have setting up instead of all the devices connected to the FlashRouter’s network please complete the instructions on our VPN Director guide.
12. Then click Apply at the bottom of the page.
Verify a successful Surfshark connection
Visit Surfshark’s IP Check from a private/incognito browsing window to verify your new IP address and virtual location.
In some cases you may notice that the location is not showing the same location as the server you have input in your router settings; this is because geo tracking tools are often tricked by VPN connections. As long as you see an IP address that is not the same as your normal Internet IP address then you are indeed connected to Surfshark.
How to change the Surfshark server
- Follow the steps at the top of the page to obtain a new .conf file.
- Then proceed with the settings same as initial setup.
NordVPN TP-Link OpenVPN Setup
Preparing for NordVPN TP-Link Setup
Obtain your NordVPN manual Username and Password
If you are not already an NordVPN user Sign Up Now.
1. Log in to your account on the NordVPN website.
2. Click NordVPN on the left hand side and then click Setup NordVPN manually.
3. Enter in the verification code that was sent to your email.
4. Copy and paste your NordVPN manual username and password to a secure location. This is the username and password you will enter into the router settings to connect to NordVPN.
Download your NordVPN .ovpn file
1. There are two options for obtaining the .ovpn file. The first and recommended is to navigate to NordVPN’s server recommendation page. Click Recommended Server to display the fastest server based on your actual location. You can adjust the country if you don’t want to connect to the recommended country.
Then click Show Available Protocols. Click Download Config next to OpenVPN UDP. This will download the .ovpn file to your computer for this server. Do not open this file.
The second method to obtain a server is for connecting to a specific server number that you know you want to use. This applies to NordVPN Dedicated IP servers if you are signed up for that service. Go to NordVPN’s .ovpn file page. Then search for the server number that you want to use and click Download UDP.
TP-Link Router Setup for NordVPN
Login to TP-Link firmware settings in a browser on any computer or smart device connected to the FlashRouter’s network.
1. Navigate to the Advanced tab.
2. Navigate to the VPN Client tab.
3. Check the Enable box next to VPN Client. Then click Save at the bottom of the page.
4. Click the Add button in the Server List area.
5. In the Description field enter in the name you’d like to use for this OpenVPN Client profile. We typically advise entering in the location or server number here. Our example server was us6821 so I have entered in NordVPN us6821.
Set the VPN Type to OpenVPN.
In the Username and Password fields paste in the NordVPN username and password we obtained earlier.
Click Browse and select the .ovpn file you downloaded earlier. Then click Save.
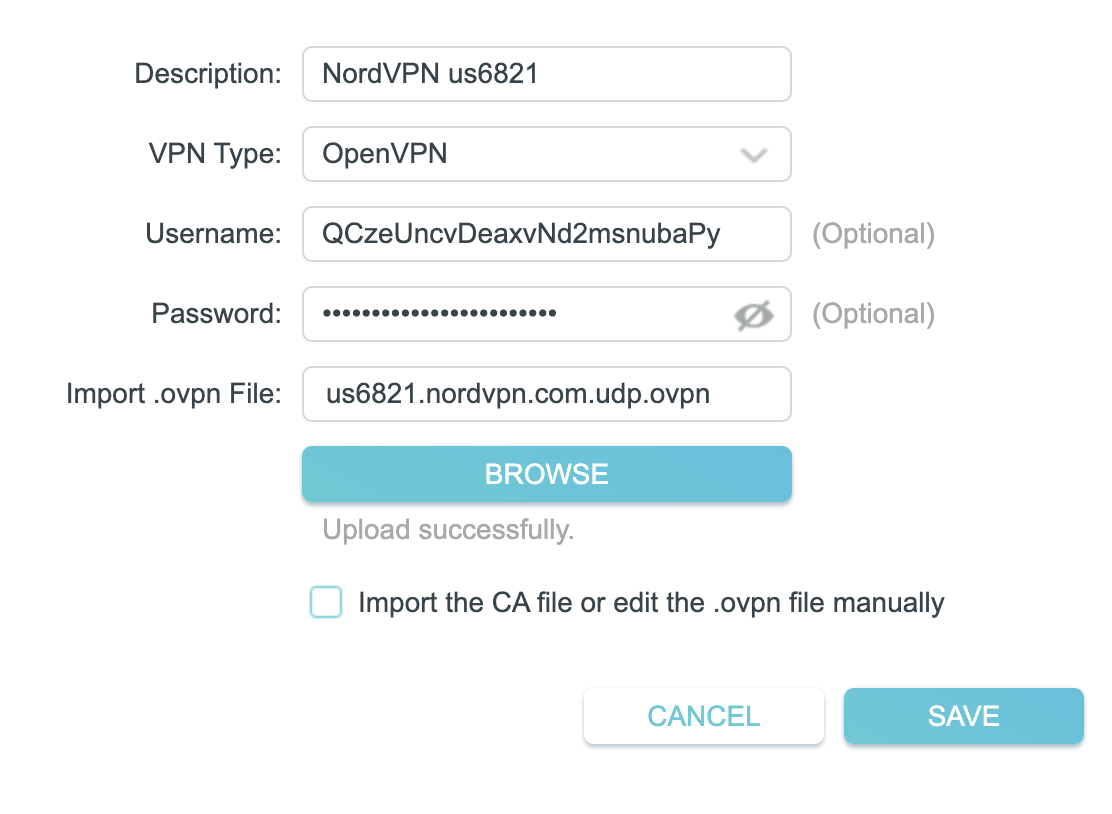
By default no devices will be assigned to the VPN Tunnel. With TP-Link firmware you must manually assign the devices that you want connected to the VPN tunnel. Proceed with the next steps to do so for all devices you want connected to VPN.
6. Click the Add button in the Device List area.
7. A list of devices connected to the FlashRouter’s network will appear. Check the devices that you want to connect to VPN. Then click OK.
8. Now that the devices have been assigned to the VPN connection click the Enable toggle in the Server List area.
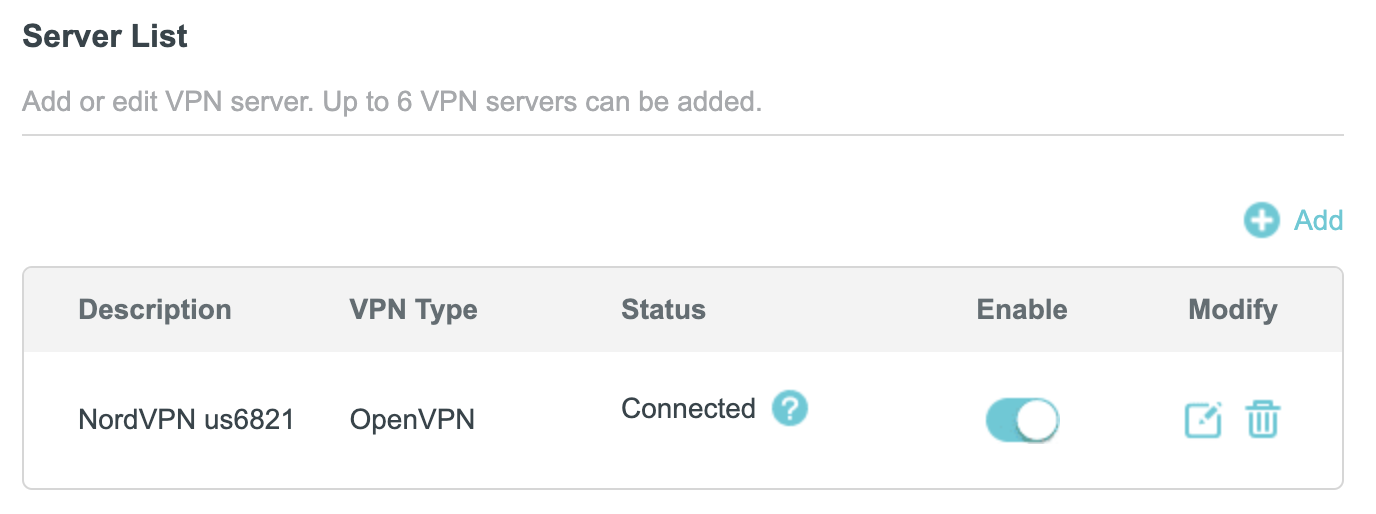
Verify a successful NordVPN connection
- You should now see a CONNECTED message.
- Visit NordVPN’s IP Check to verify your new IP address and virtual location.
In some cases you may notice that the location is not showing the same location as the server you have input in your router settings; this is because geo tracking tools are often tricked by VPN connections. As long as you see an IP address that is not the same as your normal Internet IP address then you are indeed connected to NordVPN.
How to change the NordVPN server
- Follow the steps at the top of the page to obtain a new .ovpn file.
- Then proceed with the settings same as initial setup.
PureVPN Merlin WireGuard Setup
Preparing for PureVPN Merlin Setup
Download your PureVPN .conf file
If you are not already an PureVPN user Sign Up Now.
1. Log in to your account on the PureVPN website.
2. Select Manual Configuration.
3. Select the Server Location you want to connect to and then click Download.
4. In the Select Protocol dropdown choose WireGuard.
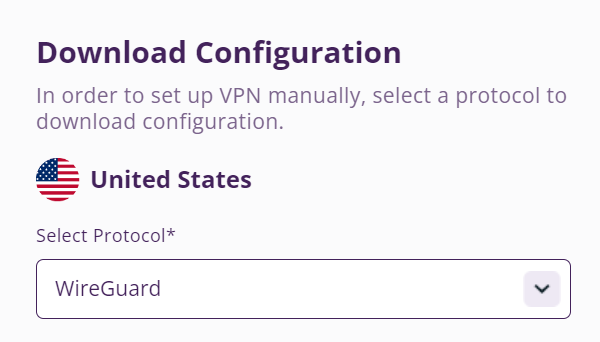
5. In the Select Device dropdown choose DD-WRT. Then click Generate Configuration. This will save a .conf file to your computer.
Merlin Router Setup for PureVPN
Login to Asus Merlin firmware settings in a browser on any computer or smart device connected to the Merlin FlashRouter’s network.
1. Navigate to the VPN tab.
2. Navigate to the VPN Client tab.
3. Select WireGuard as the VPN Protocol.
4. Click Choose file and select the .conf file you downloaded earlier. Then click Upload.
5. In the Description field enter in the name you’d like to use for this WireGuard Client profile. We typically advise entering in the location here.
6. Set Enable WireGuard to Yes.
7. Click Apply at the bottom of the page and you should then see a Connected message appear.
8. By default no devices are assigned to the new active WireGuard connection profile. Click the VPN Director tab to assign specific devices to the new WireGuard profile. Your IP will not be changed on your devices yet.
9. On the VPN Director page click the + symbol next to Add new rule.
10. Select the new WireGuard profile in the Interface dropdown.
11. In the Local IP field enter in 192.168.50.0/24 if you want ALL devices connected to the FlashRouter’s network to use the WireGuard VPN connection. Click OK.
If you only want certain devices to connect to the WireGuard Client profile you have setting up instead of all the devices connected to the FlashRouter’s network please complete the instructions on our VPN Director guide.
12. Then click Apply at the bottom of the page.
Verify a successful PureVPN connection
Visit PureVPN’s IP Check to verify your new IP address and virtual location.
In some cases you may notice that the location is not showing the same location as the server you have input in your router settings; this is because geo tracking tools are often tricked by VPN connections. As long as you see an IP address that is not the same as your normal Internet IP address then you are indeed connected to PureVPN.
How to change the PureVPN server
- Follow the steps at the top of the page to obtain a new .conf file.
- Then proceed with the settings same as initial setup.
Surfshark TP-Link WireGuard Setup
Preparing for Surfshark TP-Link Setup
Download your Surfshark .conf file
If you are not already a Surfshark user Sign Up Now.
1. Log in to your account on the Surfshark website.
2. Click VPN Manual Setup.
3. Select Router as the Setup method.
4. Select WireGuard as the Protocol.
5. Select I don’t have a key pair.
6. Enter FlashRouter as the name of the connection and click Next.
7. Click Generate a new key pair.
8. Click Choose a location.
9. Select the server location you want to connect to. Unless you need a specific location we recommend using Surfshark’s recommended Fastest server. Click Download to download the .conf file for this Surfshark server location.
TP-Link Router Setup for Surfshark
Login to TP-Link firmware settings in a browser on any computer or smart device connected to the FlashRouter’s network.
1. Navigate to the Advanced tab.
2. Navigate to the VPN Client tab.
3. Check the Enable box next to VPN Client. Then click Save at the bottom of the page.
4. Click the Add button in the Server List area.
5. In the Description field enter in the name you’d like to use for this WireGuard Client profile. We typically advise entering in the location. Our example server was New York so I have entered in Surfshark New York.
Set the VPN Type to WireGuard.
Click Browse and select the .conf file you downloaded earlier. Then click Save.
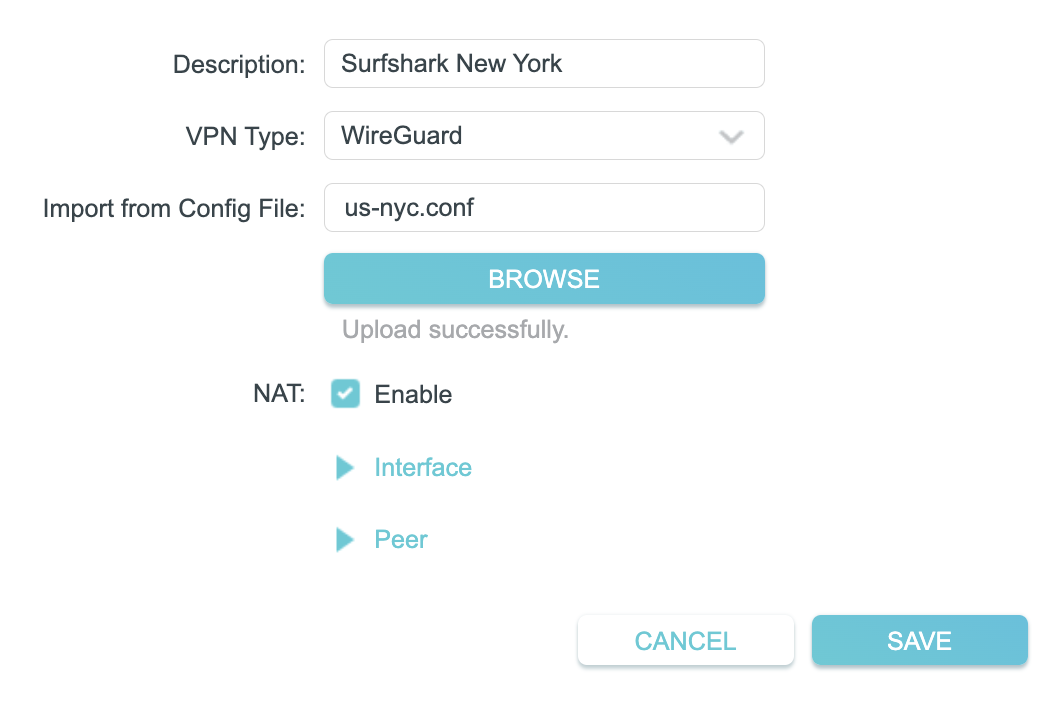
By default no devices will be assigned to the VPN Tunnel. With TP-Link firmware you must manually assign the devices that you want connected to the VPN tunnel. Proceed with the next steps to do so for all devices you want connected to VPN.
6. Click the Add button in the Device List area.
7. A list of devices connected to the FlashRouter’s network will appear. Check the devices that you want to connect to VPN. Then click OK.
8. Now that the devices have been assigned to the VPN connection click the Enable toggle in the Server List area.
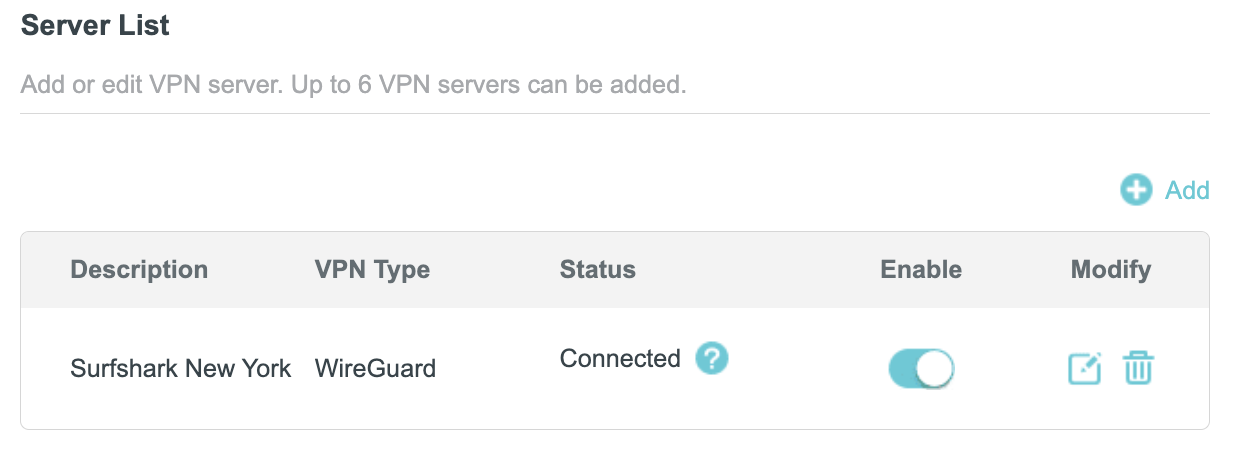
Verify a successful Surfshark connection
- You should now see a CONNECTED message.
- Visit Surfshark’s IP Check to verify your new IP address and virtual location.
In some cases you may notice that the location is not showing the same location as the server you have input in your router settings; this is because geo tracking tools are often tricked by VPN connections. As long as you see an IP address that is not the same as your normal Internet IP address then you are indeed connected to Surfshark.
How to change the Surfshark server
- Follow the steps at the top of the page to obtain a new .conf file.
- Then proceed with the settings same as initial setup.
AsusWRT-Merlin Router Setup Guide

Quick Start Guide for AsusWRT-Merlin FlashRouters
Find setup guides, FAQs and troubleshooting tips for Asus-Merlin configured FlashRouters.

- RT-BE88U (BE7200), RT-AC68U, RT-AC88U, RT-AC3100, RT-AC5300, RT-AC86U, RT-AX56U, RT-AX58U, RT-AX68U, RT-AX86U. RT-AX86U-PRO, RT-AX88U, RT-AX88U-PRO
- GT-AC2900, GT-AX6000, GT-AX11000, GT-AXE11000,GT-AXE11000-PRO, GT-AXE16000
- ZenWiFi Pro XT12
VPN Setup
- Connecting to OpenVPN on Asus Merlin Firmware
- PureVPN Merlin WireGuard Setup
- Surfshark Merlin WireGuard Setup
- ProtonVPN Merlin WireGuard Setup
- IPVanish Merlin OpenVPN Setup
- PrivateInternetAccess (PIA) Merlin OpenVPN Setup
- NordVPN Merlin OpenVPN Setup
- ExpressVPN Merlin OpenVPN Setup
- CyberGhost Merlin OpenVPN Setup
AsusWRT-Merlin Features
Search Support Articles
Troubleshooting
More Ways to Get Help

Privacy Hero Bypass certain devices from VPN
Your Privacy Hero router uses Cloud Based router management which means you can access the router settings from anywhere on any device that has an internet connection. You can follow these steps while connected to your phone, other Wi-Fi network, or the Privacy Hero network.
If you have certain devices in your network that you do NOT want connecting to VPN you can follow these steps to bypass these devices from the Privacy Hero’s VPN connection.
1. From any device that has a browser such as a computer, smartphone, or tablet visit app.privacyhero.com

2. Enter your Privacy Hero account email and password. Click Login.

If you have not created your Privacy Hero account yet please follow these instructions.
3. Click the Devices symbol.

4. Click the name of the Device you want to bypass from VPN.
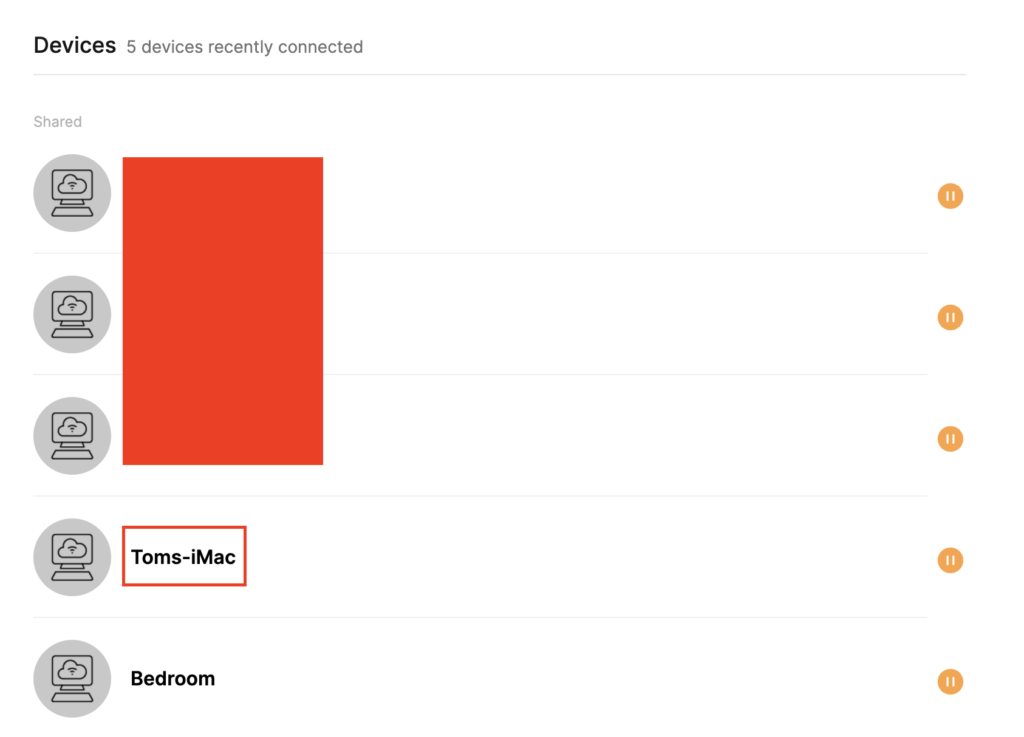
5. Set the VPN toggle to Off. You can also do the same for Adblocking and Device Protection as needed.
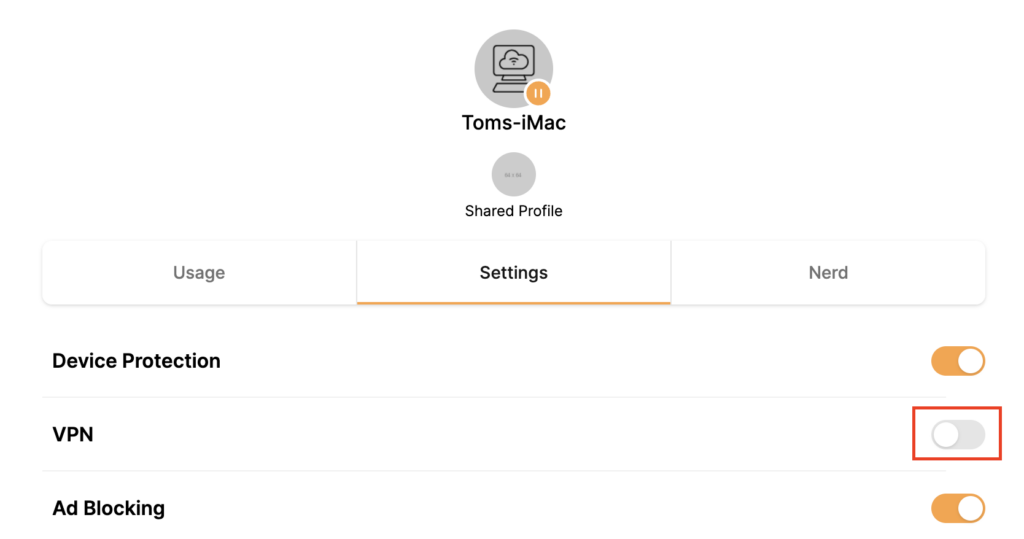
Flint/Slate GL.iNet Internet Setup
Follow this article when you receive your new Flint or Slate GL.iNet router to connect it to the Internet.
1. Connect the ethernet cable that came with the router from an open LAN ethernet port on your ISP modem or other router to the WAN port of the Flint or Slate GL.iNet router.
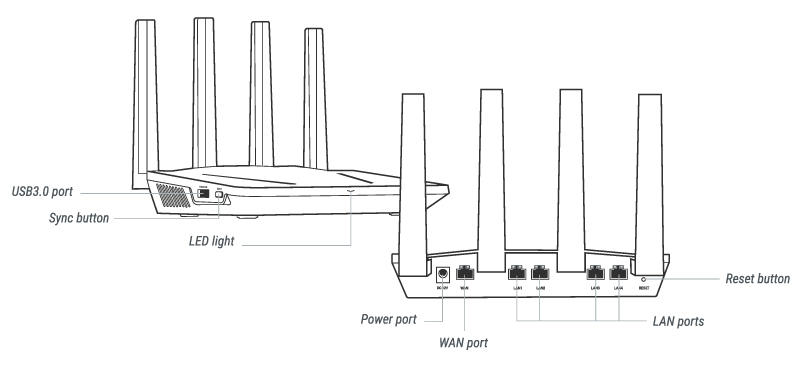
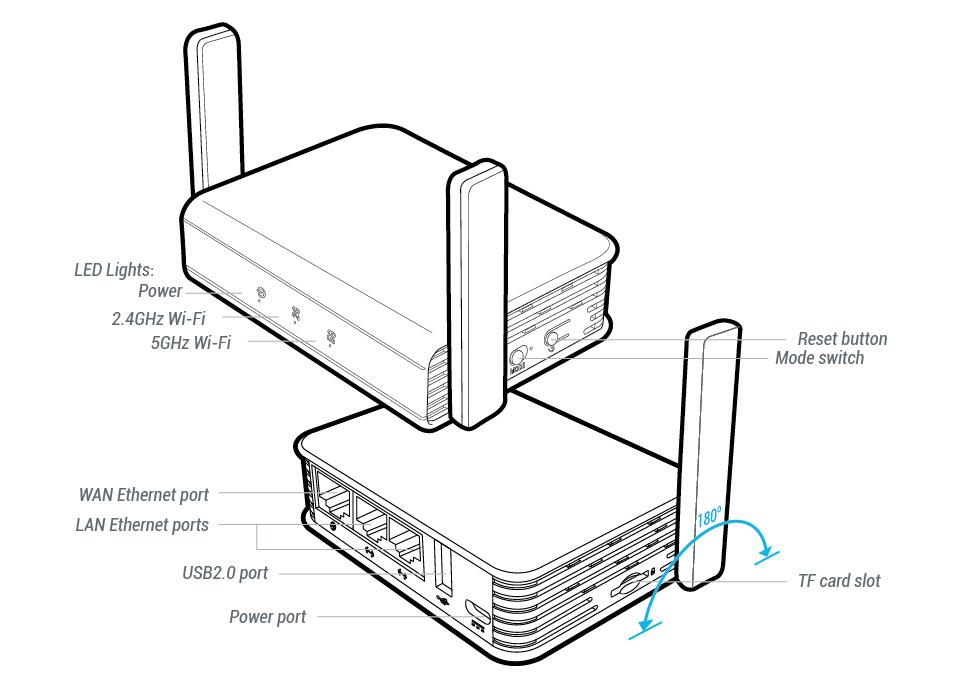
2. Connect the power to the router and wait about 2 minutes for the router to fully boot up.
3. Connect your computer, phone, or tablet to the GL.iNet router via wireless (FlashRouter24 / FlashRouter50) or via ethernet cable to one of the LAN ports on the router.
The FlashRouter WiFi password is printed on the sheet that came with the router and is set to Wireless#[First 5 characters of your router MAC]. The router MAC can be found on the bottom of your router if you cannot locate the sheet. For e.g. if your MAC is 1459C07E70A8 then your WiFi password is Wireless#1459C
Be sure to capitalize the W.
4. Once connected via wireless or ethernet on your device open your browser and go to 192.168.8.1
5. Enter openwrt as the admin password to access the GL.iNet firmware settings.
6. Verify that your Flint/Slate GL.iNet router is receiving a WAN IP Address and webpages are loading while connected to its network.
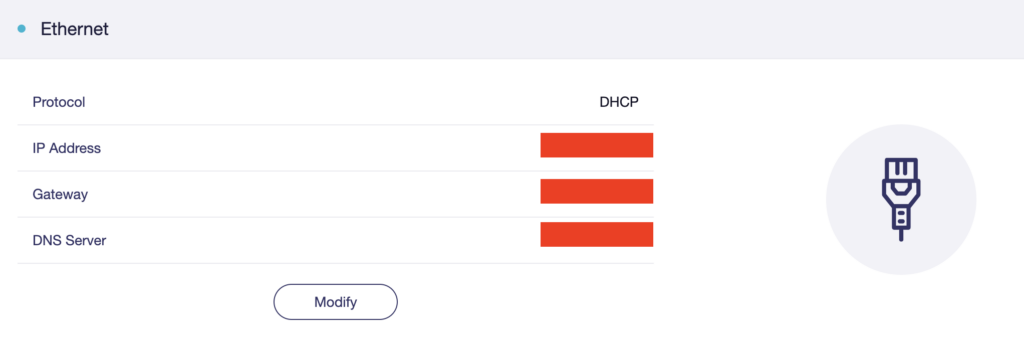
GL.iNet Access Router Settings and Firmware Upgrade
Follow this guide to upgrade the firmware of your GL.iNet FlashRouter.
1. Connect your computer, phone, or tablet to the GL.iNet router via wireless (FlashRouter24 / FlashRouter50) or via ethernet cable to one of the LAN ports on the router.
The FlashRouter WiFi password is printed on the sheet that came with the router and is set to Wireless#[First 5 characters of your router MAC]. The router MAC can be found on the bottom of your router if you cannot locate the sheet. For e.g. if your MAC is 9483C07E70A8 then your WiFi password is Wireless#9483C
Be sure to capitalize the W.
2. Once connected via wireless or ethernet on your device open your browser and go to 192.168.8.1
3. Enter openwrt as the admin password to access the GL.iNet firmware settings. Newer devices may have a different admin password set as openwrt1 or glopenwrt1
3. If a new firmware upgrade is available the router settings will either display a banner when you first access the router or a header. Click Install or the Upgrade arrow depending on which appears for you.


4. Make sure the Keep Settings toggle is pushed to the right so your router does not get reset. Click the Install button to begin the firmware upgrade.

5. The firmware update should take about 2-3 minutes. You may need to reconnect your wireless devices after the network comes back up in your available networks.
Flint/Slate GL.iNet Change Wi-Fi name and password
Follow this guide to change the Wi-Fi name and password on your GL.iNet FlashRouter.
1. Connect your computer, phone, or tablet to the GL.iNet router via wireless (FlashRouter24 / FlashRouter50) or via ethernet cable to one of the LAN ports on the router.
The FlashRouter WiFi password is printed on the sheet that came with the router and is set to Wireless#[First 5 characters of your router MAC]. The router MAC can be found on the bottom of your router if you cannot locate the sheet. For e.g. if your MAC is 1459C07E70A8 then your WiFi password is Wireless#1459C
Be sure to capitalize the W.
2. Once connected via wireless or ethernet on your device open your browser and go to 192.168.8.1
3. Enter openwrt as the admin password to access the GL.iNet firmware settings.
4. Click Wireless.
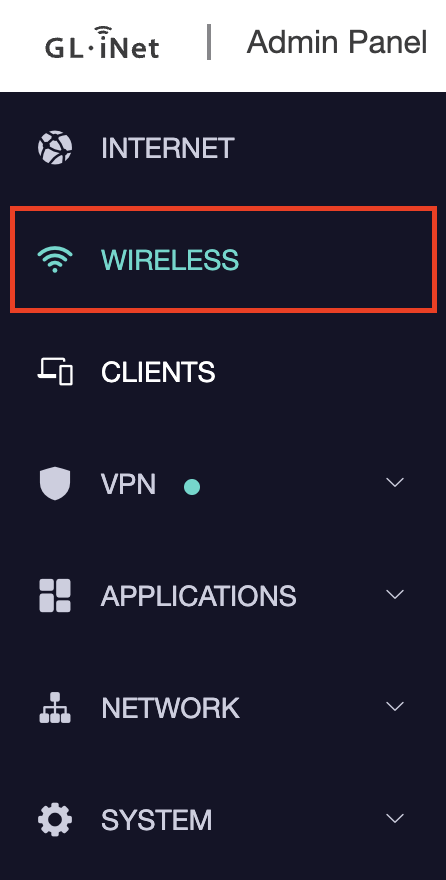
5. Click Modify under the 5GHz or 2.4GHz band.
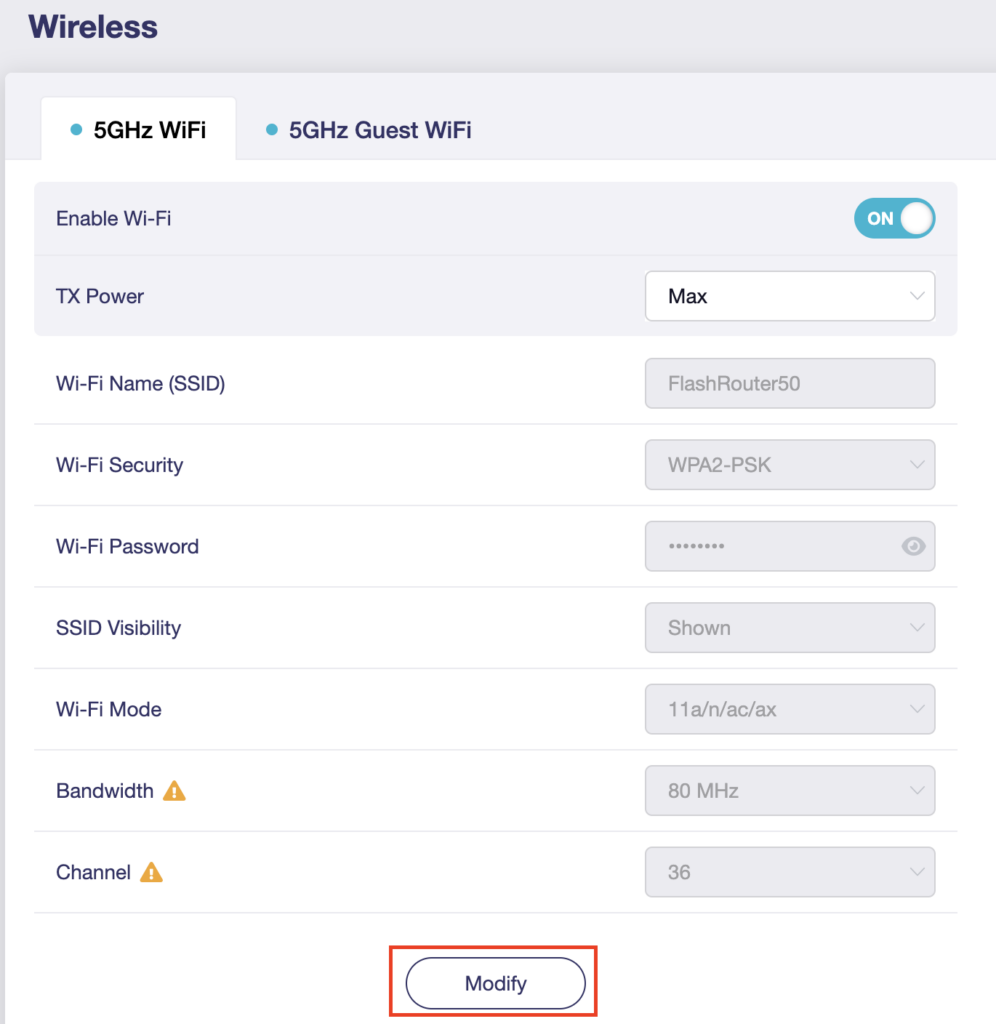
The 5GHz and 2.4GHz information must be changed at separate times. Keep in mind that if you are connected to wireless when changing one band you may need to reconnect with the new info you set to be on the network again to make changes to the other band.
6. Change the Wi-Fi Name (SSID) and Wi-Fi Password fields to what you want to use. The SSID should be unique and NOT a duplicate of an existing network. Click Apply.
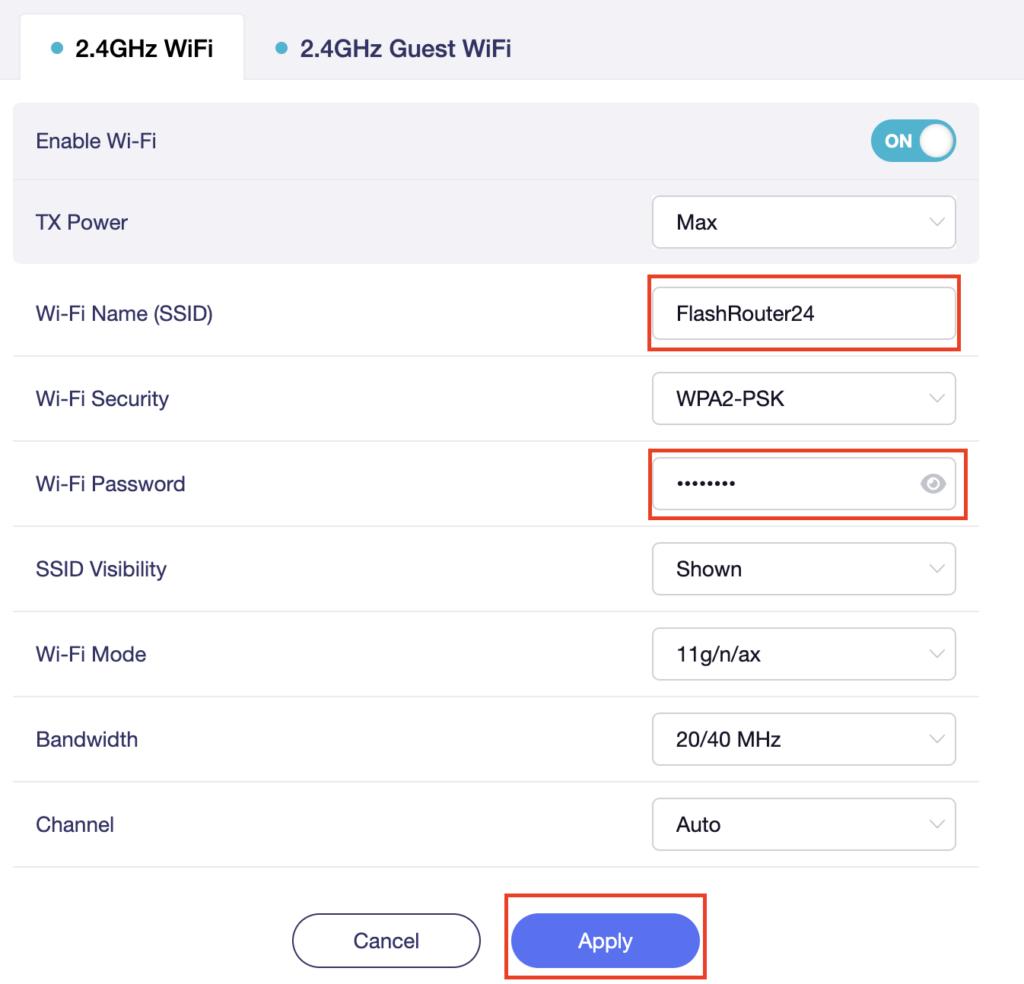
7. Connect your devices to the new wireless network.
Flint/Slate GL.iNet Disable Wi-Fi
Follow this guide to disable Wi-Fi network on your GL.iNet FlashRouter.
1. Connect your computer, phone, or tablet to the GL.iNet router via wireless (FlashRouter24 / FlashRouter50) or via ethernet cable to one of the LAN ports on the router.
The FlashRouter WiFi password is printed on the sheet that came with the router and is set to Wireless#[First 5 characters of your router MAC]. The router MAC can be found on the bottom of your router if you cannot locate the sheet. For e.g. if your MAC is 1459C07E70A8 then your WiFi password is Wireless#1459C
Be sure to capitalize the W.
2. Once connected via wireless or ethernet on your device open your browser and go to 192.168.8.1
3. Enter openwrt as the admin password to access the GL.iNet firmware settings.
4. Click Wireless.
5. Click Modify under the 5GHz or 2.4GHz band.
The 5GHz and 2.4GHz bands must be disabled at separate times. Keep in mind that if you are connected to wireless when disabling one band you may need to reconnect with the other band to disable it. Also make sure you have a device that has ethernet capabilities so you can still access the settings with wireless disabled.
6. Set the Enable Wi-Fi toggle to the OFF position and click Apply.
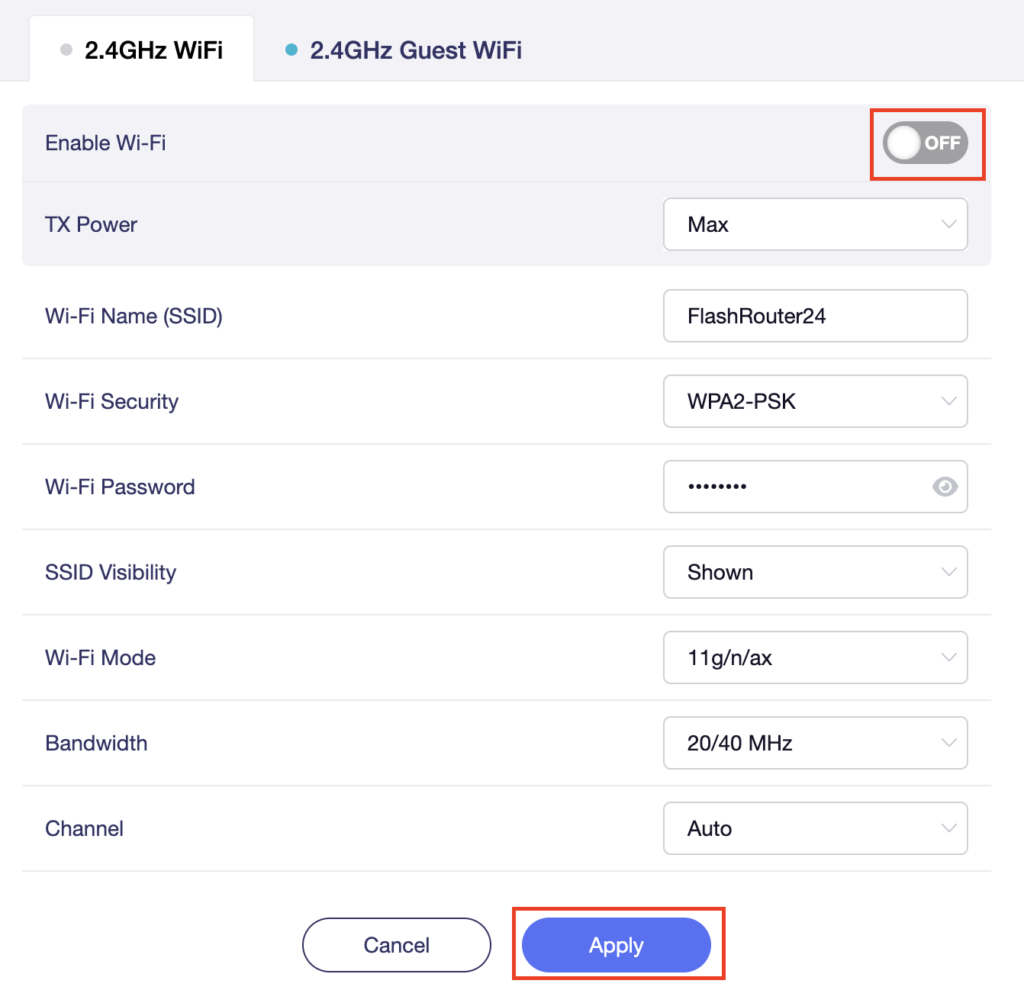
Flint/Slate GL.iNet Guest Network Setup
Follow this guide to setup a Guest Network on your GL.iNet FlashRouter. Devices connected to the guest network will be on a separate subnet and will not have access to the router settings or be able to talk to devices on the main network.
1. Connect your computer, phone, or tablet to the GL.iNet router via wireless (FlashRouter24 / FlashRouter50) or via ethernet cable to one of the LAN ports on the router.
The FlashRouter WiFi password is printed on the sheet that came with the router and is set to Wireless#[First 5 characters of your router MAC]. The router MAC can be found on the bottom of your router if you cannot locate the sheet. For e.g. if your MAC is 1459C07E70A8 then your WiFi password is Wireless#1459C
Be sure to capitalize the W.
2. Once connected via wireless or ethernet on your device open your browser and go to 192.168.8.1
3. Enter openwrt as the admin password to access the GL.iNet firmware settings.
4. Click Wireless.
5. Click 5GHz Guest Wi-Fi or 2.4GHz Guest Wi-Fi.
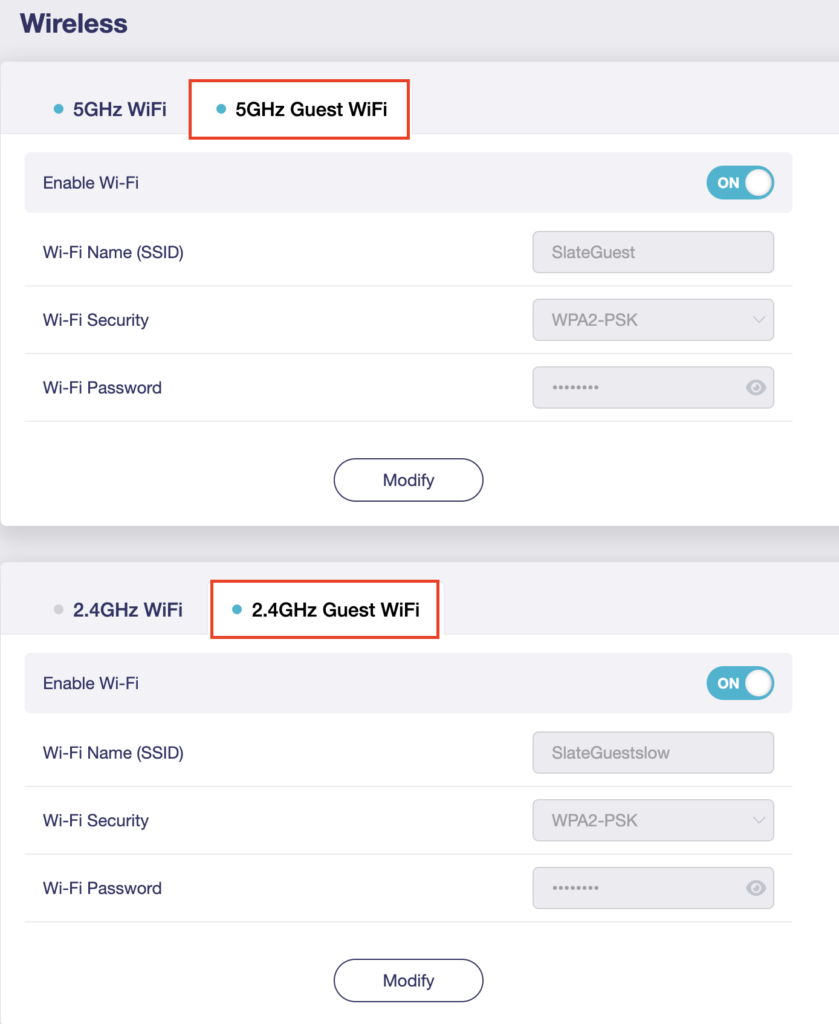
6. Click Modify.
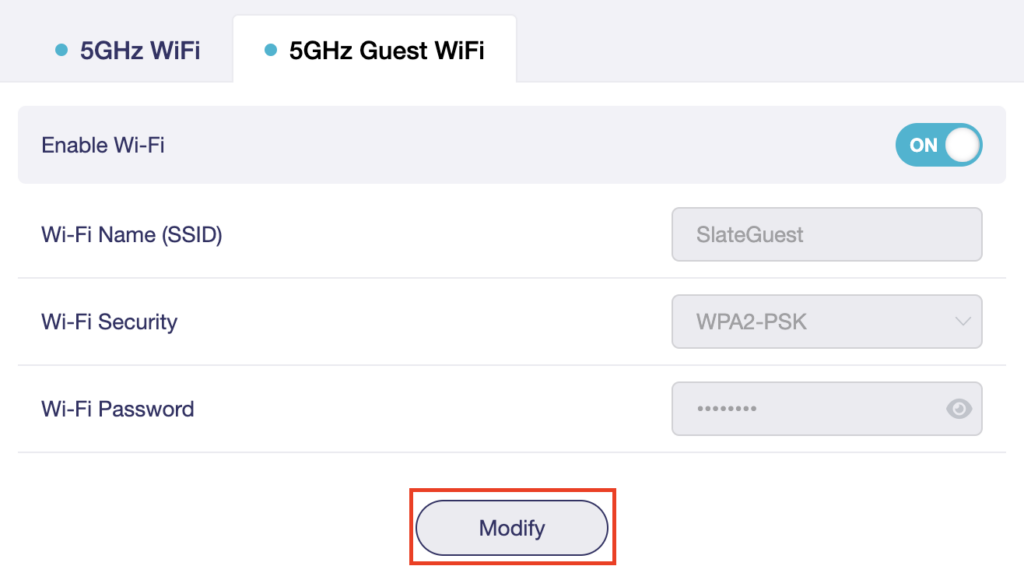
7. Set the Enable Wi-Fi toggle to the ON position.
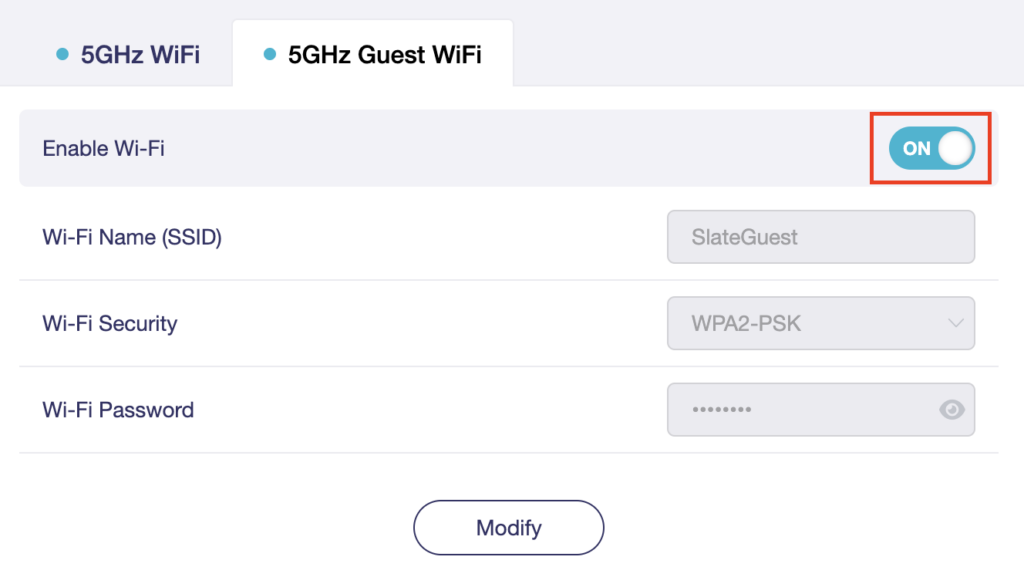
8. Change the Wi-Fi Name (SSID) and Wi-Fi Password fields to what you want to use. The SSID should be unique and NOT a duplicate of an existing network. Click Apply.
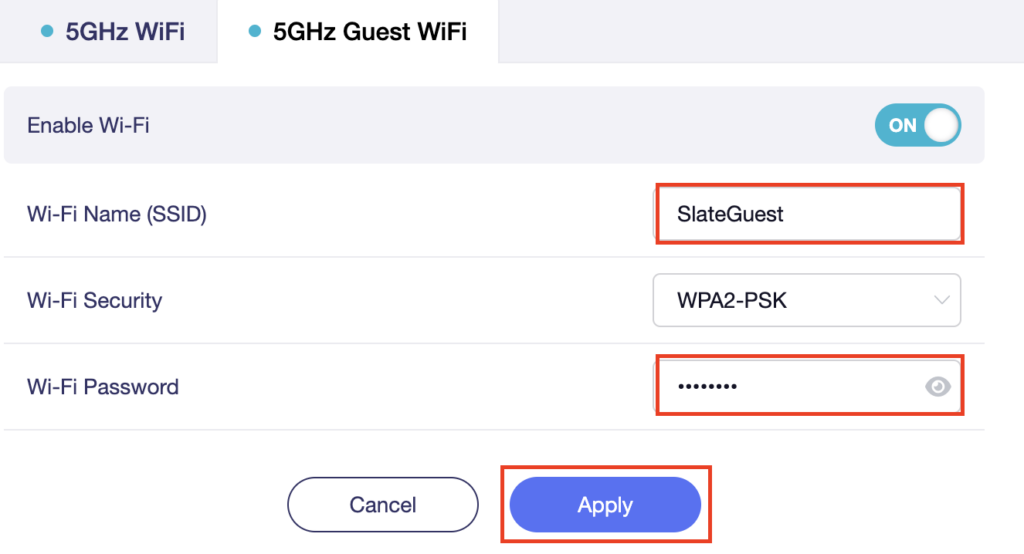
9. Connect your devices to the new guest wireless network.