• Skip to primary navigation
  • Skip to main content
  • Skip to primary sidebar
  • Skip to footer

FlashRouters Support Portal

Prioritizing Privacy

  • SETUP GUIDES
    • Privacy Hero Router Setup Guide
    • ASUS-WRT Router Setup Guide
    • AsusWRT-Merlin Router Setup Guide
    • DD-WRT Router Setup Guide
    • ExpressVPN Router Setup Guide
    • GL.iNet Router Setup Guide
    • Roqos Core Router Setup Guide
  • TROUBLESHOOTING
    • Router Access
    • WiFi Connectivity
    • Internet Connection Issues
    • General VPN Issues
    • DD-WRT Firmware
    • TeamViewer Remote Support
  • FAQs
    • Router FAQs
    • VPN FAQs
    • Warranty and Returns FAQs
    • Sales FAQs
    • Shipping FAQs
    • Service Plan FAQs
  • Show Search
Hide Search

Search Results for: user password n

Privacy Hero Activation and Setup

TeamFlashRouters · Feb 8, 2023 ·

Follow this article when you receive your new Privacy Hero router to create your Privacy Hero account, connect your Privacy Hero to the Internet, and customize your network so it is ready to use.

Your Privacy Hero router uses Cloud Based router management which means you can access the router settings from anywhere on any device that has an internet connection. You can follow these steps while connected to your phone or your other Wi-Fi network.

Create your Privacy Hero account

1. From any device that has a browser such as a computer, smartphone, or tablet visit app.privacyhero.com

App.PrivacyHero.com

2. Select Create Account.

Privacy Hero create Account

3. Enter the Email address you want to set for your Privacy Hero account. This will be your login to the Privacy Hero settings moving forward. Click Create Account.
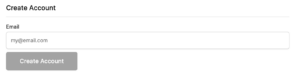
Privacy Hero Enter account email

4. Go to your Email inbox and check for an email from Privacy Hero and click the Confirm email address link. This email may be in your Promotions or Spam inbox if it is not appearing in your main inbox.
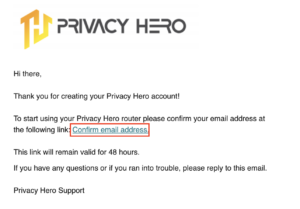
Privacy Hero Confirm Email

5. Enter the password that you want to use for your Privacy Hero account. Be sure to note this in a secure location so you do not forget. Click Submit.
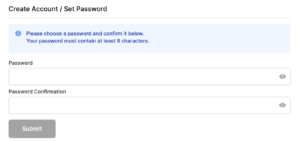
Privacy Hero create password

6. You have now created your Privacy Hero account. You will use this login to access the Privacy Hero router settings.

Activate your Privacy Hero Internet and setup Wi-Fi

1. You will then be taken to the Router Activation steps. Connect the ethernet cable that the Privacy Hero came with from an open Ethernet port on your ISP modem or other router to the WAN/Internet (blue) port of the Privacy Hero.

Then power the Privacy Hero device on by connecting the power supply. This is shown in the video on the page as well. Wait about a minute or so for the Privacy Hero router to fully boot up and then click I’m Connected.
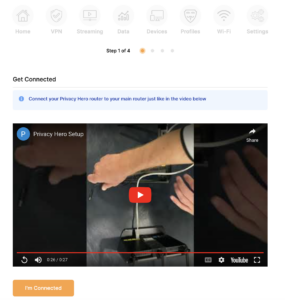
Wire Up Privacy Hero

2. The next page may say Router Found or ask you to enter the Activation Code. If it asks for the Activation Code that will be the code printed on the bottom of the Privacy Hero. Enter this code and click Next.
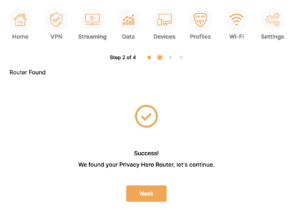
Privacy Hero Router Found

3. Set the Wi-Fi name and password for connecting your devices to the Privacy Hero network. Make sure it is not a duplicate name of an existing Wi-Fi network. Click Next.
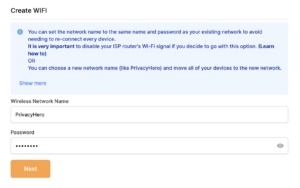
Privacy Hero Set wifi name and password

4. To activate your 1 Year NordVPN code:

Click on Claim NordVPN 1 Year Code Now
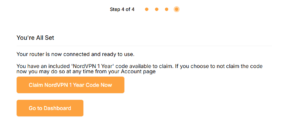
NordVPN Claim Code

Go to the Account section of your router settings.

Copy the NordVPN code shown under Claim NordVPN 1 Year Code.
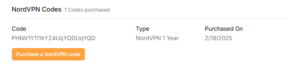
PH Nord Code

Go to the NordVPN activation page.

This code can be used with a new or existing NordVPN account.

NordVPN Activate Page

5. You are now all set to begin joining your devices to the new Privacy Hero network with the Wi-Fi name and password you entered and setting up some of the Privacy Hero features.

TROUBLESHOOTING

Still having issues? Visit the VPN Troubleshooting section.

Troubleshoot Here

Roqos Core Internet Setup and Activation

TeamFlashRouters · Mar 15, 2022 ·

Follow this article when you receive your new Roqos Core router to create your Roqos account, connect your Roqos to the Internet, and customize your network so it is ready to use.

Create your Roqos account

1. From any device that has a browser such as a computer, smartphone, or tablet visit login.roqos.com

Roqos Login URL

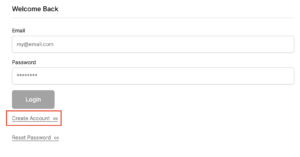
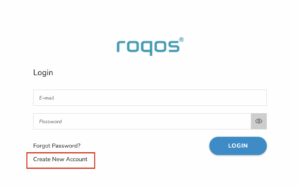
2. Select Create Account.

Roqos Create Account

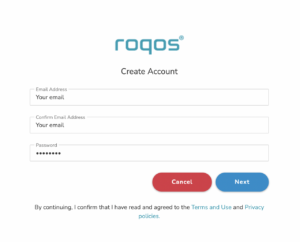
3. Enter the Email address and password you want to set for your Roqos account. This will be your login to the Roqos settings moving forward. Click Next.

Roqos Enter Email

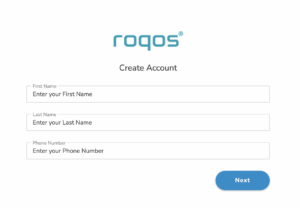
4. Enter the name and phone number you want associated with your Roqos. Click Next.

Roqos Enter Name and Number

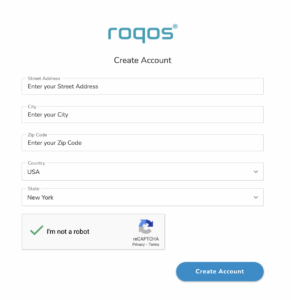
5. Enter the address where your Roqos is located. This section may require a CAPTCHA to be completed to authenticate you are human. Click Create Account.

Roqos Enter Address

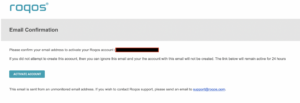
6. You have now created your Roqos account. In a new tab proceed to open the email from Roqos and click the Activate account button.

Roqos email activation

Activate your Roqos Internet

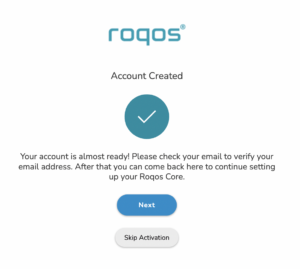
1. From the Account created page click Next to begin the Internet Setup of the Roqos.

Roqos Account Created

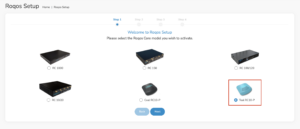
2. Select the Roqos model Teal RC10-P. Click Next.

Roqos Model

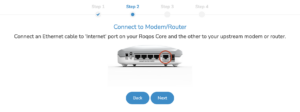
3. Connect the ethernet cable that came with your Roqos from the port labeled INTERNET on the back of your Roqos to an open ethernet port on your ISP Modem or other router in your network.

Roqos Wiring

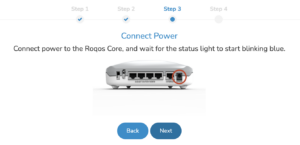
4. Then connect the power adapter that came with the Roqos to the back of the Roqos. Wait for the light on the Roqos to begin blinking blue. Once your see the blinking blue lights on the Roqos click Next.

Roqos Power On

If your Roqos lights does not begin blinking blue after a long while please see the steps in this article and contact us.

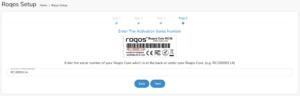
5. Enter in the Roqos serial number found on the bottom of the device exactly as it appears there. Click Next.

Roqos Activation Code

Setup your Roqos Network

1. Enter in a name that you would like to call the Roqos. This is just the Roqo’s device name and it is not the WiFi network name. Click Next.

Roqos Device Name

2. Select the Time Zone of your actual location from the dropdown. Click Next.

Roqos Time Zone

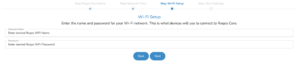
3. Set the WiFi name and password for the Roqos. The WiFi name should be unique and not a duplicate of an existing wireless network. This will be the name that appears in your wireless devices available network list and the password to join the devices to the network. Click Next.

Roqos Set WiFi Name and Password

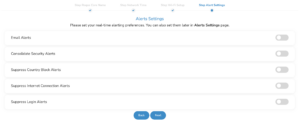
4. Select the custom alert settings as you best see fit using the toggle switches. We typically recommend having the first two toggles selected for Email Alerts and Consolidate Security Alerts. Click Next.

Begin connecting your devices to the Roqos network

You are now done setting up your Roqos to connect to the Internet and can begin joining your wireless devices to the Roqos network and exploring the Roqos Core Features.

Roqos Setup Done

TROUBLESHOOTING

Still having issues? Visit the VPN Troubleshooting section.

Troubleshoot Here

Privacy Hero Router Setup Guide

Privacy Hero Routers

Quick Start Guide for Privacy Hero FlashRouters

Find setup guides, FAQs and troubleshooting tips for Privacy Hero FlashRouters.

Privacy Hero 2

Internet Setup

  • Privacy Hero Activation and Setup
  • Privacy Hero Access Router Settings
  • Privacy Hero Creating User Profiles and Adding Devices to Profiles

WiFi Setup

  • Privacy Hero Activation and Setup
  • Privacy Hero Change Wi-Fi Name and Password
  • Privacy Hero Change Wireless Channel
  • Privacy Hero Disable Wi-Fi

VPN Setup

  • NordVPN Setup Guide for Privacy Hero
  • Surfshark VPN Setup Guide for Privacy Hero
  • IPVanish VPN Setup Guide for Privacy Hero
  • ProtonVPN Setup Guide for Privacy Hero
  • ExpressVPN Setup Guide for Privacy Hero
  • Private Internet Access VPN Setup Guide for Privacy Hero
  • Privacy Hero VPN Setup Guide for Privacy Hero
  • Privacy Hero VPN Kill Switch Setup

Privacy Hero Features

  • Privacy Hero Activation and Setup
  • Privacy Hero VPN Kill Switch Setup
  • Privacy Hero Bypass certain devices from VPN
  • Privacy Hero Streaming Relocation
  • Privacy Hero Adblocking Malware and Phishing Prevention Setup
  • Privacy Hero Creating User Profiles and Adding Devices to Profiles
  • Privacy Hero Safe Surf
  • Privacy Hero Bedtime Settings (Internet Scheduler)

Search Support Articles

Troubleshooting

  • Privacy Hero Change VPN Providers

More Ways to Get Help

GET IN TOUCH

BUY SUPPORT
BROWSE FAQs

Privacy Hero Bedtime Settings (Internet Scheduler)

TeamFlashRouters · Apr 3, 2023 ·

Your Privacy Hero router uses Cloud Based router management which means you can access the router settings from anywhere on any device that has an internet connection. You can follow these steps while connected to your phone, other Wi-Fi network, or the Privacy Hero network.

The Bedtime settings feature allows users to schedule when internet access will be turned off for specific user profiles. All devices assigned to this profile will have these rules applied.

1. From any device that has a browser such as a computer, smartphone, or tablet visit app.privacyhero.com

App.PrivacyHero.com

2. Enter your Privacy Hero account email and password. Click Login.

Privacy Hero Access Settings

If you have not created your Privacy Hero account yet please follow these instructions.

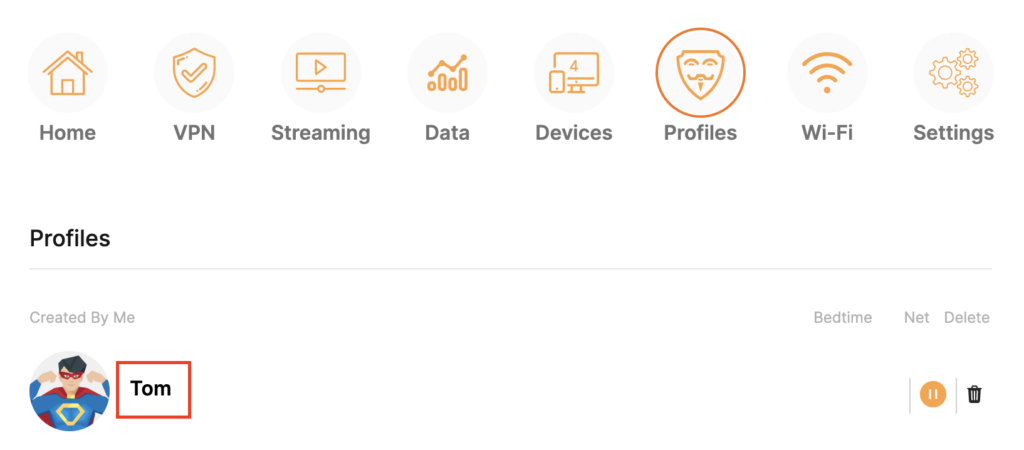
3. Click the Profiles symbol.

Privacy Hero Profiles

4. Click the name of the User Profile.

Privacy Hero Select Profile

5. Click Schoolnights or Weekends depending on which you need to set rules for.

Privacy Hero Bedtime School Nights Weekends

6. Select the time that you want the Internet to turn off and the days you want this rule to apply to. Click Save.

Privacy Hero Set Bedtime

7. Set the Bedtime toggle to On.

Privacy Hero Enable Bedtime

TROUBLESHOOTING

Still having issues? Visit the VPN Troubleshooting section.

Troubleshoot Here

IPVanish AsusWRT OpenVPN Setup

TeamFlashRouters · Apr 29, 2024 ·

Preparing for IPVanish AsusWRT Setup

Download your IPVanish .ovpn file

If you are not already an IPVanish user Sign Up Now.

1. Log in to your account on the IPVanish website.

IPVanish login

2. Successfully log in with your account information then go to IPVanish .ovpn file page.

3. Click on the .ovpn file for the server location you want to use to dowloand the .ovpn file. Do not open this file.

IPVanish download ovpn

AsusWRT Router Setup for IPVanish

Login to AsusWRT firmware settings in a browser on any computer or smart device connected to the AsusWRT FlashRouter’s network.

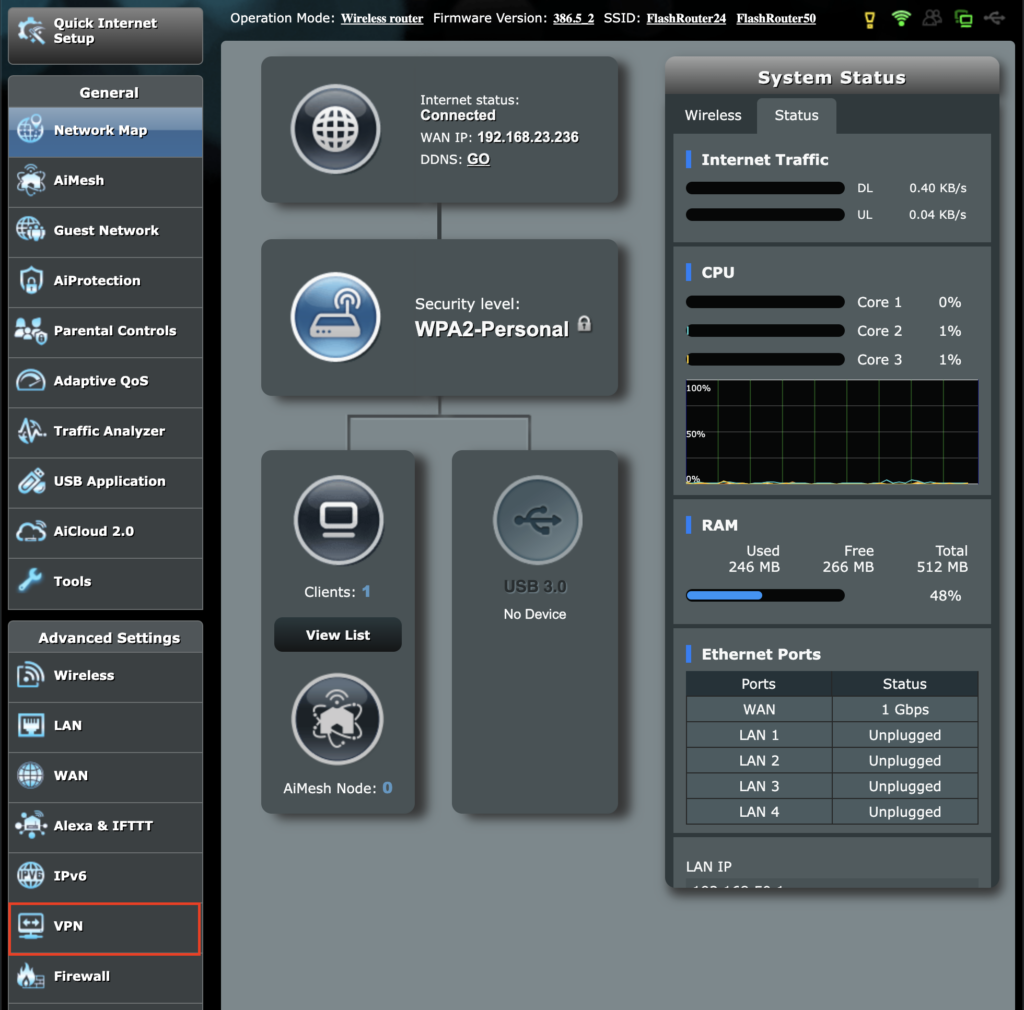
1. Navigate to the VPN tab.

Merlin VPN Tab

2. Navigate to the VPN Fusion tab.

Asus VPN Fusion

3. Click Add profile.

Asus Add profile

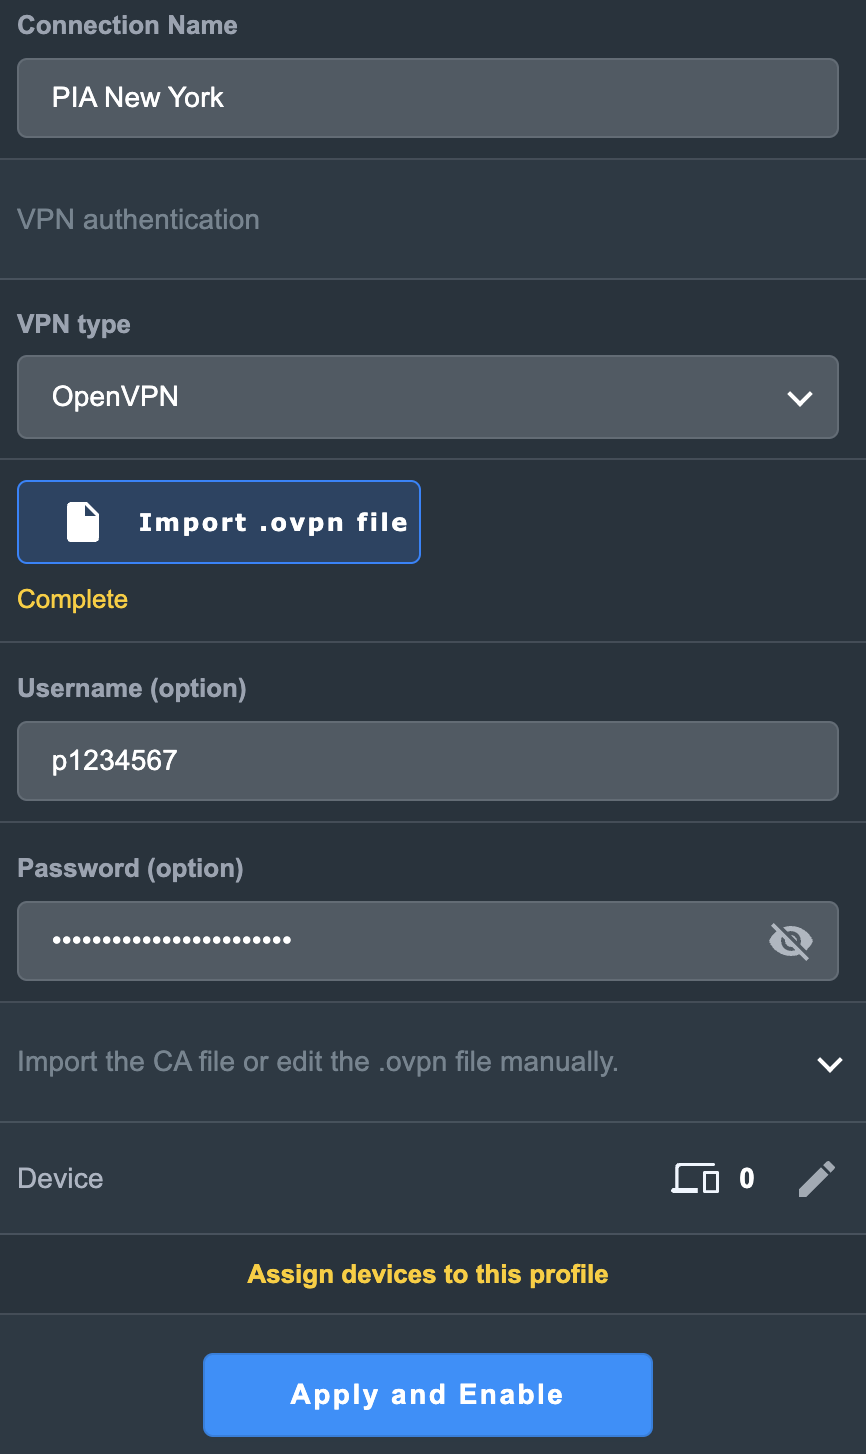
4. In the Connection Name field enter in the name you’d like to use for this OpenVPN Client profile. We typically advise entering in the location or server number here. Our example server was in New York so I have entered in IPVanish New York.

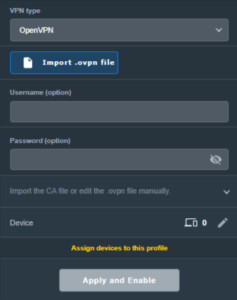
5. In the VPN Type dropdown select OpenVPN.

6. Click Import .ovpn file and select the .ovpn file you downloaded earlier. Then click Upload.

7. In the Username and Password fields paste in the IPVanish email and password you use to successfully login to your IPVanish website account.

8. Click Apply and Enable at the bottom of the page.

Asus IPVanish profile

If you only want certain devices to connect to the OpenVPN Client profile you are setting up instead of all the devices connected to the FlashRouter’s network click into the profile and disable Apply to all devices. Then click Devices and select the devices that you want to connect to VPN.

Asus VPN devices
Asus VPN select devices

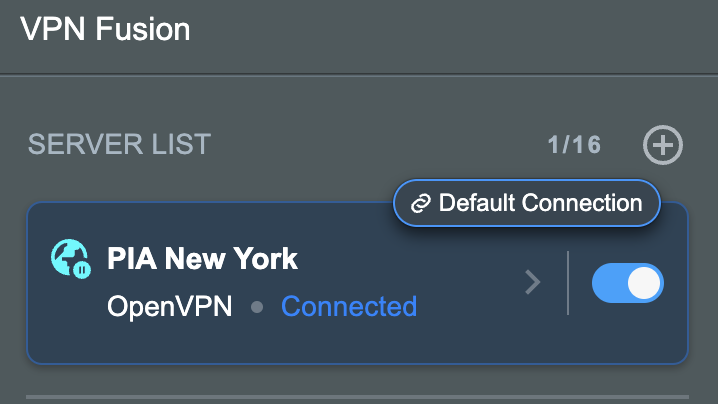
9. At the top of the page set the Service State toggle to ON to activate the VPN connection.

Asus IPVanish Connected

Verify a successful IPVanish connection

  1. You should now see a CONNECTED message.
  2. Visit IPVanish’s IP Check to verify your new IP address and virtual location.

In some cases you may notice that the location is not showing the same location as the server you have input in your router settings; this is because geo tracking tools are often tricked by VPN connections. As long as you see an IP address that is not the same as your normal Internet IP address then you are indeed connected to IPVanish.

How to change the IPVanish server

  1. Follow the steps at the top of the page to obtain a new .ovpn file.
  2. Then proceed with the settings same as initial setup.

TROUBLESHOOTING

Still having issues? Visit the VPN Troubleshooting section.

Troubleshoot Here

Service Plan FAQs
admin · May 25, 2021 ·

Service Plan FAQs

Is the service plan a one time purchase or does it renew?

All FR service plans automatically renew on a quarterly or annual basis based on the term initially purchased. A reminder e-mail will be sent one week prior to renewal. In your FlashRouter account panel, you can cancel the plan at any time to stop any further renewals.

What is included with a FlashRouter?

  • On-demand Installation of enhanced firmware and our exclusive FlashRouters VPN Privacy App.
  • Custom setup guide.
  • Power cord and an ethernet cable.
  • Individual VPN Account Setup/Pre-configuration (On Request)
  • 1 year open source hardware warranty.
  • 30 day satisfaction guarantee.
  • Initial basic setup assistance via e-mail. For any advanced setups/configurations, live chat or remote assistance, a service plan purchase is required.

Does the service plan include a VPN subscription?

A subscription to a VPN does not come with a FlashRouter or Service plan. If you are planning to use a VPN, you would need to sign up for one separately, directly from a provider.

Need assistance in finding a VPN Provider? Please visit our recent VPN Provider Best Seller List.

Plug and Play VPN Support

Unlike other VPN Router providers, FlashRouters is proud to offer free VPN service integration with any purchase.

To receive a plug and play with VPN device, you will need to provide our team with the credentials from your VPN provider subscription.

IMPORTANT NOTE: This is not required but recommended for users who wish to have the simplest, most seamless experience when the FlashRouter arrives. You can always change the password when the device arrives if you wish as well.

Shows what to look for when you want to preconfigure your router.

To have your router VPN pre-configured:

  1. Select Yes from the “Want Your Router Preconfigured?” on the Payment Page during check out.
  2. Select your VPN provider. If you don’t see your VPN listed select “Other” and you will see an additional field to input who your provider is.
  3. Enter your your VPN username and password
  4. For ExpressVPN Firmware Routers there will be an additional box for your activation code.

Please note:  If you do not enter a server location request in “Order Comments”, we will automatically start the device with the closest/optimal server for the location we are shipping the device by default. A location has to be added to the initial configuration for plug and play encryption security to occur on the device.

Do I have to buy a service plan?

Our routers are priced for the custom upgrades performed at our warehouse, testing expenses and keeping the FlashRouter App update to date.

Our service plan has three levels as an optional add-on with your purchase to get continued direct assistance from our team. This is especially useful to customers who are less tech savvy and want direct access to our support team to make sure their network is running exactly how they desire. Here is how these plans differ

Bronze – Basic E-mail Support
Silver – E-mail and Live Chat Support.
Gold – E-mail, Live Chat, and Remote One-on-One Sessions

Each situation and user has different needs and expertise. Our team of US-based support agents are highly trained specialists in VPN and DD-WRT router setup. From firmware updates to networking configuration/troubleshooting,solutions, the purpose of our Service Plans is to help our customers in whatever level they deem necessary.

Does FlashRouters offer phone support?

At this time, we do not provide phone support with our service plans. We have tested phone support for networking troubleshooting in the past but have found that on average caused us to help less customers in a less efficient manner. However, with a purchase of a Gold Service Plan, customers can schedule 1-on-1 remote support sessions via Teamviewer with our engineers and they will provide a hands-on, personal solution, to any problems you may be facing.

Do I need a Service Plan for a firmware upgrade?

Firmware upgrades are free of charge to any FlashRouter customer!

You can visit our support center and select your specific router model to upgrade your firmware based on the recommendations provided.

If you want the help of our Support Team to assist in this upgrade, you can always sign up for our Gold Service Plan and schedule a 1-on-1 Teamviewer session in which our trained engineers will take care of the upgrade for you!

What does the warranty cover?

Our complimentary 1-year hardware warranty does not include tech support outside. If your router suffers hardware failure within 365 days from the date you received the unit, then we will gladly replace your router with another fully tested one. For more information regarding our warranty and return policy, please check out our warranty and return section.

Can I purchase a router without a service plan and subscribe later?

Yes, you may purchase a service plan at any time. However, we can’t guarantee any pricing, or apply any previously offered discounts or specific features at that later date.

PureVPN Manual OpenVPN Setup

TeamFlashRouters · Apr 16, 2019 ·

Preparing for Manual PureVPN Setup

Verify your PureVPN login information

If you are not already an PureVPN user Sign Up Now.

Log in to your account on the PureVPN website.

PureVPN Website Login

Navigate to the Home page and note the VPN username on this page. You will need this specific username later on in the configuration process.
Ex: purevpn0s1234567

PureVPN Server Addresses

View a full list of PureVPN servers.

United States

Miami:
usfl1-ovpn-udp.pointtoserver.com

Seattle:
ussa-ovpn-udp.pointtoserver.com

Houston
:
ustx1-ovpn-tcp.pointtoserver.com

Georgia
:
usga1-ovpn-udp.pointtoserver.com

New Jersey
:
usnj1-ovpn-udp.pointtoserver.com

Washington
:
uswdc1-ovpn-udp.pointtoserver.com

Chicago
:
usil1-ovpn-udp.pointtoserver.com

Phoenix
:
usphx1-ovpn-udp.pointtoserver.com

Los Angeles
:
usla1-ovpn-udp.pointtoserver.com

Virginia
:
vlbr-usvc1-ovpn-udp.pointtoserver.com

San Francisco
:
vlsa-ussf1-ovpn-udp.pointtoserver.com

New York
:
usny1-ovpn-udp.pointtoserver.com

Ohio
:
vleu-usoh1-ovpn-udp.pointtoserver.com

United Kingdom

London:
ukl1-ovpn-udp.pointtoserver.com

Gosport:
ukg1-ovpn-udp.pointtoserver.com

Maidenhead:
ukm1-ovpn-udp.pointtoserver.com

Manchester
:
vlus-uk-man1-ovpn-udp.pointtoserver.com

Leicester
:
vlap-ukle1-ovpn-udp.pointtoserver.com

DD-WRT Router Setup for PureVPN

Navigate to Services > VPN

Enter PureVPN settings

OpenVPN Client

Start OpenVPN Client

If you wish to disable your VPN connection simply set this to Disable at any time and click Apply Settings.

Server IP/Name

Copy and paste the server you would like to connect to from the server list above. Be sure there are no extra spaces or characters.

If you wish to change PureVPN connection locations, THIS IS THE ONLY FIELD YOU NEED TO CHANGE.

Port

53

Tunnel Device

TUN

Tunnel Protocol

UDP

Encryption cipher

AES-256-CBC

Hash Algorithm

SHA1

Userpass Authentication

Enable

Username

Enter the Username you noted from the Home page above.
Ex: purevpn0s1234567

Password

Enter the Password you successfully logged in to your PureVPN account with.

Advanced Options

Enable

TLS Cipher

None

LZO Compression

Adaptive

NAT

Enable

Firewall Protection

Enable

TLS Auth Key

-----BEGIN OpenVPN Static key V1-----
e30af995f56d07426d9ba1f824730521
d4283db4b4d0cdda9c6e8759a3799dcb
7939b6a5989160c9660de0f6125cbb1f
585b41c074b2fe88ecfcf17eab9a33be
1352379cdf74952b588fb161a93e13df
9135b2b29038231e02d657a6225705e6
868ccb0c384ed11614690a1894bfbeb2
74cebf1fe9c2329bdd5c8a40fe882062
4d2ea7540cd79ab76892db51fc371a3a
c5fc9573afecb3fffe3281e61d72e915
79d9b03d8cbf7909b3aebf4d90850321
ee6b7d0a7846d15c27d8290e031e951e
19438a4654663cad975e138f5bc5af89
c737ad822f27e19057731f41e1e254cc
9c95b7175c622422cde9f1f2cfd3510a
dd94498b4d7133d3729dd214a16b27fb
-----END OpenVPN Static key V1-----

Additional Config

tls-cipher “DEFAULT:@SECLEVEL=0”

Policy Based Routing

This field can be used for split VPN and Dual Gateway routing.

CA Cert

-----BEGIN CERTIFICATE-----
MIIEoTCCA4mgAwIBAgIJANysBdFD6U2oMA0GCSqGSIb3DQEBBQUAMIGRMQswCQYD
VQQGEwJISzELMAkGA1UECBMCSEsxETAPBgNVBAcTCEhvbmdLb25nMRAwDgYDVQQK
EwdQdXJlVlBOMQswCQYDVQQLEwJJVDEQMA4GA1UEAxMHUHVyZVZQTjEQMA4GA1UE
KRMHUHVyZVZQTjEfMB0GCSqGSIb3DQEJARYQbWFpbEBob3N0LmRvbWFpbjAeFw0x
NDA0MTAwNzI5NDlaFw0yNDA0MDcwNzI5NDlaMIGRMQswCQYDVQQGEwJISzELMAkG
A1UECBMCSEsxETAPBgNVBAcTCEhvbmdLb25nMRAwDgYDVQQKEwdQdXJlVlBOMQsw
CQYDVQQLEwJJVDEQMA4GA1UEAxMHUHVyZVZQTjEQMA4GA1UEKRMHUHVyZVZQTjEf
MB0GCSqGSIb3DQEJARYQbWFpbEBob3N0LmRvbWFpbjCCASIwDQYJKoZIhvcNAQEB
BQADggEPADCCAQoCggEBAJYqtUkQTlf/pHcGXuuII8S3pfI0fwFbs7l/1RP3nX3n
v1vyuvLi7h0jWsgJU0XM7LJywiRFJ8zsMLH7KZnIg7bscb50GY75WIq7C2NnWnnS
7zzyCCm2XD/2xZPym2lVRytpnWJbpemSS6Hdz7xI3q2FmixuBa1t5FeKsXfeaGGg
+ohwLvamnGHJYUYu3Nu0EWVzzy5wgT0c2C5jleGxl3kxRimD8FpnlAVdqyt0ib/f
f9XanaotSopIHUZmpYjT+udRC2+harlNKvOXYgDRl1mpimCvlzEWpZAo8dyBCxWl
xlBIT8OA8rimGi1XviknuOlWu2cGi13Ug8mCG0MjOQ0CAwEAAaOB+TCB9jAdBgNV
HQ4EFgQUt+1vJ2X2ho12PUDhdo2CsSHYXbYwgcYGA1UdIwSBvjCBu4AUt+1vJ2X2
ho12PUDhdo2CsSHYXbahgZekgZQwgZExCzAJBgNVBAYTAkhLMQswCQYDVQQIEwJI
SzERMA8GA1UEBxMISG9uZ0tvbmcxEDAOBgNVBAoTB1B1cmVWUE4xCzAJBgNVBAsT
AklUMRAwDgYDVQQDEwdQdXJlVlBOMRAwDgYDVQQpEwdQdXJlVlBOMR8wHQYJKoZI
hvcNAQkBFhBtYWlsQGhvc3QuZG9tYWluggkA3KwF0UPpTagwDAYDVR0TBAUwAwEB
/zANBgkqhkiG9w0BAQUFAAOCAQEAAhLQQmkKWJdyGqgMSKOWXSKN2WXTDjIdb9bK
Q8uHeq0LYCcPoRh8VYJg2X4UWR/KO9pKaG+iZJw4Jqz4GQJjjJLKHfsWwj790ay0
7U5KT08qmxFaxZUYn663H9b0+Zud1spTsTJjVe1eoRk6IDbbB4OMUzN9zyWEn6er
xi6llIAjQX1qtlBQasmTAbRtbSsCsZAxL2kXysULIdLrQP0iTgMQqqkv5zvpdEKN
3ciKCd8OHEhHOlAwA0/DNy3dg3Et0F2hNMDJhqMpxXsbKtGJ/rzGXQF2geEVzLZA
o42I1wBOSZLTX1fO1gl3gAGS9aYg5o31rrpBKzQewitJgIuc+Q==
-----END CERTIFICATE-----

CLICK APPLY SETTINGS

Leave all settings not mentioned above as their default setting.

Verify a successful PureVPN connection

Navigate to Status > OpenVPN

  1. You should now see a CONNECTED SUCCESS message.
  2. Visit PureVPN’s website to verify your new IP address, virtual location, and status as Protected at the top of the page.

In some cases you may notice that the location is not showing the same location as the server you have input in your router settings; this is because geo tracking tools are often tricked by VPN connections. As long as you see an IP address that is not the same as your normal Internet IP address then you are indeed connected to PureVPN.

Back up your settings

Navigate to Administration > Backup

  1. Click the Backup button.
  2. A file named nvrambak.bin will be saved to your computer.
  3. You can load nvrambak.bin to restore your settings in the event of a reset.

How to change the PureVPN server

  1. Copy the new PureVPN server address from the above server list.
  2. Paste the server into the Server IP/Name field.
  3. Click Apply Settings.

TROUBLESHOOTING

Still having issues? Visit the VPN Troubleshooting section.

Troubleshoot Here

OverPlay Manual OpenVPN Setup

TeamFlashRouters · Apr 16, 2019 ·

Preparing for Manual OverPlay Setup

Verify your OverPlay login information

Log in to your account on the OverPlay website.

OverPlay Server Addresses

View a full list of OverPlay servers.

United States

Ashburn:
iad-a01.wlvpn.com

Atlanta:
atl-a01.wlvpn.com

Chicago
:
chi-a01.wlvpn.com

Dallas
:
dal-a02.wlvpn.com

Las Vegas
:
las-c11.wlvpn.com

Los Angeles
:
lax-a01.wlvpn.com

Miami
:
mia-a01.wlvpn.com

New York
:
nyc-a01.wlvpn.com

Phoenix
:
phx-a01.wlvpn.com

Salt Lake City
:
slc-c01.wlvpn.com

San Jose
:
sjc-a01.wlvpn.com

Seattle
:
sea-a01.wlvpn.com

DD-WRT Router Setup for OverPlay

Navigate to Services > VPN

Enter OverPlay settings

OpenVPN Client

Start OpenVPN Client

If you wish to disable your VPN connection simply set this to Disable at any time and click Apply Settings.

Server IP/Name

Copy and paste the server you would like to connect to from the server list above. Be sure there are no extra spaces or characters.

If you wish to change OverPlay connection locations, THIS IS THE ONLY FIELD YOU NEED TO CHANGE.

Port

1194 for UDP
443 for TCP

Tunnel Device

TUN

Tunnel Protocol

UDP or TCP

Encryption cipher

AES-256-CBC

Hash Algorithm

SHA256

User Pass Authentication

Enable

Username

Enter the username that you use to login to the OverPlay website.  Make sure to add @overplay after your username.

Hint:  For example, if your OverPlay username is “flashrouters” enter “flashrouters@overplay” as your username.

Password

Enter the Password you successfully logged in to your OverPlay account with.

Advanced Options

Enable

TLS Cipher

None

LZO Compression

Adaptive

NAT

Enable

Firewall Protection

Enable

Policy Based Routing

This field can be used for split VPN and Dual Gateway routing.

CA Cert

-----BEGIN CERTIFICATE-----
MIIESDCCAzCgAwIBAgIJAKSqvk2CSdJGMA0GCSqGSIb3DQEBBQUAMHUxCzAJBgNV
BAYTAlVTMQwwCgYDVQQIEwNWUE4xDDAKBgNVBAcTA1ZQTjEMMAoGA1UEChMDVlBO
MQwwCgYDVQQLEwNWUE4xDDAKBgNVBAMTA1ZQTjEMMAoGA1UEKRMDVlBOMRIwEAYJ
KoZIhvcNAQkBFgNWUE4wHhcNMTMwNDI1MDIzMjQ3WhcNMjMwNDI3MDIzMjQ3WjB1
MQswCQYDVQQGEwJVUzEMMAoGA1UECBMDVlBOMQwwCgYDVQQHEwNWUE4xDDAKBgNV
BAoTA1ZQTjEMMAoGA1UECxMDVlBOMQwwCgYDVQQDEwNWUE4xDDAKBgNVBCkTA1ZQ
TjESMBAGCSqGSIb3DQEJARYDVlBOMIIBIjANBgkqhkiG9w0BAQEFAAOCAQ8AMIIB
CgKCAQEAyUr2BAz2gHGaXri6rWMpKqcvVTX3IOSLEfBWf1fb2zCwx0+GFMG258Yk
OCiQho/YOX58bJpssGI42OzZitSisTVpXNIBelzGUPdKgx0qURGgDW+7eOySJYCn
1EUncElJCHt1so0SbfdQpxA88VZMH9fFOKtLY5qHHi0drXm/wZy+zW7TfV5Lce04
6vv2M9I5/Ko4zZ5Vh6jTo2VrCQRw8goXB5NAdU5D76lVhWK4Zzt4woI8nRW5Ev3A
WEw5oX85j5B0TY9nEi5j0vNYBuMxf/GiLO8M8LCHPX0HYBiLDjZesJCvuG3vfwnA
Y5CJQqNjufpmnF3ivsaF0dGeo54kWQIDAQABo4HaMIHXMB0GA1UdDgQWBBQXnwHk
vpHSf/lMacKoKshAcGM2qTCBpwYDVR0jBIGfMIGcgBQXnwHkvpHSf/lMacKoKshA
cGM2qaF5pHcwdTELMAkGA1UEBhMCVVMxDDAKBgNVBAgTA1ZQTjEMMAoGA1UEBxMD
VlBOMQwwCgYDVQQKEwNWUE4xDDAKBgNVBAsTA1ZQTjEMMAoGA1UEAxMDVlBOMQww
CgYDVQQpEwNWUE4xEjAQBgkqhkiG9w0BCQEWA1ZQToIJAKSqvk2CSdJGMAwGA1Ud
EwQFMAMBAf8wDQYJKoZIhvcNAQEFBQADggEBADAbNIIHF5vtCA+69/oipQ6niZit
Q+mnCNX5bxiF4xtw9qOQ90vLDc/ocbAGGP4Sub3hEkOoQlv9DHH56HVq1g9+L/Y7
RoneRykZ+GSPj2NlkobrPA7ZxAsLdFwM9Y+Fkql7cAHHLUCKh7H1IKidhTDHPCUj
hs4ZstNRckPd6wxlGGOP/Yf5sVse3pJwa0HyMYhI8pdTVJIHnFSy9vTPjVf3oWiz
Trci0+SkYKQE//5pE5wsYe0uB5wvQJslq/eEWfczg0l9biwJxG/qwxsVBkRgw5q6
defHWGj1eucVyy9fxKMcX89gjstQZDmsINNtG1C78/+nYS65rqaBaq+rqpA=
-----END CERTIFICATE-----

CLICK APPLY SETTINGS

Leave all settings not mentioned above as their default setting.

Verify a successful VPN connection

Navigate to Status > OpenVPN

  1. You should now see a CONNECTED SUCCESS message.
  2. Visit OverPlay’s website to verify your new IP address and virtual location.

In some cases you may notice that the location is not showing the same location as the server you have input in your router settings; this is because geo tracking tools are often tricked by VPN connections. As long as you see an IP address that is not the same as your normal Internet IP address then you are indeed connected to OverPlay.

Back up your settings

Navigate to Administration > Backup

  1. Click the Backup button.
  2. A file named nvrambak.bin will be saved to your computer.
  3. You can load nvrambak.bin to restore your settings in the event of a reset.

How to change the OverPlay server

  1. Copy the new OverPlay server address from the above server list.
  2. Paste the server into the Server IP/Name field.
  3. Click Apply Settings.

TROUBLESHOOTING

Still having issues? Visit the VPN Troubleshooting section.

Troubleshoot Here

ProtonVPN Setup Guide for GL.iNet Routers

Dave · Mar 23, 2026 ·

You can connect to ProtonVPN on your GL.iNet router using Wireguard or OpenVPN.

Quick Options

  • Wireguard: Download your preferred server .conf configuration file from the ProtonVPN website.

  • OpenVPN: Download your preferred server .ovpn configuration file from the ProtonVPN website.

:point_right: If you are not already a ProtonVPN user Sign Up Now.

ProtonVPN Wireguard Setup for GLiNet (Recommended)

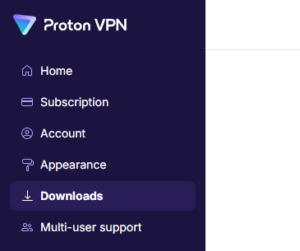
1. Login to your ProtonVPN account and go to the Downloads section of your ProtonVPN account page

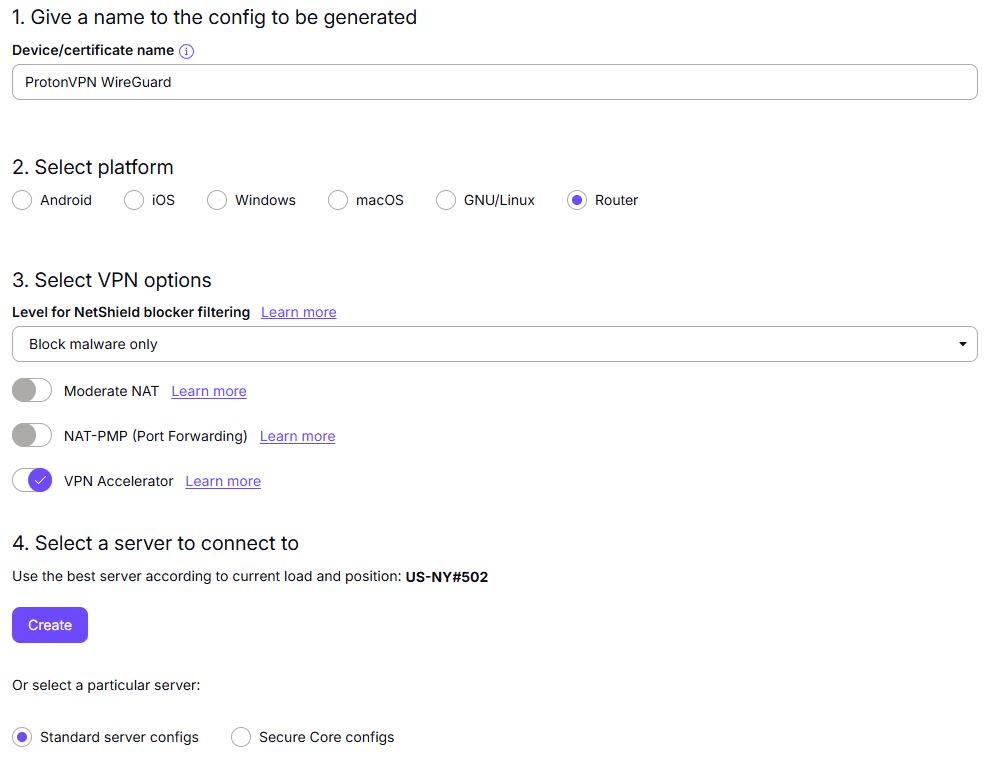
2. Scroll down to find the WireGuard configuration section. Name your configuration and then select Router as the platform, and select Standard server configs.

3. Click Create button to choose the recommended server or scroll down to choose and Download any of the available server files from the list.

4.  Login to GL.iNet firmware settings (usually 192.168.8.1) in a browser on any computer or smart device connected to the GL.iNet FlashRouter’s network.

View our guide for more instructions on how to access GL.iNet firmware settings.

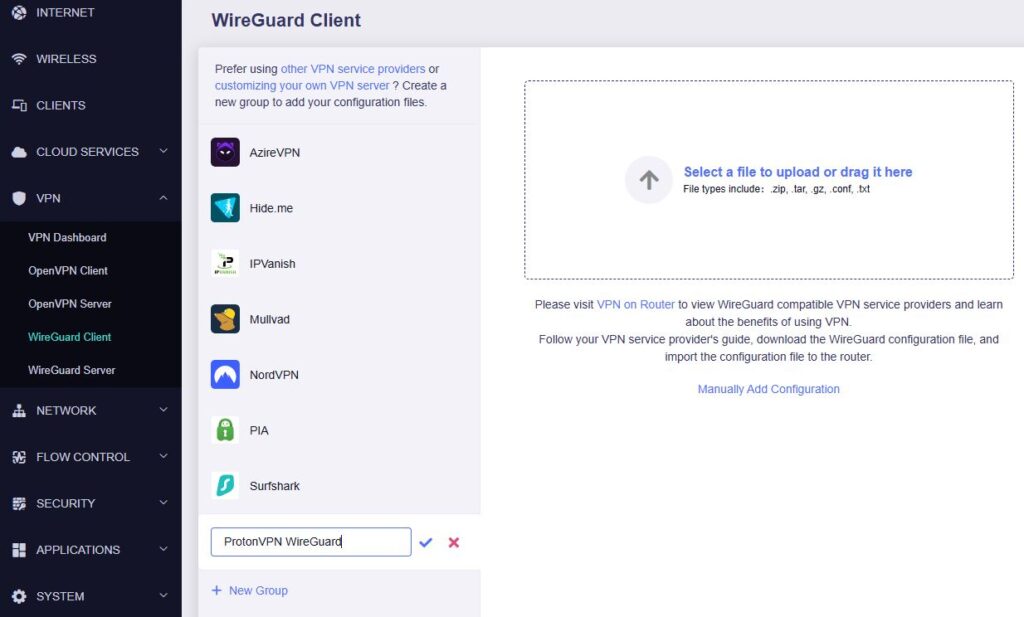
5. Navigate to the VPN tab and select WireGuard Client then click + New Group and name your connection and click the check to save.

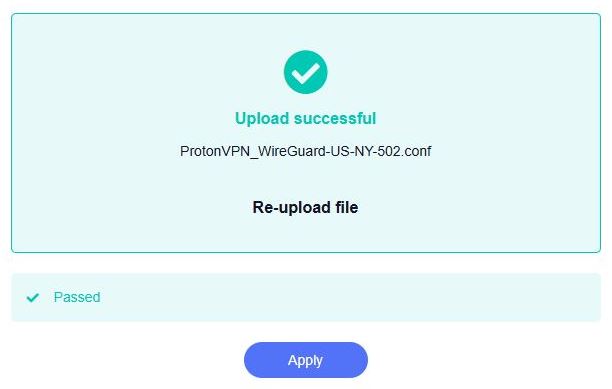
6. Upload the configuration file and click Apply.

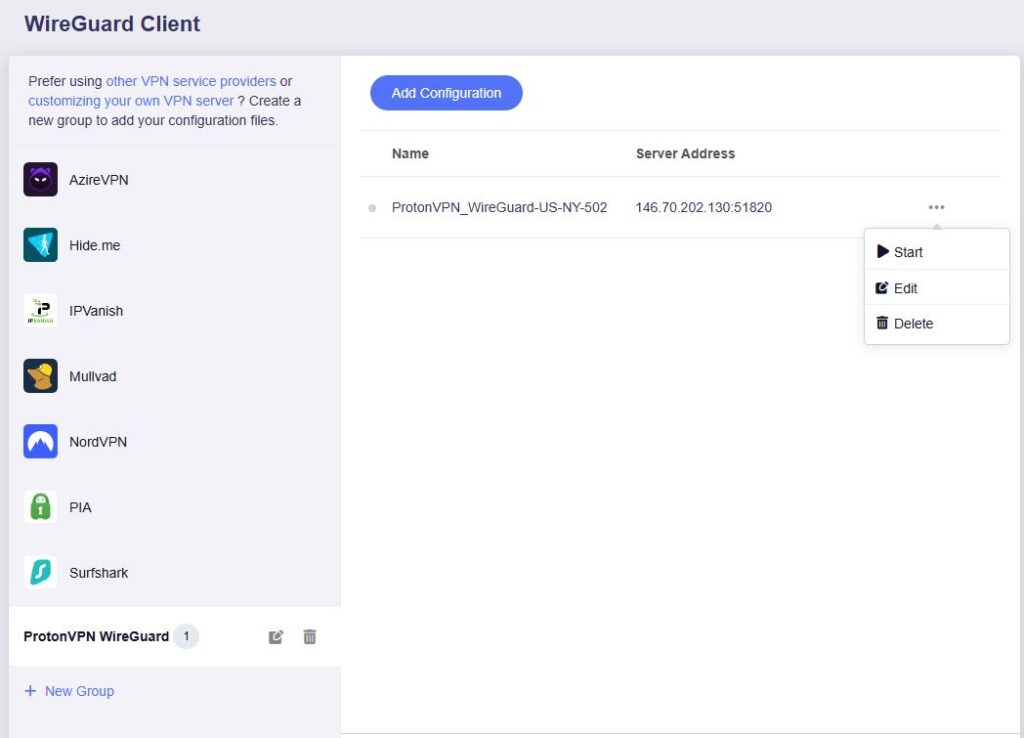
7. Start a connection by clicking the 3 dots (…) > Start next to your chosen server.

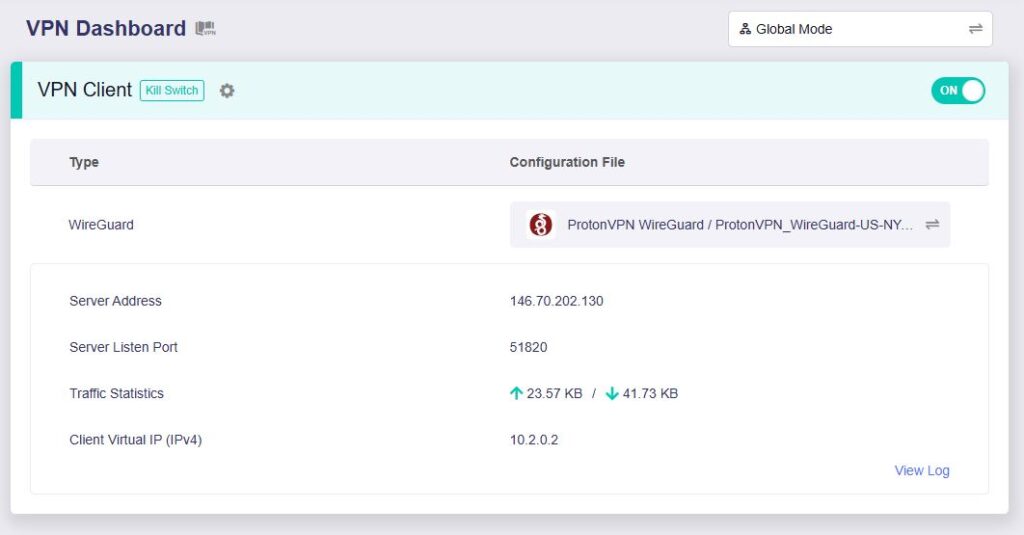
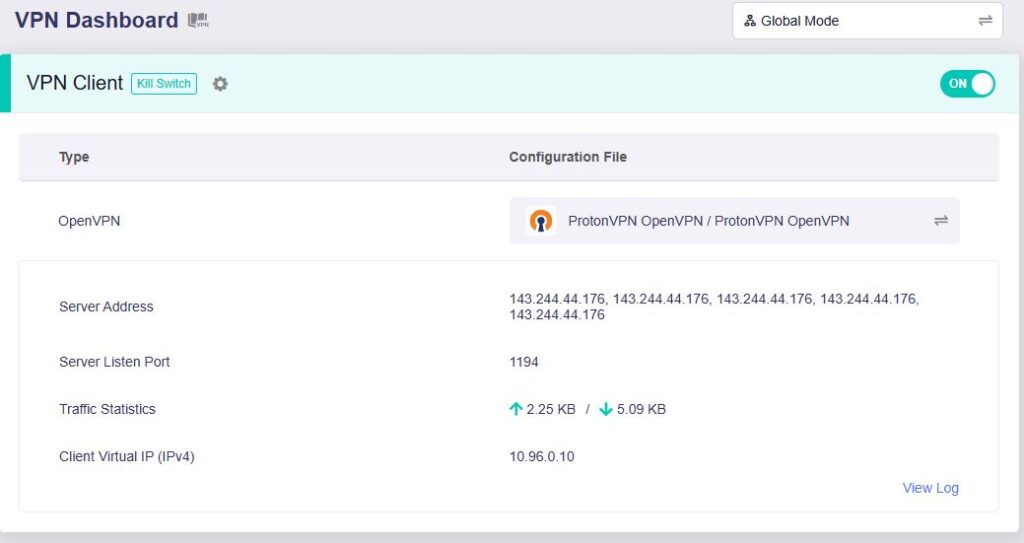
8. A green dot confirms success. You can also switch between Global Mode or Policy Mode for routing in the VPN Dashboard.

ProtonVPN OpenVPN Setup for GLiNet

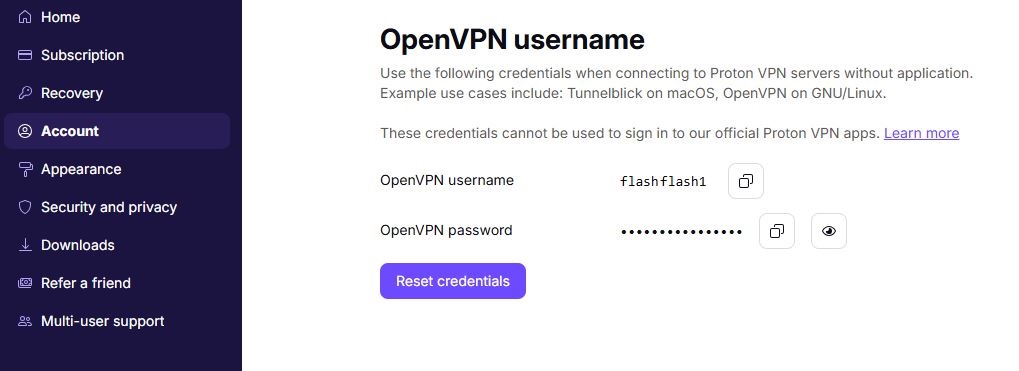
1. Log in to your ProtonVPN account and navigate to the Account tab. Scroll down to find your OpenVPN specific Username and Password.

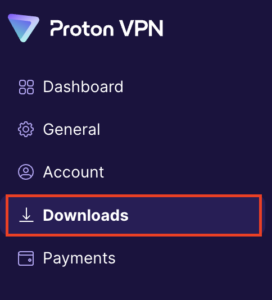
2. Go to the Downloads section of your ProtonVPN account page

ProtonVPN Downloads

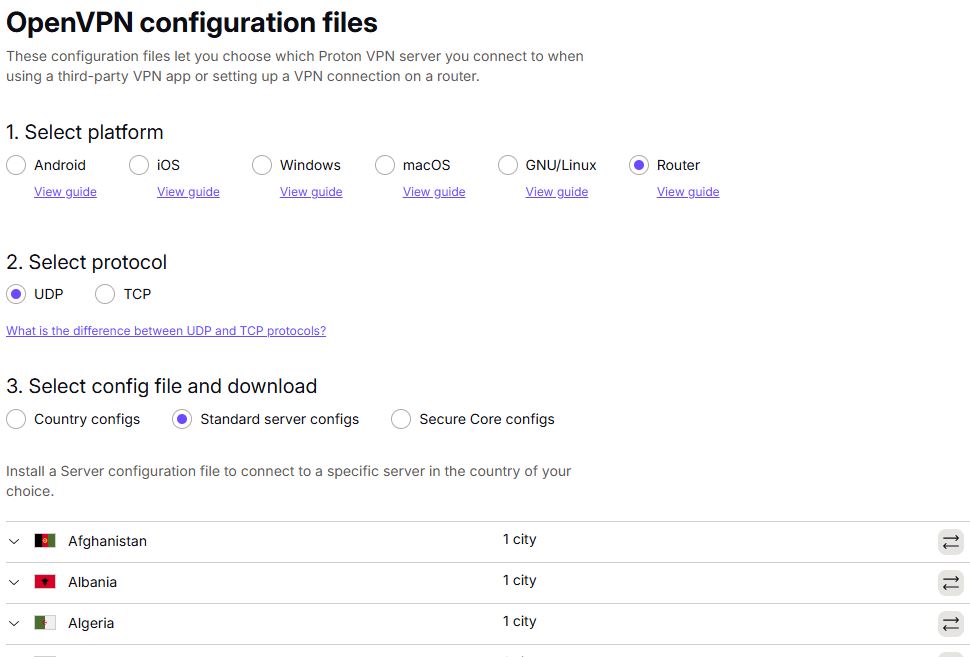
3. Scroll down to find the OpenVPN configuration Files. Select Router as the platform, UDP as the protocol, and select Standard server configs. Choose your preferred country and download the configuration file.

4. Login to GL.iNet firmware settings (usually 192.168.8.1) in a browser on any computer or smart device connected to the GL.iNet FlashRouter’s network.

View our guide for more instructions on how to access GL.iNet firmware settings.

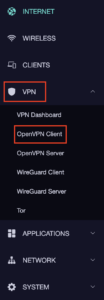
5. Navigate to the VPN tab and select OpenVPN Client.

GL.iNet VPN OpenVPN Client

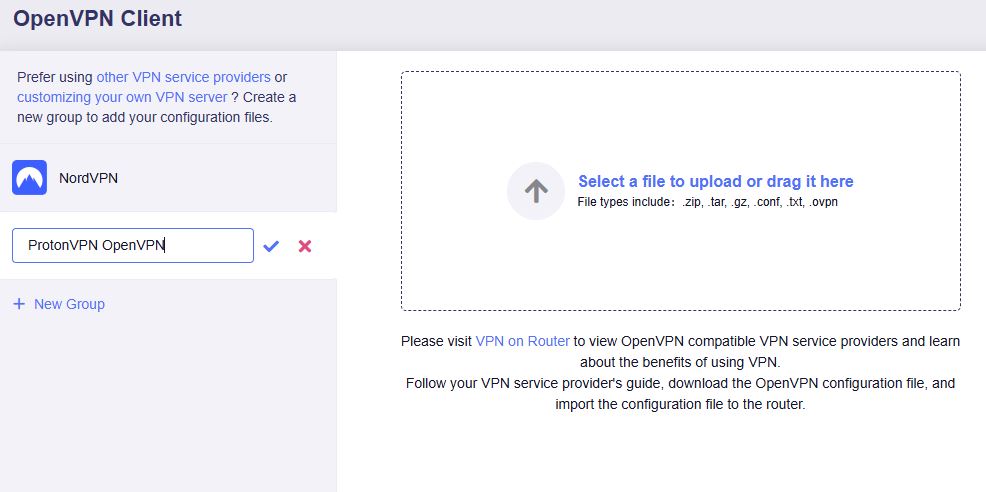
6. Select Add Manually then click + New Group and name your connection and click the check to save.

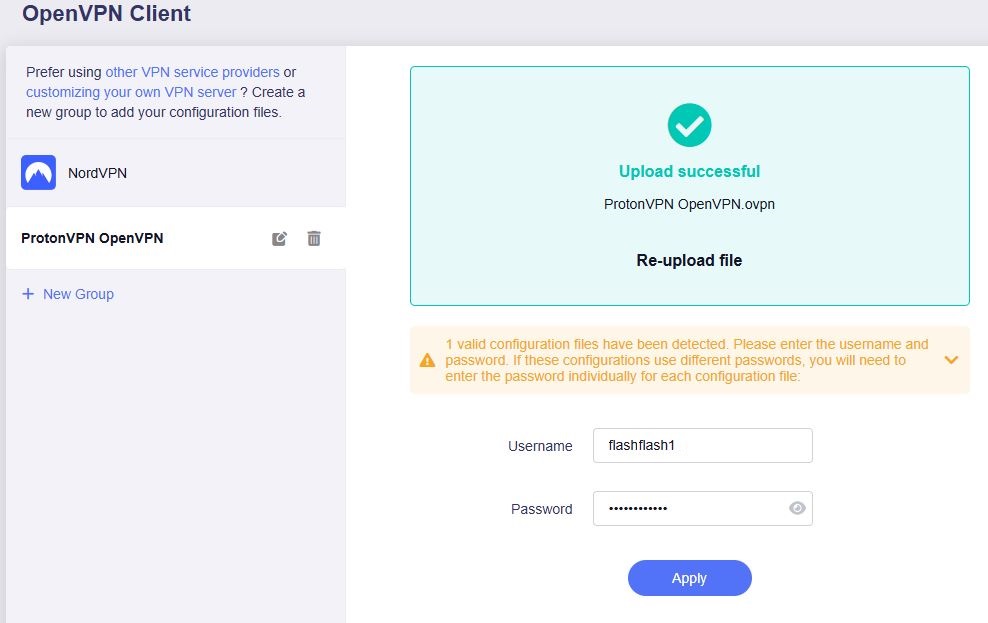
7. Upload the configuration file and input your username and password, click Apply.

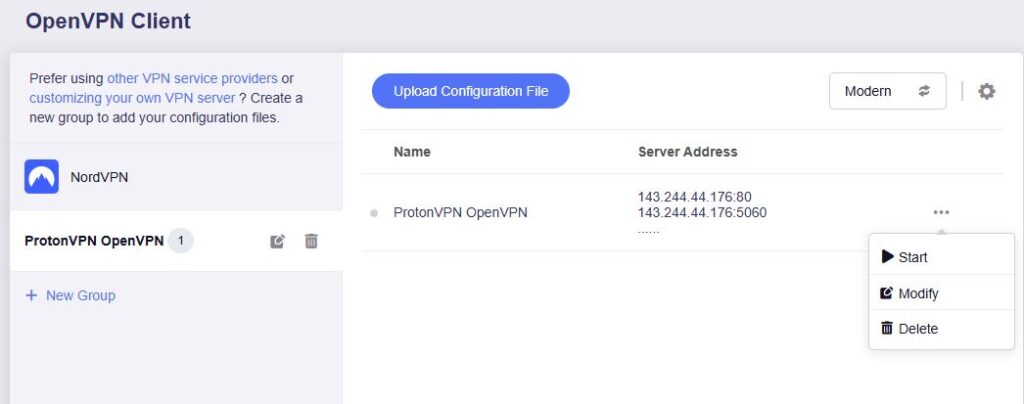
8. Start a connection by clicking the 3 dots (…) > Start next to your chosen server.

9. A green dot confirms success. You can also switch between Global Mode or Policy Mode for routing in the VPN Dashboard.

  1. You should now see information appear in the Server Address, Server Listen Port, Traffic Statistics, and Client Virtual IP areas.
  2. Visit ProtonVPN’s IP Check to verify your new IP address and virtual location.

In some cases you may notice that the location is not showing the same location as the server you have input in your router settings; this is because geo tracking tools are often tricked by VPN connections. As long as you see an IP address that is not the same as your normal Internet IP address then you are indeed connected to ProtonVPN.

🚫📱Do not run ProtonVPN apps on devices connected to your ProtonVPN router. Using the app at the same time as the router VPN may cause conflicts and connection issues.

Still having issues?

Feel free to submit a ticket and we will get back to you as soon as possible.

CyberGhost Merlin OpenVPN Setup

TeamFlashRouters · Mar 30, 2023 ·

Preparing for CyberGhost Setup

Obtain your CyberGhost OpenVPN information

If you are not already a CyberGhost user Sign Up Now.

1. Log in to your account on the CyberGhost website.

CyberGhost Website Login

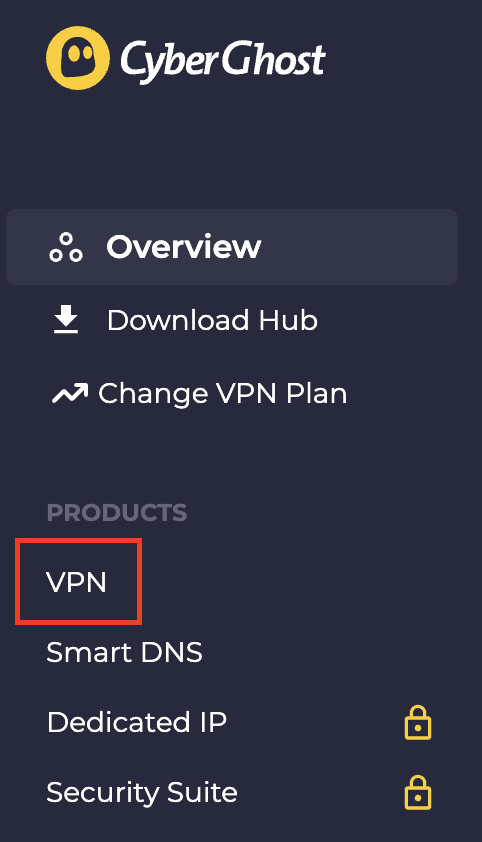
2. Select VPN.

CyberGhost VPN

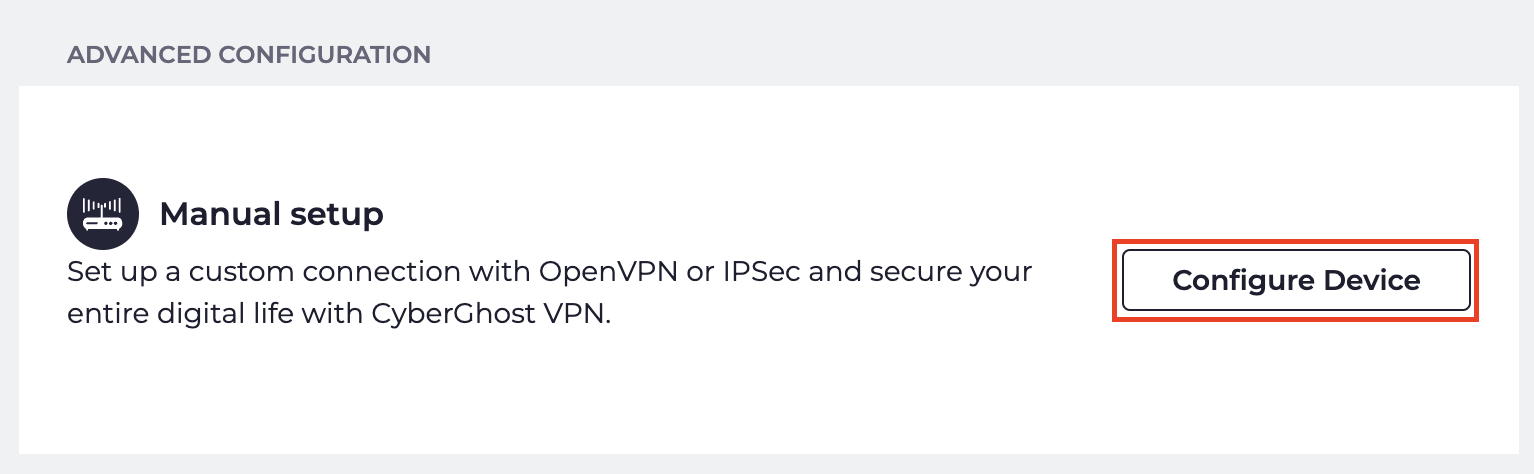
3. Click Configure New Device.

CyberGhost Configure Device

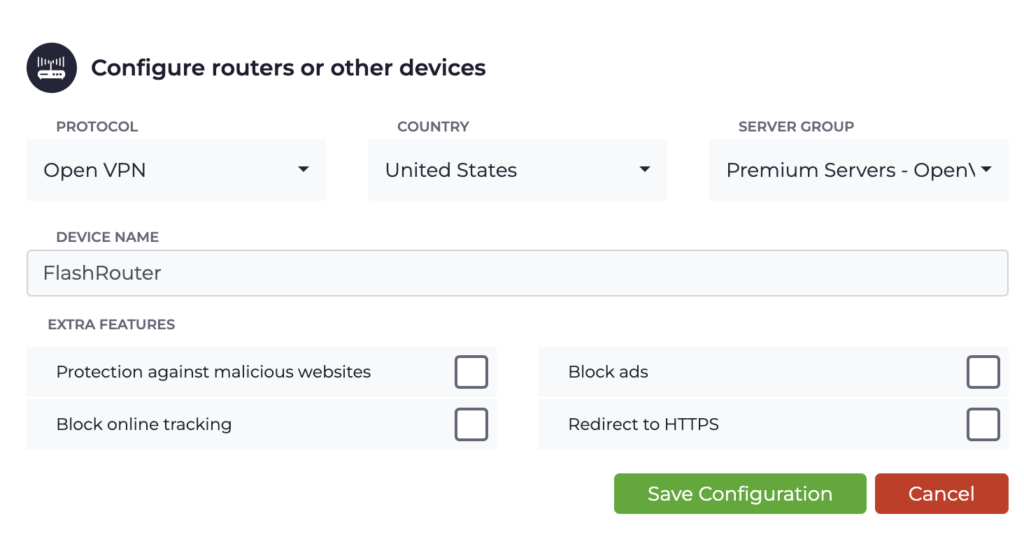
4. Set Protocol to OpenVPN. Select the Country you would like to connect to. Select the Server Group. Name the device in the Device Name field. Click Save Configuration.

CyberGhost protocol and location

5. Press View configuration.

CyberGhost view configuration

6. Copy the Username, and Password that appear to a notepad, since you will need this information later in the setup process. Click Download Configuration.

CyberGhost Website OpenVPN Configuration Files Generator 1

Open the folder that was downloaded. Then open the ca.crt the client.crt, and client.key files with NotePad++ for Windows or TextEdit for Apple. All CyberGhost servers have different keys and certificates.

Merlin Router Setup for CyberGhost

Login to Asus Merlin firmware settings in a browser on any computer or smart device connected to the Merlin FlashRouter’s network.

1. Navigate to the VPN tab.

Merlin VPN Tab

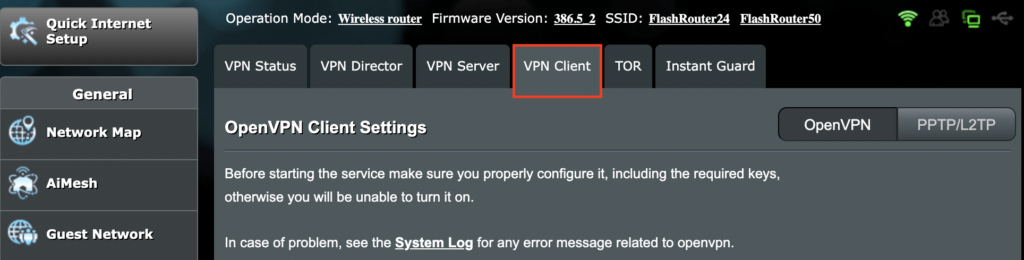
2. Navigate to the VPN Client tab.

Merlin VPN Client Tab

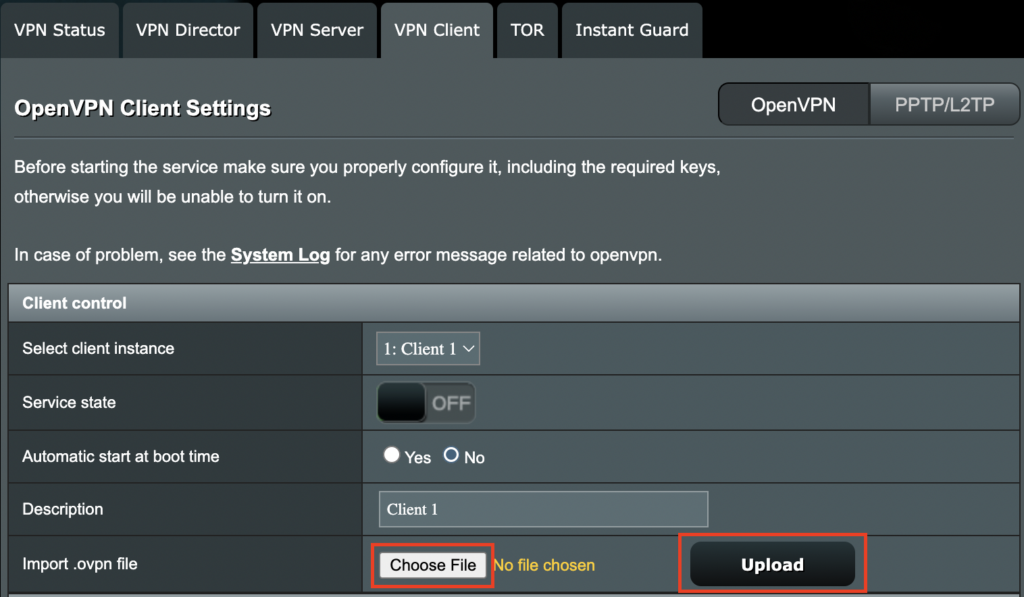
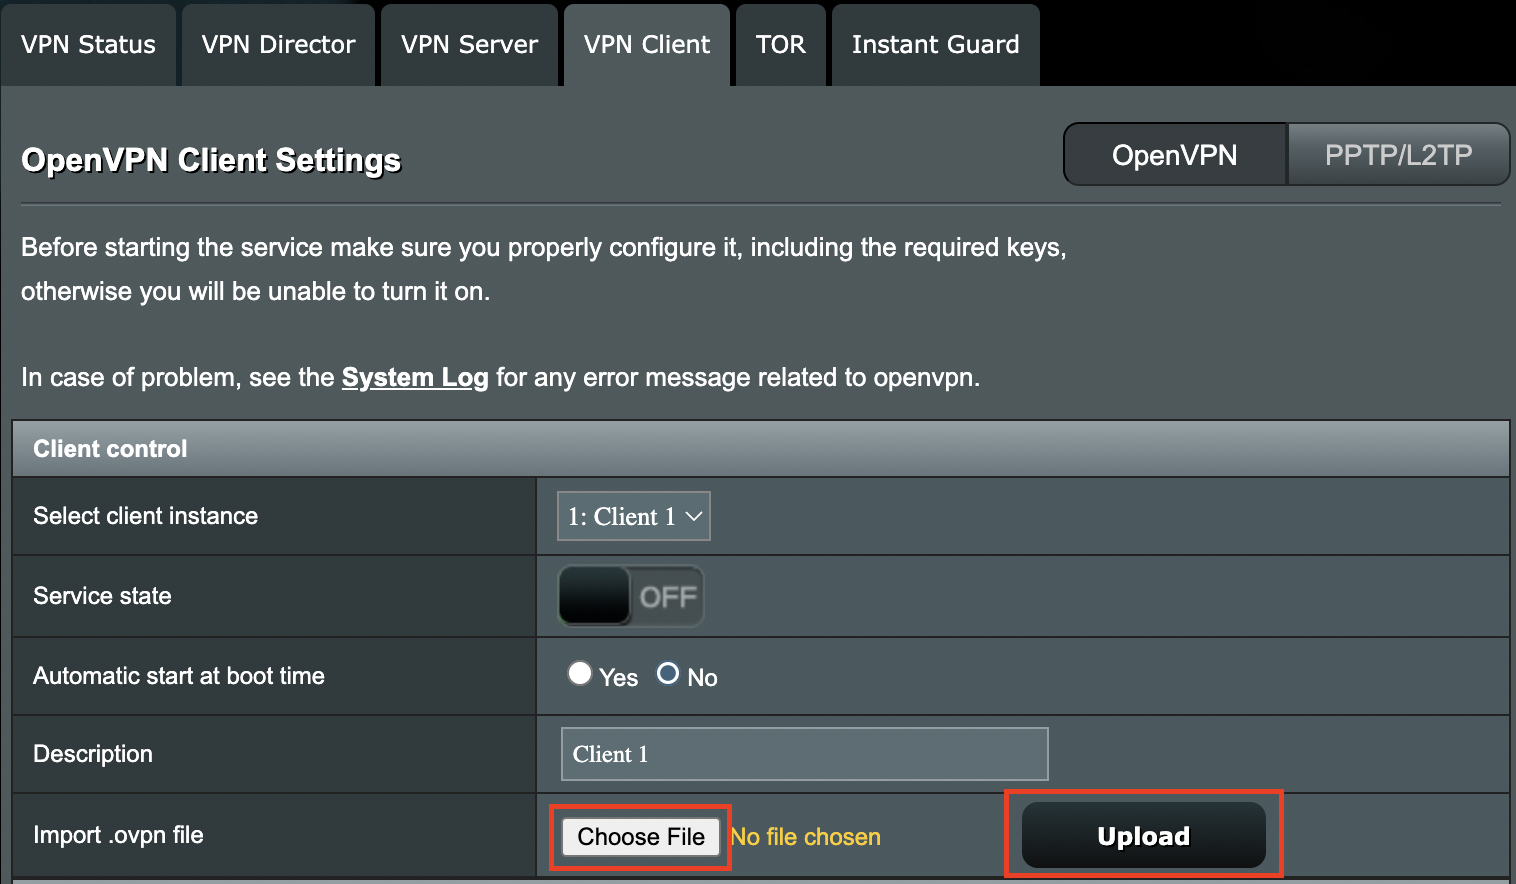
3. Click Choose file and select the .ovpn file from the folder you downloaded earlier. Then click Upload.

Merlin Choose File Upload

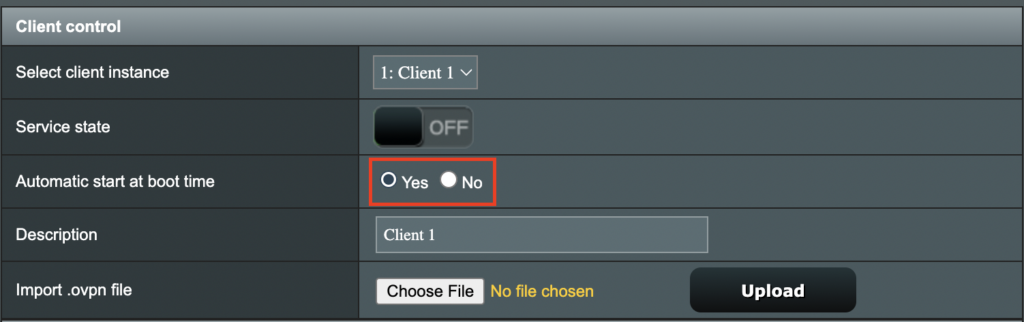
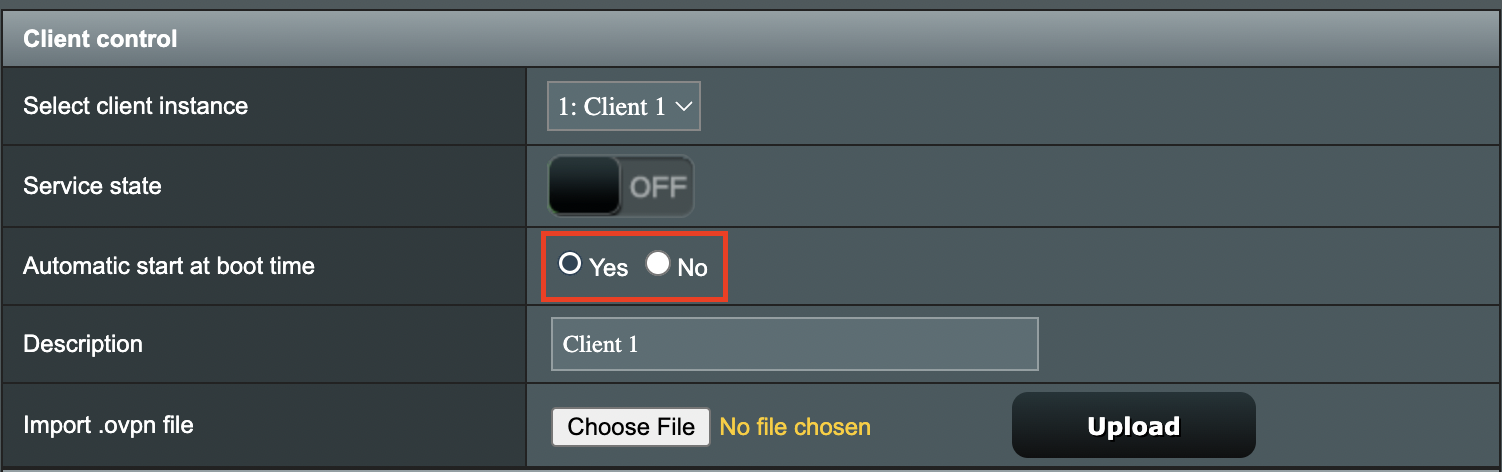
4. Set Automatic Start at boot time to Yes if you want the VPN connection to begin automatically when the router is powered off and back on.

Merlin Automatic Start at boot time

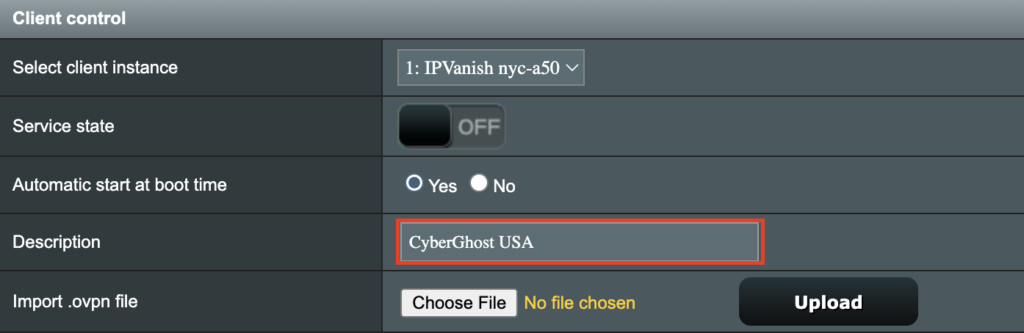
5. In the Description field enter in the name you’d like to use for this OpenVPN Client profile. We typically advise entering in the location here. Our example server was in USA so I have entered in CyberGhost USA.

Merlin CyberGhost Description field

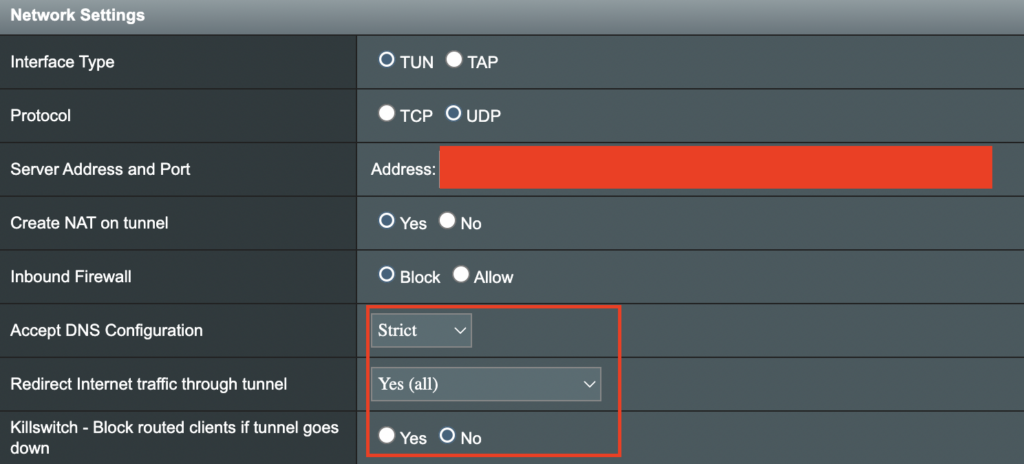
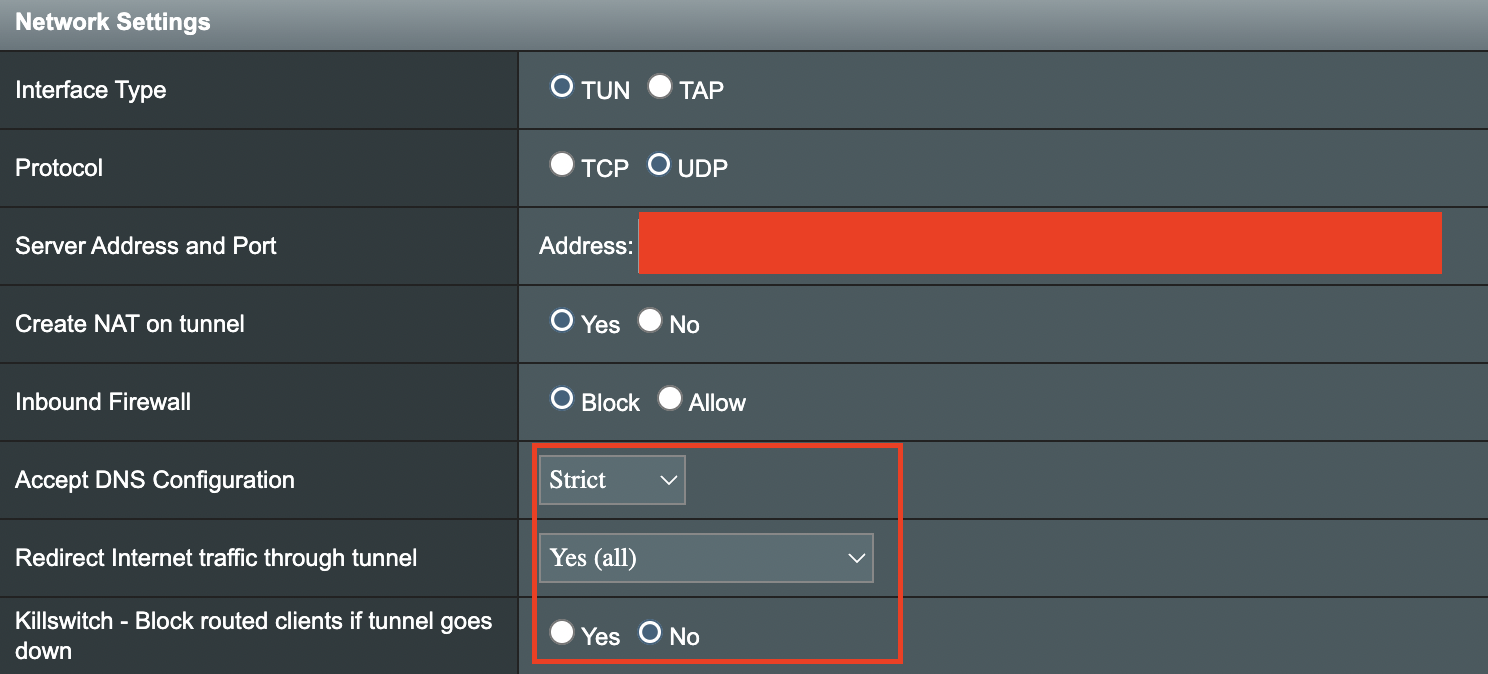
6. Set Accept DNS Configuration to Strict. Set Redirect Internet traffic through tunnel to Yes (all). Set Kill Switch to Yes or No depending on if you want the Internet to be killed if the VPN connection drops.

Merlin Accept DNS configuration Redirect Internet and Kill Switch

If you only want certain devices to connect to the OpenVPN Client profile you are setting up instead of all the devices connected to the FlashRouter’s network please set the Redirect Internet traffic through tunnel to VPN Director. Then complete the instructions on this page and then view our VPN Director guide.

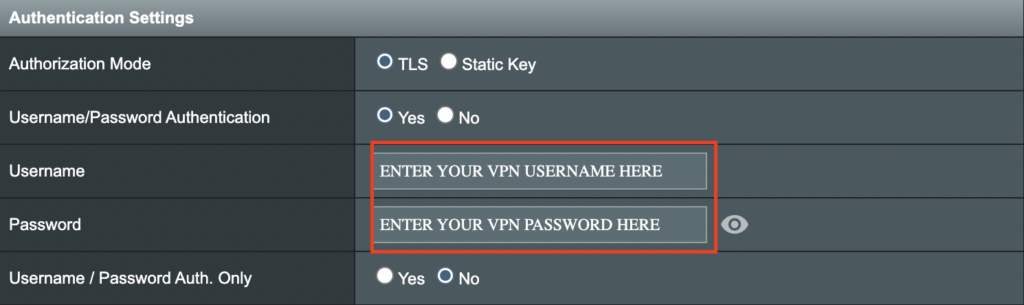
7. Enter your CyberGhost OpenVPN username and password that you obtained earlier. Do not enter your account login.

Merlin VPN Username and Password

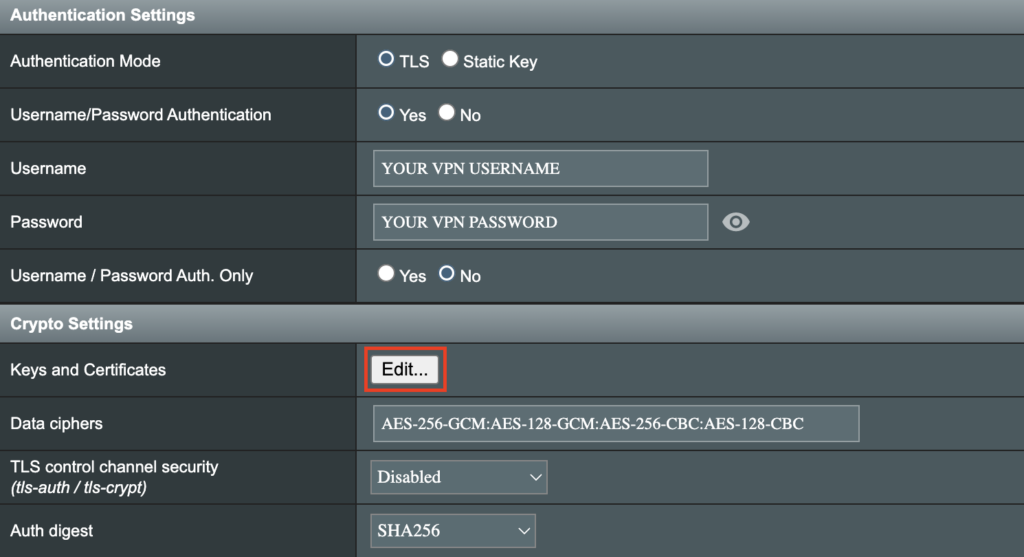
8. Click the Edit button in the Keys and Certificates area.

Merlin Keys and Certificates Edit button

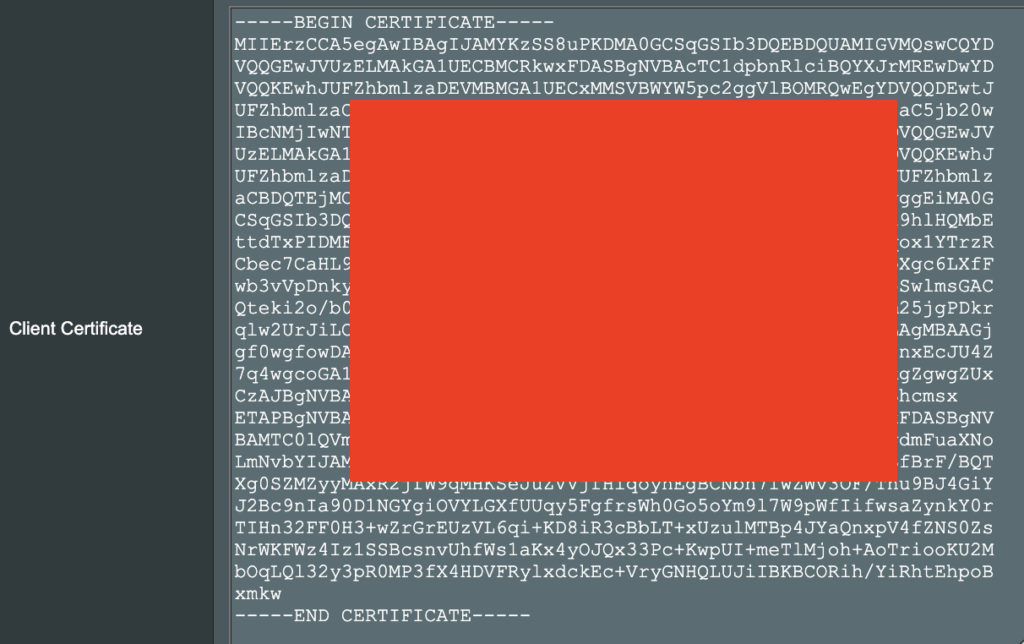
9. In the Certificate Authority field paste in the entire content of the ca.crt file.

—– BEGIN xxx —– / —– END xxx —– block (including those two lines).

Merlin Certificate Authority

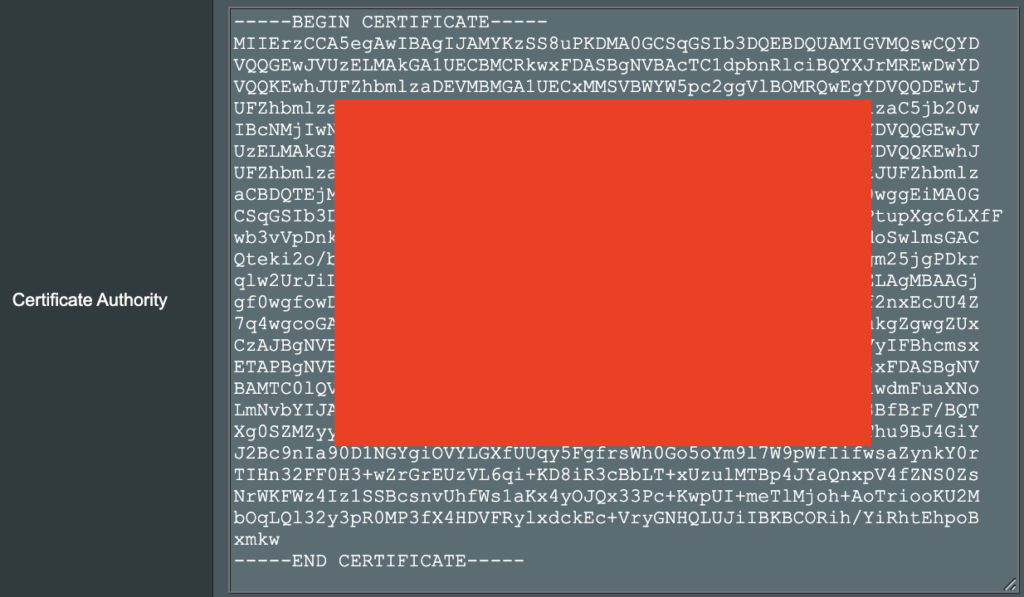
10. In the Client Certificate field paste in the entire content of the client.crt file.

—– BEGIN xxx —– / —– END xxx —– block (including those two lines).

Merlin Client Certificate

11. In the Client Key field paste in the entire content of the client.key file.

—– BEGIN xxx —– / —– END xxx —– block (including those two lines).

Merlin Client Key

12. Click Save at the bottom of that window.

13. Click Apply at the bottom of the page.

14. At the top of the page set the Service State toggle to ON to activate the VPN connection.

Merlin Service State All Providers

Verify a successful CyberGhost connection

  1. You should now see a CONNECTED message.
  2. Visit What is my IP Address from a private/incognito browser to verify your new IP address and virtual location.

TROUBLESHOOTING

Still having issues? Visit the FR Privacy App Troubleshooting section.

Troubleshoot Here

IPVanish Cudy OpenVPN Setup

TeamFlashRouters · Feb 29, 2024 ·

Preparing for IPVanish Cudy Setup

Download your IPVanish .ovpn file

If you are not already an IPVanish user Sign Up Now.

1. Log in to your account on the IPVanish website.

IPVanish login

2. Successfully log in with your account information then go to IPVanish .ovpn file page.

3. Click on the .ovpn file for the server location you want to use to dowloand the .ovpn file. Do not open this file.

IPVanish download ovpn

Cudy Router Setup for IPVanish

Login to Cudy firmware settings in a browser on any computer or smart device connected to the Cudy FlashRouter’s network.

1. Click General Settings.

Cudy General Settings

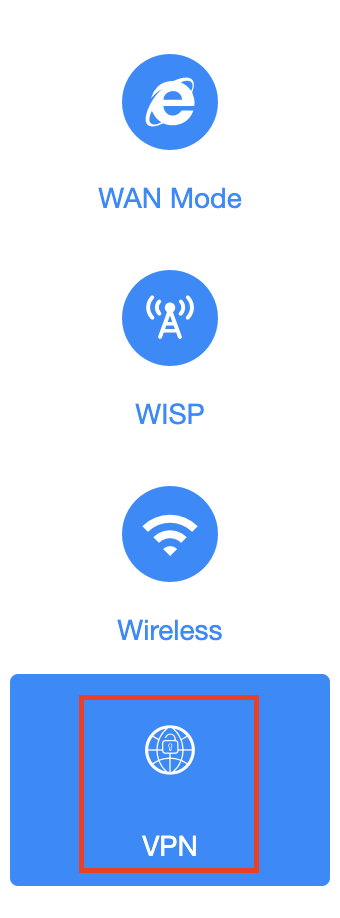
2. Click VPN.

Cudy VPN Tab

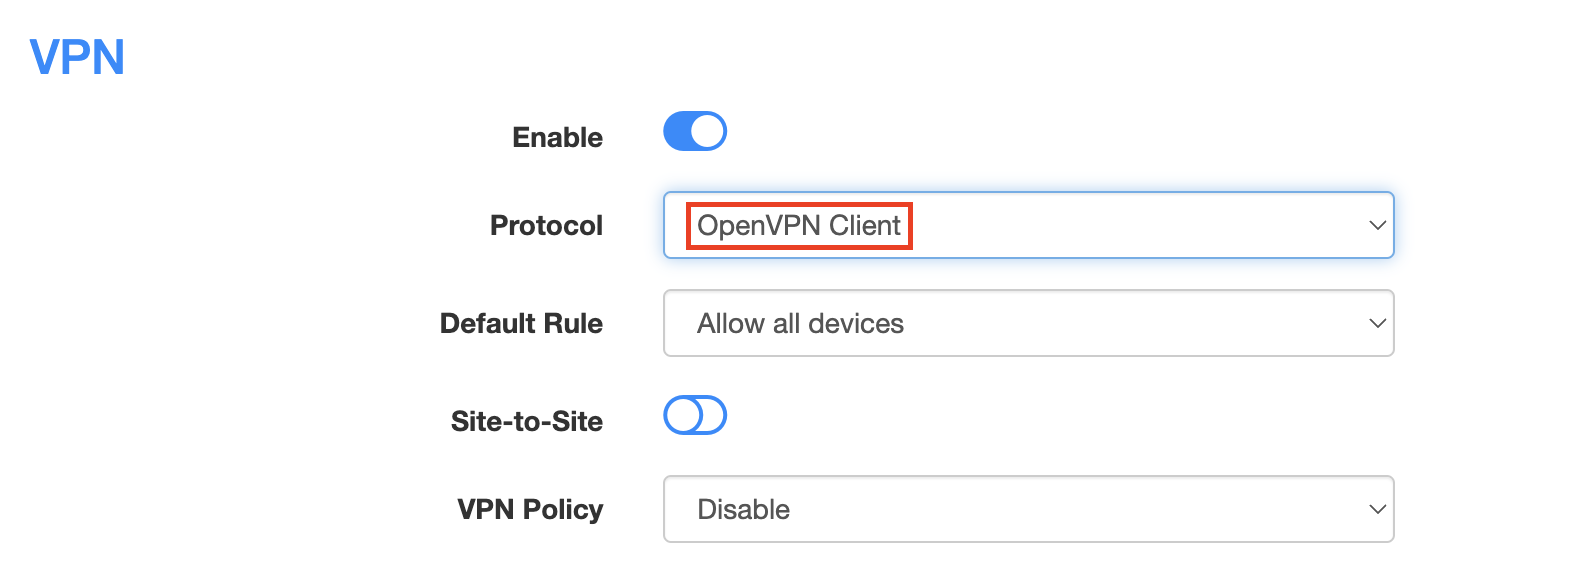
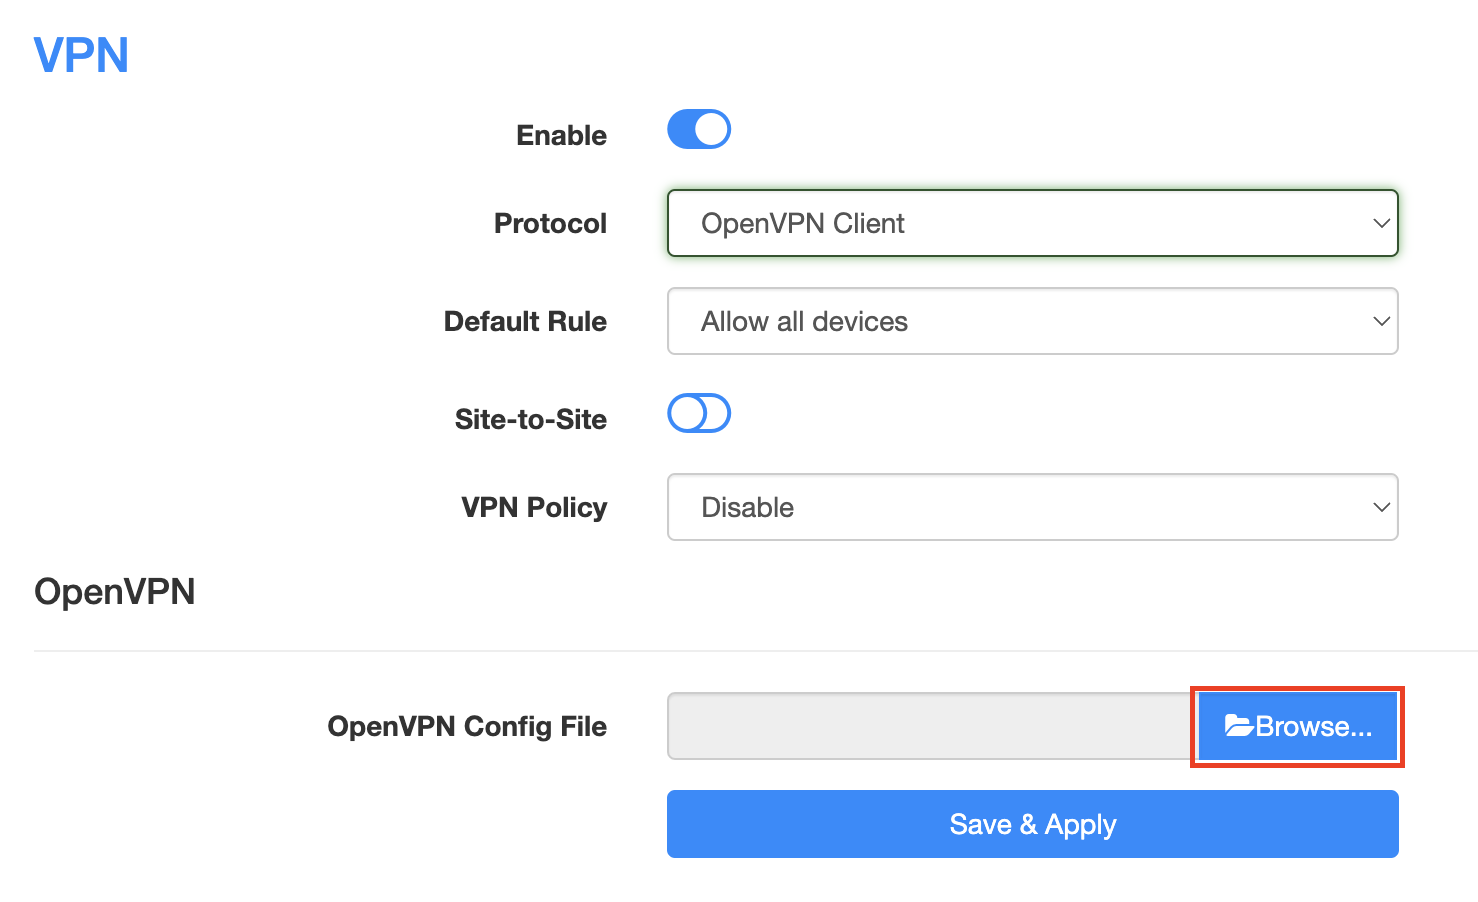
3. Toggle the Enable switch to On.

Cudy enable VPN

4. Select OpenVPN Client from the Protocol dropdown.

Cudy select OpenVPN Client

5. Click Browse and select the .ovpn file you downloaded earlier. You should see the server file name listed next to Current Config File after doing so.

Cudy OpenVPN Browse button

6. Enter your IPVanish account login email and password that you obtained earlier in the Username and Password.

Cudy IPVanish enter username and password

7. Click Save & Apply at the bottom of the page.

Verify a successful IPVanish connection

  1. You should now see a CONNECTED message.
  2. Visit IPVanish’s IP Check to verify your new IP address and virtual location.

In some cases you may notice that the location is not showing the same location as the server you have input in your router settings; this is because geo tracking tools are often tricked by VPN connections. As long as you see an IP address that is not the same as your normal Internet IP address then you are indeed connected to IPVanish.

How to change the IPVanish server

  1. Follow the steps at the top of the page to obtain a new .ovpn file.
  2. Then proceed with the settings same as initial setup.

TROUBLESHOOTING

Still having issues? Visit the VPN Troubleshooting section.

Troubleshoot Here

PrivateInternetAccess (PIA) Cudy OpenVPN Setup

TeamFlashRouters · Feb 29, 2024 ·

Preparing for PIA Cudy Setup

Download your PIA .ovpn file

If you are not already a PIA user Sign Up Now.

1. Log in to your account on the PIA website.

PIA login

2. Successfully log in with your account information then go to PIA’s OpenVPN Config Generator.

3. On the OpenVPN Configuration Generator select the following:

OpenVPN Version: OpenVPN 2.4 or newer

Select Platform: Linux

Select Region: Choose the server location you’d like to connect to

Select Port: Typically we recommend UDP/1198 RSA-2048 AES-128-CBC SHA1 for best speeds but feel free to select the one you want to use.

4. Click Generate to download the .ovpn file. Do not open this file once it is downloaded.

PIA Generate .ovpn file

Cudy Router Setup for PIA

Login to Cudy firmware settings in a browser on any computer or smart device connected to the Cudy FlashRouter’s network.

1. Click General Settings.

Cudy General Settings

2. Click VPN.

Cudy VPN Tab

3. Toggle the Enable switch to On.

Cudy enable VPN

4. Select OpenVPN Client from the Protocol dropdown.

Cudy select OpenVPN Client

5. Click Browse and select the .ovpn file you downloaded earlier. You should see the server file name listed next to Current Config File after doing so.

Cudy OpenVPN Browse button

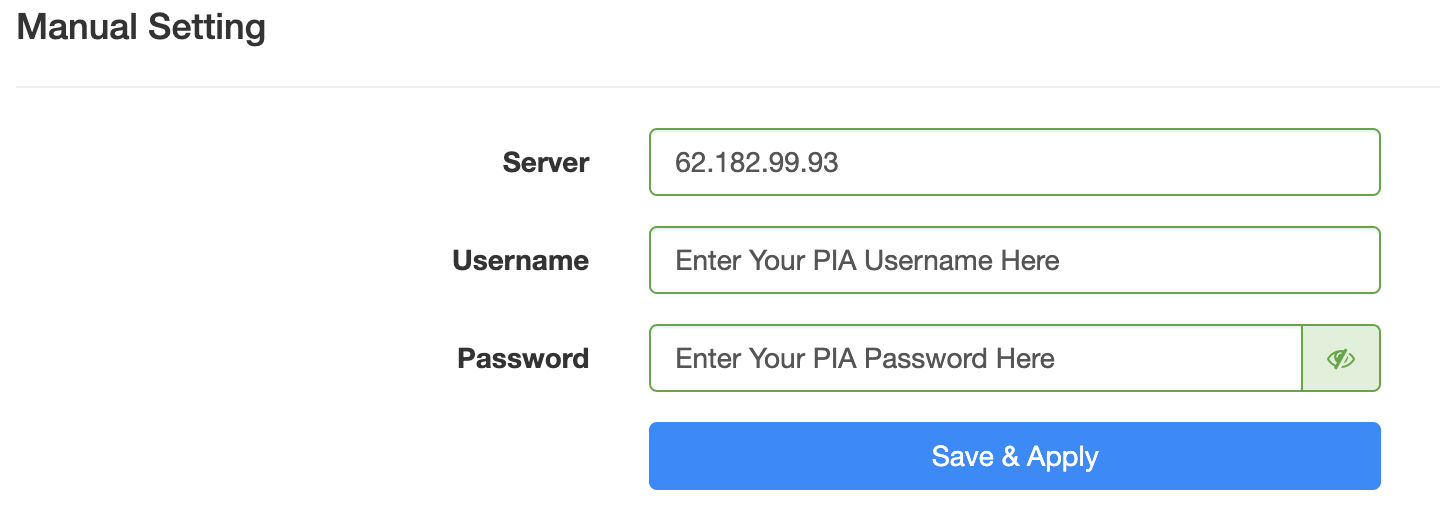
6. Enter your PIA account login username and password in the Username and Password.

Cudy PIA enter username and password

7. Click Save & Apply at the bottom of the page.

Verify a successful PIA connection

  1. You should now see a CONNECTED message.
  2. Visit PIA’s IP Check to verify your new IP address and virtual location.

In some cases you may notice that the location is not showing the same location as the server you have input in your router settings; this is because geo tracking tools are often tricked by VPN connections. As long as you see an IP address that is not the same as your normal Internet IP address then you are indeed connected to PIA.

How to change the PIA server

  1. Follow the steps at the top of the page to obtain a new .ovpn file.
  2. Then proceed with the settings same as initial setup.

TROUBLESHOOTING

Still having issues? Visit the VPN Troubleshooting section.

Troubleshoot Here

NordVPN Setup for AsusWRT Firmware Routers

TeamFlashRouters · Oct 15, 2025 ·

You can connect to NordVPN on your AsusWRT router using NordLynx, OpenVPN, or a Dedicated IP.

Quick Options

  • NordLynx: Choose your preferred country from NordVPN’s server list

  • OpenVPN: Choose your preferred city or country from NordVPN’s server list.

  • Dedicated IP (optional): Enter your unique configuration file if you’ve been assigned a static NordVPN IP.

:point_right: If you are not already a NordVPN user Sign Up Now.

NordVPN NordLynx Setup for AsusWRT

1. Get your NordVPN Access Token for NordLynx connections. Log in to your NordVPN account and select NordVPN from your list of Services.

NordVPN Services Section

2. At the bottom of the page click Get Access token and you will receive a code via email. Enter this code to proceed.

NordVPN Access Token

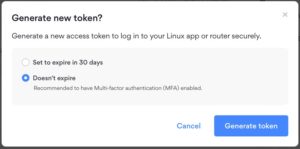
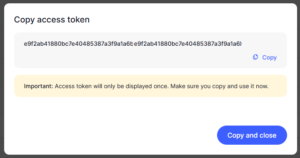
3. After you enter the email code select Generate new token and set it to Doesn’t expire. Copy this token.

NordVPN Generate new token
NordVPN Copy Token

4. Log in to the Asus settings page by connecting to the Asus router’s WiFi (or wired LAN) on your computer. Then, enter 192.168.50.1 or asusrouter.com in the browser.

View our guide for more instructions on how to access AsusWRT firmware settings.

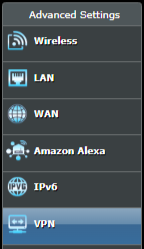
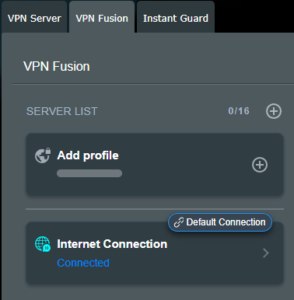
5. Navigate to the VPN tab and then select the VPN Fusion tab, then click Add profile.

Click the VPN Button
VPN Fusion Add Profile

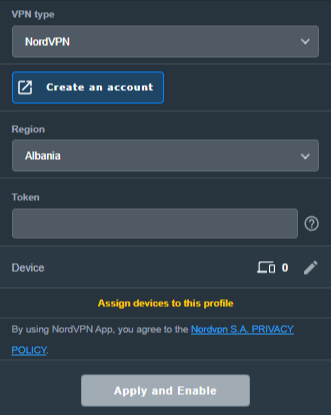
6. Fill in your NordVPN information, then click Apply and Enable.

  • Connection Name: Choose a name for your NordLynx connection.
  • VPN Type: Select NordVPN
  • Region: Choose your VPN server location
  • Token: Copy and paste your NordVPN token.
Apply NordLynx Settings

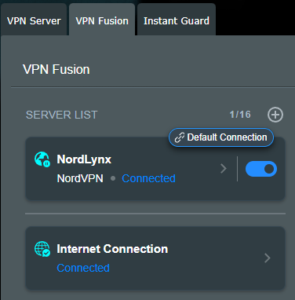
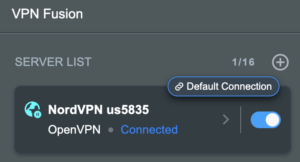
6. You should now see the Profile say Connected, indicating that the NordVPN server is successfully connected to your router!

VPN Fusion NordLynx Connected

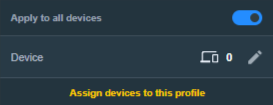
7. The VPN connection is automatically set to Apply to all devices.

If you only want certain devices to connect to the VPN, then turn off the VPN connection and switch off Apply to all devices.

Now click the pencil next to the Device section and select the devices (computer, phone, etc.) that you want to connect to VPN. Click OK and then click Apply all settings.

Apply VPN by Device

NordVPN OpenVPN Setup for AsusWRT

1. Get your NordVPN manual service credentials for OpenVPN connections. Log in to your NordVPN account and select NordVPN from your list of Services.

NordVPN Services Section

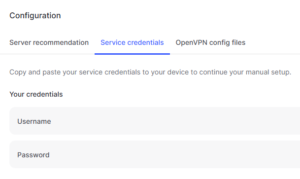
2. At the bottom of the page in the Manual Setup section click Setup NordVPN manually then under the Configuration section go to Service credentials. Click Verify email to receive a code via email and enter the code to view and copy your credentials.

NordVPN Manual OpenVPN
NordVPN Service Credentials

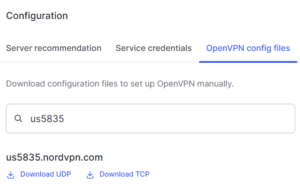
3. Click on OpenVPN config files. Search and download the server file for your preferred NordVPN location, UDP is recommended.

NordVPN OpenVPN Config Files

4. Log in to the Asus settings page by connecting to the Asus router’s WiFi (or wired LAN) on your computer. Then, enter 192.168.50.1 or asusrouter.com in the browser.

View our guide for more instructions on how to access AsusWRT firmware settings.

5. Navigate to the VPN tab and then click on the VPN Fusion tab, then click Add Profile.

Click the VPN Button
VPN Fusion Add Profile

6. Fill in your NordVPN information then click Apply and Enable.

  • Connection Name: Choose a name for your NordVPN OpenVPN connection.
  • VPN Type: Select OpenVPN
  • Import .ovpn File: Upload the OpenVPN file that you downloaded.
  • Username and Password: Copy and paste your NordVPN manual service credentials.
AsusWRT OpenVPN Connection File Load

6. You should now see the Profile say Connected, indicating that the NordVPN server is successfully connected to your router!

Asus NordVPN Connected

7. The VPN connection is automatically set to Apply to all devices.

If you only want certain devices to connect to the VPN, then turn off the VPN connection and switch off Apply to all devices.

Now click the pencil next to the Device section and select the devices (computer, phone, etc.) that you want to connect to VPN. Click OK and then click Apply all settings.

Apply VPN by Device

NordVPN Dedicated IP Setup for AsusWRT

1. Get your NordVPN manual service credentials for OpenVPN connections. Log in to your NordVPN account and select NordVPN from your list of Services.

NordVPN Services Section

2. At the bottom of the page in the Manual Setup section click Setup NordVPN manually then under the Configuration section go to Service credentials. Click Verify email to receive a code via email and enter the code to view and copy your credentials.

NordVPN Manual OpenVPN
NordVPN Service Credentials

3. Now download your Dedicated IP configuration file from the NordVPN website.

4. Log in to the Asus settings page by connecting to the Asus router’s WiFi (or wired LAN) on your computer. Then, enter 192.168.50.1 or asusrouter.com in the browser.

View our guide for more instructions on how to access AsusWRT firmware settings.

5. Navigate to the VPN tab then click on the VPN Fusion tab, then click Add Profile.

Click the VPN Button
VPN Fusion Add Profile

6. Fill in your NordVPN information then click Apply and Enable.

  • Connection Name: Choose a name for your NordVPN Dedicated IP connection.
  • VPN Type: Select OpenVPN
  • Import .ovpn File: Upload the Dedicated IP OpenVPN file that you downloaded.
  • Username and Password: Copy and paste your NordVPN manual service credentials.
AsusWRT OpenVPN Connection File Load

6. You should now see the Profile say Connected, indicating that the NordVPN server is successfully connected to your router!

Asus NordVPN Connected

7. The VPN connection is automatically set to Apply to all devices.

If you only want certain devices to connect to the VPN, then turn off the VPN connection and switch off Apply to all devices.

Now click the pencil next to the Device section and select the devices (computer, phone, etc.) that you want to connect to VPN. Click OK and then click Apply all settings.

Apply VPN by Device
  1. Connect your devices to the Asus router network and visit the NordVPN website, at the top it should display Your Status: Protected.
  2. Visit NordVPN’s IP Check to verify your new IP address and virtual location.

🚫📱Do not run NordVPN apps on devices connected to your NordVPN router. Using the app at the same time as the router VPN may cause conflicts and connection issues.

Still having issues?

Feel free to submit a ticket and we will get back to you as soon as possible.

NordVPN Manual OpenVPN Setup

TeamFlashRouters · Apr 8, 2019 ·

Preparing for Manual NordVPN Setup

Verify your NordVPN login information

If you are not already an NordVPN user Sign Up Now.

Log in to your account on the NordVPN website.

NordVPN Server Addresses

For a NordVPN server recommendation visit their Recommend Server page.

Once you have selected the server you want to connect to, download the UDP .ovpn file containing the Server IP Address, TLS Auth Key, and CA Cert referenced below.

Open the .ovpn file that is downloaded to your computer with NotePad++ for Windows or TextEdit for Apple. You will only need the Server IP Address, TLS Auth Key, and CA Cert from this file. All NordVPN servers and .ovpn files have different IP Addresses, keys, and certificates.

DD-WRT Router Setup for NordVPN

Navigate to Services > VPN

Enter NordVPN settings

OpenVPN Client

Start OpenVPN Client

If you wish to disable your VPN connection simply set this to Disable at any time and click Apply Settings.

Server IP/Name

At the top of the .ovpn file you downloaded above, there is a line e.g.:
remote 206.226.72.27 1194
206.226.72.27 is your NordVPN server IP address. Enter the IP Address in this field.

Port

1194

Tunnel Device

TUN

Tunnel Protocol

UDP

Encryption cipher

AES-256-CBC

Hash Algorithm

SHA512

Userpass Authentication

Enable

Username

Enter the Username you successfully logged in to your NordVPN account with.

Password

Enter the Password you successfully logged in to your NordVPN account with.

Advanced Options

Enable

TLS Cipher

None

LZO Compression

Adaptive

NAT

Enable

Firewall Protection

Enable

TLS Auth Key

In the .ovpn file copy and paste all contents in between the <tls-auth> and </tls-auth> lines from your .ovpn file starting and ending with:
—–BEGIN OpenVPN Static key V1—–
…
—–END OpenVPN Static key V1—–

Additional Config

tun-mtu-extra 32
mssfix 1450
persist-key
persist-tun

Policy Based Routing

This field can be used for split VPN and Dual Gateway routing.

CA Cert

In the .ovpn file Copy and Paste all contents in between the <ca> and </ca> lines from your .ovpn file starting and ending with:
—–BEGIN CERTIFICATE—–
…
—–END CERTIFICATE—–

CLICK APPLY SETTINGS

Leave all settings not mentioned above as their default setting.

Verify a successful NordVPN connection

Navigate to Status > OpenVPN

  1. You should now see a CONNECTED SUCCESS message.
  2. Visit NordVPN’s website to verify your new IP address, virtual location, and status as Protected at the top of the page.

In some cases you may notice that the location is not showing the same location as the server you have input in your router settings; this is because geo tracking tools are often tricked by VPN connections. As long as you see an IP address that is not the same as your normal Internet IP address then you are indeed connected to NordVPN.

Back up your settings

Navigate to Administration > Backup

  1. Click the Backup button.
  2. A file named nvrambak.bin will be saved to your computer.
  3. You can load nvrambak.bin to restore your settings in the event of a reset.

How to change the NordVPN server

  1. Download and open a new .ovpn file from NordVPN.
  2. Copy and paste the server IP Address into the Server IP/Name field.
  3. Copy and paste the TLS Auth Key into the TLS Auth Key field.
  4. Copy and paste the CA Cert into the CA Cert field.
  5. Click Apply Settings.

TROUBLESHOOTING

Still having issues? Visit the VPN Troubleshooting section.

Troubleshoot Here

PrivateInternetAccess (PIA) Setup on Roqos

TeamFlashRouters · Dec 24, 2021 ·

Preparing for PIA Setup

Obtain your PIA login information

If you are not already an PIA user Sign Up Now.

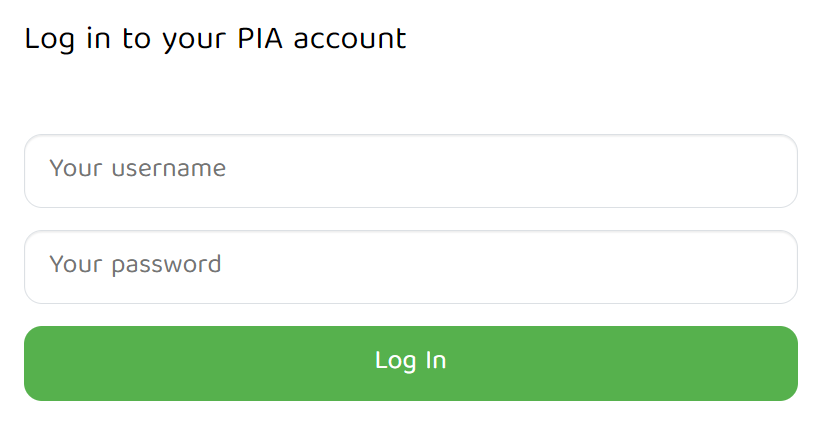
1. Visit PIA’s website login page.

PIA login

2. Successfully log in with your account information.

Connecting to PIA in the Roqos Core

Access the Roqos Core UI

1. Login to the Roqos Core web app in a browser on any computer or smart device.

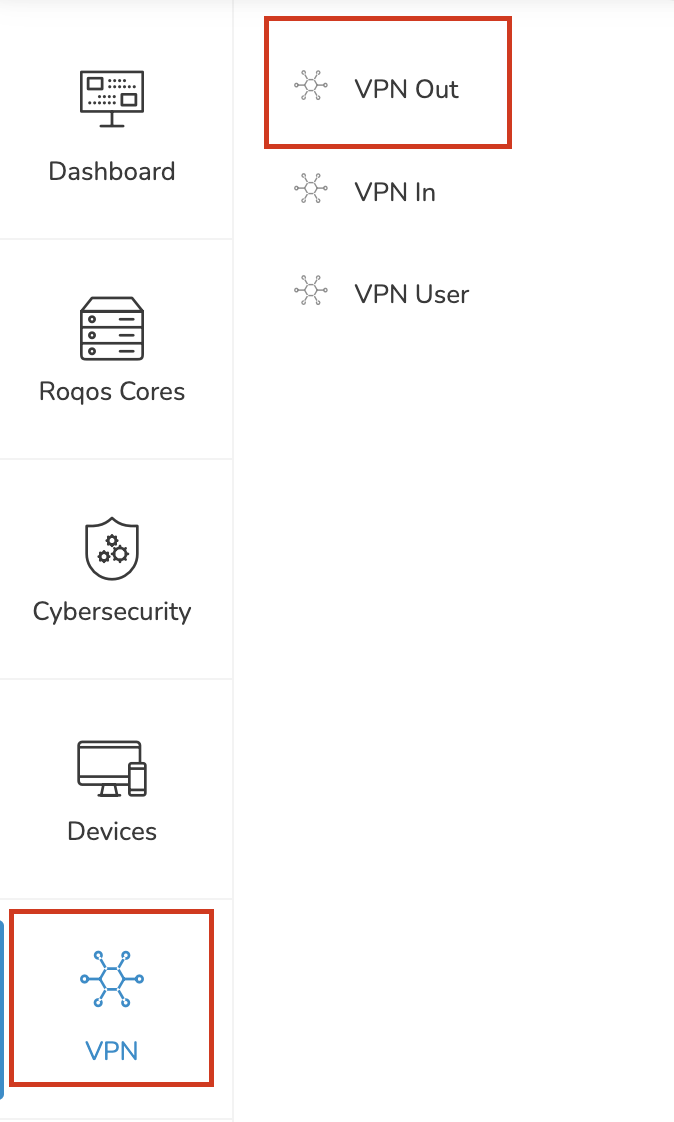
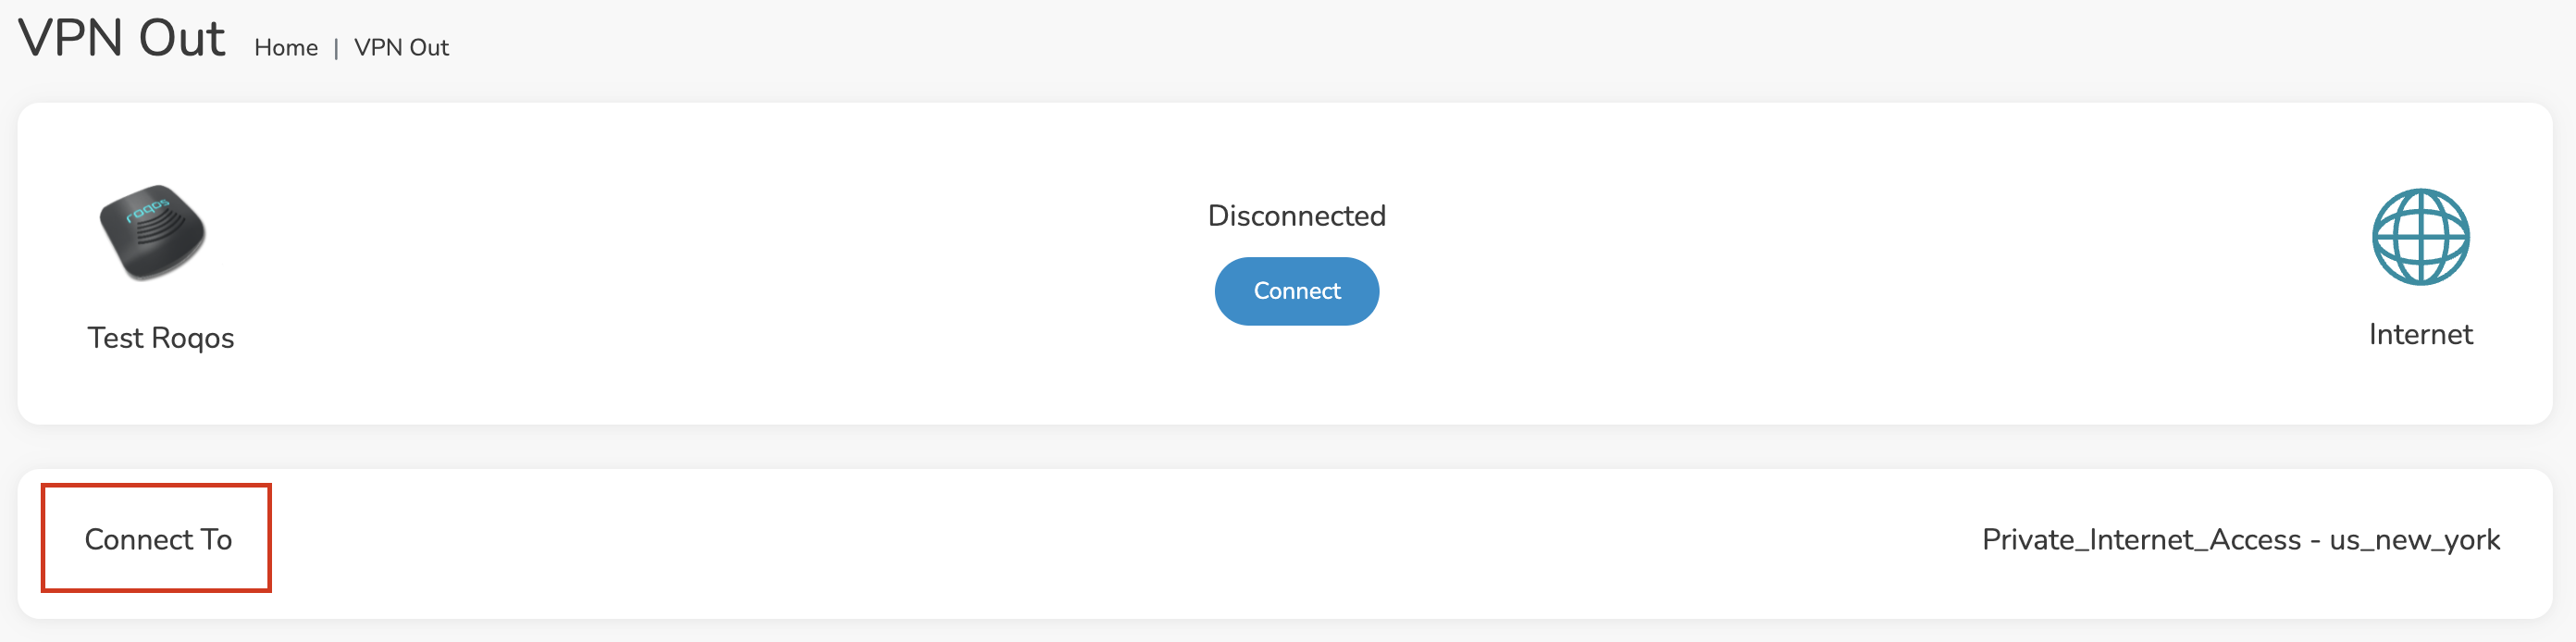
2. Click VPN from the navigation menu and then click VPN OUT.

Roqos VPN Out

3. Click the Connect to box.

Roqos PIA Connect to

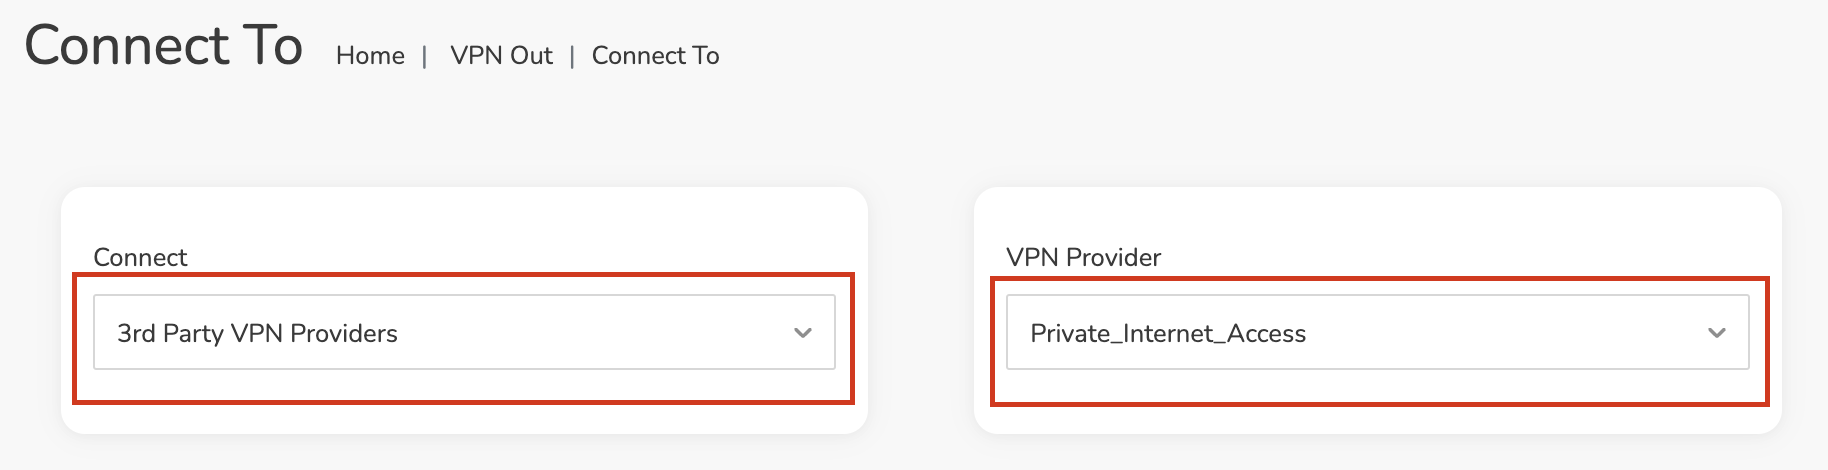
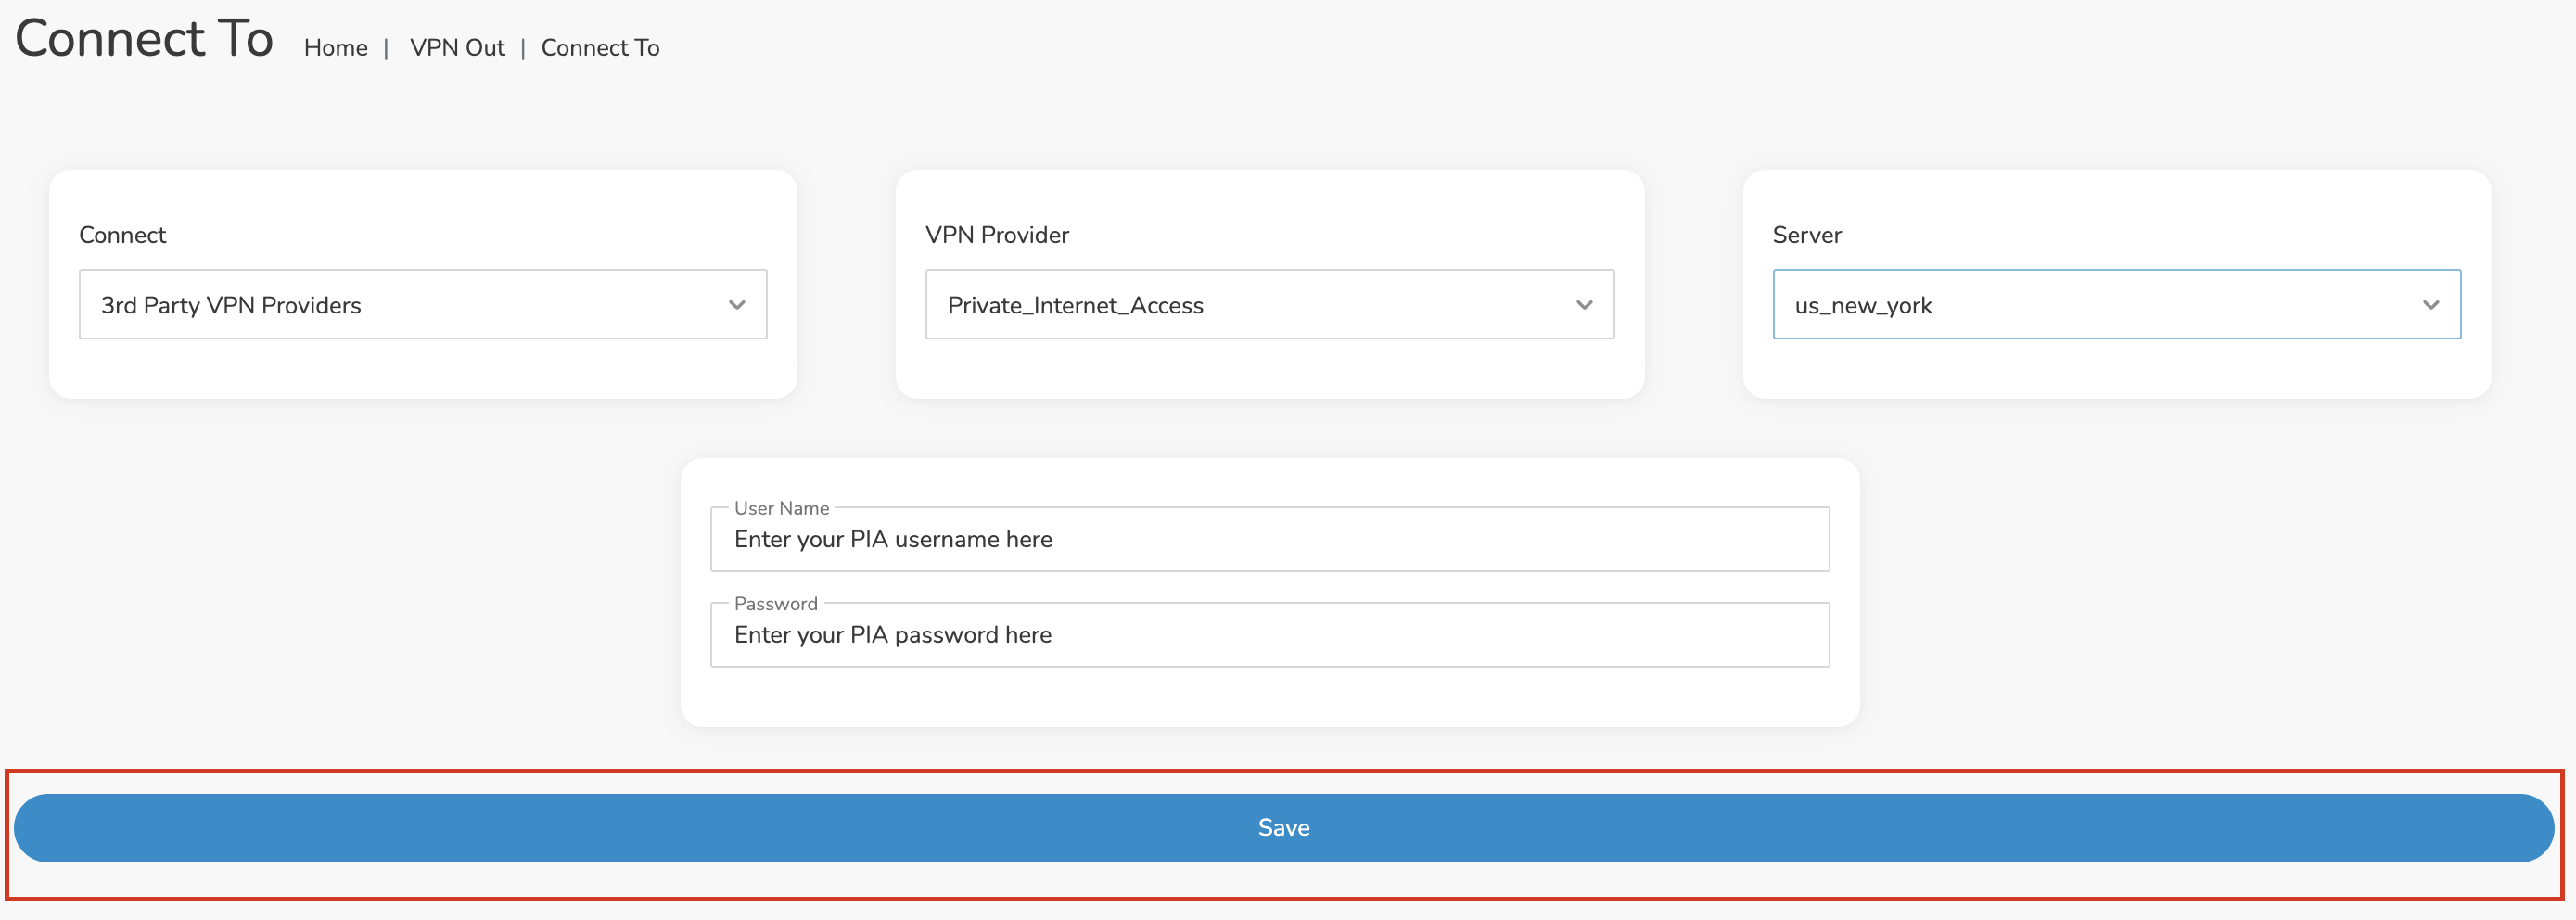
4. In the Connect dropdown choose 3rd Party VPN Providers and for the VPN Provider dropdown choose Private_Internet_Access.

Roqos PIA select provider

Enter your PIA information

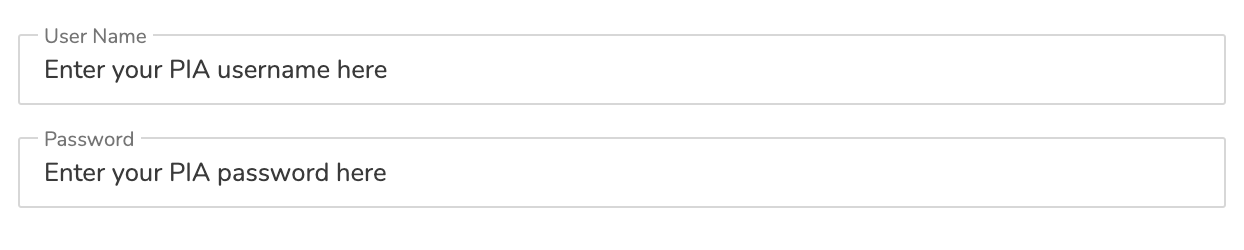
In the Username and Password field enter the PIA Username and Password that you logged in with.

Roqos PIA enter username and password

Select a PIA server

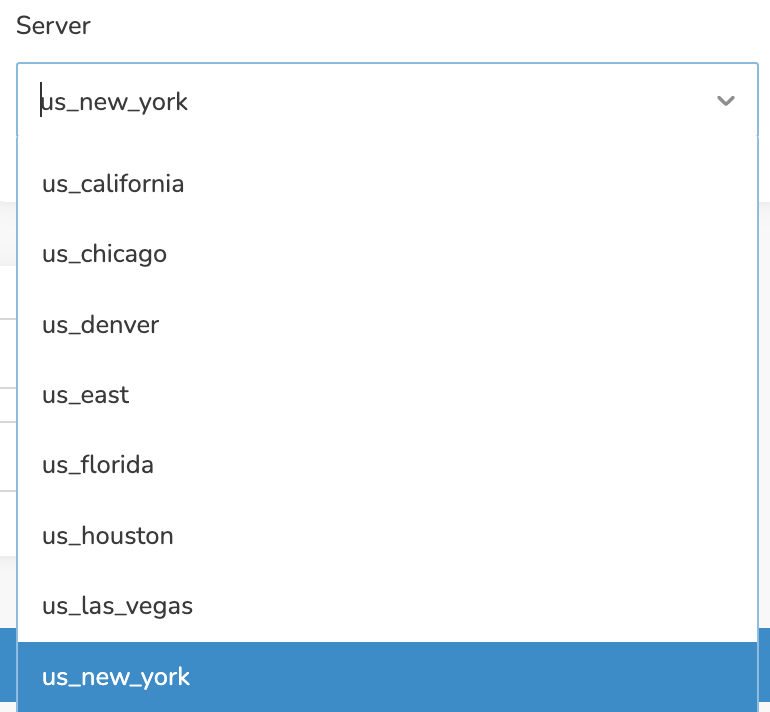
Click the Server dropdown and type in or scroll to your preferred server location.

Roqos PIA server select

Click the Save button.

Roqos PIA Save Settings

Connect to PIA

Once you click Save you will be returned to the VPN OUT menu.

Click the Connect button to start your PIA connection. Please be patient as the router connects your entire network through VPN.

Roqos VPN Connect

Assign devices to connect to VPN

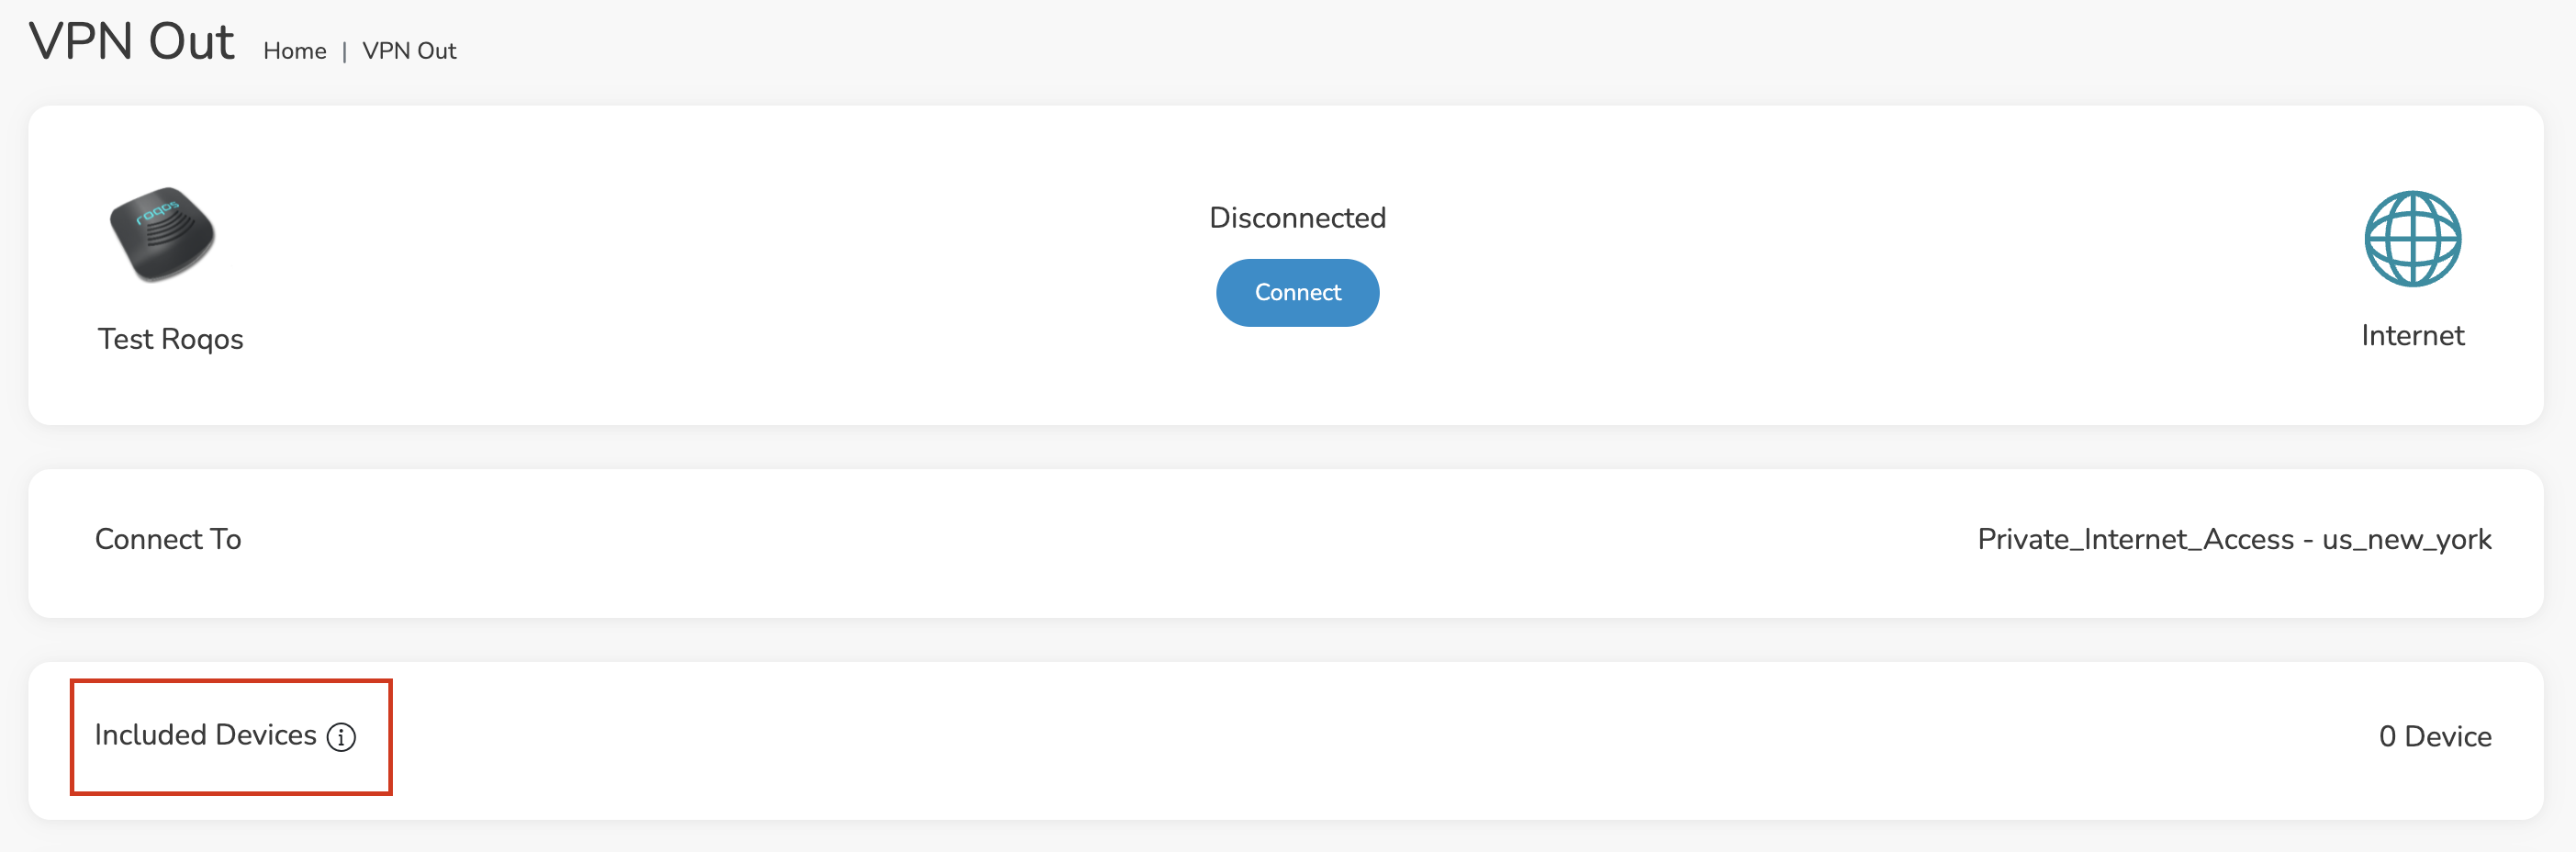
By default there are no devices assigned to the VPN tunnel. Click Included Devices. From this page you can choose if all devices should connect to PIA or only certain devices.

Roqos PIA Included Devices

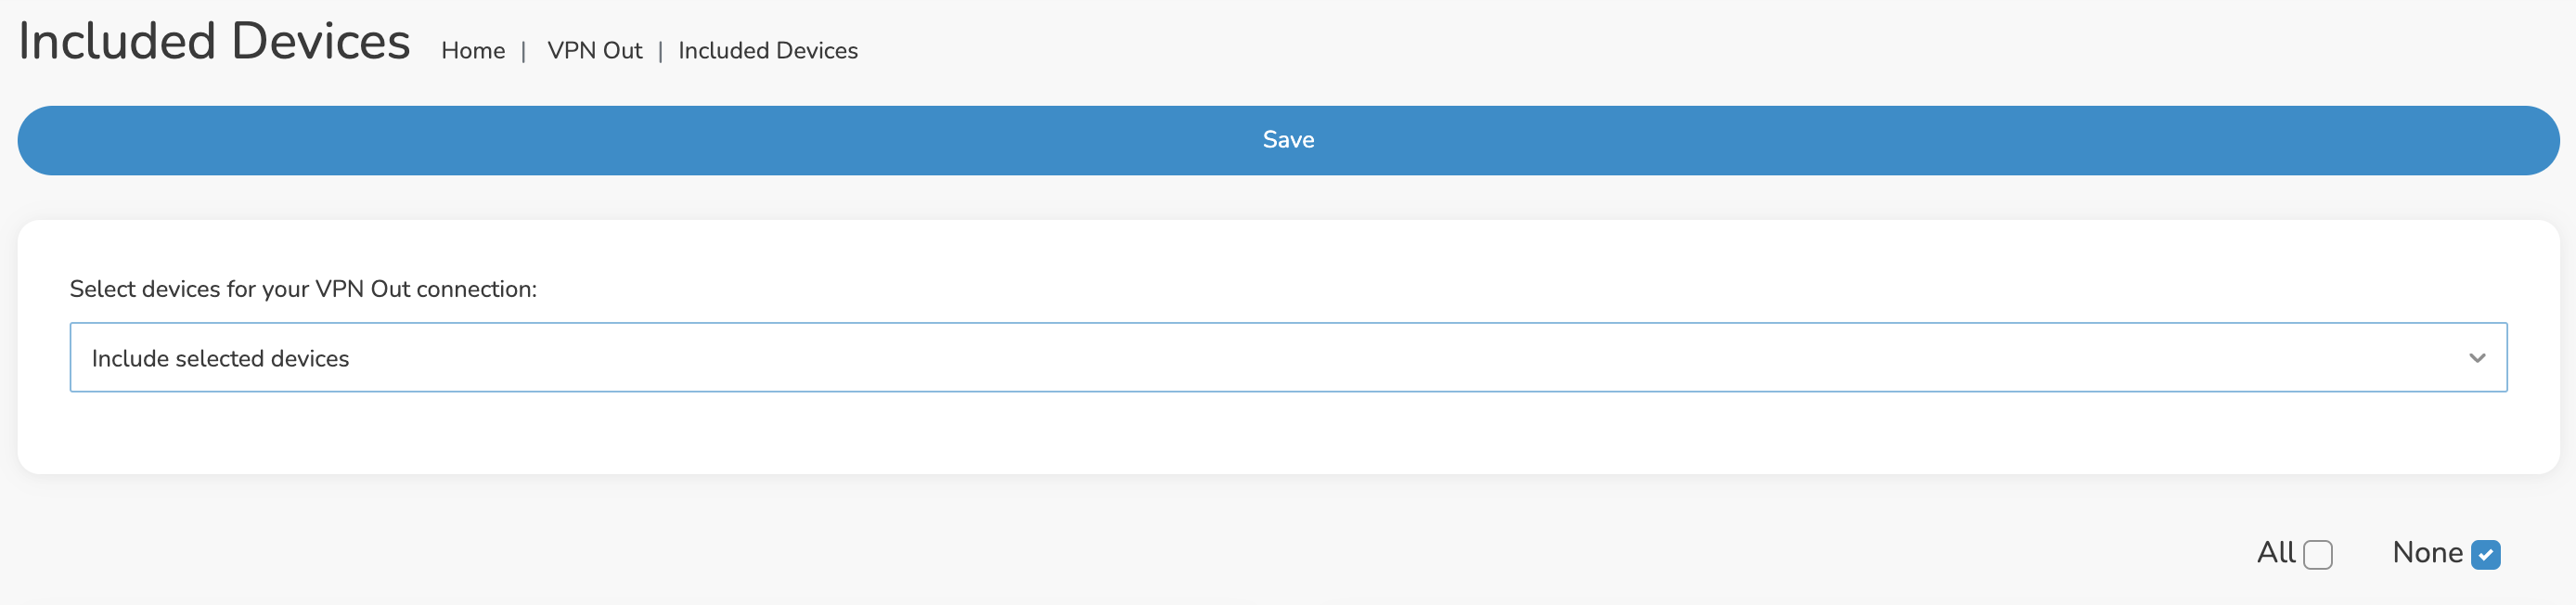
From the dropdown select Include all devices if you want every device that connects to the Roqos to connect to PIA. Then click Save.

Roqos VPN Include All Devices

If you only want specific devices to connect to PIA while others bypass the VPN connection select Include selected devices from the dropdown and then toggle the sliders for the devices you want connected to VPN. Click Save.

Roqos VPN Include Selected devices

Verify a successful PIA connection

Make sure you are connected to the Roqos network via WiFi or ethernet connection on your device.

Visit PIA’s IP Check to verify your new IP Address and virtual location.

You should see Connected at the top of the page underneath Private_Internet_Access.

Connect to a different PIA server

To change your server click Disconnect on the VPN OUT page then return to the Connect To section to select a new server from the Server dropdown and click Save. Now click Connect once again on the VPN Out page.

Disconnect from PIA

To disconnect from PIA click the Disconnect button.

TROUBLESHOOTING

Still having issues? Visit the FR Privacy App Troubleshooting section.

Troubleshoot Here

PrivateInternetAccess (PIA) TP-Link OpenVPN Setup

TeamFlashRouters · Apr 29, 2024 ·

Preparing for PIA TP-Link Setup

Download your PIA .ovpn file

If you are not already a PIA user Sign Up Now.

1. Log in to your account on the PIA website.

PIA login

2. Successfully log in with your account information then go to PIA’s OpenVPN Config Generator.

3. On the OpenVPN Configuration Generator select the following:

OpenVPN Version: OpenVPN 2.4 or newer

Select Platform: Linux

Select Region: Choose the server location you’d like to connect to

Select Port: Typically we recommend UDP/1198 RSA-2048 AES-128-CBC SHA1 for best speeds but feel free to select the one you want to use.

4. Click Generate to download the .ovpn file. Do not open this file once it is downloaded.

PIA Generate .ovpn file

TP-Link Router Setup for PIA

Login to TP-Link firmware settings in a browser on any computer or smart device connected to the FlashRouter’s network.

1. Navigate to the Advanced tab.

TP-Link Advanced settings

2. Navigate to the VPN Client tab.

TP-Link VPN Client

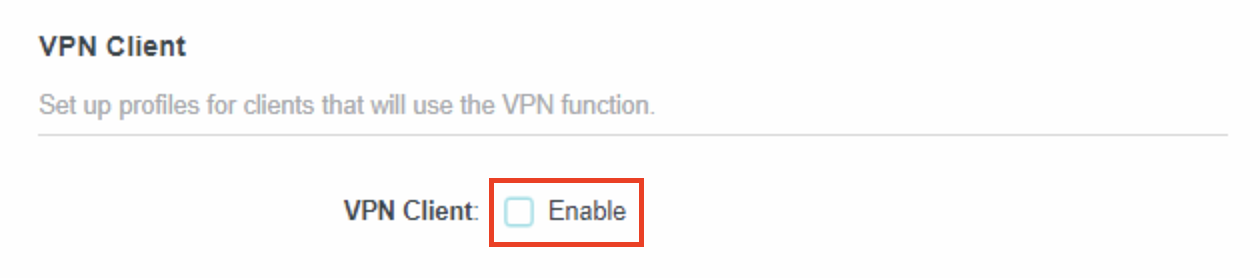
3. Check the Enable box next to VPN Client. Then click Save at the bottom of the page.

TP-Link VPN Client enable

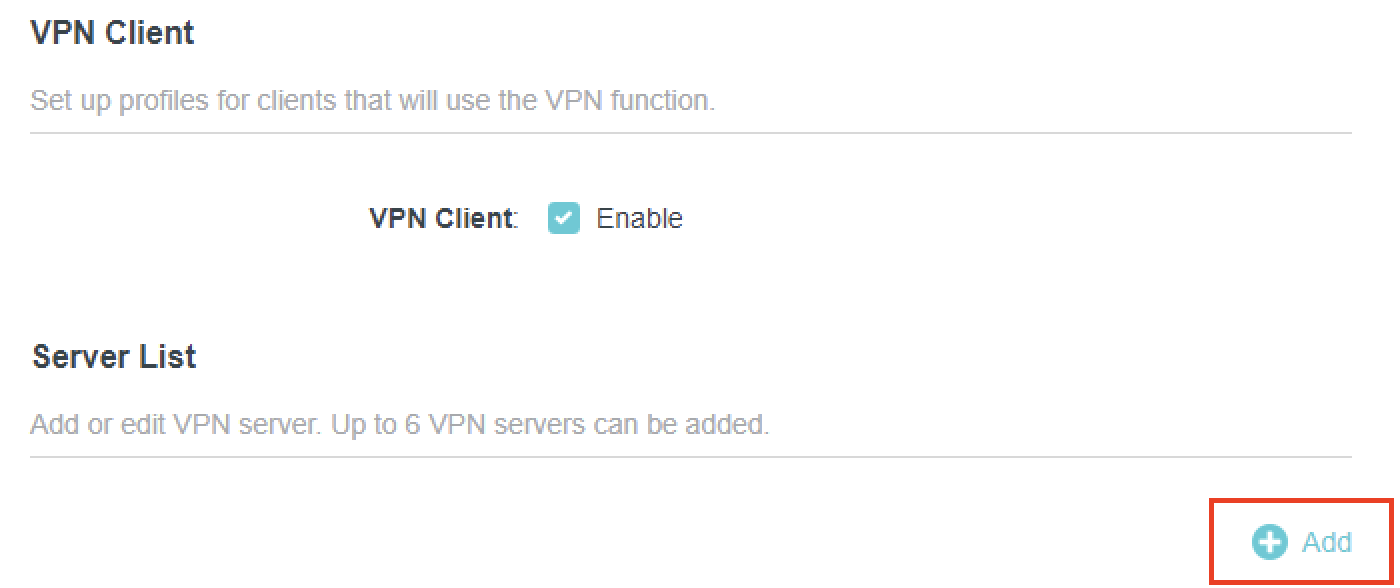
4. Click the Add button in the Server List area.

TP-Link Add server button

5. In the Description field enter in the name you’d like to use for this OpenVPN Client profile. We typically advise entering in the location. Our example server was New York so I have entered in PIA New York.

Set the VPN Type to OpenVPN.

In the Username and Password fields paste in the PIA username and password you use to successfully login to your PIA website account.

Click Browse and select the .ovpn file you downloaded earlier. Then click Save.

TP-Link PIA

By default no devices will be assigned to the VPN Tunnel. With TP-Link firmware you must manually assign the devices that you want connected to the VPN tunnel. Proceed with the next steps to do so for all devices you want connected to VPN.

6. Click the Add button in the Device List area.

TP-Link add devices to VPN tunnel

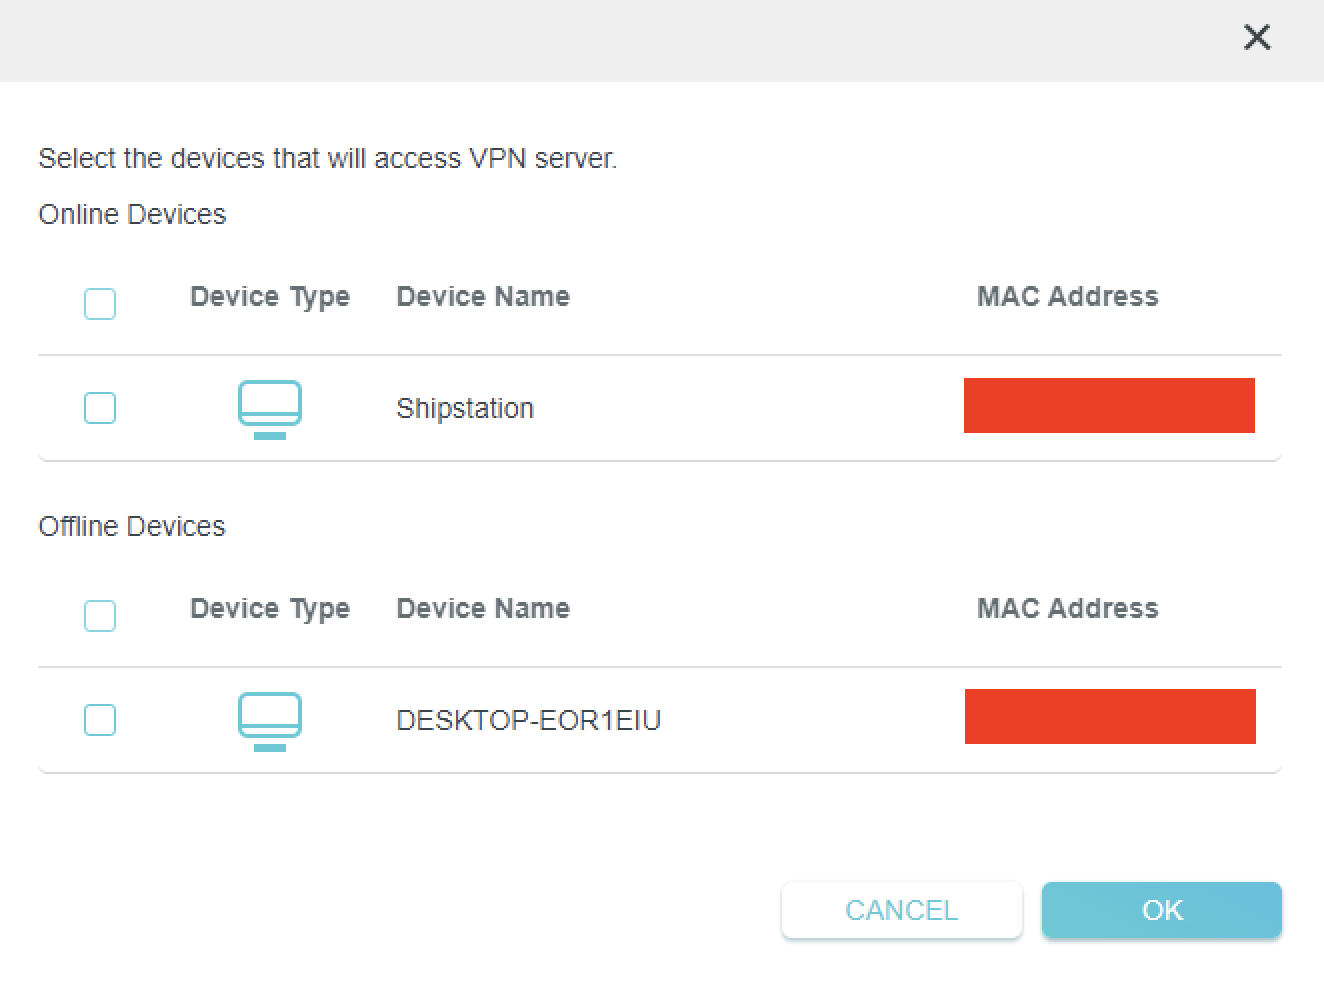
7. A list of devices connected to the FlashRouter’s network will appear. Check the devices that you want to connect to VPN. Then click OK.

TP-Link select devices to add to VPN tunnel

8. Now that the devices have been assigned to the VPN connection click the Enable toggle in the Server List area.

TP-Link PIA Connected

Verify a successful PIA connection

  1. You should now see a CONNECTED message.
  2. Visit PIA’s IP Check to verify your new IP address and virtual location.

In some cases you may notice that the location is not showing the same location as the server you have input in your router settings; this is because geo tracking tools are often tricked by VPN connections. As long as you see an IP address that is not the same as your normal Internet IP address then you are indeed connected to PIA.

How to change the PIA server

  1. Follow the steps at the top of the page to obtain a new .ovpn file.
  2. Then proceed with the settings same as initial setup.

TROUBLESHOOTING

Still having issues? Visit the VPN Troubleshooting section.

Troubleshoot Here

IPVanish TP-Link OpenVPN Setup

TeamFlashRouters · Apr 29, 2024 ·

Preparing for IPVanish TP-Link Setup

Download your IPVanish .ovpn file

If you are not already an IPVanish user Sign Up Now.

1. Log in to your account on the IPVanish website.

IPVanish login

2. Successfully log in with your account information then go to IPVanish .ovpn file page.

3. Click on the .ovpn file for the server location you want to use to dowloand the .ovpn file. Do not open this file.

IPVanish download ovpn

TP-Link Router Setup for IPVanish

Login to TP-Link firmware settings in a browser on any computer or smart device connected to the FlashRouter’s network.

1. Navigate to the Advanced tab.

TP-Link Advanced settings

2. Navigate to the VPN Client tab.

TP-Link VPN Client

3. Check the Enable box next to VPN Client. Then click Save at the bottom of the page.

TP-Link VPN Client enable

4. Click the Add button in the Server List area.

TP-Link Add server button

5. In the Description field enter in the name you’d like to use for this OpenVPN Client profile. We typically advise entering in the location. Our example server was New York so I have entered in IPVanish New York.

Set the VPN Type to OpenVPN.

In the Username and Password fields paste in the IPVanish email and password you use to successfully login to your IPVanish website account.

Click Browse and select the .ovpn file you downloaded earlier. Then click Save.

TP-Link IPVanish

By default no devices will be assigned to the VPN Tunnel. With TP-Link firmware you must manually assign the devices that you want connected to the VPN tunnel. Proceed with the next steps to do so for all devices you want connected to VPN.

6. Click the Add button in the Device List area.

TP-Link add devices to VPN tunnel

7. A list of devices connected to the FlashRouter’s network will appear. Check the devices that you want to connect to VPN. Then click OK.

TP-Link select devices to add to VPN tunnel

8. Now that the devices have been assigned to the VPN connection click the Enable toggle in the Server List area.

TP-Link IPVanish Connected

Verify a successful IPVanish connection

  1. You should now see a CONNECTED message.
  2. Visit IPVanish’s IP Check to verify your new IP address and virtual location.

In some cases you may notice that the location is not showing the same location as the server you have input in your router settings; this is because geo tracking tools are often tricked by VPN connections. As long as you see an IP address that is not the same as your normal Internet IP address then you are indeed connected to IPVanish.

How to change the IPVanish server

  1. Follow the steps at the top of the page to obtain a new .ovpn file.
  2. Then proceed with the settings same as initial setup.

TROUBLESHOOTING

Still having issues? Visit the VPN Troubleshooting section.

Troubleshoot Here

ExpressVPN Setup for AsusWRT Firmware Routers

TeamFlashRouters · Apr 29, 2024 ·

You can connect to ExpressVPN on your AsusWRT router using OpenVPN.

Quick Options

  • OpenVPN: Download your preferred server .ovpn configuration file from the ExpressVPN website.

:point_right: If you are not already a ExpressVPN user Sign Up Now.

EXPRESSVPN SETUP GUIDE FOR ASUSWRT

1. Log in to your account on the ExpressVPN website.

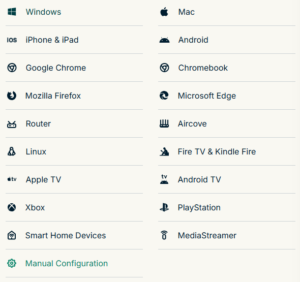
2. In the “Set up your devices” section, click More and select Manual Configuration from the menu options.

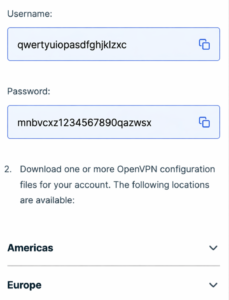
3. Copy the Username and Password that are displayed on the right

ExpressVPN Manual Service Credentials

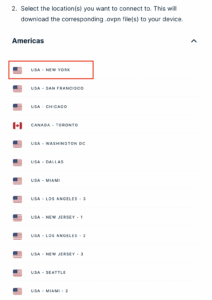
4. Download a server file from any of the available regions shown in the ExpressVPN Manual Configuration section (Americas, Europe, Asia Pacific, etc)

ExpressVPN Download .ovpn file

5. Log in to the Asus settings page by connecting to the Asus router’s WiFi (or wired LAN) on your computer. Then, enter 192.168.50.1 or asusrouter.com in the browser.

View our guide for more instructions on how to access AsusWRT firmware settings.

6. Navigate to the VPN tab and then click on the VPN Fusion tab, then click Add Profile

Click the VPN Button
VPN Fusion Add Profile

7.  Fill in your NordVPN information then click Apply and Enable.

  • Connection Name: Choose a name for your ExpressVPN OpenVPN connection.
  • VPN Type: Select OpenVPN
  • Import .ovpn File: Upload the OpenVPN file that you downloaded.
  • Username and Password: Copy and paste your ExpressVPN manual service credentials from step 3.

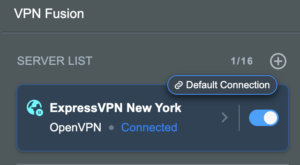
8. You should now see the Profile say Connected, indicating that the NordVPN server is successfully connected to your router.

Asus ExpressVPN Connected

9. The VPN connection is automatically set to Apply to all devices.

If you only want certain devices to connect to the VPN, then turn off the VPN connection and switch off Apply to all devices.

Now click the pencil next to the Device section and select the devices (computer, phone, etc.) that you want to connect to VPN. Click OK and then click Apply all settings.

Apply VPN by Device
  1. Connect your devices to the Asus router network and visit the ExpressVPN website, at the top it should display Your Status: Protected.
  2. Visit ExpressVPN’s IP Check to verify your new IP address and virtual location.

🚫📱Do not run ExpressVPN apps on devices connected to your ExpressVPNrouter. Using the app at the same time as the router VPN may cause conflicts and connection issues.

TROUBLESHOOTING

Still having issues? Visit the VPN Troubleshooting section.

Troubleshoot Here

PrivateInternetAccess (PIA) AsusWRT OpenVPN Setup

TeamFlashRouters · Apr 29, 2024 ·

Preparing for PIA AsusWRT Setup

Download your PIA .ovpn file

If you are not already a PIA user Sign Up Now.

1. Log in to your account on the PIA website.

PIA login

2. Successfully log in with your account information then go to PIA’s OpenVPN Config Generator.

3. On the OpenVPN Configuration Generator select the following:

OpenVPN Version: OpenVPN 2.4 or newer

Select Platform: Linux

Select Region: Choose the server location you’d like to connect to

Select Port: Typically we recommend UDP/1198 RSA-2048 AES-128-CBC SHA1 for best speeds but feel free to select the one you want to use.

4. Click Generate to download the .ovpn file. Do not open this file once it is downloaded.

PIA Generate .ovpn file

AsusWRT Router Setup for PIA

Login to AsusWRT firmware settings in a browser on any computer or smart device connected to the AsusWRT FlashRouter’s network.

1. Navigate to the VPN tab.

Merlin VPN Tab

2. Navigate to the VPN Fusion tab.

Asus VPN Fusion

3. Click Add profile.

Asus Add profile

4. In the Connection Name field enter in the name you’d like to use for this OpenVPN Client profile. We typically advise entering in the location or server number here. Our example server was in New York so I have entered in PIA New York.

5. In the VPN Type dropdown select OpenVPN.

6. Click Import .ovpn file and select the .ovpn file you downloaded earlier. Then click Upload.

7. In the Username and Password fields paste in the PIA username and password you use to successfully login to your PIA website account.

8. Click Apply and Enable at the bottom of the page.

Asus PIA profile

If you only want certain devices to connect to the OpenVPN Client profile you are setting up instead of all the devices connected to the FlashRouter’s network click into the profile and disable Apply to all devices. Then click Devices and select the devices that you want to connect to VPN.

Asus VPN devices
Asus VPN select devices

9. At the top of the page set the Service State toggle to ON to activate the VPN connection.

Asus PIA Connected

Verify a successful PIA connection

  1. You should now see a CONNECTED message.
  2. Visit PIA’s IP Check to verify your new IP address and virtual location.

In some cases you may notice that the location is not showing the same location as the server you have input in your router settings; this is because geo tracking tools are often tricked by VPN connections. As long as you see an IP address that is not the same as your normal Internet IP address then you are indeed connected to PIA.

How to change the PIA server

  1. Follow the steps at the top of the page to obtain a new .ovpn file.
  2. Then proceed with the settings same as initial setup.

TROUBLESHOOTING

Still having issues? Visit the VPN Troubleshooting section.

Troubleshoot Here

How do I access my Roqos device settings?

TeamFlashRouters · Mar 8, 2022 ·

Your Roqos Core’s settings or UI (User Interface) is accessible via a secure cloud based connection rather than the typical local access of other routers. This means that you can manage your Roqos from anywhere in the world not just at home.

Visit the Roqos Login URL

From any device that has a browser such as a computer, smartphone, or tablet visit login.roqos.com

Roqos Login URL

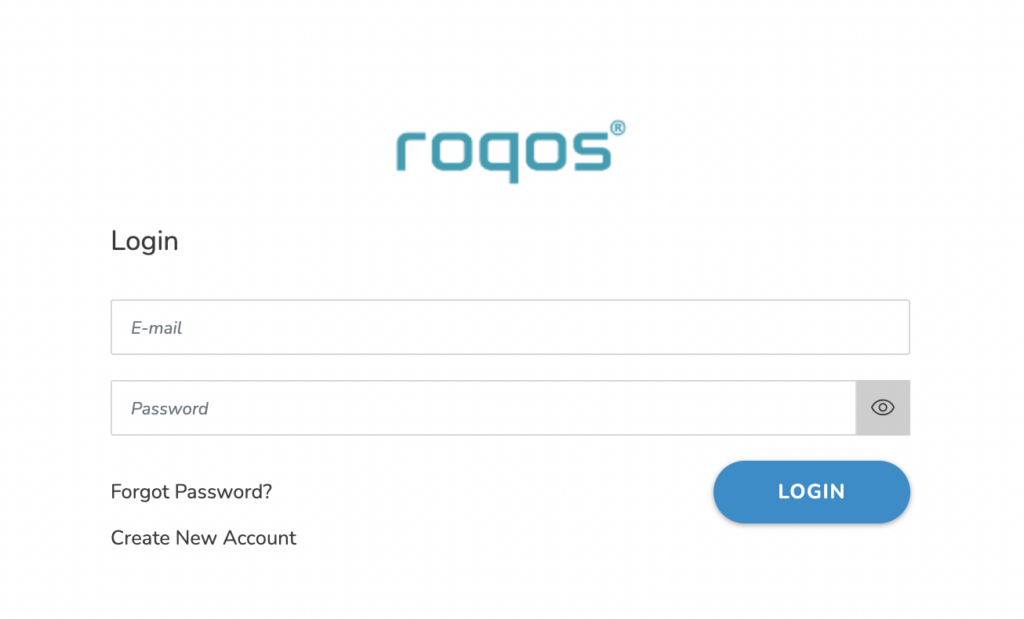
Login with your Roqos account

Enter in the email and password that you set when your Roqos was initially setup. If you still need to create your Roqos account and activate your Roqos follow our Activate and Connect Roqos to Internet guide.

Roqos UI Login

Proceed with making the changes to the settings you desire

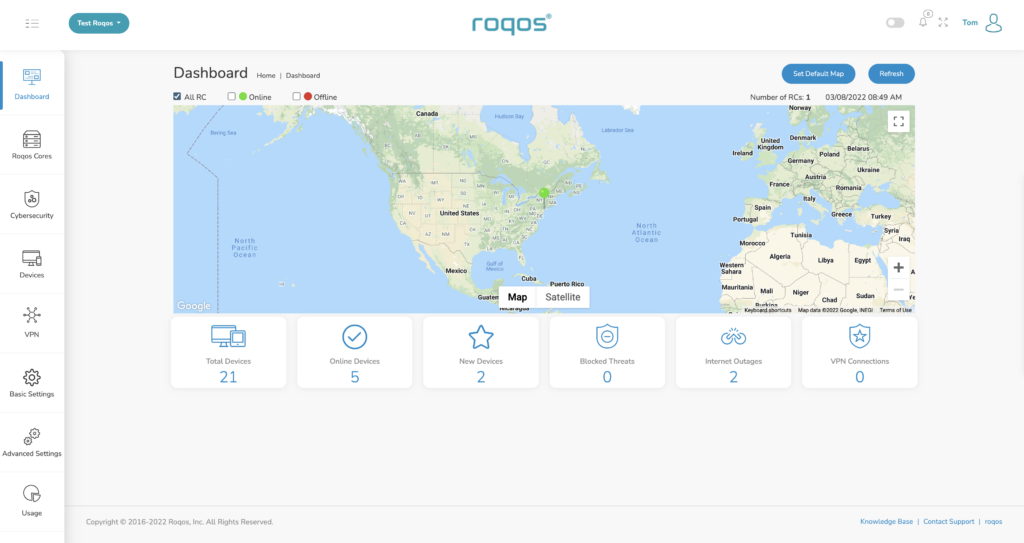
Now that you are logged in to your Roqos UI you adjust any settings as you see fit for your network. For guides on how to make specific changes to your Roqos view our Roqos Setup Guide area.

Roqos UI Logged in

PrivateInternetAccess (PIA) Merlin OpenVPN Setup

TeamFlashRouters · Jan 11, 2023 ·

Preparing for PIA Merlin Setup

Download your PIA .ovpn file

If you are not already a PIA user Sign Up Now.

1. Log in to your account on the PIA website.

PIA login

2. Successfully log in with your account information then go to PIA’s OpenVPN Config Generator.

3. On the OpenVPN Configuration Generator select the following:

OpenVPN Version: OpenVPN 2.4 or newer

Select Platform: Linux

Select Region: Choose the server location you’d like to connect to

Select Port: Typically we recommend UDP/1198 RSA-2048 AES-128-CBC SHA1 for best speeds but feel free to select the one you want to use.

4. Click Generate to download the .ovpn file. Do not open this file once it is downloaded.

PIA Generate .ovpn file

Merlin Router Setup for PIA

Login to Asus Merlin firmware settings in a browser on any computer or smart device connected to the Merlin FlashRouter’s network.

1. Navigate to the VPN tab.

Merlin VPN Tab

2. Navigate to the VPN Client tab.

Merlin VPN Client Tab

3. Click Choose file and select the .ovpn file you downloaded earlier. Then click Upload.

Merlin Choose File Upload

4. Set Automatic Start at boot time to Yes if you want the VPN connection to begin automatically when the router is powered off and back on.

Merlin Automatic Start at boot time

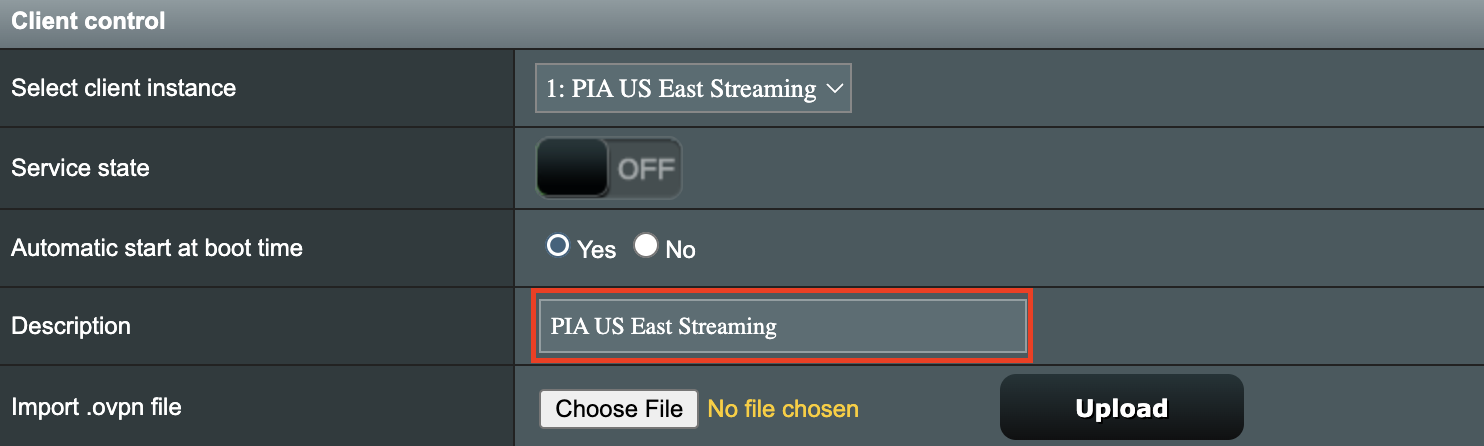
5. In the Description field enter in the name you’d like to use for this OpenVPN Client profile. We typically advise entering in the location here. Our example server was in US East Streaming so I have entered in PIA US East Streaming.

PIA Description

6. Set Accept DNS Configuration to Strict. Set Redirect Internet traffic through tunnel to Yes (all). Set Kill Switch to Yes or No depending on if you want the Internet to be killed if the VPN connection drops.

Merlin Accept DNS configuration Redirect Internet and Kill Switch

If you only want certain devices to connect to the OpenVPN Client profile you are setting up instead of all the devices connected to the FlashRouter’s network please set the Redirect Internet traffic through tunnel to VPN Director. Then complete the instructions on this page and then view our VPN Director guide.

7. Enter your PIA account username and password.

Merlin VPN Username and Password

8. Click Apply at the bottom of the page.

9. At the top of the page set the Service State toggle to ON to activate the VPN connection.

Merlin Service State All Providers

Verify a successful PIA connection

  1. You should now see a CONNECTED message.
  2. Visit PIA’s IP Check to verify your new IP address and virtual location.

In some cases you may notice that the location is not showing the same location as the server you have input in your router settings; this is because geo tracking tools are often tricked by VPN connections. As long as you see an IP address that is not the same as your normal Internet IP address then you are indeed connected to PIA.

How to change the PIA server

  1. Follow the steps at the top of the page to obtain a new .ovpn file.
  2. Then proceed with the settings same as initial setup.

TROUBLESHOOTING

Still having issues? Visit the VPN Troubleshooting section.

Troubleshoot Here

IPVanish Merlin OpenVPN Setup

TeamFlashRouters · Jan 11, 2023 ·

Preparing for IPVanish Merlin Setup

Download your IPVanish .ovpn file

If you are not already an IPVanish user Sign Up Now.

1. Log in to your account on the IPVanish website.

IPVanish login

2. Successfully log in with your account information then go to IPVanish .ovpn file page.

3. Click on the .ovpn file for the server location you want to use to dowloand the .ovpn file. Do not open this file.

IPVanish download ovpn

Merlin Router Setup for IPVanish

Login to Asus Merlin firmware settings in a browser on any computer or smart device connected to the Merlin FlashRouter’s network.

1. Navigate to the VPN tab.

Merlin VPN Tab

2. Navigate to the VPN Client tab.

Merlin VPN Client Tab

3. Click Choose file and select the .ovpn file you downloaded earlier. Then click Upload.

Merlin Choose File Upload

4. Set Automatic Start at boot time to Yes if you want the VPN connection to begin automatically when the router is powered off and back on.

Merlin Automatic Start at boot time

5. In the Description field enter in the name you’d like to use for this OpenVPN Client profile. We typically advise entering in the location here. Our example server was in nyc-a50 so I have entered in IPVanish a-50.

IPVanish Description

6. Set Accept DNS Configuration to Strict. Set Redirect Internet traffic through tunnel to Yes (all). Set Kill Switch to Yes or No depending on if you want the Internet to be killed if the VPN connection drops.

Merlin Accept DNS configuration Redirect Internet and Kill Switch

If you only want certain devices to connect to the OpenVPN Client profile you are setting up instead of all the devices connected to the FlashRouter’s network please set the Redirect Internet traffic through tunnel to VPN Director. Then complete the instructions on this page and then view our VPN Director guide.

7. Enter your IPVanish account email/username and password.

Merlin VPN Username and Password

8. Click Apply at the bottom of the page.

9. At the top of the page set the Service State toggle to ON to activate the VPN connection.

Merlin Service State All Providers

Verify a successful IPVanish connection

  1. You should now see a CONNECTED message.
  2. Visit IPVanish’s IP Check to verify your new IP address and virtual location.

In some cases you may notice that the location is not showing the same location as the server you have input in your router settings; this is because geo tracking tools are often tricked by VPN connections. As long as you see an IP address that is not the same as your normal Internet IP address then you are indeed connected to IPVanish.

How to change the IPVanish server

  1. Follow the steps at the top of the page to obtain a new .ovpn file.
  2. Then proceed with the settings same as initial setup.

TROUBLESHOOTING

Still having issues? Visit the VPN Troubleshooting section.

Troubleshoot Here

IPVanish Asus AX1800S OpenVPN Setup

TeamFlashRouters · Feb 26, 2024 ·

Preparing for IPVanish Asus AX1800S Setup

Download your IPVanish .ovpn file

If you are not already an IPVanish user Sign Up Now.

1. Log in to your account on the IPVanish website.

IPVanish login

2. Successfully log in with your account information then go to IPVanish .ovpn file page.

3. Click on the .ovpn file for the server location you want to use to dowloand the .ovpn file. Do not open this file.

IPVanish download ovpn

Asus AX1800S Router Setup for IPVanish

Login to Asus firmware settings in a browser on any computer or smart device connected to the FlashRouter’s network.

1. Navigate to the VPN tab.

Merlin VPN Tab

2. Navigate to the VPN Client tab.

Asus AX1800S VPN Settings

3. Click Add Profile.

Asus AX1800S VPN Settings

4. Click Choose file and select the .ovpn file you downloaded earlier. Then click Upload.

Asus AX1800S OpenVPN upload

5. In the Description field enter in the name you’d like to use for this OpenVPN Client profile. We typically advise entering in the location or server number here.

6. Enter your IPVanish account email/username and password.

7. Click the Activate button.

Verify a successful IPVanish connection

  1. You should now see a check mark in the Connection Status area.
  2. Visit IPVanish’s IP Check to verify your new IP address and virtual location.

In some cases you may notice that the location is not showing the same location as the server you have input in your router settings; this is because geo tracking tools are often tricked by VPN connections. As long as you see an IP address that is not the same as your normal Internet IP address then you are indeed connected to IPVanish.

How to change the IPVanish server

  1. Follow the steps at the top of the page to obtain a new .ovpn file.
  2. Then proceed with the settings same as initial setup.
  3. Be sure to deactivate a previously active connection before activating the new one. You do not want to connect to two at the same time.

TROUBLESHOOTING

Still having issues? Visit the VPN Troubleshooting section.

Troubleshoot Here

PrivateInternetAccess (PIA) Asus AX1800S OpenVPN Setup

TeamFlashRouters · Feb 26, 2024 ·

Preparing for PIA Asus AX1800S Setup

Download your PIA .ovpn file

If you are not already a PIA user Sign Up Now.

1. Log in to your account on the PIA website.

PIA login

2. Successfully log in with your account information then go to PIA’s OpenVPN Config Generator.

3. On the OpenVPN Configuration Generator select the following:

OpenVPN Version: OpenVPN 2.4 or newer

Select Platform: Linux

Select Region: Choose the server location you’d like to connect to

Select Port: Typically we recommend UDP/1198 RSA-2048 AES-128-CBC SHA1 for best speeds but feel free to select the one you want to use.

4. Click Generate to download the .ovpn file. Do not open this file once it is downloaded.

PIA Generate .ovpn file

Asus AX1800S Router Setup for PIA

Login to Asus firmware settings in a browser on any computer or smart device connected to the FlashRouter’s network.

1. Navigate to the VPN tab.

Merlin VPN Tab

2. Navigate to the VPN Client tab.

Asus AX1800S VPN Settings

3. Click Add Profile.

Asus AX1800S VPN Settings

4. Click Choose file and select the .ovpn file you downloaded earlier. Then click Upload.

Asus AX1800S OpenVPN upload

5. In the Description field enter in the name you’d like to use for this OpenVPN Client profile. We typically advise entering in the location here.

6. Enter your PIA account username and password.

7. Click the Activate button.

Verify a successful PIA connection

  1. You should now see a check mark in the Connection Status area.
  2. Visit PIA’s IP Check to verify your new IP address and virtual location.

In some cases you may notice that the location is not showing the same location as the server you have input in your router settings; this is because geo tracking tools are often tricked by VPN connections. As long as you see an IP address that is not the same as your normal Internet IP address then you are indeed connected to PIA.

How to change the PIA server

  1. Follow the steps at the top of the page to obtain a new .ovpn file.
  2. Then proceed with the settings same as initial setup.
  3. Be sure to deactivate a previously active connection before activating the new one. You do not want to connect to two at the same time.

TROUBLESHOOTING

Still having issues? Visit the VPN Troubleshooting section.

Troubleshoot Here

Roqos Core Router Setup Guide

Roqos Core Router Setup Guide

Quick Start Guide for Roqos Core Routers

Find setup guides, FAQs and troubleshooting tips for the FlashRouters Roqos Core Router.
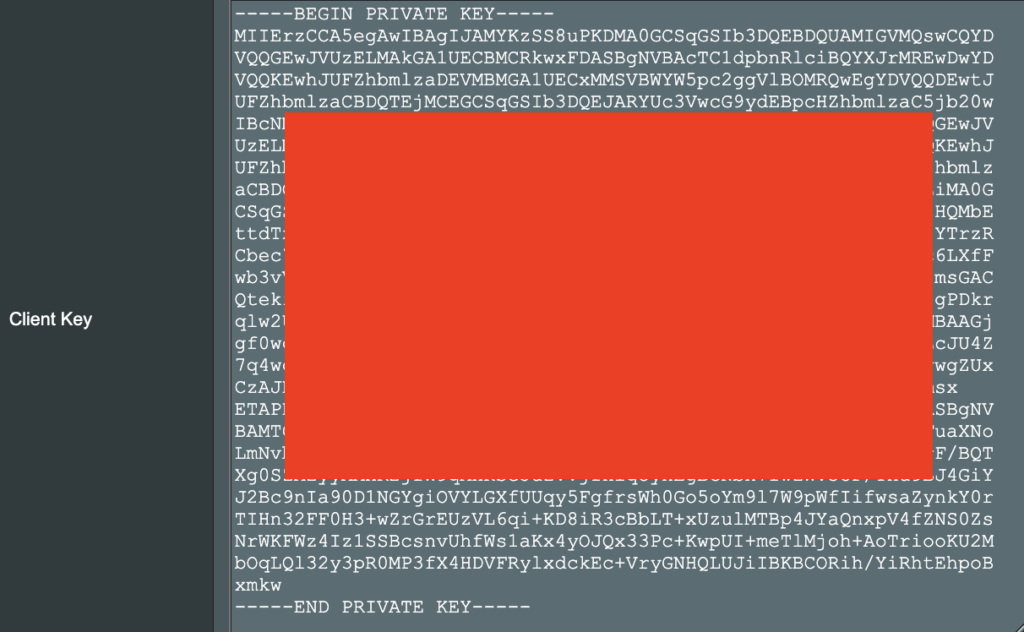
Internet Setup

  • Roqos Core Quick Start Guide
  • How do I access my Roqos device settings?
  • Roqos Core Internet Setup and Activation

WiFi Setup

  • Setting up a Guest WiFi Network on Roqos
  • Change WiFi name and password on Roqos

VPN Setup

  • NordVPN Setup on Roqos
  • PrivateInternetAccess (PIA) Setup on Roqos
  • ExpressVPN Setup on Roqos
  • Roqos VPN Connected, but my device IP is unchanged

Roqos Core Features

  • Set a Static IP for your connected devices on Roqos
  • VPN Kill Switch on Roqos
  • Managing User Profiles on Roqos
  • Cybersecurity and Intrusion Prevention on Roqos
  • Block Websites by Country on Roqos
  • Ad blocking on Roqos
  • Parental Controls on Roqos
  • Wireless Repeater – WiFi as WAN on Roqos
  • What do the lights on my Roqos Core mean?

Search Support Articles

Troubleshooting

  • Roqos VPN Connected, but my device IP is unchanged
  • How do I access my Roqos device settings?
  • What do the lights on my Roqos Core mean?

More Ways to Get Help

GET IN TOUCH

BUY SUPPORT
BROWSE FAQs

Privacy Hero Safe Surf

TeamFlashRouters · Apr 3, 2023 ·
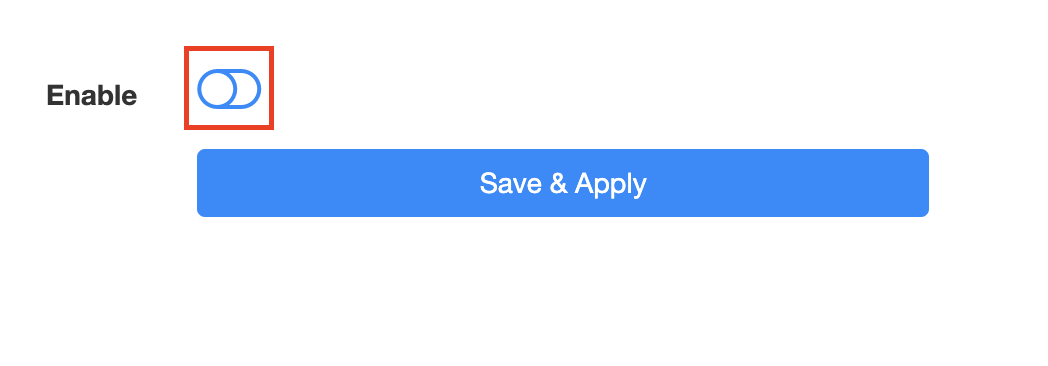
Your Privacy Hero router uses Cloud Based router management which means you can access the router settings from anywhere on any device that has an internet connection. You can follow these steps while connected to your phone, other Wi-Fi network, or the Privacy Hero network.
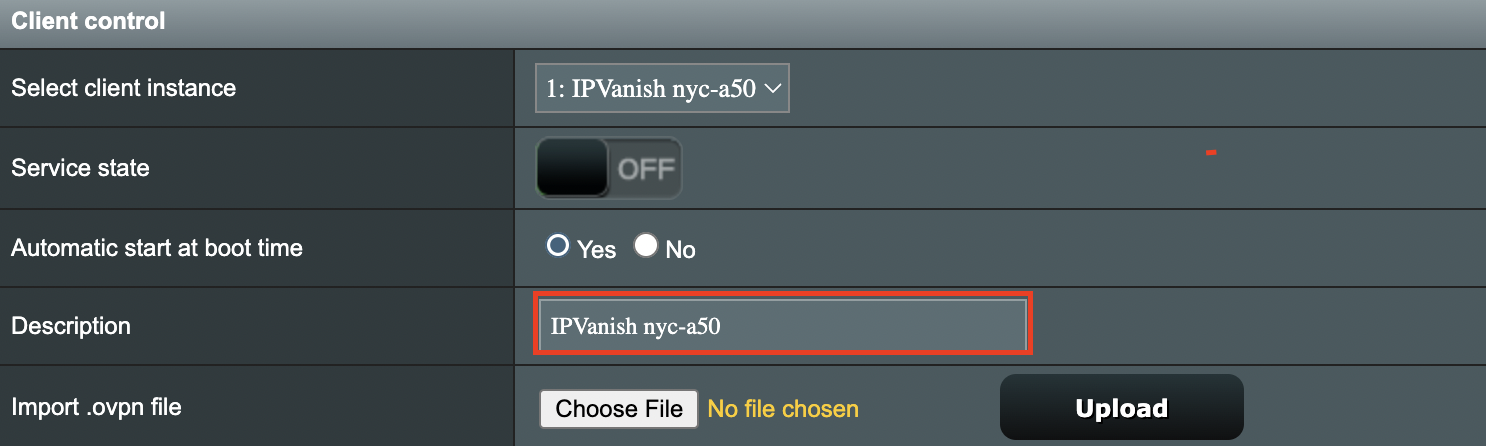
The Safe Surf settings feature allows users to block inappropriate search results, YouTube videos, and adult content. All devices assigned to this profile will have these rules applied.

1. From any device that has a browser such as a computer, smartphone, or tablet visit app.privacyhero.com

App.PrivacyHero.com

2. Enter your Privacy Hero account email and password. Click Login.

Privacy Hero Access Settings

If you have not created your Privacy Hero account yet please follow these instructions.

3. Click the Profiles symbol.

Privacy Hero Profiles

4. Click the name of the User Profile.

Privacy Hero Select Profile

5. Toggle On the settings for Internet Safe Search, YouTube Safe Search, and Block Adult Content as needed.

Privacy Hero Safe Search

TROUBLESHOOTING

Still having issues? Visit the VPN Troubleshooting section.

Troubleshoot Here
« Previous Page

Primary Sidebar

  • Troubleshooting
  • Router Access
  • Internet Connection Issues
  • WiFi Connectivity
  • General VPN Issues
  • TeamViewer Remote Support
  • DD-WRT Firmware
  • Facebook
  • Twitter
  • Instagram
  • Pinterest
  • YouTube

Footer