• Skip to primary navigation
  • Skip to main content
  • Skip to primary sidebar
  • Skip to footer

FlashRouters Support Portal

Prioritizing Privacy

  • SETUP GUIDES
    • Privacy Hero Router Setup Guide
    • ASUS-WRT Router Setup Guide
    • AsusWRT-Merlin Router Setup Guide
    • DD-WRT Router Setup Guide
    • ExpressVPN Router Setup Guide
    • GL.iNet Router Setup Guide
    • Roqos Core Router Setup Guide
  • TROUBLESHOOTING
    • Router Access
    • WiFi Connectivity
    • Internet Connection Issues
    • General VPN Issues
    • DD-WRT Firmware
    • TeamViewer Remote Support
  • FAQs
    • Router FAQs
    • VPN FAQs
    • Warranty and Returns FAQs
    • Sales FAQs
    • Shipping FAQs
    • Service Plan FAQs
  • Show Search
Hide Search

Search Results for: setting head no

ProtonVPN Manual OpenVPN Setup

TeamFlashRouters · Apr 19, 2019 ·

Preparing for Manual ProtonVPN Setup

Verify your ProtonVPN login information

If you are not already an ProtonVPN user Sign Up Now.

1. Log in to your account on the ProtonVPN website.

2. Navigate to the Account tab and note your OpenVPN specific Username and Password.
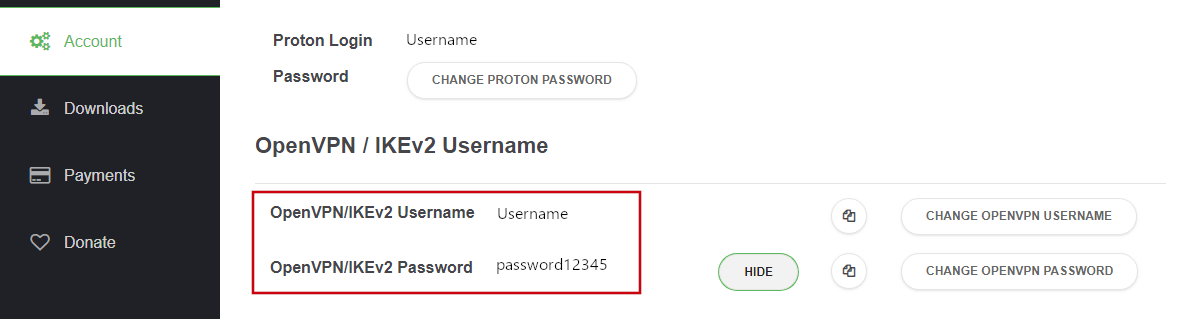
FlashRouters DD-WRT Privacy APP ProtonVPN OpenVPN Specific Username and Password

ProtonVPN Server Addresses

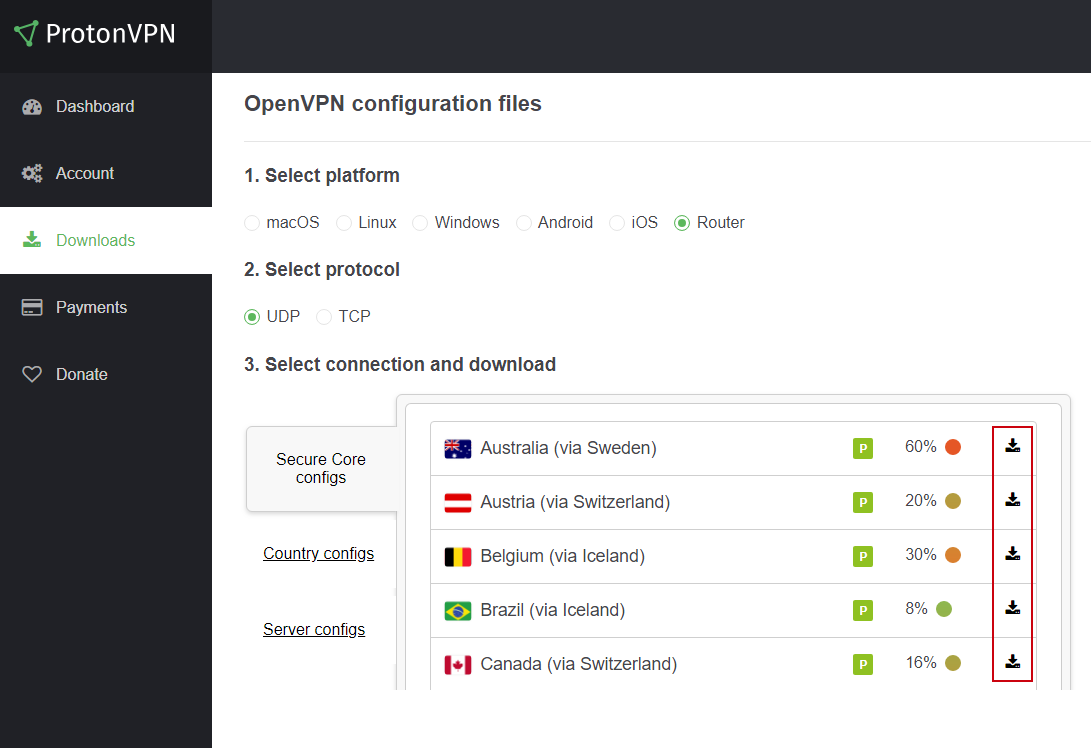
Click on the following link to Download the .ovpn file containing the Server IP Address you wish to connect to.

Open the .ovpn file that is downloaded to your computer with NotePad++ for Windows or TextEdit for Apple.
DD-WRT Router Setup for ProtonVPN

Navigate to Services > VPN

Enter ProtonVPN settings

OpenVPN Client

Start OpenVPN Client

If you wish to disable your VPN connection simply set this to Disable at any time and click Apply Settings.

Server IP/Name

At the top of the .ovpn file you downloaded above, there is a line e.g.:
remote 206.226.72.27 1194
206.226.72.27 is your ProtonVPN server IP address. Enter that IP Address in this field.

Port

1194

Tunnel Device

TUN

Tunnel Protocol

UDP

Encryption cipher

AES-256-CBC

Hash Algorithm

SHA512

Userpass Authentication

Enable

Username

Enter your OpenVPN specific Username.

Password

Enter your OpenVPN specific Password.

Advanced Options

Enable

TLS Cipher

None

LZO Compression

Adaptive

NAT

Enable

Firewall Protection

Enable

TLS Auth Key

-----BEGIN OpenVPN Static key V1-----
6acef03f62675b4b1bbd03e53b187727
423cea742242106cb2916a8a4c829756
3d22c7e5cef430b1103c6f66eb1fc5b3
75a672f158e2e2e936c3faa48b035a6d
e17beaac23b5f03b10b868d53d03521d
8ba115059da777a60cbfd7b2c9c57472
78a15b8f6e68a3ef7fd583ec9f398c8b
d4735dab40cbd1e3c62a822e97489186
c30a0b48c7c38ea32ceb056d3fa5a710
e10ccc7a0ddb363b08c3d2777a3395e1
0c0b6080f56309192ab5aacd4b45f55d
a61fc77af39bd81a19218a79762c3386
2df55785075f37d8c71dc8a42097ee43
344739a0dd48d03025b0450cf1fb5e8c
aeb893d9a96d1f15519bb3c4dcb40ee3
16672ea16c012664f8a9f11255518deb
-----END OpenVPN Static key V1-----

Additional Config

tun-mtu-extra 32
mssfix 1450
persist-key
persist-tun

Policy Based Routing

This field can be used for split VPN and Dual Gateway routing.

CA Cert

-----BEGIN CERTIFICATE-----
MIIFozCCA4ugAwIBAgIBATANBgkqhkiG9w0BAQ0FADBAMQswCQYDVQQGEwJDSDEV
MBMGA1UEChMMUHJvdG9uVlBOIEFHMRowGAYDVQQDExFQcm90b25WUE4gUm9vdCBD
QTAeFw0xNzAyMTUxNDM4MDBaFw0yNzAyMTUxNDM4MDBaMEAxCzAJBgNVBAYTAkNI
MRUwEwYDVQQKEwxQcm90b25WUE4gQUcxGjAYBgNVBAMTEVByb3RvblZQTiBSb290
IENBMIICIjANBgkqhkiG9w0BAQEFAAOCAg8AMIICCgKCAgEAt+BsSsZg7+AuqTq7
vDbPzfygtl9f8fLJqO4amsyOXlI7pquL5IsEZhpWyJIIvYybqS4s1/T7BbvHPLVE
wlrq8A5DBIXcfuXrBbKoYkmpICGc2u1KYVGOZ9A+PH9z4Tr6OXFfXRnsbZToie8t
2Xjv/dZDdUDAqeW89I/mXg3k5x08m2nfGCQDm4gCanN1r5MT7ge56z0MkY3FFGCO
qRwspIEUzu1ZqGSTkG1eQiOYIrdOF5cc7n2APyvBIcfvp/W3cpTOEmEBJ7/14RnX
nHo0fcx61Inx/6ZxzKkW8BMdGGQF3tF6u2M0FjVN0lLH9S0ul1TgoOS56yEJ34hr
JSRTqHuar3t/xdCbKFZjyXFZFNsXVvgJu34CNLrHHTGJj9jiUfFnxWQYMo9UNUd4
a3PPG1HnbG7LAjlvj5JlJ5aqO5gshdnqb9uIQeR2CdzcCJgklwRGCyDT1pm7eoiv
WV19YBd81vKulLzgPavu3kRRe83yl29It2hwQ9FMs5w6ZV/X6ciTKo3etkX9nBD9
ZzJPsGQsBUy7CzO1jK4W01+u3ItmQS+1s4xtcFxdFY8o/q1zoqBlxpe5MQIWN6Qa
lryiET74gMHE/S5WrPlsq/gehxsdgc6GDUXG4dk8vn6OUMa6wb5wRO3VXGEc67IY
m4mDFTYiPvLaFOxtndlUWuCruKcCAwEAAaOBpzCBpDAMBgNVHRMEBTADAQH/MB0G
A1UdDgQWBBSDkIaYhLVZTwyLNTetNB2qV0gkVDBoBgNVHSMEYTBfgBSDkIaYhLVZ
TwyLNTetNB2qV0gkVKFEpEIwQDELMAkGA1UEBhMCQ0gxFTATBgNVBAoTDFByb3Rv
blZQTiBBRzEaMBgGA1UEAxMRUHJvdG9uVlBOIFJvb3QgQ0GCAQEwCwYDVR0PBAQD
AgEGMA0GCSqGSIb3DQEBDQUAA4ICAQCYr7LpvnfZXBCxVIVc2ea1fjxQ6vkTj0zM
htFs3qfeXpMRf+g1NAh4vv1UIwLsczilMt87SjpJ25pZPyS3O+/VlI9ceZMvtGXd
MGfXhTDp//zRoL1cbzSHee9tQlmEm1tKFxB0wfWd/inGRjZxpJCTQh8oc7CTziHZ
ufS+Jkfpc4Rasr31fl7mHhJahF1j/ka/OOWmFbiHBNjzmNWPQInJm+0ygFqij5qs
51OEvubR8yh5Mdq4TNuWhFuTxpqoJ87VKaSOx/Aefca44Etwcj4gHb7LThidw/ky
zysZiWjyrbfX/31RX7QanKiMk2RDtgZaWi/lMfsl5O+6E2lJ1vo4xv9pW8225B5X
eAeXHCfjV/vrrCFqeCprNF6a3Tn/LX6VNy3jbeC+167QagBOaoDA01XPOx7Odhsb
Gd7cJ5VkgyycZgLnT9zrChgwjx59JQosFEG1DsaAgHfpEl/N3YPJh68N7fwN41Cj
zsk39v6iZdfuet/sP7oiP5/gLmA/CIPNhdIYxaojbLjFPkftVjVPn49RqwqzJJPR
N8BOyb94yhQ7KO4F3IcLT/y/dsWitY0ZH4lCnAVV/v2YjWAWS3OWyC8BFx/Jmc3W
DK/yPwECUcPgHIeXiRjHnJt0Zcm23O2Q3RphpU+1SO3XixsXpOVOYP6rJIXW9bMZ
A1gTTlpi7A==
-----END CERTIFICATE-----

CLICK APPLY SETTINGS

Leave all settings not mentioned above as their default setting.

Verify a successful ProtonVPN connection

Navigate to Status > OpenVPN

  1. You should now see a CONNECTED SUCCESS message.
  2. Visit WhatIsMyIPAddress to verify your new IP address, virtual location, and status as Protected at the top of the page.

In some cases you may notice that the location is not showing the same location as the server you have input in your router settings; this is because geo tracking tools are often tricked by VPN connections. As long as you see an IP address that is not the same as your normal Internet IP address then you are indeed connected to ProtonVPN.

Back up your settings

Navigate to Administration > Backup

  1. Click the Backup button.
  2. A file named nvrambak.bin will be saved to your computer.
  3. You can load nvrambak.bin to restore your settings in the event of a reset.

How to change the ProtonVPN server

  1. Download and open a new .ovpn file from ProtonVPN.
  2. Copy and paste the server IP Address into the Server IP/Name field.
  3. Click Apply Settings.
TROUBLESHOOTING

Still having issues? Visit the VPN Troubleshooting section.

Troubleshoot Here

How do I save and load a backup file?

TeamFlashRouters · Jun 4, 2019 ·

Why should I save a backup file?

Save a backup file of your correctly configured DD-WRT settings to ensure you can load the working settings in a few simple clicks instead of manually configuring each setting in the event of a reset.

Save a backup file

Navigate to Administration > Backup

  1. Click Backup and save / download the file.
  2. Name the backup file “FlashRouter Backup”

Load a backup file

Navigate to Administration > Backup

  1. Click Choose File and find the backup file you previously saved.
  2. Click Restore.
How to Load a Backup File in DD-WRT FlashRouter

My 5.0GHz network is not showing up

TeamFlashRouters · May 2, 2019 ·

Verify the device supports 5GHz

5.0GHz networks are not compatible with all devices so first make sure that you device’s wireless adapter supports 5GHz wireless frequencies.

If you are not sure, find out if your device support 5 GHz via Google search or by looking in the wireless hardware details in the device’s network settings. If you see Wireless a/b/g/n support then you have a compatible device. If you are missing the Wireless a then this means there is no 5 GHz support.

Enter the recommended wireless settings

Our team has tested the wireless functionality for each FlashRouter that we offer and shared our recommended wireless settings in our Wifi Setup area. Replicate the settings for your FlashRouter model found on that page.

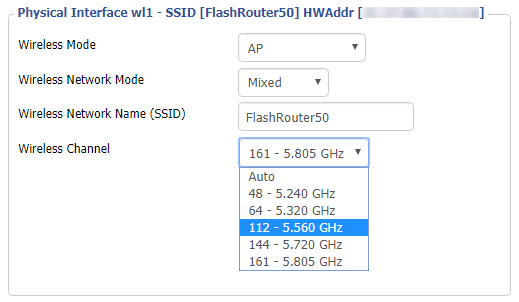
Lower the wireless channel

Some devices do support 5.0GHz connections but not the higher channels that DD-WRT firmware offers.

Navigate to Wireless > Basic Settings

Lower the wireless channel setting for the 5.0GHz band that is not showing. Based on our tests the most broadly compatible channels are 36, 48 and 161.

CLICK APPLY SETTINGS

Refresh your device's network adapter

The easiest way to accomplish this is by rebooting your device as the settings to reset your adapter may vary on all types of internet connected devices.

Review wireless Status

Navigate to Status > Wireless

The readouts on this page can help tell if there are errors with the FlashRouter’s wireless. View our article on how to read the Wireless Status page for more information.

My 2.4GHz network is not showing up

TeamFlashRouters · May 2, 2019 ·

If you ever have an issue with WiFi, you can always wire directly into the FlashRouter to verify and/or update your current WiFi settings.

Enter the recommended wireless settings

Our team has tested the wireless functionality for each FlashRouter that we offer and shared our recommended wireless settings in our Wifi Setup area. Replicate the settings for your FlashRouter model found on that page if the 2.4GHz is not showing.

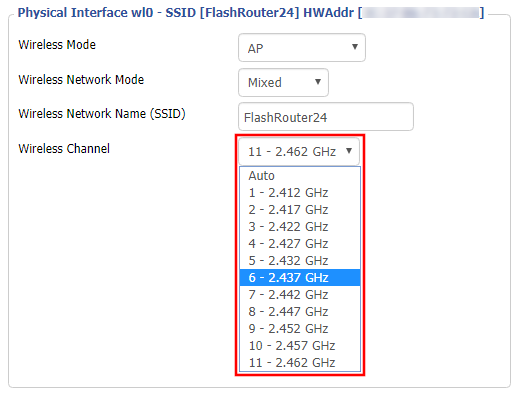
Change the wireless channel

Navigate to Wireless > Basic Settings

Change the wireless channel setting for the 2.4GHz band that is not appearing. The most broadly compatible channels are 6 and 11.

CLICK APPLY SETTINGS

Refresh your device's network adapter

In rare instances the wireless adapter for your device may stop picking up WiFi networks and must be reset. This will be different for each device, that is why the best way to refresh your wireless adapter is to simply reboot any device in question and see if the adapter now picks up your WiFi networks.

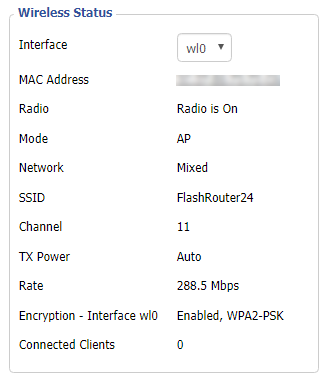
Review wireless Status

Navigate to Status > Wireless

The readouts on this page can help tell if there are errors with the FlashRouter’s wireless. View our article on how to read the Wireless Status page for more information.

Surfshark Manual OpenVPN Setup

TeamFlashRouters · Apr 24, 2019 ·

Preparing for Manual Surfshark Setup

Obtain your Surfshark OpenVPN information

If you are not already an Surfshark user Sign Up Now.

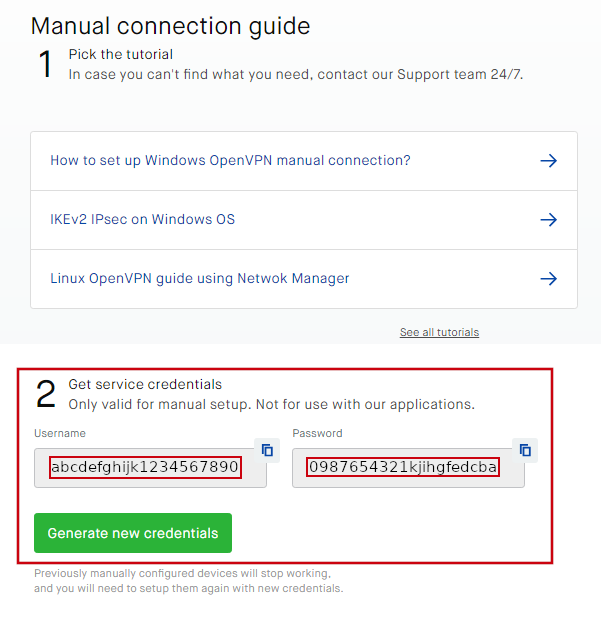
1. Log in to your account on the Surfshark website.

2. Successfully log in with your account information and Navigate to the Manual Connection Guide. Here you will find the OpenVPN Specific Username and Password required for manual configuration.

FlashRouters Privacy App - SurfShark OpenVPN Specific Username and Password

Surfshark Server Addresses

View a full list of Surfshark servers.

United States

Atlanta:
us-atl.prod.surfshark.com
Buffalo:
us-buf.prod.surfshark.com
Chicago:
us-chi.prod.surfshark.com
Dallas:
us-dal.prod.surfshark.com
Las Vegas:
us-las.prod.surfshark.com
Los Angeles:
us-lax.prod.surfshark.com
Miami:
us-mia.prod.surfshark.com
New York City:
us-nyc.prod.surfshark.com
Phoenix:
us-phx.prod.surfshark.com
San Fransisco:
us-sfo.prod.surfshark.com
Seattle:
us-sea.prod.surfshark.com

DD-WRT Router Setup for Surfshark

Navigate to Services > VPN

Enter Surfshark settings

OpenVPN Client

Start OpenVPN Client

If you wish to disable your VPN connection simply set this to Disable at any time and click Apply Settings.

Server IP/Name

Copy and paste the server you would like to connect to from the server list above. Be sure there are no extra spaces or characters.

If you wish to change Surfshark connection locations, THIS IS THE ONLY FIELD YOU NEED TO CHANGE.

Port

1194

Tunnel Device

TUN

Tunnel Protocol

UDP

Encryption cipher

None

Hash Algorithm

SHA512

Userpass Authentication

Enable

Username

Enter your OpenVPN specific Username.

Password

Enter your OpenVPN specific Password.

Advanced Options

Enable

TLS Cipher

None

LZO Compression

Disabled

NAT

Enable

Firewall Protection

Enable

TLS Auth Key

-----BEGIN OpenVPN Static key V1-----
b02cb1d7c6fee5d4f89b8de72b51a8d0
c7b282631d6fc19be1df6ebae9e2779e
6d9f097058a31c97f57f0c35526a44ae
09a01d1284b50b954d9246725a1ead1f
f224a102ed9ab3da0152a15525643b2e
ee226c37041dc55539d475183b889a10
e18bb94f079a4a49888da566b9978346
0ece01daaf93548beea6c827d9674897
e7279ff1a19cb092659e8c1860fbad0d
b4ad0ad5732f1af4655dbd66214e552f
04ed8fd0104e1d4bf99c249ac229ce16
9d9ba22068c6c0ab742424760911d463
6aafb4b85f0c952a9ce4275bc821391a
a65fcd0d2394f006e3fba0fd34c4bc4a
b260f4b45dec3285875589c97d3087c9
134d3a3aa2f904512e85aa2dc2202498
-----END OpenVPN Static key V1-----

Additional Config

remote-cert-tls server
remote-random
nobind
tun-mtu 1500
tun-mtu-extra 32
mssfix 1450
persist-key
persist-tun
ping-timer-rem
reneg-sec 0
cipher AES-256-GCM
log /tmp/vpn.log

Policy Based Routing

This field can be used for split VPN and Dual Gateway routing.

CA Cert

-----BEGIN CERTIFICATE-----
MIIFTTCCAzWgAwIBAgIJAMs9S3fqwv+mMA0GCSqGSIb3DQEBCwUAMD0xCzAJBgNV
BAYTAlZHMRIwEAYDVQQKDAlTdXJmc2hhcmsxGjAYBgNVBAMMEVN1cmZzaGFyayBS
b290IENBMB4XDTE4MDMxNDA4NTkyM1oXDTI4MDMxMTA4NTkyM1owPTELMAkGA1UE
BhMCVkcxEjAQBgNVBAoMCVN1cmZzaGFyazEaMBgGA1UEAwwRU3VyZnNoYXJrIFJv
b3QgQ0EwggIiMA0GCSqGSIb3DQEBAQUAA4ICDwAwggIKAoICAQDEGMNj0aisM63o
SkmVJyZPaYX7aPsZtzsxo6m6p5Wta3MGASoryRsBuRaH6VVa0fwbI1nw5ubyxkua
Na4v3zHVwuSq6F1p8S811+1YP1av+jqDcMyojH0ujZSHIcb/i5LtaHNXBQ3qN48C
c7sqBnTIIFpmb5HthQ/4pW+a82b1guM5dZHsh7q+LKQDIGmvtMtO1+NEnmj81BAp
FayiaD1ggvwDI4x7o/Y3ksfWSCHnqXGyqzSFLh8QuQrTmWUm84YHGFxoI1/8AKdI
yVoB6BjcaMKtKs/pbctk6vkzmYf0XmGovDKPQF6MwUekchLjB5gSBNnptSQ9kNgn
TLqi0OpSwI6ixX52Ksva6UM8P01ZIhWZ6ua/T/tArgODy5JZMW+pQ1A6L0b7egIe
ghpwKnPRG+5CzgO0J5UE6gv000mqbmC3CbiS8xi2xuNgruAyY2hUOoV9/BuBev8t
tE5ZCsJH3YlG6NtbZ9hPc61GiBSx8NJnX5QHyCnfic/X87eST/amZsZCAOJ5v4EP
SaKrItt+HrEFWZQIq4fJmHJNNbYvWzCE08AL+5/6Z+lxb/Bm3dapx2zdit3x2e+m
iGHekuiE8lQWD0rXD4+T+nDRi3X+kyt8Ex/8qRiUfrisrSHFzVMRungIMGdO9O/z
CINFrb7wahm4PqU2f12Z9TRCOTXciQIDAQABo1AwTjAdBgNVHQ4EFgQUYRpbQwyD
ahLMN3F2ony3+UqOYOgwHwYDVR0jBBgwFoAUYRpbQwyDahLMN3F2ony3+UqOYOgw
DAYDVR0TBAUwAwEB/zANBgkqhkiG9w0BAQsFAAOCAgEAn9zV7F/XVnFNZhHFrt0Z
S1Yqz+qM9CojLmiyblMFh0p7t+Hh+VKVgMwrz0LwDH4UsOosXA28eJPmech6/bjf
ymkoXISy/NUSTFpUChGO9RabGGxJsT4dugOw9MPaIVZffny4qYOc/rXDXDSfF2b+
303lLPI43y9qoe0oyZ1vtk/UKG75FkWfFUogGNbpOkuz+et5Y0aIEiyg0yh6/l5Q
5h8+yom0HZnREHhqieGbkaGKLkyu7zQ4D4tRK/mBhd8nv+09GtPEG+D5LPbabFVx
KjBMP4Vp24WuSUOqcGSsURHevawPVBfgmsxf1UCjelaIwngdh6WfNCRXa5QQPQTK
ubQvkvXONCDdhmdXQccnRX1nJWhPYi0onffvjsWUfztRypsKzX4dvM9k7xnIcGSG
EnCC4RCgt1UiZIj7frcCMssbA6vJ9naM0s7JF7N3VKeHJtqe1OCRHMYnWUZt9vrq
X6IoIHlZCoLlv39wFW9QNxelcAOCVbD+19MZ0ZXt7LitjIqe7yF5WxDQN4xru087
FzQ4Hfj7eH1SNLLyKZkA1eecjmRoi/OoqAt7afSnwtQLtMUc2bQDg6rHt5C0e4dC
LqP/9PGZTSJiwmtRHJ/N5qYWIh9ju83APvLm/AGBTR2pXmj9G3KdVOkpIC7L35dI
623cSEC3Q3UZutsEm/UplsM=
-----END CERTIFICATE-----

CLICK APPLY SETTINGS

Leave all settings not mentioned above as their default setting.

Verify a successful Surfshark connection

Navigate to Status > OpenVPN

  1. You should now see a CONNECTED SUCCESS message.
  2. Visit WhatIsMyIPAddress to verify your new IP address, virtual location, and status as Protected at the top of the page.

In some cases you may notice that the location is not showing the same location as the server you have input in your router settings; this is because geo tracking tools are often tricked by VPN connections. As long as you see an IP address that is not the same as your normal Internet IP address then you are indeed connected to Surfshark VPN.

Back up your settings

Navigate to Administration > Backup

  1. Click the Backup button.
  2. A file named nvrambak.bin will be saved to your computer.
  3. You can load nvrambak.bin to restore your settings in the event of a reset.

How to change the Surfshark server

  1. Visit the Surfshark Manual setup page and scroll down to Section 3.
  2. Copy and paste one of the server IP Address into the Server IP/Name field.
  3. Click Apply Settings.

TROUBLESHOOTING

Still having issues? Visit the VPN Troubleshooting section.

Troubleshoot Here

Block Websites by Country on Roqos

Dave · Dec 16, 2021 ·

Country Block allows you to select countries that you identify to be an unsafe and block internet traffic between your network and those countries.

Login to Roqos Core UI web app in a browser on any computer or smart device.

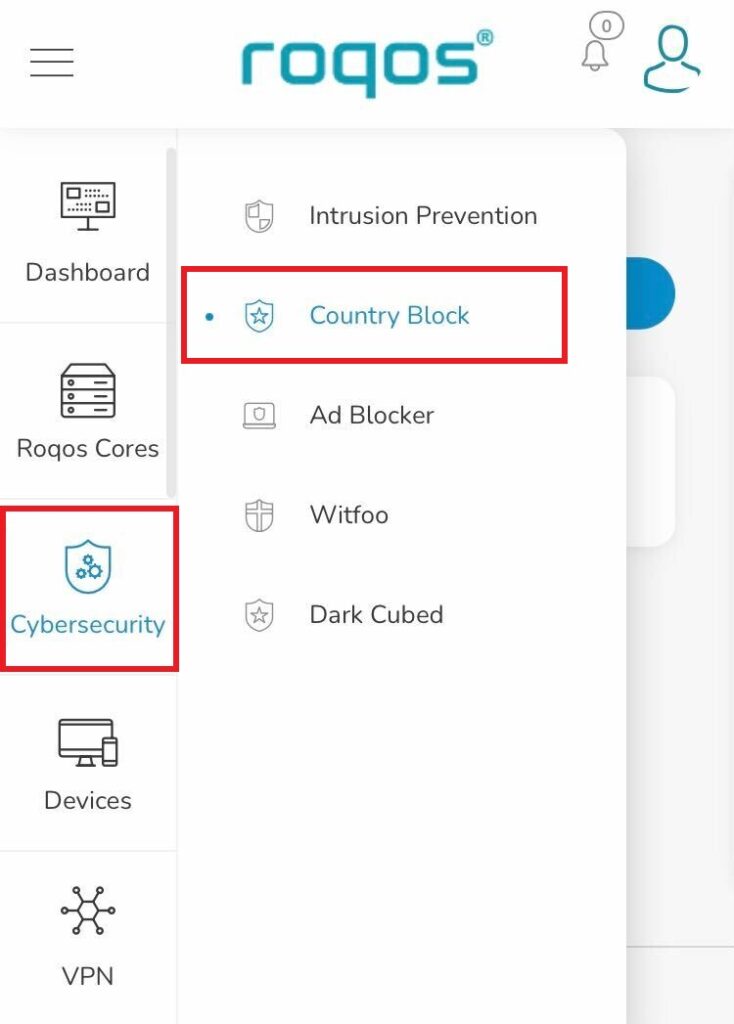
1. Click the navigation menu and select Cybersecurity > Country Block.

Roqos Cybersecurity - Country Block

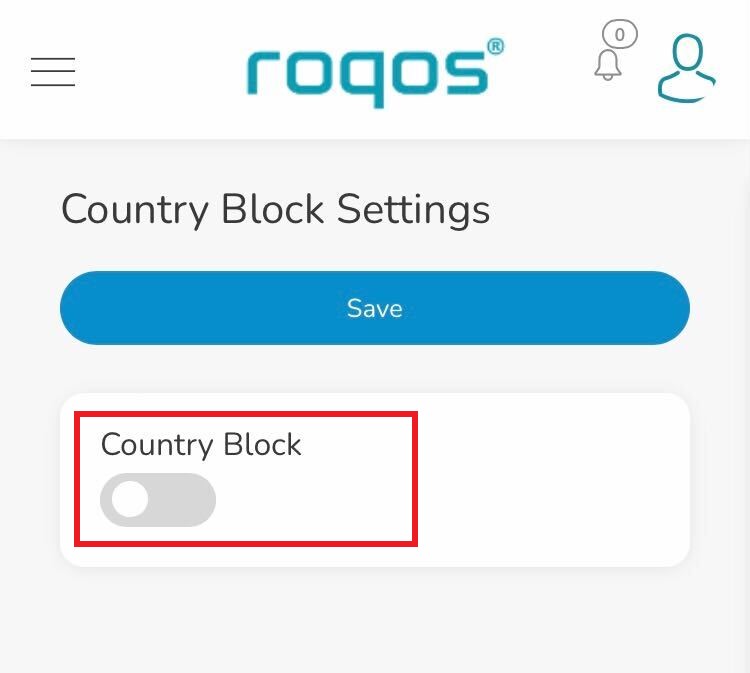
2. Toggle the Country Block setting.

Roqos Cybersecurity - Enable Country Block

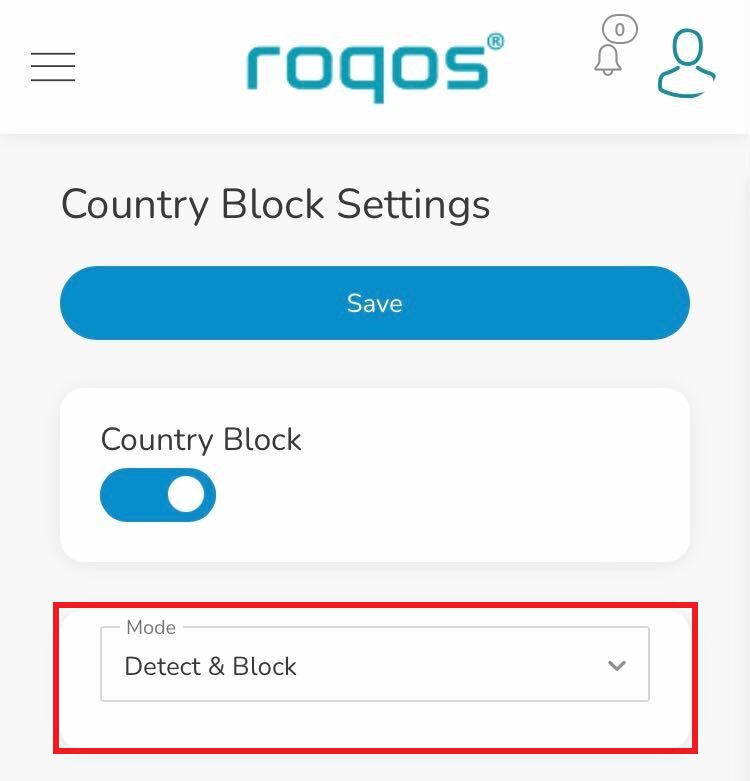
3. In the Mode dropdown select Detect & Block or Detect Only.

Roqos Cybersecurity - Country Block Mode

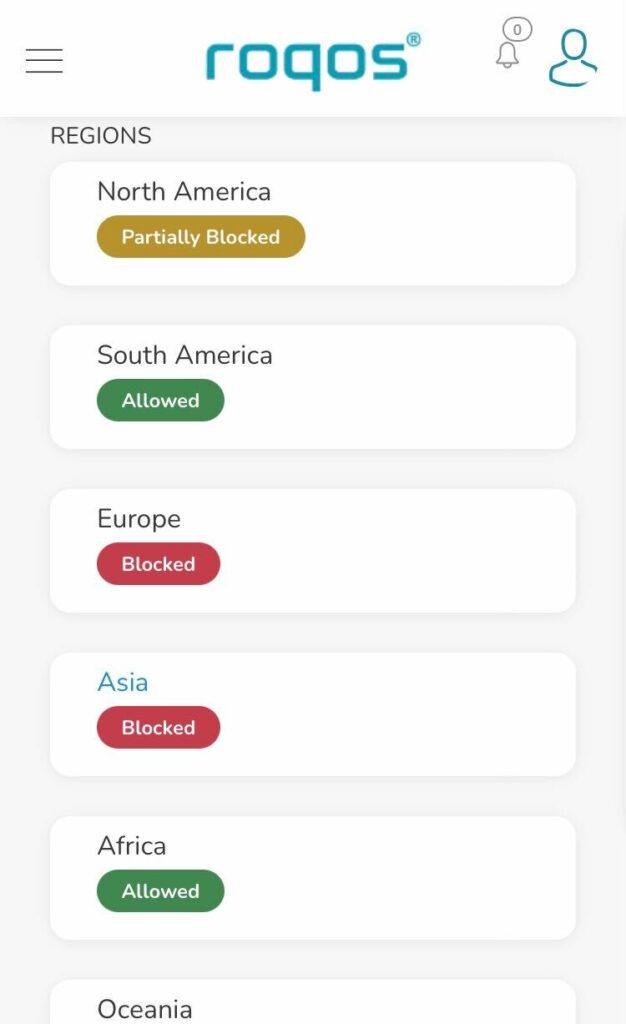
4. Under Regions you can select the regions you want to block or specific countries within that region. Once your selections are made click Save.

Roqos Cybersecurity - Select Blocked Countries

Windscribe Manual OpenVPN Setup

TeamFlashRouters · Apr 25, 2019 ·

Preparing for Manual Windscribe Setup

Verify your Windscribe login information

If you are not already an Windscribe user Sign Up Now.

1. Log in to your account on the Windscribe website.

2. Click on the Download link at the top of the page.

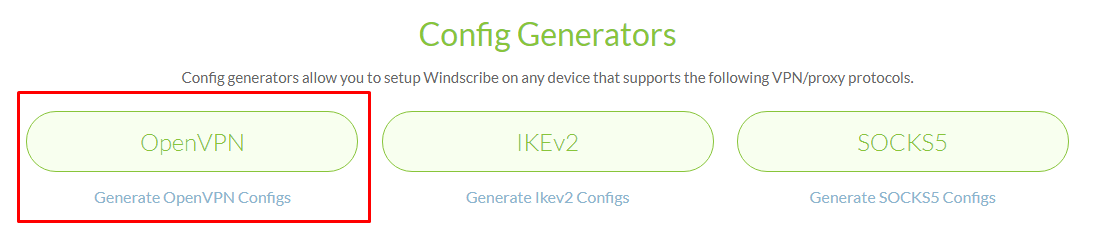
3. Scroll down to the Config Generators section and Click on the OpenVPN link.

Windscribe Website - Generate OpenVPN Configuration Files

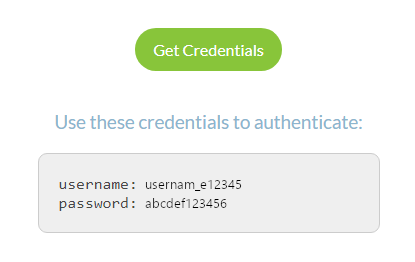
4. Click on Get Credentials and copy the Username and Password. This information will be used later on in the configuration.

Windscribe Website OpenVPN Specific Username and Password

Windscribe Server Addresses

United States

US East:
us-east.windscribe.com
US West:
us-west.windscribe.com
US Windflix:
wf-us.windscribe.com

Canada

Canada:
ca.windscribe.com
Canada West:
ca-west.windscribe.com

Additional Servers

Australia:
au.windscribe.com
Austria:
at.windscribe.com
Belgium:
be.windscribe.com
Brazil:
br.windscribe.com
Bulgaria:
bg.windscribe.com
Czech Republic:
cz.windscribe.com
Denmark:
dk.windscribe.com
Egypt:
eg.windscribe.com
Finland:
fi.windscribe.com
France:
fr.windscribe.com
Germany:
de.windscribe.com
Hong Kong:
hk.windscribe.com
Hungary:
hu.windscribe.com
India:
in.windscribe.com
Ireland:
ie.windscribe.com
Italy:
it.windscribe.com
Japan:
jp.windscribe.com
Latvia:
lv.windscribe.com
Luxemburg:
lu.windscribe.com
Malaysia:
my.windscribe.com
Mexico:
mx.windscribe.com
Netherlands:
nl.windscribe.com
Norway:
no.windscribe.com
Poland:
pl.windscribe.com
Romania:
ro.windscribe.com
Russia:
ru.windscribe.com
Singapore:
ch.windscribe.com
South Africa:
za.windscribe.com
South Korea:
kr.windscribe.com
Spain:
es.windscribe.com
Sweden:
se.windscribe.com
Switzerland:
ch.windscribe.com
Taiwan:
tw.windscribe.com
Turkey:
tr.windscribe.com
Ukraine:
ua.windscribe.com
United Kingdom:
uk.windscribe.com

DD-WRT Router Setup for Windscribe

Navigate to Services > VPN

Enter Windscribe settings

OpenVPN Client

Start OpenVPN Client

If you wish to disable your VPN connection simply set this to Disable at any time and click Apply Settings.

Server IP/Name

Copy and Paste the server you would like to connect to from the server list above. Be sure there are no extra spaces or characters.

If you wish to change Windscribe connection locations, THIS IS THE ONLY FIELD YOU NEED TO CHANGE.

Port

443

Tunnel Device

TUN

Tunnel Protocol

UDP

Encryption cipher

AES-256-CBC

Hash Algorithm

SHA512

User Pass Authentication

Enable

Username

Enter your OpenVPN specific Username.

Password

Enter your OpenVPN specific Password.

Advanced Options

Enable

TLS Cipher

None

LZO Compression

Adaptive

NAT

Enable

Firewall Protection

Enable

TLS Auth Key

-----BEGIN OpenVPN Static key V1-----
5801926a57ac2ce27e3dfd1dd6ef8204
2d82bd4f3f0021296f57734f6f1ea714
a6623845541c4b0c3dea0a050fe6746c
b66dfab14cda27e5ae09d7c155aa554f
399fa4a863f0e8c1af787e5c602a801d
3a2ec41e395a978d56729457fe6102d7
d9e9119aa83643210b33c678f9d4109e
3154ac9c759e490cb309b319cf708cae
83ddadc3060a7a26564d1a24411cd552
fe6620ea16b755697a4fc5e6e9d0cfc0
c5c4a1874685429046a424c026db672e
4c2c492898052ba59128d46200b40f88
0027a8b6610a4d559bdc9346d33a0a6b
08e75c7fd43192b162bfd0aef0c716b3
1584827693f676f9a5047123466f0654
eade34972586b31c6ce7e395f4b478cb
-----END OpenVPN Static key V1-----

Additional Config

tun-mtu-extra 32
mssfix 1450
persist-key
persist-tun

Policy Based Routing

This field can be used for split VPN and Dual Gateway routing.

CA Cert

-----BEGIN CERTIFICATE-----
MIIFozCCA4ugAwIBAgIBATANBgkqhkiG9w0BAQ0FADBAMQswCQYDVQQGEwJDSDEV
MBMGA1UEChMMUHJvdG9uVlBOIEFHMRowGAYDVQQDExFQcm90b25WUE4gUm9vdCBD
QTAeFw0xNzAyMTUxNDM4MDBaFw0yNzAyMTUxNDM4MDBaMEAxCzAJBgNVBAYTAkNI
MRUwEwYDVQQKEwxQcm90b25WUE4gQUcxGjAYBgNVBAMTEVByb3RvblZQTiBSb290
IENBMIICIjANBgkqhkiG9w0BAQEFAAOCAg8AMIICCgKCAgEAt+BsSsZg7+AuqTq7
vDbPzfygtl9f8fLJqO4amsyOXlI7pquL5IsEZhpWyJIIvYybqS4s1/T7BbvHPLVE
wlrq8A5DBIXcfuXrBbKoYkmpICGc2u1KYVGOZ9A+PH9z4Tr6OXFfXRnsbZToie8t
2Xjv/dZDdUDAqeW89I/mXg3k5x08m2nfGCQDm4gCanN1r5MT7ge56z0MkY3FFGCO
qRwspIEUzu1ZqGSTkG1eQiOYIrdOF5cc7n2APyvBIcfvp/W3cpTOEmEBJ7/14RnX
nHo0fcx61Inx/6ZxzKkW8BMdGGQF3tF6u2M0FjVN0lLH9S0ul1TgoOS56yEJ34hr
JSRTqHuar3t/xdCbKFZjyXFZFNsXVvgJu34CNLrHHTGJj9jiUfFnxWQYMo9UNUd4
a3PPG1HnbG7LAjlvj5JlJ5aqO5gshdnqb9uIQeR2CdzcCJgklwRGCyDT1pm7eoiv
WV19YBd81vKulLzgPavu3kRRe83yl29It2hwQ9FMs5w6ZV/X6ciTKo3etkX9nBD9
ZzJPsGQsBUy7CzO1jK4W01+u3ItmQS+1s4xtcFxdFY8o/q1zoqBlxpe5MQIWN6Qa
lryiET74gMHE/S5WrPlsq/gehxsdgc6GDUXG4dk8vn6OUMa6wb5wRO3VXGEc67IY
m4mDFTYiPvLaFOxtndlUWuCruKcCAwEAAaOBpzCBpDAMBgNVHRMEBTADAQH/MB0G
A1UdDgQWBBSDkIaYhLVZTwyLNTetNB2qV0gkVDBoBgNVHSMEYTBfgBSDkIaYhLVZ
TwyLNTetNB2qV0gkVKFEpEIwQDELMAkGA1UEBhMCQ0gxFTATBgNVBAoTDFByb3Rv
blZQTiBBRzEaMBgGA1UEAxMRUHJvdG9uVlBOIFJvb3QgQ0GCAQEwCwYDVR0PBAQD
AgEGMA0GCSqGSIb3DQEBDQUAA4ICAQCYr7LpvnfZXBCxVIVc2ea1fjxQ6vkTj0zM
htFs3qfeXpMRf+g1NAh4vv1UIwLsczilMt87SjpJ25pZPyS3O+/VlI9ceZMvtGXd
MGfXhTDp//zRoL1cbzSHee9tQlmEm1tKFxB0wfWd/inGRjZxpJCTQh8oc7CTziHZ
ufS+Jkfpc4Rasr31fl7mHhJahF1j/ka/OOWmFbiHBNjzmNWPQInJm+0ygFqij5qs
51OEvubR8yh5Mdq4TNuWhFuTxpqoJ87VKaSOx/Aefca44Etwcj4gHb7LThidw/ky
zysZiWjyrbfX/31RX7QanKiMk2RDtgZaWi/lMfsl5O+6E2lJ1vo4xv9pW8225B5X
eAeXHCfjV/vrrCFqeCprNF6a3Tn/LX6VNy3jbeC+167QagBOaoDA01XPOx7Odhsb
Gd7cJ5VkgyycZgLnT9zrChgwjx59JQosFEG1DsaAgHfpEl/N3YPJh68N7fwN41Cj
zsk39v6iZdfuet/sP7oiP5/gLmA/CIPNhdIYxaojbLjFPkftVjVPn49RqwqzJJPR
N8BOyb94yhQ7KO4F3IcLT/y/dsWitY0ZH4lCnAVV/v2YjWAWS3OWyC8BFx/Jmc3W
DK/yPwECUcPgHIeXiRjHnJt0Zcm23O2Q3RphpU+1SO3XixsXpOVOYP6rJIXW9bMZ
A1gTTlpi7A==
-----END CERTIFICATE-----

CLICK APPLY SETTINGS

Leave all settings not mentioned above as their default setting.

Verify a successful VPN connection

Navigate to Status > OpenVPN

  1. You should now see a CONNECTED SUCCESS message.
  2. Visit WhatIsMyIPAddress to verify your new IP address, virtual location, and status as Protected at the top of the page.

In some cases you may notice that the location is not showing the same location as the server you have input in your router settings; this is because geo tracking tools are often tricked by VPN connections. As long as you see an IP address that is not the same as your normal Internet IP address then you are indeed connected to Windscribe VPN.

Back up your settings

Navigate to Administration > Backup

  1. Click the Backup button.
  2. A file named nvrambak.bin will be saved to your computer.
  3. You can load nvrambak.bin to restore your settings in the event of a reset.

How to change the Windscribe server

  1. Copy and paste the server IP Address from the server list above into the Server IP/Name field.
  2. Click Apply Settings.
TROUBLESHOOTING

Still having issues? Visit the VPN Troubleshooting section.

Troubleshoot Here

Roqos Core Router Setup Guide

Roqos Core Router Setup Guide

Quick Start Guide for Roqos Core Routers

Find setup guides, FAQs and troubleshooting tips for the FlashRouters Roqos Core Router.

Internet Setup

  • Roqos Core Quick Start Guide
  • How do I access my Roqos device settings?
  • Roqos Core Internet Setup and Activation

WiFi Setup

  • Setting up a Guest WiFi Network on Roqos
  • Change WiFi name and password on Roqos

VPN Setup

  • NordVPN Setup on Roqos
  • PrivateInternetAccess (PIA) Setup on Roqos
  • ExpressVPN Setup on Roqos
  • Roqos VPN Connected, but my device IP is unchanged

Roqos Core Features

  • Set a Static IP for your connected devices on Roqos
  • VPN Kill Switch on Roqos
  • Managing User Profiles on Roqos
  • Cybersecurity and Intrusion Prevention on Roqos
  • Block Websites by Country on Roqos
  • Ad blocking on Roqos
  • Parental Controls on Roqos
  • Wireless Repeater – WiFi as WAN on Roqos
  • What do the lights on my Roqos Core mean?

Search Support Articles

Troubleshooting

  • Roqos VPN Connected, but my device IP is unchanged
  • How do I access my Roqos device settings?
  • What do the lights on my Roqos Core mean?

More Ways to Get Help

GET IN TOUCH

BUY SUPPORT
BROWSE FAQs

CyberGhost Merlin OpenVPN Setup

TeamFlashRouters · Mar 30, 2023 ·

Preparing for CyberGhost Setup

Obtain your CyberGhost OpenVPN information

If you are not already a CyberGhost user Sign Up Now.

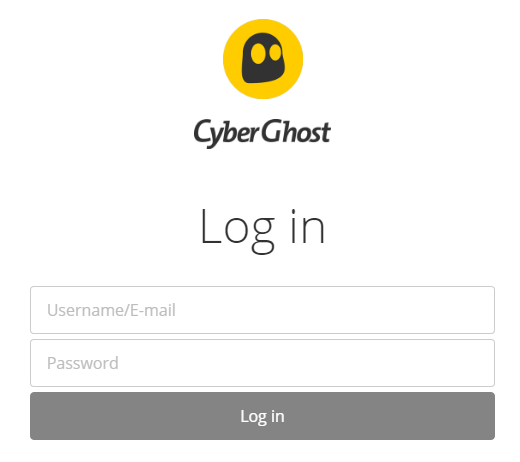
1. Log in to your account on the CyberGhost website.

CyberGhost Website Login

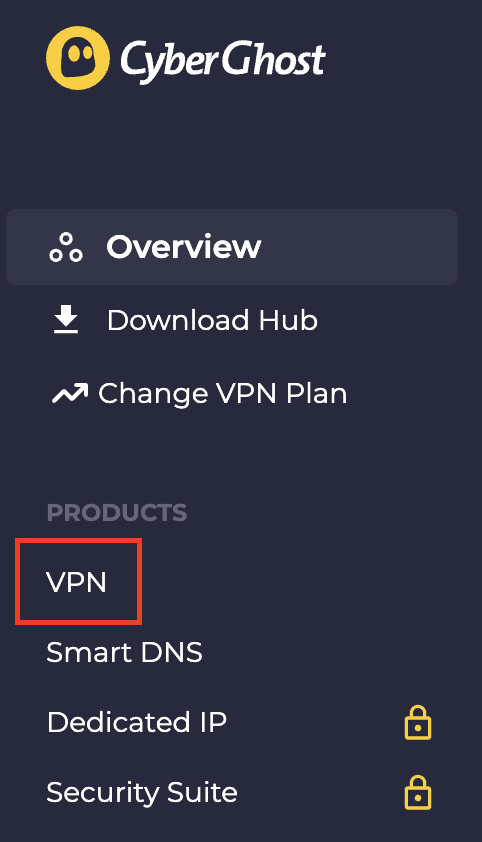
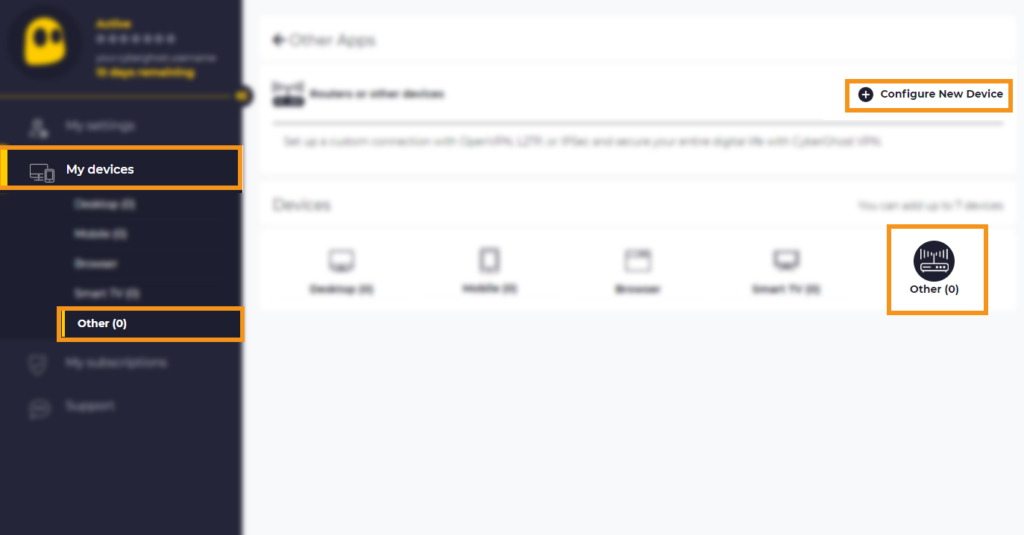
2. Select VPN.

CyberGhost VPN

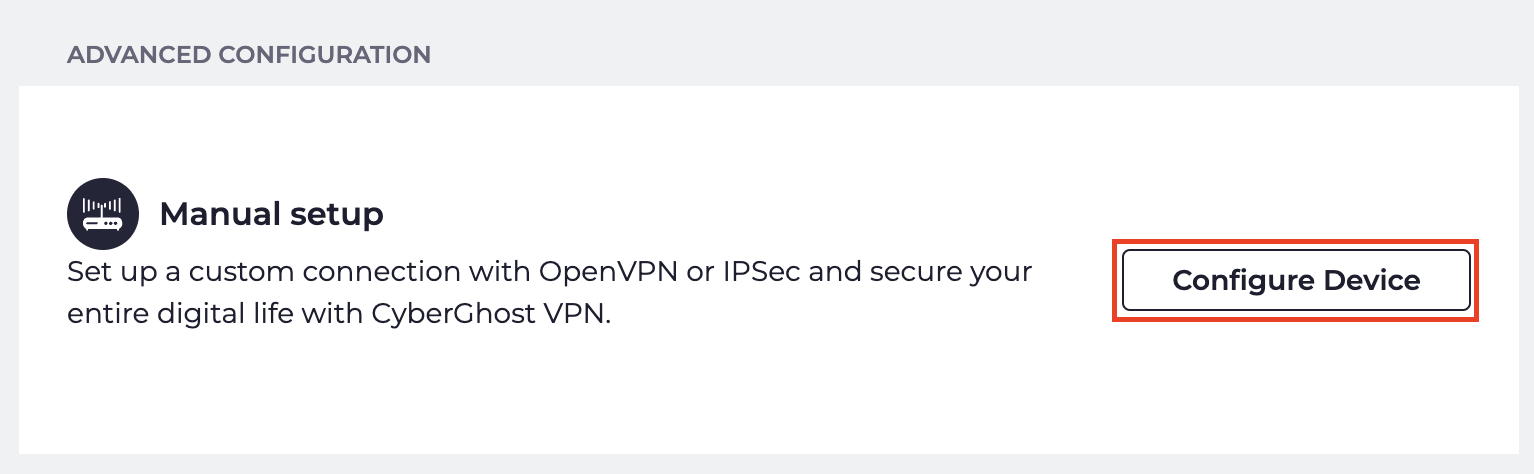
3. Click Configure New Device.

CyberGhost Configure Device

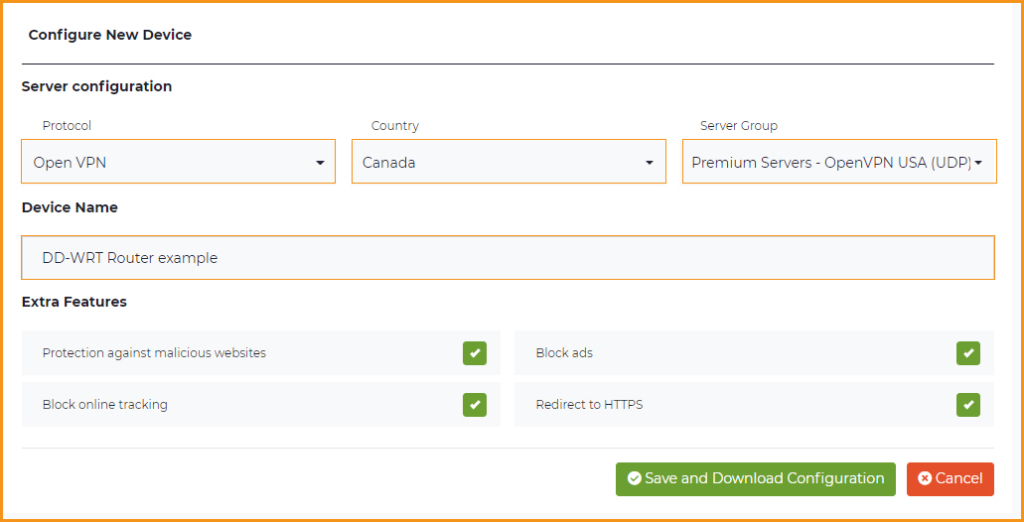
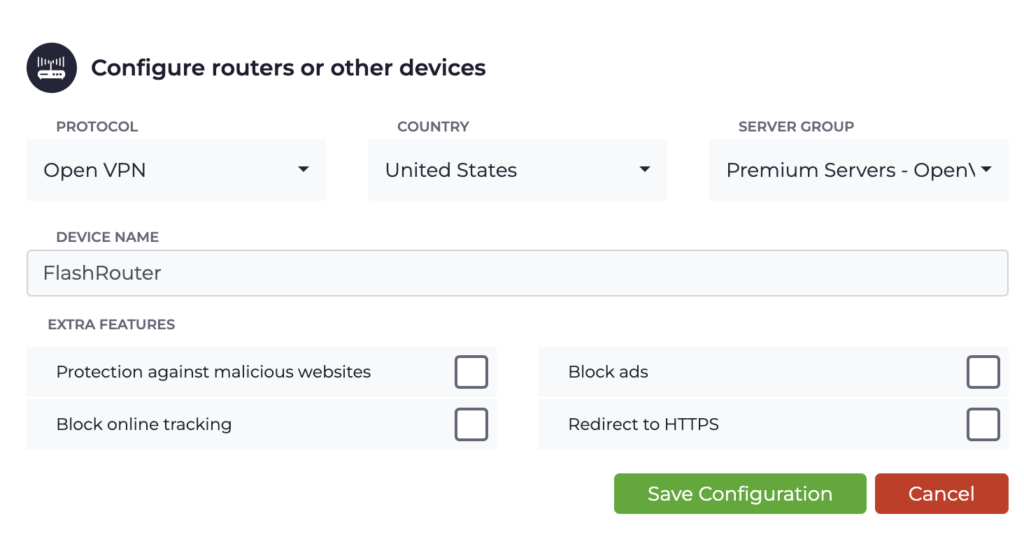
4. Set Protocol to OpenVPN. Select the Country you would like to connect to. Select the Server Group. Name the device in the Device Name field. Click Save Configuration.

CyberGhost protocol and location

5. Press View configuration.

CyberGhost view configuration

6. Copy the Username, and Password that appear to a notepad, since you will need this information later in the setup process. Click Download Configuration.

CyberGhost Website OpenVPN Configuration Files Generator 1

Open the folder that was downloaded. Then open the ca.crt the client.crt, and client.key files with NotePad++ for Windows or TextEdit for Apple. All CyberGhost servers have different keys and certificates.

Merlin Router Setup for CyberGhost

Login to Asus Merlin firmware settings in a browser on any computer or smart device connected to the Merlin FlashRouter’s network.

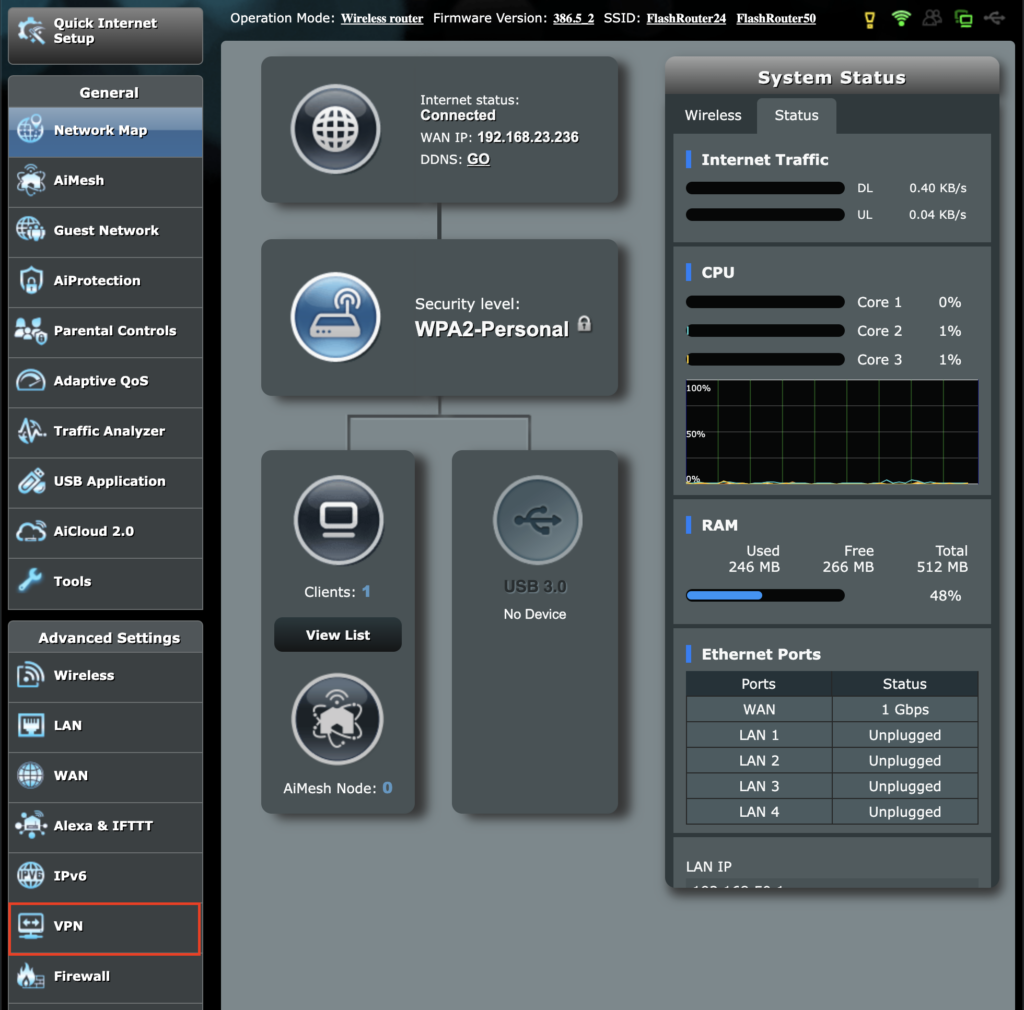
1. Navigate to the VPN tab.

Merlin VPN Tab

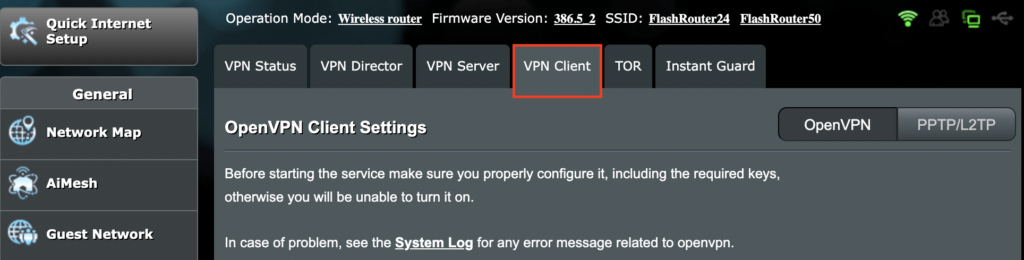
2. Navigate to the VPN Client tab.

Merlin VPN Client Tab

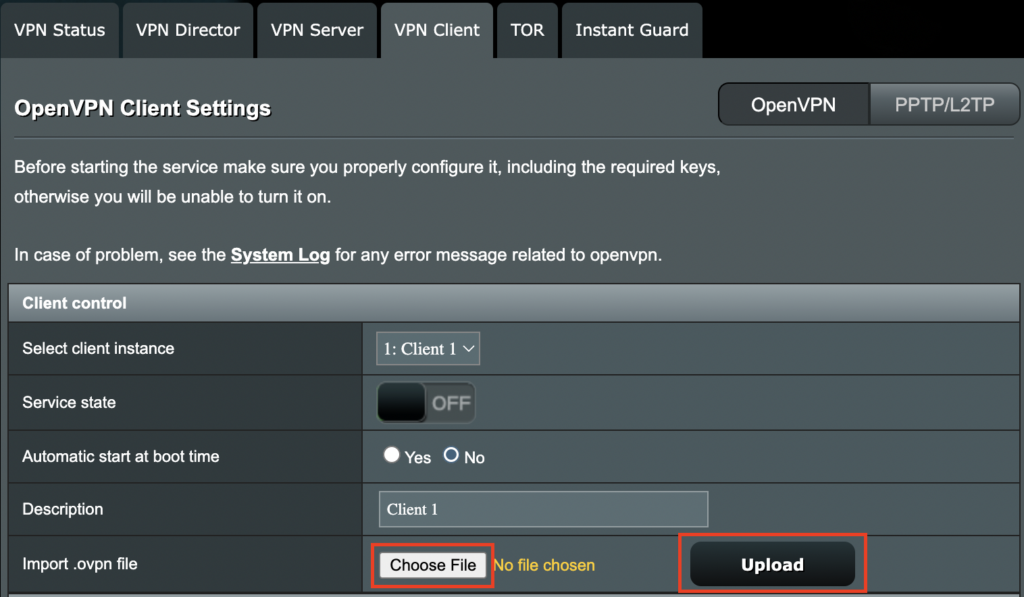
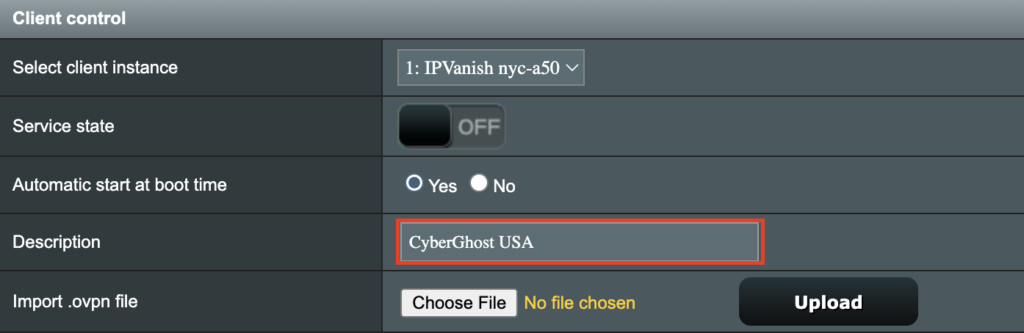
3. Click Choose file and select the .ovpn file from the folder you downloaded earlier. Then click Upload.

Merlin Choose File Upload

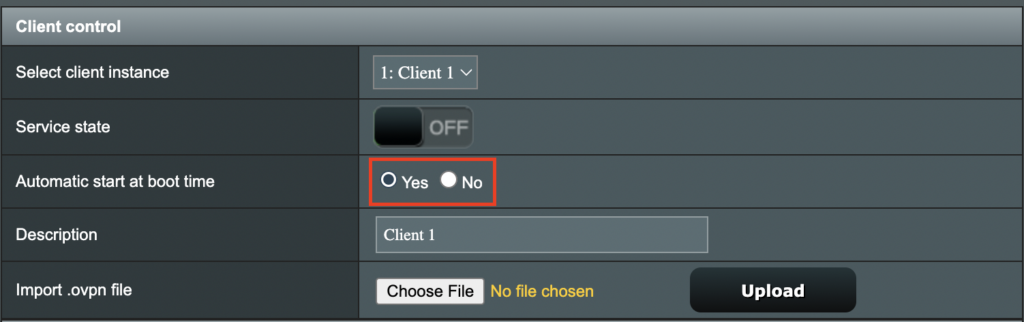
4. Set Automatic Start at boot time to Yes if you want the VPN connection to begin automatically when the router is powered off and back on.

Merlin Automatic Start at boot time

5. In the Description field enter in the name you’d like to use for this OpenVPN Client profile. We typically advise entering in the location here. Our example server was in USA so I have entered in CyberGhost USA.

Merlin CyberGhost Description field

6. Set Accept DNS Configuration to Strict. Set Redirect Internet traffic through tunnel to Yes (all). Set Kill Switch to Yes or No depending on if you want the Internet to be killed if the VPN connection drops.

Merlin Accept DNS configuration Redirect Internet and Kill Switch

If you only want certain devices to connect to the OpenVPN Client profile you are setting up instead of all the devices connected to the FlashRouter’s network please set the Redirect Internet traffic through tunnel to VPN Director. Then complete the instructions on this page and then view our VPN Director guide.

7. Enter your CyberGhost OpenVPN username and password that you obtained earlier. Do not enter your account login.

Merlin VPN Username and Password

8. Click the Edit button in the Keys and Certificates area.

Merlin Keys and Certificates Edit button

9. In the Certificate Authority field paste in the entire content of the ca.crt file.

—– BEGIN xxx —– / —– END xxx —– block (including those two lines).

Merlin Certificate Authority

10. In the Client Certificate field paste in the entire content of the client.crt file.

—– BEGIN xxx —– / —– END xxx —– block (including those two lines).

Merlin Client Certificate

11. In the Client Key field paste in the entire content of the client.key file.

—– BEGIN xxx —– / —– END xxx —– block (including those two lines).

Merlin Client Key

12. Click Save at the bottom of that window.

13. Click Apply at the bottom of the page.

14. At the top of the page set the Service State toggle to ON to activate the VPN connection.

Merlin Service State All Providers

Verify a successful CyberGhost connection

  1. You should now see a CONNECTED message.
  2. Visit What is my IP Address from a private/incognito browser to verify your new IP address and virtual location.

TROUBLESHOOTING

Still having issues? Visit the FR Privacy App Troubleshooting section.

Troubleshoot Here

ProtonVPN Merlin WireGuard Setup

TeamFlashRouters · Mar 30, 2023 ·

Preparing for ProtonVPN Merlin Setup

Download your ProtonVPN .conf file

If you are not already an ProtonVPN user Sign Up Now.

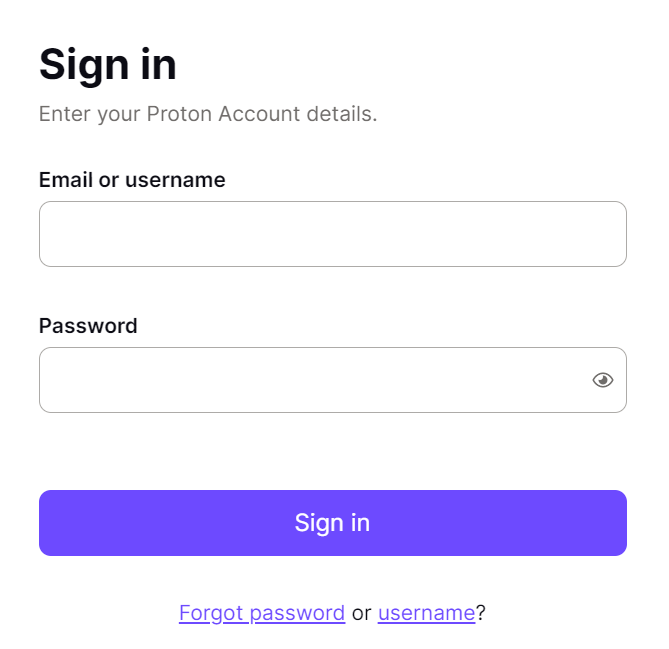
1. Log in to your account on the ProtonVPN website.

ProtonVPN Account Sign in

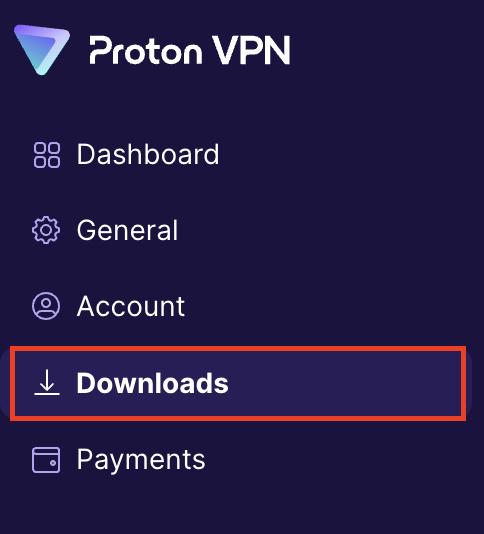
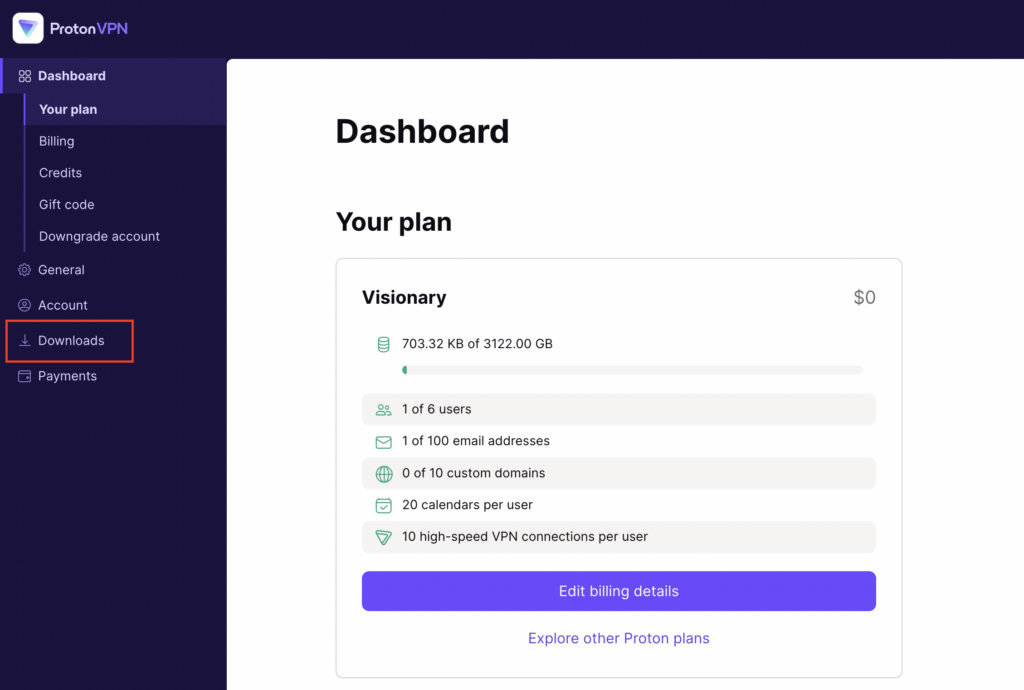
2. Click Downloads.

ProtonVPN Downloads

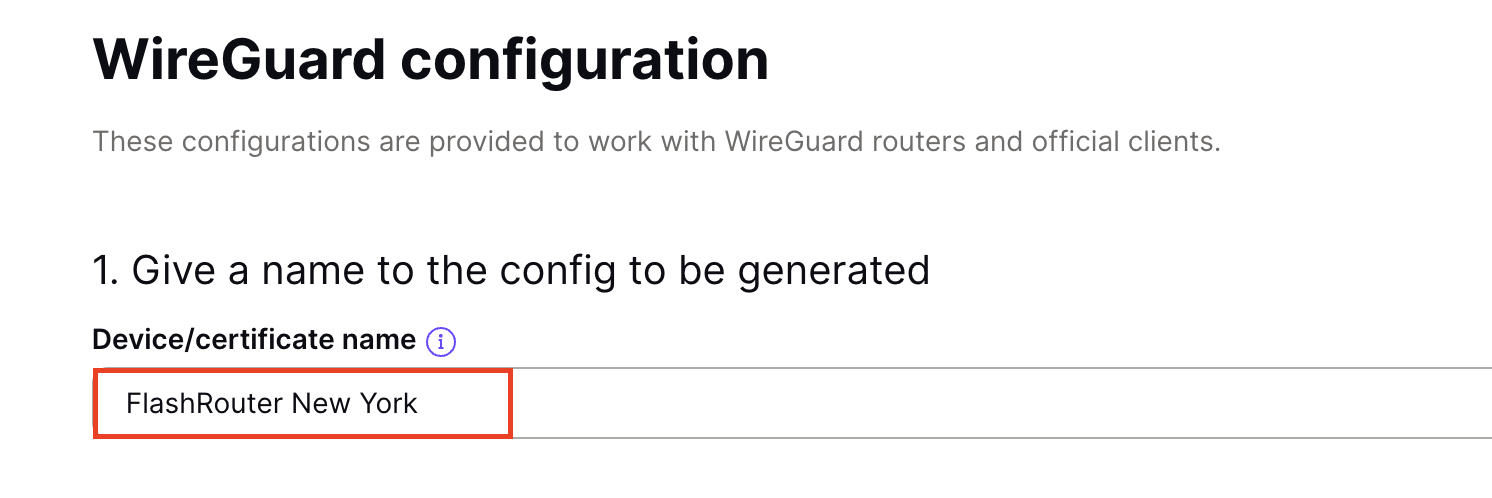
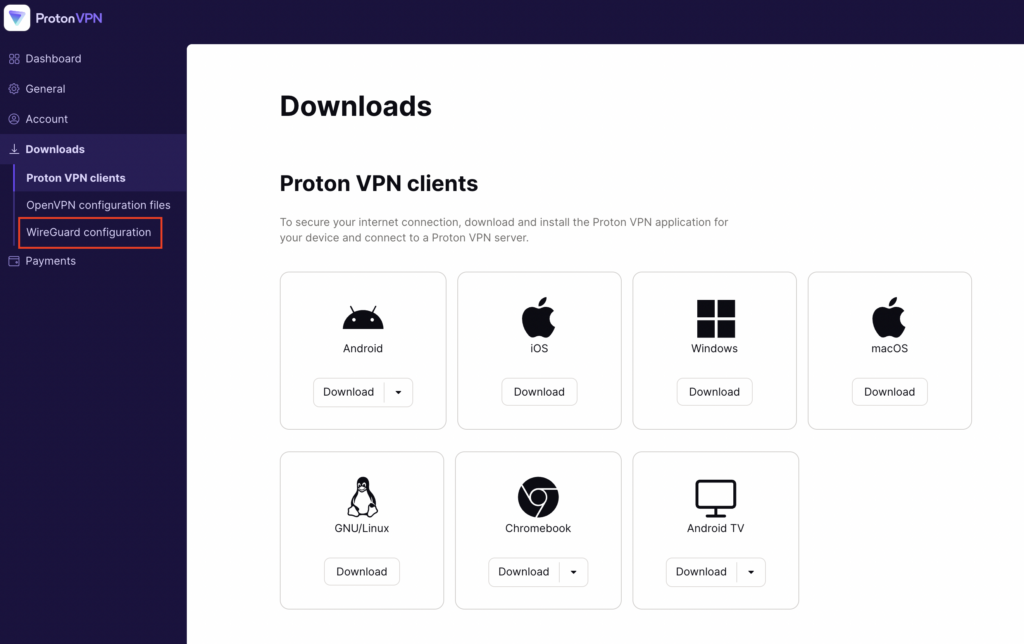
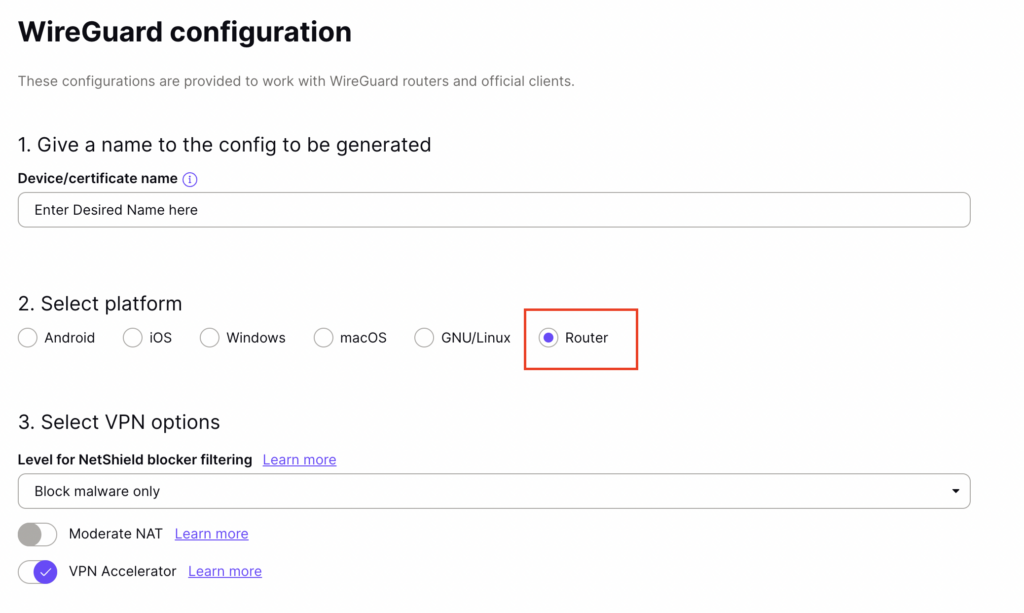
3. Scroll down to WireGuard configuration and name the device FlashRouter.

ProtonVPN WireGuard Configuration Name

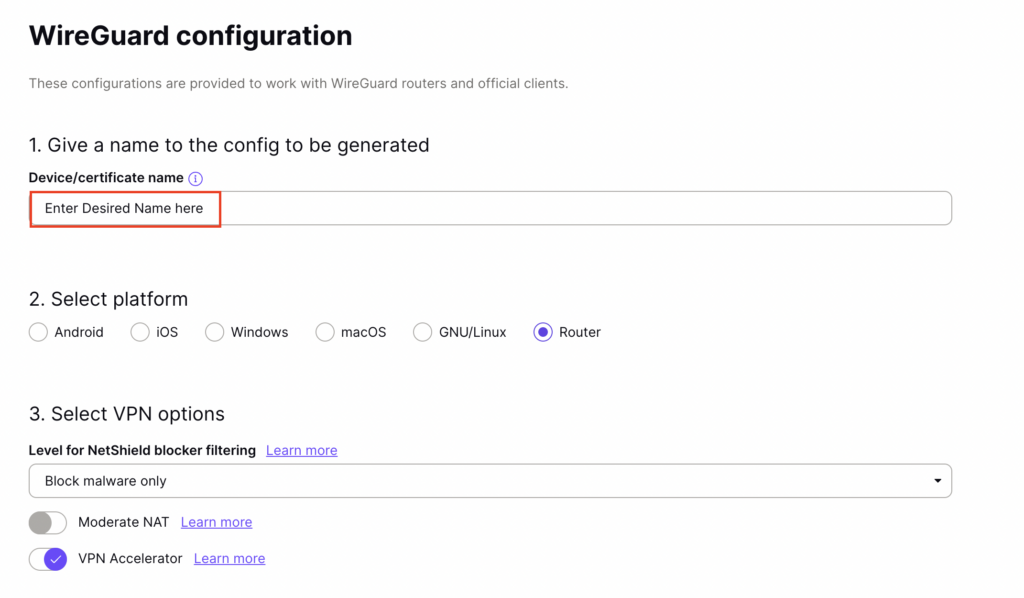
4. Select Router as the platform.

ProtonVPN WireGuard select Platform

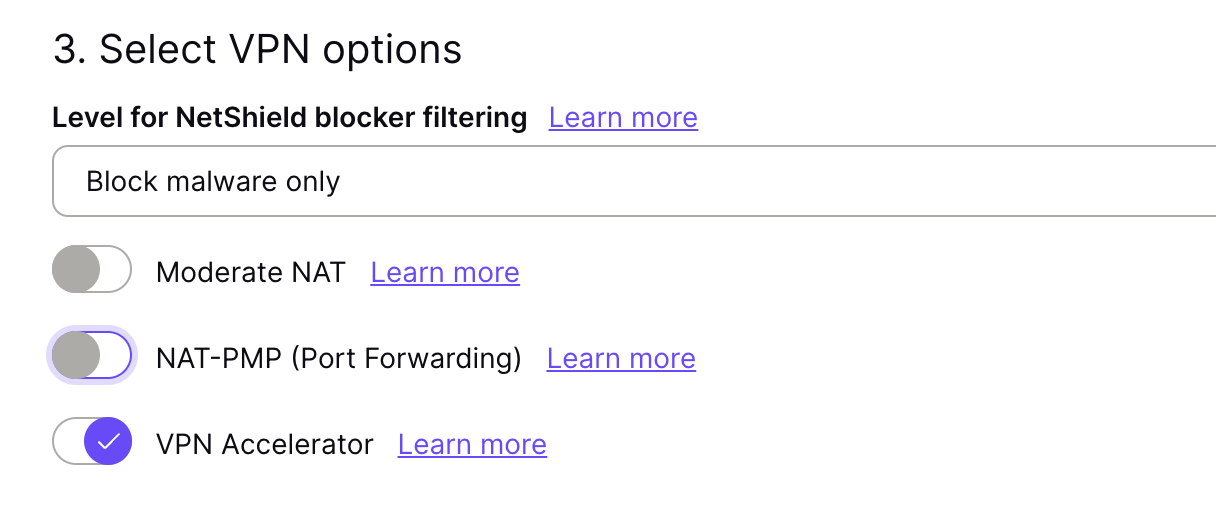
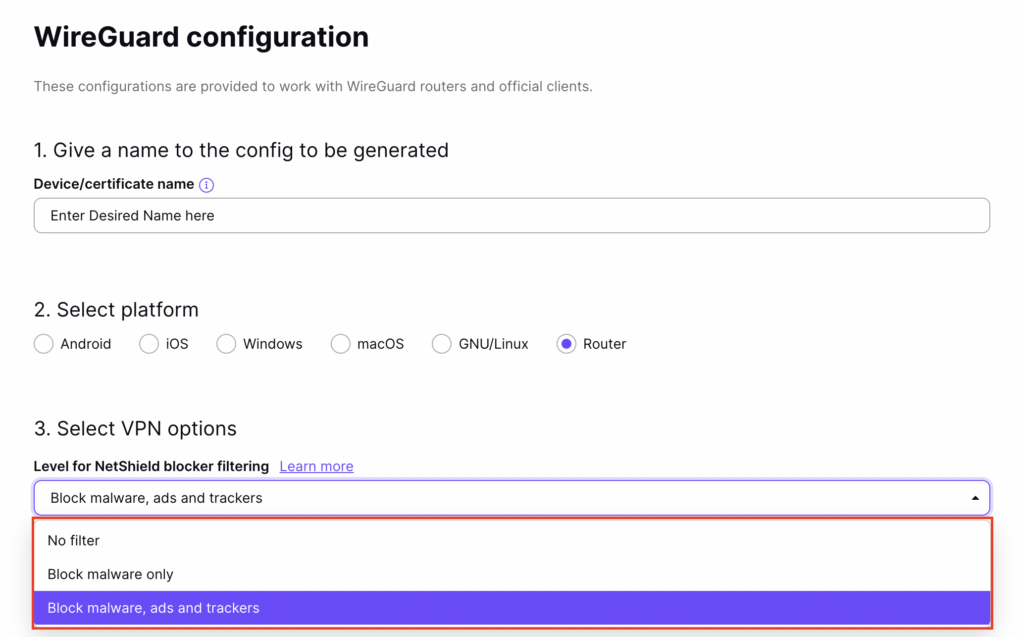
5. Select the VPN options that best fit your needs. We typically use the settings as seen in the screenshot here if you are unsure.

ProtonVPN WireGuard VPN options

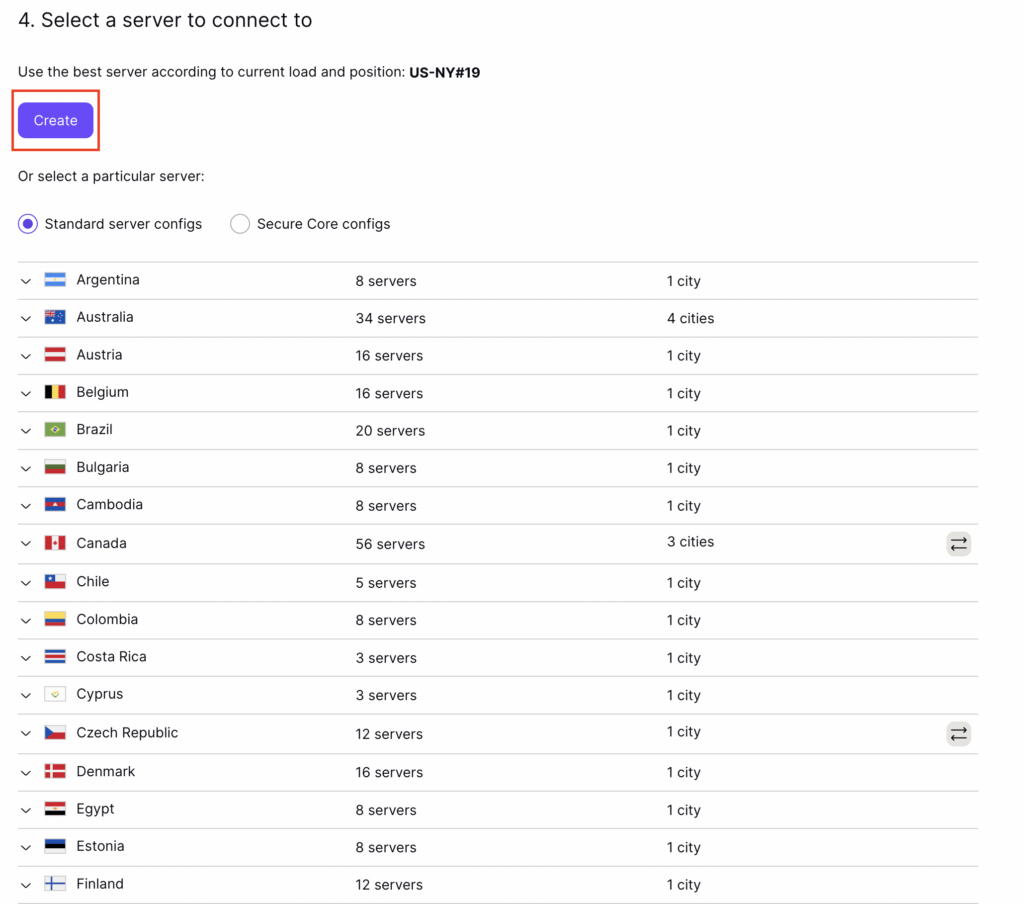
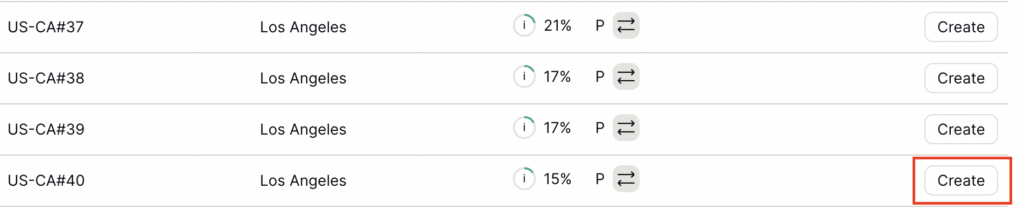
6. Next select the server that you would like to connect to and click Create. At the top of the page you’ll see ProtonVPN’s recommended server which we recommend using unless you need to connect to a specific location.

If you need a specific server location find it in the list and click Create.

ProtonVPN WireGuard recommended server
ProtonVPN WireGuard specific server

7. After clicking Create a new window will appear. Click Download to download the .conf file to your computer.

Merlin Router Setup for ProtonVPN

Login to Asus Merlin firmware settings in a browser on any computer or smart device connected to the Merlin FlashRouter’s network.

1. Navigate to the VPN tab.

Merlin VPN Tab

2. Navigate to the VPN Client tab.

Merlin VPN Client Tab

3. Select WireGuard as the VPN Protocol.

Merlin VPN Client WireGuard

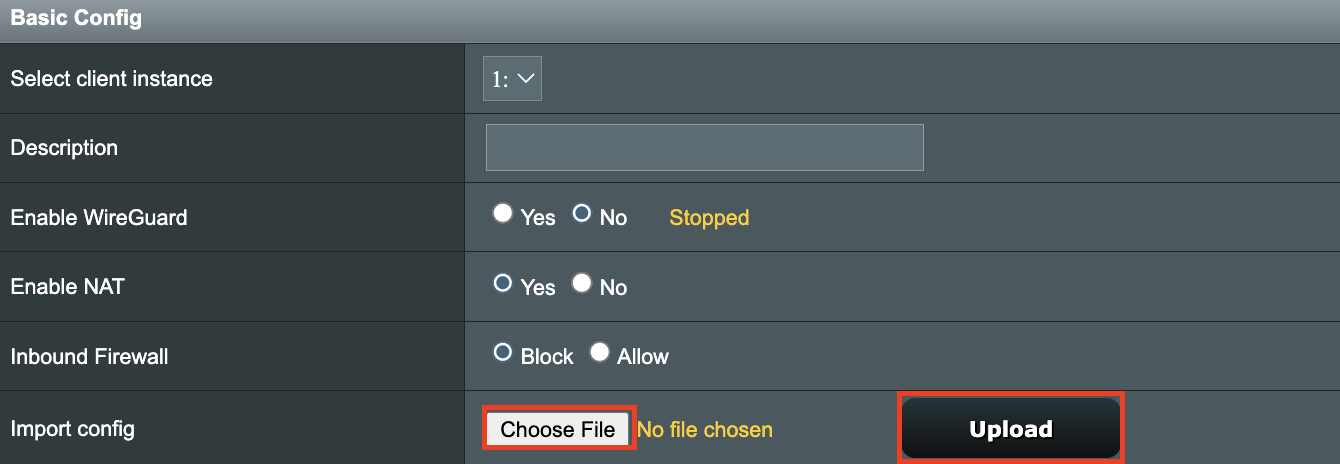
4. Click Choose file and select the .conf file you downloaded earlier. Then click Upload.

Merlin WireGuard Choose File Upload

5. In the Description field enter in the name you’d like to use for this WireGuard Client profile. We typically advise entering in the location here. Our example server was in US-NY#61 so I have entered in ProtonVPN NY-61.

Merlin WireGuard ProtonVPN Description

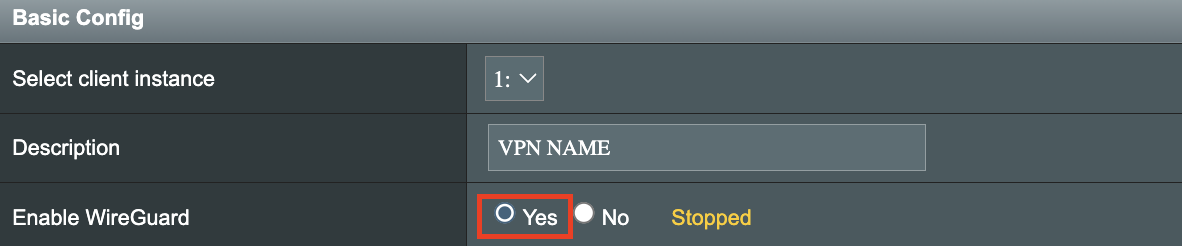
6. Set Enable WireGuard to Yes.

Merlin Enable WireGuard

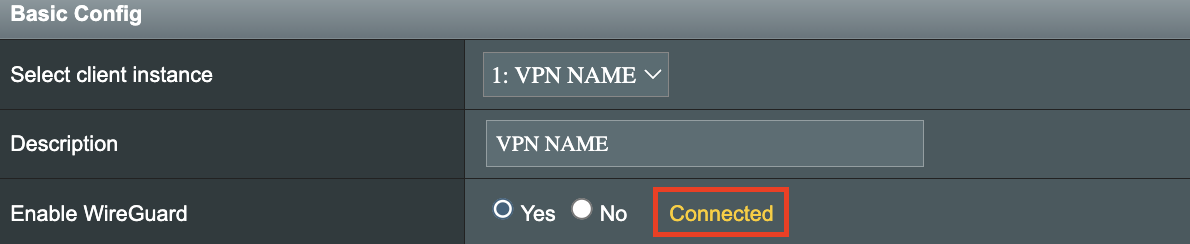
7. Click Apply at the bottom of the page and you should then see a Connected message appear.

Merlin WireGuard Connected

8. By default no devices are assigned to the new active WireGuard connection profile. Click the VPN Director tab to assign specific devices to the new WireGuard profile. Your IP will not be changed on your devices yet.

WireGuard select VPN Director

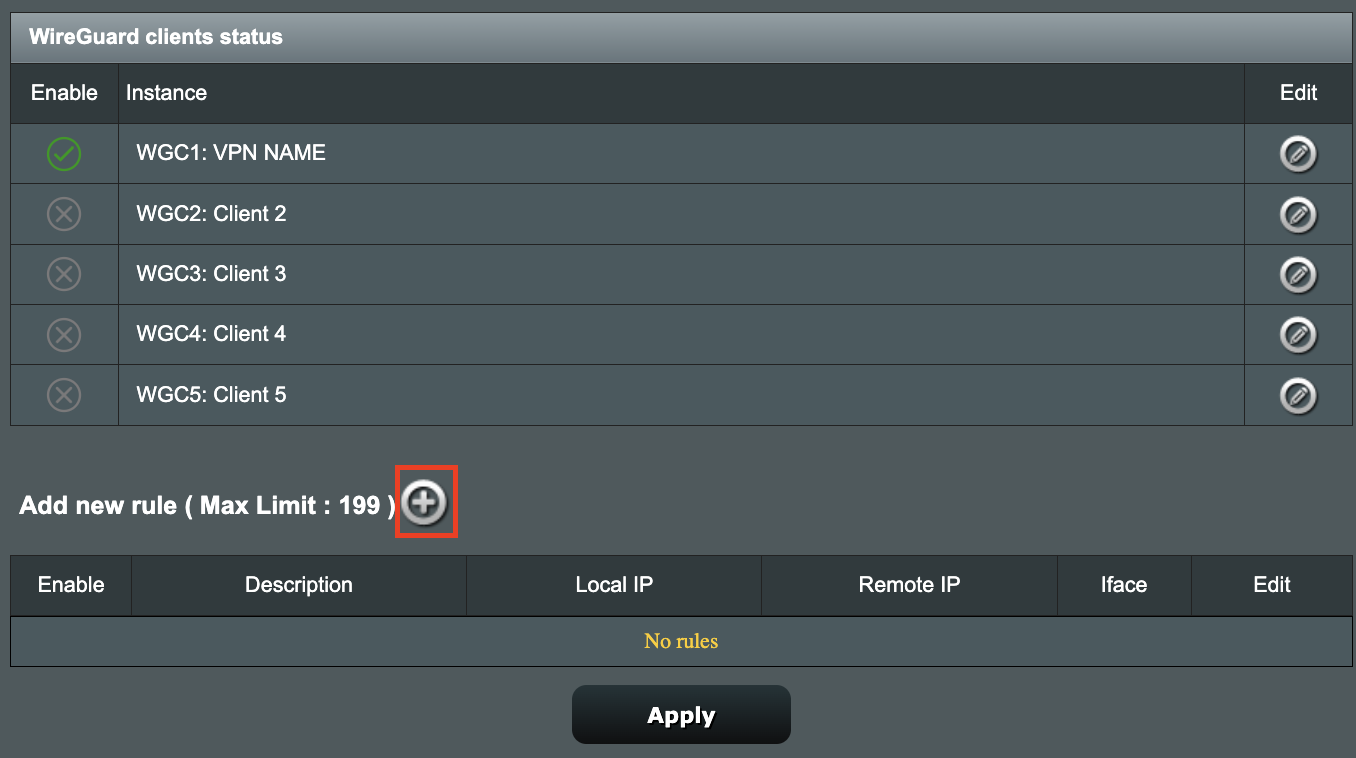
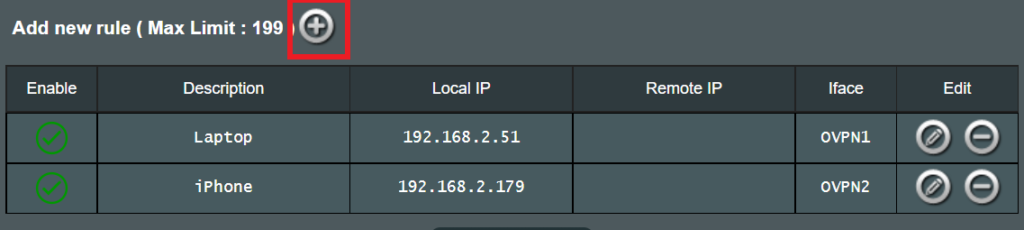
9. On the VPN Director page click the + symbol next to Add new rule.

WireGuard VPN Director Add new rule

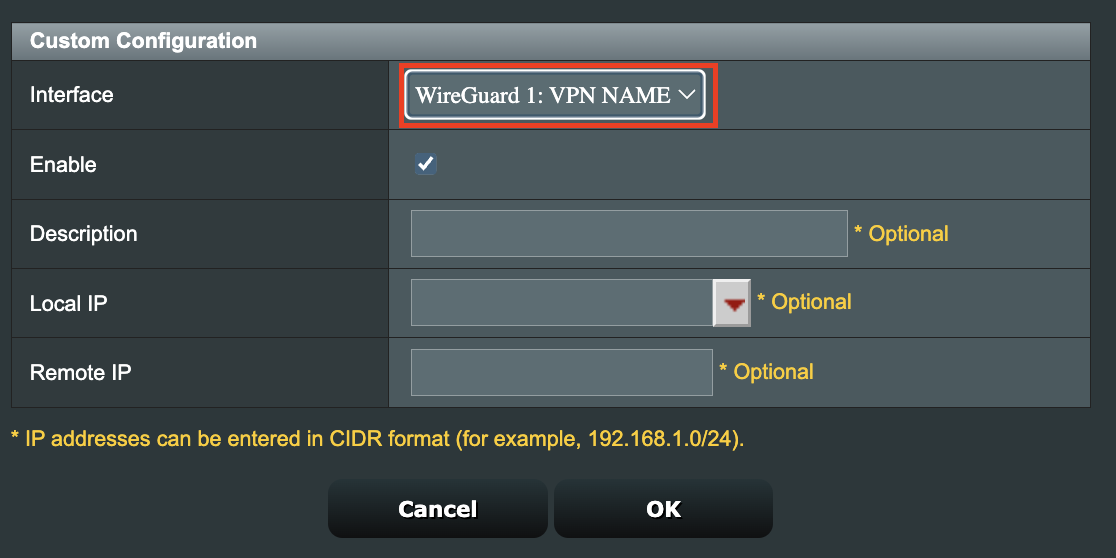
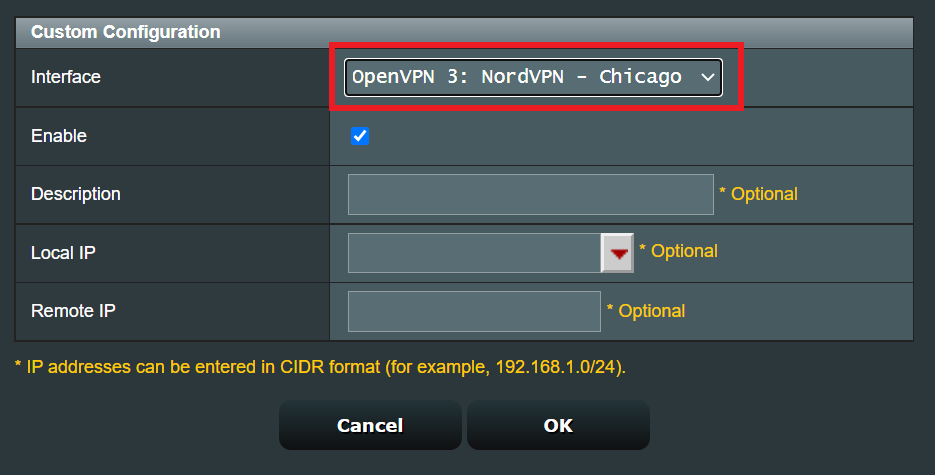
10. Select the new WireGuard profile in the Interface dropdown.

WireGuard VPN Director select Interface

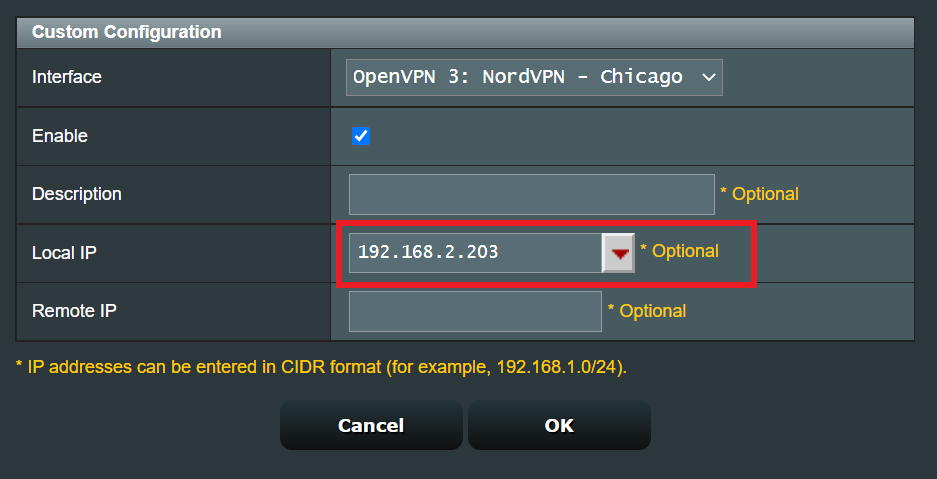
11. In the Local IP field enter in 192.168.50.0/24 if you want ALL devices connected to the FlashRouter’s network to use the WireGuard VPN connection. Click OK.

If you only want certain devices to connect to the WireGuard Client profile you have setting up instead of all the devices connected to the FlashRouter’s network please complete the instructions on our VPN Director guide.

12. Then click Apply at the bottom of the page.

Verify a successful ProtonVPN connection

Visit ProtonVPN’s IP Check from a private/incognito browsing window to verify your new IP address and virtual location.

In some cases you may notice that the location is not showing the same location as the server you have input in your router settings; this is because geo tracking tools are often tricked by VPN connections. As long as you see an IP address that is not the same as your normal Internet IP address then you are indeed connected to ProtonVPN.

How to change the ProtonVPN server

  1. Follow the steps at the top of the page to obtain a new .conf file.
  2. Then proceed with the settings same as initial setup.

TROUBLESHOOTING

Still having issues? Visit the VPN Troubleshooting section.

Troubleshoot Here

Roqos Core Internet Setup and Activation

TeamFlashRouters · Mar 15, 2022 ·

Follow this article when you receive your new Roqos Core router to create your Roqos account, connect your Roqos to the Internet, and customize your network so it is ready to use.

Create your Roqos account

1. From any device that has a browser such as a computer, smartphone, or tablet visit login.roqos.com

Roqos Login URL

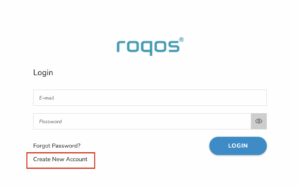
2. Select Create Account.

Roqos Create Account

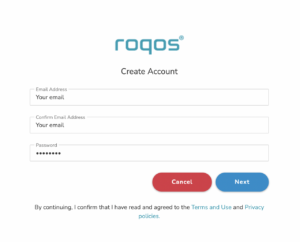
3. Enter the Email address and password you want to set for your Roqos account. This will be your login to the Roqos settings moving forward. Click Next.

Roqos Enter Email

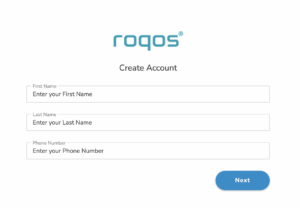
4. Enter the name and phone number you want associated with your Roqos. Click Next.

Roqos Enter Name and Number

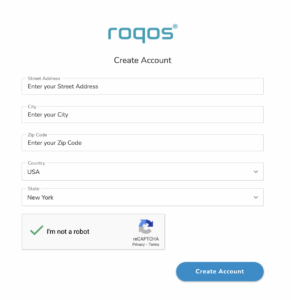
5. Enter the address where your Roqos is located. This section may require a CAPTCHA to be completed to authenticate you are human. Click Create Account.

Roqos Enter Address

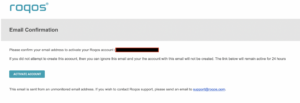
6. You have now created your Roqos account. In a new tab proceed to open the email from Roqos and click the Activate account button.

Roqos email activation

Activate your Roqos Internet

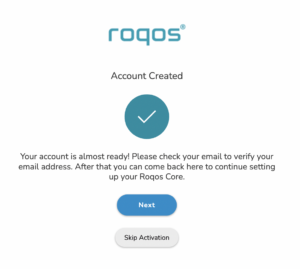
1. From the Account created page click Next to begin the Internet Setup of the Roqos.

Roqos Account Created

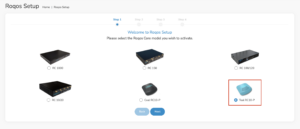
2. Select the Roqos model Teal RC10-P. Click Next.

Roqos Model

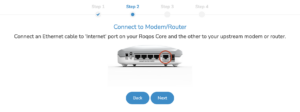
3. Connect the ethernet cable that came with your Roqos from the port labeled INTERNET on the back of your Roqos to an open ethernet port on your ISP Modem or other router in your network.

Roqos Wiring

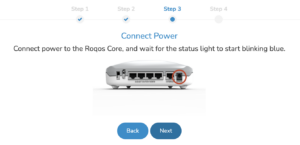
4. Then connect the power adapter that came with the Roqos to the back of the Roqos. Wait for the light on the Roqos to begin blinking blue. Once your see the blinking blue lights on the Roqos click Next.

Roqos Power On

If your Roqos lights does not begin blinking blue after a long while please see the steps in this article and contact us.

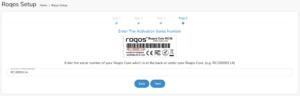
5. Enter in the Roqos serial number found on the bottom of the device exactly as it appears there. Click Next.

Roqos Activation Code

Setup your Roqos Network

1. Enter in a name that you would like to call the Roqos. This is just the Roqo’s device name and it is not the WiFi network name. Click Next.

Roqos Device Name

2. Select the Time Zone of your actual location from the dropdown. Click Next.

Roqos Time Zone

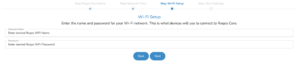
3. Set the WiFi name and password for the Roqos. The WiFi name should be unique and not a duplicate of an existing wireless network. This will be the name that appears in your wireless devices available network list and the password to join the devices to the network. Click Next.

Roqos Set WiFi Name and Password

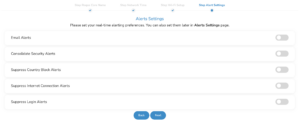
4. Select the custom alert settings as you best see fit using the toggle switches. We typically recommend having the first two toggles selected for Email Alerts and Consolidate Security Alerts. Click Next.

Begin connecting your devices to the Roqos network

You are now done setting up your Roqos to connect to the Internet and can begin joining your wireless devices to the Roqos network and exploring the Roqos Core Features.

Roqos Setup Done

TROUBLESHOOTING

Still having issues? Visit the VPN Troubleshooting section.

Troubleshoot Here

IPVanish Manual OpenVPN Setup

TeamFlashRouters · Apr 5, 2019 ·

Preparing for Manual IPVanish Setup

Verify your IPVanish login information

If you are not already an IPVanish user Sign Up Now.

Log in to your account on the IPVanish website.

IPVanish Server Addresses

View a full list of IPVanish servers.

America

Ashburn:
iad-a01.ipvanish.com
through
iad-a78.ipvanish.com

Atlanta:
atl-a01.ipvanish.com
through
atl-a88.ipvanish.com

Boston:
bos-c01.ipvanish.com
through
bos-c27.ipvanish.com

Chicago:
chi-a01.ipvanish.com
through
chi-a58.ivpanish.com

Cleveland:
cle-c01.ipvanish.com
through
cle-c20.ipvanish.com

Dallas:
dal-a01.ipvanish.com
through
dal-a79.ipvanish.com

Denver:
den-c01.ipvanish.com
through
den-c13.ipvanish.com

Jackson:
jan-c01.ipvanish.com
through
jan-c15.ipvanish.com

Las Vegas:
las-c11.ipvanish.com
through
las-c20.ipvanish.com

Los Angeles:
lax-a01.ipvanish.com
through
lax-a60.ipvanish.com

Miami:
mia-a01.ipvanish.com
through
mia-a34.ipvanish.com

Milwaukee:
mke-c01.ipvanish.com
through
mke-c19.ipvanish.com

New York:
nyc-a01.ipvanish.com
through
nyc-a51.ipvanish.com

Phoenix:
phx-a01.ipvanish.com
through
phx-a24.ipvanish.com

Salt Lake City:
slc-c01.ipvanish.com
through
slc-c12.ipvanish.com

San Jose:
sjc-a01.ipvanish.com
through
sjc-a27.ipvanish.com

Seattle:
sea-a01-ipvanish.com
through
sea-a41.ipvanish.com

St. Louis:
stl-c01.ipvanish.com
through
stl-c18.ipvanish.com

United Kingdom

London:
lon-a01.ipvanish.com
through
lon-a69.ipvanish.com

lon-c01.ipvanish.com
through
lon-c58.ipvanish.com

Manchester:
man-c01.ipvanish.com
through
man-c09.ipvanish.com

DD-WRT Router Setup for IPVanish

Navigate to Services > VPN

Enter IPVanish settings

OpenVPN Client

Start OpenVPN Client

If you wish to disable your VPN connection simply set this to Disable at any time and click Apply Settings.
Server IP/Name

Copy and paste the server you would like to connect to from the server list above. Be sure there are no extra spaces or characters.

If you wish to change IPVanish connection locations, THIS IS THE ONLY FIELD YOU NEED TO CHANGE.

Port

443

Tunnel Device

TUN

Tunnel Protocol

UDP

Encryption cipher

AES-256-CBC

Hash Algorithm

SHA256

User Pass Authentication

Enable

Username

Enter the Username you successfully logged in to your IPVanish account with.

Password

Enter the Password you successfully logged in to your IPVanish account with.

Advanced Options

Enable

TLS Cipher

None

LZO Compression

Adaptive

NAT

Enable

Firewall Protection

Enable

Additional Config

persist-key
persist-tun
persist-remote-ip
keysize 256

Policy Based Routing

This field can be used for split VPN and Dual Gateway routing.

CA Cert

-----BEGIN CERTIFICATE-----
MIIErTCCA5WgAwIBAgIJAMYKzSS8uPKDMA0GCSqGSIb3DQEBDQUAMIGVMQswCQYD
VQQGEwJVUzELMAkGA1UECBMCRkwxFDASBgNVBAcTC1dpbnRlciBQYXJrMREwDwYD
VQQKEwhJUFZhbmlzaDEVMBMGA1UECxMMSVBWYW5pc2ggVlBOMRQwEgYDVQQDEwtJ
UFZhbmlzaCBDQTEjMCEGCSqGSIb3DQEJARYUc3VwcG9ydEBpcHZhbmlzaC5jb20w
HhcNMTIwMTExMTkzMjIwWhcNMjgxMTAyMTkzMjIwWjCBlTELMAkGA1UEBhMCVVMx
CzAJBgNVBAgTAkZMMRQwEgYDVQQHEwtXaW50ZXIgUGFyazERMA8GA1UEChMISVBW
YW5pc2gxFTATBgNVBAsTDElQVmFuaXNoIFZQTjEUMBIGA1UEAxMLSVBWYW5pc2gg
Q0ExIzAhBgkqhkiG9w0BCQEWFHN1cHBvcnRAaXB2YW5pc2guY29tMIIBIjANBgkq
hkiG9w0BAQEFAAOCAQ8AMIIBCgKCAQEAt9DBWNr/IKOuY3TmDP5x7vYZR0DGxLbX
U8TyAzBbjUtFFMbhxlHiXVQrZHmgzih94x7BgXM7tWpmMKYVb+gNaqMdWE680Qm3
nOwmhy/dulXDkEHAwD05i/iTx4ZaUdtV2vsKBxRg1vdC4AEiwD7bqV4HOi13xcG9
71aQ55Mj1KeCdA0aNvpat1LWx2jjWxsfI8s2Lv5Fkoi1HO1+vTnnaEsJZrBgAkLX
pItqP29Lik3/OBIvkBIxlKrhiVPixE5qNiD+eSPirsmROvsyIonoJtuY4Dw5K6pc
NlKyYiwo1IOFYU3YxffwFJk+bSW4WVBhsdf5dGxq/uOHmuz5gdwxCwIDAQABo4H9
MIH6MAwGA1UdEwQFMAMBAf8wHQYDVR0OBBYEFEv9FCWJHefBcIPX9p8RHCVOGe6u
MIHKBgNVHSMEgcIwgb+AFEv9FCWJHefBcIPX9p8RHCVOGe6uoYGbpIGYMIGVMQsw
CQYDVQQGEwJVUzELMAkGA1UECBMCRkwxFDASBgNVBAcTC1dpbnRlciBQYXJrMREw
DwYDVQQKEwhJUFZhbmlzaDEVMBMGA1UECxMMSVBWYW5pc2ggVlBOMRQwEgYDVQQD
EwtJUFZhbmlzaCBDQTEjMCEGCSqGSIb3DQEJARYUc3VwcG9ydEBpcHZhbmlzaC5j
b22CCQDGCs0kvLjygzANBgkqhkiG9w0BAQ0FAAOCAQEAI2dkh/43ksV2fdYpVGhY
aFZPVqCJoToCez0IvOmLeLGzow+EOSrY508oyjYeNP4VJEjApqo0NrMbKl8g/8bp
LBcotOCF1c1HZ+y9v7648uumh01SMjsbBeHOuQcLb+7gX6c0pEmxWv8qj5JiW3/1
L1bktnjW5Yp5oFkFSMXjOnIoYKHyKLjN2jtwH6XowUNYpg4qVtKU0CXPdOznWcd9
/zSfa393HwJPeeVLbKYaFMC4IEbIUmKYtWyoJ9pJ58smU3pWsHZUg9Zc0LZZNjkN
lBdQSLmUHAJ33Bd7pJS0JQeiWviC+4UTmzEWRKa7pDGnYRYNu2cUo0/voStphv8E
VA==
-----END CERTIFICATE-----

CLICK APPLY SETTINGS

Leave all settings not mentioned above as their default setting.

Verify a successful IPVanish connection

Navigate to Status > OpenVPN

  1. You should now see a CONNECTED SUCCESS message.
  2. Visit IPVanish’s IP Check to verify your new IP address and virtual location.

In some cases you may notice that the location is not showing the same location as the server you have input in your router settings; this is because geo tracking tools are often tricked by VPN connections. As long as you see an IP address that is not the same as your normal Internet IP address then you are indeed connected to IPVanish.

Back up your settings

Navigate to Administration > Backup.

  1. Click the Backup button.
  2. A file named nvrambak.bin will be saved to your computer.
  3. You can load nvrambak.bin to restore your settings in the event of a reset.

How to change the IPVanish server

  1. Copy the new IPVanish server address from the above server list.
  2. Paste the server into the Server IP/Name field.
  3. Click Apply Settings.
TROUBLESHOOTING

Still having issues? Visit the VPN Troubleshooting section.

Troubleshoot Here

Internet and Wifi Setup on Asus Merlin Firmware

TeamFlashRouters · Sep 29, 2021 ·

Listed below are important links to setup instructions for connecting an Asus Merlin firmware router to the internet and WiFi.

How to set up ASUS Wi-Fi router via ASUS Router App? (QIS, Quick Internet Setup)

How to set up an Internet Connection?

How to enter the router setting page(Web GUI) (ASUSWRT)?

How do I reset and reconfigure my ExpressVPN/Aircove FlashRouter?

TeamFlashRouters · Mar 16, 2022 ·

When is a router reset needed?

A reset of the FlashRouter should only be performed in the following instances:

  • You have exhausted all other troubleshooting methods and cannot access your router settings.
  • Password to access the FlashRouter’s settings are not working.
  • Power light on the router is blinking steadily.
  • Router is not accessible after upgrading the firmware

Reset Router

Asus FlashRouters:

  1. While the router is powered off press and hold the WPS button on the back or side of the router. Power up the router while continuing to hold the WPS. Continue to hold for 15 seconds as the router powers on (note this could be up to 45 seconds on some models before lights flash).
  2. You will see the lights on the router flashing steadily and this is how you know you have reset the router.
  3. Let the router sit for about a minute and then reboot the router.

Aircove, Linksys and Netgear FlashRouters:

  1. While the router is plugged in, find the reset button located on the back of the router. You will need a pin or pencil to hold down the button for 15 seconds.
  2. You will see the lights on the back of the router flash simultaneously and this is how you know you have reset the router.
  3. Let the router sit for about a minute and then reboot the router.

Access Router Settings

1. Connect to the FlashRouter’s network via ethernet cable or wireless.

The wireless network will appear as “Aircove”, “Linksys##”, “Netgear##”, or “Asus” and the password to join the network will be the default wireless password printed on the bottom of the router.

2. Open your web browser and enter expressvpnrouter.com or 192.168.132.1 in the URL.

ExpressVPNrouter.com
192.168.132.1

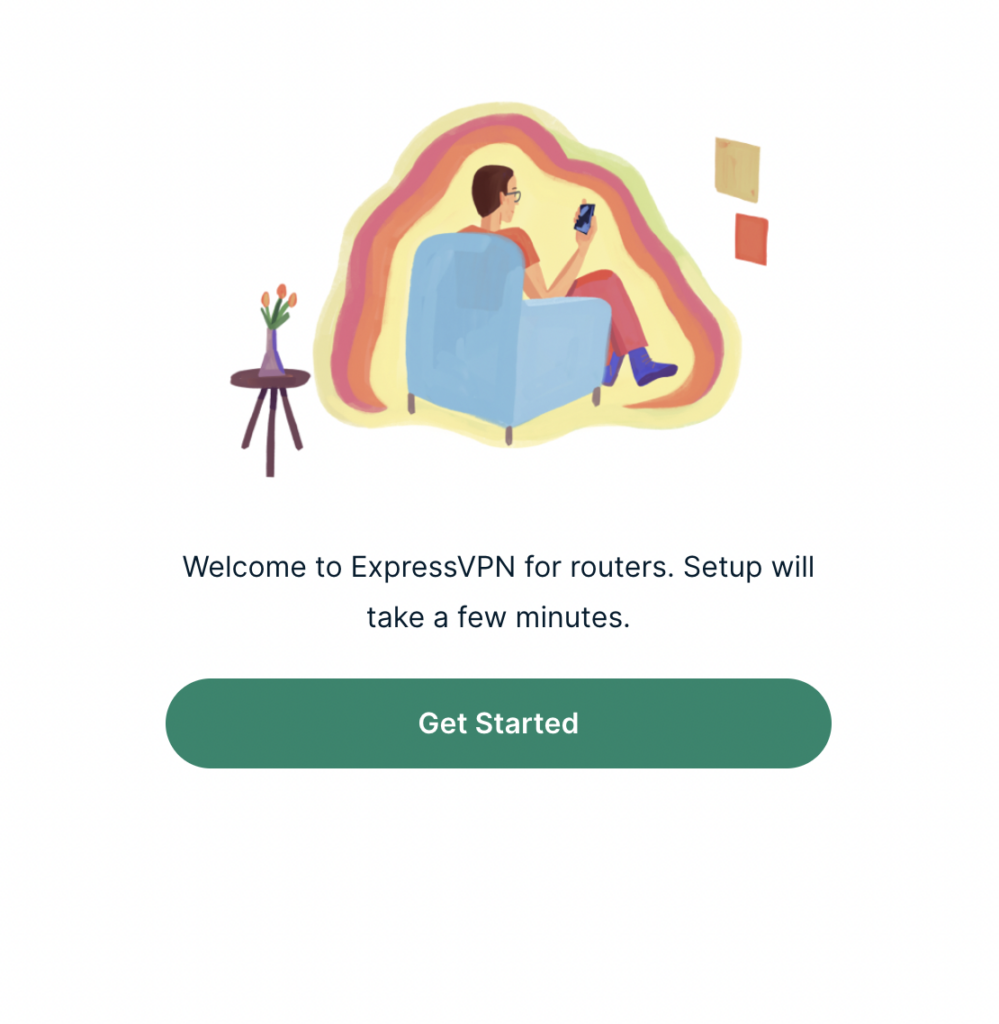
3. Click Get Started on the ExpressVPN page that is displayed.

ExpressVPN Get Started

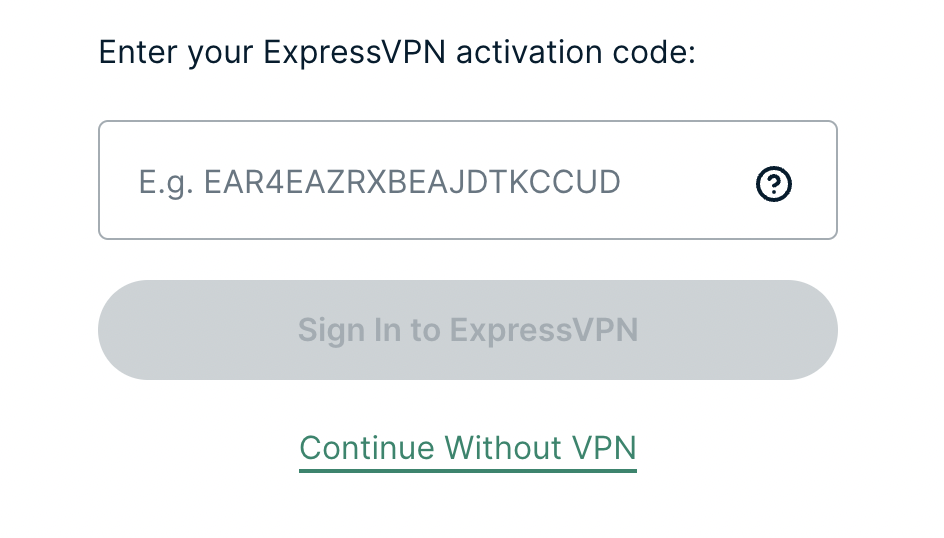
4a. If your FlashRouter is wired to the Internet correctly then you will be prompted to enter your ExpressVPN Activation Code found in your ExpressVPN account. Paste that in and click Sign in to ExpressVPN.

ExpressVPN Activation Code

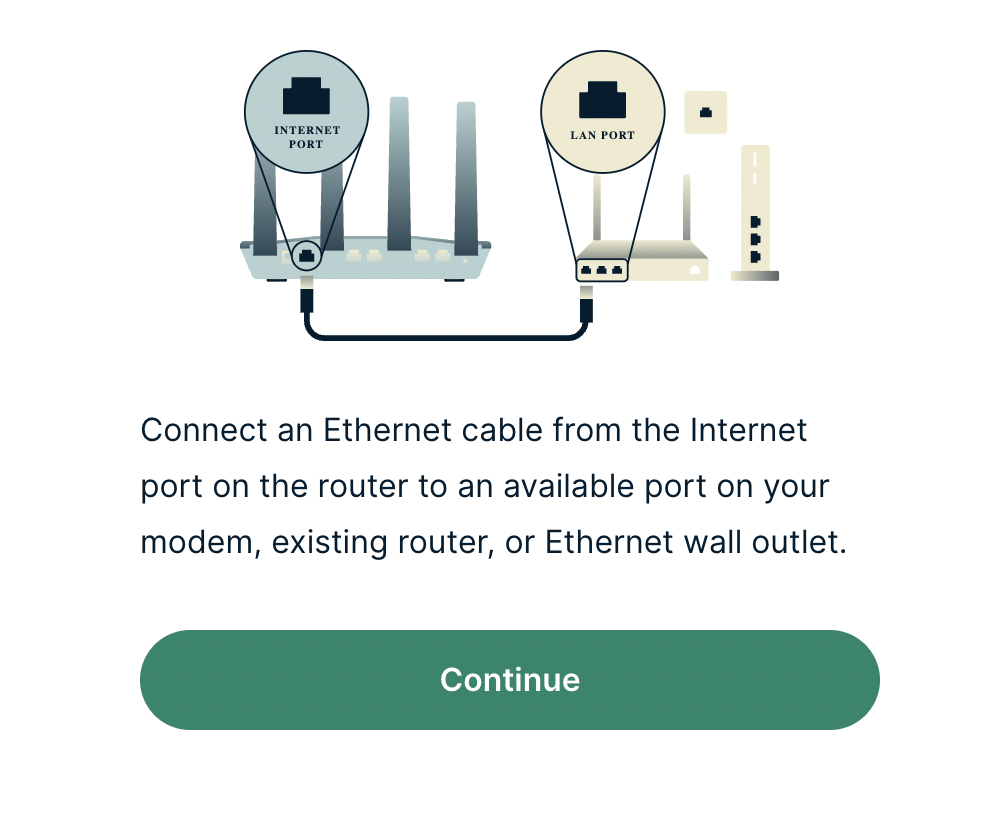
4b. If your FlashRouter is not wired correctly or is not receiving Internet properly make sure you are wired as detailed in the diagram that appears. If you are stuck at this screen we recommend powering off your ISP modem and any other router that the ExpressVPN FlashRouter is wired to and then powering them back up one by one.

Proceed with step “4a” above once the router is receiving Internet and you are prompted to enter the Activation Code.

ExpressVPN Wiring

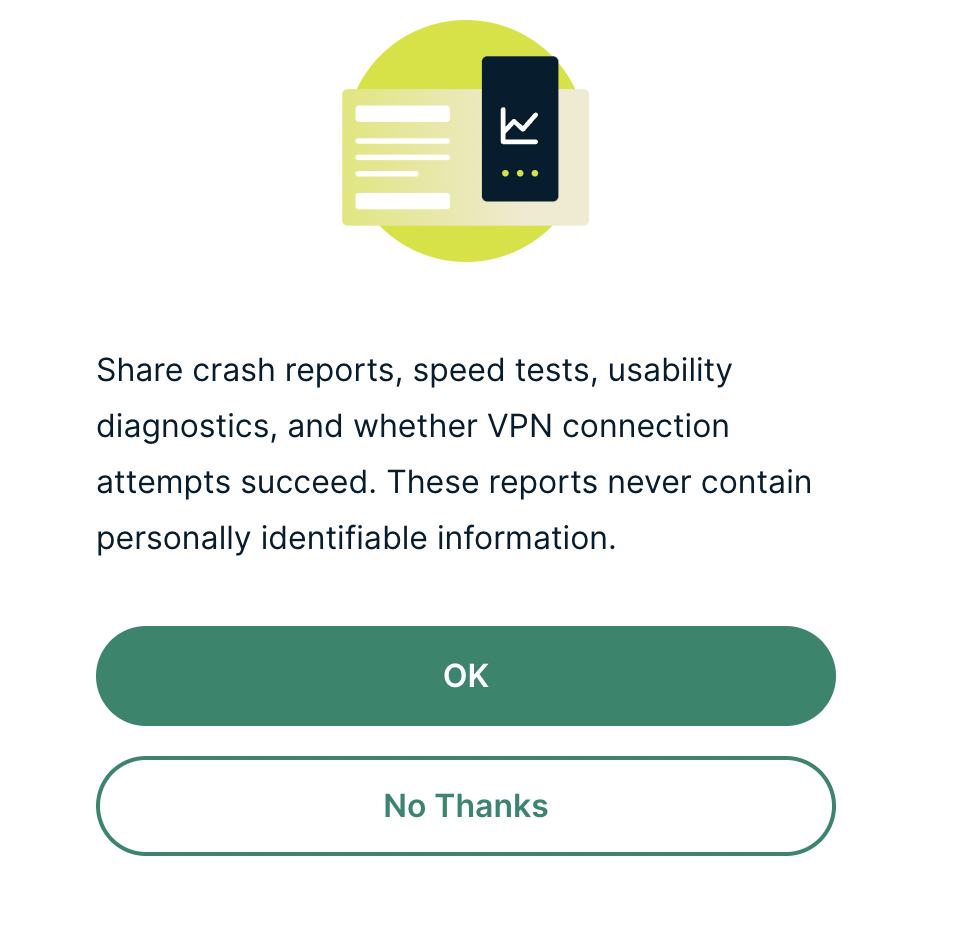
5. Select if you want to share anonymous crash report data with ExpressVPN to help them improve the firmware for future releases.

ExpressVPN Share Crash Report

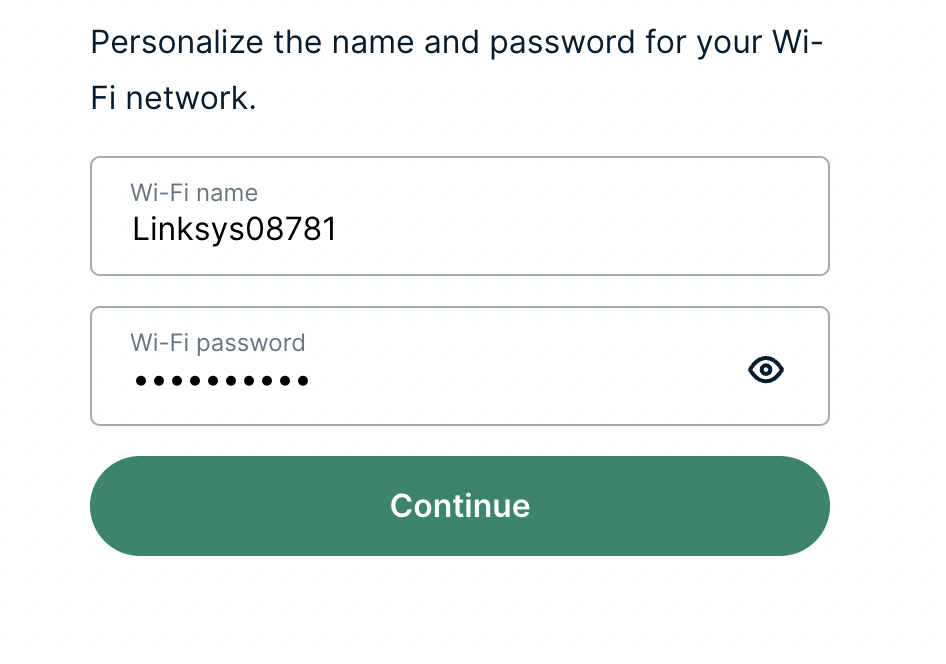
6. Set the WiFi name and password your wireless devices will use to connect to the FlashRouter’s network. Make sure the WiFi name is unique and not a duplicate of an existing WiFi name if you change it. You can also leave it as the default information if you like. Click Continue.

ExpressVPN Set WiFi Name and Password

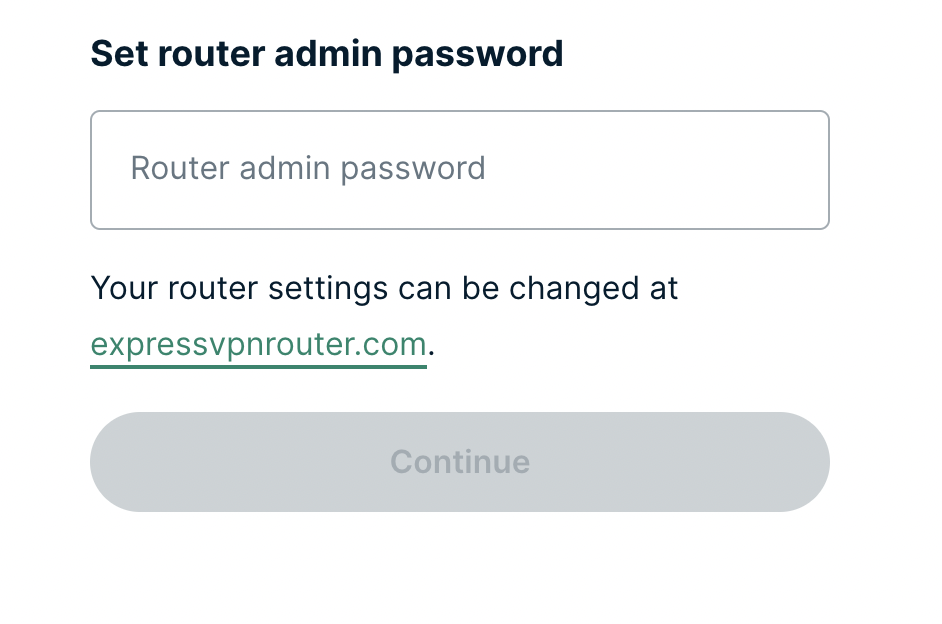
7. Enter the admin password you will use to access the ExpressVPN router settings. Be sure to TYPE CAREFULLY when setting the admin password as a typo will result in needing to reset the router again. Note this password in a secure location or commit it to memory.

ExpressVPN admin password

8. Your ExpressVPN FlashRouter is now fully setup!

ExpressVPN Connected

Surfshark Merlin WireGuard Setup

TeamFlashRouters · Mar 30, 2023 ·

Preparing for Surfshark Merlin Setup

Download your Surfshark .conf file

If you are not already a Surfshark user Sign Up Now.

1. Log in to your account on the Surfshark website.

Surfshark Account Login

2. Click VPN Manual Setup.

Surfshark VPN Manual Setup

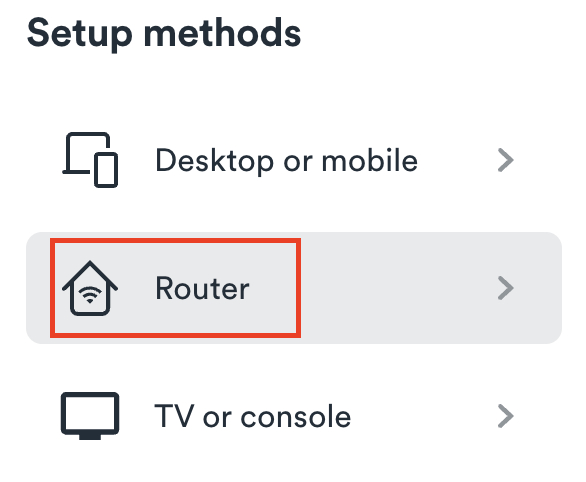
3. Select Router as the Setup Method.

Surfshark setup method Router

4. Select WireGuard as the Protocol.

Surfshark select WireGuard

5. Select I don’t have a key pair.

Surfshark No Key Pair

6. Enter FlashRouter as the name of the connection and click Next.

Surfshark Connection Name

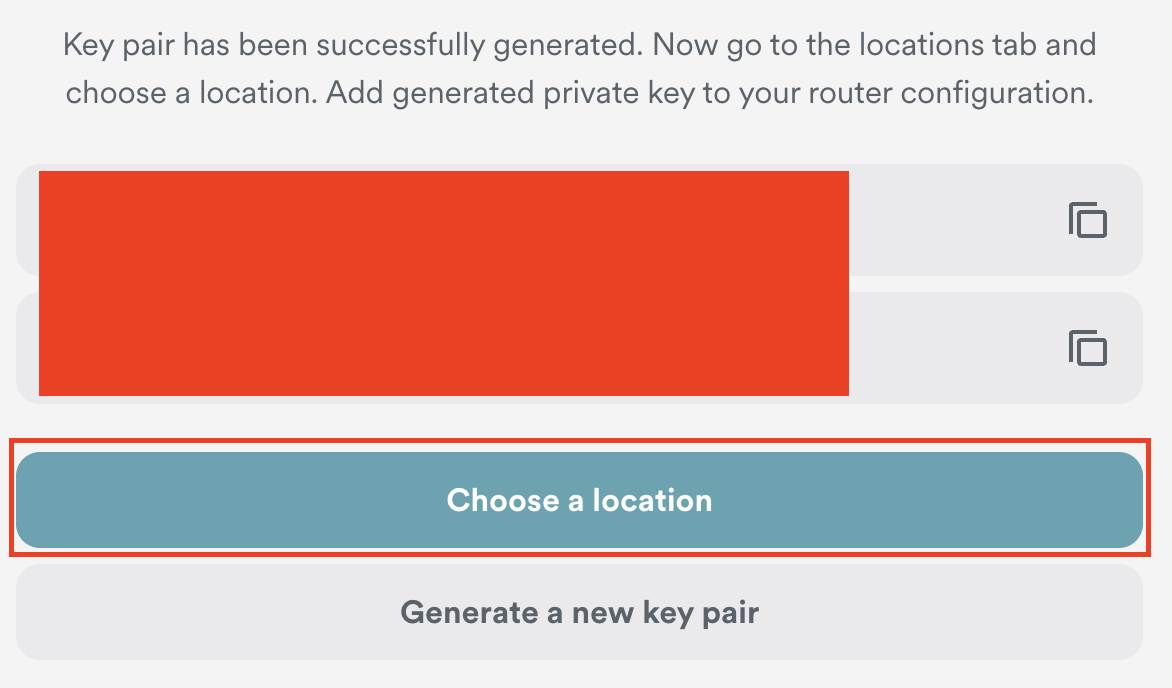
7. Click Generate a new key pair.

Surfshark Generate new Key Pair

8. Click Choose a location.

Surfshark Choose a Location

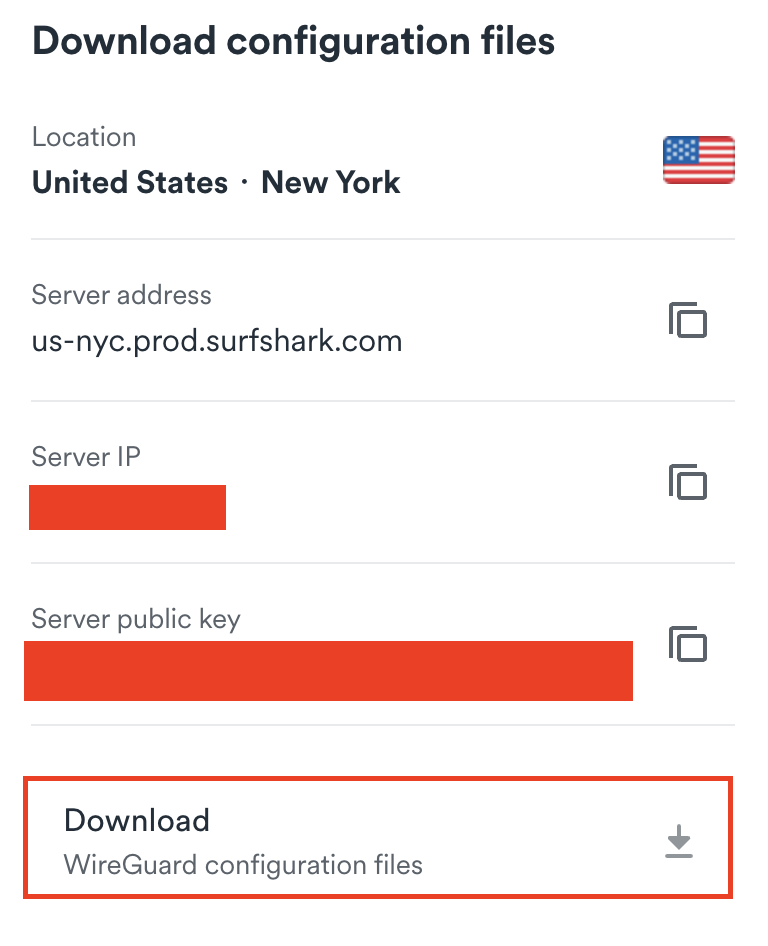
9. Select the server location you want to connect to. Unless you need a specific location we recommend using Surfshark’s recommended Fastest server. Click Download to download the .conf file for this Surfshark server location.

Surfshark download conf file

Merlin Router Setup for Surfshark

Login to Asus Merlin firmware settings in a browser on any computer or smart device connected to the Merlin FlashRouter’s network.

1. Navigate to the VPN tab.

Merlin VPN Tab

2. Navigate to the VPN Client tab.

Merlin VPN Client Tab

3. Select WireGuard as the VPN Protocol.

Merlin VPN Client WireGuard

4. Click Choose file and select the .conf file you downloaded earlier. Then click Upload.

Merlin WireGuard Choose File Upload

5. In the Description field enter in the name you’d like to use for this WireGuard Client profile. We typically advise entering in the location here. Our example server was in New York so I have entered in Surfshark New York.

Merlin WireGuard ProtonVPN Description

6. Set Enable WireGuard to Yes.

Merlin Enable WireGuard

7. Click Apply at the bottom of the page and you should then see a Connected message appear.

Merlin WireGuard Connected

8. By default no devices are assigned to the new active WireGuard connection profile. Click the VPN Director tab to assign specific devices to the new WireGuard profile. Your IP will not be changed on your devices yet.

WireGuard select VPN Director

9. On the VPN Director page click the + symbol next to Add new rule.

WireGuard VPN Director Add new rule

10. Select the new WireGuard profile in the Interface dropdown.

WireGuard VPN Director select Interface

11. In the Local IP field enter in 192.168.50.0/24 if you want ALL devices connected to the FlashRouter’s network to use the WireGuard VPN connection. Click OK.

If you only want certain devices to connect to the WireGuard Client profile you have setting up instead of all the devices connected to the FlashRouter’s network please complete the instructions on our VPN Director guide.

12. Then click Apply at the bottom of the page.

Verify a successful Surfshark connection

Visit Surfshark’s IP Check from a private/incognito browsing window to verify your new IP address and virtual location.

In some cases you may notice that the location is not showing the same location as the server you have input in your router settings; this is because geo tracking tools are often tricked by VPN connections. As long as you see an IP address that is not the same as your normal Internet IP address then you are indeed connected to Surfshark.

How to change the Surfshark server

  1. Follow the steps at the top of the page to obtain a new .conf file.
  2. Then proceed with the settings same as initial setup.

TROUBLESHOOTING

Still having issues? Visit the VPN Troubleshooting section.

Troubleshoot Here

ExpressVPN/Aircove FlashRouter Internet Setup and Activation

TeamFlashRouters · Mar 16, 2022 ·

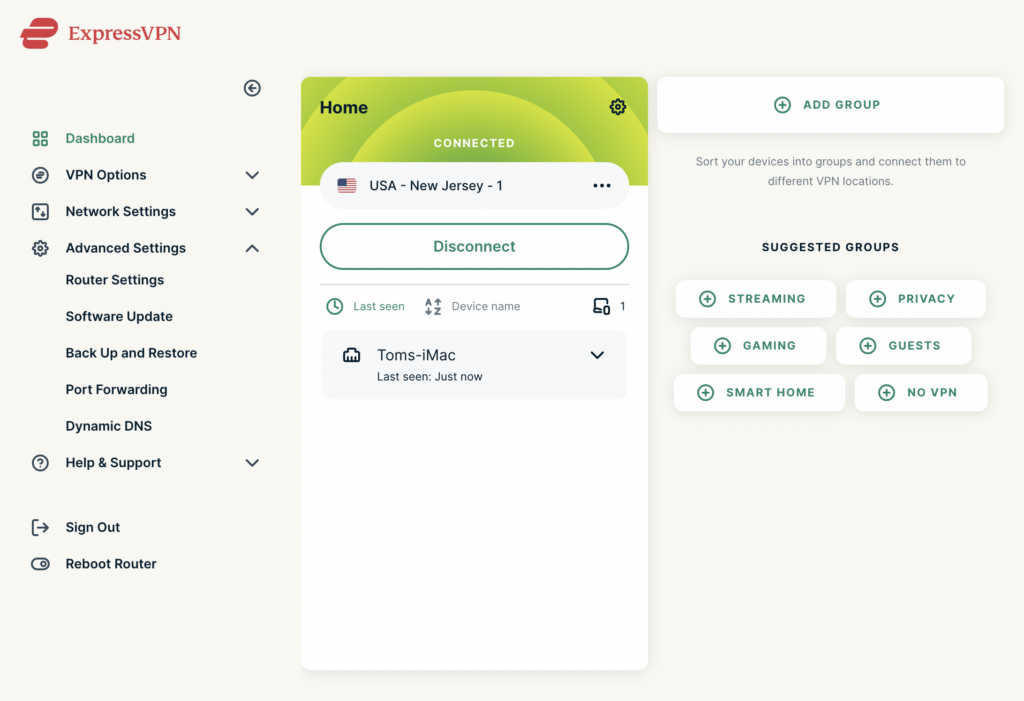
Follow this article when you receive your new ExpressVPN FlashRouter to connect your FlashRouter to the Internet via ExpressVPN and customize your network so it is ready to use.

Obtain your ExpressVPN Activation Code

If you are not already an ExpressVPN user Sign Up Now.

1. Visit ExpressVPN’s website login page.

ExpressVPN on FlashRouters Privacy App Setup - Sign Into ExpressVPN Dashboard

2. Copy your ExpressVPN Activation code and paste it into a document or leave this page open while you proceed with the instructions.

Access Router Settings

1. Connect to the FlashRouter’s network via ethernet cable or wireless.

The wireless network will appear as “Aircove”, “Linksys##”, “Netgear##”, or “Asus” and the password to join the network will be the default wireless password printed on the bottom of the router.

2. Open your web browser and enter expressvpnrouter.com or 192.168.132.1 in the URL.

ExpressVPNrouter.com
192.168.132.1

3. Click Get Started on the ExpressVPN page that is displayed.

ExpressVPN Get Started

4a. If your FlashRouter is wired to the Internet correctly then you will be prompted to enter your ExpressVPN Activation Code found in your ExpressVPN account. Paste that in and click Sign in to ExpressVPN.

ExpressVPN Activation Code

4b. If your FlashRouter is not wired correctly or is not receiving Internet properly make sure you are wired as detailed in the diagram that appears. If you are stuck at this screen we recommend powering off your ISP modem and any other router that the ExpressVPN FlashRouter is wired to and then powering them back up one by one.

Proceed with step “4a” above once the router is receiving Internet and you are prompted to enter the Activation Code.

ExpressVPN Wiring

5. Select if you want to share anonymous crash report data with ExpressVPN to help them improve the firmware for future releases.

ExpressVPN Share Crash Report

6. Set the WiFi name and password your wireless devices will use to connect to the FlashRouter’s network. Make sure the WiFi name is unique and not a duplicate of an existing WiFi name if you change it. You can also leave it as the default information if you like. Click Continue.

ExpressVPN Set WiFi Name and Password

7. Enter the admin password you will use to access the ExpressVPN router settings. Be sure to TYPE CAREFULLY when setting the admin password as a typo will result in needing to reset the router again. Note this password in a secure location or commit it to memory.

ExpressVPN admin password

8. Your ExpressVPN FlashRouter is now fully setup!

ExpressVPN Connected

NordVPN Manual OpenVPN Setup

TeamFlashRouters · Apr 8, 2019 ·

Preparing for Manual NordVPN Setup

Verify your NordVPN login information

If you are not already an NordVPN user Sign Up Now.

Log in to your account on the NordVPN website.

NordVPN Server Addresses

For a NordVPN server recommendation visit their Recommend Server page.

Once you have selected the server you want to connect to, download the UDP .ovpn file containing the Server IP Address, TLS Auth Key, and CA Cert referenced below.

Open the .ovpn file that is downloaded to your computer with NotePad++ for Windows or TextEdit for Apple. You will only need the Server IP Address, TLS Auth Key, and CA Cert from this file. All NordVPN servers and .ovpn files have different IP Addresses, keys, and certificates.

DD-WRT Router Setup for NordVPN

Navigate to Services > VPN

Enter NordVPN settings

OpenVPN Client

Start OpenVPN Client

If you wish to disable your VPN connection simply set this to Disable at any time and click Apply Settings.
Server IP/Name

At the top of the .ovpn file you downloaded above, there is a line e.g.:
remote 206.226.72.27 1194
206.226.72.27 is your NordVPN server IP address. Enter the IP Address in this field.

Port

1194

Tunnel Device

TUN

Tunnel Protocol

UDP

Encryption cipher

AES-256-CBC

Hash Algorithm

SHA512

Userpass Authentication

Enable

Username

Enter the Username you successfully logged in to your NordVPN account with.

Password

Enter the Password you successfully logged in to your NordVPN account with.

Advanced Options

Enable

TLS Cipher

None

LZO Compression

Adaptive

NAT

Enable

Firewall Protection

Enable

TLS Auth Key

In the .ovpn file copy and paste all contents in between the <tls-auth> and </tls-auth> lines from your .ovpn file starting and ending with:
—–BEGIN OpenVPN Static key V1—–
…
—–END OpenVPN Static key V1—–

Additional Config

tun-mtu-extra 32
mssfix 1450
persist-key
persist-tun

Policy Based Routing

This field can be used for split VPN and Dual Gateway routing.

CA Cert

In the .ovpn file Copy and Paste all contents in between the <ca> and </ca> lines from your .ovpn file starting and ending with:
—–BEGIN CERTIFICATE—–
…
—–END CERTIFICATE—–

CLICK APPLY SETTINGS

Leave all settings not mentioned above as their default setting.

Verify a successful NordVPN connection

Navigate to Status > OpenVPN

  1. You should now see a CONNECTED SUCCESS message.
  2. Visit NordVPN’s website to verify your new IP address, virtual location, and status as Protected at the top of the page.

In some cases you may notice that the location is not showing the same location as the server you have input in your router settings; this is because geo tracking tools are often tricked by VPN connections. As long as you see an IP address that is not the same as your normal Internet IP address then you are indeed connected to NordVPN.

Back up your settings

Navigate to Administration > Backup

  1. Click the Backup button.
  2. A file named nvrambak.bin will be saved to your computer.
  3. You can load nvrambak.bin to restore your settings in the event of a reset.

How to change the NordVPN server

  1. Download and open a new .ovpn file from NordVPN.
  2. Copy and paste the server IP Address into the Server IP/Name field.
  3. Copy and paste the TLS Auth Key into the TLS Auth Key field.
  4. Copy and paste the CA Cert into the CA Cert field.
  5. Click Apply Settings.
TROUBLESHOOTING

Still having issues? Visit the VPN Troubleshooting section.

Troubleshoot Here

PureVPN Merlin WireGuard Setup

TeamFlashRouters · Jul 20, 2023 ·

Preparing for PureVPN Merlin Setup

Download your PureVPN .conf file

If you are not already an PureVPN user Sign Up Now.

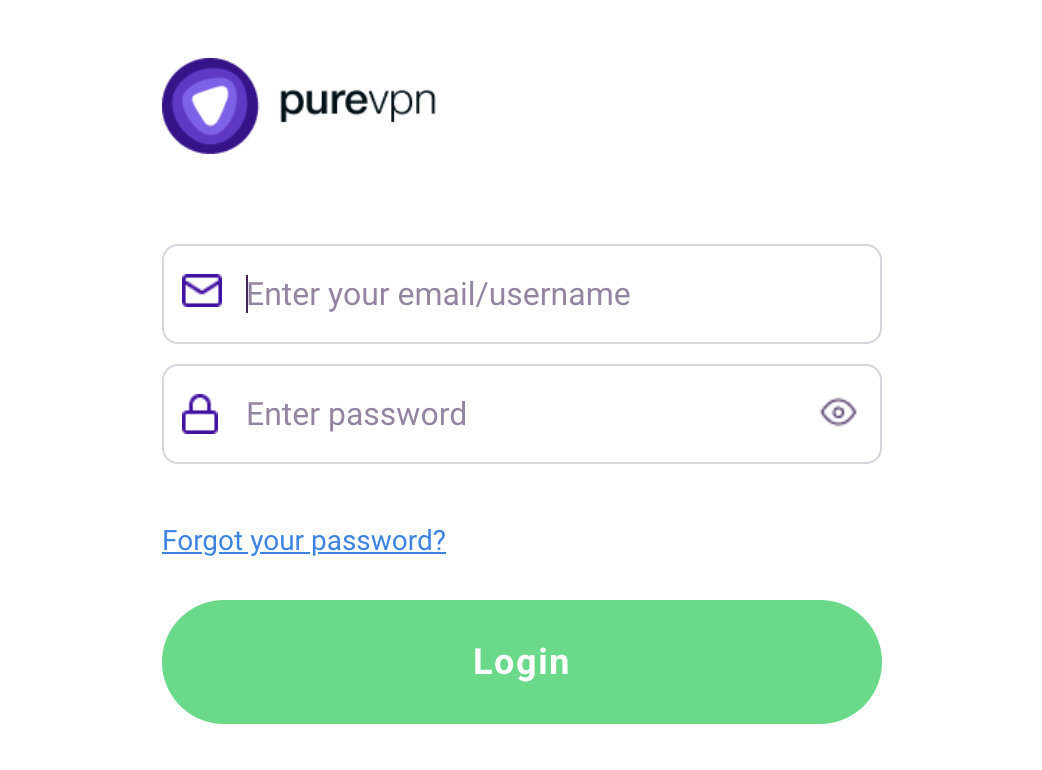
1. Log in to your account on the PureVPN website.

PureVPN Login

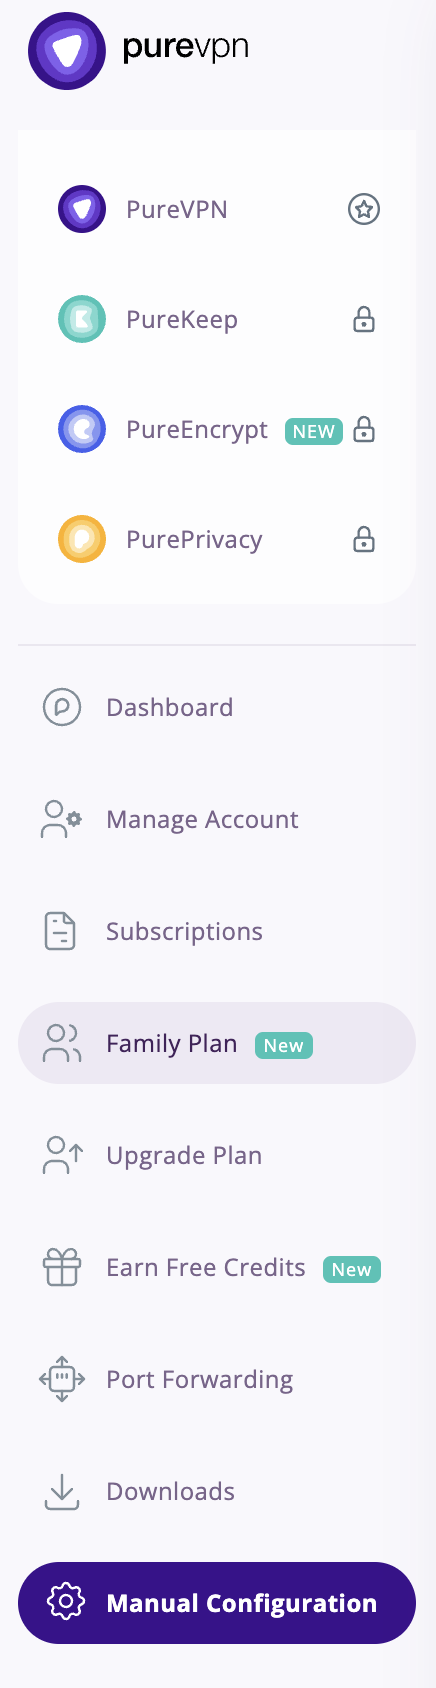
2. Select Manual Configuration.

PureVPN Manual Configuration

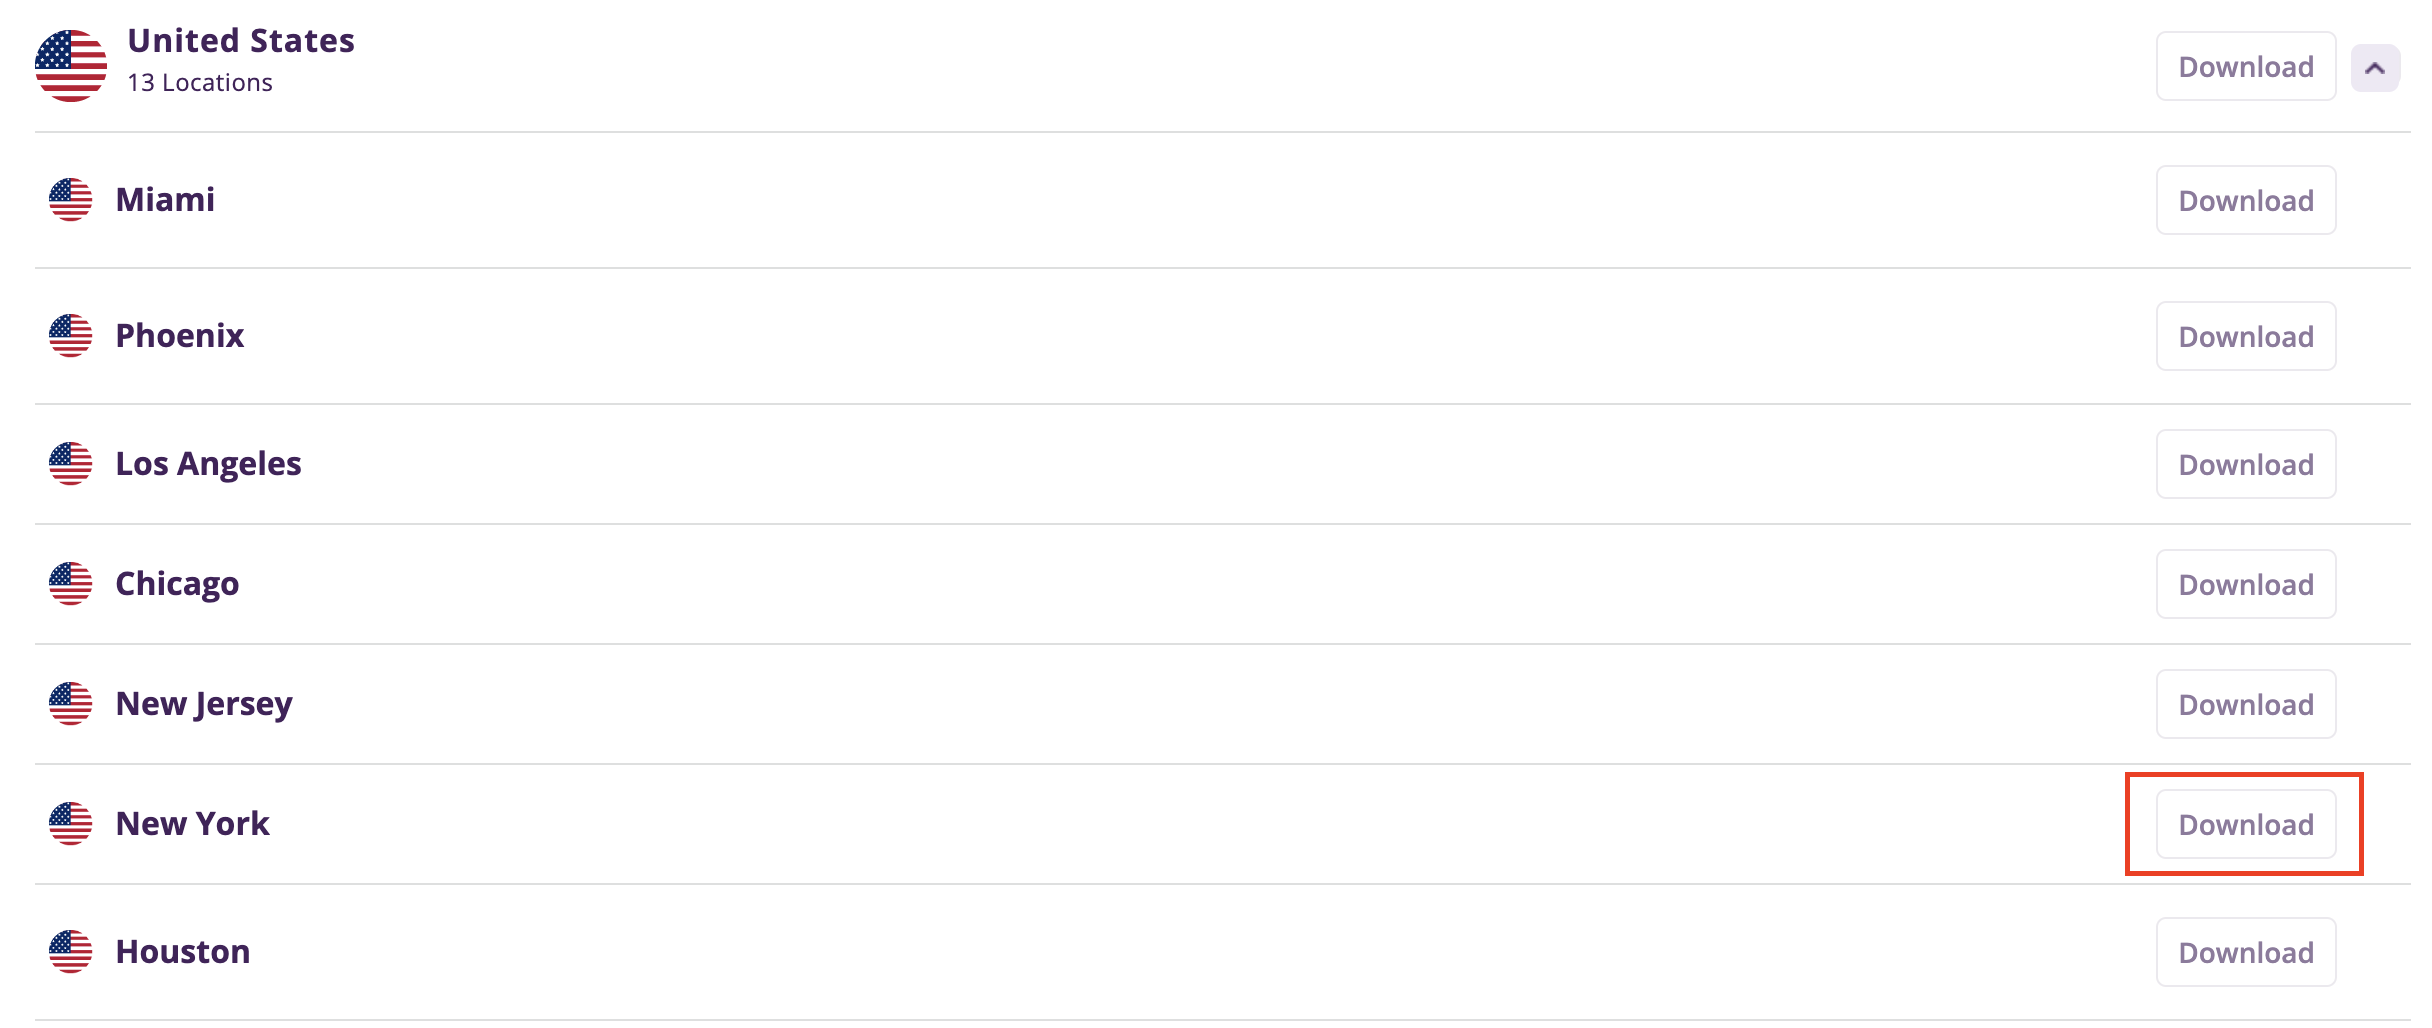
3. Select the Server Location you want to connect to and then click Download.

PureVPN select server location

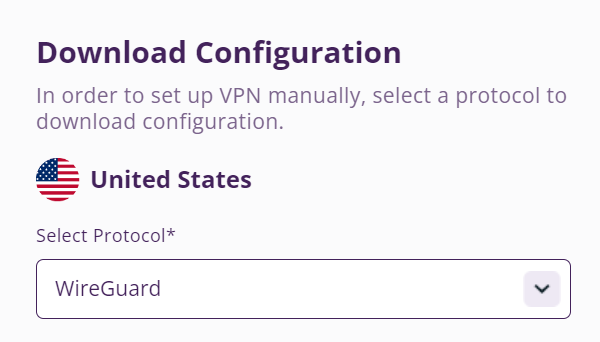
4. In the Select Protocol dropdown choose WireGuard.

PureVPN WireGuard

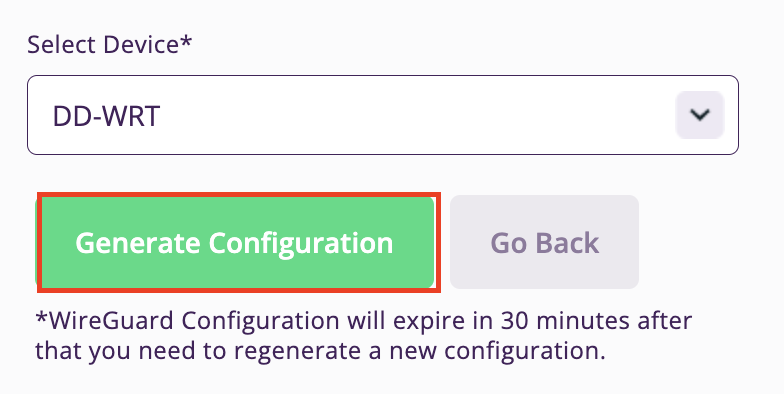
5. In the Select Device dropdown choose DD-WRT. Then click Generate Configuration. This will save a .conf file to your computer.

PureVPN Generate Config

Merlin Router Setup for PureVPN

Login to Asus Merlin firmware settings in a browser on any computer or smart device connected to the Merlin FlashRouter’s network.

1. Navigate to the VPN tab.

Merlin VPN Tab

2. Navigate to the VPN Client tab.

Merlin VPN Client Tab

3. Select WireGuard as the VPN Protocol.

Merlin VPN Client WireGuard

4. Click Choose file and select the .conf file you downloaded earlier. Then click Upload.

Merlin WireGuard Choose File Upload

5. In the Description field enter in the name you’d like to use for this WireGuard Client profile. We typically advise entering in the location here.

Merlin WireGuard ProtonVPN Description

6. Set Enable WireGuard to Yes.

Merlin Enable WireGuard

7. Click Apply at the bottom of the page and you should then see a Connected message appear.

Merlin WireGuard Connected

8. By default no devices are assigned to the new active WireGuard connection profile. Click the VPN Director tab to assign specific devices to the new WireGuard profile. Your IP will not be changed on your devices yet.

WireGuard select VPN Director

9. On the VPN Director page click the + symbol next to Add new rule.

WireGuard VPN Director Add new rule

10. Select the new WireGuard profile in the Interface dropdown.

WireGuard VPN Director select Interface

11. In the Local IP field enter in 192.168.50.0/24 if you want ALL devices connected to the FlashRouter’s network to use the WireGuard VPN connection. Click OK.

If you only want certain devices to connect to the WireGuard Client profile you have setting up instead of all the devices connected to the FlashRouter’s network please complete the instructions on our VPN Director guide.

12. Then click Apply at the bottom of the page.

Verify a successful PureVPN connection

Visit PureVPN’s IP Check to verify your new IP address and virtual location.

In some cases you may notice that the location is not showing the same location as the server you have input in your router settings; this is because geo tracking tools are often tricked by VPN connections. As long as you see an IP address that is not the same as your normal Internet IP address then you are indeed connected to PureVPN.

How to change the PureVPN server

  1. Follow the steps at the top of the page to obtain a new .conf file.
  2. Then proceed with the settings same as initial setup.

TROUBLESHOOTING

Still having issues? Visit the VPN Troubleshooting section.

Troubleshoot Here

TP-Link Change Wireless Channel

TeamFlashRouters · Apr 16, 2024 ·

Follow this guide to change the Wireless channel on your TP-Link FlashRouter.

1. Connect your computer, phone, or tablet to the TP-Link router via wireless (FlashRouter24 / FlashRouter50) or via ethernet cable to one of the LAN ports on the router.

The FlashRouter WiFi password is printed on the sheet that came with the router and is set to Wireless#[First 5 characters of your router MAC]. The router MAC can be found on the bottom of your router if you cannot locate the sheet. For e.g. if your MAC is 1459C07E70A8 then your WiFi password is Wireless#1459C

Be sure to capitalize the W.

2. Once connected via wireless or ethernet on your device open your browser and go to the TP-Link firmware settings.

TP-Link URL Access

3. Enter tp-link as the admin password to access the TP-Link firmware settings.

TP-Link admin password

4. Click Wireless.

TP-Link Wireless tab

5. Change the Channel setting to the number that you want to use. Click Save.

TP-Link Change Wireless Channel

6. Connect your devices to the wireless network again as they may have been disconnected when making this change.

TROUBLESHOOTING

Still having issues? Visit the VPN Troubleshooting section.

Troubleshoot Here

Sales FAQs

admin · Jan 29, 2019 ·

Sales FAQs

Can My Router Be Preconfigured With My VPN Information?

Plug and Play VPN Support

Yes you can!

To receive a plug and play with VPN device, you will need to provide our team with the credentials from your VPN provider subscription.

IMPORTANT NOTE: This is not required but recommended for users who wish to have the simplest, most seamless experience when the FlashRouter arrives. You can always change the password when the device arrives if you wish as well.


To have your router VPN preconfigured:

  1. Check the “Connect To VPN For Me” box under VPN – Preconfiguration on the Product Page during check out.
  2. Select your VPN provider. If you don’t see your VPN listed select “Other” and you will see an additional field to input who your provider is.
  3. You’ll receive an email after purchase with detailed instructions. If you have any questions our team is happy to help!
Please note:  If you do give a server location, we will automatically start the device with the closest/optimal server for the location we are shipping the device by default. A location has to be added to the initial configuration for plug and play encryption security to occur on the device.


Privacy Hero 2 Only:

While our team isn’t able to pre-configure the Privacy Hero 2 VPN Router before shipping it out since you’ll have to make a Privacy Hero user account and register your router, we can assist you with the VPN set up process once you receive the router and create your Privacy Hero user account via 1-on-1 remote session, email, or live chat on our site.

You can also use our step-by-step Privacy Hero VPN Router Setup Guide to complete the process.

Can I Use My Dedicated IP Address With A FlashRouter?

Dedicated IP Addresses from NordVPN, SurfShark, & TorGuard are supported on almost all of our FlashRouter options.

Check out our Dedicated IP Addresses Blog Post for more details!

Can I Use A FlashRouter With My Current Mesh System?

Yes!

You will be able to connect the FlashRouter of your choosing to your current mesh router via ethernet port as shown below:

ISP Modem/Router —- FlashRouter (VPN) —- Main Mesh Router (VPN from FlashRouter) 

This setup will allow you to keep your mesh network with added VPN protection, as well as add the FlashRouter wireless network for your devices.

You can disable the wifi on the FlashRouter also if you only wanted to use the mesh network for wifi.

Can You Flash My Router and Connect me to VPN?

At FlashRouters, we offer expert router flashing and VPN configuration services through our Flash My Router plans. Whether your router needs custom firmware flashing or just a VPN configuration, we ensure it’s set up for maximum security, privacy, and streaming performance with your chosen VPN provider.

The appointment will take place via remote software. During the appointment, our team will also answer any questions you may have about using the VPN on the router. Flashing is done out of the East Coast of the United States – we will do our best to accommodate your time zone difference if you are located in another part of the United States or another country.

👉 Explore our Flash My Router plans:
🔗 Flash My Router Plans


🔹 How It Works

✅ Flashing vs. Configuration: Some routers require custom firmware (flashing) to enable VPN, while others can be configured without flashing.
✅ Fully Optimized: Our team ensures your router is ready to securely connect to your VPN, block ISP tracking, and enhance your streaming experience.
✅ Remote Assistance Available: Get expert help setting up your VPN connection remotely if needed.


Flashing vs. Configuration: Router Compatibility

At FlashRouters, we handle VPN setup differently based on your router brand and model. Some routers require flashing custom firmware (like DD-WRT or AsusWRT-Merlin), while others can be configured without flashing.

🛠 Router Setup Types by Brand

🔹 Flashing Required (Custom Firmware Installation)

These routers require firmware flashing (DD-WRT or AsusWRT-Merlin) to enable VPN compatibility.

  • Asus – Flashed with AsusWRT-Merlin or updated to the latest AsusWRT build. Some models only require configuration.
  • Linksys – Flashed with DD-WRT firmware.
  • Netgear – Flashed with DD-WRT firmware.

🔹 Configuration Only (No Flashing Required)

These routers have built-in VPN support and only require proper setup.

  • TP-Link – Configured without flashing.
  • GL.iNet – Configured without flashing.
  • Cudy – Configured without flashing.

📌 Other brands are not supported at this time. If you have a different router, we recommend checking out our pre-flashed router options.


✅ Supported VPN Providers

We work with a wide range of VPN providers, including:

  • NordVPN
  • ExpressVPN
  • Surfshark
  • CyberGhost
  • IPVanish
  • Private Internet Access (PIA)
  • VyprVPN
  • ProtonVPN
  • PureVPN
  • Windscribe
  • IVPN
  • Mullvad
  • StrongVPN
  • AzireVPN
  • AstrillVPN
  • HotspotShield VPN

(If your provider isn’t listed, reach out – we may still be able to support it!)


🔗 Get Started Today!

👉 Explore our Flash My Router plans:
🔗 Flash My Router Plans

🔹 Need help selecting the right option? Contact our support team! We’re happy to assist.

How Can I Add The 1 Year NordVPN Service From My FlashRouters.com Order To My Current NordVPN Account?

You can easily combine the free 1 year of NordVPN included with your FlashRouter purchase once you receive the NordVPN Activation Code Email from FlashRouters.com. The email is typically received within 24 hours of order completion and will contain a link as well as an activation code.

This code can be entered at nordvpn.com/activate with the email address associated with your current NordVPN account to add the 1 year of free service to your existing service.


Privacy Hero 2 Only:

You can easily combine the free 1 year of NordVPN included with the Privacy Hero 2 VPN Router during the router activation process.

After activating the router, you’ll receive a NordVPN activation code within your privacy hero account dashboard. This code can be entered at nordvpn.com/activate with the email address associated with your current NordVPN account to add the 1 year of free service to your existing service.

What Are the Differences Between New, Recertified, And Open Box FlashRouters?

New

  • Direct from manufacturer, in new box.
  • Custom flashed on demand at time of the order.
  • 30 Day Satisfaction Guarantee / 1 Year Warranty.

Recertified (RM)

  • Direct from manufacturer/reseller, may be reboxed.
  • Custom flashed on demand at time of the order.
  • Specialists tested to guarantee same functionality as NEW routers.
  • 30 Day Satisfaction Guarantee / 1 Year Warranty.

Open Box

  • Limited quantity, discount items reboxed that may have cosmetic imperfections.
  • Same testing and functionality level and New and RM.
  • 30 Day Satisfaction Guarantee / No Warranty.

Will a FlashRouter Work With My Internet Service Provider?

US Customers (Single Router Solution):

Almost all Internet Service Providers(ISPs) require a modem in place to establish a connection to their service, however a modem by itself doesn’t provide the wifi connectivity needed in the home or office. A FlashRouter can connect directly to all known modems provided by major ISPs to create a wireless network so long as there is an Ethernet port on the modem to connect to the FlashRouter Internet port. 

US Customers (Dual Router Solution): 

Yes, FlashRouters are compatible with your ISP in what is called a Dual Router Set Up.

For this type of setup, you would use your current router or modem router to connect to your local ISP while using a FlashRouter to connect to your VPN. This is recommended as you will not overhaul your network with a new router, and you will be able to use your selected VPN service on the devices you wish to use it with.

This set up would result in the creation of two networks, which can be seen as the “Local Network” and the “FlashRouter Network”. All devices connected to the FlashRouter Network will go through the VPN service. 

For any device you would prefer to use without a VPN, you can connect to the local network. The chain of devices would be connected from LAN ton your modem or modem/router to WAN on the FlashRouter, with your current router connected to the FlashRouter via Ethernet cable. 


International Customers (Single Router Solution):

Almost all Internet Service Providers (ISPs) require a modem in place to establish a connection to their service, however a modem by itself doesn’t provide the wifi connectivity needed in the home or office. A FlashRouter can connect directly to all known modems provided by major ISPs to create a wireless network so long as there is an Ethernet port on the modem to connect to the FlashRouter Internet port. 

International Customers (Dual Router Solution):

ISPs should all be compatible. Some providers require VLAN tagging/VID settings when wiring directly from modem to FlashRouter. 

For this type of setup, you would use your current router or modem router to connect to your local ISP while using a FlashRouter to connect to your VPN. This is recommended as you will not overhaul your network with a new router, and you will be able to use your selected VPN service on the devices you wish to use it with.

This set up would result in the creation of two networks, which can be seen as the “Local Network” and the “FlashRouter Network”. All devices connected to the FlashRouter Network will go through the VPN service. 

For any device you would prefer to use without a VPN, you can connect to the local network. The chain of devices would be connected from LAN ton your modem or modem/router to WAN on the FlashRouter, with your current router connected to the FlashRouter via Ethernet cable. 

What Stock Firmware Features Will I Lose If I Flash My Router

Open Source firmware like DD-WRT or Assu Merlin has many features equivalent to what stock firmware has, in addition to adding new features to a router. However, some features are lost from the stock firmware when a router is flashed.

These are typically features that are put into the stock firmware by the manufacturers themselves. Things like the Linksys App and the NetGear Genie are examples of what would not be available or compatible on the router after flashing.

Most routers also have a WPS button. By default, the WPS button’s functionality is disabled when a router is flashed as it can be vulnerable and a security risk. It can be re-enabled by following this guide but we do not recommend it.

Does a FlashRouter or Service Plan Purchase Include a VPN Subscription?

A subscription to a VPN does not come with a FlashRouter or Service plan. If you are planning to use a VPN, you would need to sign up for one separately, directly from a provider.

Need assistance in finding a VPN Provider? Please visit our recent VPN Provider Best Seller List.

Plug and Play VPN Support

Unlike other VPN Router providers, FlashRouters is proud to offer free VPN service integration with any purchase.

To receive a plug and play with VPN device, you will need to provide our team with the credentials from your VPN provider subscription.

IMPORTANT NOTE: This is not required but recommended for users who wish to have the simplest, most seamless experience when the FlashRouter arrives. You can always change the password when the device arrives if you wish as well.

Shows what to look for when you want to preconfigure your router.

To have your router VPN pre-configured:

  1. Select Yes from the “Want Your Router Preconfigured?” on the Payment Page during checkout.
  2. Select your VPN provider. If you don’t see your VPN listed select “Other” and you will see an additional field to input who your provider is.
  3. Enter your your VPN username and password
  4. For ExpressVPN Firmware Routers there will be an additional box for your activation code.

Please note:  If you do not enter a server location request in “Order Comments”, we will automatically start the device with the closest/optimal server for the location we are shipping the device by default. A location has to be added to the initial configuration for plug and play encryption security to occur on the device.

Can I Use A FlashRouter To Work From Home?

Yes! A large number of our customers use their FlashRouters to “work from home” no matter where your travels take you. Check out our Working Remotely Blog Post for more details.

What is the Difference Between Business VPNs and VPN Services?

Location: VPN Services offer many server locations to encrypt your traffic through. They are located in several countries worldwide for creating a private VPN tunnel for your online activities. A business VPN connects to specific central servers for data or directly to your office, creating a direct tunnel for accessing sensitive work documents and information.

Logging: Most VPN services offer log-free connections for total anonymity and security when connected (it is important to check out their terms of service and privacy policy for full details). A business VPN is monitored and maintained by employers such as corporations, hospitals or universities.

Protection: VPN services secure your family’s personal data while using computers, SmartTVs and various Internet of Things devices. Business VPNs protect the data of the company while you are tunneling into work.

Are There VPN Service Providers That Offer VPN for Business?

There are in fact several trusted VPN providers that have services specially tailored for business use. NordVPN Teams and VyprVPN for Business offer a full suite of solutions like user management tools, dedicated IPs, personal product managers, global server access, business pricing, and more.

These solutions allow you to quickly deploy a safe and secure corporate network without building and maintaining your own servers. If you are a small business looking to quickly secure remote workers as they shift to work from home, and you do not have an in-house IT expert, then you should consider NordVPN Teams or VyprVPN for Business.

Even better, when choosing a business VPN provider like NordVPN or VyprVPN, employees can use routers with direct NordVPN and VyprVPN integration already included through the FR Privacy App. Meaning that a full network kill switch, routing by device, automatic connections, and more are all included as features with your business VPN connection.

Can I use a VPN on a FlashRouter With My Work/Corporate VPN?

Many of our customers have found that they can connect to both their corporate and personal VPN, however due to the variables beyond our control, we cannot guarantee this for every unique situation.

Using two VPNs at once can lead to unpredictable results. Bouncing your network traffic to multiple servers before finally arriving at it’s intended destination can sometimes introduce speed and connection issues.

Please consider that some employers and agencies are more vigilant regarding third party VPN use than others. There are tools readily available that detect the use of VPN services.

While these tools cannot decrypt and view your network traffic, they can tell your employer that you are potentially using a VPN, which can be against company policy.

If your corporate and personal VPN do not work together, then you can always set the computer using your work VPN to bypass the FlashRouter’s VPN tunnel by accessing the router admin panel for your device.

This way, your computer would only use the work VPN. Keep in mind however, your location would appear as your actual location to your work.

Every FlashRouter also comes with a 30 Day Satisfaction Guarantee.

If in the event you determine the FlashRouter is not working out for you, you can return the device within the first 30 Days. A $25 restocking fee does apply.

Can I Use a FlashRouter to Connect to a Dedicated Business VPN Network?

Of course! If you have an OpenVPN server running on a local machine or hosted on a cloud provider like Amazon Web Services (AWS), FlashRouters can create a custom router client configuration to connect the entire router and all connected devices to your OpenVPN server. Instead of employees connecting device-by-device, a router-based VPN connection allows for always-on secure VPN tunneling.

Our service team is here to work with you to test and ensure compatibility before purchasing. Interested in a router based custom client VPN solution for your remote workers? Please do not hesitate to contact us.

And, if you’re looking for a specific router, take a look at some of our most popular options!

How can I Reset the Password for My FlashRouters.com Customer Account?

To reset your password, you’ll want to click the “Account” icon in the upper right hand corner on our main website (Flashrouters.com). Once clicked, a menu will open where you can enter your login information, or select the “Forgot Password” button to trigger a reset email.

If you’re still having issues accessing your FlashRouters.com customer account after attempting a password reset, please reach out to us at support@flashrouters.com for further assistance.

What Payment Methods does FlashRouters Accept?

We accept Apple Pay, Google Pay, and all major cred/debit card providers on our payment method options page during checkout.


If you’d like to complete a purchase using PayPal as a payment method, please contact our team at support@flashrouters.com to request an invoice.

Can I Make Change/Update/Cancel My Order?

We strive to process and ship all orders within one business day. If you wish to make changes or cancellations, please contact us within 24 hours of placing your order at support@flashrouters.com with your order number and the changes you’d like to make.

While we will do our best to accommodate your request, please note that we cannot guarantee changes or cancellations.

Please note that if you need to update the shipping address, the order will require reapproval through our fraud prevention system with the new address.

Trouble Checking Out

Some customers have found that trying the methods below have helped solve any checkout errors they may have encountered:

⚡️Clearing cache
⚡️Refreshing web page
⚡️Switching web browsers
⚡️Using an incognito/private window
⚡️Confirming all billing information is accurate
⚡️Disable VPN if one is enabled
⚡️Disable Ad & Script Blockers if enabled
⚡️If you’re using a mobile device, switching to a computer or laptop would be ideal.

CyberGhost Manual OpenVPN Setup

TeamFlashRouters · Apr 9, 2019 ·

Preparing for Manual CyberGhost Setup

Obtain your CyberGhost OpenVPN Information

If you are not already a CyberGhost user Sign Up Now.

1. Log in to your account on the CyberGhost website.

CyberGhost Website Login

2. Select My Devices.

3. Select Other and then Configure New Device.

CyberGhost Website OpenVPN Configuration Files Generator Cyberghost - Website Screen CyberGhost Website OpenVPN Configuration Files Generator

4. Set Protocol to OpenVPN. Select the Country you would like to connect to. Select the Server Group. Name the device in the Device Name field. Click Save Configuration.

CyberGhost Website OpenVPN Configuration Files Generator 3

5. Press View configuration.

CyberGhost Website OpenVPN Configuration Files Generator 2

6. Copy the Username, and Password that appear to a notepad, since you will need this information later in the setup process. Click Download Configuration.

CyberGhost Website OpenVPN Configuration Files Generator 1

Open the file that was downloaded with NotePad++ for Windows or TextEdit for Apple. You only need the ca.crt, client.crt, and client.key files. All CyberGhost servers have different keys and certificates.

DD-WRT Router Setup for CyberGhost

Navigate to Services > VPN

Enter CyberGhost settings

OpenVPN Client

Start OpenVPN Client

If you wish to disable your VPN connection simply set this to Disable at any time and click Apply Settings.
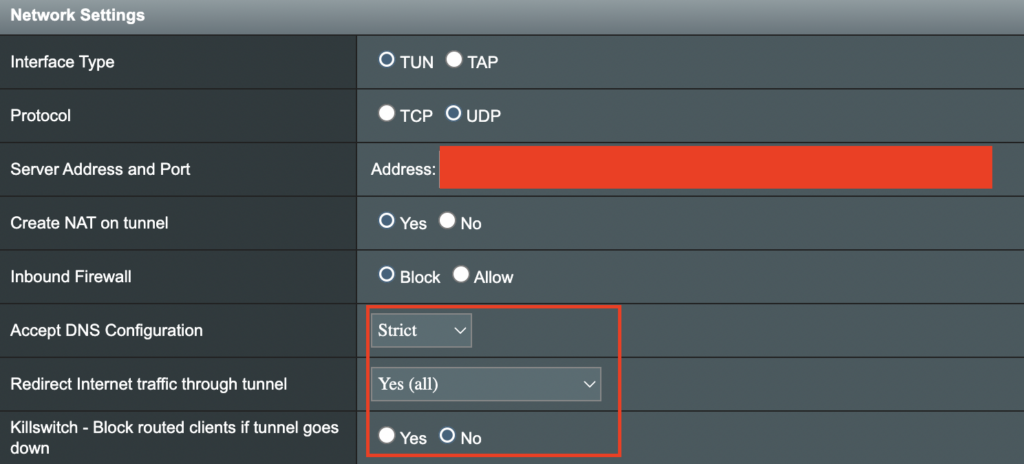
Server IP/Name

Copy and paste the server you selected in your account. Be sure there are no extra spaces or characters.

Port

443

Tunnel Device

TUN

Tunnel Protocol

UDP

Encryption cipher

AES-256-CBC

Hash Algorithm

SHA256

User Pass Authentication

Enable

Username

Enter the Username you obtained in your CyberGhost account.

Password

Enter the Password you obtained in your CyberGhost account.

Advanced Options

Enable

TLS Cipher

None

LZO Compression

Adaptive

NAT

Enable

Firewall Protection

Enable

Additional Config

tun-mtu 1500
fragment 1300
mssfix 1300

Policy Based Routing

This field can be used for split VPN and Dual Gateway routing.

CA Cert

—–BEGIN CERTIFICATE—–
MIIGWjCCBEKgAwIBAgIJAJxUG61mxDS7MA0GCSqGSIb3DQEBDQUAMHsxCzAJBgNV
BAYTAlJPMRIwEAYDVQQHEwlCdWNoYXJlc3QxGDAWBgNVBAoTD0N5YmVyR2hvc3Qg
Uy5BLjEbMBkGA1UEAxMSQ3liZXJHaG9zdCBSb290IENBMSEwHwYJKoZIhvcNAQkB
FhJpbmZvQGN5YmVyZ2hvc3Qucm8wHhcNMTcwNjE5MDgxNzI1WhcNMzcwNjE0MDgx
NzI1WjB7MQswCQYDVQQGEwJSTzESMBAGA1UEBxMJQnVjaGFyZXN0MRgwFgYDVQQK
Ew9DeWJlckdob3N0IFMuQS4xGzAZBgNVBAMTEkN5YmVyR2hvc3QgUm9vdCBDQTEh
MB8GCSqGSIb3DQEJARYSaW5mb0BjeWJlcmdob3N0LnJvMIICIjANBgkqhkiG9w0B
AQEFAAOCAg8AMIICCgKCAgEA7O8+mji2FlQhJXn/G4VLrKPjGtxgQBAdjo0dZEQz
KX08q14dLkslmOLgShStWKrOiLXGAvB1rPvvk613jtA0KjQLpgyLy9lIWohQKYjj
5jrJYXMZMkbSHBYI9L8L7iezBEFYrjYKdDo51nq99wRFhKdbyKKjDh3e2L2SVEZL
T1ogkK5gWzjvH+mjjtjUUicK+YjGwWOz6I+KKaG4Ve/D/cE6nCLbhHIMMnargZEu
7sqA6BFeS4kEP/ZdCZoTSX2n43XV1q63nJt/v0KDetbZDciFVW9h9SVPG4qT44p0
550N+Mom7zTX7S/ID5T9dplgU8sRGtIMrG0cIMD9zmpFgUnMusCrR7jJFr0sMAve
TbgZg95LmstV6R6WKZkSFdUrE0DHl4dHoZvTFX+1LhwhHgjgDLaosX0vhG/C/7Lp
oVWimd6RRQT3M9o4Fa1TuhfvBzQ20QHrmRV/yKvGNK0xckZ6EZ/QY7Z55ORU15Tg
ab4ebnblYPWoEmn0mIYP3LFFeoR5OS1EX7+j4kPv+bwPGsmpHjxmZyq2Y7sJBpbO
CJgbkn52WZdPBIRDpPdIHQ8pAJC4T0iMK9xvAwWNl/V6EYYNpR97osyEDXn+BTdA
HlhJ5fck9KlwI9mb1Kg1bhbvbmaIAiOLenSULYf3j6rI1ygo3R2cCyybtuAq8M7z
0OECAwEAAaOB4DCB3TAdBgNVHQ4EFgQU6tdK1g/He5qzjeAoM5eHt4in9iUwga0G
A1UdIwSBpTCBooAU6tdK1g/He5qzjeAoM5eHt4in9iWhf6R9MHsxCzAJBgNVBAYT
AlJPMRIwEAYDVQQHEwlCdWNoYXJlc3QxGDAWBgNVBAoTD0N5YmVyR2hvc3QgUy5B
LjEbMBkGA1UEAxMSQ3liZXJHaG9zdCBSb290IENBMSEwHwYJKoZIhvcNAQkBFhJp
bmZvQGN5YmVyZ2hvc3Qucm+CCQCcVButZsQ0uzAMBgNVHRMEBTADAQH/MA0GCSqG
SIb3DQEBDQUAA4ICAQDNyQ92kj4qiNjnHk99qvnFw9qGfwB9ofaPL74zh0G5hEe3
Wgb2o4fqUGnvUNgOu53gJksz3DcPQ8t40wfmm9I1Z8tiM9qrqvkuQ+nKcLgdooXt
EsTybPIYDZ2cWR/5E0TKRvC7RFzKgQ4D77Vbi4TdaHiDV7ZNfU1iLCoBGcYm80hc
UHEs5KIVLwUmcSOTmbZBySJxcSD0yUpS7nlZGwLY6VQrU+JFwDSisbXT4DXf3iSz
p7FzW0/u/SFvWsPHrjE0hkPoZPalYvouaJEHKAhip0ZwSmitlxbBnmm8+K/3c9mL
A5/uXrirfpuhhs8V3lyV2mczVtSiTl6gpi88gc//JY80JeHdupjO25T3XEzY9cpx
ecmkWaUEjLMx4wVoXQuUiPonfILM6OLwi+zUS8gQErdFeGvcQXbncPa4SdJuHkF8
lgiX2i8S8fPGdXvU37E9bdAXwP5nZriYq1s0D59Qfvz+vLXVkmyZp6ztxjKjKole
mPMak0Y5c1Q4RjNF6tmQoFuy/ACSkWy14Tzu2dFp7UiVbGg1FOvKhfs48zC2/IUQ
v1arqmPT/9LVq3B2DVT9UKXRUXX/f/jSSsVjkz4uUe2jUyL+XHX1nSmROTPHSAJ+
oKf0BLnfqUxFkEUTwLnayssP2nwGgq35b7wEbTFIXdrjHGFUVQIDeERz8UThew==
—–END CERTIFICATE—–

Public Client Cert

Copy and paste all contents of the client.crt file starting and ending with:
—–BEGIN CERTIFICATE—–
…
—–END CERTIFICATE—–

Private Client Key

Copy and paste all contents of the client.key file starting and ending with:
—–BEGIN PRIVATE KEY—–
…
—–END PRIVATE KEY—–

CLICK APPLY SETTINGS

Leave all settings not mentioned above as their default setting.

Verify a successful CyberGhost connection

Navigate to Status > OpenVPN

  1. You should now see a CONNECTED SUCCESS message.
  2. Visit CyberGhost’s website to verify your new IP address and virtual location.

In some cases you may notice that the location is not showing the same location as the server you have input in your router settings; this is because geo tracking tools are often tricked by VPN connections. As long as you see an IP address that is not the same as your normal Internet IP address then you are indeed connected to CyberGhost.

Back up your settings

Navigate to Administration > Backup

  1. Click the Backup button.
  2. A file named nvrambak.bin will be saved to your computer.
  3. You can load nvrambak.bin to restore your settings in the event of a reset.

How to change the CyberGhost server

  1. Follow the instructions for obtaining the OpenVPN information from above.
  2. Enter the new Server Address in the Server IP/Name field.
  3. Enter the new Username and Password.
  4. Enter the new ca.crt, client.crt, and client.key
  5. Click Apply Settings.
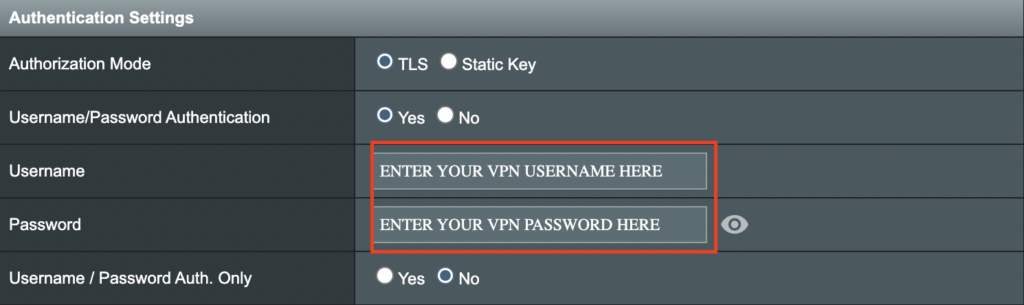
TROUBLESHOOTING

Still having issues? Visit the VPN Troubleshooting section.

Troubleshoot Here

AirVPN Manual OpenVPN Setup

TeamFlashRouters · Jun 11, 2019 ·

Preparing for Manual AirVPN Setup

Obtain your AirVPN OpenVPN Information

If you are not already a AirVPN user Sign Up Now.

1. Log in to your account on the AirVPN website.

AIRVPN OpenVPN Client Login for FlashRouter DD-WRT VPN Configuration

2. Click on the Client Area tab.

AIRVPN OpenVPN Client Area for FlashRouter DD-WRT VPN Configuration

3. Click on the Config Generator subtab.

AIRVPN OpenVPN Configuration Generator for FlashRouter DD-WRT VPN Configuration

4. Click on the Router icon under Choose your Operating System.

AIRVPN OpenVPN FlashRouter DD-WRT VPN Configuration

5. Select a Protocol under the Protocols section. We recommend UDP.

Select AIRVPN OpenVPN Encryption Protocol for FlashRouter DD-WRT VPN Configuration

6. Select one option under the Choose Servers section. AirVPN sorts these servers by Planet, Continent, Country, and Single servers. Choose whichever best suits your needs.

Sort AIRVPN OpenVPN Specific Certificates for FlashRouter DD-WRT VPN Configuration

7. Scroll down towards the bottom of the page and click on Generate.

Generate AIRVPN OpenVPN Specific Certificates for FlashRouter DD-WRT VPN Configuration

Open the file that was downloaded with NotePad++ for Windows or TextEdit for Apple. You will be copying the Server IP/Name, client.crt and client.key from this file.

Please note, all VPN servers have different keys and certificates. If you wish to change servers in the future, you will have to go through steps 1-7 again.

DD-WRT Router Setup for AirVPN

Navigate to Services > VPN

Enter AirVPN settings

OpenVPN Client

Start OpenVPN Client

If you wish to disable your VPN connection simply set this to Disable at any time and click Apply Settings.
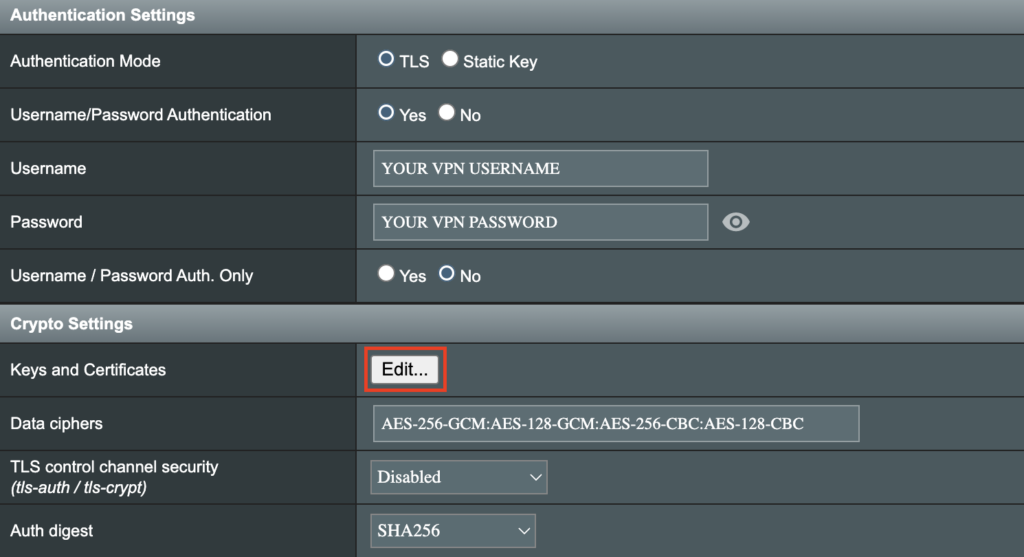
Server IP/Name

Copy and paste the server you selected in your account. Be sure there are no extra spaces or characters.

Port

443

Tunnel Device

TUN

Tunnel Protocol

UDP or TCP

Encryption cipher

AES-256-CBC

Hash Algorithm

SHA1

User Pass Authentication

Disable

Advanced Options

Enable

TLS Cipher

None

LZO Compression

No

NAT

Enable

Firewall Protection

Enable

nsCertType verification

Checked

Policy Based Routing

This field can be used for split VPN and Dual Gateway routing.

TLS Auth Key

—–BEGIN OpenVPN Static key V1—–
7bb7a23a0f5f28d01e792df68f1764ab
f2688719288808bf58e8a2d4f9354ecf
132625dfb895fc3f6330ae1e868e4dfa
c164c0931593d7f9a7da9595cf353433
8896e1d0a987a0d19838944af8fea4e5
215a3a0c76f4c67d5a4aee6a53be66a4
c88b84f850030840fb30f8550ed8068f
35c1ef34ee8f40a0ea5862dfb6f8d3c5
7ab5e27ac2799cf93e8765ff63cd8cd8
6b391b813925cd373bb202796f64d16f
003d042ca828d1b07f18ba1d0cb0323d
df3ee9287e9e084e655699efb3cffa92
3626946fa372e7beee245e7a95b4c1d8
7d16cae685218d4b8afc019b22e41083
476ee9883fe666d236301e55b2062551
4d91c8a69467a758293994df1e6fa7ae
—–END OpenVPN Static key V1—–

CA Cert

—–BEGIN CERTIFICATE—–
MIIGVDCCBDygAwIBAgIJAIzYQ+/kXyADMA0GCSqGSIb3DQEBBQUAMHkxCzAJBgNV
BAYTAklUMQswCQYDVQQIEwJJVDEQMA4GA1UEBxMHUGVydWdpYTETMBEGA1UEChMK
YWlydnBuLm9yZzEWMBQGA1UEAxMNYWlydnBuLm9yZyBDQTEeMBwGCSqGSIb3DQEJ
ARYPaW5mb0BhaXJ2cG4ub3JnMB4XDTE0MDQxMTEwMTU0NVoXDTI0MDQwODEwMTU0
NVoweTELMAkGA1UEBhMCSVQxCzAJBgNVBAgTAklUMRAwDgYDVQQHEwdQZXJ1Z2lh
MRMwEQYDVQQKEwphaXJ2cG4ub3JnMRYwFAYDVQQDEw1haXJ2cG4ub3JnIENBMR4w
HAYJKoZIhvcNAQkBFg9pbmZvQGFpcnZwbi5vcmcwggIiMA0GCSqGSIb3DQEBAQUA
A4ICDwAwggIKAoICAQDGG3ZrJbP61PNjGc4mjTx0TLkUjP7IXZ3wnpPjwF/lwK9n
HgRqoPL0KY/ABJuzMViD8ChtwthNfc7PuJ7vSPtN84lSJ4JGmTxvZkNeLQLZsu1F
f88OcSpjW5ErBM05iVBeF8/ljwaajgFfbgop9W/UK5yMji4qgq5KHxxXqsB8R4rC
eFpWHoNTwFjvXhtVyMgXiT9XAh/vBYim021m8onio4K48q7YRZ4qU8gvE79h5M0g
miIlt6v1vaZskw9cqIBbCYefGMsvBRk2x824ChPf6FazMwAnQHsuBHt6eXAARvfF
DBDanzPHlRSiCP6Je6Vod/MPyepiTZgjgk2VxYUc1ohNxEEGzPGTayeNzLJUldou
P4B+tjJ0Xly30+wvlahADlqjtz3CGQmKMj7btZjd+Uo61B7gau5YiXR/IO7ZpFAC
PCZJSbrwFs6rt9Kewqk8zslfVIro8oDndXRkVsa/c8Qmd6ZE7V+oMGl2OggdWOLl
mDEjkytzx+Bw2sSSalJRAQmOQO8V0anOI6jGYLuU2jnFDsnqSHuwIK11xb6iHmh7
ONsRLUtQ+d64TzB00w2M0fCvGqUIp0N+lf7nsZKsEcU08OoHQYUuwX75ZEOYNSZJ
rqAXohcXdVUHqgRlJRErfSkjcGMM0yqjHkvopcnBIRXKMYTDVXvzRJboyJiVpQID
AQABo4HeMIHbMB0GA1UdDgQWBBTlFdcTqJ4x49Ew1/Ef9OJj0lDIiDCBqwYDVR0j
BIGjMIGggBTlFdcTqJ4x49Ew1/Ef9OJj0lDIiKF9pHsweTELMAkGA1UEBhMCSVQx
CzAJBgNVBAgTAklUMRAwDgYDVQQHEwdQZXJ1Z2lhMRMwEQYDVQQKEwphaXJ2cG4u
b3JnMRYwFAYDVQQDEw1haXJ2cG4ub3JnIENBMR4wHAYJKoZIhvcNAQkBFg9pbmZv
QGFpcnZwbi5vcmeCCQCM2EPv5F8gAzAMBgNVHRMEBTADAQH/MA0GCSqGSIb3DQEB
BQUAA4ICAQCUVAQteCtgNQiZMXV0wCdqivlxlCCuj5sD+XvEuoDqb7dH70u1KQ90
OAbkeotHlIbqJU10xWtvHEjnXg8QG5VOzaWnWWev+ivdPCkGWe8E7C8shsr4WMlA
EF8PPRtzOwCKayxjR713x+Tc2Sb6/rDsXcY5LV6RNmE9HWBM6IoHdqruR8PHkYge
2CPXMuLByEADri6xmvussAjCWEDplJNY7tQsUGT7vjrwrNSNBx/SvxkXnWBj0wYa
EwNu43jrjcRfM/3eGcKDX3cQqTfRQd3j3OA7zmJOXPeExRUIWZTNCvQItGy1TJdw
JTphflw15Bui4l2mYfDqK08zm4aJODrCjoQnVVzM5uOzSTOjmneI6AHj3MjjL3A/
CFA5PCSquBhUycF4UEVf3aPGiV0vAthCBUqM4eKE+rbjWPSaxKghVdr/S82o7Wzz
9mGwnOZDqWk+8AWSsGBjamMk3mNMR45E9FRfPF/dyjOSbVyyTsd1VzlTFEJa0wjB
l3yq3r3iZAM3UtevocAyTEAu0vDYBbS6TgWmWEDOizybB0hNrTx5u/SEI0Kwcthc
rilYxD+n4kmV7TvIR0ZSaYpgYALWQV27zOqY51Ol4UT98WCOokge9HdoFcGJU2Uj
5VneGp14/Oklh7y6BxxxGC3zNGjKGNQYuHGTIgw1DoASmRUdkPkn/w==
—–END CERTIFICATE—–

Public Client Cert

Copy and paste all contents between <cert> and </cert> make sure to also include the following lines when copying and pasting:
—–BEGIN CERTIFICATE—–
…
—–END CERTIFICATE—–

Private Client Key

Copy and paste all contents between <key> and </key> make sure to also include the following lines when copying and pasting:
—–BEGIN PRIVATE KEY—–
…
—–END PRIVATE KEY—–

CLICK APPLY SETTINGS

Leave all settings not mentioned above as their default setting.

Verify a successful AirVPN connection

Navigate to Status > OpenVPN

  1. You should now see a CONNECTED SUCCESS message.
  2. Visit whatismyipaddress.com to verify your new IP address and virtual location.

In some cases you may notice that the location is not showing the same location as the server you have input in your router settings; this is because geo tracking tools are often tricked by VPN connections. As long as you see an IP address that is not the same as your normal Internet IP address then you are indeed connected to AirVPN.

Back up your settings

Navigate to Administration > Backup

  1. Click the Backup button.
  2. A file named nvrambak.bin will be saved to your computer.
  3. You can load nvrambak.bin to restore your settings in the event of a reset.

How to change the AirVPN server

  1. Follow the instructions for obtaining the OpenVPN information from above.
  2. Enter the new Server Address in the Server IP/Name field.
  3. Enter the new client.key and private.key
  4. Click Apply Settings.
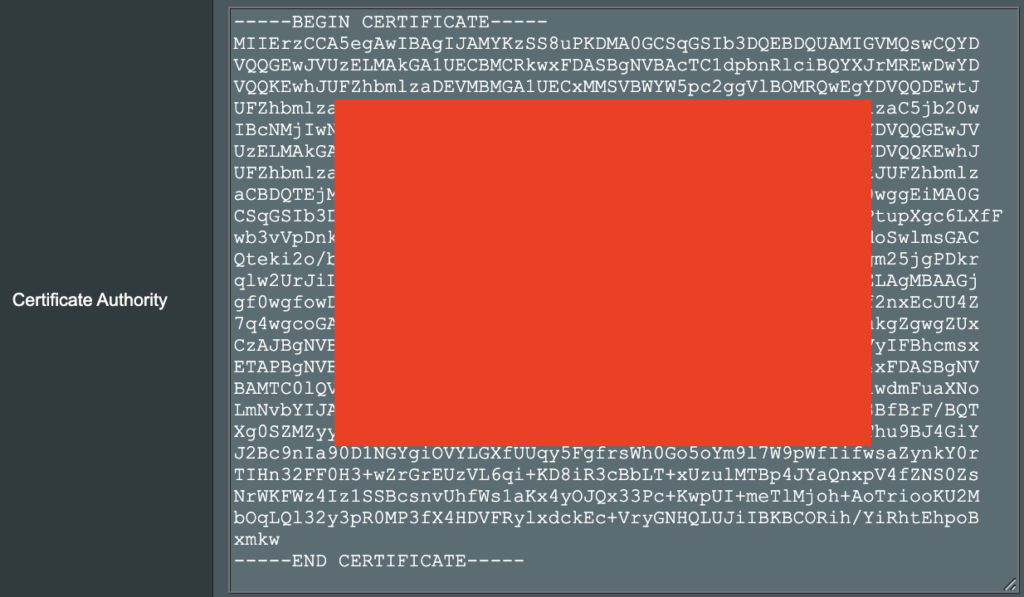
TROUBLESHOOTING

Still having issues? Visit the VPN Troubleshooting section.

Troubleshoot Here

Privacy Hero VPN Kill Switch Setup

TeamFlashRouters · Apr 3, 2023 ·

Your Privacy Hero router uses Cloud Based router management which means you can access the router settings from anywhere on any device that has an internet connection. You can follow these steps while connected to your phone, other Wi-Fi network, or the Privacy Hero network.

Use these steps to enable Privacy Hero’s VPN Kill Switch to make sure that no traffic goes through your router unless it is connected to VPN.

1. From any device that has a browser such as a computer, smartphone, or tablet visit app.privacyhero.com

App.PrivacyHero.com

2. Enter your Privacy Hero account email and password. Click Login.

Privacy Hero Access Settings

If you have not created your Privacy Hero account yet please follow these instructions.

3. Click the VPN symbol.

Privacy Hero Setup VPN

4. Toggle the VPN Kill Switch setting to On.

Privacy Hero VPN Kill Switch

TROUBLESHOOTING

Still having issues? Visit the VPN Troubleshooting section.

Troubleshoot Here

ProtonVPN WireGuard Setup

TeamFlashRouters · Jun 15, 2022 ·

Preparing for ProtonVPN WireGuard Setup

Verify your ProtonVPN login information

If you are not already a ProtonVPN user Sign Up Now.

Log in to your account on the ProtonVPN website.

ProtonVPN Account login

1. On the left hand side select Downloads.

ProtonVPN Downloads

2. Then select WireGuard Configuration.

ProtonVPN WireGuard Configuration

3. Enter the Device Name to assign the FlashRouter to identify it among your ProtonVPN connections.

ProtonVPN WireGuard Desired Name

4. Set the Device platform as Router.

ProtonVPN WireGuard select Router

5. Select the VPN Options that you would like to connect with.

ProtonVPN WireGuard VPN Options

6. ProtonVPN will recommend the ideal server for you to connect to based on your location. Click Create or scroll down and select the server you wish to connect to and click Create next to the server number.

ProtonVPN WireGuard select server
ProtonVPN WireGuard select servers

7. Click Download to download the .conf file of the server you selected.

ProtonVPN WireGuard download configuration

DD-WRT Router Setup for ProtonVPN WireGuard

Navigate to Setup > Tunnels 

ProtonVPN WireGuard DD-WRT Tunnels

Enter ProtonVPN WireGuard settings

1. Click Import Config and then select Choose file. Select the .conf file that was downloaded earlier.

ProtonVPN WireGuard Import Config and Choose File

2. All settings will be loaded into the DD-WRT firmware the only field that needs to be adjusted is setting Persistent Keepalive to 25.

ProtonVPN WireGuard Persistent Keep Alive

3. Click Apply Settings at the bottom of the page.

4. After 30 seconds or so refresh the page until you see the WireGuard Status on the page is populated as seen below.

ProtonVPN WireGuard Status

Verify a successful ProtonVPN connection

Navigate to Setup > Tunnels

  1. You should Endpoint, Latest handshake, and Transfer in the WireGuard status area.
  2. Visit whatismyipaddress.com to verify your status as using ProtonVPN.

Back up your settings

Navigate to Administration > Backup

  1. Click the Backup button.
  2. A file named nvrambak.bin will be saved to your computer.
  3. You can load nvrambak.bin to restore your settings in the event of a reset.

TROUBLESHOOTING

Still having issues? Visit the VPN Troubleshooting section.

Troubleshoot Here

Hotspot Shield Manual OpenVPN Setup

TeamFlashRouters · Jul 15, 2020 ·

Preparing for Manual Hotspot Shield Setup

Obtain your Hotspot Shield OpenVPN Information

If you are not already a Hotspot Shield user Sign Up Now.

1. Log in to your account on the Hotspot Shield website.

2. Click Hotspot Shield on the left side navigation.

Hotspot Shield - Website Admin

3. Under Choose your device click Router.

Hotspot Shield - Select Router

4. In the Set up your router section Select your desired virtual location and then click Download file.

Open the file that was downloaded with NotePad++ for Windows or TextEdit for Apple. You only need the <cert> and <key> from the .ovpn file. All Hotspot Shield servers have different keys and certificates.

Hotspot Shield - Download Configuration File

5. Copy the VPN Username, and Password that appear under Step 2 to a notepad, you will need this information later in the setup process.

Hotspot Shield - OpenVPN username and password

DD-WRT Router Setup for Hotspot Shield

Navigate to Services > VPN

Enter Hotspot Shield settings

OpenVPN Client

Start OpenVPN Client

If you wish to disable your VPN connection simply set this to Disable at any time and click Apply Settings.
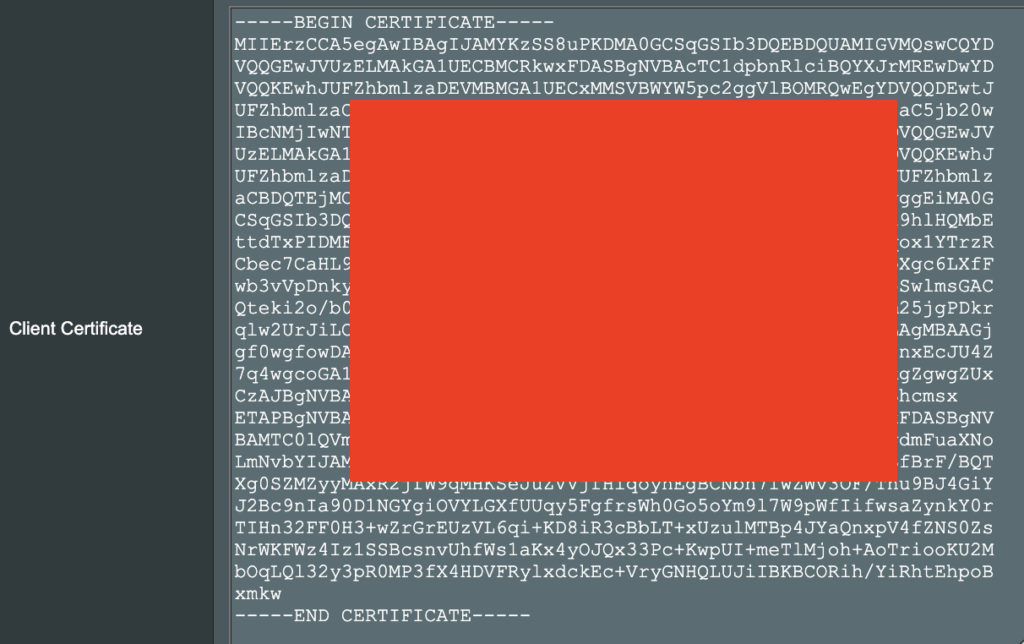
Server IP/Name

At the top of the .ovpn file you downloaded above, there is a line e.g.:
remote universitycalendar.us 8041
universitycalendar.us is your Hotspot Shield server name. Enter the server name in this field.

Port

8041

Tunnel Device

TUN

Tunnel Protocol

UDP

Encryption cipher

AES-128-CBC

Hash Algorithm

SHA256

User Pass Authentication

Enable

Username

Enter the Username you obtained in your Hotspot Shield account.

Password

Enter the Password you obtained in your Hotspot Shield account.

Advanced Options

Enable

TLS Cipher

None

LZO Compression

No

NAT

Enable

Firewall Protection

Enable

Additional Config

resolv-retry infinite
remote-random
nobind
tun-mtu 1500
tun-mtu-extra 32
mssfix 1450
persist-key
persist-tun
ping 15
ping-restart 0
reneg-sec 0
remote-cert-tls server

Policy Based Routing

This field can be used for split VPN and Dual Gateway routing.

CA Cert

—–BEGIN CERTIFICATE—–
MIIFazCCA1OgAwIBAgIRAIIQz7DSQONZRGPgu2OCiwAwDQYJKoZIhvcNAQELBQAw
TzELMAkGA1UEBhMCVVMxKTAnBgNVBAoTIEludGVybmV0IFNlY3VyaXR5IFJlc2Vh
cmNoIEdyb3VwMRUwEwYDVQQDEwxJU1JHIFJvb3QgWDEwHhcNMTUwNjA0MTEwNDM4
WhcNMzUwNjA0MTEwNDM4WjBPMQswCQYDVQQGEwJVUzEpMCcGA1UEChMgSW50ZXJu
ZXQgU2VjdXJpdHkgUmVzZWFyY2ggR3JvdXAxFTATBgNVBAMTDElTUkcgUm9vdCBY
MTCCAiIwDQYJKoZIhvcNAQEBBQADggIPADCCAgoCggIBAK3oJHP0FDfzm54rVygc
h77ct984kIxuPOZXoHj3dcKi/vVqbvYATyjb3miGbESTtrFj/RQSa78f0uoxmyF+
0TM8ukj13Xnfs7j/EvEhmkvBioZxaUpmZmyPfjxwv60pIgbz5MDmgK7iS4+3mX6U
A5/TR5d8mUgjU+g4rk8Kb4Mu0UlXjIB0ttov0DiNewNwIRt18jA8+o+u3dpjq+sW
T8KOEUt+zwvo/7V3LvSye0rgTBIlDHCNAymg4VMk7BPZ7hm/ELNKjD+Jo2FR3qyH
B5T0Y3HsLuJvW5iB4YlcNHlsdu87kGJ55tukmi8mxdAQ4Q7e2RCOFvu396j3x+UC
B5iPNgiV5+I3lg02dZ77DnKxHZu8A/lJBdiB3QW0KtZB6awBdpUKD9jf1b0SHzUv
KBds0pjBqAlkd25HN7rOrFleaJ1/ctaJxQZBKT5ZPt0m9STJEadao0xAH0ahmbWn
OlFuhjuefXKnEgV4We0+UXgVCwOPjdAvBbI+e0ocS3MFEvzG6uBQE3xDk3SzynTn
jh8BCNAw1FtxNrQHusEwMFxIt4I7mKZ9YIqioymCzLq9gwQbooMDQaHWBfEbwrbw
qHyGO0aoSCqI3Haadr8faqU9GY/rOPNk3sgrDQoo//fb4hVC1CLQJ13hef4Y53CI
rU7m2Ys6xt0nUW7/vGT1M0NPAgMBAAGjQjBAMA4GA1UdDwEB/wQEAwIBBjAPBgNV
HRMBAf8EBTADAQH/MB0GA1UdDgQWBBR5tFnme7bl5AFzgAiIyBpY9umbbjANBgkq
hkiG9w0BAQsFAAOCAgEAVR9YqbyyqFDQDLHYGmkgJykIrGF1XIpu+ILlaS/V9lZL
ubhzEFnTIZd+50xx+7LSYK05qAvqFyFWhfFQDlnrzuBZ6brJFe+GnY+EgPbk6ZGQ
3BebYhtF8GaV0nxvwuo77x/Py9auJ/GpsMiu/X1+mvoiBOv/2X/qkSsisRcOj/KK
NFtY2PwByVS5uCbMiogziUwthDyC3+6WVwW6LLv3xLfHTjuCvjHIInNzktHCgKQ5
ORAzI4JMPJ+GslWYHb4phowim57iaztXOoJwTdwJx4nLCgdNbOhdjsnvzqvHu7Ur
TkXWStAmzOVyyghqpZXjFaH3pO3JLF+l+/+sKAIuvtd7u+Nxe5AW0wdeRlN8NwdC
jNPElpzVmbUq4JUagEiuTDkHzsxHpFKVK7q4+63SM1N95R1NbdWhscdCb+ZAJzVc
oyi3B43njTOQ5yOf+1CceWxG1bQVs5ZufpsMljq4Ui0/1lvh+wjChP4kqKOJ2qxq
4RgqsahDYVvTH9w7jXbyLeiNdd8XM2w9U/t7y0Ff/9yi0GE44Za4rF2LN9d11TPA
mRGunUHBcnWEvgJBQl9nJEiU0Zsnvgc/ubhPgXRR4Xq37Z0j4r7g1SgEEzwxA57d
emyPxgcYxn/eR44/KJ4EBs+lVDR3veyJm+kXQ99b21/+jh5Xos1AnX5iItreGCc=
—–END CERTIFICATE—–
—–BEGIN CERTIFICATE—–
MIIFjTCCA3WgAwIBAgIRANOxciY0IzLc9AUoUSrsnGowDQYJKoZIhvcNAQELBQAw
TzELMAkGA1UEBhMCVVMxKTAnBgNVBAoTIEludGVybmV0IFNlY3VyaXR5IFJlc2Vh
cmNoIEdyb3VwMRUwEwYDVQQDEwxJU1JHIFJvb3QgWDEwHhcNMTYxMDA2MTU0MzU1
WhcNMjExMDA2MTU0MzU1WjBKMQswCQYDVQQGEwJVUzEWMBQGA1UEChMNTGV0J3Mg
RW5jcnlwdDEjMCEGA1UEAxMaTGV0J3MgRW5jcnlwdCBBdXRob3JpdHkgWDMwggEi
MA0GCSqGSIb3DQEBAQUAA4IBDwAwggEKAoIBAQCc0wzwWuUuR7dyXTeDs2hjMOrX
NSYZJeG9vjXxcJIvt7hLQQWrqZ41CFjssSrEaIcLo+N15Obzp2JxunmBYB/XkZqf
89B4Z3HIaQ6Vkc/+5pnpYDxIzH7KTXcSJJ1HG1rrueweNwAcnKx7pwXqzkrrvUHl
Npi5y/1tPJZo3yMqQpAMhnRnyH+lmrhSYRQTP2XpgofL2/oOVvaGifOFP5eGr7Dc
Gu9rDZUWfcQroGWymQQ2dYBrrErzG5BJeC+ilk8qICUpBMZ0wNAxzY8xOJUWuqgz
uEPxsR/DMH+ieTETPS02+OP88jNquTkxxa/EjQ0dZBYzqvqEKbbUC8DYfcOTAgMB
AAGjggFnMIIBYzAOBgNVHQ8BAf8EBAMCAYYwEgYDVR0TAQH/BAgwBgEB/wIBADBU
BgNVHSAETTBLMAgGBmeBDAECATA/BgsrBgEEAYLfEwEBATAwMC4GCCsGAQUFBwIB
FiJodHRwOi8vY3BzLnJvb3QteDEubGV0c2VuY3J5cHQub3JnMB0GA1UdDgQWBBSo
SmpjBH3duubRObemRWXv86jsoTAzBgNVHR8ELDAqMCigJqAkhiJodHRwOi8vY3Js
LnJvb3QteDEubGV0c2VuY3J5cHQub3JnMHIGCCsGAQUFBwEBBGYwZDAwBggrBgEF
BQcwAYYkaHR0cDovL29jc3Aucm9vdC14MS5sZXRzZW5jcnlwdC5vcmcvMDAGCCsG
AQUFBzAChiRodHRwOi8vY2VydC5yb290LXgxLmxldHNlbmNyeXB0Lm9yZy8wHwYD
VR0jBBgwFoAUebRZ5nu25eQBc4AIiMgaWPbpm24wDQYJKoZIhvcNAQELBQADggIB
ABnPdSA0LTqmRf/Q1eaM2jLonG4bQdEnqOJQ8nCqxOeTRrToEKtwT++36gTSlBGx
A/5dut82jJQ2jxN8RI8L9QFXrWi4xXnA2EqA10yjHiR6H9cj6MFiOnb5In1eWsRM
UM2v3e9tNsCAgBukPHAg1lQh07rvFKm/Bz9BCjaxorALINUfZ9DD64j2igLIxle2
DPxW8dI/F2loHMjXZjqG8RkqZUdoxtID5+90FgsGIfkMpqgRS05f4zPbCEHqCXl1
eO5HyELTgcVlLXXQDgAWnRzut1hFJeczY1tjQQno6f6s+nMydLN26WuU4s3UYvOu
OsUxRlJu7TSRHqDC3lSE5XggVkzdaPkuKGQbGpny+01/47hfXXNB7HntWNZ6N2Vw
p7G6OfY+YQrZwIaQmhrIqJZuigsrbe3W+gdn5ykE9+Ky0VgVUsfxo52mwFYs1JKY
2PGDuWx8M6DlS6qQkvHaRUo0FMd8TsSlbF0/v965qGFKhSDeQoMpYnwcmQilRh/0
ayLThlHLN81gSkJjVrPI0Y8xCVPB4twb1PFUd2fPM3sA1tJ83sZ5v8vgFv2yofKR
PB0t6JzUA81mSqM3kxl5e+IZwhYAyO0OTg3/fs8HqGTNKd9BqoUwSRBzp06JMg5b
rUCGwbCUDI0mxadJ3Bz4WxR6fyNpBK2yAinWEsikxqEt
—–END CERTIFICATE—–

Public Client Cert

In the .ovpn file Copy and Paste all contents in between the <cert> and </cert> lines from your .ovpn file starting and ending with:
—–BEGIN CERTIFICATE—–
…
—–END CERTIFICATE—–

Private Client Key

In the .ovpn file Copy and Paste all contents in between the <key> and </key> lines from your .ovpn file starting and ending with:
—–BEGIN PRIVATE KEY—–
…
—–END PRIVATE KEY—–

CLICK APPLY SETTINGS

Leave all settings not mentioned above as their default setting.

Verify a successful Hotspot Shield connection

Navigate to Status > OpenVPN

  1. You should now see a CONNECTED SUCCESS message.
  2. Visit Hotspot Shield’s website to verify your new IP address and virtual location.

In some cases you may notice that the location is not showing the same location as the server you have input in your router settings; this is because geo tracking tools are often tricked by VPN connections. As long as you see an IP address that is not the same as your normal Internet IP address then you are indeed connected to Hotspot Shield.

Back up your settings

Navigate to Administration > Backup

  1. Click the Backup button.
  2. A file named nvrambak.bin will be saved to your computer.
  3. You can load nvrambak.bin to restore your settings in the event of a reset.

How to change the Hotspot Shield server

  1. Follow the instructions for obtaining the OpenVPN information from above.
  2. Enter the new Server Address in the Server IP/Name field.
  3. Enter the new Username and Password.
  4. Enter the new Public Client Cert and Private Client Key.
  5. Click Apply Settings.
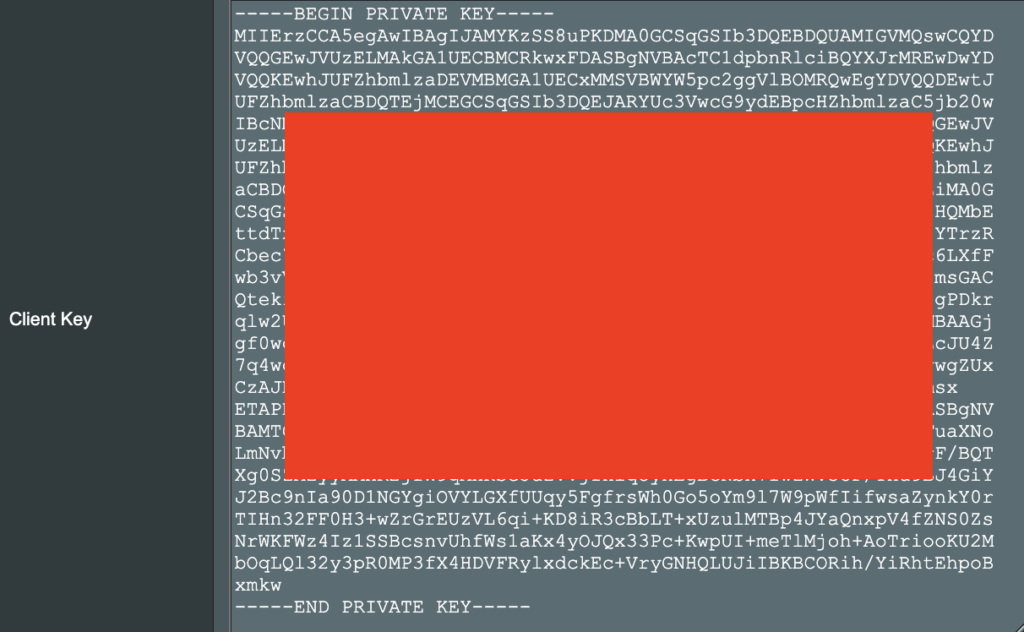
TROUBLESHOOTING

Still having issues? Visit the VPN Troubleshooting section.

Troubleshoot Here

PrivateInternetAccess (PIA) AsusWRT OpenVPN Setup

TeamFlashRouters · Apr 29, 2024 ·

Preparing for PIA AsusWRT Setup

Download your PIA .ovpn file

If you are not already a PIA user Sign Up Now.

1. Log in to your account on the PIA website.

PIA login

2. Successfully log in with your account information then go to PIA’s OpenVPN Config Generator.

3. On the OpenVPN Configuration Generator select the following:

OpenVPN Version: OpenVPN 2.4 or newer

Select Platform: Linux

Select Region: Choose the server location you’d like to connect to

Select Port: Typically we recommend UDP/1198 RSA-2048 AES-128-CBC SHA1 for best speeds but feel free to select the one you want to use.

4. Click Generate to download the .ovpn file. Do not open this file once it is downloaded.

PIA Generate .ovpn file

AsusWRT Router Setup for PIA

Login to AsusWRT firmware settings in a browser on any computer or smart device connected to the AsusWRT FlashRouter’s network.

1. Navigate to the VPN tab.

Merlin VPN Tab

2. Navigate to the VPN Fusion tab.

Asus VPN Fusion

3. Click Add profile.

Asus Add profile

4. In the Connection Name field enter in the name you’d like to use for this OpenVPN Client profile. We typically advise entering in the location or server number here. Our example server was in New York so I have entered in PIA New York.

5. In the VPN Type dropdown select OpenVPN.

6. Click Import .ovpn file and select the .ovpn file you downloaded earlier. Then click Upload.

7. In the Username and Password fields paste in the PIA username and password you use to successfully login to your PIA website account.

8. Click Apply and Enable at the bottom of the page.

Asus PIA profile

If you only want certain devices to connect to the OpenVPN Client profile you are setting up instead of all the devices connected to the FlashRouter’s network click into the profile and disable Apply to all devices. Then click Devices and select the devices that you want to connect to VPN.
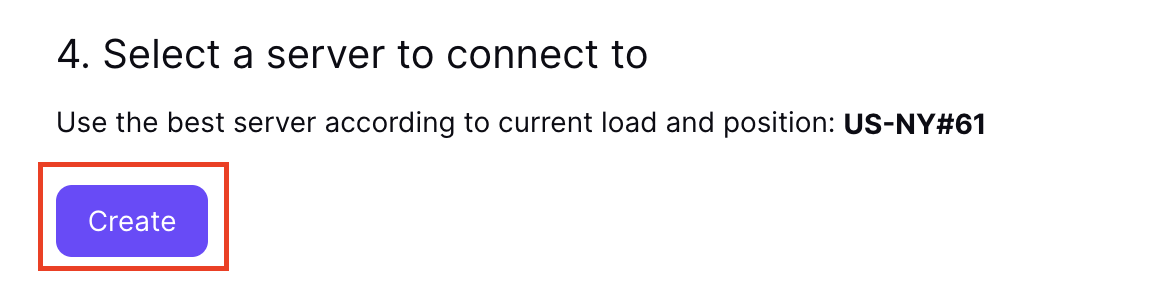
Asus VPN devices

Asus VPN select devices

9. At the top of the page set the Service State toggle to ON to activate the VPN connection.

Asus PIA Connected

Verify a successful PIA connection

  1. You should now see a CONNECTED message.
  2. Visit PIA’s IP Check to verify your new IP address and virtual location.

In some cases you may notice that the location is not showing the same location as the server you have input in your router settings; this is because geo tracking tools are often tricked by VPN connections. As long as you see an IP address that is not the same as your normal Internet IP address then you are indeed connected to PIA.

How to change the PIA server

  1. Follow the steps at the top of the page to obtain a new .ovpn file.
  2. Then proceed with the settings same as initial setup.

TROUBLESHOOTING

Still having issues? Visit the VPN Troubleshooting section.

Troubleshoot Here

Separate your WiFi 2.4GHz and 5GHz Merlin networks

TeamFlashRouters · Jan 19, 2022 ·

Change your Merlin FlashRouter’s WiFi Network Name to different names for the 2.4GHz and 5GHz bands so they can be joined separately.

Login to Asus Merlin firmware settings in a browser on any computer or smart device.

1. Under General select Network Map.

2. In the Network name (SSID) field enter two different names for the 2.4GHz and 5GHz bands.

Merlin Separate 2.4 and 5

3. Click Apply and then rejoin the new wireless network.

DNS Setup for Asus Merlin

TeamFlashRouters · Jan 19, 2022 ·

Enter custom DNS servers in your Asus Merlin firmware to avoid using your ISP DNS, which will steal and collect your browsing data.

Login to Asus Merlin firmware settings in a browser on any computer or smart device.

1. Under Advanced Settings select LAN.

2. Click the DHCP Server tab.

3. In the DNS Server 1 and DNS Server 2 fields enter the DNS server that you wish to use.

Merlin DNS Setup

4. Click Apply and then reboot the router and reconnect to the network.

VPN Killswitch for Asus Merlin

TeamFlashRouters · Jan 19, 2022 ·

Once you have OpenVPN connected on your Merlin FlashRouter you can enable the VPN Killswitch so that no internet traffic passes through your router that is not encrypted by the VPN tunnel.

Login to Asus Merlin firmware settings in a browser on any computer or smart device.

1. Under Advanced Settings select VPN.

2. Click the VPN Client tab.

3. Set Killswitch – Block routed clients if tunnel goes down to Yes.

Merlin Accept DNS configuration Redirect Internet and Kill Switch

4. Click Apply.

VPN Director for Asus Merlin

TeamFlashRouters · Jan 19, 2022 ·

Once you have OpenVPN connected on your Merlin FlashRouter you can manage your VPN connections by device or by VPN servers or even VPN providers. This is a major advantage of Asus Merlin firmware as it allows up to 5 VPN connections at the same.

Login to Asus Merlin firmware settings in a browser on any computer or smart device.

Setup multiple VPN clients

1. Under Advanced Settings select VPN.

2. Click the VPN Client tab.

3. In the Select Client instance dropdown select a new client instance to setup and follow your VPN providers setup guide.

VPN Director select client instance

4. Name the client in the Description field for more clarity for which server or provider is being setup.

VPN Director Description

5. Set the Redirect Internet traffic through tunnel dropdown to VPN Director.

VPN Director Policy

Start or Stop VPN Client

1. Under Advanced Settings select VPN.

2. Click the VPN Director tab.

Merlin VPN Director

3. With multiple VPN clients connected you can start and stop them as needed from this page.

VPN Director

Assign a device to a specific VPN client

1. On the VPN Director page click the + symbol next to Add new rule.

VPN direct add new rule

2. Select the Interface that you want to add the device to.

VPN director select interface

3. Click the Local IP dropdown and a full list of devices connected to the Merlin FlashRouter should appear. Select the device you want to assign to this VPN client.

VPN director select device

4. Click OK and click Apply.

« Previous Page
Next Page »

Primary Sidebar

  • Troubleshooting
  • Router Access
  • Internet Connection Issues
  • WiFi Connectivity
  • General VPN Issues
  • TeamViewer Remote Support
  • DD-WRT Firmware
  • Facebook
  • Twitter
  • Instagram
  • Pinterest
  • YouTube

Footer