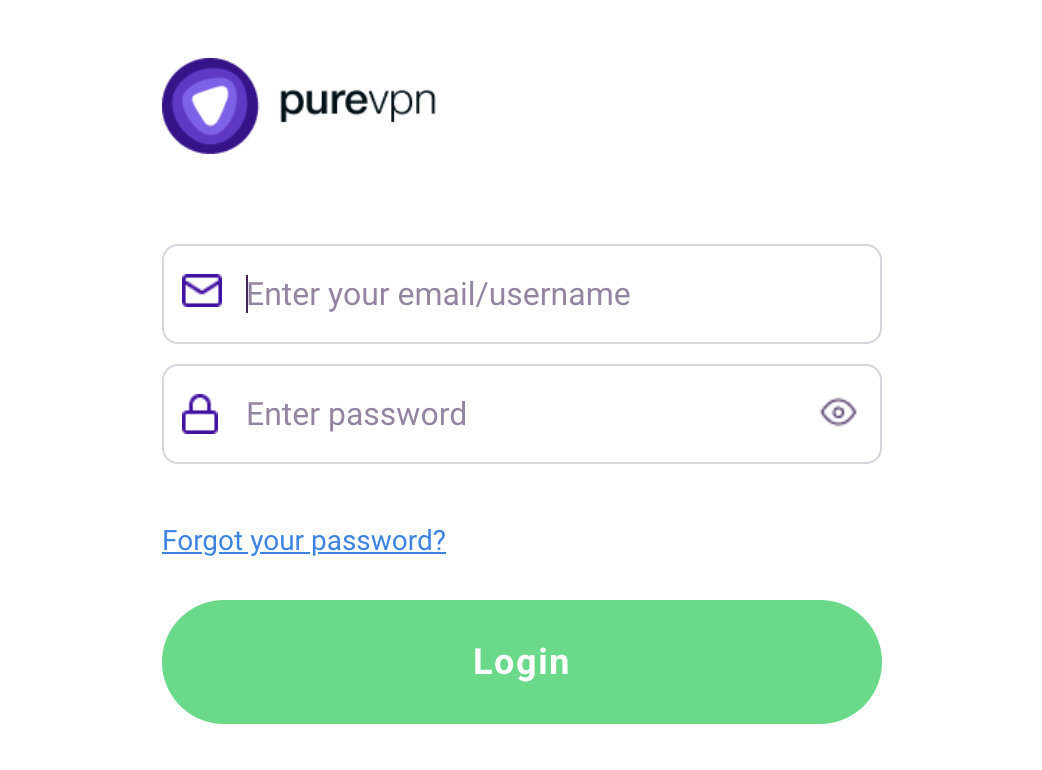
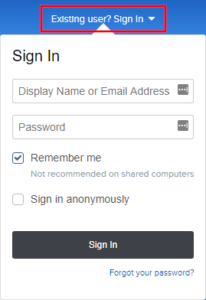
- Visit ExpressVPN’s website login page

- Successfully log in with your account information. Select Setup on More Devices.

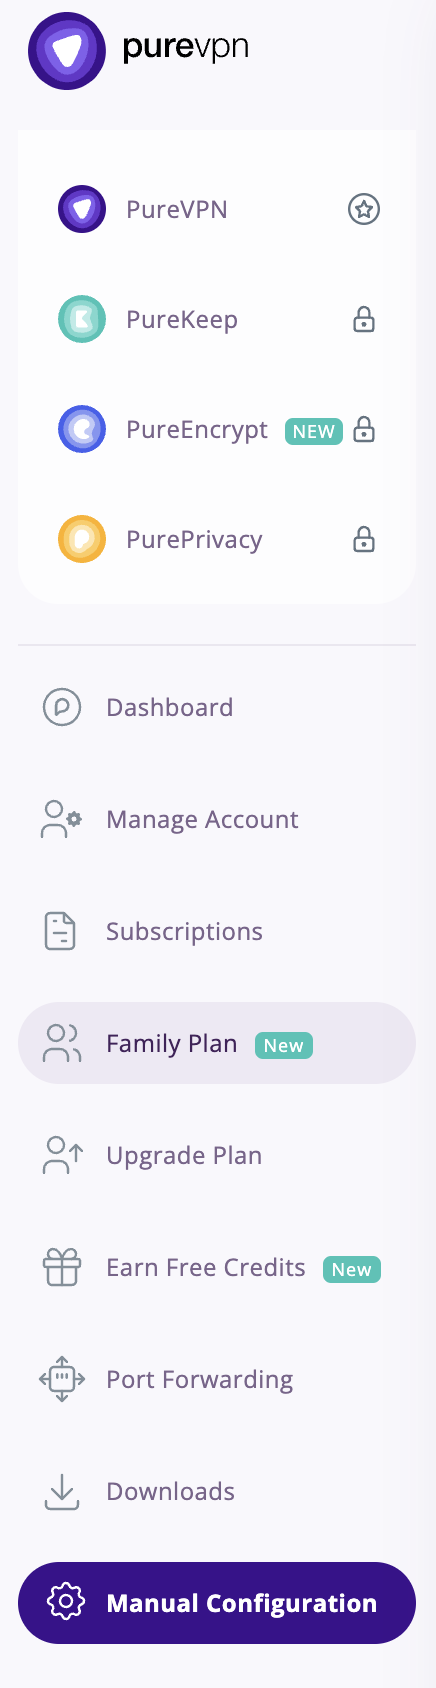
- Select Manual Config and copy the Username and Password that are displayed on the right hand side of the screen.

Search Results for: steps for elect
IPVanish Merlin OpenVPN Setup
Preparing for IPVanish Merlin Setup
Download your IPVanish .ovpn file
If you are not already an IPVanish user Sign Up Now.
1. Log in to your account on the IPVanish website.

2. Successfully log in with your account information then go to IPVanish .ovpn file page.
3. Click on the .ovpn file for the server location you want to use to dowloand the .ovpn file. Do not open this file.

Merlin Router Setup for IPVanish
Login to Asus Merlin firmware settings in a browser on any computer or smart device connected to the Merlin FlashRouter’s network.
1. Navigate to the VPN tab.

2. Navigate to the VPN Client tab.

3. Click Choose file and select the .ovpn file you downloaded earlier. Then click Upload.

4. Set Automatic Start at boot time to Yes if you want the VPN connection to begin automatically when the router is powered off and back on.

5. In the Description field enter in the name you’d like to use for this OpenVPN Client profile. We typically advise entering in the location here. Our example server was in nyc-a50 so I have entered in IPVanish a-50.

6. Set Accept DNS Configuration to Strict. Set Redirect Internet traffic through tunnel to Yes (all). Set Kill Switch to Yes or No depending on if you want the Internet to be killed if the VPN connection drops.

If you only want certain devices to connect to the OpenVPN Client profile you are setting up instead of all the devices connected to the FlashRouter’s network please set the Redirect Internet traffic through tunnel to VPN Director. Then complete the instructions on this page and then view our VPN Director guide.
7. Enter your IPVanish account email/username and password.

8. Click Apply at the bottom of the page.
9. At the top of the page set the Service State toggle to ON to activate the VPN connection.

Verify a successful IPVanish connection
- You should now see a CONNECTED message.
- Visit IPVanish’s IP Check to verify your new IP address and virtual location.
In some cases you may notice that the location is not showing the same location as the server you have input in your router settings; this is because geo tracking tools are often tricked by VPN connections. As long as you see an IP address that is not the same as your normal Internet IP address then you are indeed connected to IPVanish.
How to change the IPVanish server
- Follow the steps at the top of the page to obtain a new .ovpn file.
- Then proceed with the settings same as initial setup.
NordVPN Asus AX1800S OpenVPN Setup
Preparing for NordVPN Asus AX1800S Setup
Obtain your NordVPN manual Username and Password
If you are not already an NordVPN user Sign Up Now.
1. Log in to your account on the NordVPN website.

2. Click NordVPN on the left hand side and then click Setup NordVPN manually.

3. Enter in the verification code that was sent to your email.

4. Copy and paste your NordVPN manual username and password to a secure location. This is the username and password you will enter into the router settings to connect to NordVPN.

Download your NordVPN .ovpn file
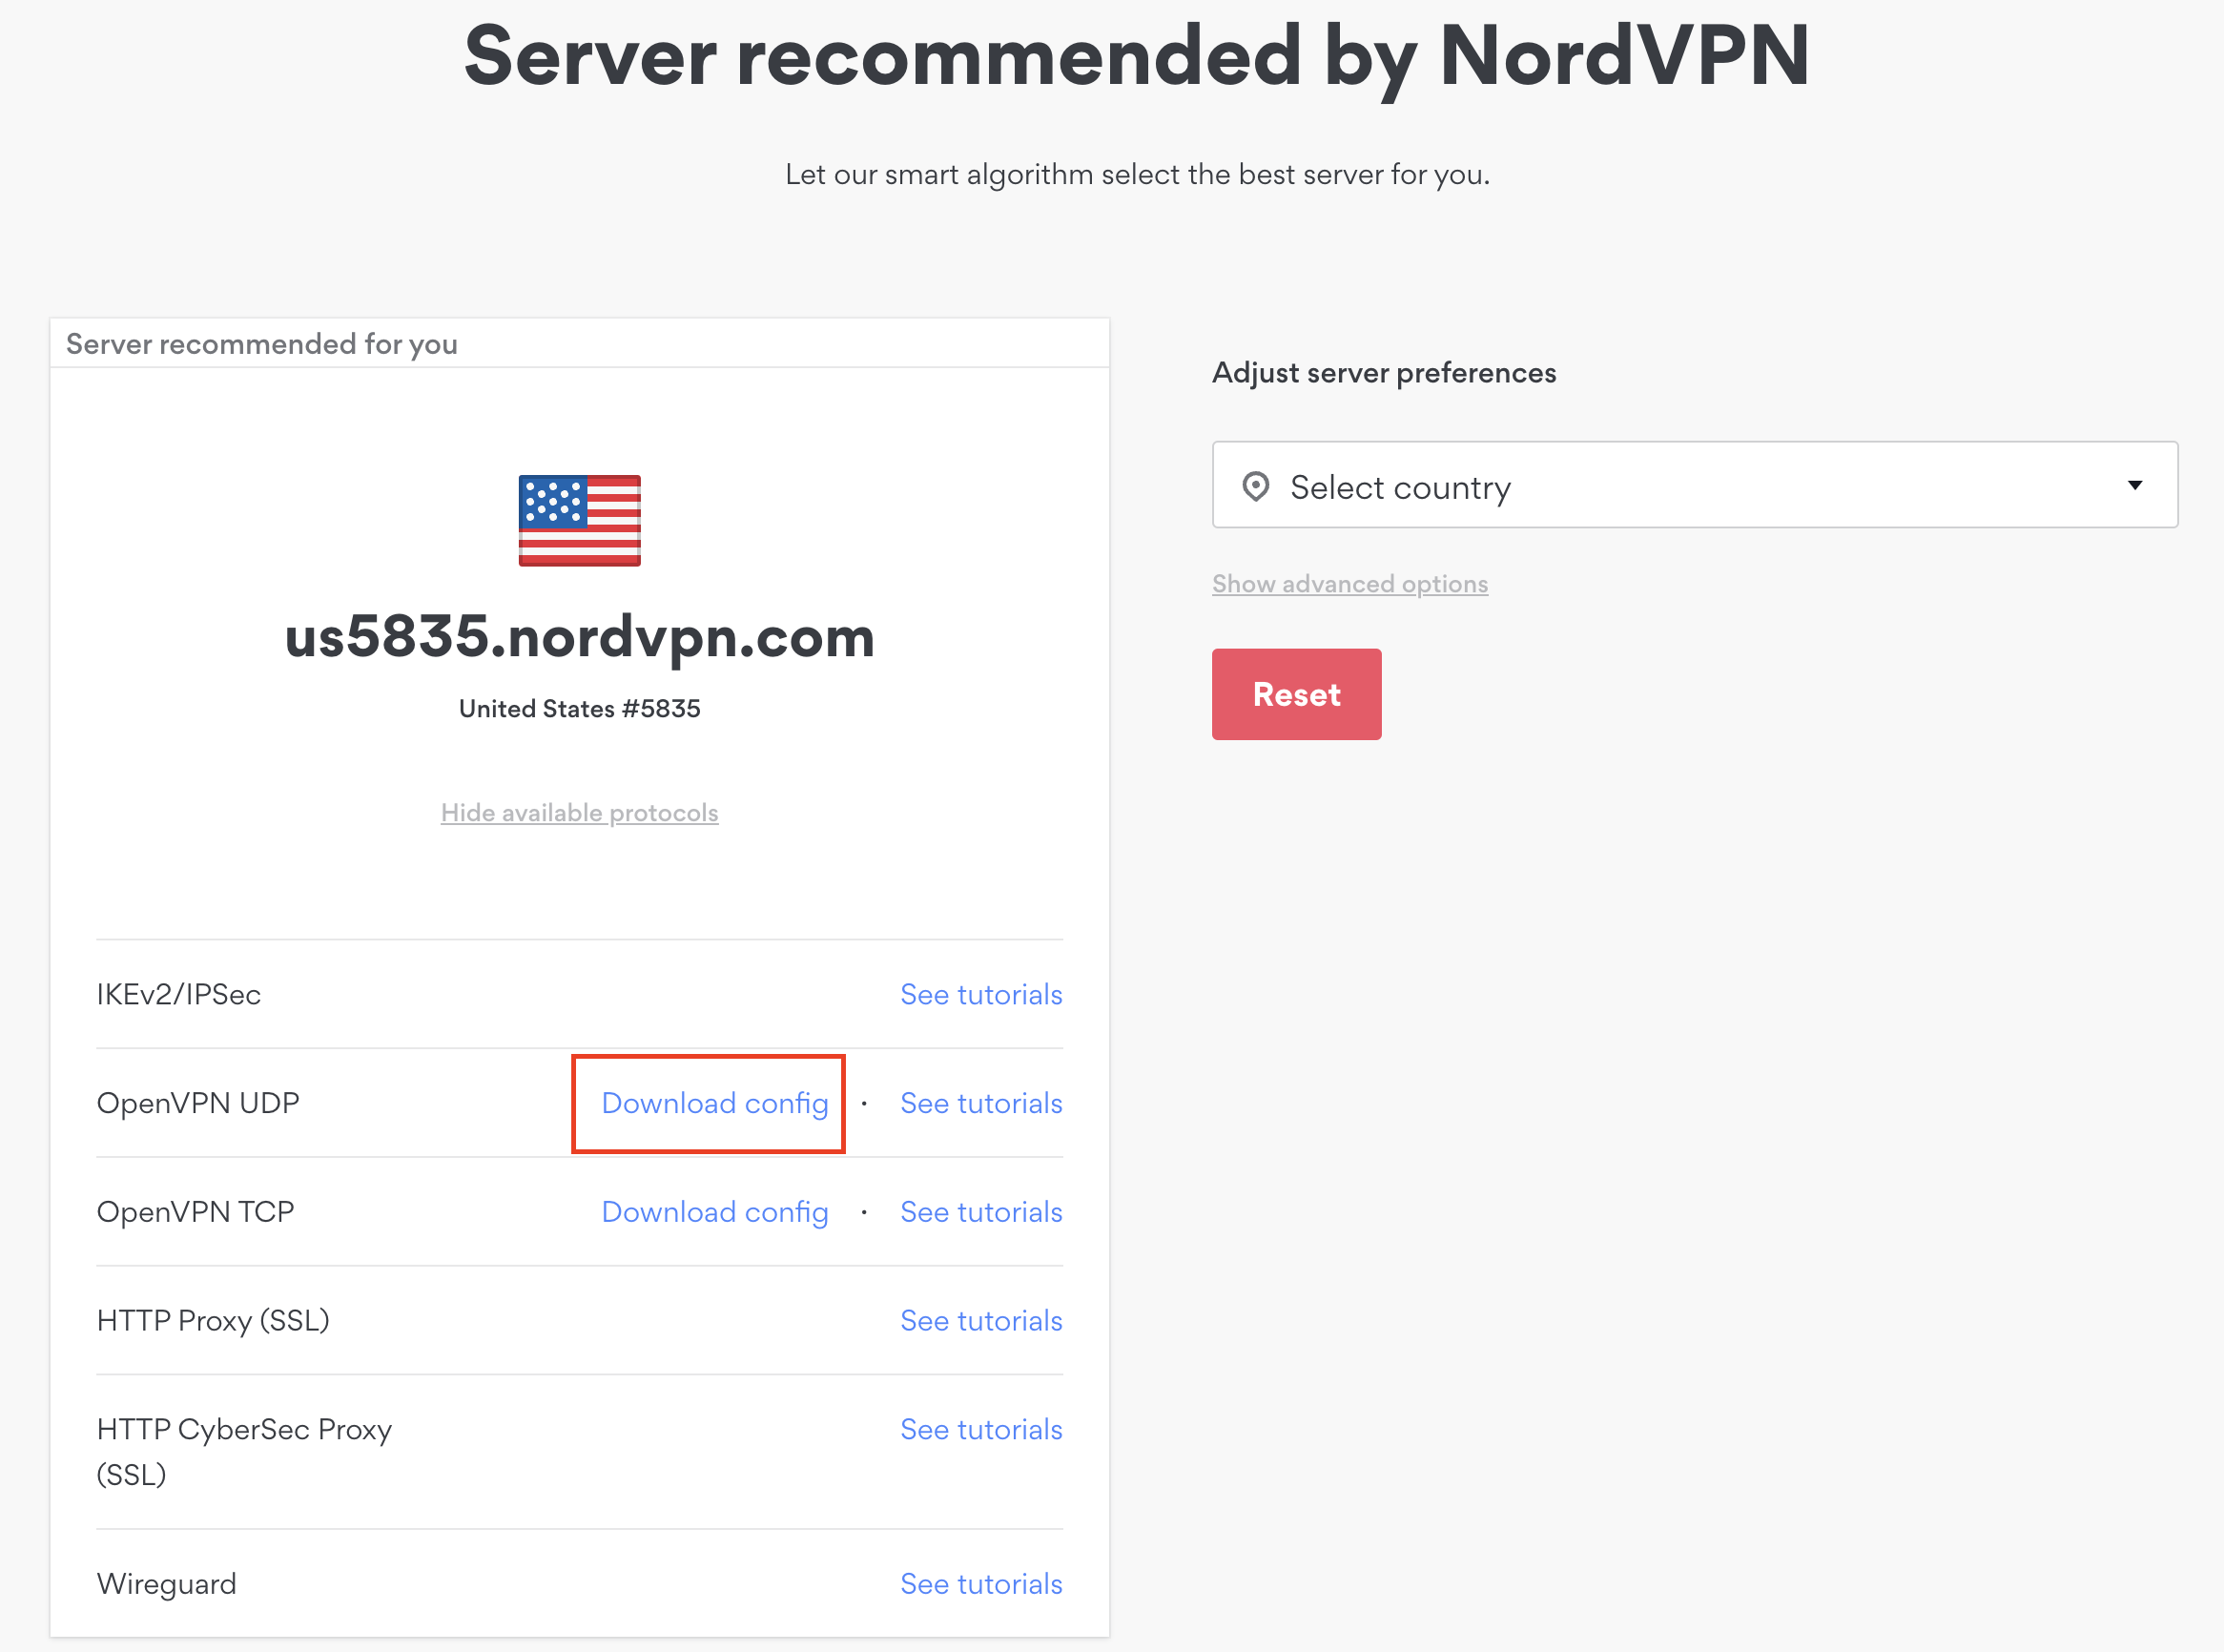
1. There are two options for obtaining the .ovpn file. The first and recommended is to navigate to NordVPN’s server recommendation page. Click Recommended Server to display the fastest server based on your actual location. You can adjust the country if you don’t want to connect to the recommended country.
Then click Show Available Protocols. Click Download Config next to OpenVPN UDP. This will download the .ovpn file to your computer for this server. Do not open this file.

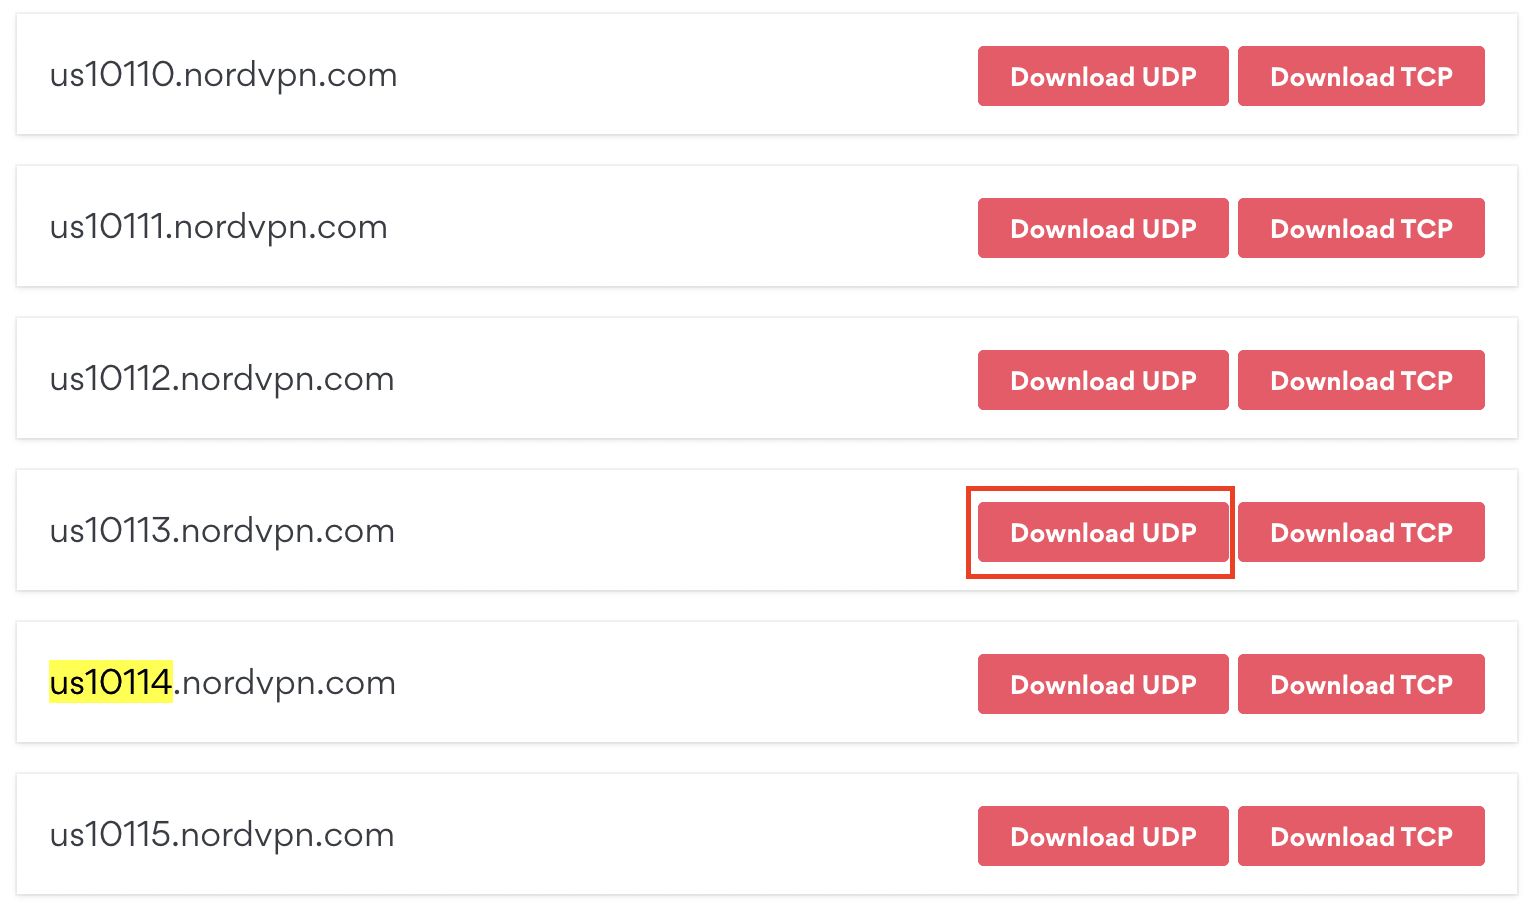
The second method to obtain a server is for connecting to a specific server number that you know you want to use. This applies to NordVPN Dedicated IP servers if you are signed up for that service. Go to NordVPN’s .ovpn file page. Then search for the server number that you want to use and click Download UDP.

Asus AX1800S Router Setup for NordVPN
Login to Asus firmware settings in a browser on any computer or smart device connected to the FlashRouter’s network.
1. Navigate to the VPN tab.

2. Navigate to the VPN Client tab.
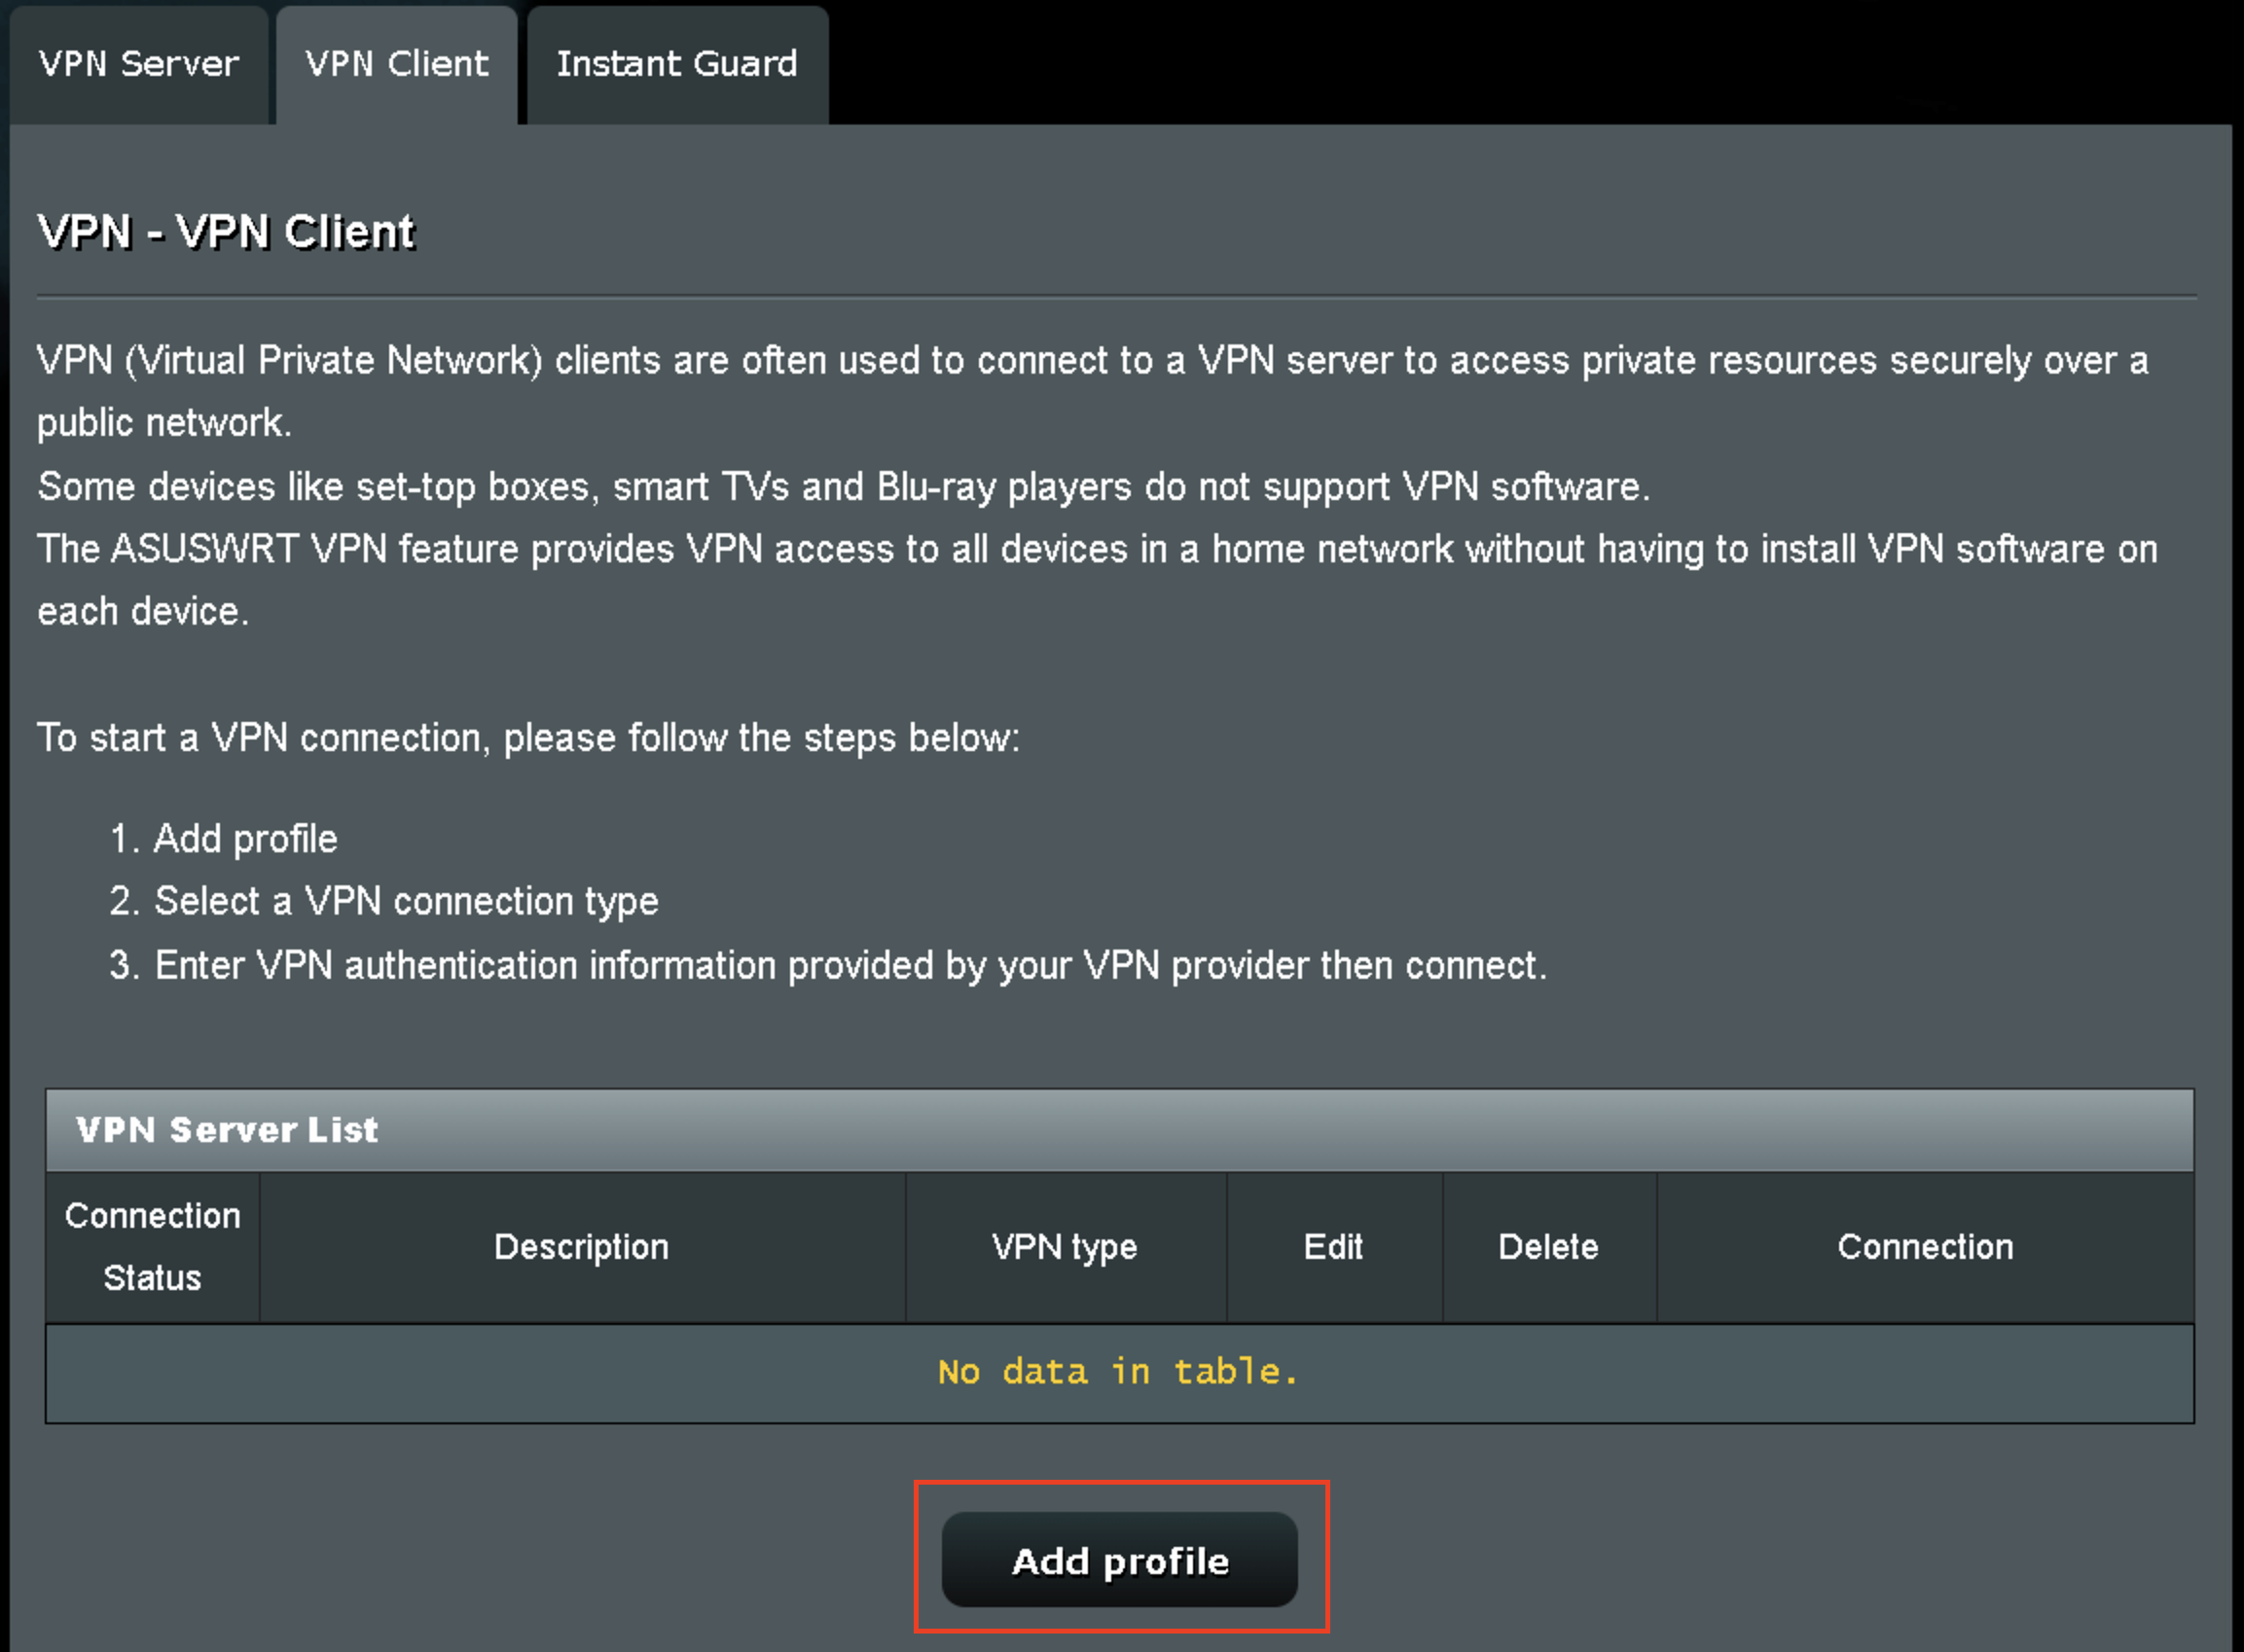
3. Click Add Profile.

4. Click Choose file and select the .ovpn file you downloaded earlier. Then click Upload.
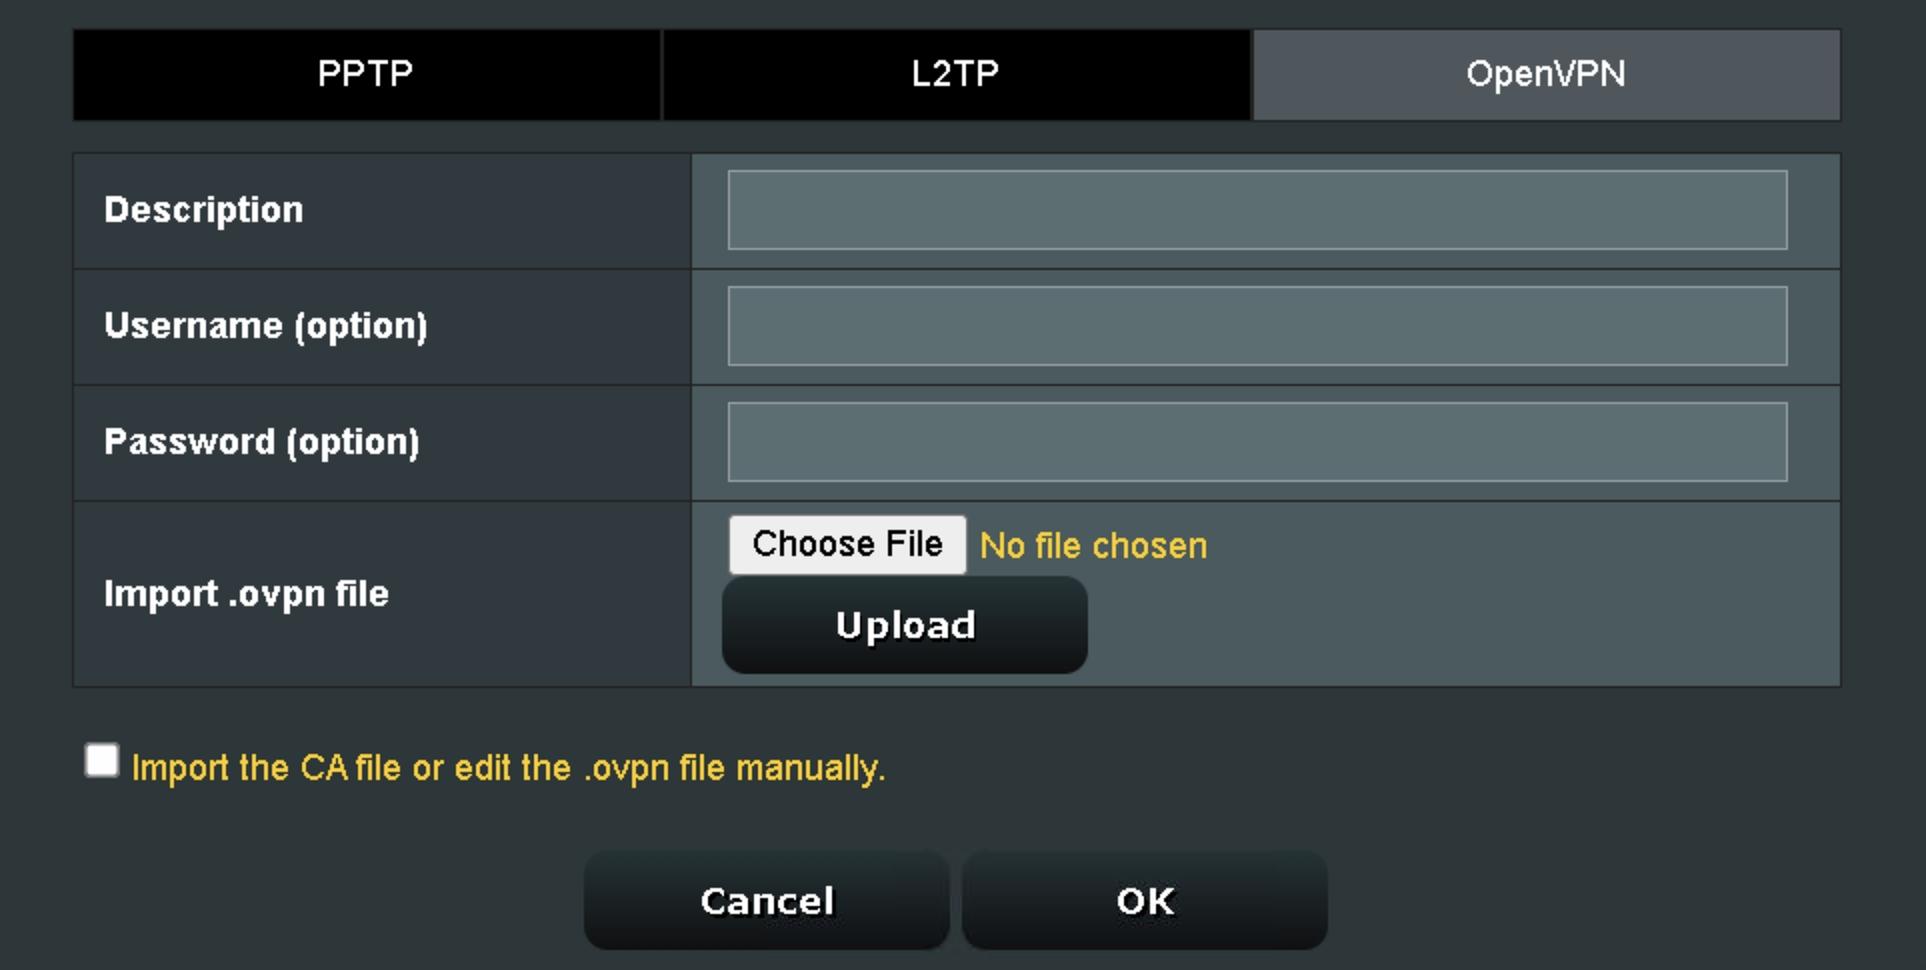
5. In the Description field enter in the name you’d like to use for this OpenVPN Client profile. We typically advise entering in the location or server number here.
6. Enter your NordVPN username and password that you obtained earlier in the Username and Password. Note that these are different from your NordVPN email login and password. Click OK.
7. Click the Activate button.
Verify a successful NordVPN connection
- You should now see a check mark in the Connection Status area.
- Visit NordVPN’s IP Check to verify your new IP address and virtual location.
In some cases you may notice that the location is not showing the same location as the server you have input in your router settings; this is because geo tracking tools are often tricked by VPN connections. As long as you see an IP address that is not the same as your normal Internet IP address then you are indeed connected to NordVPN.
How to change the NordVPN server
- Follow the steps at the top of the page to obtain a new .ovpn file.
- Then proceed with the settings same as initial setup.
- Be sure to deactivate a previously active connection before activating the new one. You do not want to connect to two at the same time.

ExpressVPN Asus AX1800S OpenVPN Setup
Preparing for ExpressVPN Asus AX1800S Setup
Obtain your ExpressVPN OpenVPN Information
If you are not already an ExpressVPN user Sign Up Now.
1. Log in to your account on the ExpressVPN website.

2. Successfully log in with your account information. Select More.

3. Select Manual Configuration and copy the Username and Password that are displayed on the right hand side of the screen.


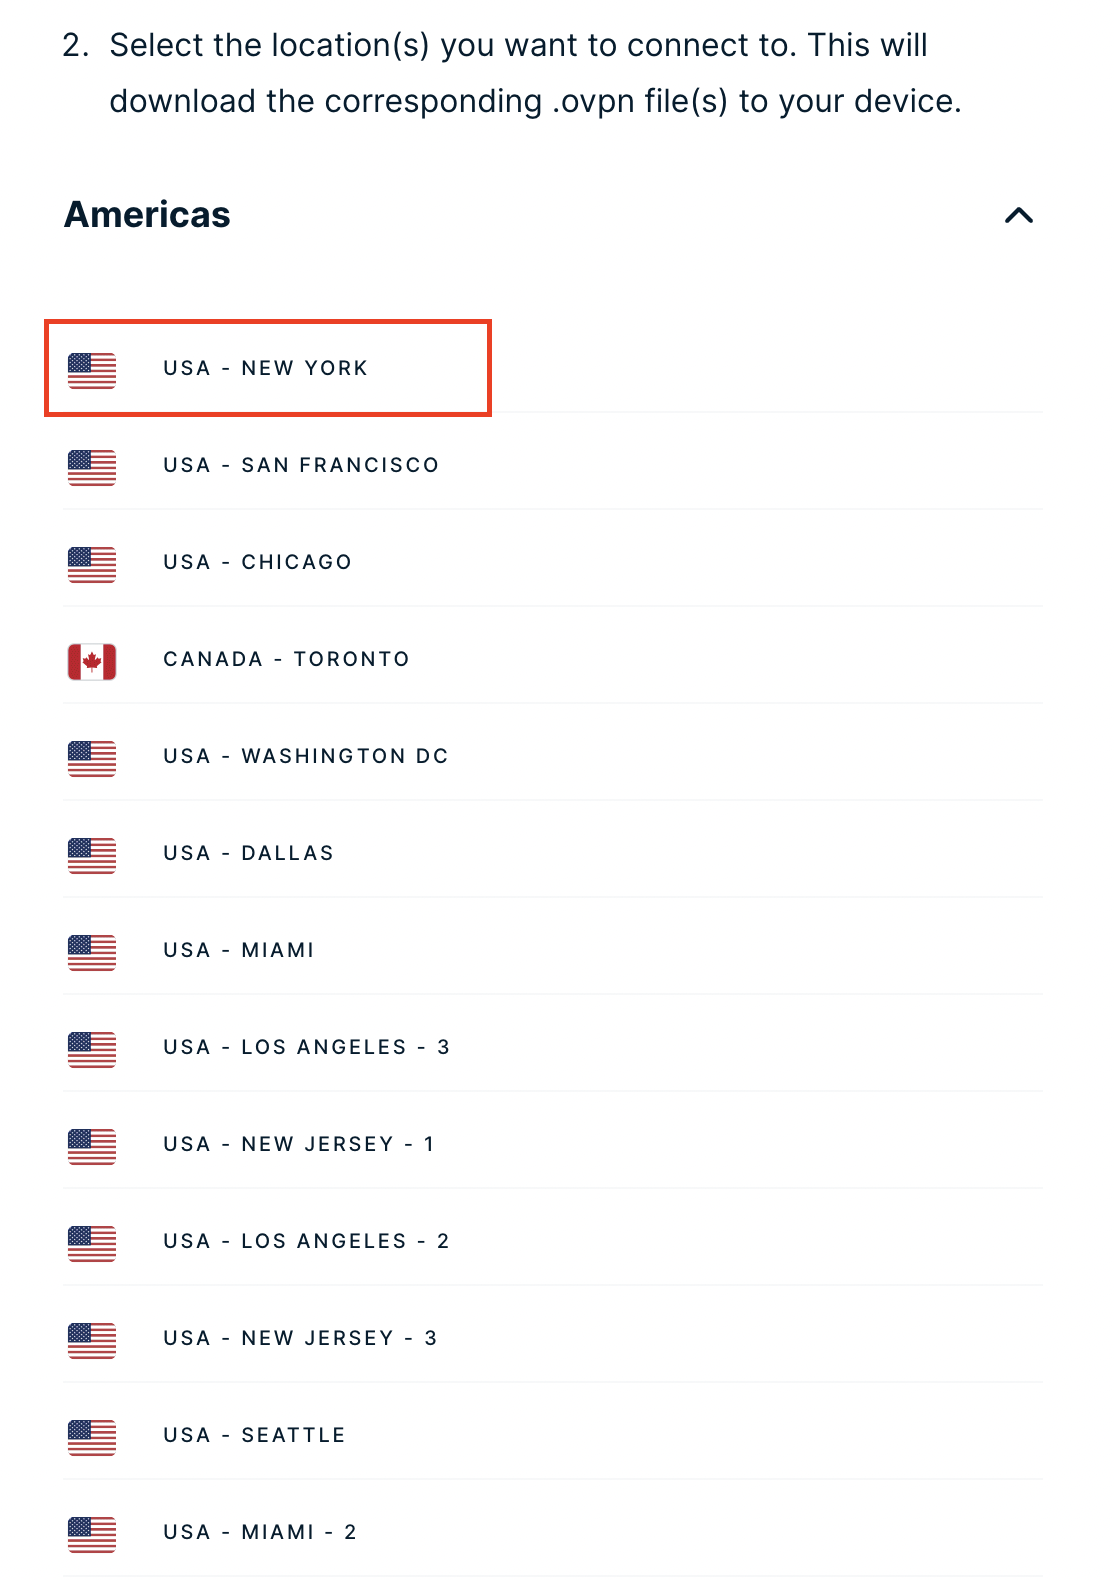
4. Click the Server Location that you want to connect to. This will download a .ovpn file to your computer that we will use later on. There is no need to open the file. For this example I have selected New York but feel free to select any server listed there.

Asus AX1800S Router Setup for ExpressVPN
Login to Asus firmware settings in a browser on any computer or smart device connected to the FlashRouter’s network.
1. Navigate to the VPN tab.

2. Navigate to the VPN Client tab.

3. Click Add Profile.

4. Click Choose file and select the .ovpn file you downloaded earlier. Then click Upload.

5. In the Description field enter in the name you’d like to use for this OpenVPN Client profile. We typically advise entering in the location or server number here.
6. Enter your ExpressVPN username and password that you obtained earlier in the Username and Password. Note that these are different from your ExpressVPN email login and password.
7. Click the Activate button.
Verify a successful ExpressVPN connection
- You should now see a check mark in the Connection Status area.
- Visit ExpressVPN’s IP Check to verify your new IP address and virtual location.
In some cases you may notice that the location is not showing the same location as the server you have input in your router settings; this is because geo tracking tools are often tricked by VPN connections. As long as you see an IP address that is not the same as your normal Internet IP address then you are indeed connected to ExpressVPN.
How to change the ExpressVPN server
- Follow the steps at the top of the page to obtain a new .ovpn file.
- Then proceed with the settings same as initial setup.
- Be sure to deactivate a previously active connection before activating the new one. You do not want to connect to two at the same time.

IPVanish Asus AX1800S OpenVPN Setup
Preparing for IPVanish Asus AX1800S Setup
Download your IPVanish .ovpn file
If you are not already an IPVanish user Sign Up Now.
1. Log in to your account on the IPVanish website.

2. Successfully log in with your account information then go to IPVanish .ovpn file page.
3. Click on the .ovpn file for the server location you want to use to dowloand the .ovpn file. Do not open this file.

Asus AX1800S Router Setup for IPVanish
Login to Asus firmware settings in a browser on any computer or smart device connected to the FlashRouter’s network.
1. Navigate to the VPN tab.

2. Navigate to the VPN Client tab.

3. Click Add Profile.

4. Click Choose file and select the .ovpn file you downloaded earlier. Then click Upload.

5. In the Description field enter in the name you’d like to use for this OpenVPN Client profile. We typically advise entering in the location or server number here.
6. Enter your IPVanish account email/username and password.
7. Click the Activate button.
Verify a successful IPVanish connection
- You should now see a check mark in the Connection Status area.
- Visit IPVanish’s IP Check to verify your new IP address and virtual location.
In some cases you may notice that the location is not showing the same location as the server you have input in your router settings; this is because geo tracking tools are often tricked by VPN connections. As long as you see an IP address that is not the same as your normal Internet IP address then you are indeed connected to IPVanish.
How to change the IPVanish server
- Follow the steps at the top of the page to obtain a new .ovpn file.
- Then proceed with the settings same as initial setup.
- Be sure to deactivate a previously active connection before activating the new one. You do not want to connect to two at the same time.

Privacy Hero Access Router Settings
Your Privacy Hero router uses Cloud Based router management which means you can access the router settings from anywhere on any device that has an internet connection. You can follow these steps while connected to your phone, other Wi-Fi network, or the Privacy Hero network.
1. From any device that has a browser such as a computer, smartphone, or tablet visit app.privacyhero.com

2. Enter your Privacy Hero account email and password. Click Login.

If you have not created your Privacy Hero account yet please follow these instructions.
PrivateInternetAccess (PIA) Asus AX1800S OpenVPN Setup
Preparing for PIA Asus AX1800S Setup
Download your PIA .ovpn file
If you are not already a PIA user Sign Up Now.
1. Log in to your account on the PIA website.

2. Successfully log in with your account information then go to PIA’s OpenVPN Config Generator.
3. On the OpenVPN Configuration Generator select the following:
OpenVPN Version: OpenVPN 2.4 or newer
Select Platform: Linux
Select Region: Choose the server location you’d like to connect to
Select Port: Typically we recommend UDP/1198 RSA-2048 AES-128-CBC SHA1 for best speeds but feel free to select the one you want to use.
4. Click Generate to download the .ovpn file. Do not open this file once it is downloaded.

Asus AX1800S Router Setup for PIA
Login to Asus firmware settings in a browser on any computer or smart device connected to the FlashRouter’s network.
1. Navigate to the VPN tab.

2. Navigate to the VPN Client tab.

3. Click Add Profile.

4. Click Choose file and select the .ovpn file you downloaded earlier. Then click Upload.

5. In the Description field enter in the name you’d like to use for this OpenVPN Client profile. We typically advise entering in the location here.
6. Enter your PIA account username and password.
7. Click the Activate button.
Verify a successful PIA connection
- You should now see a check mark in the Connection Status area.
- Visit PIA’s IP Check to verify your new IP address and virtual location.
In some cases you may notice that the location is not showing the same location as the server you have input in your router settings; this is because geo tracking tools are often tricked by VPN connections. As long as you see an IP address that is not the same as your normal Internet IP address then you are indeed connected to PIA.
How to change the PIA server
- Follow the steps at the top of the page to obtain a new .ovpn file.
- Then proceed with the settings same as initial setup.
- Be sure to deactivate a previously active connection before activating the new one. You do not want to connect to two at the same time.

How to Access Your GL.iNet FlashRouter Settings
This quick guide walk you through connecting to your GL.iNet FlashRouter (Flint, Slate, Beryl, or Marble) and logging into the admin settings page. You’ll use either WiFi or an Ethernet cable, then access the router dashboard through your browser.
Step 1. Connect Your Device to the Router
You can connect by WiFi or Ethernet:
- WiFi: Look for a network name like FlashRouter24 or FlashRouter50
- The WiFi password has been set to: Wireless#9483C
- ⚠️ Be sure to capitalize the “W” in
- Ethernet: Plug an Ethernet cable from your computer into one of the router’s LAN ports (usually marked or color-coded differently from the WAN port).
👉 Pro tip: Disconnect from any other WiFi networks during setup.
Step 2. Open the Router Login Page
- Open a web browser (Chrome, Safari, Firefox, Edge).
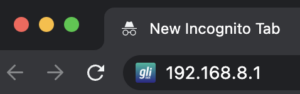
- In the address bar, type: 192.168.8.1
- Press Enter.

This is the local router dashboard address (not a public website). If the page doesn’t load:
- Try a different browser.
- Clear your cache.
- Ensure your device is connected to the FlashRouter network.
Step 3. Log In to the Router Settings
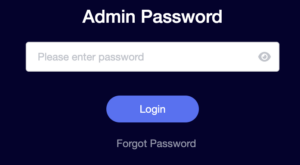
- Default password:
glopenwrt1oropenwrt - This is the factory default for all GL.iNet routers shipped by FlashRouters.

💡 Once you’re in, you can update your admin password in the settings for extra security.
Next Steps
Now that you’ve accessed your GL.iNet FlashRouter, you can:
- Set up your VPN service
- Customize your WiFi name and password
- Adjust device controls and security settings
Check our support library for your specific VPN setup guide.
Flint/Slate GL.iNet PureVPN WireGuard Setup
Preparing for PureVPN GL.iNet Setup
Obtain PureVPN WireGuard file
If you are not already an PureVPN user Sign Up Now.
1. Log in to your account on the PureVPN website.

2. Select Manual Configuration.

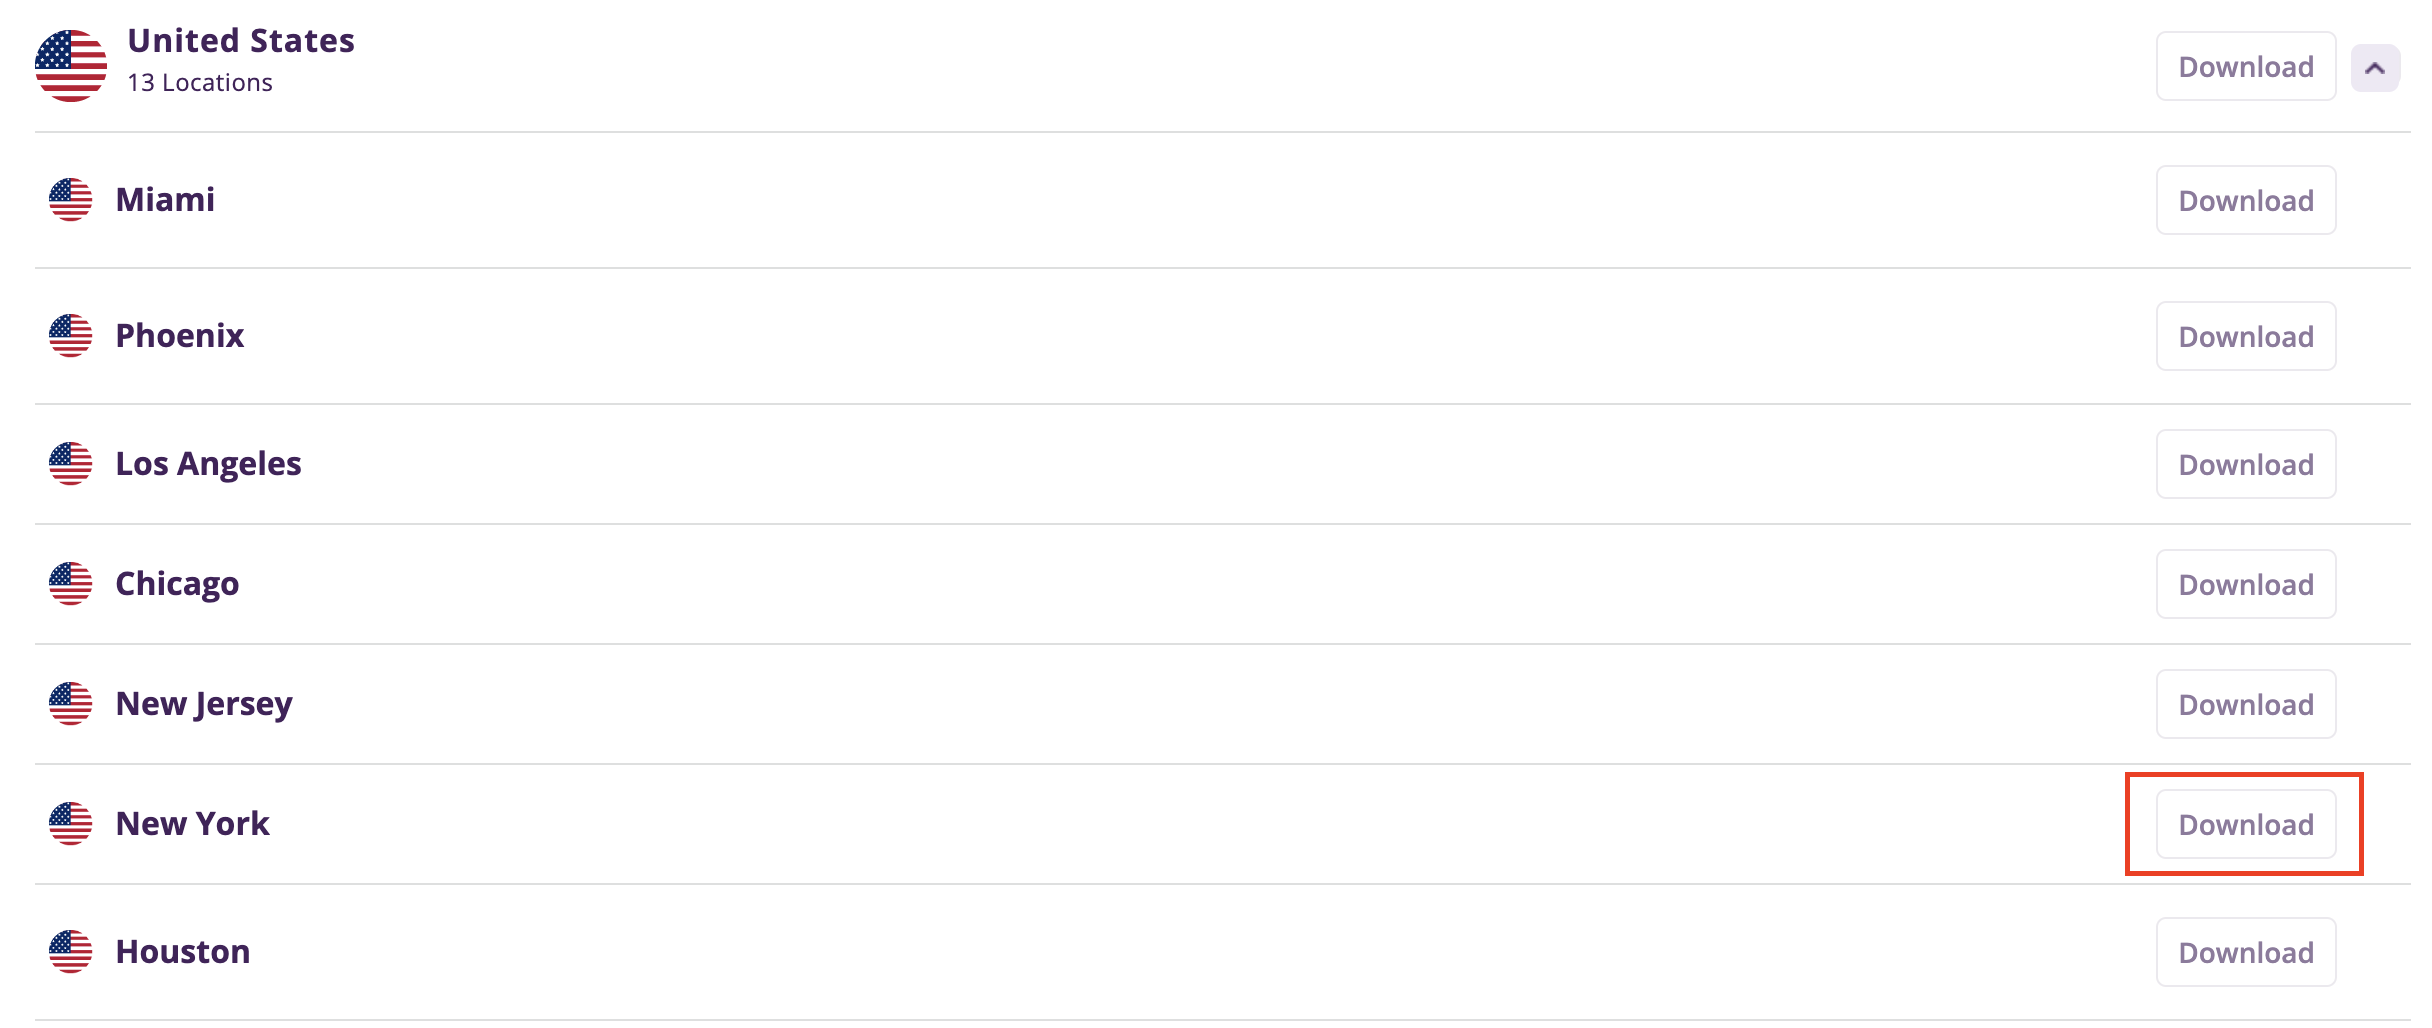
3. Select the Server Location you want to connect to and then click Download.

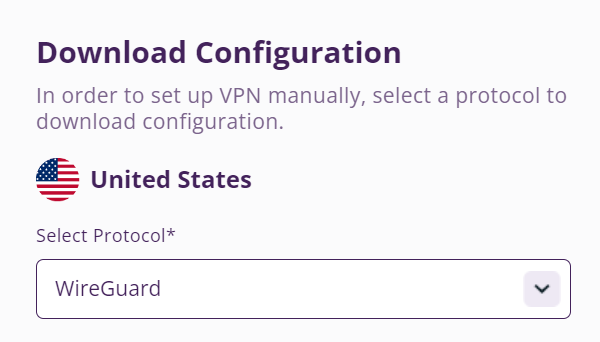
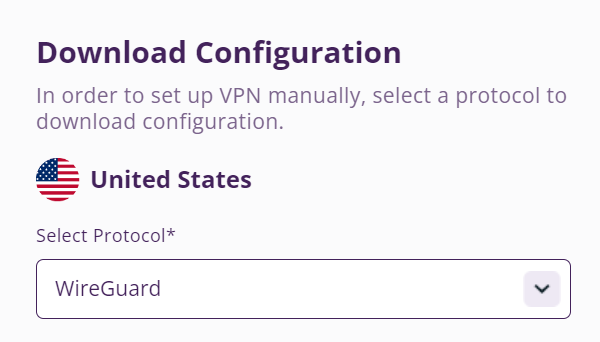
4. In the Select Protocol dropdown choose WireGuard.

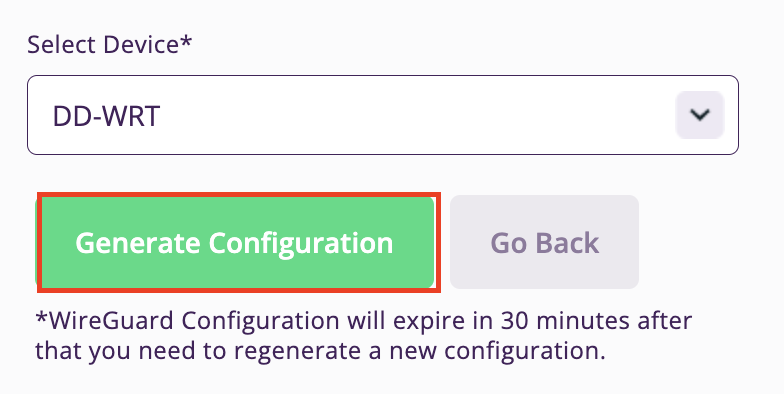
5. In the Select Device dropdown choose DD-WRT. Then click Generate Configuration. This will save a .conf file to your computer.

GL.iNet Router Setup for PureVPN
Login to GL.iNet firmware settings in a browser on any computer or smart device connected to the GL.iNet FlashRouter’s network. For more instructions on how to access the firmware settings view our guide here.
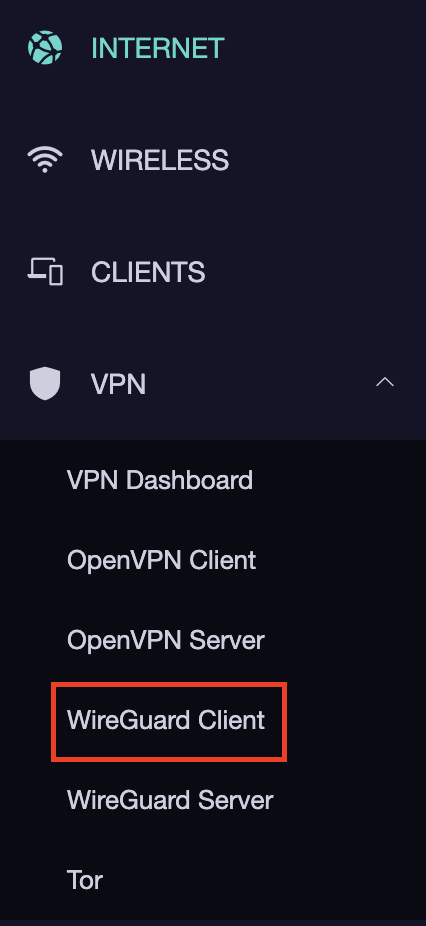
1. Navigate to the VPN tab and select WireGuard Client.

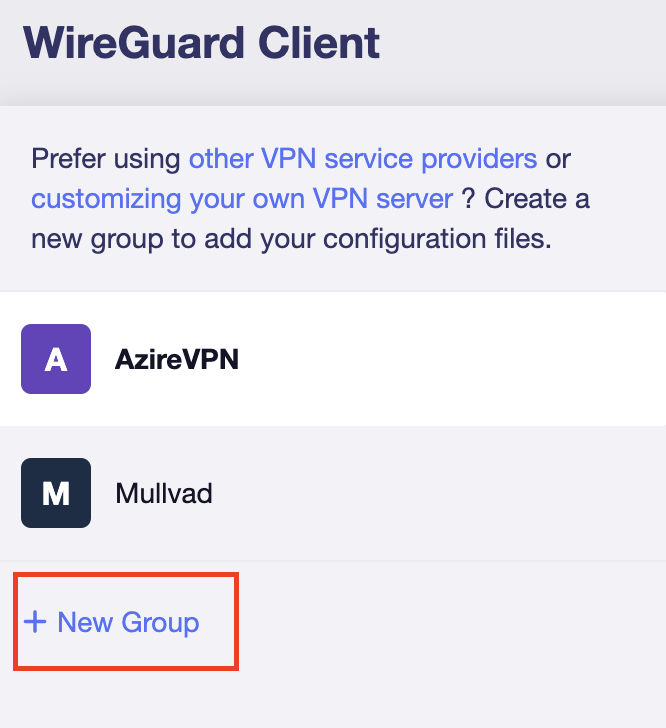
2. Click New Group.

3. Enter PureVPN and click the check mark.

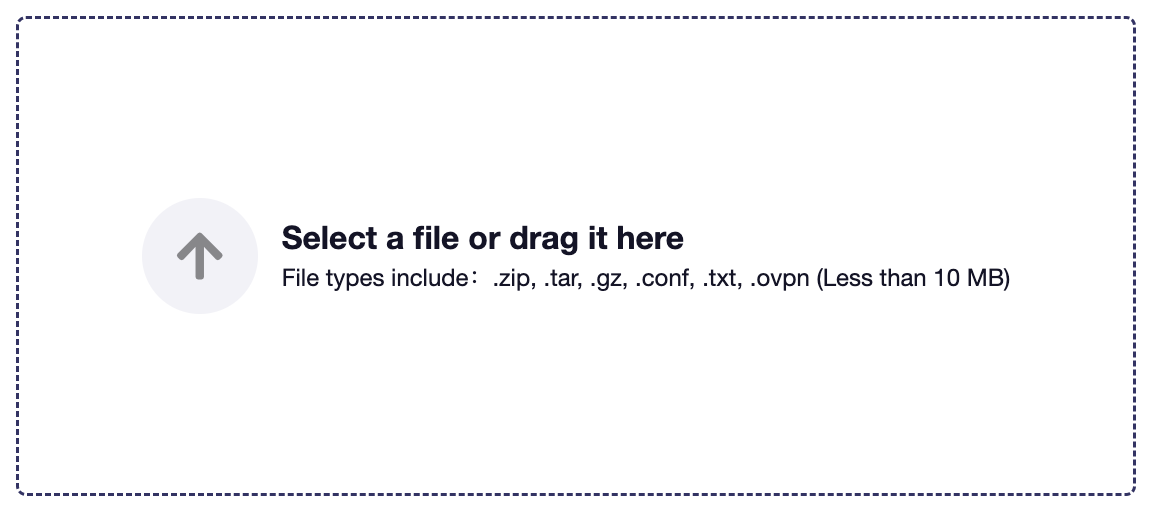
4. Select the .conf file you downloaded earlier and upload it here.

5. Click Apply.
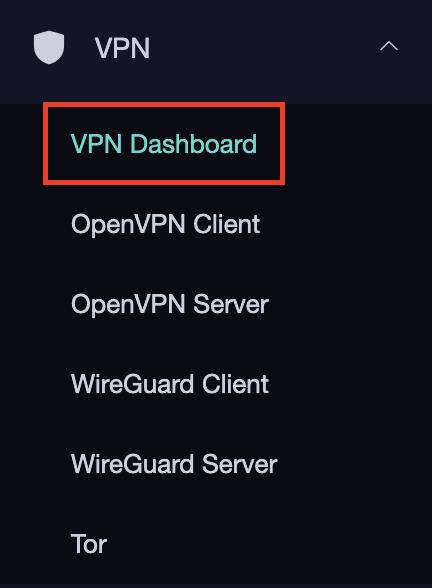
6. Select VPN Dashboard.

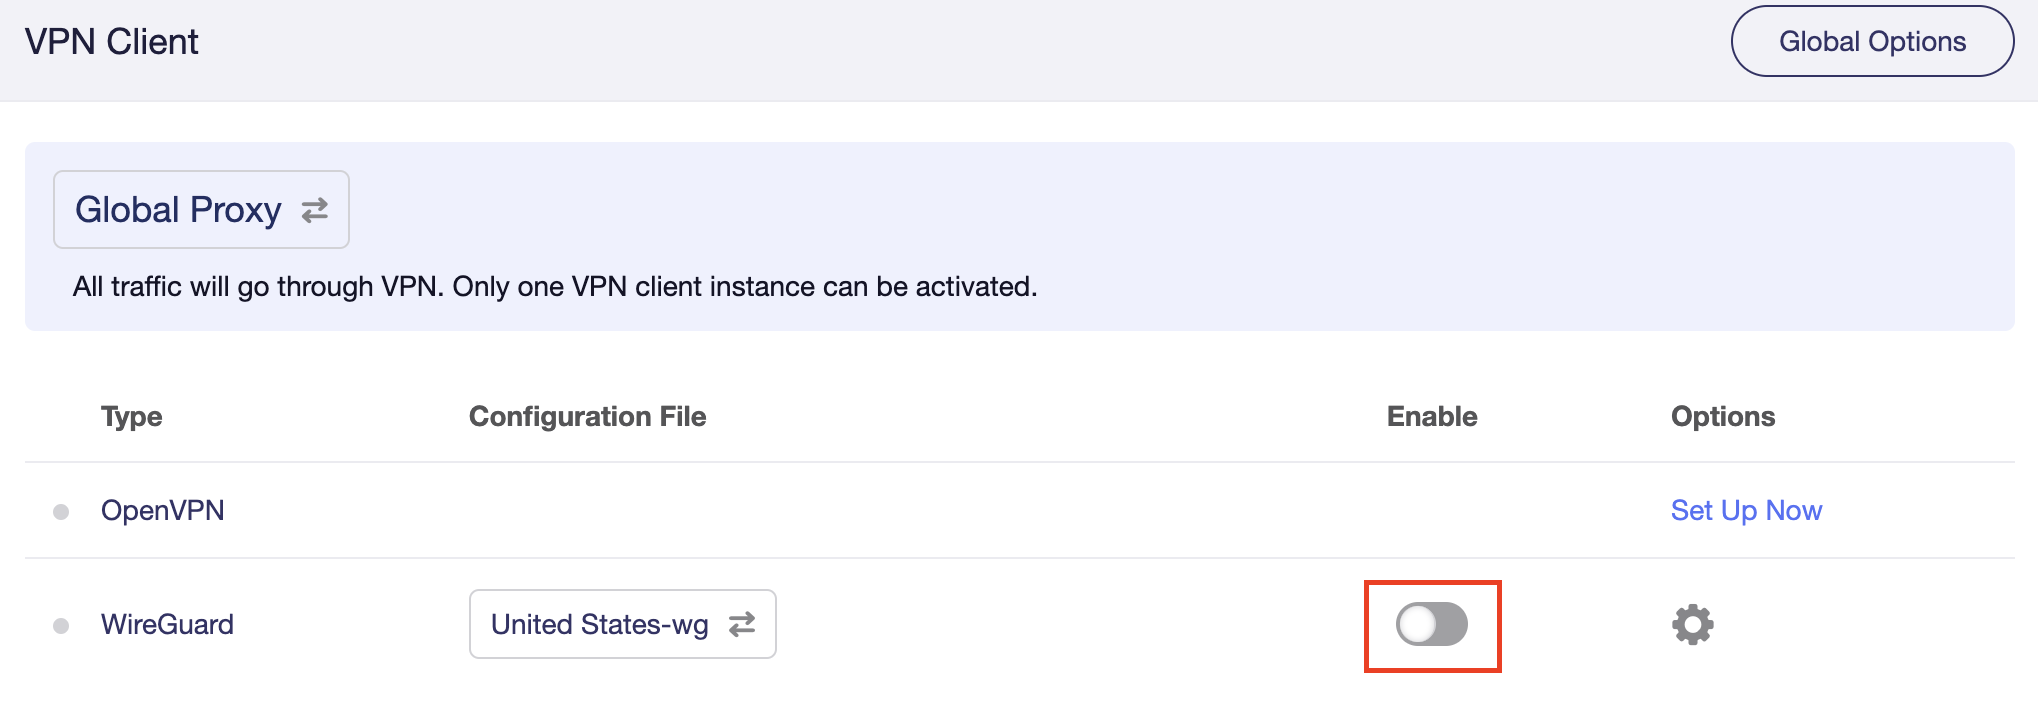
7. Set the Enable toggle to On to begin the PureVPN connection.

Verify a successful PureVPN connection
- You should now see information appear in the Server Address, Server Listen Port, Traffic Statistics, and Client Virtual IP areas.
- Visit PureVPN’s IP Check to verify your new IP address and virtual location.
In some cases you may notice that the location is not showing the same location as the server you have input in your router settings; this is because geo tracking tools are often tricked by VPN connections. As long as you see an IP address that is not the same as your normal Internet IP address then you are indeed connected to PureVPN.
How to change the PureVPN server
Replicate the steps above with a new location.
NordVPN Cudy OpenVPN Setup
Preparing for NordVPN Cudy Setup
Obtain your NordVPN manual Username and Password
If you are not already an NordVPN user Sign Up Now.
1. Log in to your account on the NordVPN website.

2. Click NordVPN on the left hand side and then click Setup NordVPN manually.

3. Enter in the verification code that was sent to your email.

4. Copy and paste your NordVPN manual username and password to a secure location. This is the username and password you will enter into the router settings to connect to NordVPN.

Download your NordVPN .ovpn file
1. There are two options for obtaining the .ovpn file. The first and recommended is to navigate to NordVPN’s server recommendation page. Click Recommended Server to display the fastest server based on your actual location. You can adjust the country if you don’t want to connect to the recommended country.
Then click Show Available Protocols. Click Download Config next to OpenVPN UDP. This will download the .ovpn file to your computer for this server. Do not open this file.

The second method to obtain a server is for connecting to a specific server number that you know you want to use. This applies to NordVPN Dedicated IP servers if you are signed up for that service. Go to NordVPN’s .ovpn file page. Then search for the server number that you want to use and click Download UDP.

Cudy Router Setup for NordVPN
Login to Cudy firmware settings in a browser on any computer or smart device connected to the Cudy FlashRouter’s network.
1. Click General Settings.

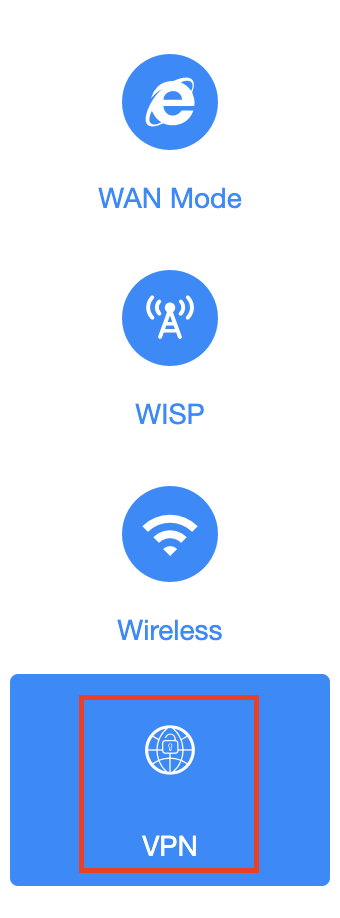
2. Click VPN.

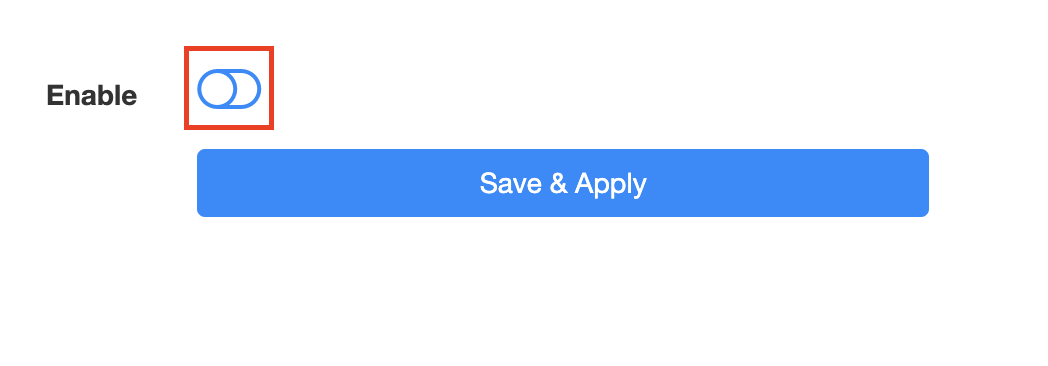
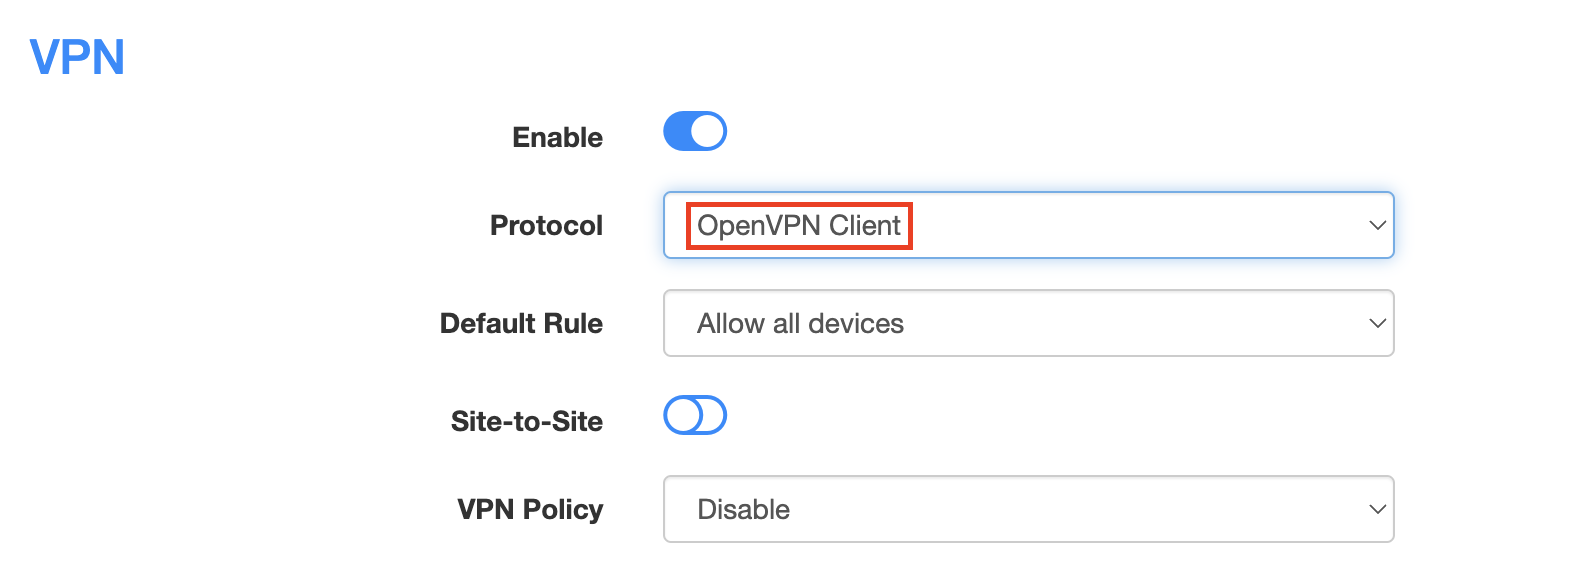
3. Toggle the Enable switch to On.

4. Select OpenVPN Client from the Protocol dropdown.

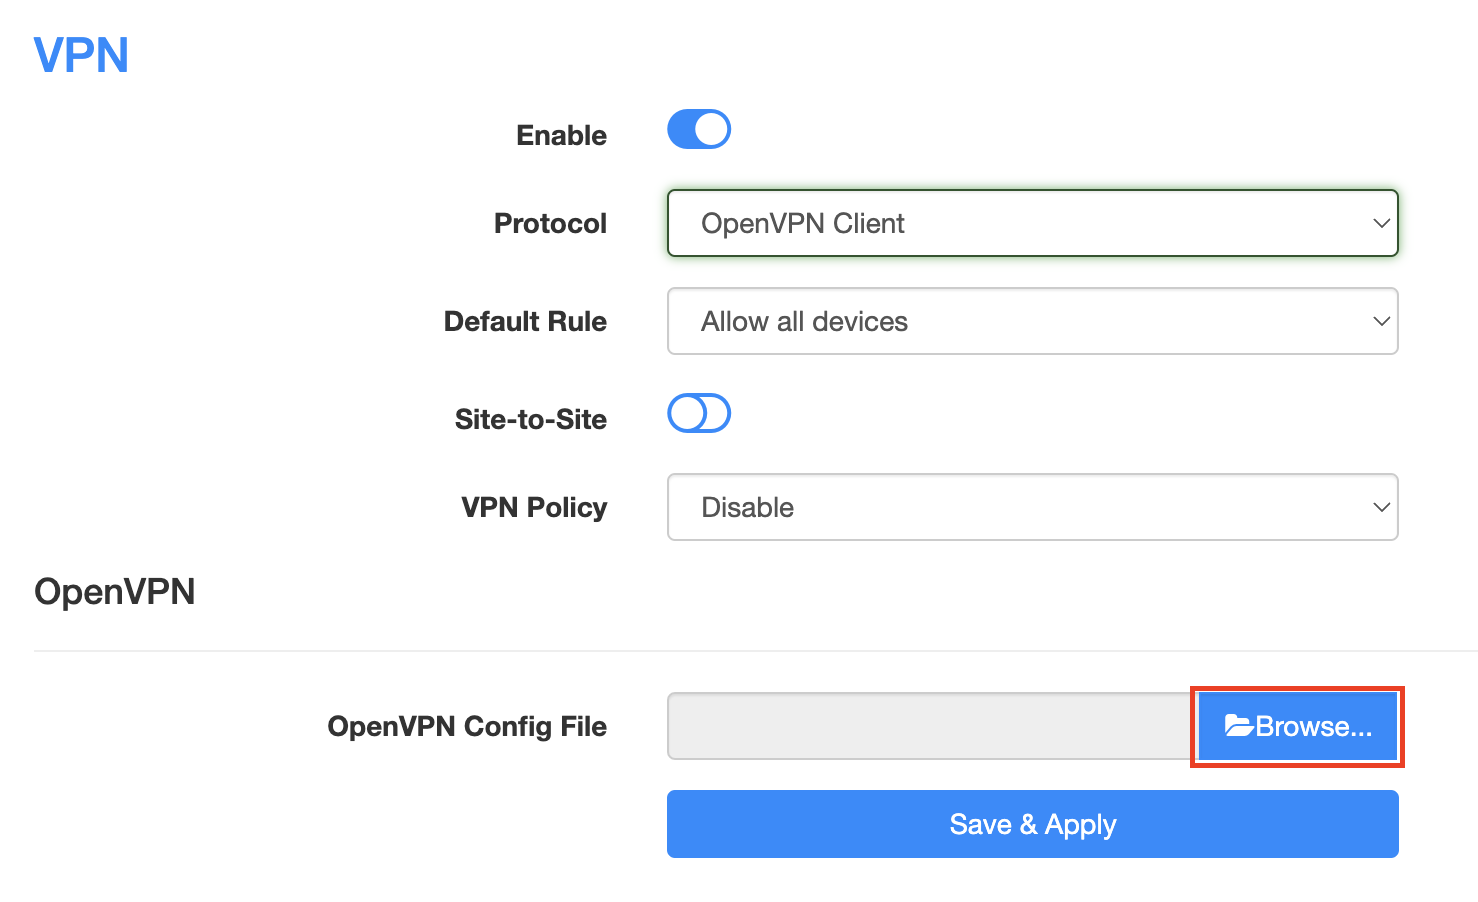
5. Click Browse and select the .ovpn file you downloaded earlier. You should see the server file name listed next to Current Config File after doing so.

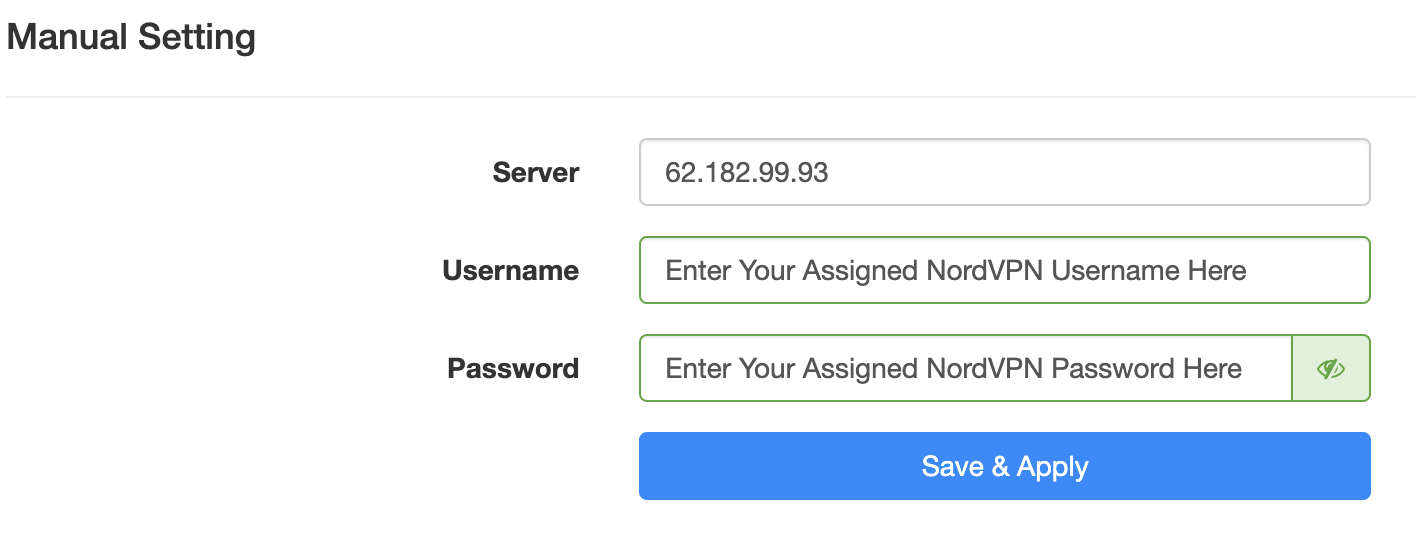
6. Enter your NordVPN username and password that you obtained earlier in the Username and Password. Note that these are different from your NordVPN email login and password.

7. Click Save & Apply at the bottom of the page.
Verify a successful NordVPN connection
- You should now see a CONNECTED message.
- Visit NordVPN’s IP Check to verify your new IP address and virtual location.
In some cases you may notice that the location is not showing the same location as the server you have input in your router settings; this is because geo tracking tools are often tricked by VPN connections. As long as you see an IP address that is not the same as your normal Internet IP address then you are indeed connected to NordVPN.
How to change the NordVPN server
- Follow the steps at the top of the page to obtain a new .ovpn file.
- Then proceed with the settings same as initial setup.
ExpressVPN Cudy OpenVPN Setup
Preparing for ExpressVPN Cudy Setup
Obtain your ExpressVPN OpenVPN Information
If you are not already an ExpressVPN user Sign Up Now.
1. Log in to your account on the ExpressVPN website.

2. Successfully log in with your account information. Select More.

3. Select Manual Configuration and copy the Username and Password that are displayed on the right hand side of the screen.


4. Click the Server Location that you want to connect to. This will download a .ovpn file to your computer that we will use later on. There is no need to open the file. For this example I have selected New York but feel free to select any server listed there.

Cudy Router Setup for ExpressVPN
Login to Cudy firmware settings in a browser on any computer or smart device connected to the Cudy FlashRouter’s network.
1. Click General Settings.

2. Click VPN.

3. Toggle the Enable switch to On.

4. Select OpenVPN Client from the Protocol dropdown.

5. Click Browse and select the .ovpn file you downloaded earlier. You should see the server file name listed next to Current Config File after doing so.

6. Enter your ExpressVPN username and password that you obtained earlier in the Username and Password. Note that these are different from your ExpressVPN email login and password.

7. Click Save & Apply at the bottom of the page.
Verify a successful ExpressVPN connection
- You should now see a CONNECTED message.
- Visit ExpressVPN’s IP Check to verify your new IP address and virtual location.
In some cases you may notice that the location is not showing the same location as the server you have input in your router settings; this is because geo tracking tools are often tricked by VPN connections. As long as you see an IP address that is not the same as your normal Internet IP address then you are indeed connected to ExpressVPN.
How to change the ExpressVPN server
- Follow the steps at the top of the page to obtain a new .ovpn file.
- Then proceed with the settings same as initial setup.
IPVanish Cudy OpenVPN Setup
Preparing for IPVanish Cudy Setup
Download your IPVanish .ovpn file
If you are not already an IPVanish user Sign Up Now.
1. Log in to your account on the IPVanish website.

2. Successfully log in with your account information then go to IPVanish .ovpn file page.
3. Click on the .ovpn file for the server location you want to use to dowloand the .ovpn file. Do not open this file.

Cudy Router Setup for IPVanish
Login to Cudy firmware settings in a browser on any computer or smart device connected to the Cudy FlashRouter’s network.
1. Click General Settings.

2. Click VPN.

3. Toggle the Enable switch to On.

4. Select OpenVPN Client from the Protocol dropdown.

5. Click Browse and select the .ovpn file you downloaded earlier. You should see the server file name listed next to Current Config File after doing so.

6. Enter your IPVanish account login email and password that you obtained earlier in the Username and Password.

7. Click Save & Apply at the bottom of the page.
Verify a successful IPVanish connection
- You should now see a CONNECTED message.
- Visit IPVanish’s IP Check to verify your new IP address and virtual location.
In some cases you may notice that the location is not showing the same location as the server you have input in your router settings; this is because geo tracking tools are often tricked by VPN connections. As long as you see an IP address that is not the same as your normal Internet IP address then you are indeed connected to IPVanish.
How to change the IPVanish server
- Follow the steps at the top of the page to obtain a new .ovpn file.
- Then proceed with the settings same as initial setup.
PrivateInternetAccess (PIA) Cudy OpenVPN Setup
Preparing for PIA Cudy Setup
Download your PIA .ovpn file
If you are not already a PIA user Sign Up Now.
1. Log in to your account on the PIA website.

2. Successfully log in with your account information then go to PIA’s OpenVPN Config Generator.
3. On the OpenVPN Configuration Generator select the following:
OpenVPN Version: OpenVPN 2.4 or newer
Select Platform: Linux
Select Region: Choose the server location you’d like to connect to
Select Port: Typically we recommend UDP/1198 RSA-2048 AES-128-CBC SHA1 for best speeds but feel free to select the one you want to use.
4. Click Generate to download the .ovpn file. Do not open this file once it is downloaded.

Cudy Router Setup for PIA
Login to Cudy firmware settings in a browser on any computer or smart device connected to the Cudy FlashRouter’s network.
1. Click General Settings.

2. Click VPN.

3. Toggle the Enable switch to On.

4. Select OpenVPN Client from the Protocol dropdown.

5. Click Browse and select the .ovpn file you downloaded earlier. You should see the server file name listed next to Current Config File after doing so.

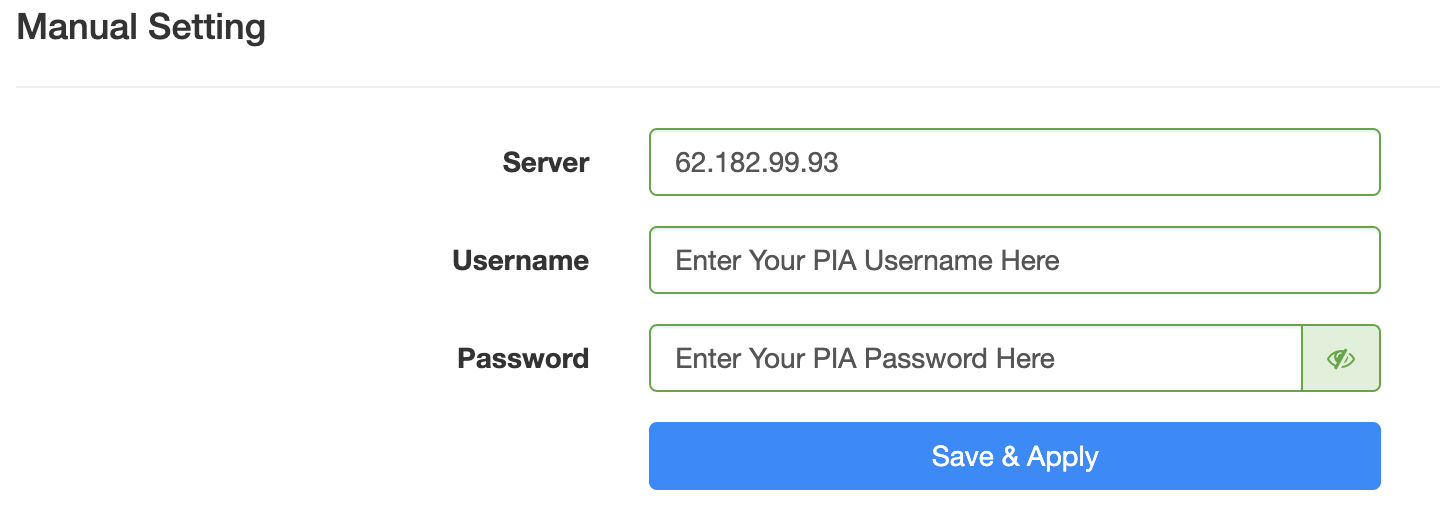
6. Enter your PIA account login username and password in the Username and Password.

7. Click Save & Apply at the bottom of the page.
Verify a successful PIA connection
- You should now see a CONNECTED message.
- Visit PIA’s IP Check to verify your new IP address and virtual location.
In some cases you may notice that the location is not showing the same location as the server you have input in your router settings; this is because geo tracking tools are often tricked by VPN connections. As long as you see an IP address that is not the same as your normal Internet IP address then you are indeed connected to PIA.
How to change the PIA server
- Follow the steps at the top of the page to obtain a new .ovpn file.
- Then proceed with the settings same as initial setup.
ProtonVPN Merlin WireGuard Setup
Preparing for ProtonVPN Merlin Setup
Download your ProtonVPN .conf file
If you are not already an ProtonVPN user Sign Up Now.
1. Log in to your account on the ProtonVPN website.

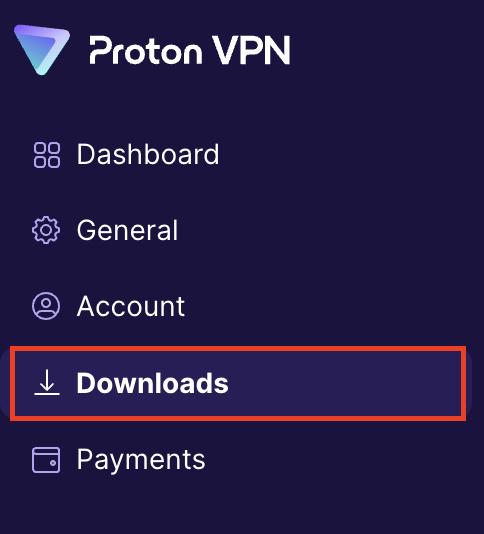
2. Click Downloads.

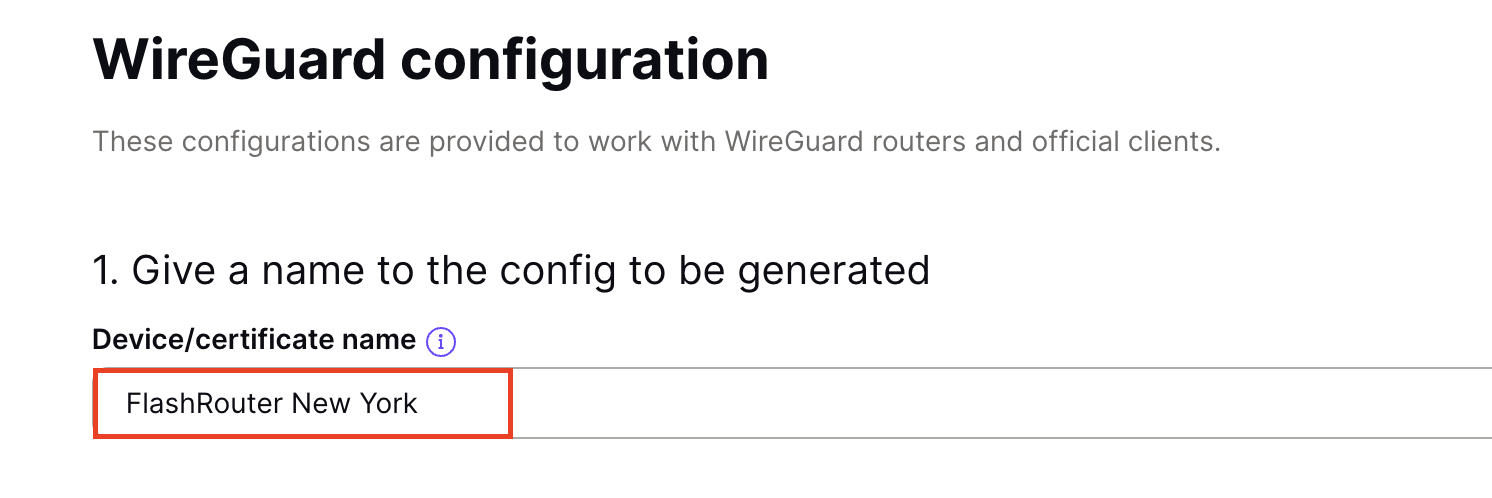
3. Scroll down to WireGuard configuration and name the device FlashRouter.

4. Select Router as the platform.

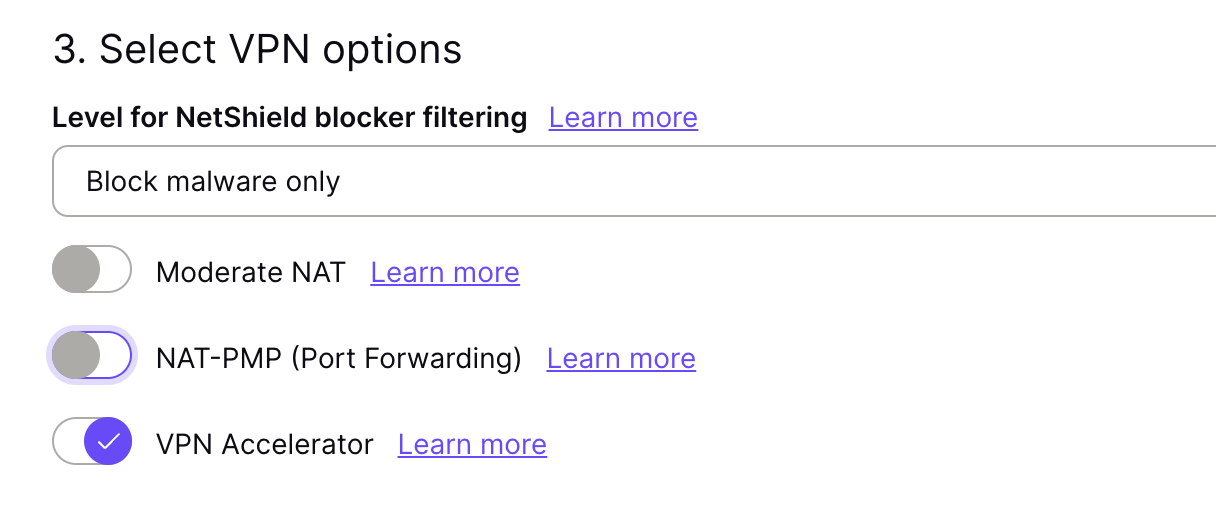
5. Select the VPN options that best fit your needs. We typically use the settings as seen in the screenshot here if you are unsure.

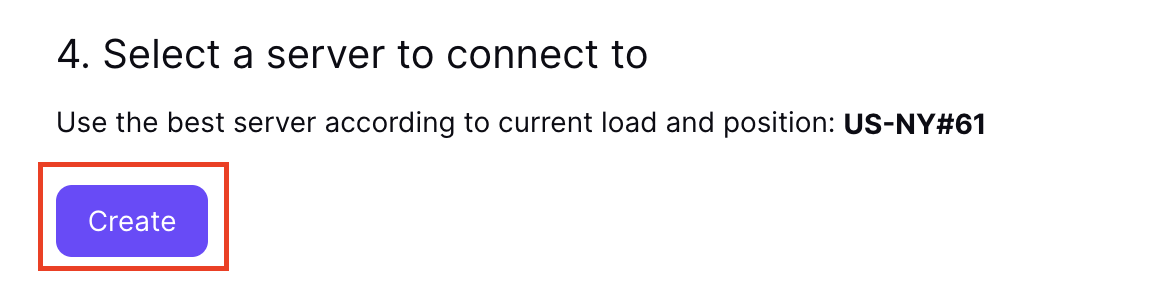
6. Next select the server that you would like to connect to and click Create. At the top of the page you’ll see ProtonVPN’s recommended server which we recommend using unless you need to connect to a specific location.
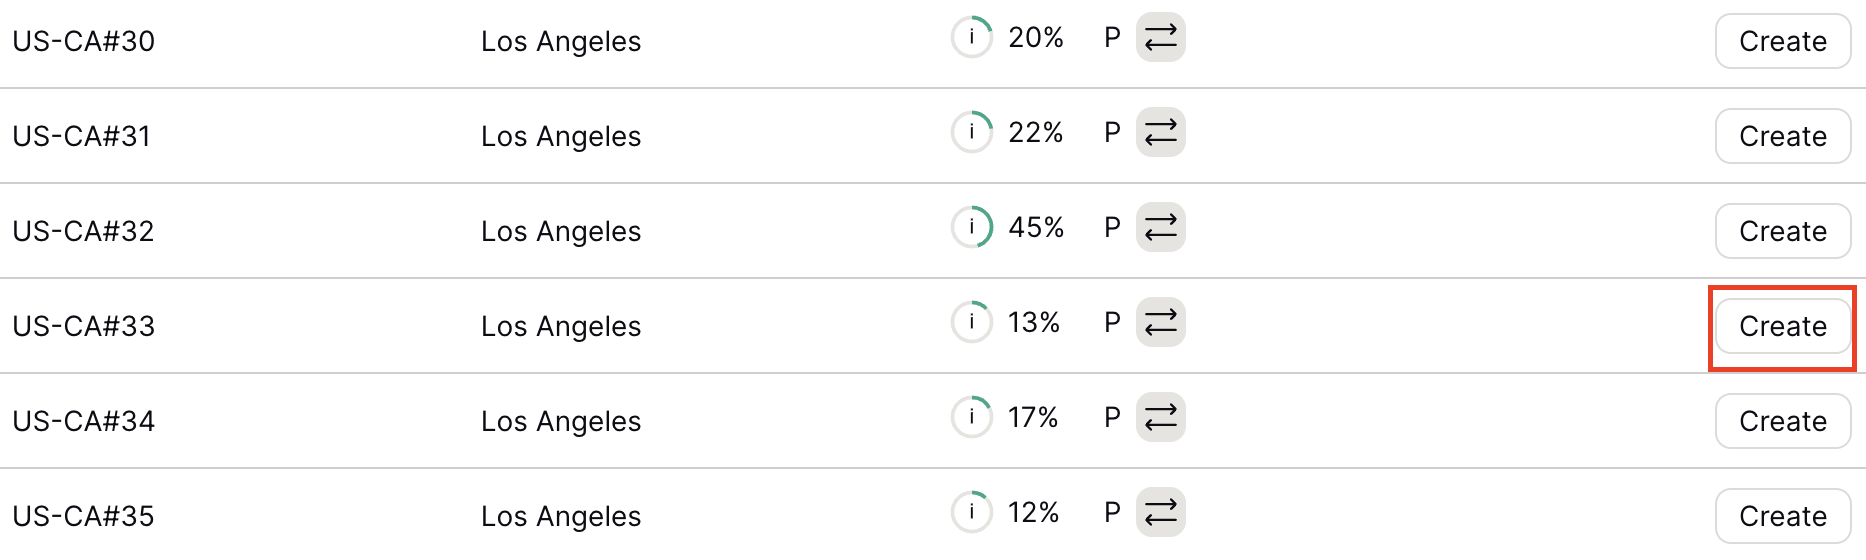
If you need a specific server location find it in the list and click Create.


7. After clicking Create a new window will appear. Click Download to download the .conf file to your computer.
Merlin Router Setup for ProtonVPN
Login to Asus Merlin firmware settings in a browser on any computer or smart device connected to the Merlin FlashRouter’s network.
1. Navigate to the VPN tab.

2. Navigate to the VPN Client tab.

3. Select WireGuard as the VPN Protocol.

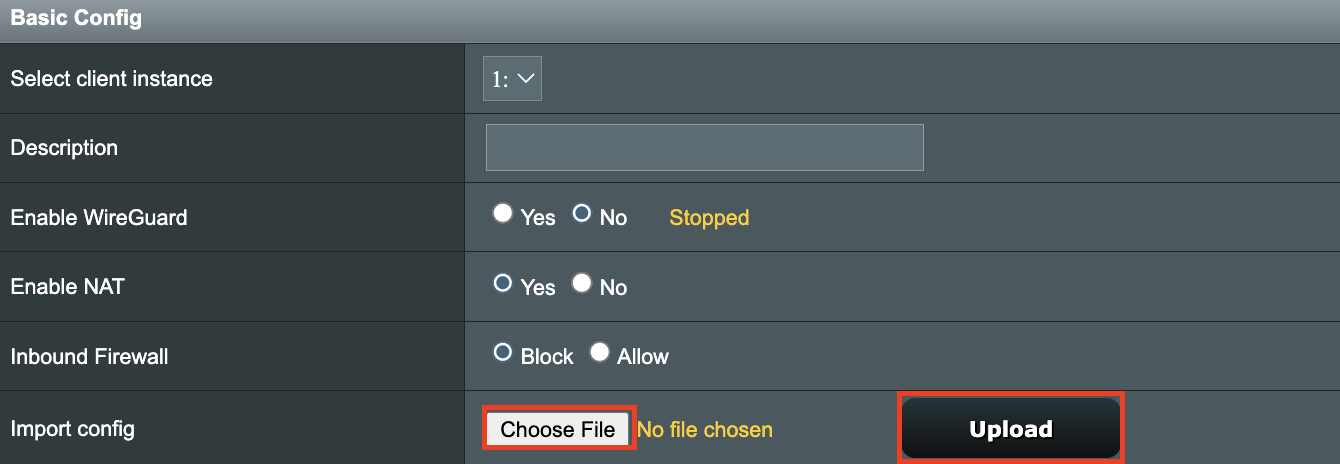
4. Click Choose file and select the .conf file you downloaded earlier. Then click Upload.

5. In the Description field enter in the name you’d like to use for this WireGuard Client profile. We typically advise entering in the location here. Our example server was in US-NY#61 so I have entered in ProtonVPN NY-61.

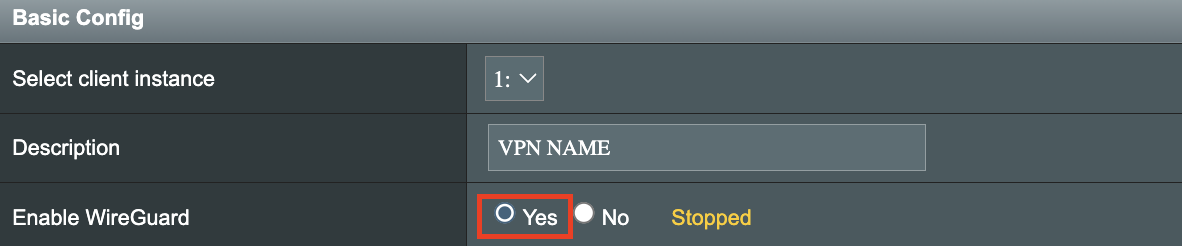
6. Set Enable WireGuard to Yes.

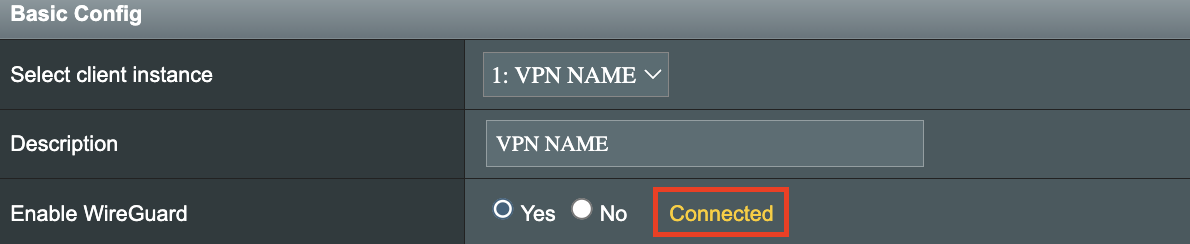
7. Click Apply at the bottom of the page and you should then see a Connected message appear.

8. By default no devices are assigned to the new active WireGuard connection profile. Click the VPN Director tab to assign specific devices to the new WireGuard profile. Your IP will not be changed on your devices yet.

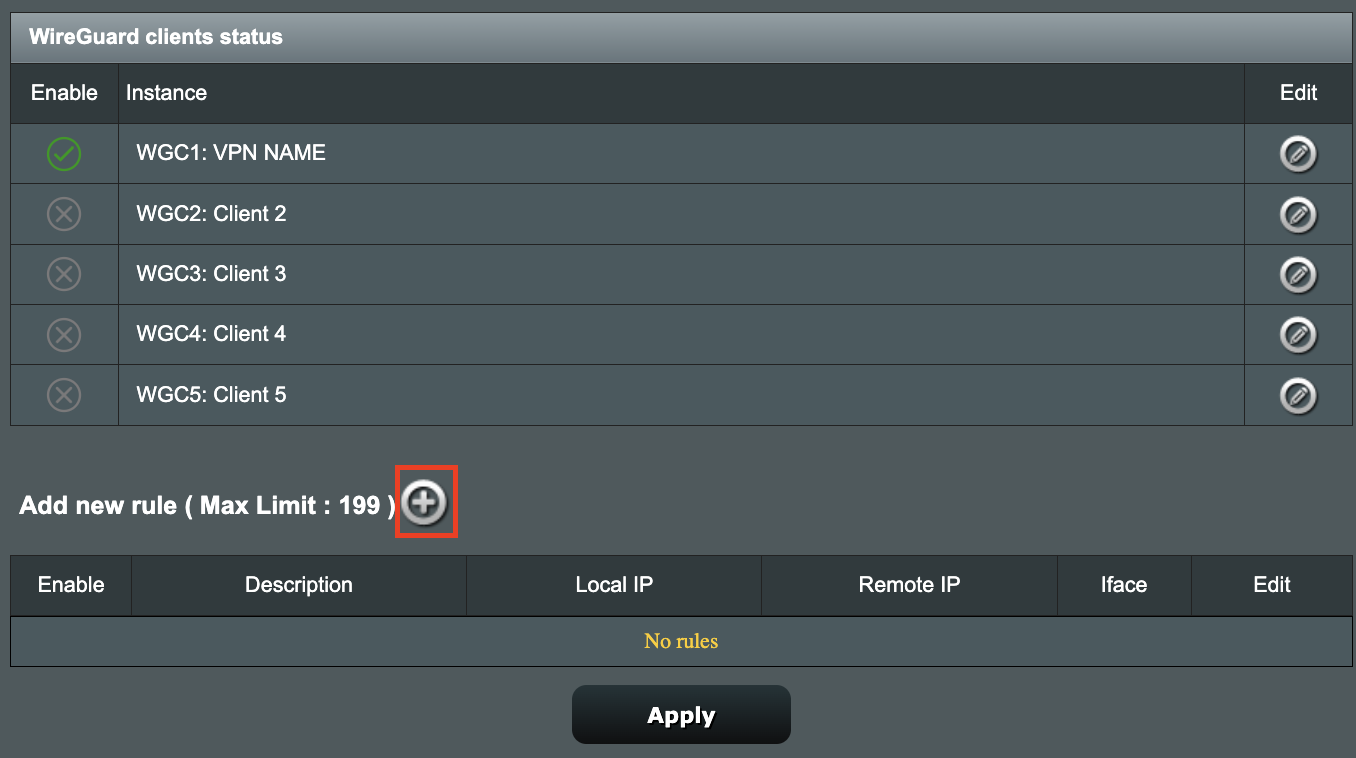
9. On the VPN Director page click the + symbol next to Add new rule.

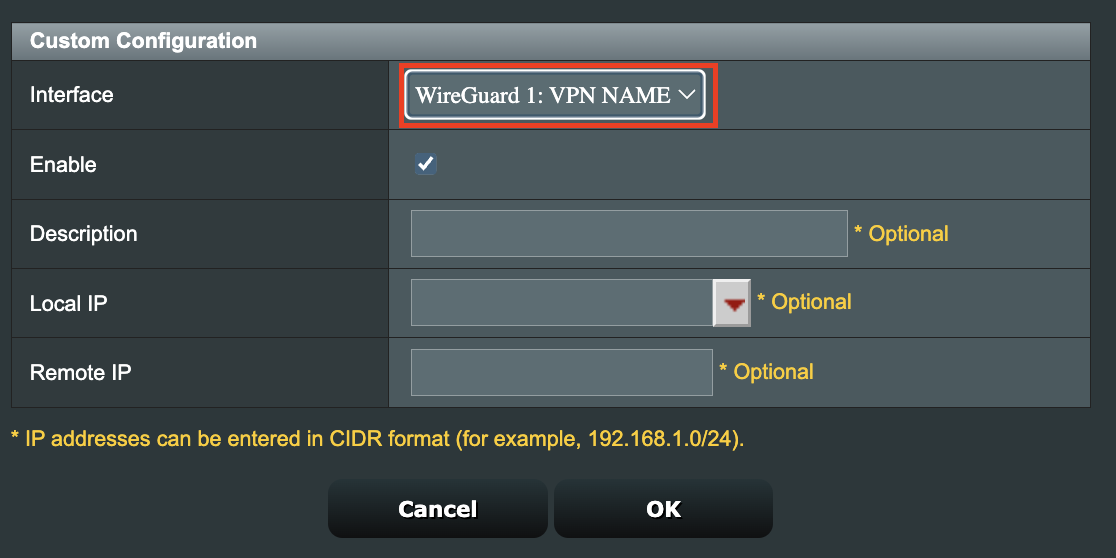
10. Select the new WireGuard profile in the Interface dropdown.

11. In the Local IP field enter in 192.168.50.0/24 if you want ALL devices connected to the FlashRouter’s network to use the WireGuard VPN connection. Click OK.
If you only want certain devices to connect to the WireGuard Client profile you have setting up instead of all the devices connected to the FlashRouter’s network please complete the instructions on our VPN Director guide.
12. Then click Apply at the bottom of the page.
Verify a successful ProtonVPN connection
Visit ProtonVPN’s IP Check from a private/incognito browsing window to verify your new IP address and virtual location.
In some cases you may notice that the location is not showing the same location as the server you have input in your router settings; this is because geo tracking tools are often tricked by VPN connections. As long as you see an IP address that is not the same as your normal Internet IP address then you are indeed connected to ProtonVPN.
How to change the ProtonVPN server
- Follow the steps at the top of the page to obtain a new .conf file.
- Then proceed with the settings same as initial setup.
Roqos Core Internet Setup and Activation
Follow this article when you receive your new Roqos Core router to create your Roqos account, connect your Roqos to the Internet, and customize your network so it is ready to use.
Create your Roqos account
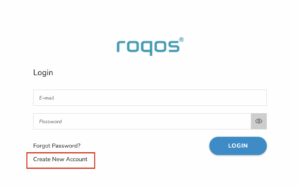
1. From any device that has a browser such as a computer, smartphone, or tablet visit login.roqos.com

2. Select Create Account.

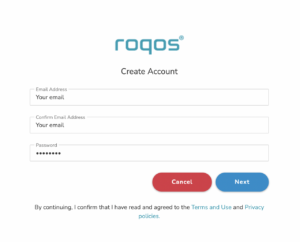
3. Enter the Email address and password you want to set for your Roqos account. This will be your login to the Roqos settings moving forward. Click Next.

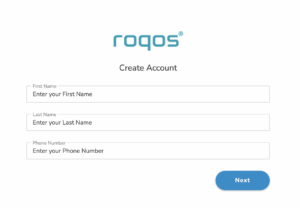
4. Enter the name and phone number you want associated with your Roqos. Click Next.

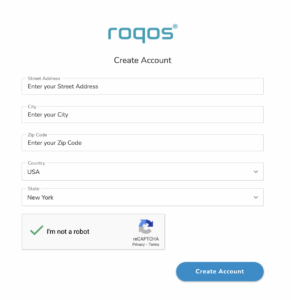
5. Enter the address where your Roqos is located. This section may require a CAPTCHA to be completed to authenticate you are human. Click Create Account.

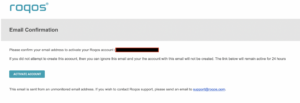
6. You have now created your Roqos account. In a new tab proceed to open the email from Roqos and click the Activate account button.

Activate your Roqos Internet
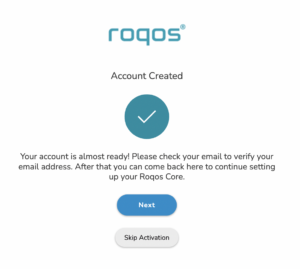
1. From the Account created page click Next to begin the Internet Setup of the Roqos.

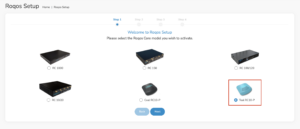
2. Select the Roqos model Teal RC10-P. Click Next.

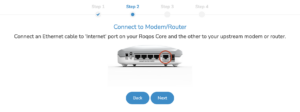
3. Connect the ethernet cable that came with your Roqos from the port labeled INTERNET on the back of your Roqos to an open ethernet port on your ISP Modem or other router in your network.

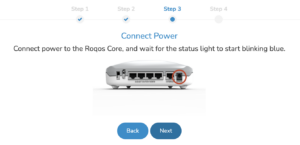
4. Then connect the power adapter that came with the Roqos to the back of the Roqos. Wait for the light on the Roqos to begin blinking blue. Once your see the blinking blue lights on the Roqos click Next.

If your Roqos lights does not begin blinking blue after a long while please see the steps in this article and contact us.
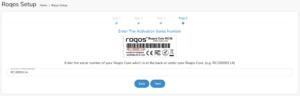
5. Enter in the Roqos serial number found on the bottom of the device exactly as it appears there. Click Next.

Setup your Roqos Network
1. Enter in a name that you would like to call the Roqos. This is just the Roqo’s device name and it is not the WiFi network name. Click Next.

2. Select the Time Zone of your actual location from the dropdown. Click Next.

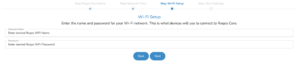
3. Set the WiFi name and password for the Roqos. The WiFi name should be unique and not a duplicate of an existing wireless network. This will be the name that appears in your wireless devices available network list and the password to join the devices to the network. Click Next.

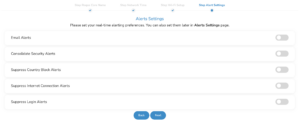
4. Select the custom alert settings as you best see fit using the toggle switches. We typically recommend having the first two toggles selected for Email Alerts and Consolidate Security Alerts. Click Next.

Begin connecting your devices to the Roqos network
You are now done setting up your Roqos to connect to the Internet and can begin joining your wireless devices to the Roqos network and exploring the Roqos Core Features.

Connecting to OpenVPN on Asus Merlin Firmware
To setup VPN on your Asuswrt Merlin router, you will need to first download an OpenVPN (.ovpn) file from your VPN service provider and load it onto your router.
Review your specific VPN service instructions below. Follow these instructions to locate and upload your OpenVPN file. Depending on the VPN service, there may be additional steps and configurations required to complete the setup.
Using Asuswrt Merlin’s VPN Director, your router can store up to five different VPN connections and switch between them at will.
Surfshark Merlin WireGuard Setup
Preparing for Surfshark Merlin Setup
Download your Surfshark .conf file
If you are not already a Surfshark user Sign Up Now.
1. Log in to your account on the Surfshark website.

2. Click VPN Manual Setup.

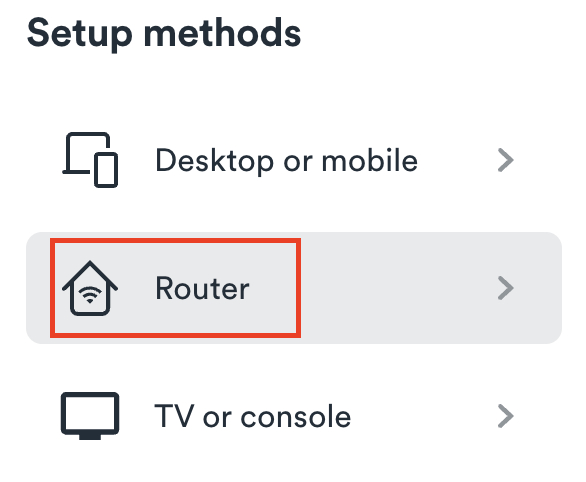
3. Select Router as the Setup Method.

4. Select WireGuard as the Protocol.

5. Select I don’t have a key pair.

6. Enter FlashRouter as the name of the connection and click Next.

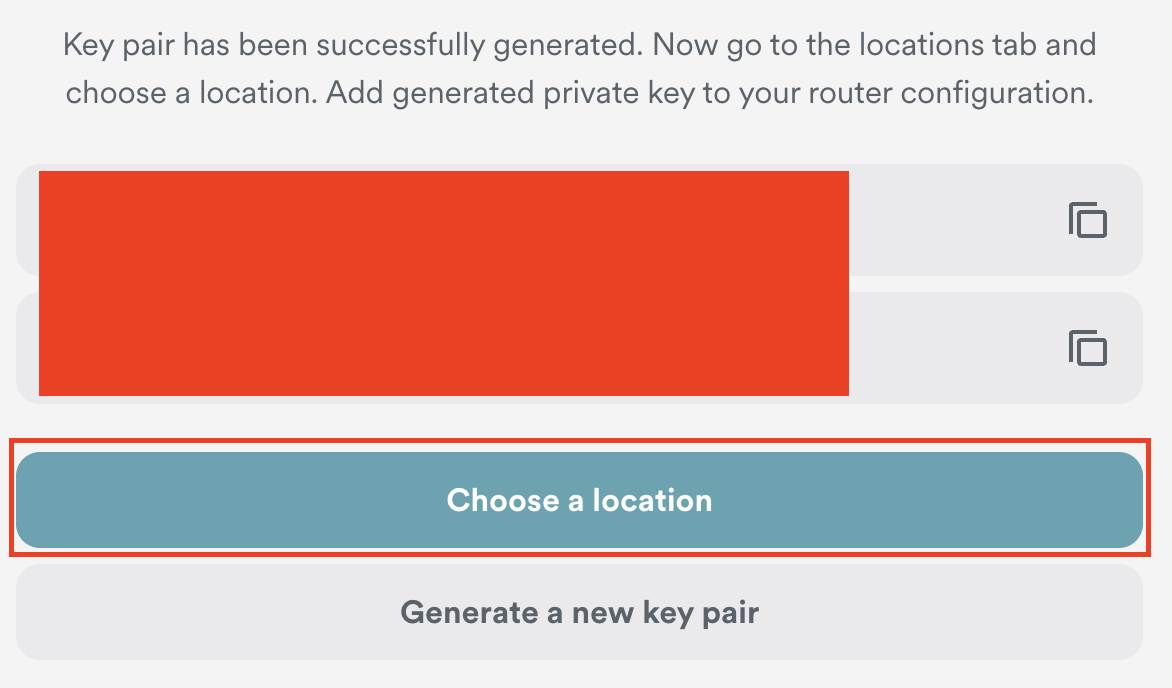
7. Click Generate a new key pair.

8. Click Choose a location.

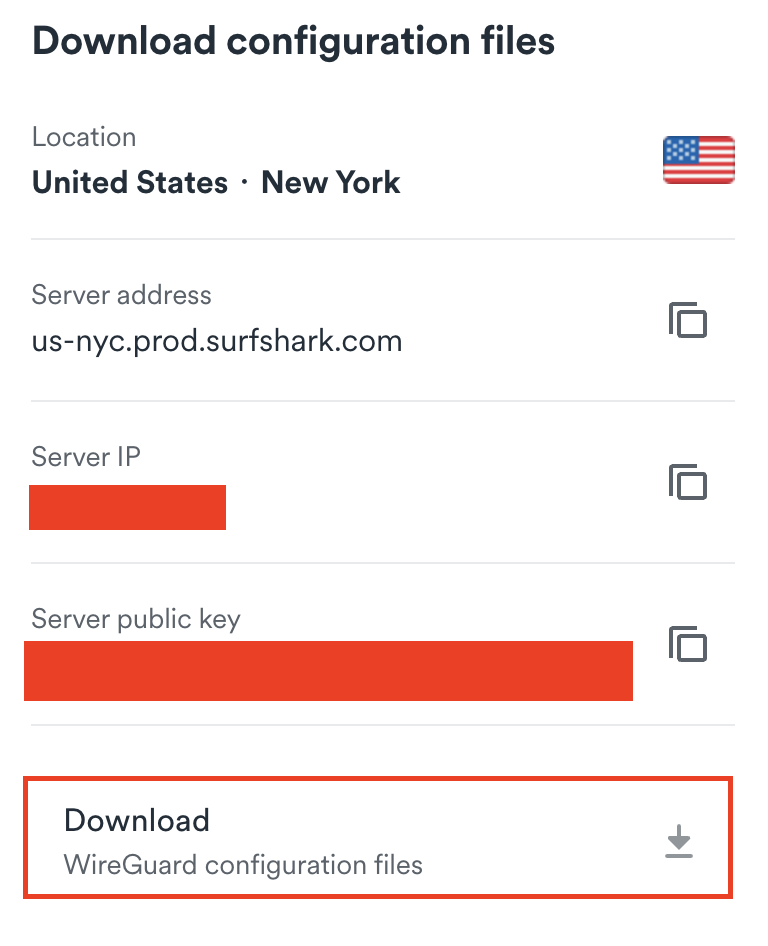
9. Select the server location you want to connect to. Unless you need a specific location we recommend using Surfshark’s recommended Fastest server. Click Download to download the .conf file for this Surfshark server location.

Merlin Router Setup for Surfshark
Login to Asus Merlin firmware settings in a browser on any computer or smart device connected to the Merlin FlashRouter’s network.
1. Navigate to the VPN tab.

2. Navigate to the VPN Client tab.

3. Select WireGuard as the VPN Protocol.

4. Click Choose file and select the .conf file you downloaded earlier. Then click Upload.

5. In the Description field enter in the name you’d like to use for this WireGuard Client profile. We typically advise entering in the location here. Our example server was in New York so I have entered in Surfshark New York.

6. Set Enable WireGuard to Yes.

7. Click Apply at the bottom of the page and you should then see a Connected message appear.

8. By default no devices are assigned to the new active WireGuard connection profile. Click the VPN Director tab to assign specific devices to the new WireGuard profile. Your IP will not be changed on your devices yet.

9. On the VPN Director page click the + symbol next to Add new rule.

10. Select the new WireGuard profile in the Interface dropdown.

11. In the Local IP field enter in 192.168.50.0/24 if you want ALL devices connected to the FlashRouter’s network to use the WireGuard VPN connection. Click OK.
If you only want certain devices to connect to the WireGuard Client profile you have setting up instead of all the devices connected to the FlashRouter’s network please complete the instructions on our VPN Director guide.
12. Then click Apply at the bottom of the page.
Verify a successful Surfshark connection
Visit Surfshark’s IP Check from a private/incognito browsing window to verify your new IP address and virtual location.
In some cases you may notice that the location is not showing the same location as the server you have input in your router settings; this is because geo tracking tools are often tricked by VPN connections. As long as you see an IP address that is not the same as your normal Internet IP address then you are indeed connected to Surfshark.
How to change the Surfshark server
- Follow the steps at the top of the page to obtain a new .conf file.
- Then proceed with the settings same as initial setup.
StrongVPN WireGuard Setup
DD-WRT Router Setup for StrongVPN WireGuard
StrongVPN Wireguard DD-WRT setup is now officially supported by FlashRouters. Follow the steps below to gather all the required information to complete your Wireguard router setup.
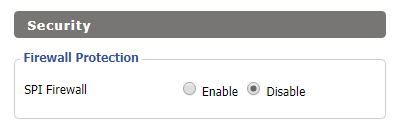
Navigate to Security > Firewall
Set SPI Firewall to Disable.

Click Save at the bottom of the page.
Select your actual time zone for you physical location from the dropdown and enter 1.pool.ntp.org in the Server IP/Name dropdown.

Click Apply Settings at the bottom of the page.
Preparing for StrongVPN WireGuard Setup
Obtain your StrongVPN WireGuard Information
If you are not already a StrongVPN user Sign Up Now.
1. Log in to your account on the StrongVPN website.

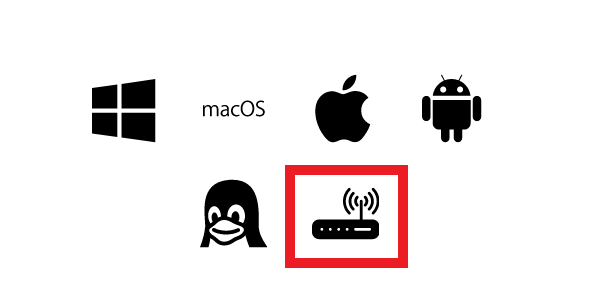
2. Select Router icon as the Platform

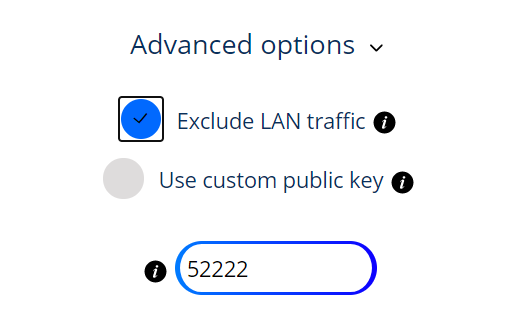
3. Select the Advanced Options dropdown and then check Exclude LAN Traffic and set any value between 52000 and 60000 in the Custom Port field.

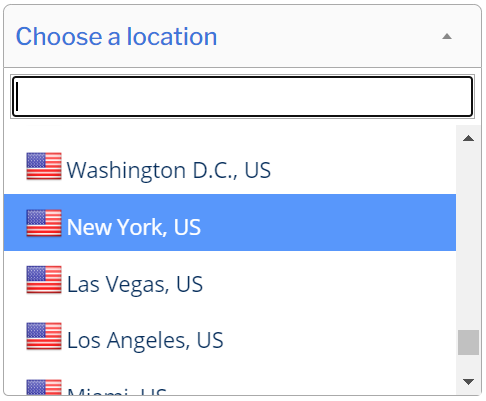
4. Select the Server Location from the dropdown that you would like to connect to.

5. Select the Generate at the bottom of the page.
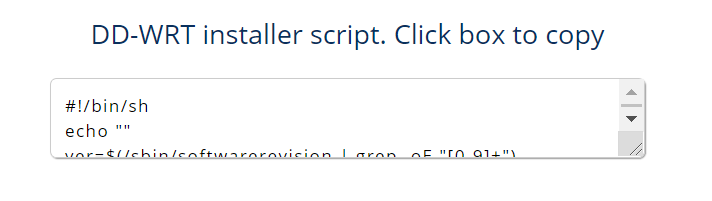
6. Click the DD-WRT installer script box to copy.

Enter StrongVPN WireGuard Script
Navigate to Administration > Commands
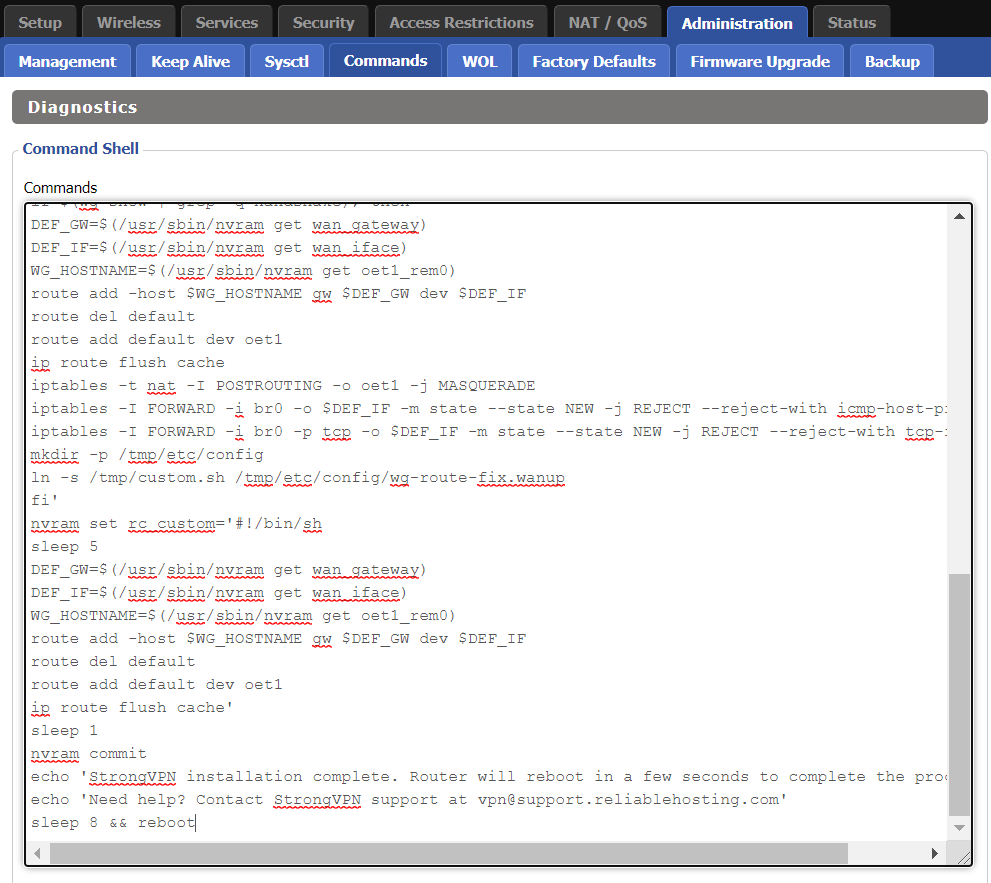
Paste the StrongVPN Script that was copied in the empty Commands Shell.

Delete the very last line sleep 8 && reboot.
Click Save Custom (or Save Custom Script may appear depending on your firmware build, they are the same thing)
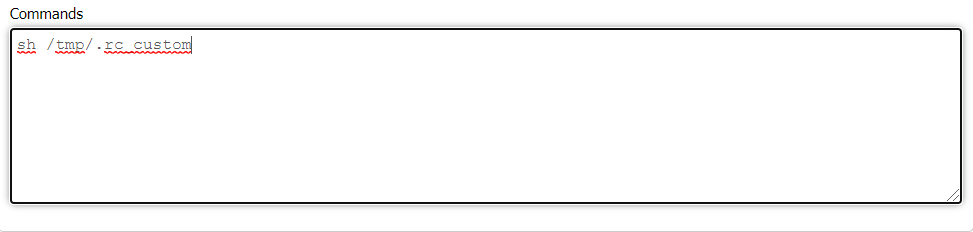
Copy the line below and paste into the empty Commands Shell.

sh /tmp/.rc_custom
Click Run Commands.
Wait two minutes and then power the FlashRouter off and back on. Reconnect to the FlashRouter’s network when it has booted back up.
Verify a successful StrongVPN WireGuard connection
Navigate to Setup > Tunnels
- You should now see that page filled in with WireGuard info.
- Visit StrongVPN’s IP Check to verify your new IP address and virtual location.
Back up your settings
Navigate to Administration > Backup
- Click the Backup button.
- A file named nvrambak.bin will be saved to your computer.
- You can load nvrambak.bin to restore your settings in the event of a reset.
How do I set a Static IP for my device in DD-WRT?
It can be very useful to setup static local IP addresses for devices on your FlashRouter network. By assigning specific IP’s to specific devices you can better control and manage how your network and the internet interacts with each device.
Once you setup a static IP you can set access restrictions, monitor and control bandwidth, as well as bypass a router VPN connection or setup a device specific Kill Switch. Without a static IP assignment you may lose device specific settings when the DHCP lease to the router expires.
Navigate to Services > Services

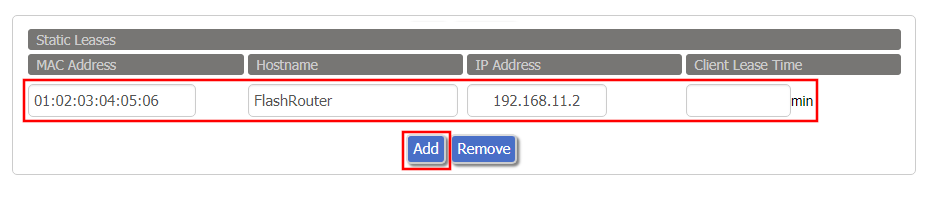
- Under Static Leases click Add once.
- Fill in the newly appeared fields.
- MAC Address: Enter the device’s MAC address which can be found on the device itself or on the Status > LAN page.
- Hostame: Enter a name for the device. Make sure that there are no spaces.
- IP Address: Enter the desired static IP Address of the device. It should be on the same subnet as the FlashRouter (192.168.11.x)
- Client Lease Time: Leave this field blank.
- Click Apply Settings
- Repeat the steps above for each individual static IP address you would like to setup. If you click Add before clicking Apply Settings you will lose the configuration.
If a device has wireless and ethernet capabilities the MAC Addresses will be different for a wireless connection and an ethernet connection. Make sure to set a static IP for both MAC Addresses in this case.
PureVPN Merlin WireGuard Setup
Preparing for PureVPN Merlin Setup
Download your PureVPN .conf file
If you are not already an PureVPN user Sign Up Now.
1. Log in to your account on the PureVPN website.

2. Select Manual Configuration.

3. Select the Server Location you want to connect to and then click Download.

4. In the Select Protocol dropdown choose WireGuard.

5. In the Select Device dropdown choose DD-WRT. Then click Generate Configuration. This will save a .conf file to your computer.

Merlin Router Setup for PureVPN
Login to Asus Merlin firmware settings in a browser on any computer or smart device connected to the Merlin FlashRouter’s network.
1. Navigate to the VPN tab.

2. Navigate to the VPN Client tab.

3. Select WireGuard as the VPN Protocol.

4. Click Choose file and select the .conf file you downloaded earlier. Then click Upload.

5. In the Description field enter in the name you’d like to use for this WireGuard Client profile. We typically advise entering in the location here.

6. Set Enable WireGuard to Yes.

7. Click Apply at the bottom of the page and you should then see a Connected message appear.

8. By default no devices are assigned to the new active WireGuard connection profile. Click the VPN Director tab to assign specific devices to the new WireGuard profile. Your IP will not be changed on your devices yet.

9. On the VPN Director page click the + symbol next to Add new rule.

10. Select the new WireGuard profile in the Interface dropdown.

11. In the Local IP field enter in 192.168.50.0/24 if you want ALL devices connected to the FlashRouter’s network to use the WireGuard VPN connection. Click OK.
If you only want certain devices to connect to the WireGuard Client profile you have setting up instead of all the devices connected to the FlashRouter’s network please complete the instructions on our VPN Director guide.
12. Then click Apply at the bottom of the page.
Verify a successful PureVPN connection
Visit PureVPN’s IP Check to verify your new IP address and virtual location.
In some cases you may notice that the location is not showing the same location as the server you have input in your router settings; this is because geo tracking tools are often tricked by VPN connections. As long as you see an IP address that is not the same as your normal Internet IP address then you are indeed connected to PureVPN.
How to change the PureVPN server
- Follow the steps at the top of the page to obtain a new .conf file.
- Then proceed with the settings same as initial setup.
NordVPN Setup Guide for Privacy Hero
Your Privacy Hero NordVPN Router uses cloud-based management, which means you can securely access and adjust your router settings from anywhere, on any device with an internet connection. Whether you’re connected through your phone, another Wi-Fi network, or directly to the Privacy Hero network, setup and management are always within reach.
Follow the steps below to connect your Privacy Hero to NordVPN NordLynx or OpenVPN servers. By default, you’ll automatically connect to the fastest, most reliable server available based on your location. If you prefer, you can also select a specific country server and input it directly into your Privacy Hero for more control.
Don’t have a Privacy Hero yet? Get your Privacy Hero NordVPN Router here
1. From any device that has a browser such as a computer, smartphone, or tablet visit app.privacyhero.com

2. Enter your Privacy Hero account email and password. Click Login.

3. Click the VPN symbol.

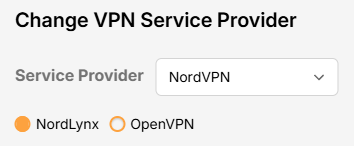
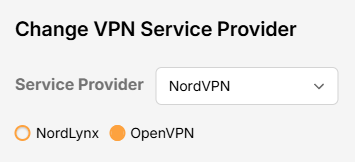
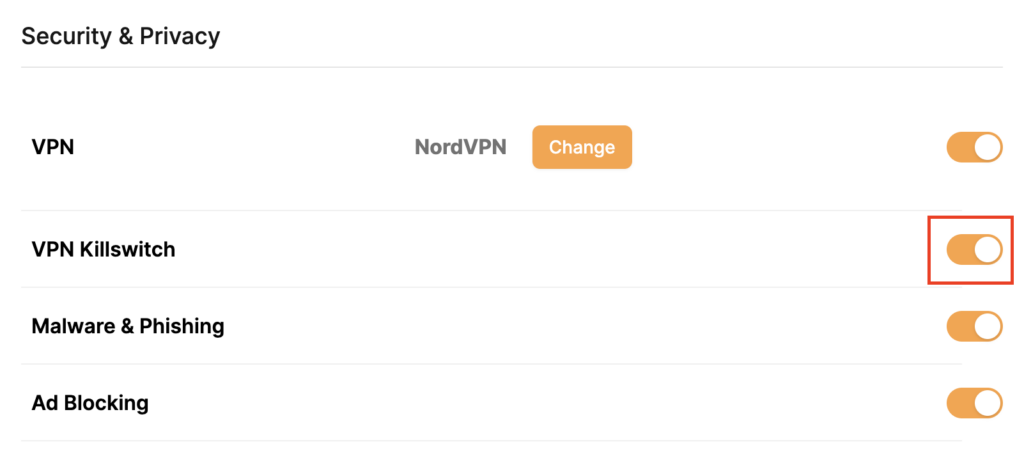
4. Click the Change button and select NordVPN from the dropdown.

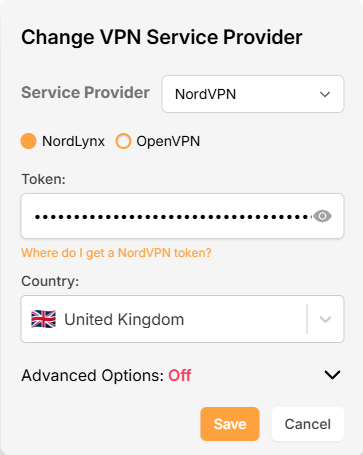
5. Click the Change button and select NordVPN from the dropdown and choose the NordLynx option. Next you will need to obtain your Token.

6. In a new tab login to your NordVPN account and select NordVPN from your list of Services.

7. At the bottom of the page click Get Access token and you will receive a code via email. Enter this code to proceed.

8. After you enter the email code select Generate new token and set it to Doesn’t expire. Copy this token.


9. Paste the token and then Click Save to connect to the server address recommended by NordVPN within your country.

10. To connect to a specific location, click the Country dropdown menu and scroll or type to search from the available options. Choose your preferred country and you will automatically connect to the recommended server within that country at the time. Then click Save.

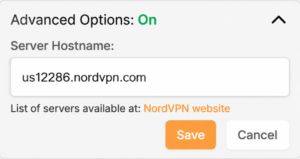
11. If you prefer to enter a specific server address number click Advanced Options and then type in the NordVPN server you would like to use as shown below e.g. uk1784.nordvpn.com. Then click Save.

Use the NordVPN’s server recommendation tool to select a specific country and receive a recommendation for the fastest server based on your actual location. You can then enter that server in the Privacy Hero settings manually.
12. Your Privacy Hero settings should now show a Connected message, indicating you have successfully signed in to your NordVPN NordLynx VPN server!

1. From any device that has a browser such as a computer, smartphone, or tablet visit app.privacyhero.com

2. Enter your Privacy Hero account email and password. Click Login.

3. Click the VPN symbol.

4. Click the Change button and select NordVPN from the dropdown.

5. Choose the OpenVPN option to connect to OpenVPN servers or to setup a NordVPN Dedicated IP address. Next you will need to obtain your Manual Service credentials.

6. In a new tab login to your NordVPN account and select NordVPN from your list of Services.


7. At the bottom of the page in the Manual Setup section click Setup NordVPN manually then under the Configuration section go to Service credentials. Click Verify email to receive a code via email and enter the code to view and copy your credentials.


8. Enter these credentials into the OpenVPN Username and Password sections in your Privacy Hero and Click Save if you want to connect to the server address recommended by NordVPN within your country.

9. To connect to a specific location, click the Country dropdown menu and scroll or type to search from the available options. Choose your preferred country and you will automatically connect to the recommended server within that country at the time. Then click Save.
10. To connect with a NordVPN Dedicated IP Address or if you prefer to enter a specific server address number click Advanced Options and then type in the NordVPN server you would like to use as shown below e.g. uk1784.nordvpn.com. Then click Save.

Use the NordVPN’s server recommendation tool to select a specific country and receive a recommendation for the fastest server based on your actual location. You can then enter that server in the Privacy Hero settings manually.
11. Your Privacy Hero settings should now show a Connected message, indicating you have successfully signed in to your NordVPN Dedicated IP address or preferred OpenVPN server!

Privacy Hero’s cloud based router settings access makes it so you can change settings while not connected to the Privacy Hero network. Visit the NordVPN IP Check to verify your VPN IP address. If it has not changed be sure to double check that you are indeed connected to the Privacy Hero network.
Keep in mind that the VPN connection will not change the location of the streaming services listed in the Streaming Relocation area of the Privacy Hero settings if the Streaming Relocation feature is Enabled.
Private Internet Access VPN Setup Guide for Privacy Hero
Your Privacy Hero router uses Cloud Based router management which means you can access the router settings from anywhere on any device that has an internet connection. You can follow these steps while connected to your phone, other Wi-Fi network, or the Privacy Hero network
1. From any device that has a browser such as a computer, smartphone, or tablet visit app.privacyhero.com.

2. Enter your Privacy Hero account email and password. Click Login.

3. Click the VPN symbol.

4. Click the Change button and select Private Internet Access from the dropdown.

5. Enter your correct PIA account login username and password and click Save.


6. Click Save if you want to automatically connect to the ideal server location as recommended by Private Internet Access.
Or, connect to a specific server location click Advanced Options and then type in the PIA server name you would like to use. (All server names are noted below).
Then click Save.

North America
bahamas.privacy.network
ca-ontario.privacy.network
ca-toronto.privacy.network
ca-vancouver.privacy.network
ca-montreal.privacy.network
greenland.privacy.network
gt-guatemala-pf.privacy.network
mexico.privacy.network
panama.privacy.network
sanjose.privacy.network
us-alabama-pf.privacy.network
us-alaska-pf.privacy.network
us-arkansas-pf.privacy.network
us-atlanta.privacy.network
us-california.privacy.network
us-chicago.privacy.network
us-connecticut-pf.privacy.network
us-denver.privacy.network
us-florida.privacy.network
us-houston.privacy.network
us-idaho-pf.privacy.network
us-indiana-pf.privacy.network
us-iowa-pf.privacy.network
us-kansas-pf.privacy.network
us-kentucky-pf.privacy.network
us-lasvegas.privacy.network
us-louisiana-pf.privacy.network
us-maine-pf.privacy.network
us-massachusetts-pf.privacy.network
us-michigan-pf.privacy.network
us-minnesota-pf.privacy.network
us-mississippi-pf.privacy.network
us-missouri-pf.privacy.network
us-montana-pf.privacy.network
us-nebraska-pf.privacy.network
us-new-hampshire-pf.privacy.network
us-new-mexico-pf.privacy.network
us-newyorkcity.privacy.network
us-north-carolina-pf.privacy.network
us-north-dakota-pf.privacy.network
us-ohio-pf.privacy.network
us-oklahoma-pf.privacy.network
us-oregon-pf.privacy.network
us-pennsylvania-pf.privacy.network
us-rhode-island-pf.privacy.network
us-seattle.privacy.network
us-siliconvalley.privacy.network
us-south-carolina-pf.privacy.network
us-south-dakota-pf.privacy.network
us-texas.privacy.network
us-tennessee-pf.privacy.network
us-vermont-pf.privacy.network
us-virginia-pf.privacy.network
us-washingtondc.privacy.network
us-west-virginia-pf.privacy.network
us-wisconsin-pf.privacy.network
us-wyoming-pf.privacy.network
us3.privacy.network
us-baltimore.privacy.network
us-honolulu.privacy.network
us-newjersey.privacy.network
us-saltlakecity.privacy.network
us-streaming-2.privacy.network
us-streaming.privacy.network
us-wilmington.privacy.network
South America
ar.privacy.network
bo-bolivia-pf.privacy.network
bogota.privacy.network
br.privacy.network
ec-ecuador-pf.privacy.network
pe-peru-pf.privacy.network
santiago.privacy.network
uy-uruguay-pf.privacy.network
venezuela.privacy.network
Europe
al.privacy.network
ad.privacy.network
austria.privacy.network
brussels.privacy.network
ba.privacy.network
sofia.privacy.network
zagreb.privacy.network
czech.privacy.network
de-berlin.privacy.network
de-frankfurt.privacy.network
denmark.privacy.network
denmark-2.privacy.network
spain.privacy.network
es-valencia.privacy.network
ee.privacy.network
fi.privacy.network
fi-2.privacy.network
france.privacy.network
gr.privacy.network
hungary.privacy.network
italy.privacy.network
italy-2.privacy.network
is.privacy.network
ireland.privacy.network
man.privacy.network
lv.privacy.network
liechtenstein.privacy.network
lt.privacy.network
lu.privacy.network
malta.privacy.network
md.privacy.network
monaco.privacy.network
montenegro.privacy.network
nl-amsterdam.privacy.network
mk.privacy.network
no.privacy.network
poland.privacy.network
pt.privacy.network
ro.privacy.network
sweden.privacy.network
sweden-2.privacy.network
rs.privacy.network
sk.privacy.network
slovenia.privacy.network
swiss.privacy.network
tr.privacy.network
uk-london.privacy.network
uk-manchester.privacy.network
uk-southampton.privacy.network
uk-2.privacy.network
ua.privacy.network
Asia
ae.privacy.network
bangladesh.privacy.network
cambodia.privacy.network
china.privacy.network
cyprus.privacy.network
georgia.privacy.network
hk.privacy.network
in.privacy.network
israel.privacy.network
jakarta.privacy.network
japan.privacy.network
japan-2.privacy.network
kazakhstan.privacy.network
kr-south-korea-pf.privacy.network
kualalumpur.privacy.network
macau.privacy.network
mongolia.privacy.network
np-nepal-pf.privacy.network
philippines.privacy.network
qatar.privacy.network
saudiarabia.privacy.network
sg.privacy.network
srilanka.privacy.network
taiwan.privacy.network
vietnam.privacy.network
yerevan.privacy.network
Oceania
au-adelaide-pf.privacy.network
au-australia-so.privacy.network
au-brisbane-pf.privacy.network
aus-melbourne.privacy.network
aus-perth.privacy.network
au-sydney.privacy.network
nz.privacy.network
Africa
dz.privacy.network
egypt.privacy.network
morocco.privacy.network
nigeria.privacy.network
za.privacy.network
8. Your Privacy Hero settings should now show a Connected message, indicating you have successfully signed in to your PIA VPN server!
1. From any device that has a browser such as a computer, smartphone, or tablet visit app.privacyhero.com.

2. Enter your Privacy Hero account email and password. Click Login.

3. Click the VPN symbol.

4. Click the Change button and select Custom from the dropdown and choose the OpenVPN option.

5. Enter your PIA Account login as the Username and Password.
6. Now log in to your PIA Account page.

7. Go to the Downloads section.

8. Scroll down to the bottom of the page, and go to OpenVPN Configuration Generator.

9. Choose OpenVPN 2.4 or newer and Linux.

10. From the Select Port section, choose UDP/1198 AES-128-CBC for a faster connection or choose UDP/1197 AES-256-CBC for stronger security as shown in the image below then Click Generate to download the server configuration file.

11. Drag and drop or click to Upload the server file into the Custom box on your Privacy Hero settings page then click Save.
12. Your Privacy Hero settings should now show a Connected message, indicating you have successfully signed in to your PIA VPN server!
Privacy Hero’s cloud based router settings access makes it so you can change settings while not connected to the Privacy Hero network. Visit the Private Internet Access IP Check to verify your VPN IP address. If it has not changed be sure to double check that you are indeed connected to the Privacy Hero network.
Keep in mind that the VPN connection will not change the location of the streaming services listed in the Streaming Relocation area of the Privacy Hero settings.
DD-WRT Router Setup Guide

Quick Start Guide for DD-WRT FlashRouters
Find setup guides, FAQs and troubleshooting tips for DD-WRT configured FlashRouters.

AC1450, R6220, R6230, R6250, R6260, R6300 V1, R6300 V2, R6400 V1, R6400 V2, R6700 V1, R6700 V2, R6700 V3, R7000, R7000P, R7800, R8000, R9000, XR500

RT-AC56U/R, RT-AC68U V1, RT-AC68U V2, RT-AC1900P, RT-AC87U, RT-AC3100, RT-AC5300

WRT1200AC, WRT1900AC V1, WRT1900AC V2, WRT1900ACS V1, WRT1900ACS V2, WRT32X, WRT3200ACM

Search Support Articles
Troubleshooting
- Why can’t I send emails while connected to VPN?
- What is a DNS leak and how can I prevent a DNS leak in my router?
- My VPN stopped working on my FlashRouter.
- Why is my connection speed slower?
- Why are streaming services blocked while connected to VPN?
- How do I find my router local IP address?
- How do I reset and reconfigure my FlashRouter?
- How do I check for static network settings on my devices?
- Why is my router not connecting to internet?
- How to fix an Unidentified Network or Limited Connection.
- Why are some of my devices not connecting to the internet?
- Why is the internet LED red on my router?
- Why is the power light on my FlashRouter blinking?
- My 2.4GHz network is not showing up
- My 5.0GHz network is not showing up
- My WiFi password is not working
- Why did my WiFi SSID change to ‘dd-wrt’?
- Why are devices disconnecting from Wireless?
- Why is my WiFi signal weak?
More Ways to Get Help
AirVPN Manual OpenVPN Setup
Preparing for Manual AirVPN Setup
Obtain your AirVPN OpenVPN Information
If you are not already a AirVPN user Sign Up Now.
1. Log in to your account on the AirVPN website.

2. Click on the Client Area tab.

3. Click on the Config Generator subtab.

4. Click on the Router icon under Choose your Operating System.

5. Select a Protocol under the Protocols section. We recommend UDP.

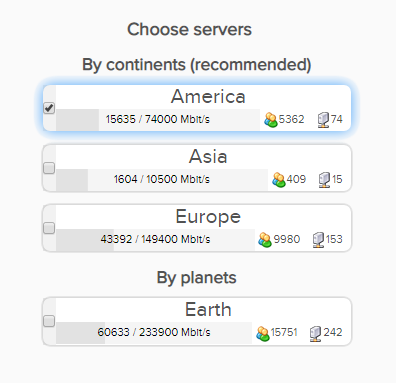
6. Select one option under the Choose Servers section. AirVPN sorts these servers by Planet, Continent, Country, and Single servers. Choose whichever best suits your needs.

7. Scroll down towards the bottom of the page and click on Generate.

Open the file that was downloaded with NotePad++ for Windows or TextEdit for Apple. You will be copying the Server IP/Name, client.crt and client.key from this file.
Please note, all VPN servers have different keys and certificates. If you wish to change servers in the future, you will have to go through steps 1-7 again.
DD-WRT Router Setup for AirVPN
Navigate to Services > VPN
Enter AirVPN settings
OpenVPN Client
Start OpenVPN Client
If you wish to disable your VPN connection simply set this to Disable at any time and click Apply Settings.
Server IP/Name
Copy and paste the server you selected in your account. Be sure there are no extra spaces or characters.
Port
443
Tunnel Device
TUN
Tunnel Protocol
UDP or TCP
Encryption cipher
AES-256-CBC
Hash Algorithm
SHA1
User Pass Authentication
Disable
Advanced Options
Enable
TLS Cipher
None
LZO Compression
No
NAT
Enable
Firewall Protection
Enable
nsCertType verification
Checked
Policy Based Routing
This field can be used for split VPN and Dual Gateway routing.
TLS Auth Key
—–BEGIN OpenVPN Static key V1—–
7bb7a23a0f5f28d01e792df68f1764ab
f2688719288808bf58e8a2d4f9354ecf
132625dfb895fc3f6330ae1e868e4dfa
c164c0931593d7f9a7da9595cf353433
8896e1d0a987a0d19838944af8fea4e5
215a3a0c76f4c67d5a4aee6a53be66a4
c88b84f850030840fb30f8550ed8068f
35c1ef34ee8f40a0ea5862dfb6f8d3c5
7ab5e27ac2799cf93e8765ff63cd8cd8
6b391b813925cd373bb202796f64d16f
003d042ca828d1b07f18ba1d0cb0323d
df3ee9287e9e084e655699efb3cffa92
3626946fa372e7beee245e7a95b4c1d8
7d16cae685218d4b8afc019b22e41083
476ee9883fe666d236301e55b2062551
4d91c8a69467a758293994df1e6fa7ae
—–END OpenVPN Static key V1—–
CA Cert
—–BEGIN CERTIFICATE—–
MIIGVDCCBDygAwIBAgIJAIzYQ+/kXyADMA0GCSqGSIb3DQEBBQUAMHkxCzAJBgNV
BAYTAklUMQswCQYDVQQIEwJJVDEQMA4GA1UEBxMHUGVydWdpYTETMBEGA1UEChMK
YWlydnBuLm9yZzEWMBQGA1UEAxMNYWlydnBuLm9yZyBDQTEeMBwGCSqGSIb3DQEJ
ARYPaW5mb0BhaXJ2cG4ub3JnMB4XDTE0MDQxMTEwMTU0NVoXDTI0MDQwODEwMTU0
NVoweTELMAkGA1UEBhMCSVQxCzAJBgNVBAgTAklUMRAwDgYDVQQHEwdQZXJ1Z2lh
MRMwEQYDVQQKEwphaXJ2cG4ub3JnMRYwFAYDVQQDEw1haXJ2cG4ub3JnIENBMR4w
HAYJKoZIhvcNAQkBFg9pbmZvQGFpcnZwbi5vcmcwggIiMA0GCSqGSIb3DQEBAQUA
A4ICDwAwggIKAoICAQDGG3ZrJbP61PNjGc4mjTx0TLkUjP7IXZ3wnpPjwF/lwK9n
HgRqoPL0KY/ABJuzMViD8ChtwthNfc7PuJ7vSPtN84lSJ4JGmTxvZkNeLQLZsu1F
f88OcSpjW5ErBM05iVBeF8/ljwaajgFfbgop9W/UK5yMji4qgq5KHxxXqsB8R4rC
eFpWHoNTwFjvXhtVyMgXiT9XAh/vBYim021m8onio4K48q7YRZ4qU8gvE79h5M0g
miIlt6v1vaZskw9cqIBbCYefGMsvBRk2x824ChPf6FazMwAnQHsuBHt6eXAARvfF
DBDanzPHlRSiCP6Je6Vod/MPyepiTZgjgk2VxYUc1ohNxEEGzPGTayeNzLJUldou
P4B+tjJ0Xly30+wvlahADlqjtz3CGQmKMj7btZjd+Uo61B7gau5YiXR/IO7ZpFAC
PCZJSbrwFs6rt9Kewqk8zslfVIro8oDndXRkVsa/c8Qmd6ZE7V+oMGl2OggdWOLl
mDEjkytzx+Bw2sSSalJRAQmOQO8V0anOI6jGYLuU2jnFDsnqSHuwIK11xb6iHmh7
ONsRLUtQ+d64TzB00w2M0fCvGqUIp0N+lf7nsZKsEcU08OoHQYUuwX75ZEOYNSZJ
rqAXohcXdVUHqgRlJRErfSkjcGMM0yqjHkvopcnBIRXKMYTDVXvzRJboyJiVpQID
AQABo4HeMIHbMB0GA1UdDgQWBBTlFdcTqJ4x49Ew1/Ef9OJj0lDIiDCBqwYDVR0j
BIGjMIGggBTlFdcTqJ4x49Ew1/Ef9OJj0lDIiKF9pHsweTELMAkGA1UEBhMCSVQx
CzAJBgNVBAgTAklUMRAwDgYDVQQHEwdQZXJ1Z2lhMRMwEQYDVQQKEwphaXJ2cG4u
b3JnMRYwFAYDVQQDEw1haXJ2cG4ub3JnIENBMR4wHAYJKoZIhvcNAQkBFg9pbmZv
QGFpcnZwbi5vcmeCCQCM2EPv5F8gAzAMBgNVHRMEBTADAQH/MA0GCSqGSIb3DQEB
BQUAA4ICAQCUVAQteCtgNQiZMXV0wCdqivlxlCCuj5sD+XvEuoDqb7dH70u1KQ90
OAbkeotHlIbqJU10xWtvHEjnXg8QG5VOzaWnWWev+ivdPCkGWe8E7C8shsr4WMlA
EF8PPRtzOwCKayxjR713x+Tc2Sb6/rDsXcY5LV6RNmE9HWBM6IoHdqruR8PHkYge
2CPXMuLByEADri6xmvussAjCWEDplJNY7tQsUGT7vjrwrNSNBx/SvxkXnWBj0wYa
EwNu43jrjcRfM/3eGcKDX3cQqTfRQd3j3OA7zmJOXPeExRUIWZTNCvQItGy1TJdw
JTphflw15Bui4l2mYfDqK08zm4aJODrCjoQnVVzM5uOzSTOjmneI6AHj3MjjL3A/
CFA5PCSquBhUycF4UEVf3aPGiV0vAthCBUqM4eKE+rbjWPSaxKghVdr/S82o7Wzz
9mGwnOZDqWk+8AWSsGBjamMk3mNMR45E9FRfPF/dyjOSbVyyTsd1VzlTFEJa0wjB
l3yq3r3iZAM3UtevocAyTEAu0vDYBbS6TgWmWEDOizybB0hNrTx5u/SEI0Kwcthc
rilYxD+n4kmV7TvIR0ZSaYpgYALWQV27zOqY51Ol4UT98WCOokge9HdoFcGJU2Uj
5VneGp14/Oklh7y6BxxxGC3zNGjKGNQYuHGTIgw1DoASmRUdkPkn/w==
—–END CERTIFICATE—–
Public Client Cert
Copy and paste all contents between <cert> and </cert> make sure to also include the following lines when copying and pasting:
—–BEGIN CERTIFICATE—–
…
—–END CERTIFICATE—–
Private Client Key
Copy and paste all contents between <key> and </key> make sure to also include the following lines when copying and pasting:
—–BEGIN PRIVATE KEY—–
…
—–END PRIVATE KEY—–
CLICK APPLY SETTINGS
Leave all settings not mentioned above as their default setting.
Verify a successful AirVPN connection
Navigate to Status > OpenVPN
- You should now see a CONNECTED SUCCESS message.
- Visit whatismyipaddress.com to verify your new IP address and virtual location.
In some cases you may notice that the location is not showing the same location as the server you have input in your router settings; this is because geo tracking tools are often tricked by VPN connections. As long as you see an IP address that is not the same as your normal Internet IP address then you are indeed connected to AirVPN.
Back up your settings
Navigate to Administration > Backup
- Click the Backup button.
- A file named nvrambak.bin will be saved to your computer.
- You can load nvrambak.bin to restore your settings in the event of a reset.
How to change the AirVPN server
- Follow the instructions for obtaining the OpenVPN information from above.
- Enter the new Server Address in the Server IP/Name field.
- Enter the new client.key and private.key
- Click Apply Settings.
ProtonVPN Setup Guide for Privacy Hero
Your Privacy Hero router uses Cloud Based router management which means you can access the router settings from anywhere on any device that has an internet connection. You can follow these steps while connected to your phone, other Wi-Fi network, or the Privacy Hero network.
1. From any device that has a browser such as a computer, smartphone, or tablet visit app.privacyhero.com.

2. Enter your Privacy Hero account email and password. Click Login.

3. Click the VPN symbol.

4. Click the Change button and select Custom from the dropdown and choose the Wireguard option.


5. In a new tab login to your ProtonVPN account.

6. Go to the Downloads section of your ProtonVPN account page.

7. Scroll down to find the WireGuard configuration section. Name your configuration and then select Router as the platform, and select Standard server configs.

8. Click on the country name that you want to choose, and Download any of the available server files from the list.

9. Drag and drop or click to Upload the server file into the Custom box on your Privacy Hero settings page. Then press Save.
10. Your Privacy Hero settings should now show a Connected message, indicating you have successfully signed in to your ProtonVPN server!

1. From any device that has a browser such as a computer, smartphone, or tablet visit app.privacyhero.com.

2. Enter your Privacy Hero account email and password. Click Login.

3. Click the VPN symbol.

4. Click the Change button and select Custom from the dropdown and choose the OpenVPN option.


5. In a new tab login to your ProtonVPN account.

6. Navigate to the Account tab and find your OpenVPN specific Username and Password.

7. Copy and paste the username and password from previous step into the Custom box on your Privacy Hero settings page.
8. Go to the Downloads section of your ProtonVPN account page.

9. Scroll down to find the OpenVPN Configuration Files section. Then select “Router” as the platform, and select “Standard Server Configs.”

10. Click on the country name that you want to choose, and Download any of the available server files from the list.

11. Drag and drop or click to Upload the server file into the Custom box on your Privacy Hero settings page. Then press Save.
12. Your Privacy Hero settings should now show a Connected message, indicating you have successfully signed in to your ProtonVPN server!

Privacy Hero’s cloud based router settings access makes it so you can change settings while not connected to the Privacy Hero network. Visit the ProtonVPN IP Check to verify your VPN IP address. If it has not changed be sure to double check that you are indeed connected to the Privacy Hero network.
Keep in mind that the VPN connection will not change the location of the streaming services listed in the Streaming Relocation area of the Privacy Hero settings if the Streaming Relocation feature is Enabled.
Privacy Hero Bedtime Settings (Internet Scheduler)
Your Privacy Hero router uses Cloud Based router management which means you can access the router settings from anywhere on any device that has an internet connection. You can follow these steps while connected to your phone, other Wi-Fi network, or the Privacy Hero network.
The Bedtime settings feature allows users to schedule when internet access will be turned off for specific user profiles. All devices assigned to this profile will have these rules applied.
1. From any device that has a browser such as a computer, smartphone, or tablet visit app.privacyhero.com

2. Enter your Privacy Hero account email and password. Click Login.

If you have not created your Privacy Hero account yet please follow these instructions.
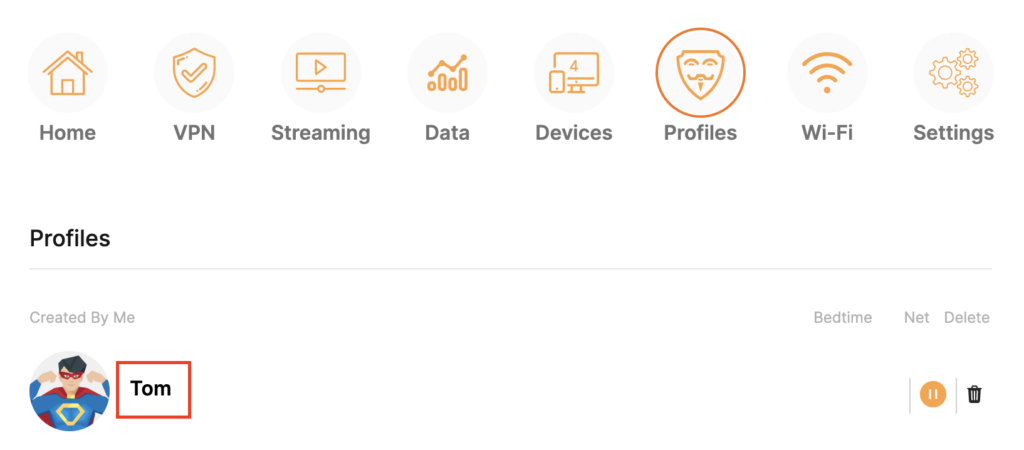
3. Click the Profiles symbol.

4. Click the name of the User Profile.

5. Click Schoolnights or Weekends depending on which you need to set rules for.

6. Select the time that you want the Internet to turn off and the days you want this rule to apply to. Click Save.

7. Set the Bedtime toggle to On.

How to Access Your AsusWRT FlashRouter Settings
This quick guide will walk you through connecting to your AsusWRT FlashRouter and logging into the admin settings page. You’ll use either WiFi or an Ethernet cable, then access the router dashboard through your browser.
Step 1. Connect Your Device to the Router
You can connect by WiFi or Ethernet:
- WiFi: Look for a network name like FlashRouter24 or FlashRouter50.
- The WiFi password is set to: Wireless#[First 5 characters of your router’s MAC]
- Example: If your MAC is CC28A07E70A8, your WiFi password is Wireless#CC28A.
- ⚠️ Be sure to capitalize the “W” in Wireless.
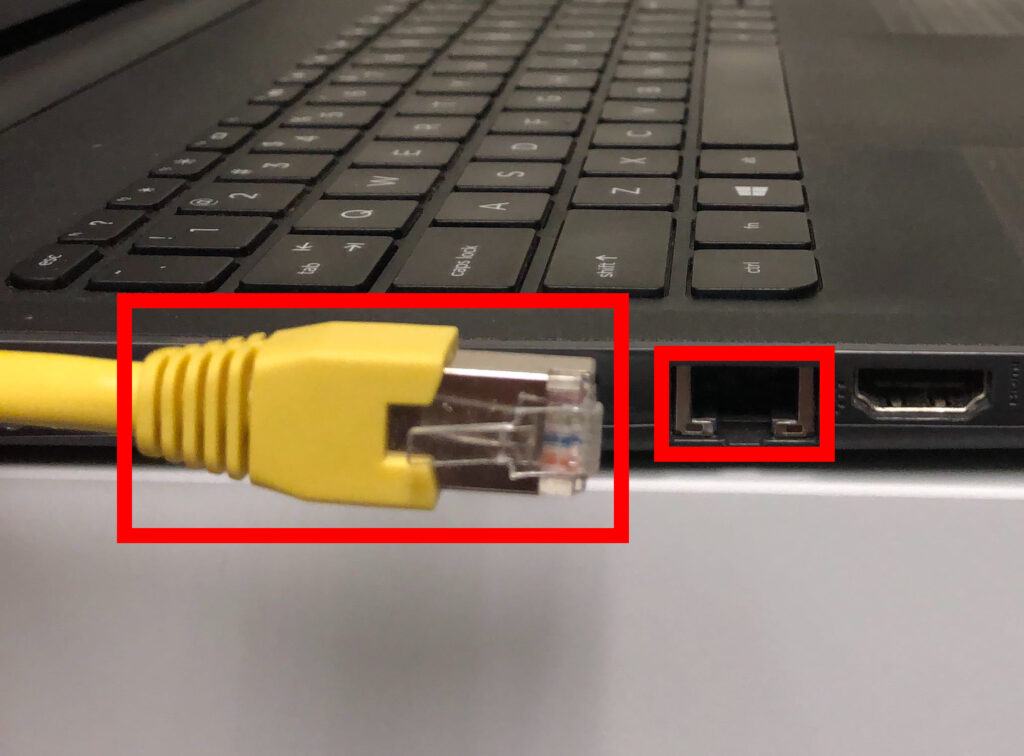
- Ethernet: Plug an Ethernet cable from your computer into one of the router’s LAN ports (usually marked or color-coded differently from the WAN port).
👉 Pro tip: Disconnect from any other WiFi networks during setup.
Step 2. Open the Router Login Page
- Open a web browser (Chrome, Safari, Firefox, Edge).
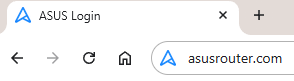
- In the address bar, type: 192.168.50.1 or go to asusrouter.com
- Press Enter.

This is the local router dashboard address (not a public website). If the page doesn’t load:
- Try a different browser.
- Clear your cache.
- Ensure your device is connected to the FlashRouter network.
Step 3. Log In to the Router Settings
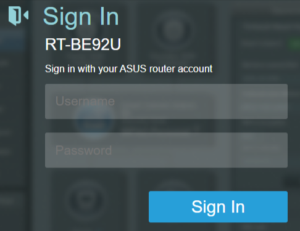
- Default username:
flashrouter - Default password:
asuswrt-admin1 - Some older devices may use:
asuswrt1orasuswrt - This is the factory default for AsusWRT routers shipped by FlashRouters.

💡 Once you’re in, you can update your admin password in the settings for extra security.
Next Steps
Now that you’ve accessed your AsusWRT FlashRouter, you can:
- Set up your VPN service
- Customize your WiFi name and password
- Adjust device controls and security settings
Check our support library for your specific VPN setup guide.
Privacy Hero Safe Surf
Your Privacy Hero router uses Cloud Based router management which means you can access the router settings from anywhere on any device that has an internet connection. You can follow these steps while connected to your phone, other Wi-Fi network, or the Privacy Hero network.
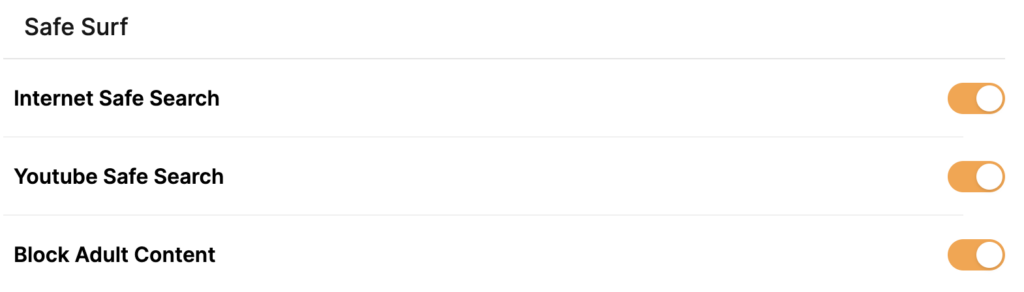
The Safe Surf settings feature allows users to block inappropriate search results, YouTube videos, and adult content. All devices assigned to this profile will have these rules applied.
1. From any device that has a browser such as a computer, smartphone, or tablet visit app.privacyhero.com

2. Enter your Privacy Hero account email and password. Click Login.

If you have not created your Privacy Hero account yet please follow these instructions.
3. Click the Profiles symbol.

4. Click the name of the User Profile.

5. Toggle On the settings for Internet Safe Search, YouTube Safe Search, and Block Adult Content as needed.

PrivateInternetAccess (PIA) AsusWRT OpenVPN Setup
Preparing for PIA AsusWRT Setup
Download your PIA .ovpn file
If you are not already a PIA user Sign Up Now.
1. Log in to your account on the PIA website.

2. Successfully log in with your account information then go to PIA’s OpenVPN Config Generator.
3. On the OpenVPN Configuration Generator select the following:
OpenVPN Version: OpenVPN 2.4 or newer
Select Platform: Linux
Select Region: Choose the server location you’d like to connect to
Select Port: Typically we recommend UDP/1198 RSA-2048 AES-128-CBC SHA1 for best speeds but feel free to select the one you want to use.
4. Click Generate to download the .ovpn file. Do not open this file once it is downloaded.

AsusWRT Router Setup for PIA
Login to AsusWRT firmware settings in a browser on any computer or smart device connected to the AsusWRT FlashRouter’s network.
1. Navigate to the VPN tab.

2. Navigate to the VPN Fusion tab.

3. Click Add profile.

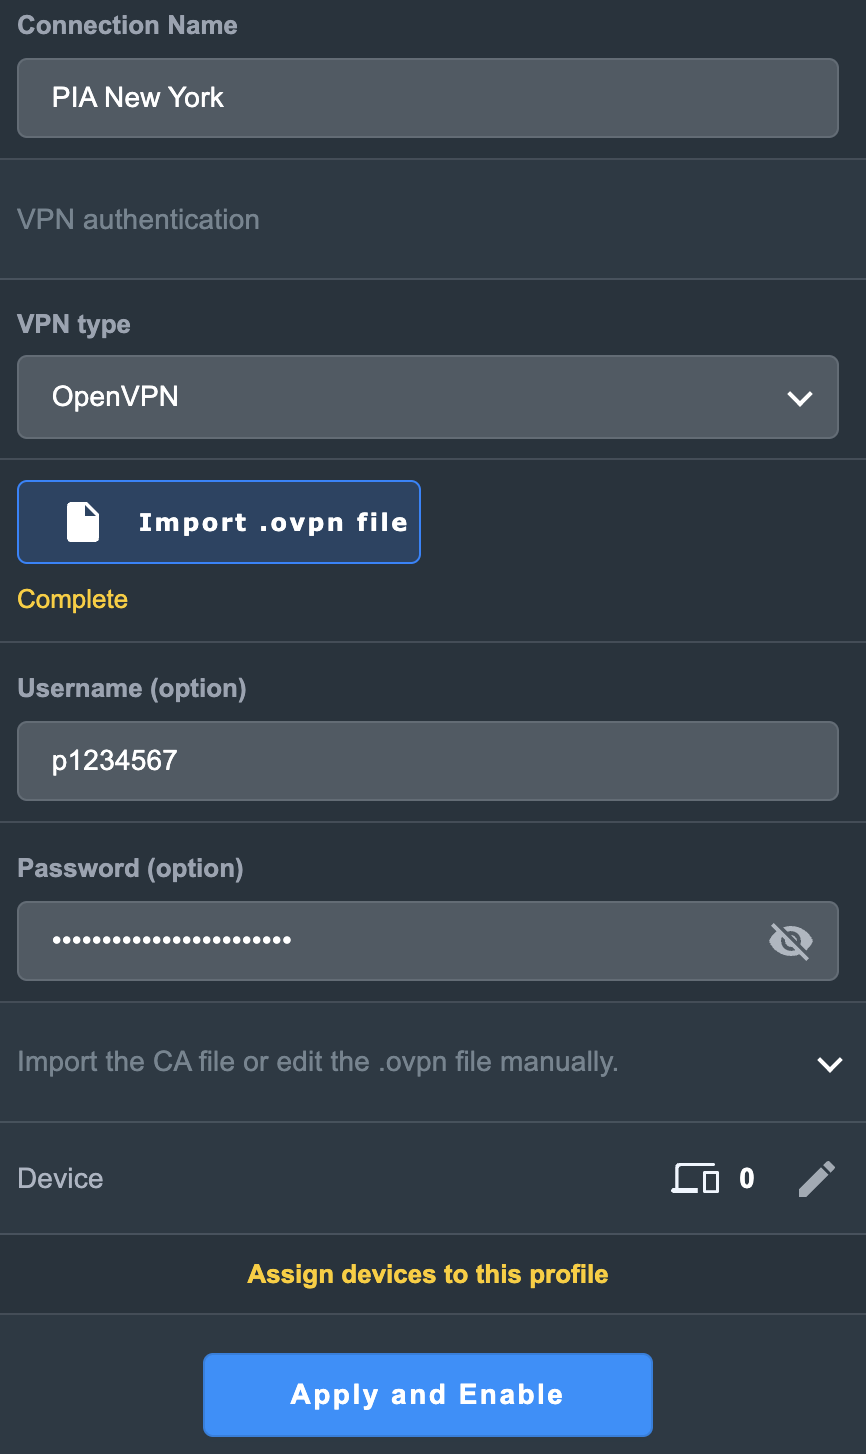
4. In the Connection Name field enter in the name you’d like to use for this OpenVPN Client profile. We typically advise entering in the location or server number here. Our example server was in New York so I have entered in PIA New York.
5. In the VPN Type dropdown select OpenVPN.
6. Click Import .ovpn file and select the .ovpn file you downloaded earlier. Then click Upload.
7. In the Username and Password fields paste in the PIA username and password you use to successfully login to your PIA website account.
8. Click Apply and Enable at the bottom of the page.

If you only want certain devices to connect to the OpenVPN Client profile you are setting up instead of all the devices connected to the FlashRouter’s network click into the profile and disable Apply to all devices. Then click Devices and select the devices that you want to connect to VPN.


9. At the top of the page set the Service State toggle to ON to activate the VPN connection.

Verify a successful PIA connection
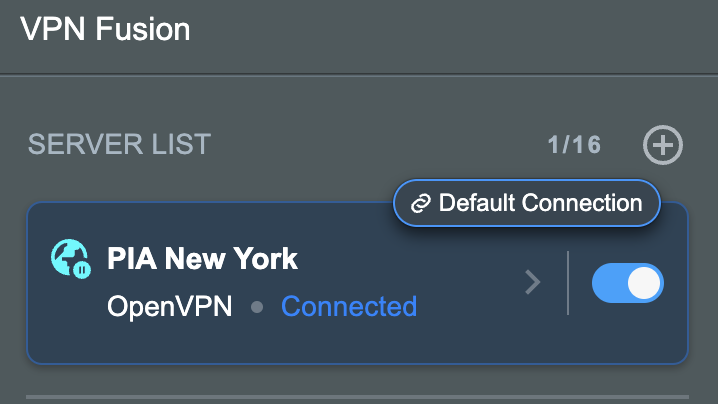
- You should now see a CONNECTED message.
- Visit PIA’s IP Check to verify your new IP address and virtual location.
In some cases you may notice that the location is not showing the same location as the server you have input in your router settings; this is because geo tracking tools are often tricked by VPN connections. As long as you see an IP address that is not the same as your normal Internet IP address then you are indeed connected to PIA.
How to change the PIA server
- Follow the steps at the top of the page to obtain a new .ovpn file.
- Then proceed with the settings same as initial setup.
Why can’t I access router settings?
Be sure to first try the preset details to access your FlashRouter’s settings.
First time setup
Are you connected to the FlashRouter's network?
In order to access the FlashRouter’s settings you need to be connected to the FlashRouter’s network via ethernet or WiFi.
It is possible that if you are connected to the FlashRouter’s network you device might have static IP settings from a previous connection preventing it from being read correctly. Check your device’s static IP settings before proceeding.
Is your FlashRouter wired correctly?
Your FlashRouter should be wired as detailed in our Connect FlashRouter to the Internet setup.
A common mistake is to connect from your modem or other router to a LAN/numbered port of the FlashRouter instead of the WAN/Internet port of the FlashRouter as it should be. Doing so results in no access to the FlashRouter’s settings.
Lost access
How to find you FlashRouter's Local IP Address?
It is possible that your Local IP Address was changed at some point. Your Local IP Address is the address that you can access the FlashRouter’s settings with. We recommend finding the Local IP Address of the FlashRouter.
Was your FlashRouter reset?
If your FlashRouter is showing a local IP Address of 192.168.1.1 and you are seeing ‘dd-wrt’ as an available network in your wireless networks, your FlashRouter was reset. Reconfigure your FlashRouter.
Keep in mind that seeing a Local IP Address of 192.168.1.1 can also mean your are wired incorrectly and the router has not been reset. Be sure to check your wireless networks for ‘dd-wrt’. If the FlashRouter’s wireless network name appears as it was set then your FlashRouter was not reset and you should see the above section.
Tried updating firmware
Why can't I access my FlashRouter after a firmware upgrade?
When performing a firmware upgrade there is a dropdown that has Don’t Reset or Reset to Default settings as options.
If you accidentally selected Reset to Default settings you will need to reconfigure your FlashRouter.
If you had Don’t Reset selected and are still unable to connect to the FlashRouter’s network after a firmware upgrade, first make sure you are connected to the FlashRouter’s network as WiFi can disconnect during an upgrade, and then Reboot the FlashRouter.