• Skip to primary navigation
  • Skip to main content
  • Skip to primary sidebar
  • Skip to footer

FlashRouters Support Portal

Prioritizing Privacy

  • SETUP GUIDES
    • Privacy Hero Router Setup Guide
    • ASUS-WRT Router Setup Guide
    • AsusWRT-Merlin Router Setup Guide
    • DD-WRT Router Setup Guide
    • ExpressVPN Router Setup Guide
    • GL.iNet Router Setup Guide
    • Roqos Core Router Setup Guide
  • TROUBLESHOOTING
    • Router Access
    • WiFi Connectivity
    • Internet Connection Issues
    • General VPN Issues
    • DD-WRT Firmware
    • TeamViewer Remote Support
  • FAQs
    • Router FAQs
    • VPN FAQs
    • Warranty and Returns FAQs
    • Sales FAQs
    • Shipping FAQs
    • Service Plan FAQs
  • Show Search
Hide Search

Search Results for: identify font from image

ExpressVPN Setup on Roqos

Dave · Dec 16, 2021 ·

Preparing for ExpressVPN Setup

Obtain your ExpressVPN login information

If you are not already an ExpressVPN user Sign Up Now.

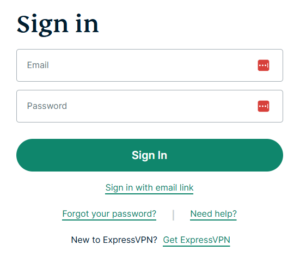
1. Visit ExpressVPN’s website login page.

ExpressVPN login page

2. Successfully log in with your account information. Select More.

ExpressVPN account page

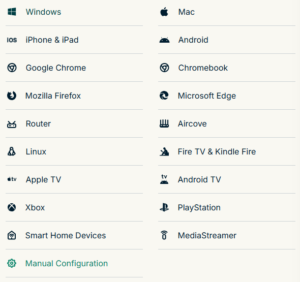
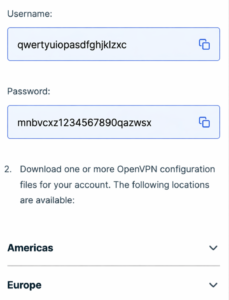
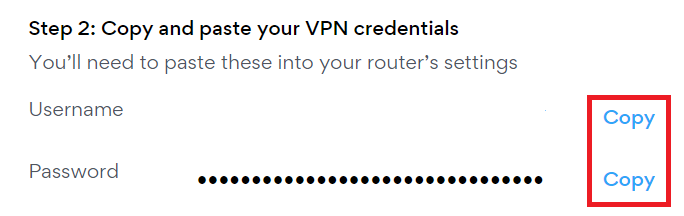
3. Select Manual Configuration and copy the Username and Password that are displayed on the right hand side of the screen.

ExpressVPN Manual Configuration
ExpressVPN username and password

Connecting to ExpressVPN in the Roqos Core

Access the Roqos Core UI

1. Login to the Roqos Core web app in a browser on any computer or smart device.

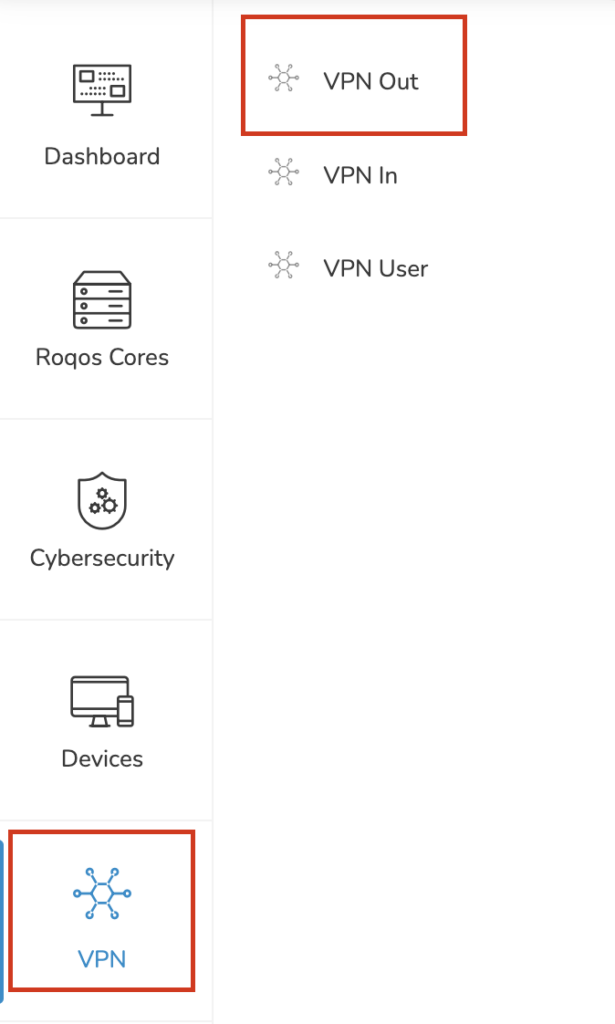
2. Click VPN from the navigation menu and then click VPN OUT.

Roqos VPN Out

3. Click the Connect to box.

Roqos VPN Connect to

4. In the Connect dropdown choose 3rd Party VPN Providers and for the VPN Provider dropdown choose ExpressVPN.

Roqos ExpressVPN select provider

Enter your ExpressVPN information

In the Username and Password field enter the ExpressVPN OpenVPN Username and Password that you obtained.

ExpressVPN on FlashRouters Privacy App Setup - OpenVPN Specific Username and Password
Roqos VPN ExpressVPN enter username and password

Select an ExpressVPN server

Click the Server dropdown and type in or scroll to your preferred server location.

Roqos VPN ExpressVPN select server

Click the Save button.

Roqos VPN Save Settings

Connect to ExpressVPN

Once you click Save you will be returned to the VPN OUT menu.

Click the Connect button to start your ExpressVPN connection. Please be patient as the router connects your entire network through VPN.

Roqos VPN Connect

Assign devices to connect to VPN

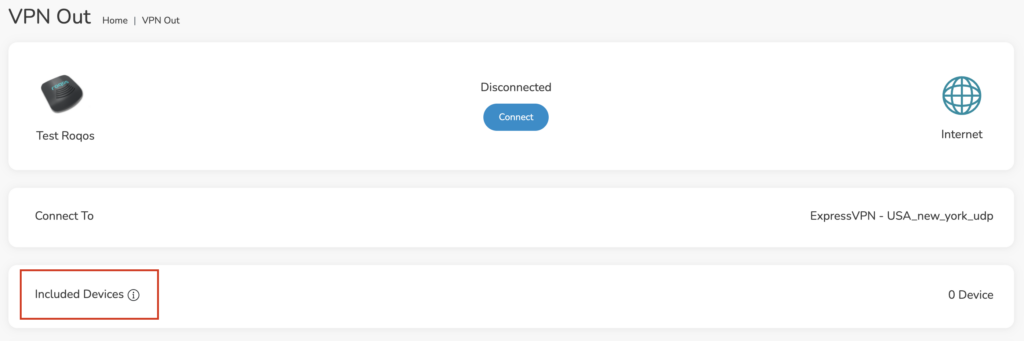
By default there are no devices assigned to the VPN tunnel. Click Included Devices. From this page you can choose if all devices should connect to ExpressVPN or only certain devices.

Roqos VPN Included Devices

From the dropdown select Include all devices if you want every device that connects to the Roqos to connect to ExpressVPN. Then click Save.

Roqos VPN Include All Devices

If you only want specific devices to connect to ExpressVPN while others bypass the VPN connection select Include selected devices from the dropdown and then toggle the sliders for the devices you want connected to VPN. Click Save.

Roqos VPN Include Selected devices

Verify a successful ExpressVPN connection

Make sure you are connected to the Roqos network via WiFi or ethernet connection on your device.

Visit ExpressVPN’s IP Check to verify your new IP Address and virtual location.

You should see Connected at the top of the page underneath ExpressVPN.

Connect to a different ExpressVPN server

To change your server click Disconnect on the VPN OUT page then return to the Connect To section to select a new server from the Server dropdown and click Save. Now click Connect once again on the VPN Out page.

Disconnect from ExpressVPN

To disconnect from ExpressVPN click the Disconnect button.

TROUBLESHOOTING

Still having issues? Visit the FR Privacy App Troubleshooting section.

Troubleshoot Here

NordVPN Setup for GL.iNet Routers

TeamFlashRouters · May 29, 2023 ·

You can connect to NordVPN on your GL.iNet router using NordLynx, OpenVPN, or a Dedicated IP.

Quick Options

  • NordLynx: Choose your preferred city or country from NordVPN’s server list

  • OpenVPN: Choose your preferred city or country from NordVPN’s server list.

  • Dedicated IP (optional): Enter your unique configuration file if you’ve been assigned a static NordVPN IP.

:point_right: If you are not already a NordVPN user Sign Up Now.

NordVPN NordLynx Setup for GLiNet

1. Get your NordVPN Access Token for NordLynx connections. Log in to your NordVPN account and select NordVPN from your list of Services.

NordVPN Services Section

2. At the bottom of the page click Get Access token and you will receive a code via email. Enter this code to proceed.

NordVPN Access Token

3. After you enter the email code select Generate new token and set it to Doesn’t expire. Copy this token.

NordVPN Generate new token
NordVPN Copy Token

4. Login to GL.iNet firmware settings (usually 192.168.8.1) in a browser on any computer or smart device connected to the GL.iNet FlashRouter’s network.

View our guide for more instructions on how to access GL.iNet firmware settings.

5. Navigate to the VPN tab and select Wireguard Client then choose NordVPN. Enter your Token then click Save and Continue

GLiNet NordVPN Wireguard

6. Select your preferred server locations, and click Apply.

GLiNet Select NordLynx Servers

7. Start a connection by clicking the 3 dots (…) > Start next to your chosen server.

GLiNet NordLynx Start

8. A green dot confirms success. You can also switch between Global Mode or Policy Mode for routing in the VPN Dashboard.

GLiNet NordLynx Connected

NordVPN OpenVPN Setup for GLiNet

1. Get your NordVPN manual service credentials for OpenVPN connections. Log in to your NordVPN account and select NordVPN from your list of Services.

NordVPN Service

2. At the bottom of the page in the Manual Setup section click Setup NordVPN manually then under the Configuration section go to Service credentials. Click Verify email to receive a code via email and enter the code to view and copy your credentials.

NordVPN Manual OpenVPN
NordVPN Service Credentials

3. Login to GL.iNet firmware settings (usually 192.168.8.1) in a browser on any computer or smart device connected to the GL.iNet FlashRouter’s network.

View our guide for more instructions on how to access GL.iNet firmware settings.

4. Navigate to the VPN tab and select OpenVPN Client.

GL.iNet VPN OpenVPN Client

5. Select the NordVPN group, enter your manual credentials, then click Save Credentials & Get Servers.

GL.iNet NordVPN Group
GL.iNet NordVPN Login

6. Choose UDP (recommended), select your preferred server locations, and click Apply.

GL.iNet NordVPN select servers

7. Start a connection by clicking the 3 dots (…) > Start next to your chosen server.

NordVPN GLiNet OpenVPN Start

8. A green dot confirms success. You can also switch between Global Mode or Policy Mode for routing in the VPN Dashboard.

GLiNet VPN Dashboard

NordVPN Dedicated IP Setup for GLiNet

1. Get your NordVPN manual service credentials for OpenVPN connections. Log in to your NordVPN account and select NordVPN from your list of Services.

NordVPN Service

2. At the bottom of the page in the Manual Setup section click Setup NordVPN manually then under the Configuration section go to Service credentials. Click Verify email to receive a code via email and enter the code to view and copy your credentials.

NordVPN Manual OpenVPN
NordVPN Service Credentials

3. Login to GL.iNet firmware settings (usually 192.168.8.1) in a browser on any computer or smart device connected to the GL.iNet FlashRouter’s network.

View our guide for more instructions on how to access GL.iNet firmware settings.

4. Navigate to the VPN tab and select OpenVPN Client.

GLiNet VPN Dashboard

5. Download your Dedicated IP configuration file from the NordVPN website.

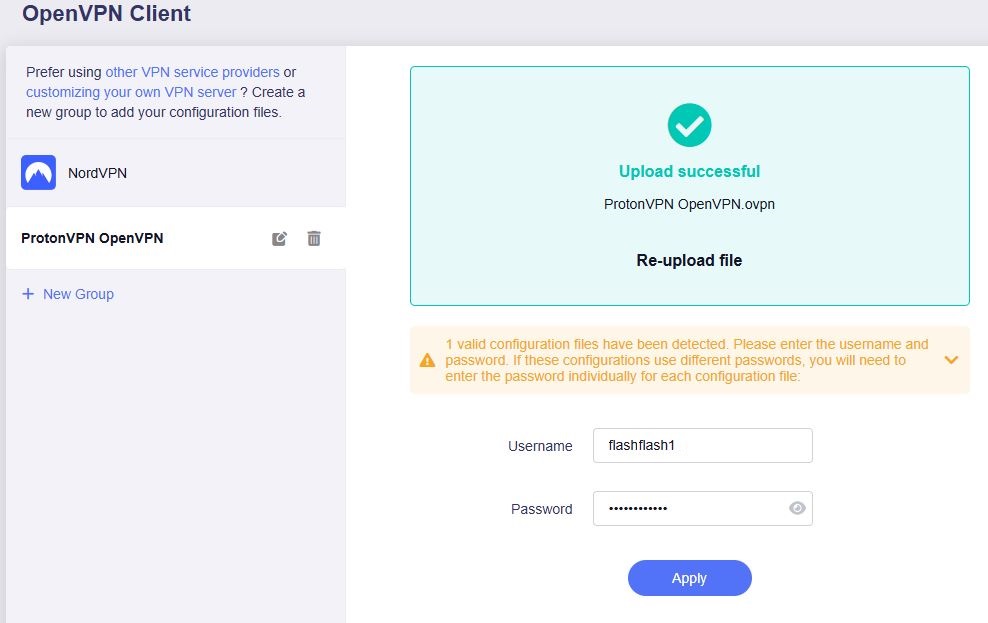
6. Click +New Group and name your NordVPN Dedicated IP connection, then upload the configuration file, enter your manual service credentials and click Apply.

GLiNet Dedicated IP Address Load

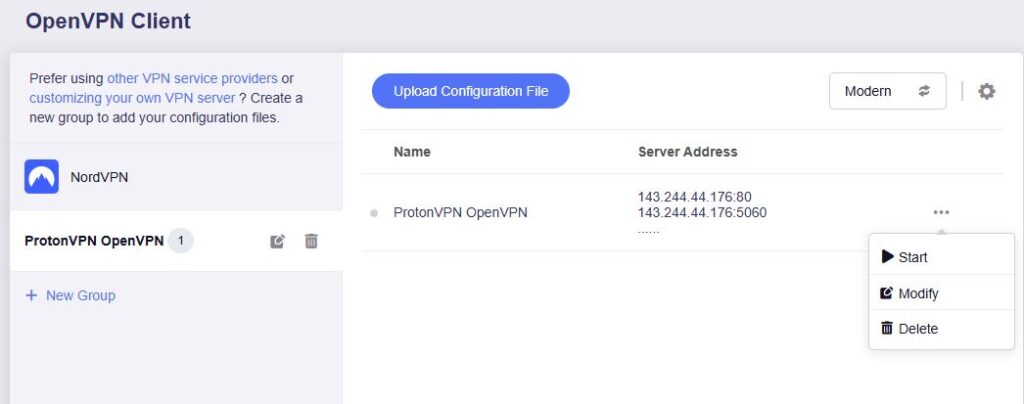
7. Start a connection by clicking the 3 dots (…) > Start next to your chosen server.

GLiNet Dedicated IP

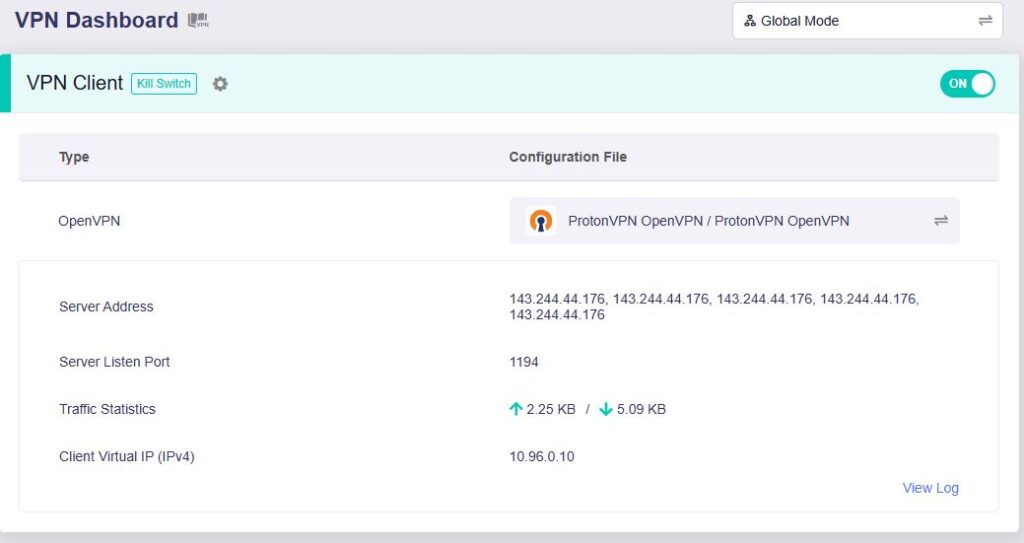
8. A green dot confirms success. You can also switch between Global Mode or Policy Mode for routing in the VPN Dashboard.

GLiNet Dedicated IP Dashboard
  1. You should now see information appear in the Server Address, Server Listen Port, Traffic Statistics, and Client Virtual IP areas.
  2. Visit NordVPN’s IP Check to verify your new IP address and virtual location.

In some cases you may notice that the location is not showing the same location as the server you have input in your router settings; this is because geo tracking tools are often tricked by VPN connections. As long as you see an IP address that is not the same as your normal Internet IP address then you are indeed connected to NordVPN.

🚫📱Do not run NordVPN apps on devices connected to your NordVPN router. Using the app at the same time as the router VPN may cause conflicts and connection issues.

Still having issues?

Feel free to submit a ticket and we will get back to you as soon as possible.

NordVPN Setup for AsusWRT Firmware Routers

TeamFlashRouters · Oct 15, 2025 ·

You can connect to NordVPN on your AsusWRT router using NordLynx, OpenVPN, or a Dedicated IP.

Quick Options

  • NordLynx: Choose your preferred country from NordVPN’s server list

  • OpenVPN: Choose your preferred city or country from NordVPN’s server list.

  • Dedicated IP (optional): Enter your unique configuration file if you’ve been assigned a static NordVPN IP.

:point_right: If you are not already a NordVPN user Sign Up Now.

NordVPN NordLynx Setup for AsusWRT

1. Get your NordVPN Access Token for NordLynx connections. Log in to your NordVPN account and select NordVPN from your list of Services.

NordVPN Services Section

2. At the bottom of the page click Get Access token and you will receive a code via email. Enter this code to proceed.

NordVPN Access Token

3. After you enter the email code select Generate new token and set it to Doesn’t expire. Copy this token.

NordVPN Generate new token
NordVPN Copy Token

4. Log in to the Asus settings page by connecting to the Asus router’s WiFi (or wired LAN) on your computer. Then, enter 192.168.50.1 or asusrouter.com in the browser.

View our guide for more instructions on how to access AsusWRT firmware settings.

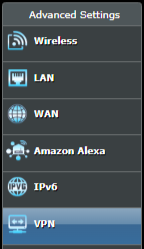
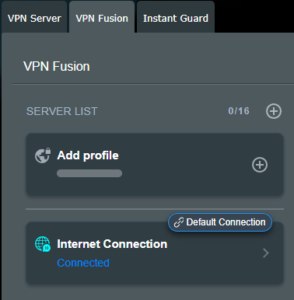
5. Navigate to the VPN tab and then select the VPN Fusion tab, then click Add profile.

Click the VPN Button
VPN Fusion Add Profile

6. Fill in your NordVPN information, then click Apply and Enable.

  • Connection Name: Choose a name for your NordLynx connection.
  • VPN Type: Select NordVPN
  • Region: Choose your VPN server location
  • Token: Copy and paste your NordVPN token.
Apply NordLynx Settings

6. You should now see the Profile say Connected, indicating that the NordVPN server is successfully connected to your router!

VPN Fusion NordLynx Connected

7. The VPN connection is automatically set to Apply to all devices.

If you only want certain devices to connect to the VPN, then turn off the VPN connection and switch off Apply to all devices.

Now click the pencil next to the Device section and select the devices (computer, phone, etc.) that you want to connect to VPN. Click OK and then click Apply all settings.

Apply VPN by Device

NordVPN OpenVPN Setup for AsusWRT

1. Get your NordVPN manual service credentials for OpenVPN connections. Log in to your NordVPN account and select NordVPN from your list of Services.

NordVPN Services Section

2. At the bottom of the page in the Manual Setup section click Setup NordVPN manually then under the Configuration section go to Service credentials. Click Verify email to receive a code via email and enter the code to view and copy your credentials.

NordVPN Manual OpenVPN
NordVPN Service Credentials

3. Click on OpenVPN config files. Search and download the server file for your preferred NordVPN location, UDP is recommended.

NordVPN OpenVPN Config Files

4. Log in to the Asus settings page by connecting to the Asus router’s WiFi (or wired LAN) on your computer. Then, enter 192.168.50.1 or asusrouter.com in the browser.

View our guide for more instructions on how to access AsusWRT firmware settings.

5. Navigate to the VPN tab and then click on the VPN Fusion tab, then click Add Profile.

Click the VPN Button
VPN Fusion Add Profile

6. Fill in your NordVPN information then click Apply and Enable.

  • Connection Name: Choose a name for your NordVPN OpenVPN connection.
  • VPN Type: Select OpenVPN
  • Import .ovpn File: Upload the OpenVPN file that you downloaded.
  • Username and Password: Copy and paste your NordVPN manual service credentials.
AsusWRT OpenVPN Connection File Load

6. You should now see the Profile say Connected, indicating that the NordVPN server is successfully connected to your router!

Asus NordVPN Connected

7. The VPN connection is automatically set to Apply to all devices.

If you only want certain devices to connect to the VPN, then turn off the VPN connection and switch off Apply to all devices.

Now click the pencil next to the Device section and select the devices (computer, phone, etc.) that you want to connect to VPN. Click OK and then click Apply all settings.

Apply VPN by Device

NordVPN Dedicated IP Setup for AsusWRT

1. Get your NordVPN manual service credentials for OpenVPN connections. Log in to your NordVPN account and select NordVPN from your list of Services.

NordVPN Services Section

2. At the bottom of the page in the Manual Setup section click Setup NordVPN manually then under the Configuration section go to Service credentials. Click Verify email to receive a code via email and enter the code to view and copy your credentials.

NordVPN Manual OpenVPN
NordVPN Service Credentials

3. Now download your Dedicated IP configuration file from the NordVPN website.

4. Log in to the Asus settings page by connecting to the Asus router’s WiFi (or wired LAN) on your computer. Then, enter 192.168.50.1 or asusrouter.com in the browser.

View our guide for more instructions on how to access AsusWRT firmware settings.

5. Navigate to the VPN tab then click on the VPN Fusion tab, then click Add Profile.

Click the VPN Button
VPN Fusion Add Profile

6. Fill in your NordVPN information then click Apply and Enable.

  • Connection Name: Choose a name for your NordVPN Dedicated IP connection.
  • VPN Type: Select OpenVPN
  • Import .ovpn File: Upload the Dedicated IP OpenVPN file that you downloaded.
  • Username and Password: Copy and paste your NordVPN manual service credentials.
AsusWRT OpenVPN Connection File Load

6. You should now see the Profile say Connected, indicating that the NordVPN server is successfully connected to your router!

Asus NordVPN Connected

7. The VPN connection is automatically set to Apply to all devices.

If you only want certain devices to connect to the VPN, then turn off the VPN connection and switch off Apply to all devices.

Now click the pencil next to the Device section and select the devices (computer, phone, etc.) that you want to connect to VPN. Click OK and then click Apply all settings.

Apply VPN by Device
  1. Connect your devices to the Asus router network and visit the NordVPN website, at the top it should display Your Status: Protected.
  2. Visit NordVPN’s IP Check to verify your new IP address and virtual location.

🚫📱Do not run NordVPN apps on devices connected to your NordVPN router. Using the app at the same time as the router VPN may cause conflicts and connection issues.

Still having issues?

Feel free to submit a ticket and we will get back to you as soon as possible.

NordVPN Setup on Roqos

TeamFlashRouters · Dec 24, 2021 ·

Preparing for NordVPN Setup

Obtain your NordVPN manual Username and Password

If you are not already a NordVPN user Sign Up Now.

1. Log in to your account on the NordVPN website.

NordVPN login

2. Click NordVPN on the left hand side and then click Setup NordVPN manually.

NordVPN setup manually

3. Enter in the verification code that was sent to your email.

NordVPN verify code

4. Copy and paste your NordVPN manual username and password to a secure location. This is the username and password you will enter into the router settings to connect to NordVPN.

NordVPN credentials

Connecting to NordVPN in the Roqos Core

Access the Roqos Core UI

1. Login to the Roqos Core web app in a browser on any computer or smart device.

2. Click VPN from the navigation menu and then click VPN OUT.

Roqos VPN Out

3. Click the Connect to box.

Roqos NordVPN Connect to

4. In the Connect dropdown choose 3rd Party VPN Providers and for the VPN Provider dropdown choose NordVPN.

Roqos NordVPN select provider

Enter your NordVPN information

In the Username and Password field enter the NordVPN OpenVPN Username and Password that you obtained.

NordVPN credentials
Roqos NordVPN enter username and password

Select a NordVPN server

Navigate to NordVPN server recommendation page. Click Recommended server and select the country you want to connect to and note the server number that appears.

Click the Location dropdown and type in or scroll to the preferred server country.

Roqos NordVPN Select Location

Click the Server dropdown and type in or scroll to the server number that was recommended. Select the UDP version of the server.

Roqos NordVPN select server number

Click the Save button.

Roqos NordVPN Save Settings

Connect to NordVPN

Once you click Save you will be returned to the VPN OUT menu.

Click the Connect button to start your NordVPN connection. Please be patient as the router connects your entire network through VPN.

Roqos VPN Connect

Assign devices to connect to VPN

By default there are no devices assigned to the VPN tunnel. Click Included Devices. From this page you can choose if all devices should connect to NordVPN or only certain devices.

Roqos NordVPN Included Devices

From the dropdown select Include all devices if you want every device that connects to the Roqos to connect to NordVPN. Then click Save.

Roqos VPN Include All Devices

If you only want specific devices to connect to NordVPN while others bypass the VPN connection select Include selected devices from the dropdown and then toggle the sliders for the devices you want connected to VPN. Click Save.

Roqos VPN Include Selected devices

Verify a successful NordVPN connection

Make sure you are connected to the Roqos network via WiFi or ethernet connection on your device.

Visit NordVPN’s website to verify your new IP Address and Protected Status at the top of the page.

You should see Connected at the top of the page underneath NordVPN.

Connect to a different NordVPN server

To change your server click Disconnect on the VPN OUT page then return to the Connect To section to select a new server from the Server dropdown and click Save. Now click Connect once again on the VPN Out page.

Disconnect from NordVPN

To disconnect from NordVPN click the Disconnect button.

TROUBLESHOOTING

Still having issues? Visit the FR Privacy App Troubleshooting section.

Troubleshoot Here

PrivateInternetAccess (PIA) Setup on Roqos

TeamFlashRouters · Dec 24, 2021 ·

Preparing for PIA Setup

Obtain your PIA login information

If you are not already an PIA user Sign Up Now.

1. Visit PIA’s website login page.

PIA login

2. Successfully log in with your account information.

Connecting to PIA in the Roqos Core

Access the Roqos Core UI

1. Login to the Roqos Core web app in a browser on any computer or smart device.

2. Click VPN from the navigation menu and then click VPN OUT.

Roqos VPN Out

3. Click the Connect to box.

Roqos PIA Connect to

4. In the Connect dropdown choose 3rd Party VPN Providers and for the VPN Provider dropdown choose Private_Internet_Access.

Roqos PIA select provider

Enter your PIA information

In the Username and Password field enter the PIA Username and Password that you logged in with.

Roqos PIA enter username and password

Select a PIA server

Click the Server dropdown and type in or scroll to your preferred server location.

Roqos PIA server select

Click the Save button.

Roqos PIA Save Settings

Connect to PIA

Once you click Save you will be returned to the VPN OUT menu.

Click the Connect button to start your PIA connection. Please be patient as the router connects your entire network through VPN.

Roqos VPN Connect

Assign devices to connect to VPN

By default there are no devices assigned to the VPN tunnel. Click Included Devices. From this page you can choose if all devices should connect to PIA or only certain devices.

Roqos PIA Included Devices

From the dropdown select Include all devices if you want every device that connects to the Roqos to connect to PIA. Then click Save.

Roqos VPN Include All Devices

If you only want specific devices to connect to PIA while others bypass the VPN connection select Include selected devices from the dropdown and then toggle the sliders for the devices you want connected to VPN. Click Save.

Roqos VPN Include Selected devices

Verify a successful PIA connection

Make sure you are connected to the Roqos network via WiFi or ethernet connection on your device.

Visit PIA’s IP Check to verify your new IP Address and virtual location.

You should see Connected at the top of the page underneath Private_Internet_Access.

Connect to a different PIA server

To change your server click Disconnect on the VPN OUT page then return to the Connect To section to select a new server from the Server dropdown and click Save. Now click Connect once again on the VPN Out page.

Disconnect from PIA

To disconnect from PIA click the Disconnect button.

TROUBLESHOOTING

Still having issues? Visit the FR Privacy App Troubleshooting section.

Troubleshoot Here

Windscribe WireGuard Setup

TeamFlashRouters · Oct 13, 2021 ·

Preparing for Windscribe WireGuard Setup

Verify your Windscribe login information

If you are not already a Windscribe user Sign Up Now.

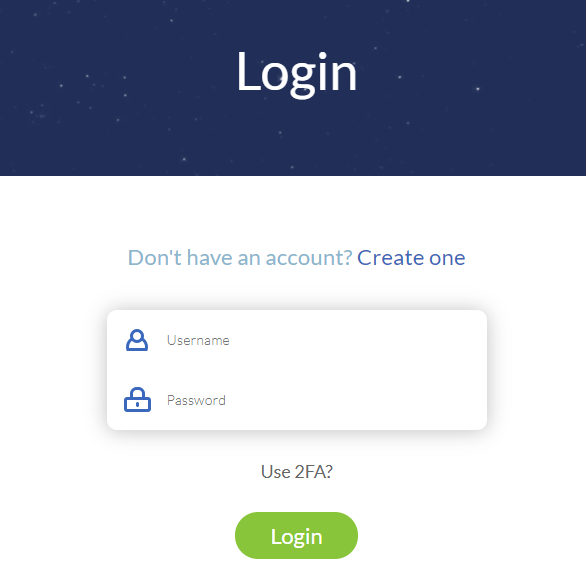
Log in to your account on the Windscribe website.
Windscribe Login

Go to the Windscribe WireGuard config generator page and select the Server location and Port you would like to use. Click Download Config.
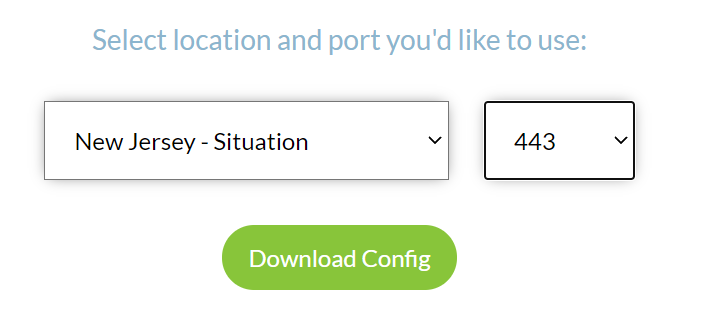
Windscribe Wireguard select server location

Open the .conf file that is downloaded using Notepad in Windows or TextEdit in Mac.

DD-WRT Router Setup for Windscribe WireGuard

Navigate to Setup > Tunnels 

Enter Winscribe WireGuard settings

1. Click Add Tunnel.

2. Set Tunnel to Enable.
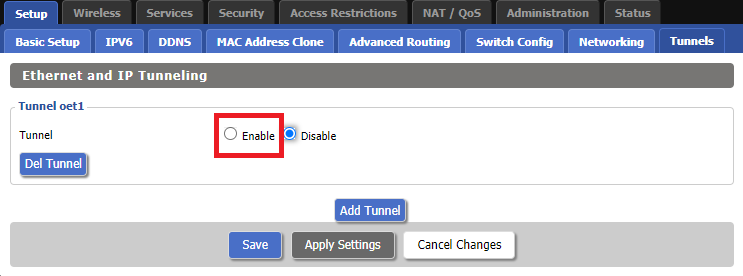
Setup - Tunnel - Enable Tunnel

3. Select Wireguard from the dropdown.
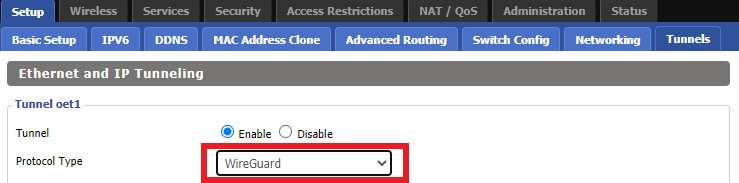
Setup - Tunnel - Select Wireguard

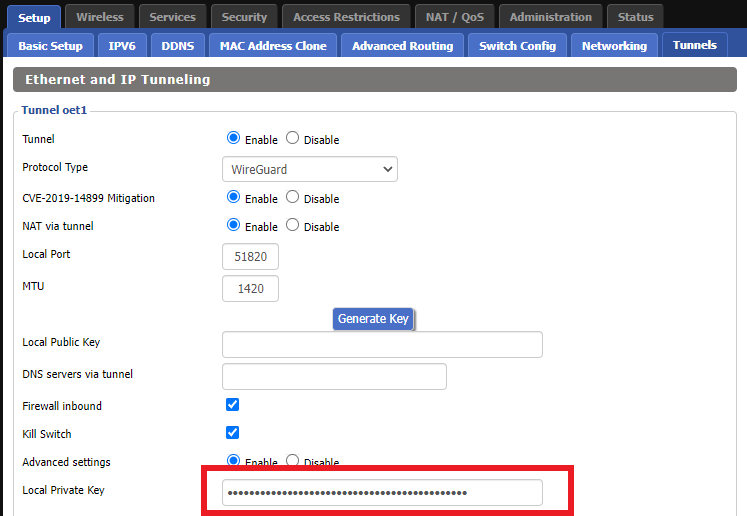
3. Set CVE-2019-14899 Mitigation to Enable. Set NAT via Tunnel to Enable. Set Local Port to 51820. Set MTU to 1420.
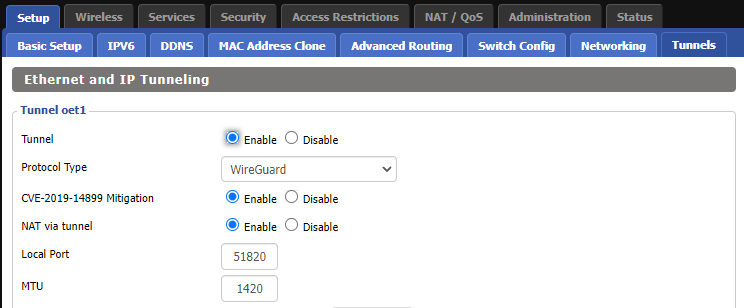
Windscribe Wireguard Basic Settings

4. Check Firewall inbound and Kill Switch.
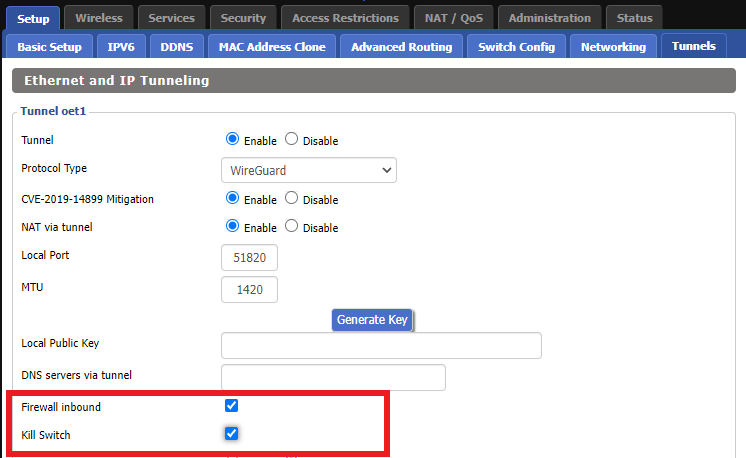
Windscribe Wireguard enable Firewall and Kill Switch

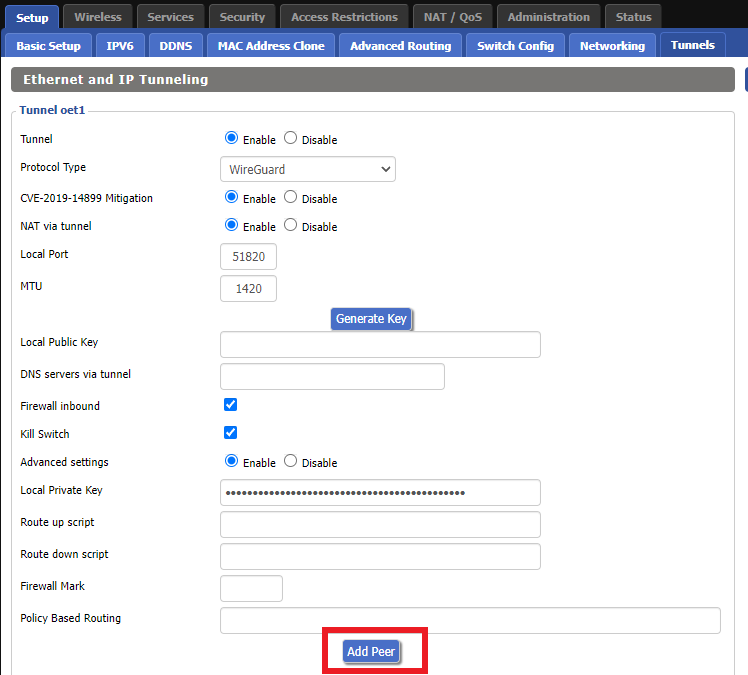
5. Set Advanced Settings to Enable and copy the PrivateKey from the .conf file and paste it into the Local Private Key field.
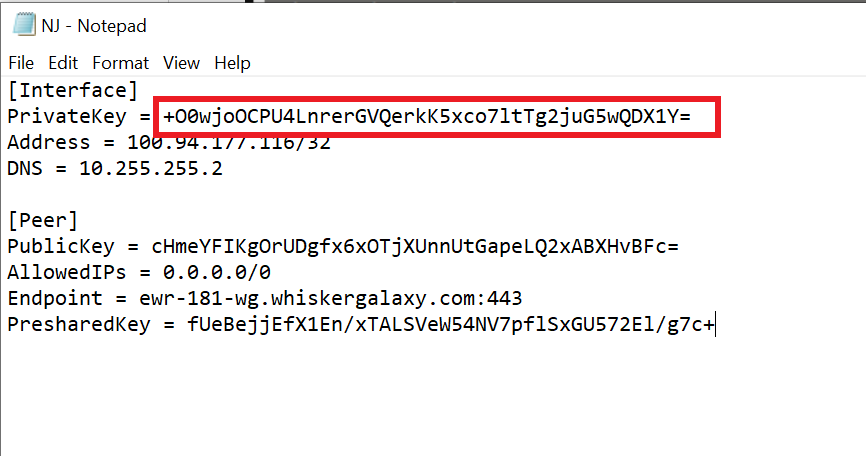
Windscribe Wireguard conf file PrivateKey
Windscribe Wireguard Local Private Key

6. Click Add Peer.

Windscribe Wireguard Add Peer

7. Set Peer Tunnel IP to 0.0.0.0. Set Peer Tunnel DNS to the DNS found in the .conf file.
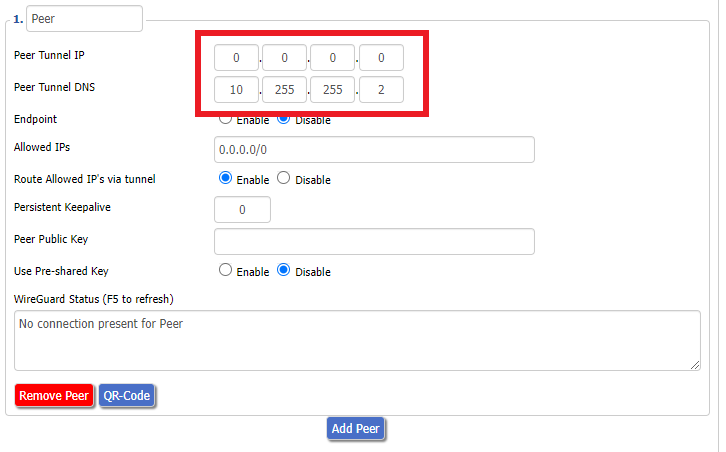
Windscribe Wireguard Peer Tunnel IP and DNS

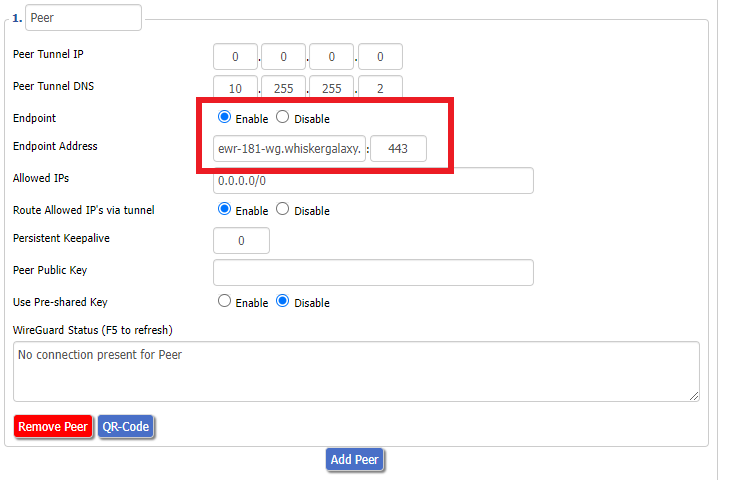
8. Set Endpoint to Enable. Copy and Paste the Endpoint from the .conf file and paste it into the Endpoint Address field. Enter the same Port that appears next to the Endpoint.
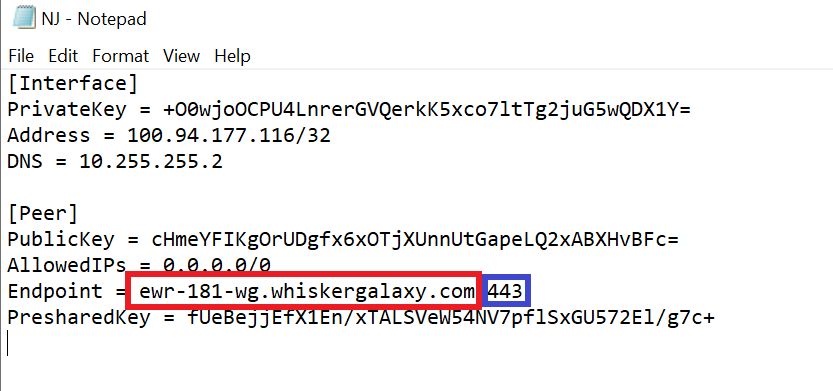
Windscribe Wireguard conf file Endpoint
Windscribe Wireguard paste Endpoint

9. Leave Allowed IPs as 0.0.0.0/0. Set Router Allowed IP’s via tunnel to Enable. Set Persistent Keep Alive to 25.
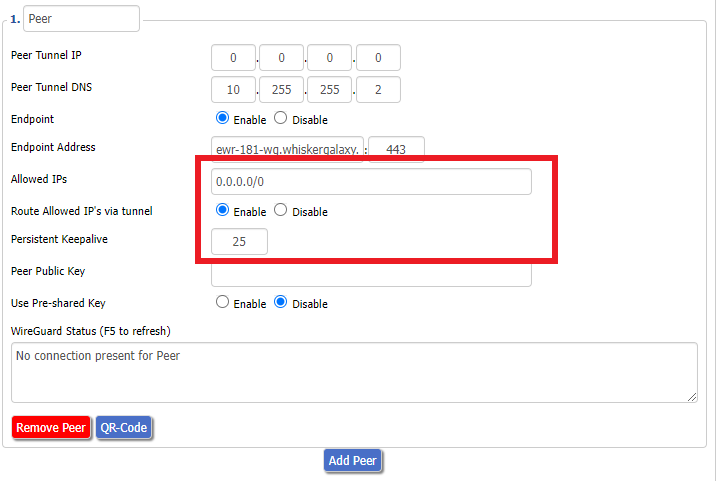
Windscribe Wireguard settings

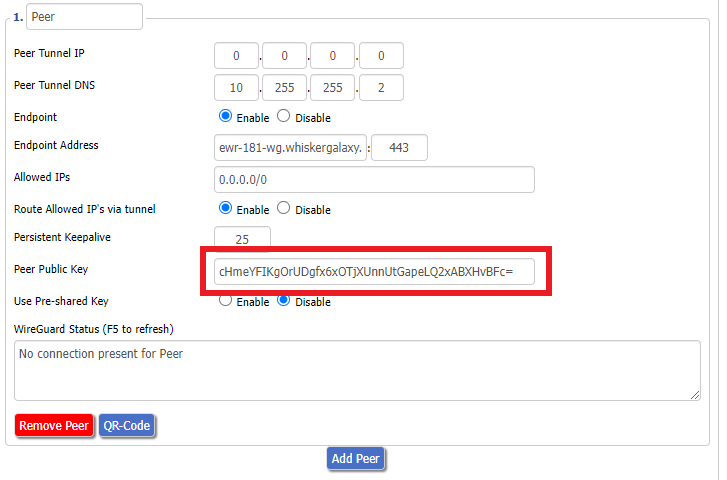
10. Copy and Paste the PublicKey from the .conf file and paste it into the Peer Public Key field.
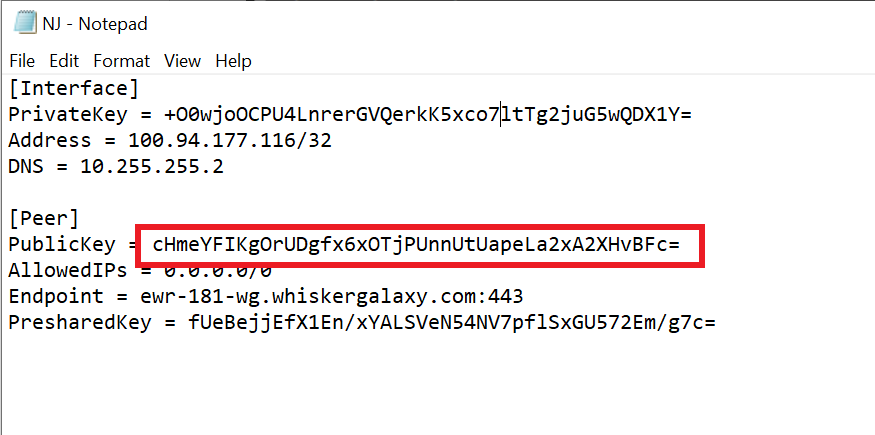
Windscribe Wireguard conf file PublicKey
Windscribe Wireguard Peer Public Key

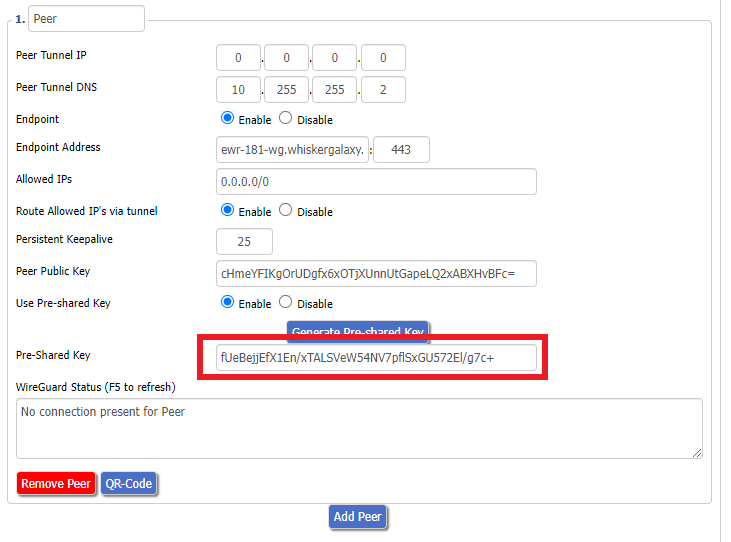
11. Set Use Pre-shared Key to Enable. Copy and Paste the Presharedkey from the .conf file and paste it into the Pre-Shared Key field.
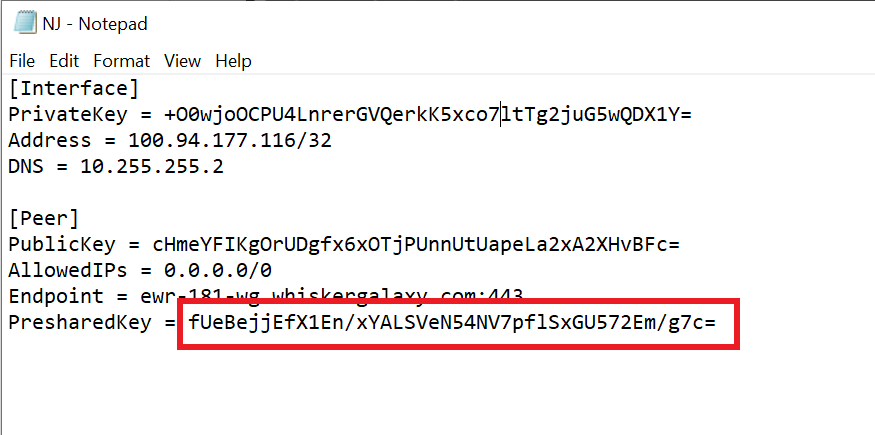
Windscribe Wireguard conf file PresharedKey
Windscribe Wireguard Pre-shared Key

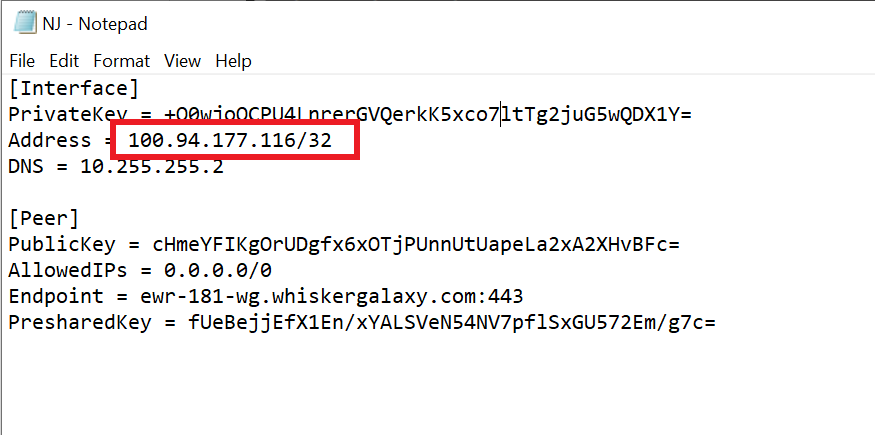
12. Copy the Address from the .conf file and paste it into the IP Addresses/Netmask(CIDR) field.
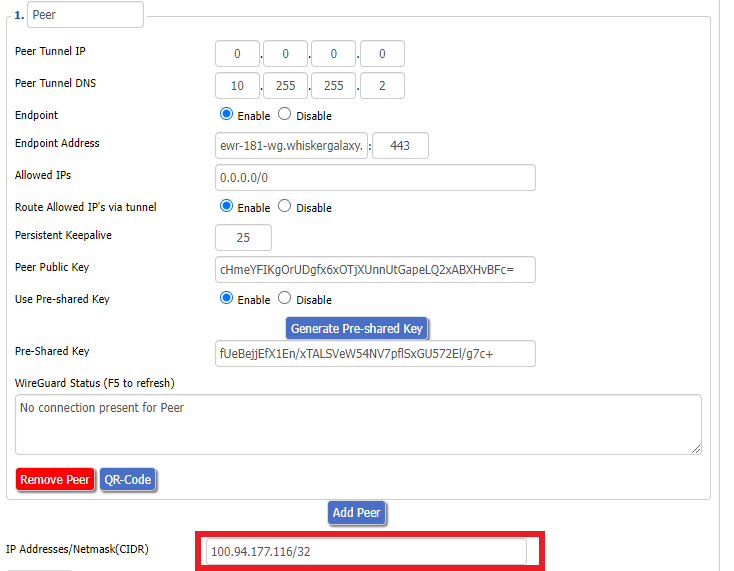
Windscribe Wireguard IP Address
Windscribe Wireguard conf file Address

Certain DD-WRT builds will show two separate fields here: IP Address and Subnet Mask. If that is the case set the IP Address field to the Address without the /32 added and set the Subnet Mask to 255.255.255.255

21. At the bottom of the page click Save and then click Apply Settings.

Verify a successful Winscribe connection

Navigate to Setup > Tunnels

  1. You should Endpoint, Latest handshake, and Transfer in the WireGuard status area.
  2. Visit whatismyipaddress.com to verify your status as using Winscribe.

Back up your settings

Navigate to Administration > Backup

  1. Click the Backup button.
  2. A file named nvrambak.bin will be saved to your computer.
  3. You can load nvrambak.bin to restore your settings in the event of a reset.

TROUBLESHOOTING

Still having issues? Visit the VPN Troubleshooting section.

Troubleshoot Here

Managing User Profiles on Roqos

Dave · Dec 16, 2021 ·

User Profiles allow you to organize your devices connected to the Roqos Core. This allow you to see a user profile’s usage history, set a schedule when devices are allowed to connect to the Internet, and filter out specific content such as explicit websites and games.

Login to Roqos Core UI web app in a browser on any computer or smart device.

Adding new User Profile

1. Click the navigation menu and select Users.

2. To add a new User Profile click Add User.

3. In the Name field enter the name for the User Profile. You can add an image for the User Profile here as well.

4. You will see a list of devices connected to the Roqos Core at the bottom of the page. Check the box of the devices that you would like to add to this User Profile. Then click Save.

Tracking Usage History

1. Click the User Profile that you want to review.

2. Select Usage History.

3. On the new page you can view usage by Top Visited, All Activity, and Activity Graph.

Schedule Pauses

1. Click the User Profile that you want to review.

2. Select Scheduled Pauses.

3. Click Add Schedule.

4. From here you can set the name of the schedule, the days that the schedule will be in effect, and if the schedule should be applied all day or during specific hours. Click Save.

Filters

1. Click the User Profile that you want to review.

2. Select Filters.

3. From here you can use the toggle to Block explicit websites and Block explicit search results.

4. In the Safe Youtube dropdown you can select None, Moderate, or Strict.

5. The Blocked Content area allows you to block specific services such as Games and Social Media.

6. Add specific websites to the Block Sites list if the above policies did not cover them.

7. Add specific websites to the Allowed Sites list if you want to block all websites except for a few.

Roqos Core Internet Setup and Activation

TeamFlashRouters · Mar 15, 2022 ·

Follow this article when you receive your new Roqos Core router to create your Roqos account, connect your Roqos to the Internet, and customize your network so it is ready to use.

Create your Roqos account

1. From any device that has a browser such as a computer, smartphone, or tablet visit login.roqos.com

Roqos Login URL

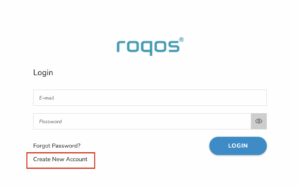
2. Select Create Account.

Roqos Create Account

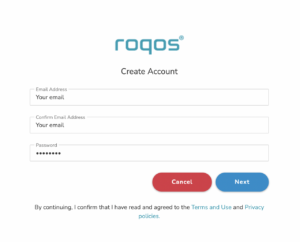
3. Enter the Email address and password you want to set for your Roqos account. This will be your login to the Roqos settings moving forward. Click Next.

Roqos Enter Email

4. Enter the name and phone number you want associated with your Roqos. Click Next.

Roqos Enter Name and Number

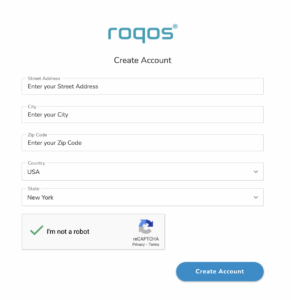
5. Enter the address where your Roqos is located. This section may require a CAPTCHA to be completed to authenticate you are human. Click Create Account.

Roqos Enter Address

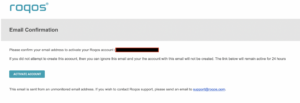
6. You have now created your Roqos account. In a new tab proceed to open the email from Roqos and click the Activate account button.

Roqos email activation

Activate your Roqos Internet

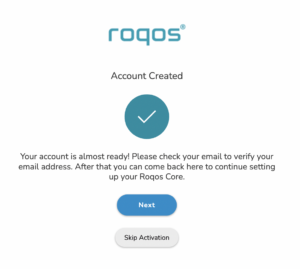
1. From the Account created page click Next to begin the Internet Setup of the Roqos.

Roqos Account Created

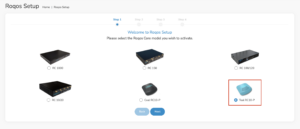
2. Select the Roqos model Teal RC10-P. Click Next.

Roqos Model

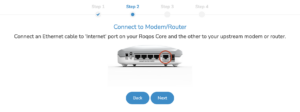
3. Connect the ethernet cable that came with your Roqos from the port labeled INTERNET on the back of your Roqos to an open ethernet port on your ISP Modem or other router in your network.

Roqos Wiring

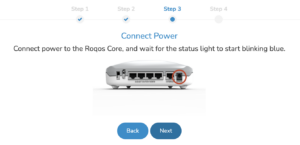
4. Then connect the power adapter that came with the Roqos to the back of the Roqos. Wait for the light on the Roqos to begin blinking blue. Once your see the blinking blue lights on the Roqos click Next.

Roqos Power On

If your Roqos lights does not begin blinking blue after a long while please see the steps in this article and contact us.

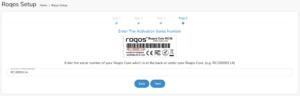
5. Enter in the Roqos serial number found on the bottom of the device exactly as it appears there. Click Next.

Roqos Activation Code

Setup your Roqos Network

1. Enter in a name that you would like to call the Roqos. This is just the Roqo’s device name and it is not the WiFi network name. Click Next.

Roqos Device Name

2. Select the Time Zone of your actual location from the dropdown. Click Next.

Roqos Time Zone

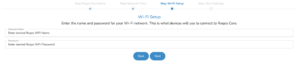
3. Set the WiFi name and password for the Roqos. The WiFi name should be unique and not a duplicate of an existing wireless network. This will be the name that appears in your wireless devices available network list and the password to join the devices to the network. Click Next.

Roqos Set WiFi Name and Password

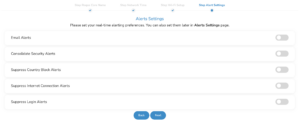
4. Select the custom alert settings as you best see fit using the toggle switches. We typically recommend having the first two toggles selected for Email Alerts and Consolidate Security Alerts. Click Next.

Begin connecting your devices to the Roqos network

You are now done setting up your Roqos to connect to the Internet and can begin joining your wireless devices to the Roqos network and exploring the Roqos Core Features.

Roqos Setup Done

TROUBLESHOOTING

Still having issues? Visit the VPN Troubleshooting section.

Troubleshoot Here

VPN FAQs

admin · Jan 29, 2019 ·

VPN FAQs

General VPN FAQ Answers

What is a VPN?

VPN is an acronym for ‘Virtual Private Network’, historically used by private organizations to seamlessly link geographically diverse locations via the Internet. A VPN ‘tunnels’ traffic between two devices by transmitting it over a secure network. There are also clearly identifiable benefits to individual Internet users accessing a VPN.

  • A VPN provides you with top-level security and privacy for all your Internet downloading, streaming and browsing. As long as you are signed into your VPN account, all data you transmit over the Internet is encrypted.
  • A VPN encrypts your device by hiding the IP address assigned by your Internet Service Provider (ISP) and replacing it with the IP address of your choosing from the list of server locations belonging to your VPN provider. This masks your identity when visiting sites that geo-restricted content, and helps you avoid devious local Internet marketing and advertising schemes that track you through your IP address.

Will a FlashRouter with a built-in VPN client speed up my connection?

FlashRouters are relatively new models that may enhance data transfers across your home network or extend the range of your Wireless signal. However, the speed at which you download or stream content can not exceed the speed of the connection you pay for through your ISP. Purchasing a FlashRouter or signing up for VPN service WILL NOT transform your regular connection into a high-speed broadband connection.

At the same time, if you do have a broadband connection, a FlashRouter with a VPN connection may slow down your transfer speeds due to the processor encrypting all of your data. In certain cases a FlashRouter with a VPN can also prevent throttling by an ISP of specific service like Netflix or Amazon Video.

Which VPN provider should I use?

Our routers have been tested to perform with many of the most popular VPN providers such as ExpressVPN, NordVPN, IPVanish, PrivateInternetAccess & CyberGhost among 50+ VPN providers so that subscribers can get the maximum benefit from their VPN service. If you prefer another provider, that is not an issue at all. You can still use a DD-WRT VPN FlashRouter with any VPN provider that offers DD-WRT router integration support. Contact our team for further information about using our routers with your VPN service of choice or if you need a VPN provider recommendation based on your location.

Should my FlashRouter replace my old router?

A FlashRouter will work as a standalone router by connecting your modem to its Wide Area Network (WAN) port, or using it in a Dual Router Network by connecting it to your existing router through a Local Area Network (LAN)/Ethernet port. Either way a FlashRouter can be configured to tunnel all traffic through the VPN server of your choosing.

If you would like to set up your Home Network so that some devices are being tunneled through a VPN server, and others are connecting to your Internet Service Provider (ISP) within your home country, then using your FlashRouter as an auxiliary device is recommended.

VPN Security FAQ Answers

Can I change my IP address to one in another country?

YES! The countries that you can change your IP address to depend on the offerings of your specific VPN providers. Prices and server locations vary across all VPN providers.

If you choose to purchase a FlashRouter then you will not have to install any VPN client software on your computer to change your IP address; the VPN will already be configured within the router. Therefore, any device you plug into this FlashRouter is automatically assigned the IP address of your selected VPN server.

When is my connection secure?

As long as the VPN account preset into your FlashRouter is active, any device that is connected to the Internet through this router has its network traffic encrypted, and IP address masked. With a FlashRouter you never have to physically login to your VPN account, as the settings have been stored in the router’s DD-WRT firmware.

Don’t worry though! If you are not at home, and using Wi-Fi in a public location, you can still use your VPN account on a laptop or mobile device through various other methods.

How can I be sure my connection is safe and encrypted?

In order to make sure that the connection on your FlashRouter is being rerouted appropriately through your VPN service, visit What is my IP address and make sure the location listed is the one you have chosen in your VPN settings, NOT your actual location.

If you wish, there is an Internet Kill Switch available as well for your router which will block the internet whenever you disconnect from VPN.

What VPN connection standards are supported on a FlashRouter?

Currently we support the OpenVPN protocol for VPN client connections. PPTP VPN has been deemed as insecure by the privacy community and so we no longer offer support for PPTP VPN connections.

Technical VPN FAQ Answers

What operating systems do you support?

A FlashRouter can be used with any operating system, be it Windows, Mac OS or Linux. A FlashRouter can also be used as a wireless access point for iPhones, iPads, and Android devices.

Our routers also work in conjunction with any other brand of router of ADSL or DSL modem/router combo from ISPs across the world.

Can I set up a VPN on a PS4, Xbox One, Kindle Fire, Roku, AppleTV or other devices without native VPN support?

THAT’S WHAT WE ARE HERE FOR!

If you purchase one of our FlashRouters loaded with DD-WRT firmware, you can run the client VPN connection from your router. Once you do this every device connected to the router will tunnel through the VPN.

Now you can stream content like Netflix, BBC iPlayer, Pandora Hulu, or Amazon Instant to your TV through any of these devices, instead of being constrained to streaming content on your computer!

If you need a recommendation for a VPN service with a specific streaming platform do not hesitate to contact our support team.

Wireless Guest Network Setup – Bridged (Advanced)

TeamFlashRouters · Jun 12, 2019 ·

If you would like to prevent visitors from connecting to your main WiFi network then you can create a Bridged Guest Network that will prevent access to the main router. This setup also allows you to create different rules for different WiFi SSID’s in your home ranging from QoS controls, access restrictions, VPN network segmentation, and more.

Preparing for Wireless Guest Network Setup

If you have a Dual-band or Tri-Band router you can setup a WiFi Guest Network, creating a separate VLAN (virtual local area network) for your visitors, or in order to segment your VPN networks on any band you like. We recommend using the 2.4GHz network for your DD-WRT Guest Wireless Network so it is compatible with the most possible WiFi devices. Setting up a guest network for visitors in your home allows you to keep them off of your main WiFi network.

We recommend performing this setup while connected to the FlashRouter via ethernet cable. If your computer does not have an ethernet port and you must proceed via wireless connection to the FlashRouter pay attention to the wireless connection as you may need to rejoin the FlashRouter’s network after making changes.

DD-WRT Router Setup for Wireless Guest Network

Enter Wireless settings

Navigate to Wireless > Basic Settings

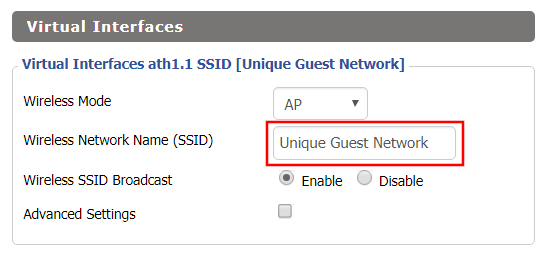
Bridged Wireless Guest Network Setup on DD-WRT FlashRouter – Setting SSID for Guest Network
  1. Under the 2.4GHz or 5GHz Interface click the Add button.
  2. In the Wireless Network Name (SSID) field enter the unique network name of the guest network.
  3. Click Save.

Enter Wireless Security settings

Navigate to Wireless > Wireless Security

Bridged Wireless Guest Network Setup on DD-WRT FlashRouter – Setting Guest Network Wireless Password
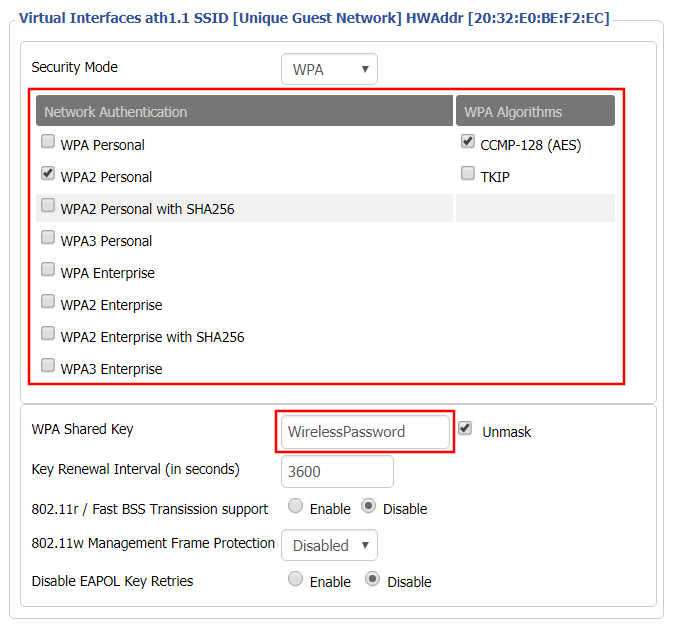
  1. Duplicate the wireless security settings that are set for the other bands for the newly created virtual interface.
  2. Click Apply Settings.
  3. Reboot your router.

Create Bridge

Navigate to Setup > Networking

Bridged Wireless Guest Network Setup on DD-WRT FlashRouter – Create Bridge
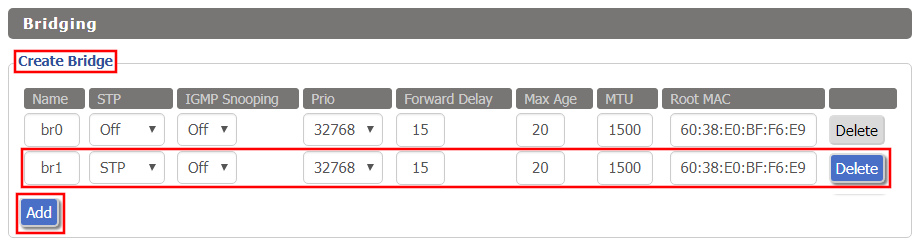
  1. Under Create Bridge click Add. Name the newly created bridge br1.
  2. Click Apply Settings

Assign to Bridge

Bridged Wireless Guest Network Setup on DD-WRT FlashRouter – Assign Bridge
  1. Under Assign to Bridge select br1 from the Assignment dropdown. Select wl1.1 or ath1.1 depending on your router model.
  2. Click Apply Settings.

Depending on the router model and WiFi band you are using, the wireless interfaces will be labelled differently.

This setting can be labelled wl1.1, ath0.1, wl2.1, and so on. Make sure when you get up to the bridge assignment section that you are using the correct guest network Virtual Interface.

Network Configuration br1

Bridged Wireless Guest Network Setup on DD-WRT FlashRouter – Configure Bridge DNS Redirection
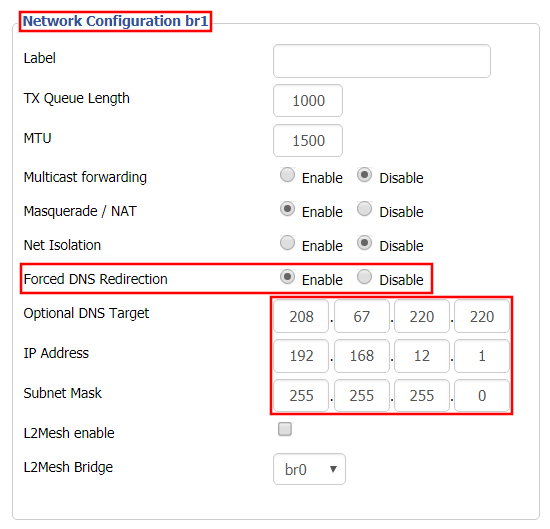
  1. Under Network Configuration br1 select Enable for Forced DNS Redirection.
  2. Set Optional DNS Target to 208.67.220.220
  3. Set IP Address to 192.168.12.1
  4. Set Subnet Mask to 255.255.255.0
  5. Click Apply Settings.

Multiple DHCP Server

Bridged Wireless Guest Network Setup on DD-WRT FlashRouter – Configure DHCP Server Settings
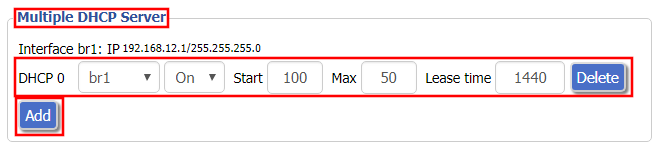
  1. Under Multiple DHCP Server click Add.
  2. Set the first dropdown to br1.
  3. Click Apply Settings.
  4. Reboot your router.

Firewall Rules

Navigate to Administration > Commands

  1. Copy the fire script from below and paste into the empty Commands shell
  2. Click Save Firewall.
  3. Wait one minute and then reboot your router.

iptables -I FORWARD -i br1 -o br0 -m state –state NEW -j DROP
iptables -I FORWARD -i br0 -o br1 -m state –state NEW -j DROP
iptables -I INPUT -i br1 -p tcp –dport telnet -j REJECT –reject-with tcp-reset
iptables -I INPUT -i br1 -p tcp –dport ssh -j REJECT –reject-with tcp-reset
iptables -I INPUT -i br1 -p tcp –dport www -j REJECT –reject-with tcp-reset
iptables -I INPUT -i br1 -p tcp –dport https -j REJECT –reject-with tcp-reset

You will now have a working Bridged Guest Network on the FlashRouter. By inputting the firewall rules, this will also prevent any guests on your network from gaining access to your router settings.

Back up your settings

Navigate to Administration > Backup

  1. Click the Backup button.
  2. A file named nvrambak.bin will be saved to your computer.
  3. You can load nvrambak.bin to restore your settings in the event of a reset.

TROUBLESHOOTING

Still having issues? Visit our Troubleshooting section to diagnose common problems here.

Troubleshoot Here

Change server locations on ExpressVPN/Aircove firmware

TeamFlashRouters · May 12, 2022 ·

You can change the ExpressVPN server location at any time so your Internet connection appears as originating from that location.

1. Connect to the FlashRouter’s network via ethernet cable or wireless.

2. Open your web browser and enter expressvpnrouter.com or 192.168.132.1 in the URL.

ExpressVPNrouter.com
192.168.132.1

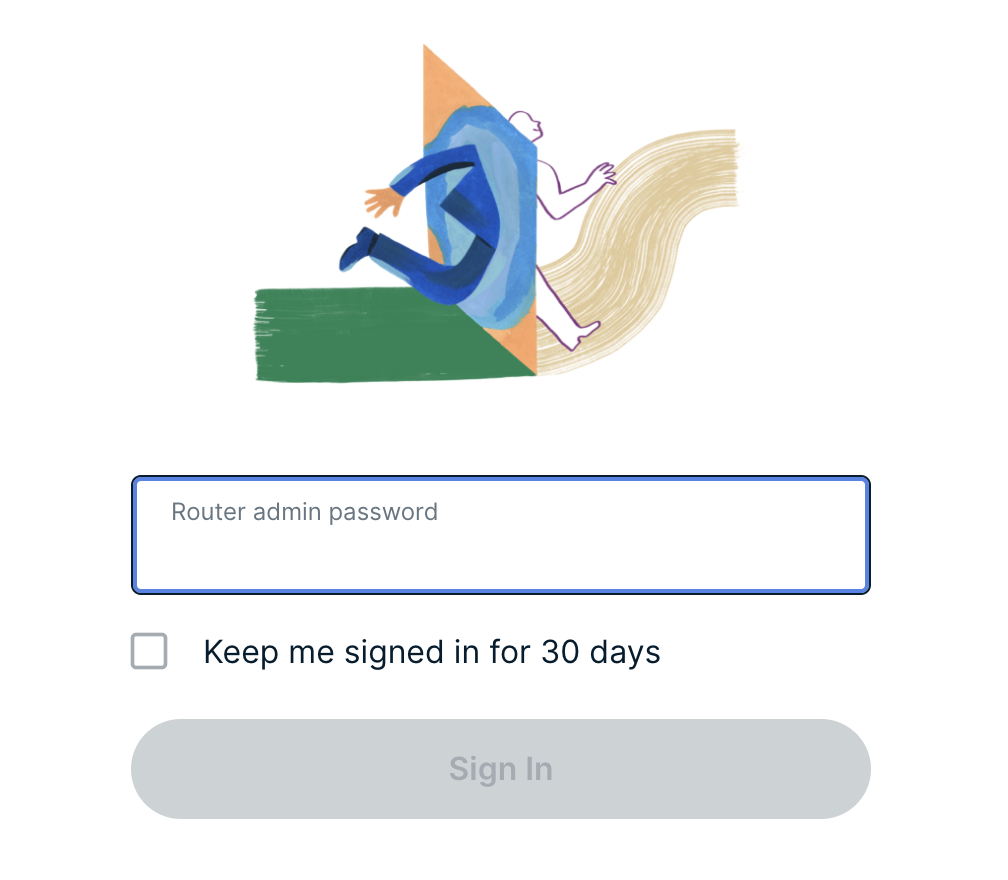
3. Login with your ExpressVPN FlashRouter admin password.

ExpressVPN Router admin login

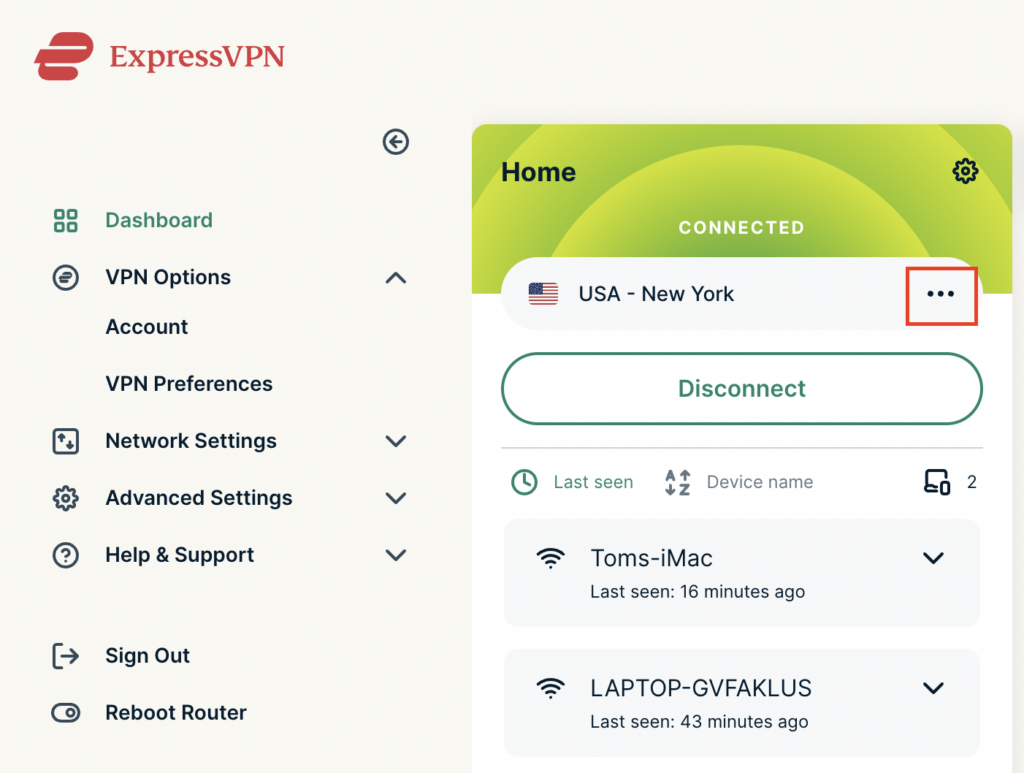
4. Click the three dots next to the server location.

ExpressVPN change server 1

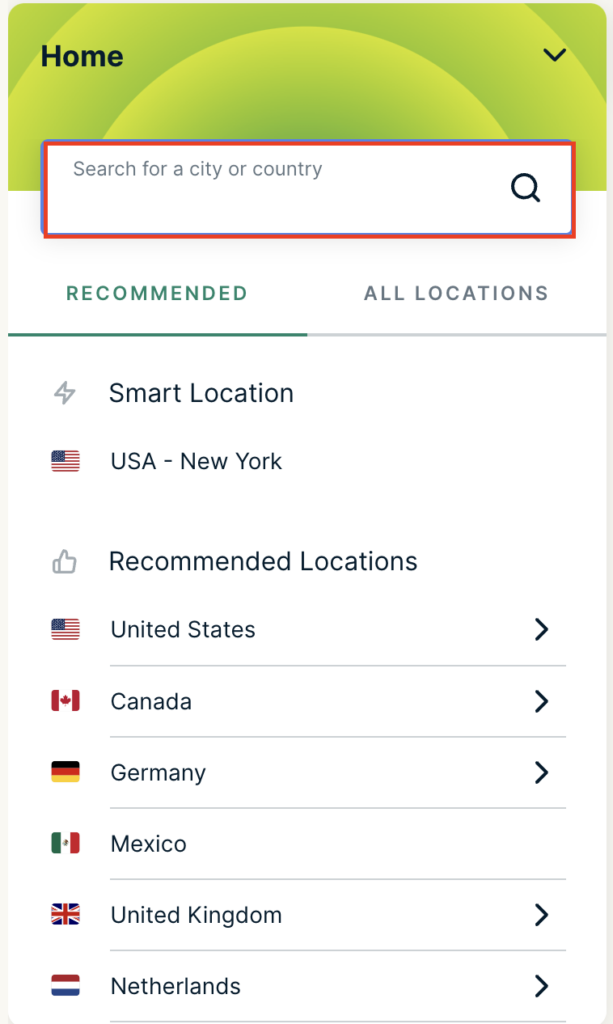
5. Type in the location you want to connect to. Click the new location to connect.

ExpressVPN change server 2

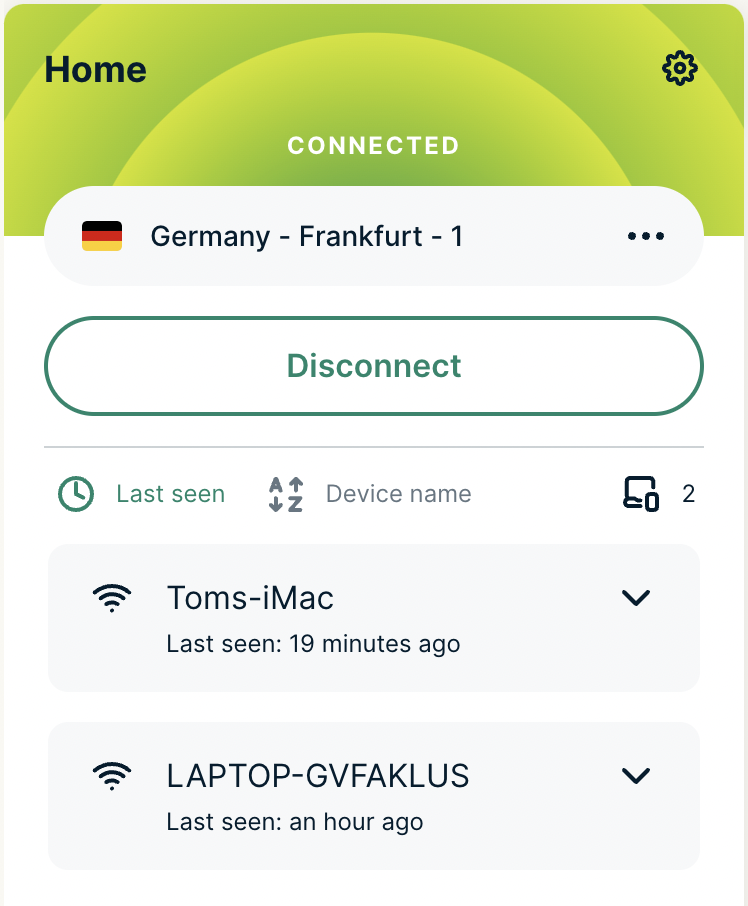
6. You are now connected to the new server location.

ExpressVPN change server 3

ExpressVPN offers servers in locations all over the world. Typically for speeds it is best to connect to the server closest to your actual location. Clicking a country instead of a city will connect you to the ideal city in that country.

Why are devices disconnecting from Wireless?

Dave · Apr 29, 2019 ·

If you find that wireless devices are routinely disconnecting from the FlashRouter’s network we recommend that you do the following:

  1. On the Wireless > Wireless Security page make sure you are using WPA2 Personal / AES as your security settings.
  2. On the Wireless > Basic Settings adjust the Wireless Channel. Select a wireless channel with less interference. The best channel will depend on your wireless environment.

Privacy Hero Activation and Setup

TeamFlashRouters · Feb 8, 2023 ·

Follow this article when you receive your new Privacy Hero router to create your Privacy Hero account, connect your Privacy Hero to the Internet, and customize your network so it is ready to use.

Your Privacy Hero router uses Cloud Based router management which means you can access the router settings from anywhere on any device that has an internet connection. You can follow these steps while connected to your phone or your other Wi-Fi network.

Create your Privacy Hero account

1. From any device that has a browser such as a computer, smartphone, or tablet visit app.privacyhero.com

App.PrivacyHero.com

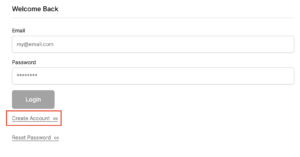
2. Select Create Account.

Privacy Hero create Account

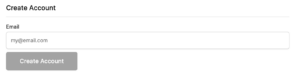
3. Enter the Email address you want to set for your Privacy Hero account. This will be your login to the Privacy Hero settings moving forward. Click Create Account.

Privacy Hero Enter account email

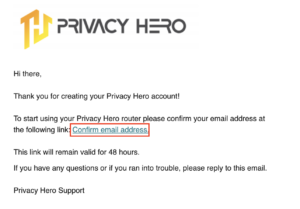
4. Go to your Email inbox and check for an email from Privacy Hero and click the Confirm email address link. This email may be in your Promotions or Spam inbox if it is not appearing in your main inbox.

Privacy Hero Confirm Email

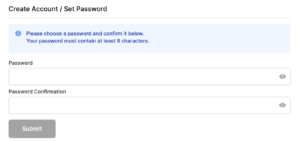
5. Enter the password that you want to use for your Privacy Hero account. Be sure to note this in a secure location so you do not forget. Click Submit.

Privacy Hero create password

6. You have now created your Privacy Hero account. You will use this login to access the Privacy Hero router settings.

Activate your Privacy Hero Internet and setup Wi-Fi

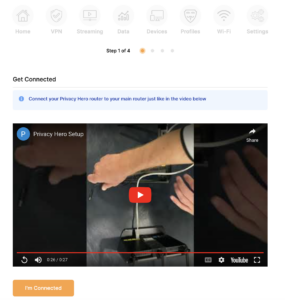
1. You will then be taken to the Router Activation steps. Connect the ethernet cable that the Privacy Hero came with from an open Ethernet port on your ISP modem or other router to the WAN/Internet (blue) port of the Privacy Hero.

Then power the Privacy Hero device on by connecting the power supply. This is shown in the video on the page as well. Wait about a minute or so for the Privacy Hero router to fully boot up and then click I’m Connected.

Wire Up Privacy Hero

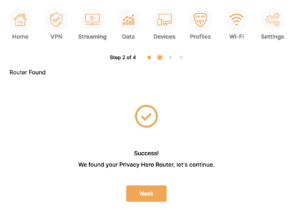
2. The next page may say Router Found or ask you to enter the Activation Code. If it asks for the Activation Code that will be the code printed on the bottom of the Privacy Hero. Enter this code and click Next.

Privacy Hero Router Found

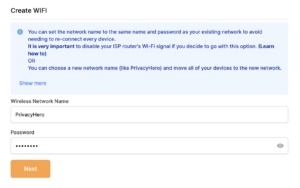
3. Set the Wi-Fi name and password for connecting your devices to the Privacy Hero network. Make sure it is not a duplicate name of an existing Wi-Fi network. Click Next.

Privacy Hero Set wifi name and password

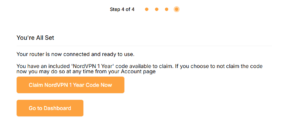
4. To activate your 1 Year NordVPN code:

Click on Claim NordVPN 1 Year Code Now

NordVPN Claim Code

Go to the Account section of your router settings.

Copy the NordVPN code shown under Claim NordVPN 1 Year Code.

PH Nord Code

Go to the NordVPN activation page.

This code can be used with a new or existing NordVPN account.

NordVPN Activate Page

5. You are now all set to begin joining your devices to the new Privacy Hero network with the Wi-Fi name and password you entered and setting up some of the Privacy Hero features.

TROUBLESHOOTING

Still having issues? Visit the VPN Troubleshooting section.

Troubleshoot Here

Roqos VPN Connected, but my device IP is unchanged

TeamFlashRouters · Mar 8, 2022 ·

If your VPN Out page in your Roqos settings is reporting that you are Connected to your VPN provider but your IP Address and location have not changed when you visit What is my IP address? follow the below checklist.

Double check that your device is connected to the Roqos network

Since the Roqos UI is being accessed securely via the cloud you can change the settings while your device is not connected to the Roqos network. This would result in your IP Address not updating when you connect to VPN.

Make sure that you are connected to your Roqos WiFi network or from an ethernet port on the back of the Roqos directly to your device and not another network.

Assign Devices To Connect To VPN in the Roqos

By default there are no devices assigned to the VPN tunnel. To assign devices to the Roqos’ VPN connection.

1. Login to your Roqos UI.

2. Select the VPN tab on the left hand menu and select VPN Out.

Roqos VPN Out

3. Click Included Devices. From this page you can choose if all devices should connect to VPN or only certain devices.

Roqos VPN Included Devices

4. From the dropdown select Include all devices if you want every device that connects to the Roqos to connect to VPN or if you only want specific devices to connect to VPN while others bypass the VPN connection select Include selected devices from the dropdown and then toggle the sliders for the devices you want connected to VPN. Click Save.

Turn off VPN device applications

Connecting to VPN via a device application or browser extension at the same time while connecting via your Roqos is not recommended. Doubling up on VPN connections can cause issues with speeds and stability.

When you are connected to the Roqos VPN network at home you should leave all VPN applications and extensions disconnected and unopened.

Privacy Hero VPN Setup Guide for Privacy Hero

TeamFlashRouters · Apr 3, 2023 ·

Your Privacy Hero router uses Cloud Based router management which means you can access the router settings from anywhere on any device that has an internet connection. You can follow these steps while connected to your phone, other Wi-Fi network, or the Privacy Hero network.

Use these steps to connect to Privacy Hero’s own WireGuard VPN servers. You will automatically be connected to the ideal USA or Canada server based on your location.

1. From any device that has a browser such as a computer, smartphone, or tablet visit app.privacyhero.com

App.PrivacyHero.com

2. Enter your Privacy Hero account email and password. Click Login.

Privacy Hero Access Settings

If you have not created your Privacy Hero account yet please follow these instructions.

3. Click the VPN symbol.

Privacy Hero Setup VPN

4. Set the VPN toggle to On.

Privacy Hero Enable VPN

5. Connect to the Privacy Hero’s via wireless or ethernet connection on your device and visit What is my IP Address from a private/incognito browser to verify your new IP address and virtual location.

Privacy Hero’s cloud based router settings access makes it so you can change settings while not connected to the Privacy Hero network so if your IP Address has not changed be sure to double check that you are indeed connected to the Privacy Hero network on the device you are checking your IP from.

Keep in mind that the VPN connection will not change the location of the streaming services listed in the Streaming Relocation area of the Privacy Hero settings.

TROUBLESHOOTING

Still having issues? Visit the VPN Troubleshooting section.

Troubleshoot Here

ExpressVPN Setup for AsusWRT Firmware Routers

TeamFlashRouters · Apr 29, 2024 ·

You can connect to ExpressVPN on your AsusWRT router using OpenVPN.

Quick Options

  • OpenVPN: Download your preferred server .ovpn configuration file from the ExpressVPN website.

:point_right: If you are not already a ExpressVPN user Sign Up Now.

EXPRESSVPN SETUP GUIDE FOR ASUSWRT

1. Log in to your account on the ExpressVPN website.

2. In the “Set up your devices” section, click More and select Manual Configuration from the menu options.

3. Copy the Username and Password that are displayed on the right

ExpressVPN Manual Service Credentials

4. Download a server file from any of the available regions shown in the ExpressVPN Manual Configuration section (Americas, Europe, Asia Pacific, etc)

ExpressVPN Download .ovpn file

5. Log in to the Asus settings page by connecting to the Asus router’s WiFi (or wired LAN) on your computer. Then, enter 192.168.50.1 or asusrouter.com in the browser.

View our guide for more instructions on how to access AsusWRT firmware settings.

6. Navigate to the VPN tab and then click on the VPN Fusion tab, then click Add Profile

Click the VPN Button
VPN Fusion Add Profile

7.  Fill in your NordVPN information then click Apply and Enable.

  • Connection Name: Choose a name for your ExpressVPN OpenVPN connection.
  • VPN Type: Select OpenVPN
  • Import .ovpn File: Upload the OpenVPN file that you downloaded.
  • Username and Password: Copy and paste your ExpressVPN manual service credentials from step 3.

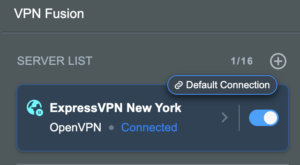
8. You should now see the Profile say Connected, indicating that the NordVPN server is successfully connected to your router.

Asus ExpressVPN Connected

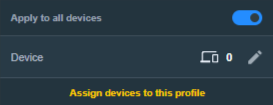
9. The VPN connection is automatically set to Apply to all devices.

If you only want certain devices to connect to the VPN, then turn off the VPN connection and switch off Apply to all devices.

Now click the pencil next to the Device section and select the devices (computer, phone, etc.) that you want to connect to VPN. Click OK and then click Apply all settings.

Apply VPN by Device
  1. Connect your devices to the Asus router network and visit the ExpressVPN website, at the top it should display Your Status: Protected.
  2. Visit ExpressVPN’s IP Check to verify your new IP address and virtual location.

🚫📱Do not run ExpressVPN apps on devices connected to your ExpressVPNrouter. Using the app at the same time as the router VPN may cause conflicts and connection issues.

TROUBLESHOOTING

Still having issues? Visit the VPN Troubleshooting section.

Troubleshoot Here

Hotspot Shield Manual OpenVPN Setup

TeamFlashRouters · Jul 15, 2020 ·

Preparing for Manual Hotspot Shield Setup

Obtain your Hotspot Shield OpenVPN Information

If you are not already a Hotspot Shield user Sign Up Now.

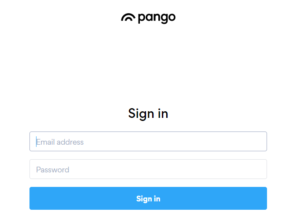
1. Log in to your account on the Hotspot Shield website.

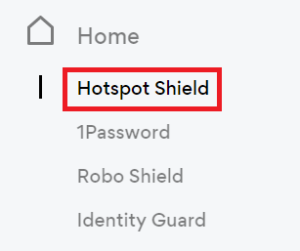
2. Click Hotspot Shield on the left side navigation.

Hotspot Shield - Website Admin

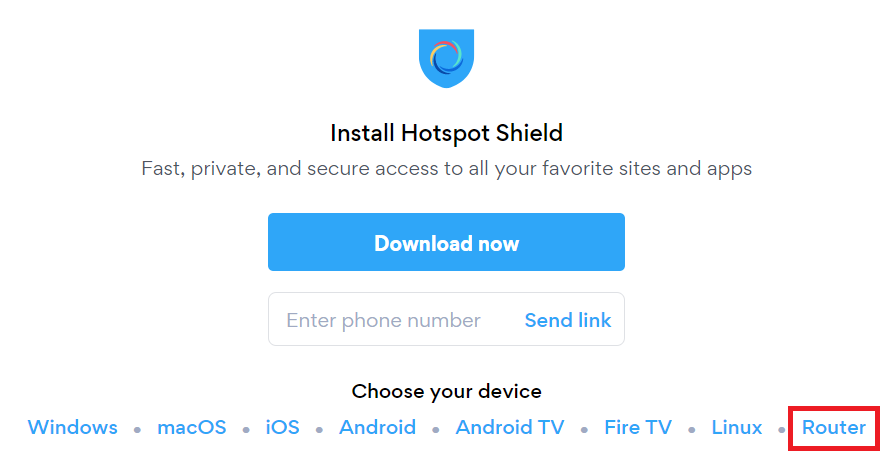
3. Under Choose your device click Router.

Hotspot Shield - Select Router

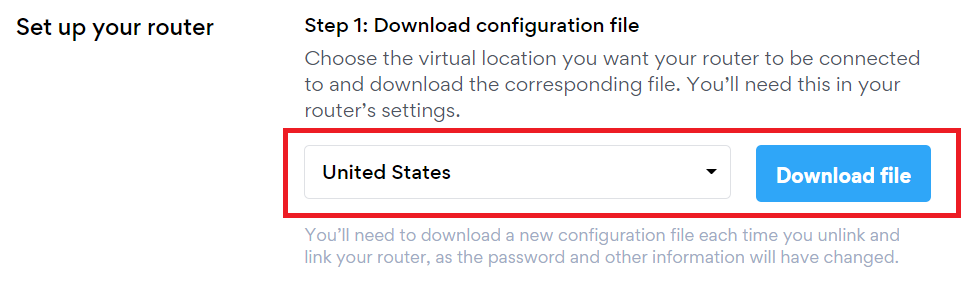
4. In the Set up your router section Select your desired virtual location and then click Download file.

Open the file that was downloaded with NotePad++ for Windows or TextEdit for Apple. You only need the <cert> and <key> from the .ovpn file. All Hotspot Shield servers have different keys and certificates.

Hotspot Shield - Download Configuration File

5. Copy the VPN Username, and Password that appear under Step 2 to a notepad, you will need this information later in the setup process.

Hotspot Shield - OpenVPN username and password

DD-WRT Router Setup for Hotspot Shield

Navigate to Services > VPN

Enter Hotspot Shield settings

OpenVPN Client

Start OpenVPN Client

If you wish to disable your VPN connection simply set this to Disable at any time and click Apply Settings.

Server IP/Name

At the top of the .ovpn file you downloaded above, there is a line e.g.:
remote universitycalendar.us 8041
universitycalendar.us is your Hotspot Shield server name. Enter the server name in this field.

Port

8041

Tunnel Device

TUN

Tunnel Protocol

UDP

Encryption cipher

AES-128-CBC

Hash Algorithm

SHA256

User Pass Authentication

Enable

Username

Enter the Username you obtained in your Hotspot Shield account.

Password

Enter the Password you obtained in your Hotspot Shield account.

Advanced Options

Enable

TLS Cipher

None

LZO Compression

No

NAT

Enable

Firewall Protection

Enable

Additional Config

resolv-retry infinite
remote-random
nobind
tun-mtu 1500
tun-mtu-extra 32
mssfix 1450
persist-key
persist-tun
ping 15
ping-restart 0
reneg-sec 0
remote-cert-tls server

Policy Based Routing

This field can be used for split VPN and Dual Gateway routing.

CA Cert

—–BEGIN CERTIFICATE—–
MIIFazCCA1OgAwIBAgIRAIIQz7DSQONZRGPgu2OCiwAwDQYJKoZIhvcNAQELBQAw
TzELMAkGA1UEBhMCVVMxKTAnBgNVBAoTIEludGVybmV0IFNlY3VyaXR5IFJlc2Vh
cmNoIEdyb3VwMRUwEwYDVQQDEwxJU1JHIFJvb3QgWDEwHhcNMTUwNjA0MTEwNDM4
WhcNMzUwNjA0MTEwNDM4WjBPMQswCQYDVQQGEwJVUzEpMCcGA1UEChMgSW50ZXJu
ZXQgU2VjdXJpdHkgUmVzZWFyY2ggR3JvdXAxFTATBgNVBAMTDElTUkcgUm9vdCBY
MTCCAiIwDQYJKoZIhvcNAQEBBQADggIPADCCAgoCggIBAK3oJHP0FDfzm54rVygc
h77ct984kIxuPOZXoHj3dcKi/vVqbvYATyjb3miGbESTtrFj/RQSa78f0uoxmyF+
0TM8ukj13Xnfs7j/EvEhmkvBioZxaUpmZmyPfjxwv60pIgbz5MDmgK7iS4+3mX6U
A5/TR5d8mUgjU+g4rk8Kb4Mu0UlXjIB0ttov0DiNewNwIRt18jA8+o+u3dpjq+sW
T8KOEUt+zwvo/7V3LvSye0rgTBIlDHCNAymg4VMk7BPZ7hm/ELNKjD+Jo2FR3qyH
B5T0Y3HsLuJvW5iB4YlcNHlsdu87kGJ55tukmi8mxdAQ4Q7e2RCOFvu396j3x+UC
B5iPNgiV5+I3lg02dZ77DnKxHZu8A/lJBdiB3QW0KtZB6awBdpUKD9jf1b0SHzUv
KBds0pjBqAlkd25HN7rOrFleaJ1/ctaJxQZBKT5ZPt0m9STJEadao0xAH0ahmbWn
OlFuhjuefXKnEgV4We0+UXgVCwOPjdAvBbI+e0ocS3MFEvzG6uBQE3xDk3SzynTn
jh8BCNAw1FtxNrQHusEwMFxIt4I7mKZ9YIqioymCzLq9gwQbooMDQaHWBfEbwrbw
qHyGO0aoSCqI3Haadr8faqU9GY/rOPNk3sgrDQoo//fb4hVC1CLQJ13hef4Y53CI
rU7m2Ys6xt0nUW7/vGT1M0NPAgMBAAGjQjBAMA4GA1UdDwEB/wQEAwIBBjAPBgNV
HRMBAf8EBTADAQH/MB0GA1UdDgQWBBR5tFnme7bl5AFzgAiIyBpY9umbbjANBgkq
hkiG9w0BAQsFAAOCAgEAVR9YqbyyqFDQDLHYGmkgJykIrGF1XIpu+ILlaS/V9lZL
ubhzEFnTIZd+50xx+7LSYK05qAvqFyFWhfFQDlnrzuBZ6brJFe+GnY+EgPbk6ZGQ
3BebYhtF8GaV0nxvwuo77x/Py9auJ/GpsMiu/X1+mvoiBOv/2X/qkSsisRcOj/KK
NFtY2PwByVS5uCbMiogziUwthDyC3+6WVwW6LLv3xLfHTjuCvjHIInNzktHCgKQ5
ORAzI4JMPJ+GslWYHb4phowim57iaztXOoJwTdwJx4nLCgdNbOhdjsnvzqvHu7Ur
TkXWStAmzOVyyghqpZXjFaH3pO3JLF+l+/+sKAIuvtd7u+Nxe5AW0wdeRlN8NwdC
jNPElpzVmbUq4JUagEiuTDkHzsxHpFKVK7q4+63SM1N95R1NbdWhscdCb+ZAJzVc
oyi3B43njTOQ5yOf+1CceWxG1bQVs5ZufpsMljq4Ui0/1lvh+wjChP4kqKOJ2qxq
4RgqsahDYVvTH9w7jXbyLeiNdd8XM2w9U/t7y0Ff/9yi0GE44Za4rF2LN9d11TPA
mRGunUHBcnWEvgJBQl9nJEiU0Zsnvgc/ubhPgXRR4Xq37Z0j4r7g1SgEEzwxA57d
emyPxgcYxn/eR44/KJ4EBs+lVDR3veyJm+kXQ99b21/+jh5Xos1AnX5iItreGCc=
—–END CERTIFICATE—–
—–BEGIN CERTIFICATE—–
MIIFjTCCA3WgAwIBAgIRANOxciY0IzLc9AUoUSrsnGowDQYJKoZIhvcNAQELBQAw
TzELMAkGA1UEBhMCVVMxKTAnBgNVBAoTIEludGVybmV0IFNlY3VyaXR5IFJlc2Vh
cmNoIEdyb3VwMRUwEwYDVQQDEwxJU1JHIFJvb3QgWDEwHhcNMTYxMDA2MTU0MzU1
WhcNMjExMDA2MTU0MzU1WjBKMQswCQYDVQQGEwJVUzEWMBQGA1UEChMNTGV0J3Mg
RW5jcnlwdDEjMCEGA1UEAxMaTGV0J3MgRW5jcnlwdCBBdXRob3JpdHkgWDMwggEi
MA0GCSqGSIb3DQEBAQUAA4IBDwAwggEKAoIBAQCc0wzwWuUuR7dyXTeDs2hjMOrX
NSYZJeG9vjXxcJIvt7hLQQWrqZ41CFjssSrEaIcLo+N15Obzp2JxunmBYB/XkZqf
89B4Z3HIaQ6Vkc/+5pnpYDxIzH7KTXcSJJ1HG1rrueweNwAcnKx7pwXqzkrrvUHl
Npi5y/1tPJZo3yMqQpAMhnRnyH+lmrhSYRQTP2XpgofL2/oOVvaGifOFP5eGr7Dc
Gu9rDZUWfcQroGWymQQ2dYBrrErzG5BJeC+ilk8qICUpBMZ0wNAxzY8xOJUWuqgz
uEPxsR/DMH+ieTETPS02+OP88jNquTkxxa/EjQ0dZBYzqvqEKbbUC8DYfcOTAgMB
AAGjggFnMIIBYzAOBgNVHQ8BAf8EBAMCAYYwEgYDVR0TAQH/BAgwBgEB/wIBADBU
BgNVHSAETTBLMAgGBmeBDAECATA/BgsrBgEEAYLfEwEBATAwMC4GCCsGAQUFBwIB
FiJodHRwOi8vY3BzLnJvb3QteDEubGV0c2VuY3J5cHQub3JnMB0GA1UdDgQWBBSo
SmpjBH3duubRObemRWXv86jsoTAzBgNVHR8ELDAqMCigJqAkhiJodHRwOi8vY3Js
LnJvb3QteDEubGV0c2VuY3J5cHQub3JnMHIGCCsGAQUFBwEBBGYwZDAwBggrBgEF
BQcwAYYkaHR0cDovL29jc3Aucm9vdC14MS5sZXRzZW5jcnlwdC5vcmcvMDAGCCsG
AQUFBzAChiRodHRwOi8vY2VydC5yb290LXgxLmxldHNlbmNyeXB0Lm9yZy8wHwYD
VR0jBBgwFoAUebRZ5nu25eQBc4AIiMgaWPbpm24wDQYJKoZIhvcNAQELBQADggIB
ABnPdSA0LTqmRf/Q1eaM2jLonG4bQdEnqOJQ8nCqxOeTRrToEKtwT++36gTSlBGx
A/5dut82jJQ2jxN8RI8L9QFXrWi4xXnA2EqA10yjHiR6H9cj6MFiOnb5In1eWsRM
UM2v3e9tNsCAgBukPHAg1lQh07rvFKm/Bz9BCjaxorALINUfZ9DD64j2igLIxle2
DPxW8dI/F2loHMjXZjqG8RkqZUdoxtID5+90FgsGIfkMpqgRS05f4zPbCEHqCXl1
eO5HyELTgcVlLXXQDgAWnRzut1hFJeczY1tjQQno6f6s+nMydLN26WuU4s3UYvOu
OsUxRlJu7TSRHqDC3lSE5XggVkzdaPkuKGQbGpny+01/47hfXXNB7HntWNZ6N2Vw
p7G6OfY+YQrZwIaQmhrIqJZuigsrbe3W+gdn5ykE9+Ky0VgVUsfxo52mwFYs1JKY
2PGDuWx8M6DlS6qQkvHaRUo0FMd8TsSlbF0/v965qGFKhSDeQoMpYnwcmQilRh/0
ayLThlHLN81gSkJjVrPI0Y8xCVPB4twb1PFUd2fPM3sA1tJ83sZ5v8vgFv2yofKR
PB0t6JzUA81mSqM3kxl5e+IZwhYAyO0OTg3/fs8HqGTNKd9BqoUwSRBzp06JMg5b
rUCGwbCUDI0mxadJ3Bz4WxR6fyNpBK2yAinWEsikxqEt
—–END CERTIFICATE—–

Public Client Cert

In the .ovpn file Copy and Paste all contents in between the <cert> and </cert> lines from your .ovpn file starting and ending with:
—–BEGIN CERTIFICATE—–
…
—–END CERTIFICATE—–

Private Client Key

In the .ovpn file Copy and Paste all contents in between the <key> and </key> lines from your .ovpn file starting and ending with:
—–BEGIN PRIVATE KEY—–
…
—–END PRIVATE KEY—–

CLICK APPLY SETTINGS

Leave all settings not mentioned above as their default setting.

Verify a successful Hotspot Shield connection

Navigate to Status > OpenVPN

  1. You should now see a CONNECTED SUCCESS message.
  2. Visit Hotspot Shield’s website to verify your new IP address and virtual location.

In some cases you may notice that the location is not showing the same location as the server you have input in your router settings; this is because geo tracking tools are often tricked by VPN connections. As long as you see an IP address that is not the same as your normal Internet IP address then you are indeed connected to Hotspot Shield.

Back up your settings

Navigate to Administration > Backup

  1. Click the Backup button.
  2. A file named nvrambak.bin will be saved to your computer.
  3. You can load nvrambak.bin to restore your settings in the event of a reset.
How to change the Hotspot Shield server

  1. Follow the instructions for obtaining the OpenVPN information from above.
  2. Enter the new Server Address in the Server IP/Name field.
  3. Enter the new Username and Password.
  4. Enter the new Public Client Cert and Private Client Key.
  5. Click Apply Settings.

TROUBLESHOOTING

Still having issues? Visit the VPN Troubleshooting section.

Troubleshoot Here

How do I reset and reconfigure my FlashRouter?

Dave · May 3, 2019 ·

When is a router reset needed?

A reset of the FlashRouter should only be performed in the following instances:

  • You have exhausted all other troubleshooting methods and cannot access your router settings.
  • A backup file was saved of your previously working settings.
  • Username and password to access the FlashRouter’s settings are not working.
  • Power light on the router is blinking steadily.
  • Firmware upgrade was performed with Reset to Default settings selected.

Reset Router

Asus FlashRouters:

  1. While the router is powered off press and hold the WPS button on the back or side of the router. Power up the router while continuing to hold the WPS. Continue to hold for 15 seconds as the router powers on (note this could be up to 45 seconds on some models before lights flash).
  2. You will see the lights on the router flashing steadily and this is how you know you have reset the router.
  3. Let the router sit for about a minute and then reboot the router.

Linksys and Netgear FlashRouters:

  1. While the router is plugged in, find the reset button located on the back of the router. You will need a pin or pencil to hold down the button for 15 seconds.
  2. You will see the lights on the back of the router flash simultaneously and this is how you know you have reset the router.
  3. Let the router sit for about a minute and then reboot the router.

Access Router Settings

1. Connect to the FlashRouter’s network via ethernet cable or wireless.

The wireless network will appear as “dd-wrt” and will likely not require a password to join. If it does require a password to join the password will be the default wireless password found on the bottom of the router.

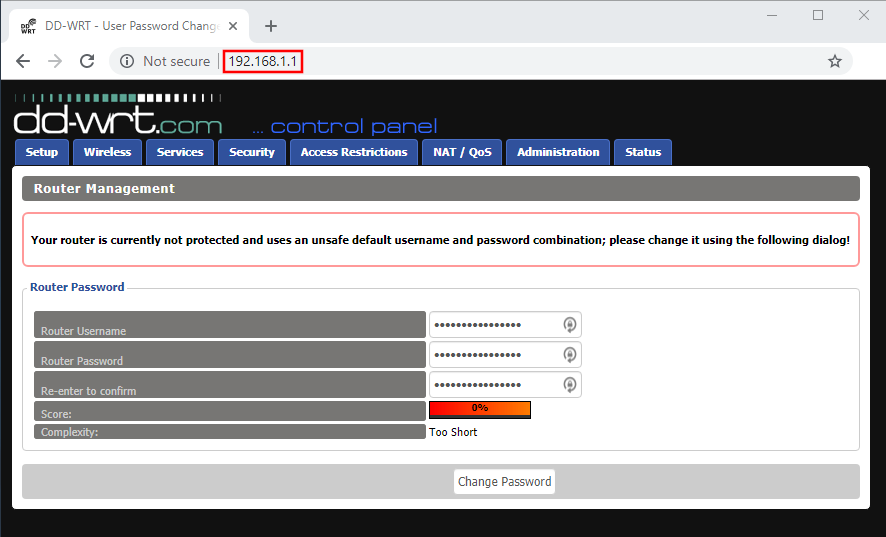
2. Open your web browser and enter 192.168.1.1 in the URL.

Reset FlashRouters DD-WRT Settings Back to Default Settings

3. Delete the dots and enter the new administration login in the Router Username, Router Password, and Re-enter to confirm fields.

TYPE CAREFULLY when setting the administration login as a typo will result in needing to reset the router again.

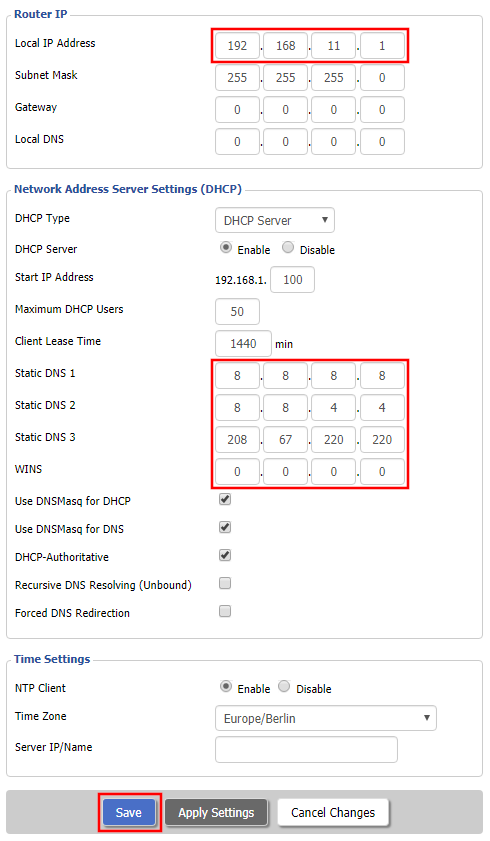
Change Local IP Address and DNS

Navigate to Setup > Basic Setup

1. Set the Local IP Address to 192.168.11.1

2. Set the Static DNS 1 to 8.8.8.8

3. Set the Static DNS 2 to 8.8.4.4

4. Set the Static DNS 3 to 208.67.220.220

Enter New Local IP Address and DNS Servers After FlashRouter DD-WRT Reset

CLICK SAVE

Setup WiFi

Navigate to Wireless > Basic Settings

Find your FlashRouter model in the WiFi Setup section and replicate the wireless settings on this page.

CLICK APPLY SETTINGS

REBOOT ROUTER

Connect to the FlashRouter's network

You will be able to connect to the newly setup wireless network using the details you set. The router will now be accessible at 192.168.11.1

Back up your settings

  1. Click the Backup button.
  2. A file named nvrambak.bin will be saved to your computer.
  3. You can load nvrambak.bin to restore your settings in the event of a reset.
How do I reset and reconfigure my ExpressVPN/Aircove FlashRouter?

TeamFlashRouters · Mar 16, 2022 ·

When is a router reset needed?

A reset of the FlashRouter should only be performed in the following instances:

  • You have exhausted all other troubleshooting methods and cannot access your router settings.
  • Password to access the FlashRouter’s settings are not working.
  • Power light on the router is blinking steadily.
  • Router is not accessible after upgrading the firmware

Reset Router

Asus FlashRouters:

  1. While the router is powered off press and hold the WPS button on the back or side of the router. Power up the router while continuing to hold the WPS. Continue to hold for 15 seconds as the router powers on (note this could be up to 45 seconds on some models before lights flash).
  2. You will see the lights on the router flashing steadily and this is how you know you have reset the router.
  3. Let the router sit for about a minute and then reboot the router.

Aircove, Linksys and Netgear FlashRouters:

  1. While the router is plugged in, find the reset button located on the back of the router. You will need a pin or pencil to hold down the button for 15 seconds.
  2. You will see the lights on the back of the router flash simultaneously and this is how you know you have reset the router.
  3. Let the router sit for about a minute and then reboot the router.

Access Router Settings

1. Connect to the FlashRouter’s network via ethernet cable or wireless.

The wireless network will appear as “Aircove”, “Linksys##”, “Netgear##”, or “Asus” and the password to join the network will be the default wireless password printed on the bottom of the router.

2. Open your web browser and enter expressvpnrouter.com or 192.168.132.1 in the URL.

ExpressVPNrouter.com
192.168.132.1

3. Click Get Started on the ExpressVPN page that is displayed.

ExpressVPN Get Started

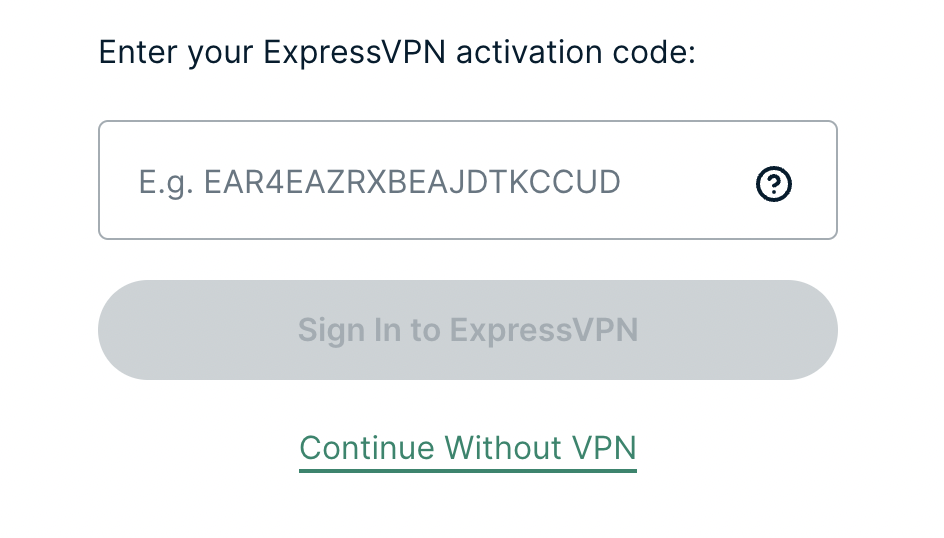
4a. If your FlashRouter is wired to the Internet correctly then you will be prompted to enter your ExpressVPN Activation Code found in your ExpressVPN account. Paste that in and click Sign in to ExpressVPN.

ExpressVPN Activation Code

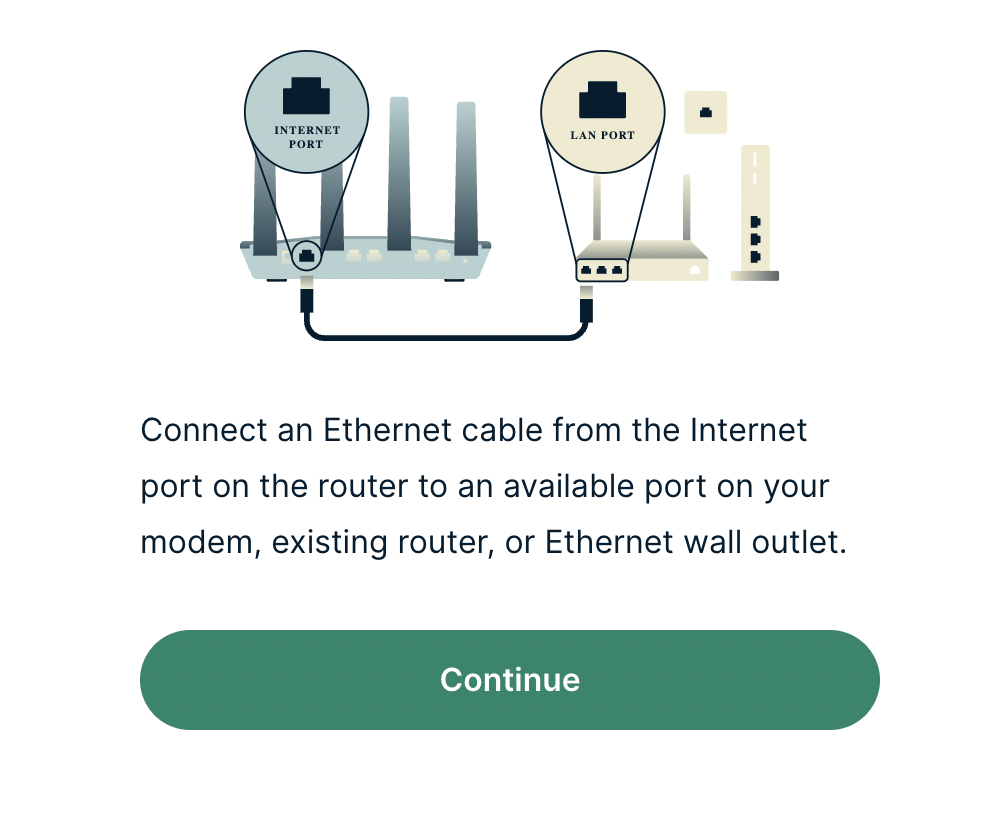
4b. If your FlashRouter is not wired correctly or is not receiving Internet properly make sure you are wired as detailed in the diagram that appears. If you are stuck at this screen we recommend powering off your ISP modem and any other router that the ExpressVPN FlashRouter is wired to and then powering them back up one by one.

Proceed with step “4a” above once the router is receiving Internet and you are prompted to enter the Activation Code.

ExpressVPN Wiring

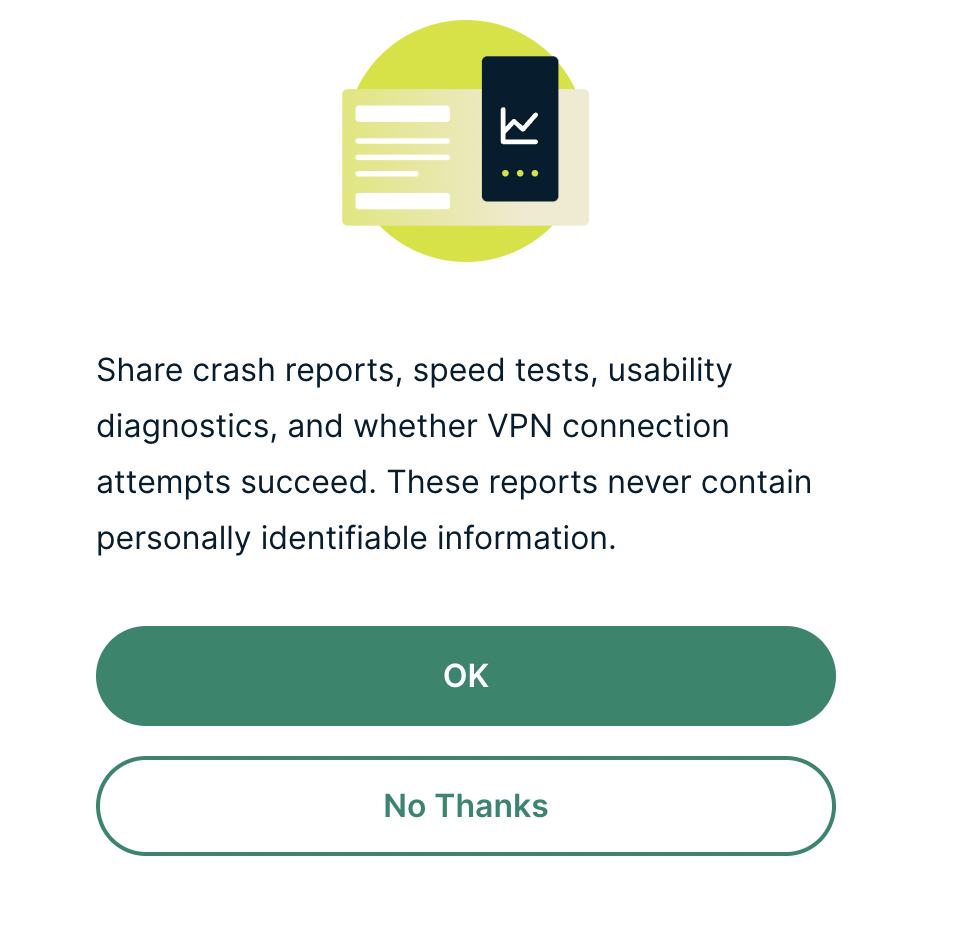
5. Select if you want to share anonymous crash report data with ExpressVPN to help them improve the firmware for future releases.

ExpressVPN Share Crash Report

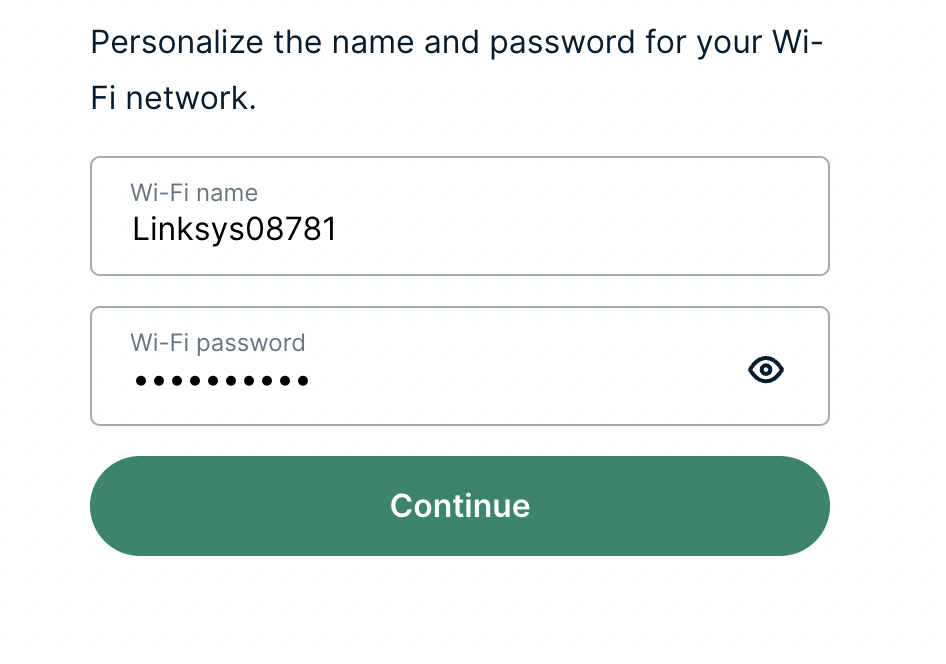
6. Set the WiFi name and password your wireless devices will use to connect to the FlashRouter’s network. Make sure the WiFi name is unique and not a duplicate of an existing WiFi name if you change it. You can also leave it as the default information if you like. Click Continue.

ExpressVPN Set WiFi Name and Password

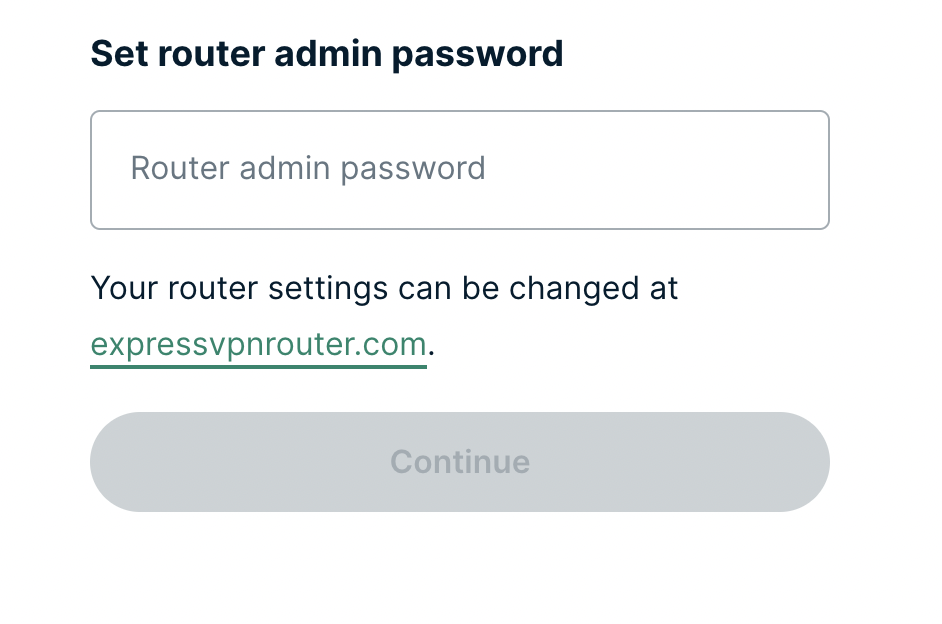
7. Enter the admin password you will use to access the ExpressVPN router settings. Be sure to TYPE CAREFULLY when setting the admin password as a typo will result in needing to reset the router again. Note this password in a secure location or commit it to memory.

ExpressVPN admin password

8. Your ExpressVPN FlashRouter is now fully setup!

ExpressVPN Connected

ExpressVPN/Aircove FlashRouter Internet Setup and Activation

TeamFlashRouters · Mar 16, 2022 ·

Follow this article when you receive your new ExpressVPN FlashRouter to connect your FlashRouter to the Internet via ExpressVPN and customize your network so it is ready to use.

Obtain your ExpressVPN Activation Code

If you are not already an ExpressVPN user Sign Up Now.

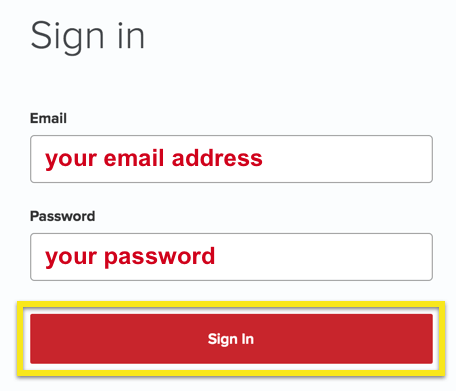
1. Visit ExpressVPN’s website login page.

ExpressVPN on FlashRouters Privacy App Setup - Sign Into ExpressVPN Dashboard

2. Copy your ExpressVPN Activation code and paste it into a document or leave this page open while you proceed with the instructions.

Access Router Settings

1. Connect to the FlashRouter’s network via ethernet cable or wireless.

The wireless network will appear as “Aircove”, “Linksys##”, “Netgear##”, or “Asus” and the password to join the network will be the default wireless password printed on the bottom of the router.

2. Open your web browser and enter expressvpnrouter.com or 192.168.132.1 in the URL.

ExpressVPNrouter.com
192.168.132.1

3. Click Get Started on the ExpressVPN page that is displayed.

ExpressVPN Get Started

4a. If your FlashRouter is wired to the Internet correctly then you will be prompted to enter your ExpressVPN Activation Code found in your ExpressVPN account. Paste that in and click Sign in to ExpressVPN.

ExpressVPN Activation Code

4b. If your FlashRouter is not wired correctly or is not receiving Internet properly make sure you are wired as detailed in the diagram that appears. If you are stuck at this screen we recommend powering off your ISP modem and any other router that the ExpressVPN FlashRouter is wired to and then powering them back up one by one.

Proceed with step “4a” above once the router is receiving Internet and you are prompted to enter the Activation Code.

ExpressVPN Wiring

5. Select if you want to share anonymous crash report data with ExpressVPN to help them improve the firmware for future releases.

ExpressVPN Share Crash Report

6. Set the WiFi name and password your wireless devices will use to connect to the FlashRouter’s network. Make sure the WiFi name is unique and not a duplicate of an existing WiFi name if you change it. You can also leave it as the default information if you like. Click Continue.

ExpressVPN Set WiFi Name and Password

7. Enter the admin password you will use to access the ExpressVPN router settings. Be sure to TYPE CAREFULLY when setting the admin password as a typo will result in needing to reset the router again. Note this password in a secure location or commit it to memory.

ExpressVPN admin password

8. Your ExpressVPN FlashRouter is now fully setup!

ExpressVPN Connected

Change VPN Protocols on ExpressVPN/Aircove firmware

TeamFlashRouters · Mar 16, 2022 ·

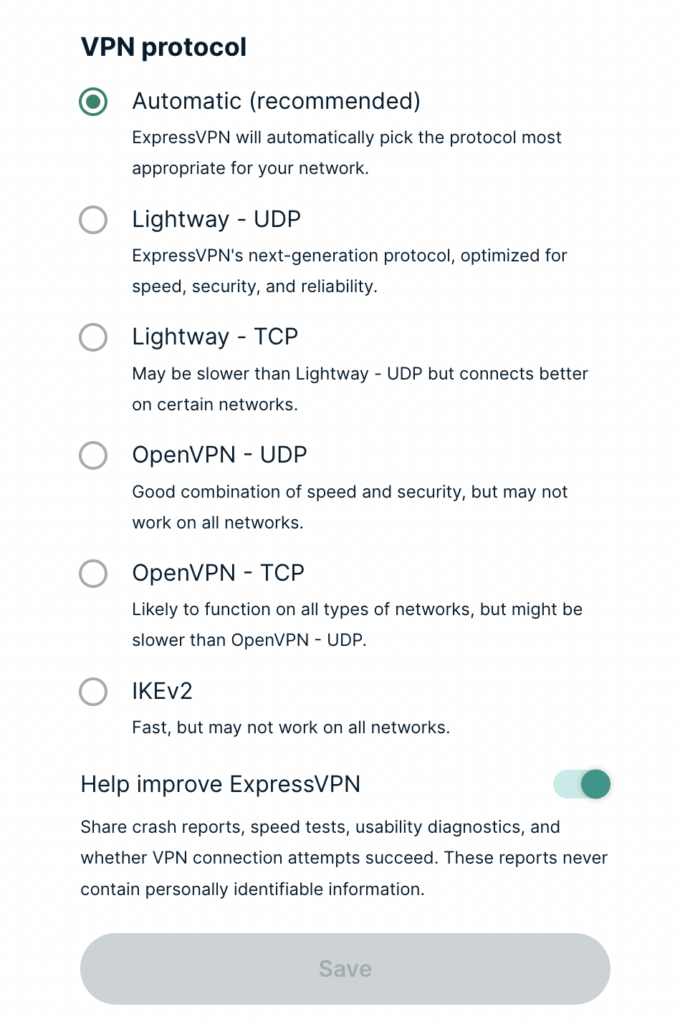
Changing the VPN protocol your ExpressVPN FlashRouter is using can help with obtaining faster speeds while connected to VPN and connectivity issues in some regions of the world. A great advantage of using ExpressVPN firmware is the ability to use multiple protocols such as OpenVPN, IKEv2, and ExpressVPN’s own protocol Lightway.

1. Connect to the FlashRouter’s network via ethernet cable or wireless.

2. Open your web browser and enter expressvpnrouter.com or 192.168.132.1 in the URL.

ExpressVPNrouter.com
192.168.132.1

3. Login with your ExpressVPN FlashRouter admin password.

ExpressVPN Router admin login

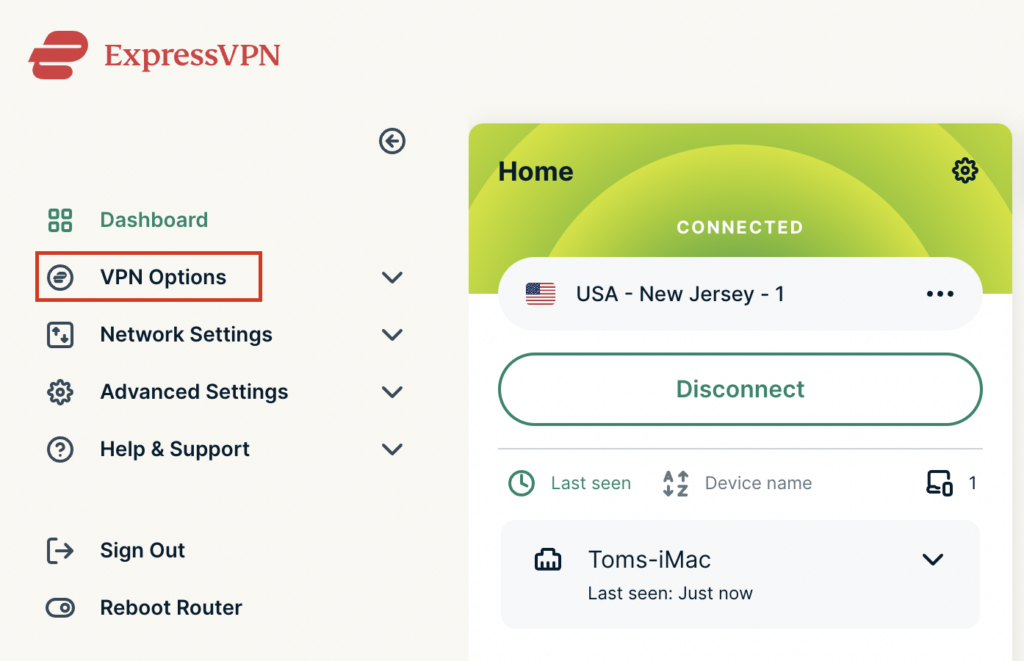
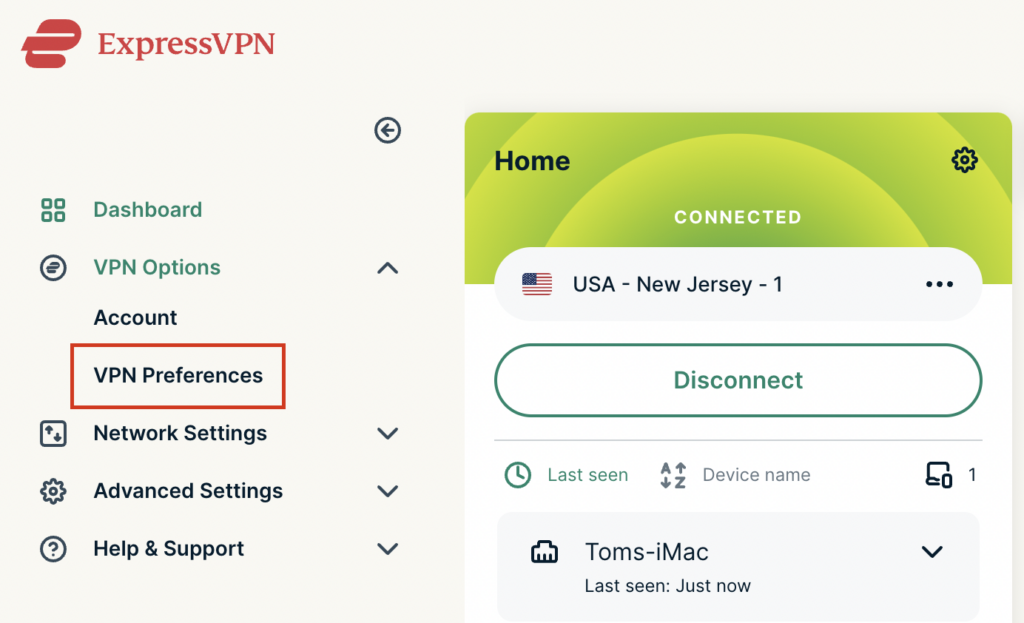
4. Select VPN Options on the left hand side of the menu.

ExpressVPN VPN Options

5. Select VPN Preferences on the left hand side of the menu.

ExpressVPN VPN Preferences

6. Choose the VPN protocol that best suits your needs. We typically see the fastest speeds while using the Lightway – UDP or IKEv2 protocols. Click Save.

ExpressVPN Protocols

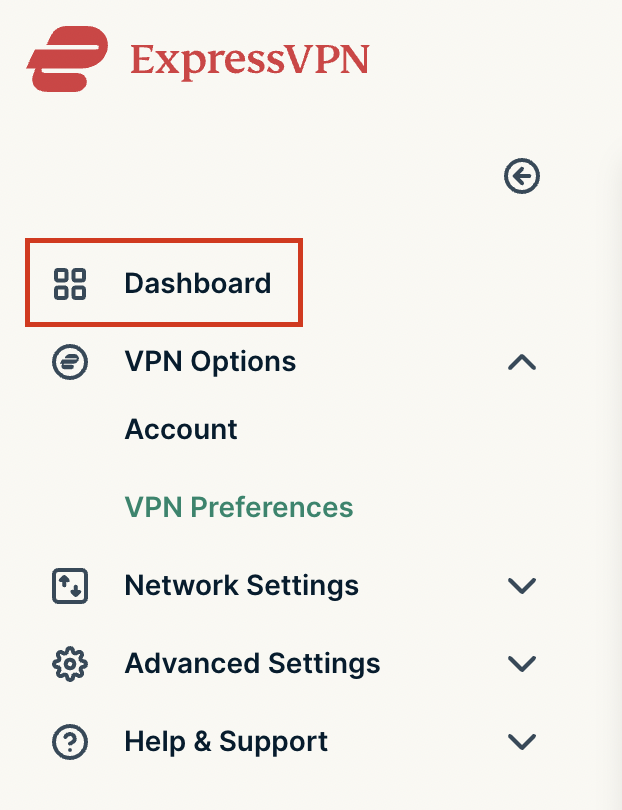
7. Click OK and then select Dashboard.

ExpressVPN Dashboard

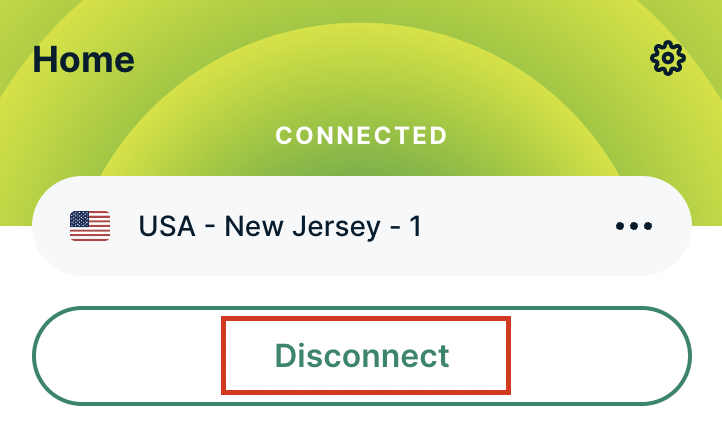
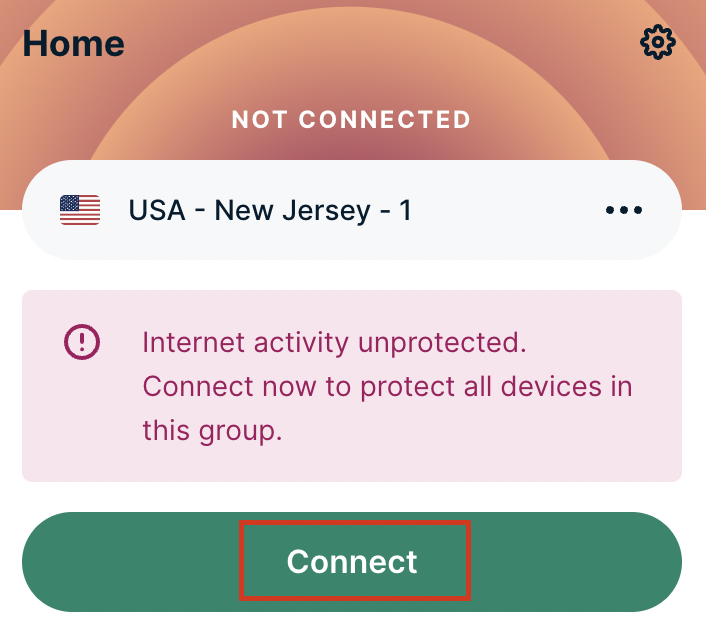
8. Click Disconnect to turn the VPN connection off.

ExpressVPN Disconnect

9. Click Connect to turn the VPN connection back on so it is using the new Protocol you selected.

ExpressVPN Connect

Change Wireless Channels on ExpressVPN/Aircove firmware

TeamFlashRouters · Mar 16, 2022 ·

Changing the wireless channel on your ExpressVPN FlashRouter can help with WiFi stability and allows you to use a wireless channel with less traffic in your local environment.

1. Connect to the FlashRouter’s network via ethernet cable or wireless.

2. Open your web browser and enter expressvpnrouter.com or 192.168.132.1 in the URL.

ExpressVPNrouter.com
192.168.132.1

3. Login with your ExpressVPN FlashRouter admin password.

ExpressVPN Router admin login

4. Select Network Settings on the left hand side of the menu.

ExpressVPN Network Settings

5. Select Wi-Fi Settings on the left hand side of the menu.

ExpressVPN WiFi Settings

6. Select Advanced Settings.

ExpressVPN WiFi Advanced Settings

7. Select the Channel Width and Main Channel you want your ExpressVPN FlashRouter to use. Note that higher 5GHz Wi-Fi channels will not be compatible with older devices. Click Save. Click Continue.

ExpressVPN WiFi Channels

Separate 2.4GHz and 5GHz Wi-Fi bands on ExpressVPN/Aircove firmware

TeamFlashRouters · Mar 16, 2022 ·

By default ExpressVPN firmware bonds the 2.4GHz and 5GHz wireless networks to a single wireless network name. Your device will automatically choose which one will provide the best connection. You can separate these networks to have unique Wi-Fi names so you can control which network your devices will use.

1. Connect to the FlashRouter’s network via ethernet cable or wireless.

2. Open your web browser and enter expressvpnrouter.com or 192.168.132.1 in the URL.

ExpressVPNrouter.com
192.168.132.1

3. Login with your ExpressVPN FlashRouter admin password.

ExpressVPN Router admin login

4. Select Network Settings on the left hand side of the menu.

ExpressVPN Network Settings

5. Select Wi-Fi Settings on the left hand side of the menu.

ExpressVPN WiFi Settings

6. Click the toggle for Separate 2.4GHz and 5GHz Wi-Fi.

ExpressVPN Separate 2.4GHz and 5GHz

7. Separate Wi-Fi details for the 5GHz band will now display. You can change the name and password if you so choose or leave it with the default name and password with “-5GHz” added to the name. Click Save. Click Continue.

ExpressVPN 5GHz added

Using Device Groups to bypass VPN on ExpressVPN/Aircove firmware

TeamFlashRouters · May 12, 2022 ·

Bypassing the ExpressVPN tunnel on certain devices allows you to have multiple IP Addresses while connected to the same router. This feature is very helpful with certain websites where VPN is blocked such as streaming services and banking information.

1. Connect to the FlashRouter’s network via ethernet cable or wireless.

2. Open your web browser and enter expressvpnrouter.com or 192.168.132.1 in the URL.

ExpressVPNrouter.com
192.168.132.1

3. Login with your ExpressVPN FlashRouter admin password.

ExpressVPN Router admin login

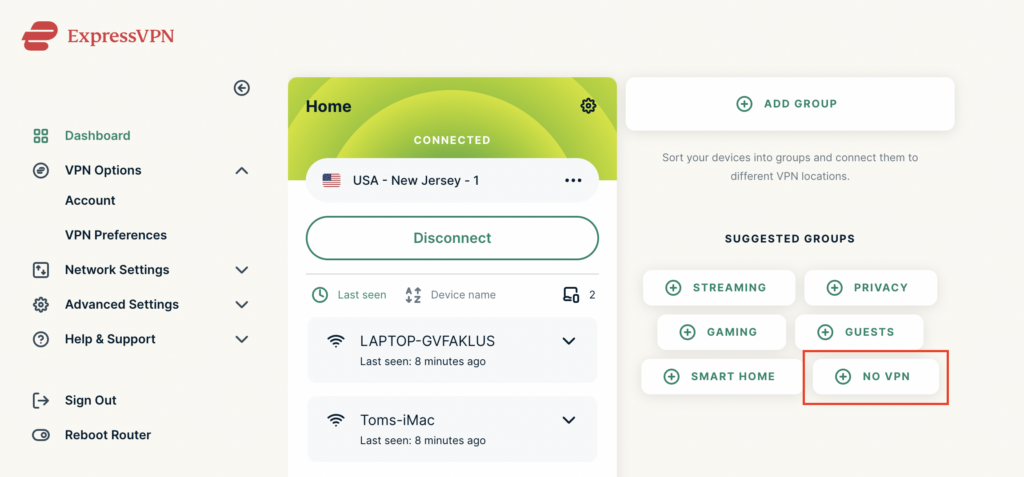
4. Select VPN Off on the right hand side of the menu.

ExpressVPN select No VPN

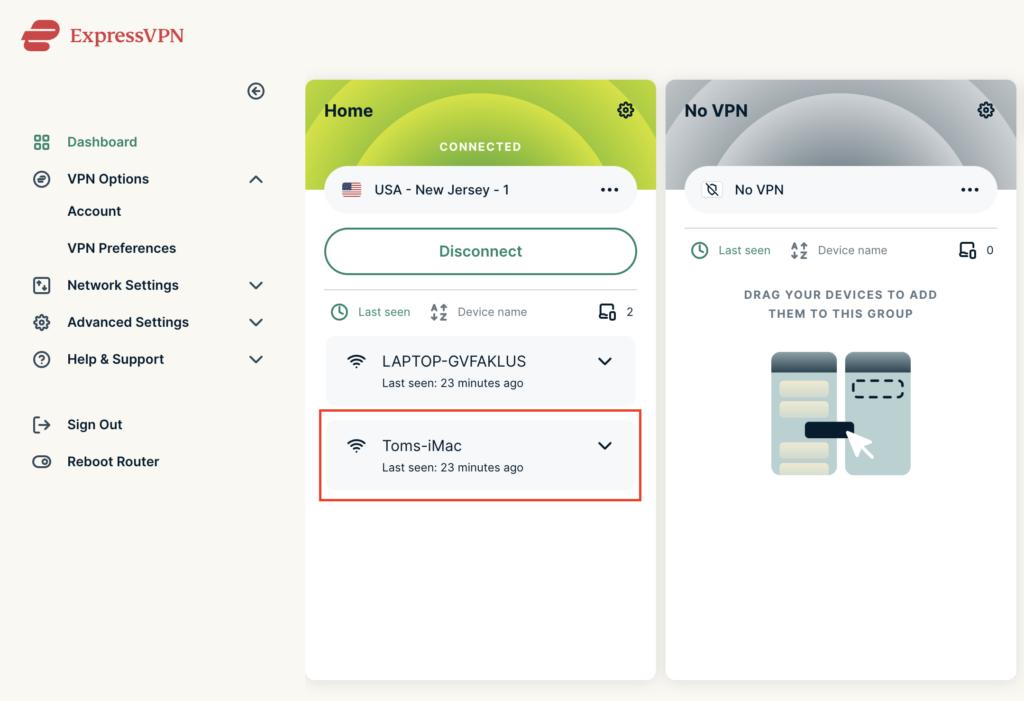
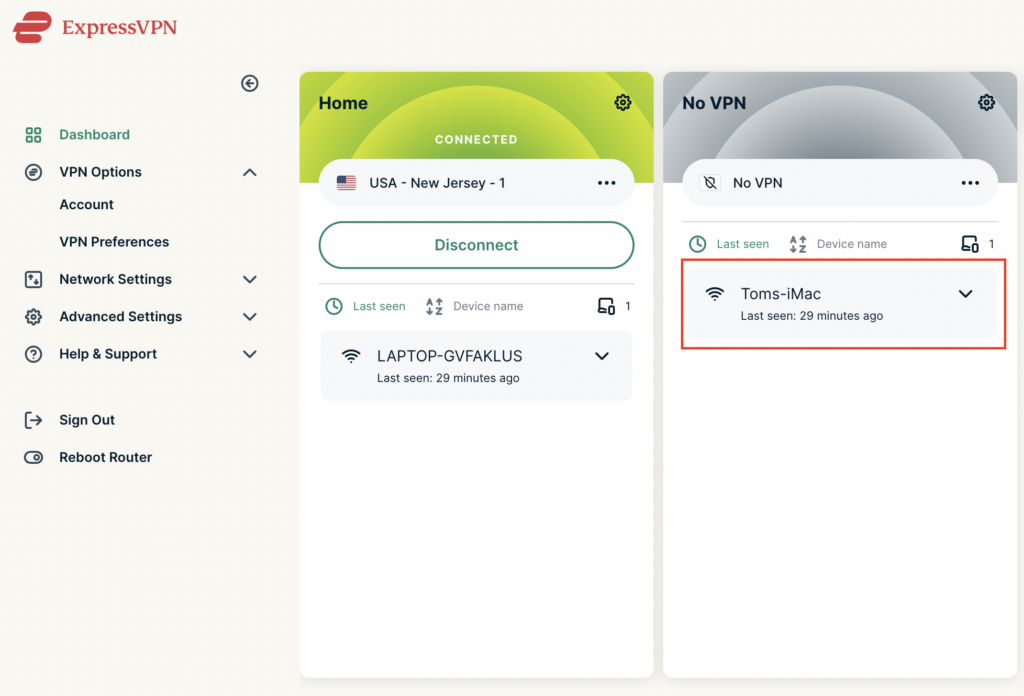
5. Click and drag the device that you want to bypass the VPN tunnel to the No VPN area.

ExpressVPN No VPN select device
ExpressVPN No VPN select device 2

The devices assigned to No VPN will now correct directly to your ISP internet while the devices in the VPN group will remain connected to the VPN server.

Using Device Groups to connect to multiple VPN locations on ExpressVPN/Aircove firmware

TeamFlashRouters · May 12, 2022 ·

ExpressVPN offers a great feature of connecting the FlashRouter to multiple ExpressVPN servers at the same time. You can then assign your devices to the location that you wish.

1. Connect to the FlashRouter’s network via ethernet cable or wireless.

2. Open your web browser and enter expressvpnrouter.com or 192.168.132.1 in the URL.

ExpressVPNrouter.com
192.168.132.1

3. Login with your ExpressVPN FlashRouter admin password.

ExpressVPN Router admin login

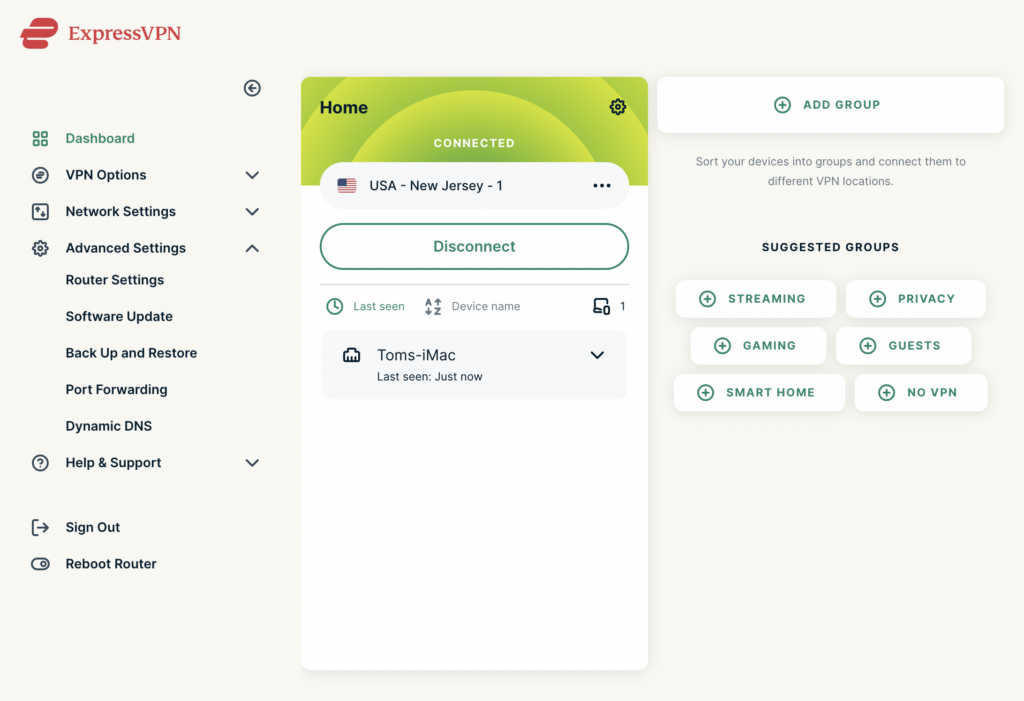
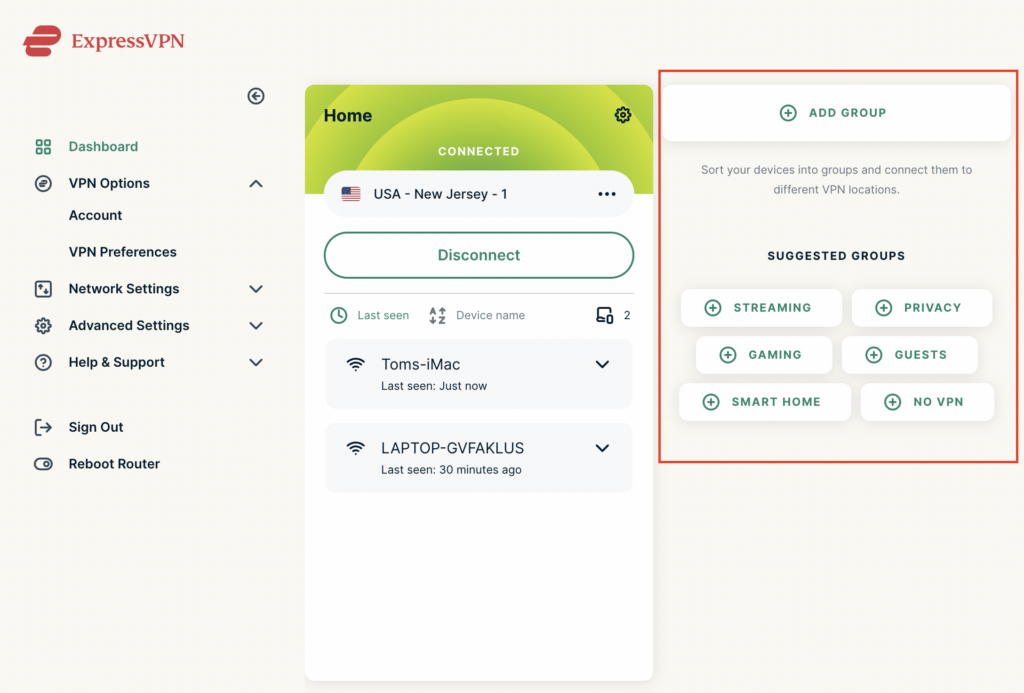
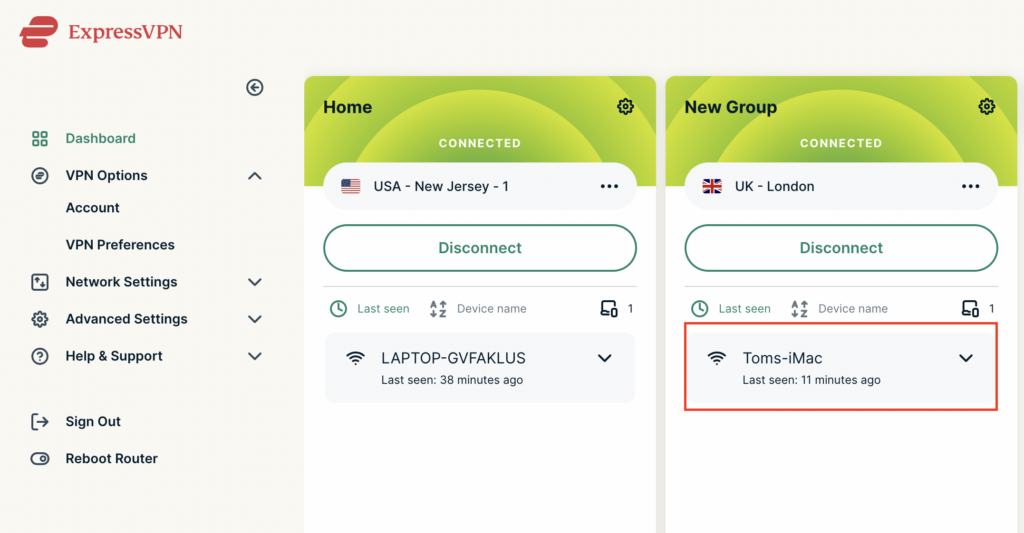
4. Select Add Group and name the new group or select one of the pre-named groups below.

ExpressVPN Add Group

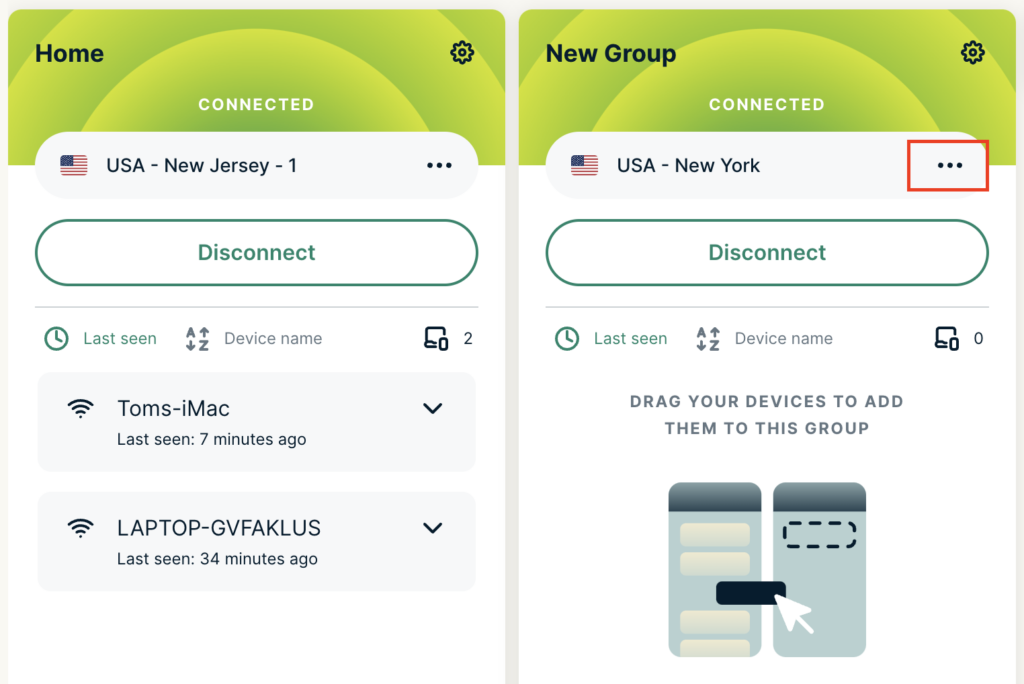
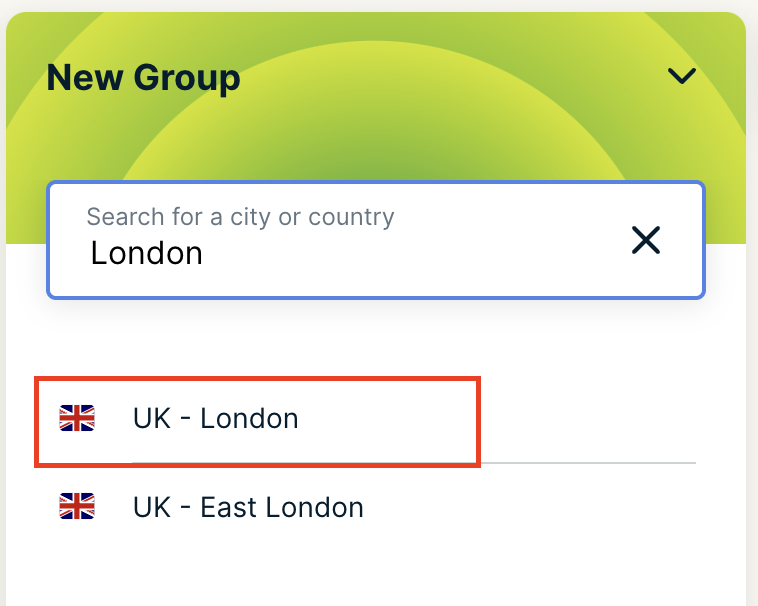
5. Click the three dots next to the new server location and type in the location you want to connect to. Click the new location to connect.

ExpressVPN Change server
ExpressVPN select new server

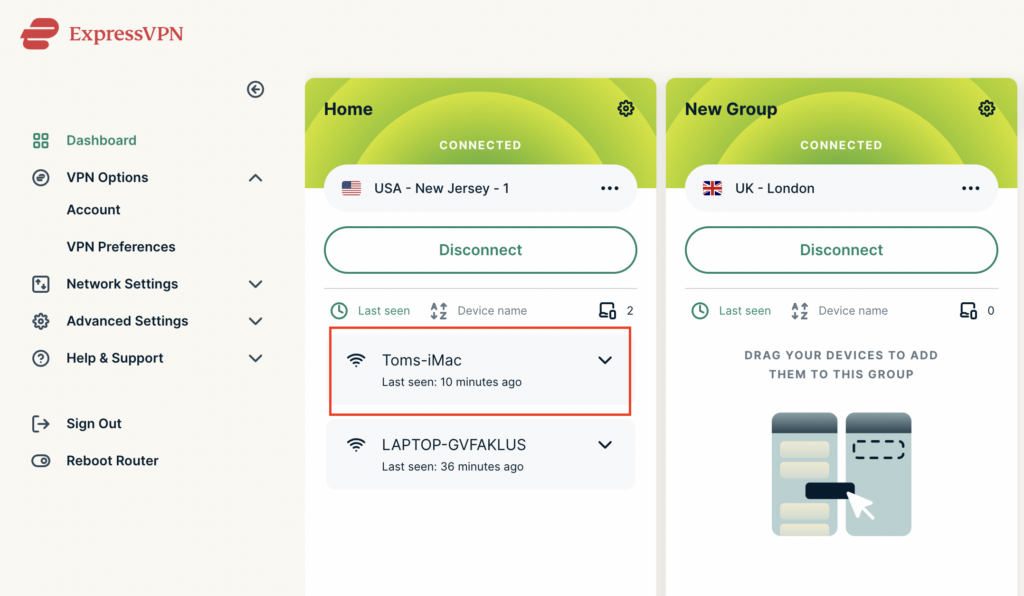
5. Click and drag the device that you want assigned to the VPN New Group.

ExpressVPN select device
ExpressVPN device assigned

The devices assigned to new group will now connect to that location while the devices in the first VPN group will remain connected to the VPN server selected in that area.

Getting Started With Your FlashRouter

Getting Started With Your FlashRouter

  1. Connect FlashRouter to Internet
  2. Access FlashRouter DD-WRT firmware settings
  3. Connect FlashRouter to VPN 
VIEW ALL SETUP GUIDES
TROUBLESHOOTING
FAQS

Setting Up Your VPN Service

Select your operating system below to setup the FlashRouters Privacy App on your router, the easiest way to connect to the best VPN services.  For ExpressVPN FlashRouter users, please view the following section for setting up the ExpressVPN app.

Windows

Mac

Android

iPhone

ExpressVPN NETGEAR ROUTERS
ExpressVPN LINKSYS ROUTERS

More Ways to Get Help

Can’t find the answer you are looking for? Open a support ticket and our support team will be there to assist you.

Why can’t I access router settings?

Dave · May 3, 2019 ·

Be sure to first try the preset details to access your FlashRouter’s settings.

First time setup

Are you connected to the FlashRouter's network?

In order to access the FlashRouter’s settings you need to be connected to the FlashRouter’s network via ethernet or WiFi.

It is possible that if you are connected to the FlashRouter’s network you device might have static IP settings from a previous connection preventing it from being read correctly. Check your device’s static IP settings before proceeding.

Is your FlashRouter wired correctly?

Your FlashRouter should be wired as detailed in our Connect FlashRouter to the Internet setup.

A common mistake is to connect from your modem or other router to a LAN/numbered port of the FlashRouter instead of the WAN/Internet port of the FlashRouter as it should be. Doing so results in no access to the FlashRouter’s settings.

Lost access

How to find you FlashRouter's Local IP Address?

It is possible that your Local IP Address was changed at some point. Your Local IP Address is the address that you can access the FlashRouter’s settings with. We recommend finding the Local IP Address of the FlashRouter.

Was your FlashRouter reset?

If your FlashRouter is showing a local IP Address of 192.168.1.1 and you are seeing ‘dd-wrt’ as an available network in your wireless networks, your FlashRouter was reset. Reconfigure your FlashRouter.

Keep in mind that seeing a Local IP Address of 192.168.1.1 can also mean your are wired incorrectly and the router has not been reset. Be sure to check your wireless networks for ‘dd-wrt’. If the FlashRouter’s wireless network name appears as it was set then your FlashRouter was not reset and you should see the above section.

Tried updating firmware

Why can't I access my FlashRouter after a firmware upgrade?

When performing a firmware upgrade there is a dropdown that has Don’t Reset or Reset to Default settings as options.

If you accidentally selected Reset to Default settings you will need to reconfigure your FlashRouter.

If you had Don’t Reset selected and are still unable to connect to the FlashRouter’s network after a firmware upgrade, first make sure you are connected to the FlashRouter’s network as WiFi can disconnect during an upgrade, and then Reboot the FlashRouter.

IVPN Manual OpenVPN Setup

TeamFlashRouters · Apr 16, 2019 ·

Preparing for Manual IVPN Setup

Verify your IVPN login information

If you are not already an IVPN user Sign Up Now.

Log in to your account on the IVPN website.

FlashRouter Privacy App - IVPN Login

Locate and Copy the Username displayed on the VPN Accounts page.

FlashRouters DD-WRT Privacy APP IVPN OpenVPN Specific Username and Password

IVPN Server Addresses

View a full list of IVPN servers.

United States

Atlanta:
us-ga.gw.ivpn.net

Dallas:
us-tx.gw.ivpn.net

Los Angeles
:
us-ca.gw.ivpn.net

Miami
:
us-fl.gw.ivpn.net

New Jersey
:
us-nj.gw.ivpn.net

Salt Lake City
:
us-ut.gw.ivpn.net

DD-WRT Router Setup for IVPN

Navigate to Services > VPN

Enter IVPN settings

OpenVPN Client

Start OpenVPN Client

If you wish to disable your VPN connection simply set this to Disable at any time and click Apply Settings.

Server IP/Name

Copy and paste the server you would like to connect to from the server list above. Be sure there are no extra spaces or characters.

If you wish to change PureVPN connection locations, THIS IS THE ONLY FIELD YOU NEED TO CHANGE.

Port

443 for TCP
2049 for UDP

Tunnel Device

TUN

Tunnel Protocol

TCP or UDP

Encryption cipher

AES-256-CBC

Hash Algorithm

SHA1

User Pass Authentication

Enable

Username

Enter the Username you noted from the Home page above.
eg. ivpn1234567

Password

Enter the Password you successfully logged in to your IVPN account with.

Advanced Options

Enable

TLS Cipher

None

LZO Compression

Adaptive

NAT

Enable

Firewall Protection

Enable

TLS Auth Key

-----BEGIN OpenVPN Static key V1-----
ac470c93ff9f5602a8aab37dee84a528
14d10f20490ad23c47d5d82120c1bf85
9e93d0696b455d4a1b8d55d40c2685c4
1ca1d0aef29a3efd27274c4ef09020a3
978fe45784b335da6df2d12db97bbb83
8416515f2a96f04715fd28949c6fe296
a925cfada3f8b8928ed7fc963c156327
2f5cf46e5e1d9c845d7703ca881497b7
e6564a9d1dea9358adffd435295479f4
7d5298fabf5359613ff5992cb57ff081
a04dfb81a26513a6b44a9b5490ad265f
8a02384832a59cc3e075ad545461060b
7bcab49bac815163cb80983dd51d5b1f
d76170ffd904d8291071e96efc3fb777
856c717b148d08a510f5687b8a8285dc
ffe737b98916dd15ef6235dee4266d3b
-----END OpenVPN Static key V1-----

Additional Config

tls-client
tls-cipher TLS-DHE-RSA-WITH-AES-256-CBC-SHA
resolv-retry infinite
keepalive 10 60
nobind
persist-key
persist-tun
persist-remote-ip
verb 3

Policy Based Routing

This field can be used for split VPN and Dual Gateway routing.

CA Cert

-----BEGIN CERTIFICATE-----
MIIGoDCCBIigAwIBAgIJAJjvUclXmxtnMA0GCSqGSIb3DQEBCwUAMIGMMQswCQYD
VQQGEwJDSDEPMA0GA1UECAwGWnVyaWNoMQ8wDQYDVQQHDAZadXJpY2gxETAPBgNV
BAoMCElWUE4ubmV0MQ0wCwYDVQQLDARJVlBOMRgwFgYDVQQDDA9JVlBOIFJvb3Qg
Q0EgdjIxHzAdBgkqhkiG9w0BCQEWEHN1cHBvcnRAaXZwbi5uZXQwHhcNMjAwMjI2
MTA1MjI5WhcNNDAwMjIxMTA1MjI5WjCBjDELMAkGA1UEBhMCQ0gxDzANBgNVBAgM
Blp1cmljaDEPMA0GA1UEBwwGWnVyaWNoMREwDwYDVQQKDAhJVlBOLm5ldDENMAsG
A1UECwwESVZQTjEYMBYGA1UEAwwPSVZQTiBSb290IENBIHYyMR8wHQYJKoZIhvcN
AQkBFhBzdXBwb3J0QGl2cG4ubmV0MIICIjANBgkqhkiG9w0BAQEFAAOCAg8AMIIC
CgKCAgEAxHVeaQN3nYCLnGoEg6cY44AExbQ3W6XGKYwC9vI+HJbb1o0tAv56ryvc
6eS6BdG5q9M8fHaHEE/jw9rtznioiXPwIEmqMqFPA9k1oRIQTGX73m+zHGtRpt9P
4tGYhkvbqnN0OGI0H+j9R6cwKi7KpWIoTVibtyI7uuwgzC2nvDzVkLi63uvnCKRX
cGy3VWC06uWFbqI9+QDrHHgdJA1F0wRfg0Iac7TE75yXItBMvNLbdZpge9SmplYW
FQ2rVPG+n75KepJ+KW7PYfTP4Mh3R8A7h3/WRm03o3spf2aYw71t44voZ6agvslv
wqGyczDytsLUny0U2zR7/mfEAyVbL8jqcWr2Df0m3TA0WxwdWvA51/RflVk9G96L
ncUkoxuBT56QSMtdjbMSqRgLfz1iPsglQEaCzUSqHfQExvONhXtNgy+Pr2+wGrEu
SlLMee7aUEMTFEX/vHPZanCrUVYf5Vs8vDOirZjQSHJfgZfwj3nL5VLtIq6ekDhS
AdrqCTILP3V2HbgdZGWPVQxl4YmQPKo0IJpse5Kb6TF2o0i90KhORcKg7qZA40sE
bYLEwqTM7VBs1FahTXsOPAoMa7xZWV1TnigF5pdVS1l51dy5S8L4ErHFEnAp242B
DuTClSLVnWDdofW0EZ0OkK7V9zKyVl75dlBgxMIS0y5MsK7IWicCAwEAAaOCAQEw
gf4wHQYDVR0OBBYEFHUDcMOMo35yg2A/v0uYfkDE11CXMIHBBgNVHSMEgbkwgbaA
FHUDcMOMo35yg2A/v0uYfkDE11CXoYGSpIGPMIGMMQswCQYDVQQGEwJDSDEPMA0G
A1UECAwGWnVyaWNoMQ8wDQYDVQQHDAZadXJpY2gxETAPBgNVBAoMCElWUE4ubmV0
MQ0wCwYDVQQLDARJVlBOMRgwFgYDVQQDDA9JVlBOIFJvb3QgQ0EgdjIxHzAdBgkq
hkiG9w0BCQEWEHN1cHBvcnRAaXZwbi5uZXSCCQCY71HJV5sbZzAMBgNVHRMEBTAD
AQH/MAsGA1UdDwQEAwIBBjANBgkqhkiG9w0BAQsFAAOCAgEAABAjRMJy+mXFLezA
Z8iUgxOjNtSqkCv1aU78K1XkYUzbwNNrSIVGKfP9cqOEiComXY6nniws7QEV2IWi
lcdPKm0x57recrr9TExGGOTVGB/WdmsFfn0g/HgmxNvXypzG3qulBk4qQTymICds
l9vIPb1l9FSjKw1KgUVuCPaYq7xiXbZ/kZdZX49xeKtoDBrXKKhXVYoWus/S+k2I
S8iCxvcp599y7LQJg5DOGlbaxFhsW4R+kfGOaegyhPvpaznguv02i7NLd99XqJhp
v2jTUF5F3T23Z4KkL/wTo4zxz09DKOlELrE4ai++ilCt/mXWECXNOSNXzgszpe6W
As0h9R++sH+AzJyhBfIGgPUTxHHHvxBVLj3k6VCgF7mRP2Y+rTWa6d8AGI2+Raey
V9DVVH9UeSoU0Hv2JHiZL6dRERnyg8dyzKeTCke8poLIjXF+gyvI+22/xsL8jcNH
i9Kji3Vpc3i0Mxzx3gu2N+PL71CwJilgqBgxj0firr3k8sFcWVSGos6RJ3IvFvTh
xYx0p255WrWM01fR9TktPYEfjDT9qpIJ8OrGlNOhWhYj+a45qibXDpaDdb/uBEmf
2sSXNifjSeUyqu6cKfZvMqB7pS3l/AhuAOTT80E4sXLEoDxkFD4C78swZ8wyWRKw
sWGIGABGAHwXEAoDiZ/jjFrEZT0=
-----END CERTIFICATE-----

CLICK APPLY SETTINGS

Leave all settings not mentioned above as their default setting.

Verify a successful IVPN connection

Navigate to Status > OpenVPN

  1. You should now see a CONNECTED SUCCESS message.
  2. Visit WhatIsMyIPAddress to verify your new IP address, virtual location, and status as Protected at the top of the page.

In some cases you may notice that the location is not showing the same location as the server you have input in your router settings; this is because geo tracking tools are often tricked by VPN connections. As long as you see an IP address that is not the same as your normal Internet IP address then you are indeed connected to IVPN.

Back up your settings

Navigate to Administration > Backup

  1. Click the Backup button.
  2. A file named nvrambak.bin will be saved to your computer.
  3. You can load nvrambak.bin to restore your settings in the event of a reset.
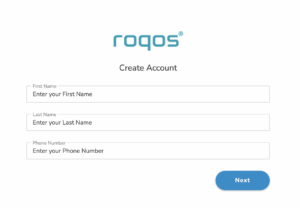
How to change the IVPN server

  1. Copy the new IVPN server address from the above server list.
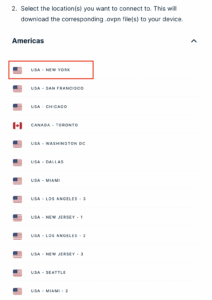
  2. Paste the server into the Server IP/Name field.
  3. Click Apply Settings.

TROUBLESHOOTING

Still having issues? Visit the VPN Troubleshooting section.

Troubleshoot Here

ProtonVPN Setup Guide for GL.iNet Routers

Dave · Mar 23, 2026 ·

You can connect to ProtonVPN on your GL.iNet router using Wireguard or OpenVPN.

Quick Options

  • Wireguard: Download your preferred server .conf configuration file from the ProtonVPN website.

  • OpenVPN: Download your preferred server .ovpn configuration file from the ProtonVPN website.

:point_right: If you are not already a ProtonVPN user Sign Up Now.

ProtonVPN Wireguard Setup for GLiNet (Recommended)

1. Login to your ProtonVPN account and go to the Downloads section of your ProtonVPN account page

2. Scroll down to find the WireGuard configuration section. Name your configuration and then select Router as the platform, and select Standard server configs.

3. Click Create button to choose the recommended server or scroll down to choose and Download any of the available server files from the list.

4.  Login to GL.iNet firmware settings (usually 192.168.8.1) in a browser on any computer or smart device connected to the GL.iNet FlashRouter’s network.

View our guide for more instructions on how to access GL.iNet firmware settings.

5. Navigate to the VPN tab and select WireGuard Client then click + New Group and name your connection and click the check to save.

6. Upload the configuration file and click Apply.

7. Start a connection by clicking the 3 dots (…) > Start next to your chosen server.

8. A green dot confirms success. You can also switch between Global Mode or Policy Mode for routing in the VPN Dashboard.

ProtonVPN OpenVPN Setup for GLiNet

1. Log in to your ProtonVPN account and navigate to the Account tab. Scroll down to find your OpenVPN specific Username and Password.

2. Go to the Downloads section of your ProtonVPN account page

ProtonVPN Downloads

3. Scroll down to find the OpenVPN configuration Files. Select Router as the platform, UDP as the protocol, and select Standard server configs. Choose your preferred country and download the configuration file.

4. Login to GL.iNet firmware settings (usually 192.168.8.1) in a browser on any computer or smart device connected to the GL.iNet FlashRouter’s network.

View our guide for more instructions on how to access GL.iNet firmware settings.

5. Navigate to the VPN tab and select OpenVPN Client.

GL.iNet VPN OpenVPN Client

6. Select Add Manually then click + New Group and name your connection and click the check to save.

7. Upload the configuration file and input your username and password, click Apply.

8. Start a connection by clicking the 3 dots (…) > Start next to your chosen server.

9. A green dot confirms success. You can also switch between Global Mode or Policy Mode for routing in the VPN Dashboard.

  1. You should now see information appear in the Server Address, Server Listen Port, Traffic Statistics, and Client Virtual IP areas.
  2. Visit ProtonVPN’s IP Check to verify your new IP address and virtual location.

In some cases you may notice that the location is not showing the same location as the server you have input in your router settings; this is because geo tracking tools are often tricked by VPN connections. As long as you see an IP address that is not the same as your normal Internet IP address then you are indeed connected to ProtonVPN.

🚫📱Do not run ProtonVPN apps on devices connected to your ProtonVPN router. Using the app at the same time as the router VPN may cause conflicts and connection issues.

Still having issues?

Feel free to submit a ticket and we will get back to you as soon as possible.

My VPN stopped working on my FlashRouter.

TeamFlashRouters · Jun 4, 2019 ·

The VPN connection on the FlashRouter will not drop in most instances however if the VPN stopped working follow the steps below.

In order to use the FlashRouters Privacy App you need DD-WRT build 02/15/22 r48362 or 2/10/20 r42335.

Follow these instructions to upgrade the firmware to 02/15/22 r48362: How do I upgrade the DD-WRT firmware of my FlashRouter?

If you would like the fully featured FR Privacy App version with Simple Setup you must use firmware builds from 2/10/20 r42335.

FlashRouters Privacy App

Navigate to Status > MyPage

  1. If MyPage is not properly loading the FlashRouters Privacy App try reinstalling the FlashRouters Privacy App.
  2. With the Auto Connect to VPN box checked simply power off the FlashRouter and power it back on to connect back to VPN.
  3. Verify that you have the correct settings entered for your provider. A change in the user information used to authenticate the VPN connection will cause a disconnect.
  4. Try a different VPN server location.
  5. If applicable, switch from UDP to TCP or vice versa.
  6. Make sure that you have any VPN/proxy apps and extensions turned off on all devices connected to the FlashRouter.

DD-WRT Manual VPN

Navigate to Services > VPN

  1. Verify that you have the correct settings entered for your provider. A change in the user information used to authenticate the VPN connection will cause a disconnect.
  2. Scroll to the bottom of the page and click Apply Settings.
  3. Try a different VPN server location.
  4. If applicable, switch from UDP to TCP or vice versa. Check your VPN provider’s website to see if the port needs to change with the protocol.
  5. Make sure that you have any VPN/proxy apps and extensions turned off on all devices connected to the FlashRouter.
« Previous Page
Next Page »

Primary Sidebar

  • Troubleshooting
  • Router Access
  • Internet Connection Issues
  • WiFi Connectivity
  • General VPN Issues
  • TeamViewer Remote Support
  • DD-WRT Firmware
  • Facebook
  • Twitter
  • Instagram
  • Pinterest
  • YouTube

Footer