• Skip to primary navigation
  • Skip to main content
  • Skip to primary sidebar
  • Skip to footer

FlashRouters Support Portal

Prioritizing Privacy

  • SETUP GUIDES
    • Privacy Hero Router Setup Guide
    • ASUS-WRT Router Setup Guide
    • AsusWRT-Merlin Router Setup Guide
    • DD-WRT Router Setup Guide
    • ExpressVPN Router Setup Guide
    • GL.iNet Router Setup Guide
    • Roqos Core Router Setup Guide
  • TROUBLESHOOTING
    • Router Access
    • WiFi Connectivity
    • Internet Connection Issues
    • General VPN Issues
    • DD-WRT Firmware
    • TeamViewer Remote Support
  • FAQs
    • Router FAQs
    • VPN FAQs
    • Warranty and Returns FAQs
    • Sales FAQs
    • Shipping FAQs
    • Service Plan FAQs
  • Show Search
Hide Search

Search Results for: span of a set

GL.iNet Access Router Settings and Firmware Upgrade

TeamFlashRouters · Apr 3, 2023 ·

Follow this guide to upgrade the firmware of your GL.iNet FlashRouter.

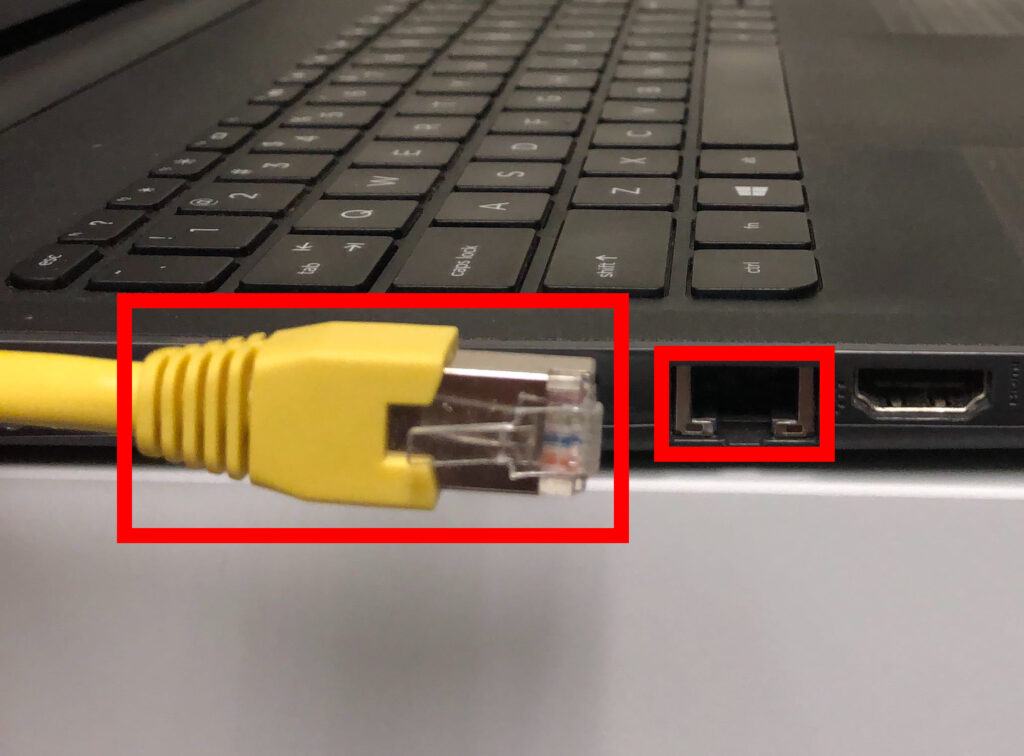
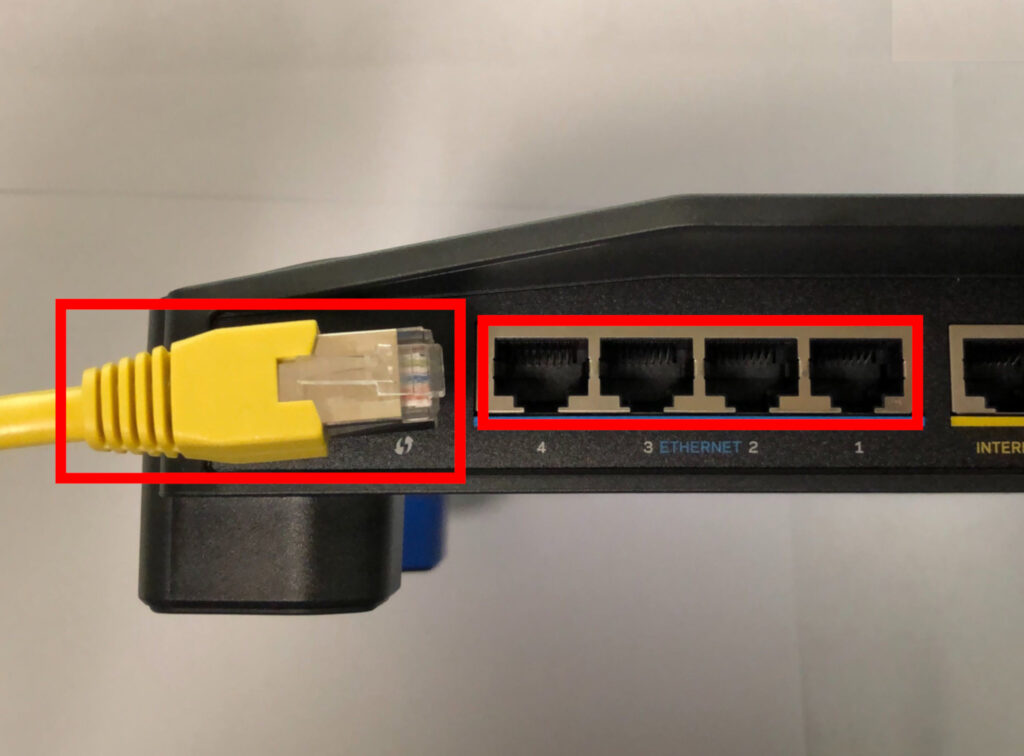
1. Connect your computer, phone, or tablet to the GL.iNet router via wireless (FlashRouter24 / FlashRouter50) or via ethernet cable to one of the LAN ports on the router.

The FlashRouter WiFi password is printed on the sheet that came with the router and is set to Wireless#[First 5 characters of your router MAC]. The router MAC can be found on the bottom of your router if you cannot locate the sheet. For e.g. if your MAC is 9483C07E70A8 then your WiFi password is Wireless#9483C

Be sure to capitalize the W.

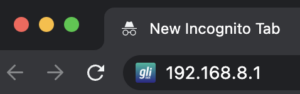
2. Once connected via wireless or ethernet on your device open your browser and go to 192.168.8.1
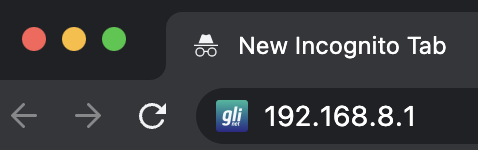
GL.iNet router access

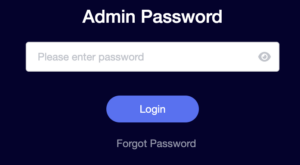
3. Enter openwrt as the admin password to access the GL.iNet firmware settings. Newer devices may have a different admin password set as openwrt1 or glopenwrt1
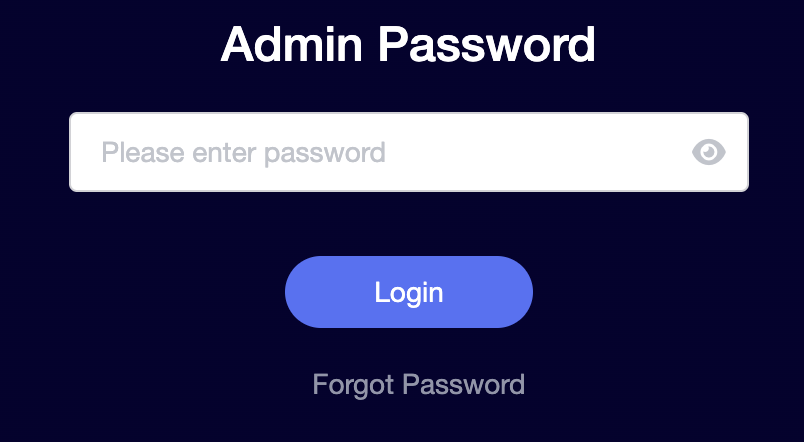
GL.iNet admin password enter

3. If a new firmware upgrade is available the router settings will either display a banner when you first access the router or a header. Click Install or the Upgrade arrow depending on which appears for you.

GL.iNet Firmware Upgrade Banner
GL.iNet Firmware Upgrade Header

4. Make sure the Keep Settings toggle is pushed to the right so your router does not get reset. Click the Install button to begin the firmware upgrade.

GL.iNet Install Firmware Upgrade

5. The firmware update should take about 2-3 minutes. You may need to reconnect your wireless devices after the network comes back up in your available networks.
TROUBLESHOOTING

Still having issues? Visit the VPN Troubleshooting section.

Troubleshoot Here

Flint/Slate GL.iNet Change Wi-Fi name and password

TeamFlashRouters · Apr 20, 2023 ·

Follow this guide to change the Wi-Fi name and password on your GL.iNet FlashRouter.

1. Connect your computer, phone, or tablet to the GL.iNet router via wireless (FlashRouter24 / FlashRouter50) or via ethernet cable to one of the LAN ports on the router.

The FlashRouter WiFi password is printed on the sheet that came with the router and is set to Wireless#[First 5 characters of your router MAC]. The router MAC can be found on the bottom of your router if you cannot locate the sheet. For e.g. if your MAC is 1459C07E70A8 then your WiFi password is Wireless#1459C

Be sure to capitalize the W.

2. Once connected via wireless or ethernet on your device open your browser and go to 192.168.8.1

GL.iNet router access

3. Enter openwrt as the admin password to access the GL.iNet firmware settings.

GL.iNet admin password enter

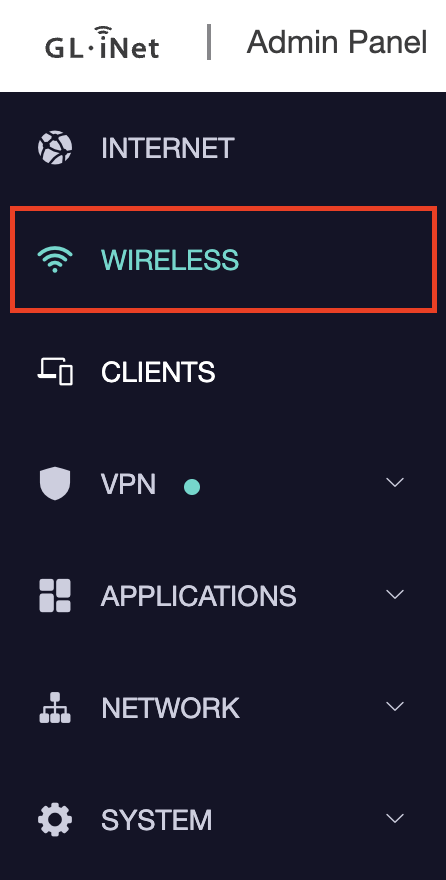
4. Click Wireless.

GL.iNet Click Wireless

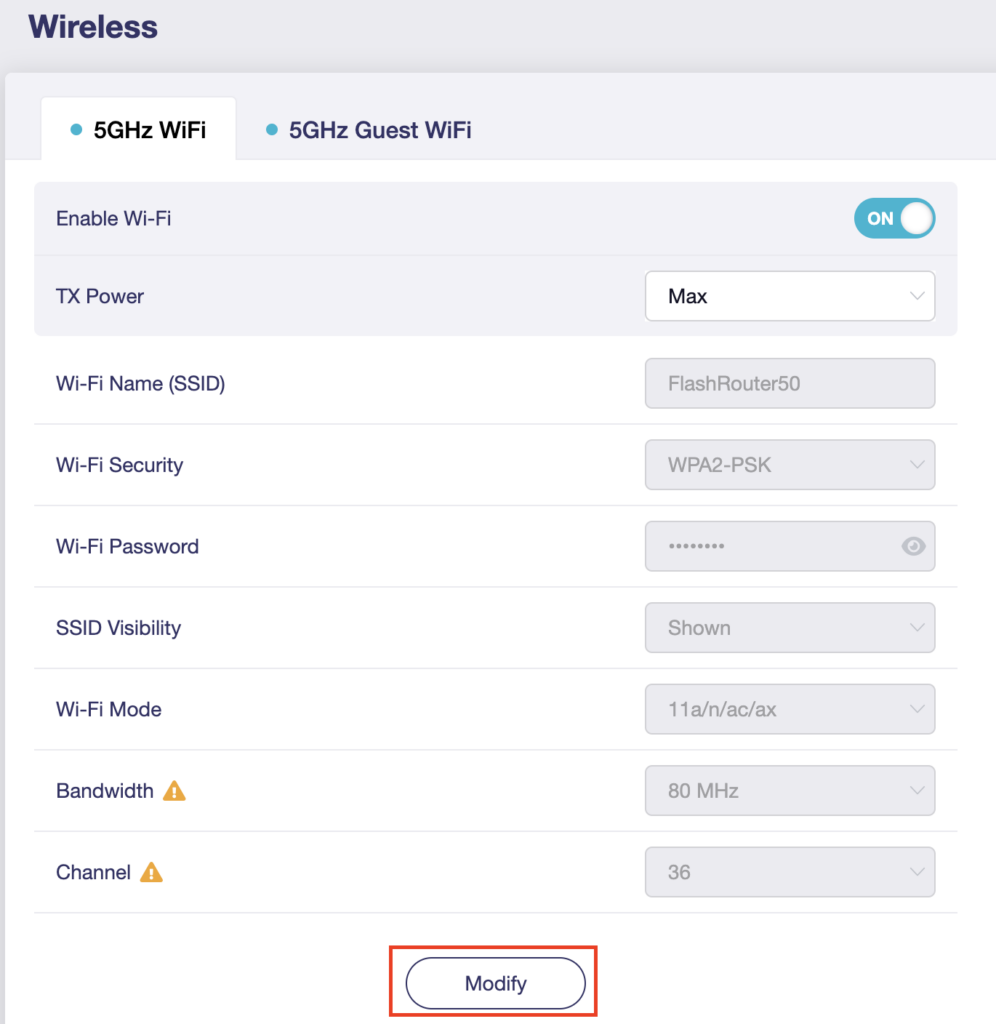
5. Click Modify under the 5GHz or 2.4GHz band.

GL.iNet Modify Wifi

The 5GHz and 2.4GHz information must be changed at separate times. Keep in mind that if you are connected to wireless when changing one band you may need to reconnect with the new info you set to be on the network again to make changes to the other band.

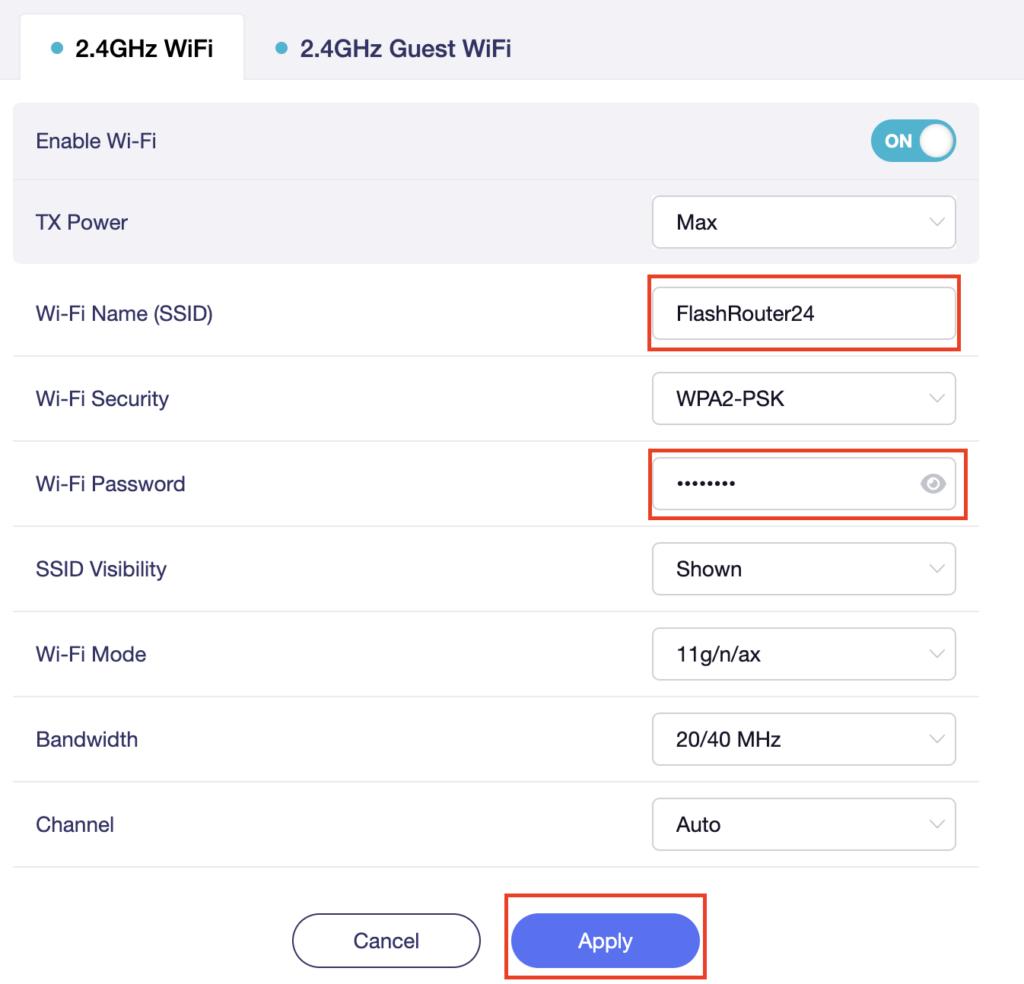
6. Change the Wi-Fi Name (SSID) and Wi-Fi Password fields to what you want to use. The SSID should be unique and NOT a duplicate of an existing network. Click Apply.

GL.iNet change Wifi name and password

7. Connect your devices to the new wireless network.

TROUBLESHOOTING

Still having issues? Visit the VPN Troubleshooting section.

Troubleshoot Here

Flint/Slate GL.iNet Disable Wi-Fi

TeamFlashRouters · Apr 20, 2023 ·

Follow this guide to disable Wi-Fi network on your GL.iNet FlashRouter.

1. Connect your computer, phone, or tablet to the GL.iNet router via wireless (FlashRouter24 / FlashRouter50) or via ethernet cable to one of the LAN ports on the router.

The FlashRouter WiFi password is printed on the sheet that came with the router and is set to Wireless#[First 5 characters of your router MAC]. The router MAC can be found on the bottom of your router if you cannot locate the sheet. For e.g. if your MAC is 1459C07E70A8 then your WiFi password is Wireless#1459C

Be sure to capitalize the W.

2. Once connected via wireless or ethernet on your device open your browser and go to 192.168.8.1

GL.iNet router access

3. Enter openwrt as the admin password to access the GL.iNet firmware settings.

GL.iNet admin password enter

4. Click Wireless.

GL.iNet Click Wireless

5. Click Modify under the 5GHz or 2.4GHz band.

GL.iNet Modify Wifi

The 5GHz and 2.4GHz bands must be disabled at separate times. Keep in mind that if you are connected to wireless when disabling one band you may need to reconnect with the other band to disable it. Also make sure you have a device that has ethernet capabilities so you can still access the settings with wireless disabled.

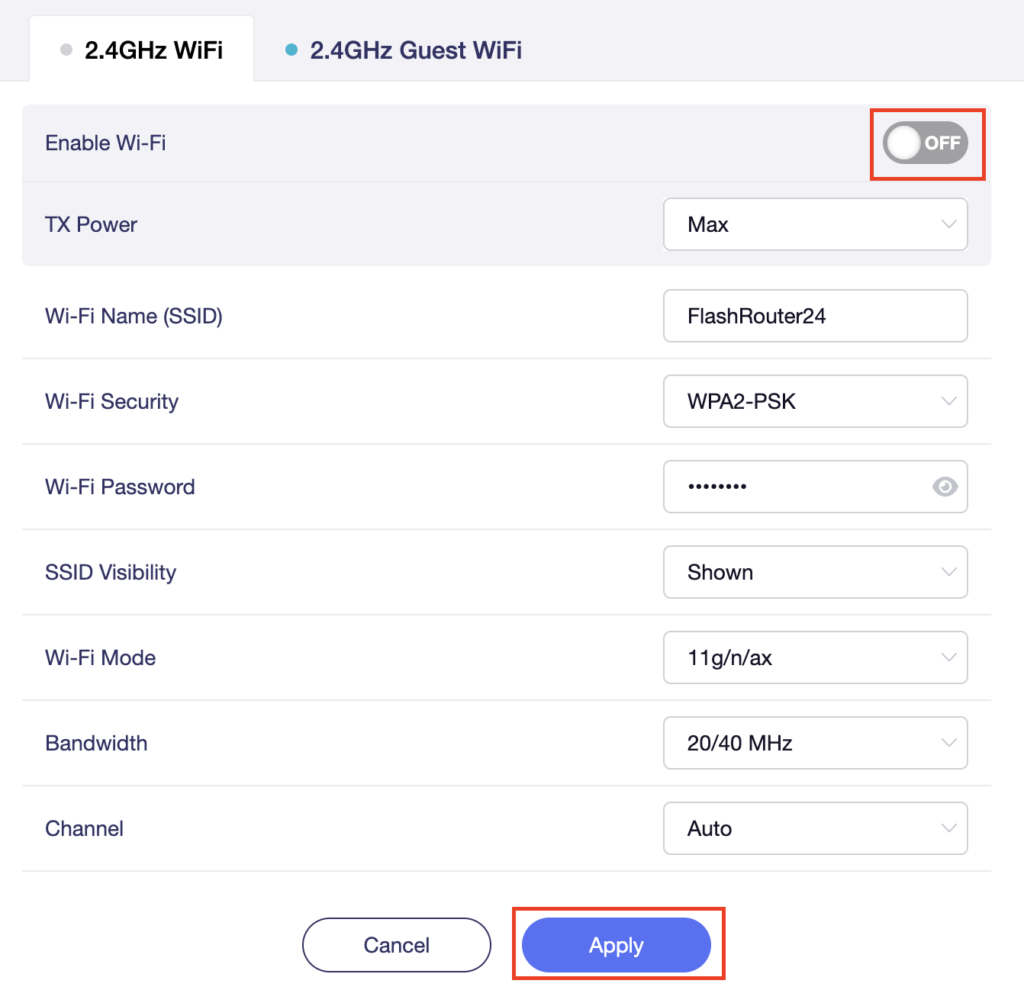
6. Set the Enable Wi-Fi toggle to the OFF position and click Apply.

GL.iNet Disable Wifi

TROUBLESHOOTING

Still having issues? Visit the VPN Troubleshooting section.

Troubleshoot Here

Flint/Slate GL.iNet Guest Network Setup

TeamFlashRouters · Apr 20, 2023 ·

Follow this guide to setup a Guest Network on your GL.iNet FlashRouter. Devices connected to the guest network will be on a separate subnet and will not have access to the router settings or be able to talk to devices on the main network.

1. Connect your computer, phone, or tablet to the GL.iNet router via wireless (FlashRouter24 / FlashRouter50) or via ethernet cable to one of the LAN ports on the router.

The FlashRouter WiFi password is printed on the sheet that came with the router and is set to Wireless#[First 5 characters of your router MAC]. The router MAC can be found on the bottom of your router if you cannot locate the sheet. For e.g. if your MAC is 1459C07E70A8 then your WiFi password is Wireless#1459C

Be sure to capitalize the W.

2. Once connected via wireless or ethernet on your device open your browser and go to 192.168.8.1

GL.iNet router access

3. Enter openwrt as the admin password to access the GL.iNet firmware settings.

GL.iNet admin password enter

4. Click Wireless.

GL.iNet Click Wireless

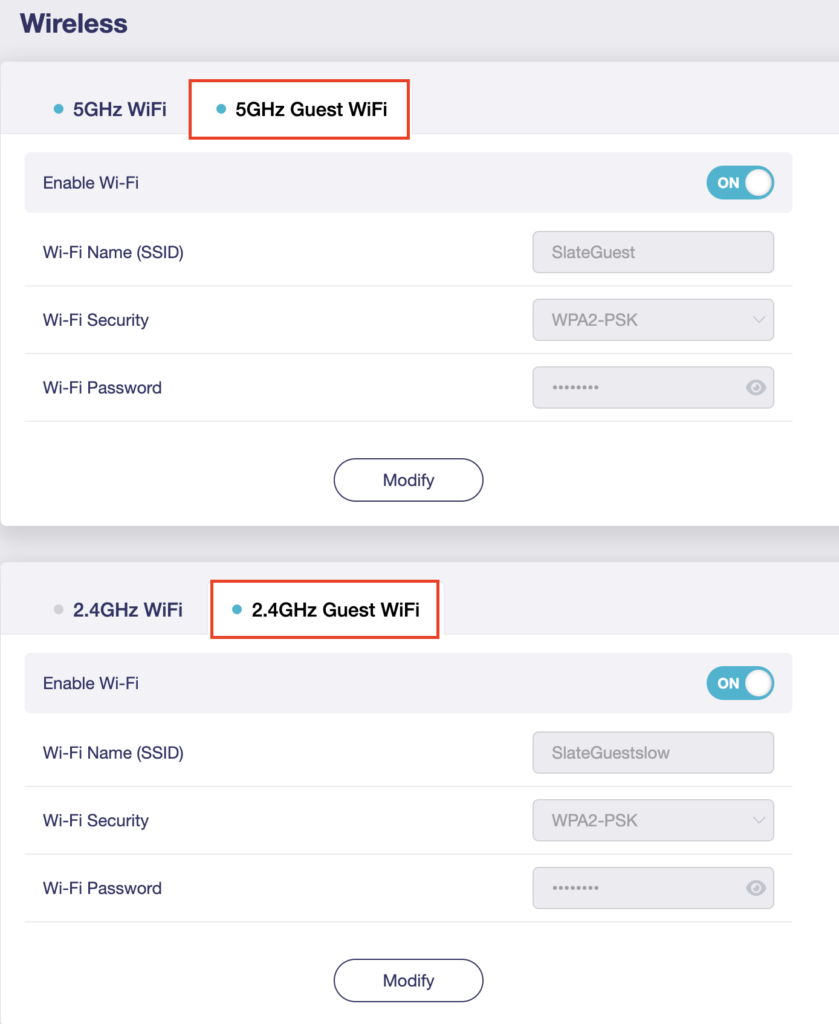
5. Click 5GHz Guest Wi-Fi or 2.4GHz Guest Wi-Fi.

GL.iNet Select Guest Wifi

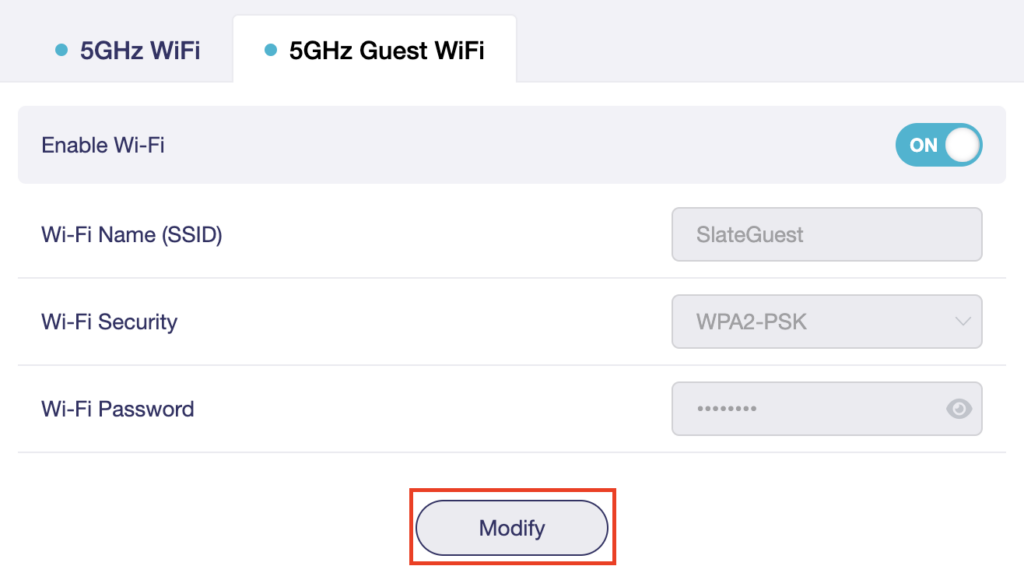
6. Click Modify.

GL.iNet Guest Modify

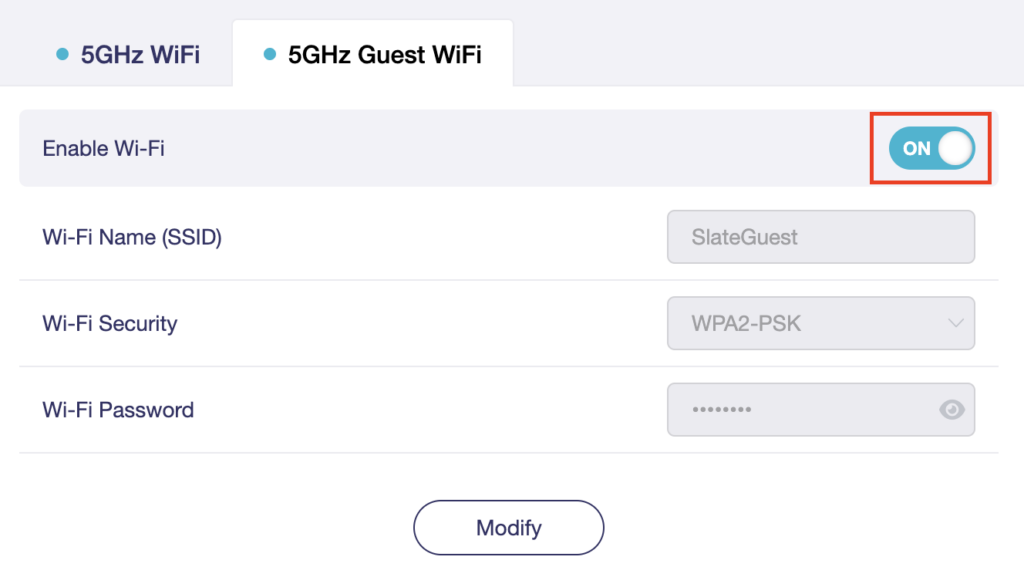
7. Set the Enable Wi-Fi toggle to the ON position.

GL.iNet Enable Guest Wifi

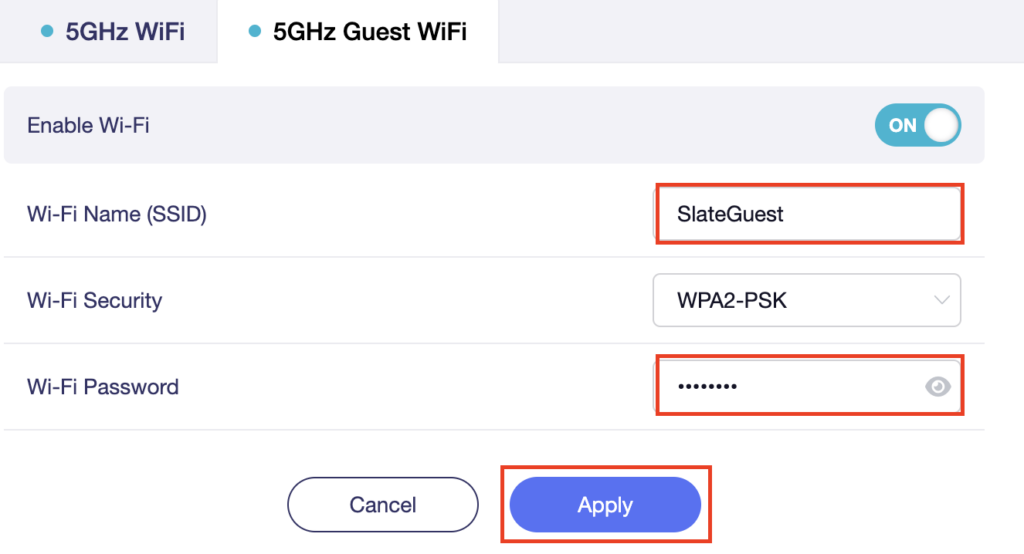
8. Change the Wi-Fi Name (SSID) and Wi-Fi Password fields to what you want to use. The SSID should be unique and NOT a duplicate of an existing network. Click Apply.

GL.iNet Guest change wifi name and pass

9. Connect your devices to the new guest wireless network.

TROUBLESHOOTING

Still having issues? Visit the VPN Troubleshooting section.

Troubleshoot Here

VyprVPN Manual OpenVPN Setup

TeamFlashRouters · Apr 19, 2019 ·

Preparing for Manual VyprVPN Setup

Verify your VyprVPN login information

If you are not already a VyprVPN user Sign Up Now.

Log in to your account on the VyprVPN website.

VyprVPN - Website Login

VyprVPN Server Addresses

United States

Los Angeles, CA us1.vpn.goldenfrog.com
Washington, DC us2.vpn.goldenfrog.com
Austin, TX us3.vpn.goldenfrog.com
Miami, FL us4.vpn.goldenfrog.com
New York City, NY us5.vpn.goldenfrog.com
Chicago, IL us6.vpn.goldenfrog.com
San Francisco, CA us7.vpn.goldenfrog.com
Seattle, WA us8.vpn.goldenfrog.com

United Kingdom

 London uk1.vpn.goldenfrog.com

Canada

Toronto ca1.vpn.goldenfrog.com

Australia

Sydney au1.vpn.goldenfrog.com
Melbourne au2.vpn.goldenfrog.com
Perth au3.vpn.goldenfrog.com

Germany

Frankfurt de1.vpn.goldenfrog.com

Rest of the World

UAE – Dubai ae1.vpn.goldenfrog.com
Argentina – Buenos Aires ar1.vpn.goldenfrog.com
Austria – Vienna at1.vpn.goldenfrog.com
Belgium – Brussels be1.vpn.goldenfrog.com
Bulgaria – Sofia bg1.vpn.goldenfrog.com
Bahrain – Manama bh1.vpn.goldenfrog.com
Brazil – São Paulo br1.vpn.goldenfrog.com
Switzerland – Zurich ch1.vpn.goldenfrog.com
Colombia – Bogotá co1.vpn.goldenfrog.com
Costa Rica – San José cr1.vpn.goldenfrog.com
Czech Republic – Prague cz1.vpn.goldenfrog.com
Germany – Frankfurt de1.vpn.goldenfrog.com
Denmark – Copenhagen dk1.vpn.goldenfrog.com
Algeria – Algiers dz1.vpn.goldenfrog.com
Egypt – Cairo eg1.vpn.goldenfrog.com
Spain – Madrid es1.vpn.goldenfrog.com
Netherlands – Amsterdam eu1.vpn.goldenfrog.com
Finland – Helsinki fi1.vpn.goldenfrog.com
France – Paris fr1.vpn.goldenfrog.com
Greece – Athens gr1.vpn.goldenfrog.com
Hong Kong – Hong Kong hk1.vpn.goldenfrog.com
Indonesia – Jakarta id1.vpn.goldenfrog.com
Ireland – Dublin ie1.vpn.goldenfrog.com
Israel – Tel Aviv il1.vpn.goldenfrog.com
India – Mumbai in1.vpn.goldenfrog.com
Iceland – Reykjavík is1.vpn.goldenfrog.com
Italy – Rome it1.vpn.goldenfrog.com
Japan – Tokyo jp1.vpn.goldenfrog.com
South Korea – Seoul kr1.vpn.goldenfrog.com
Liechtenstein – Schaan li1.vpn.goldenfrog.com
Lithuania – Vilnius lt1.vpn.goldenfrog.com
Luxembourg – Luxembourg City lu1.vpn.goldenfrog.com
Latvia – Riga lv1.vpn.goldenfrog.com
Marshall Islands – Majuro mh1.vpn.goldenfrog.com
Macao – Macao mo1.vpn.goldenfrog.com
Maldives – Malé mv1.vpn.goldenfrog.com
Mexico – Mexico City mx1.vpn.goldenfrog.com
Malaysia – Kuala Lumpur my1.vpn.goldenfrog.com
Norway – Oslo no1.vpn.goldenfrog.com
New Zealand – Auckland nz1.vpn.goldenfrog.com
Panama – Panama City pa1.vpn.goldenfrog.com
Philippines – Manila ph1.vpn.goldenfrog.com
Pakistan – Karachi pk1.vpn.goldenfrog.com
Poland – Warsaw pl1.vpn.goldenfrog.com
Portugal – Lisbon pt1.vpn.goldenfrog.com
Qatar – Doha qa1.vpn.goldenfrog.com
Romania – Bucharest ro1.vpn.goldenfrog.com
Russia – Moscow ru1.vpn.goldenfrog.com
Saudi Arabia – Riyadh sa1.vpn.goldenfrog.com
Sweden – Stockholm se1.vpn.goldenfrog.com
Singapore – Singapore sg1.vpn.goldenfrog.com
Slovenia – Ljubljana si1.vpn.goldenfrog.com
Slovakia – Bratislava sk1.vpn.goldenfrog.com
El Salvador – San Salvador sv1.vpn.goldenfrog.com
Thailand – Bangkok th1.vpn.goldenfrog.com
Turkey – Istanbul tr1.vpn.goldenfrog.com
Taiwan – Taipei tw1.vpn.goldenfrog.com
Ukraine – Kiev ua1.vpn.goldenfrog.com
Uruguay – Montevideo uy1.vpn.goldenfrog.com
Vietnam – Hanoi vn1.vpn.goldenfrog.com

DD-WRT Router Setup for VyprVPN

Navigate to Services > VPN

VyprVPN offers two different Encryption levels:

Default Encryption (Blowfish-CBC)
typically provides faster speeds.

Strong Encryption (AES-256) provides stronger encryption.

Follow the table below of the one that fits your needs.

Enter VyprVPN settings (Default Encryption)

OpenVPN Client

Start OpenVPN Client

If you wish to disable your VPN connection simply set this to Disable at any time and click Apply Settings.

Server IP/Name

Copy and paste the server you would like to connect to from the server list above. Be sure there are no extra spaces or characters.

If you wish to change VyprVPN connection locations, THIS IS THE ONLY FIELD YOU NEED TO CHANGE.

Port

1194

Tunnel Device

TUN

Tunnel Protocol

UDP

Encryption cipher

Blowfish-CBC

Hash Algorithm

SHA1

User Pass Authentication

Enable

Username

Enter the Username you successfully logged in to your VyprVPN account with.

Password

Enter the Password you successfully logged in to your VyprVPN account with.

Advanced Options

Enable

TLS Cipher

None

LZO Compression

Adaptive

NAT

Enable

Firewall Protection

Enable

Additional Config

resolv-retry infinite
keepalive 10 60
persist-key
persist-tun
persist-remote-ip
nobind

Policy Based Routing

This field can be used for split VPN and Dual Gateway routing.

CA Cert

-----BEGIN CERTIFICATE-----
MIIGWjCCBEKgAwIBAgIJAJxUG61mxDS7MA0GCSqGSIb3DQEBDQUAMHsxCzAJBgNV
BAYTAlJPMRIwEAYDVQQHEwlCdWNoYXJlc3QxGDAWBgNVBAoTD0N5YmVyR2hvc3Qg
Uy5BLjEbMBkGA1UEAxMSQ3liZXJHaG9zdCBSb290IENBMSEwHwYJKoZIhvcNAQkB
FhJpbmZvQGN5YmVyZ2hvc3Qucm8wHhcNMTcwNjE5MDgxNzI1WhcNMzcwNjE0MDgx
NzI1WjB7MQswCQYDVQQGEwJSTzESMBAGA1UEBxMJQnVjaGFyZXN0MRgwFgYDVQQK
Ew9DeWJlckdob3N0IFMuQS4xGzAZBgNVBAMTEkN5YmVyR2hvc3QgUm9vdCBDQTEh
MB8GCSqGSIb3DQEJARYSaW5mb0BjeWJlcmdob3N0LnJvMIICIjANBgkqhkiG9w0B
AQEFAAOCAg8AMIICCgKCAgEA7O8+mji2FlQhJXn/G4VLrKPjGtxgQBAdjo0dZEQz
KX08q14dLkslmOLgShStWKrOiLXGAvB1rPvvk613jtA0KjQLpgyLy9lIWohQKYjj
5jrJYXMZMkbSHBYI9L8L7iezBEFYrjYKdDo51nq99wRFhKdbyKKjDh3e2L2SVEZL
T1ogkK5gWzjvH+mjjtjUUicK+YjGwWOz6I+KKaG4Ve/D/cE6nCLbhHIMMnargZEu
7sqA6BFeS4kEP/ZdCZoTSX2n43XV1q63nJt/v0KDetbZDciFVW9h9SVPG4qT44p0
550N+Mom7zTX7S/ID5T9dplgU8sRGtIMrG0cIMD9zmpFgUnMusCrR7jJFr0sMAve
TbgZg95LmstV6R6WKZkSFdUrE0DHl4dHoZvTFX+1LhwhHgjgDLaosX0vhG/C/7Lp
oVWimd6RRQT3M9o4Fa1TuhfvBzQ20QHrmRV/yKvGNK0xckZ6EZ/QY7Z55ORU15Tg
ab4ebnblYPWoEmn0mIYP3LFFeoR5OS1EX7+j4kPv+bwPGsmpHjxmZyq2Y7sJBpbO
CJgbkn52WZdPBIRDpPdIHQ8pAJC4T0iMK9xvAwWNl/V6EYYNpR97osyEDXn+BTdA
HlhJ5fck9KlwI9mb1Kg1bhbvbmaIAiOLenSULYf3j6rI1ygo3R2cCyybtuAq8M7z
0OECAwEAAaOB4DCB3TAdBgNVHQ4EFgQU6tdK1g/He5qzjeAoM5eHt4in9iUwga0G
A1UdIwSBpTCBooAU6tdK1g/He5qzjeAoM5eHt4in9iWhf6R9MHsxCzAJBgNVBAYT
AlJPMRIwEAYDVQQHEwlCdWNoYXJlc3QxGDAWBgNVBAoTD0N5YmVyR2hvc3QgUy5B
LjEbMBkGA1UEAxMSQ3liZXJHaG9zdCBSb290IENBMSEwHwYJKoZIhvcNAQkBFhJp
bmZvQGN5YmVyZ2hvc3Qucm+CCQCcVButZsQ0uzAMBgNVHRMEBTADAQH/MA0GCSqG
SIb3DQEBDQUAA4ICAQDNyQ92kj4qiNjnHk99qvnFw9qGfwB9ofaPL74zh0G5hEe3
Wgb2o4fqUGnvUNgOu53gJksz3DcPQ8t40wfmm9I1Z8tiM9qrqvkuQ+nKcLgdooXt
EsTybPIYDZ2cWR/5E0TKRvC7RFzKgQ4D77Vbi4TdaHiDV7ZNfU1iLCoBGcYm80hc
UHEs5KIVLwUmcSOTmbZBySJxcSD0yUpS7nlZGwLY6VQrU+JFwDSisbXT4DXf3iSz
p7FzW0/u/SFvWsPHrjE0hkPoZPalYvouaJEHKAhip0ZwSmitlxbBnmm8+K/3c9mL
A5/uXrirfpuhhs8V3lyV2mczVtSiTl6gpi88gc//JY80JeHdupjO25T3XEzY9cpx
ecmkWaUEjLMx4wVoXQuUiPonfILM6OLwi+zUS8gQErdFeGvcQXbncPa4SdJuHkF8
lgiX2i8S8fPGdXvU37E9bdAXwP5nZriYq1s0D59Qfvz+vLXVkmyZp6ztxjKjKole
mPMak0Y5c1Q4RjNF6tmQoFuy/ACSkWy14Tzu2dFp7UiVbGg1FOvKhfs48zC2/IUQ
v1arqmPT/9LVq3B2DVT9UKXRUXX/f/jSSsVjkz4uUe2jUyL+XHX1nSmROTPHSAJ+
oKf0BLnfqUxFkEUTwLnayssP2nwGgq35b7wEbTFIXdrjHGFUVQIDeERz8UThew==
-----END CERTIFICATE-----

CLICK APPLY SETTINGS

Leave all settings not mentioned above as their default setting.

Enter VyprVPN settings (Strong Encryption)

OpenVPN Client

Start OpenVPN Client

If you wish to disable your VPN connection simply set this to Disable at any time and click Apply Settings.

Server IP/Name

Copy and paste the server you would like to connect to from the server list above. Be sure there are no extra spaces or characters.

If you wish to change VyprVPN connection locations, THIS IS THE ONLY FIELD YOU NEED TO CHANGE.

Port

443

Tunnel Device

TUN

Tunnel Protocol

UDP

Encryption cipher

AES-256-CBC

Hash Algorithm

SHA256

User Pass Authentication

Enable

Username

Enter the Username you successfully logged in to your VyprVPN account with.

Password

Enter the Password you successfully logged in to your VyprVPN account with.

Advanced Options

Enable

TLS Cipher

None

LZO Compression

Adaptive

NAT

Enable

Firewall Protection

Enable

Additional Config

resolv-retry infinite
keepalive 10 60
persist-key
persist-tun
persist-remote-ip
nobind
tls-cipher TLS-DHE-RSA-WITH-AES-256-CBC-SHA

Policy Based Routing

This field can be used for split VPN and Dual Gateway routing. Learn more here.

CA Cert

-----BEGIN CERTIFICATE-----
MIIGWjCCBEKgAwIBAgIJAJxUG61mxDS7MA0GCSqGSIb3DQEBDQUAMHsxCzAJBgNV
BAYTAlJPMRIwEAYDVQQHEwlCdWNoYXJlc3QxGDAWBgNVBAoTD0N5YmVyR2hvc3Qg
Uy5BLjEbMBkGA1UEAxMSQ3liZXJHaG9zdCBSb290IENBMSEwHwYJKoZIhvcNAQkB
FhJpbmZvQGN5YmVyZ2hvc3Qucm8wHhcNMTcwNjE5MDgxNzI1WhcNMzcwNjE0MDgx
NzI1WjB7MQswCQYDVQQGEwJSTzESMBAGA1UEBxMJQnVjaGFyZXN0MRgwFgYDVQQK
Ew9DeWJlckdob3N0IFMuQS4xGzAZBgNVBAMTEkN5YmVyR2hvc3QgUm9vdCBDQTEh
MB8GCSqGSIb3DQEJARYSaW5mb0BjeWJlcmdob3N0LnJvMIICIjANBgkqhkiG9w0B
AQEFAAOCAg8AMIICCgKCAgEA7O8+mji2FlQhJXn/G4VLrKPjGtxgQBAdjo0dZEQz
KX08q14dLkslmOLgShStWKrOiLXGAvB1rPvvk613jtA0KjQLpgyLy9lIWohQKYjj
5jrJYXMZMkbSHBYI9L8L7iezBEFYrjYKdDo51nq99wRFhKdbyKKjDh3e2L2SVEZL
T1ogkK5gWzjvH+mjjtjUUicK+YjGwWOz6I+KKaG4Ve/D/cE6nCLbhHIMMnargZEu
7sqA6BFeS4kEP/ZdCZoTSX2n43XV1q63nJt/v0KDetbZDciFVW9h9SVPG4qT44p0
550N+Mom7zTX7S/ID5T9dplgU8sRGtIMrG0cIMD9zmpFgUnMusCrR7jJFr0sMAve
TbgZg95LmstV6R6WKZkSFdUrE0DHl4dHoZvTFX+1LhwhHgjgDLaosX0vhG/C/7Lp
oVWimd6RRQT3M9o4Fa1TuhfvBzQ20QHrmRV/yKvGNK0xckZ6EZ/QY7Z55ORU15Tg
ab4ebnblYPWoEmn0mIYP3LFFeoR5OS1EX7+j4kPv+bwPGsmpHjxmZyq2Y7sJBpbO
CJgbkn52WZdPBIRDpPdIHQ8pAJC4T0iMK9xvAwWNl/V6EYYNpR97osyEDXn+BTdA
HlhJ5fck9KlwI9mb1Kg1bhbvbmaIAiOLenSULYf3j6rI1ygo3R2cCyybtuAq8M7z
0OECAwEAAaOB4DCB3TAdBgNVHQ4EFgQU6tdK1g/He5qzjeAoM5eHt4in9iUwga0G
A1UdIwSBpTCBooAU6tdK1g/He5qzjeAoM5eHt4in9iWhf6R9MHsxCzAJBgNVBAYT
AlJPMRIwEAYDVQQHEwlCdWNoYXJlc3QxGDAWBgNVBAoTD0N5YmVyR2hvc3QgUy5B
LjEbMBkGA1UEAxMSQ3liZXJHaG9zdCBSb290IENBMSEwHwYJKoZIhvcNAQkBFhJp
bmZvQGN5YmVyZ2hvc3Qucm+CCQCcVButZsQ0uzAMBgNVHRMEBTADAQH/MA0GCSqG
SIb3DQEBDQUAA4ICAQDNyQ92kj4qiNjnHk99qvnFw9qGfwB9ofaPL74zh0G5hEe3
Wgb2o4fqUGnvUNgOu53gJksz3DcPQ8t40wfmm9I1Z8tiM9qrqvkuQ+nKcLgdooXt
EsTybPIYDZ2cWR/5E0TKRvC7RFzKgQ4D77Vbi4TdaHiDV7ZNfU1iLCoBGcYm80hc
UHEs5KIVLwUmcSOTmbZBySJxcSD0yUpS7nlZGwLY6VQrU+JFwDSisbXT4DXf3iSz
p7FzW0/u/SFvWsPHrjE0hkPoZPalYvouaJEHKAhip0ZwSmitlxbBnmm8+K/3c9mL
A5/uXrirfpuhhs8V3lyV2mczVtSiTl6gpi88gc//JY80JeHdupjO25T3XEzY9cpx
ecmkWaUEjLMx4wVoXQuUiPonfILM6OLwi+zUS8gQErdFeGvcQXbncPa4SdJuHkF8
lgiX2i8S8fPGdXvU37E9bdAXwP5nZriYq1s0D59Qfvz+vLXVkmyZp6ztxjKjKole
mPMak0Y5c1Q4RjNF6tmQoFuy/ACSkWy14Tzu2dFp7UiVbGg1FOvKhfs48zC2/IUQ
v1arqmPT/9LVq3B2DVT9UKXRUXX/f/jSSsVjkz4uUe2jUyL+XHX1nSmROTPHSAJ+
oKf0BLnfqUxFkEUTwLnayssP2nwGgq35b7wEbTFIXdrjHGFUVQIDeERz8UThew==
-----END CERTIFICATE-----

CLICK APPLY SETTINGS

Leave all settings not mentioned above as their default setting.

Verify a successful VyprVPN connection

Navigate to the Status > OpenVPN

  1. You should now see a CONNECTED SUCCESS message.
  2. Visit to WhatIsMyIPAddress to verify your new IP address and virtual location.

In some cases you may notice that the location is not showing the same location as the server you have input in your router settings; this is because geo tracking tools are often tricked by VPN connections. As long as you see an IP address that is not the same as your normal Internet IP address then you are indeed connected to VyprVPN.

Back up your settings

Navigate to Administration > Backup

  1. Click the Backup button.
  2. A file named nvrambak.bin will be saved to your computer.
  3. You can load nvrambak.bin to restore your settings in the event of a reset.

How to change the VyprVPN server

  1. Copy the new VyprVPN server address from the above server list.
  2. Paste the server into the Server IP/Name field and Click Apply Settings.

TROUBLESHOOTING

Still having issues? Visit the VPN Troubleshooting section.

Troubleshoot Here

Change WiFi name and password on Asus

TeamFlashRouters · Feb 26, 2024 ·

Set a custom WiFi network name and password for your devices to join the Asus FlashRouter’s network.

View our guide for more instructions on how to access AsusWRT firmware settings.

1. Under General select Network Map.

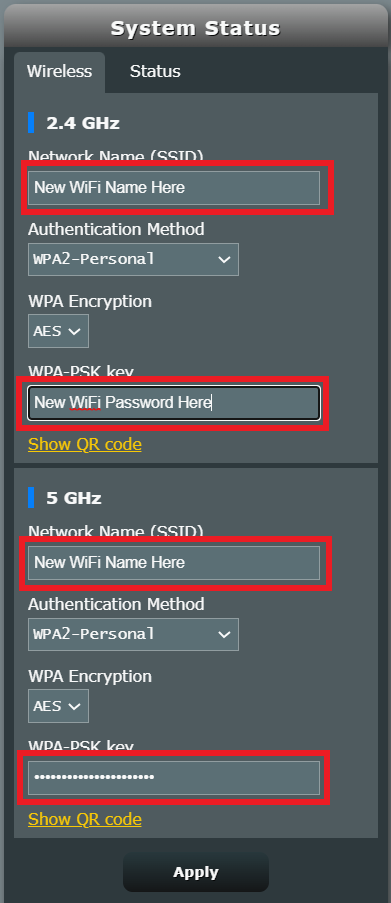
Merlin Wifi change name and pass

2. In the Network name (SSID) field enter the name you want your Asus WiFi to appear as. This can be the same or different for both 2.4GHz and 5GHz bands. We typically advise setting different names for each so you can connect your streaming devices to the 5GHz band as that is the faster WiFi band.

3. In the WPA-PSK key field enter the password you want to join your devices to the Asus WiFi network. If your WiFi names are the same for 2.4GHz and 5GHz make sure they have the exact same wireless password set.

4. Click Apply and then rejoin the new wireless network.

How to Access Your GL.iNet FlashRouter Settings

TeamFlashRouters · Feb 26, 2024 ·

This quick guide walk you through connecting to your GL.iNet FlashRouter (Flint, Slate, Beryl, or Marble) and logging into the admin settings page. You’ll use either WiFi or an Ethernet cable, then access the router dashboard through your browser.

Step 1. Connect Your Device to the Router

You can connect by WiFi or Ethernet:

  • WiFi: Look for a network name like FlashRouter24 or FlashRouter50
    • The WiFi password has been set to: Wireless#9483C
    • ⚠️ Be sure to capitalize the “W” in
  • Ethernet: Plug an Ethernet cable from your computer into one of the router’s LAN ports (usually marked or color-coded differently from the WAN port).

👉 Pro tip: Disconnect from any other WiFi networks during setup.

Step 2. Open the Router Login Page

  1. Open a web browser (Chrome, Safari, Firefox, Edge).
  2. In the address bar, type: 192.168.8.1
  3. Press Enter.
GL.iNet router access

This is the local router dashboard address (not a public website). If the page doesn’t load:

  • Try a different browser.
  • Clear your cache.
  • Ensure your device is connected to the FlashRouter network.

Step 3. Log In to the Router Settings

  • Default password: glopenwrt1 or openwrt
  • This is the factory default for all GL.iNet routers shipped by FlashRouters.
GL.iNet admin password enter

💡 Once you’re in, you can update your admin password in the settings for extra security.

Next Steps

Now that you’ve accessed your GL.iNet FlashRouter, you can:

  • Set up your VPN service
  • Customize your WiFi name and password
  • Adjust device controls and security settings

Check our support library for your specific VPN setup guide.

Managing User Profiles on Roqos

Dave · Dec 16, 2021 ·

User Profiles allow you to organize your devices connected to the Roqos Core. This allow you to see a user profile’s usage history, set a schedule when devices are allowed to connect to the Internet, and filter out specific content such as explicit websites and games.

Login to Roqos Core UI web app in a browser on any computer or smart device.

Adding new User Profile

1. Click the navigation menu and select Users.

2. To add a new User Profile click Add User.

3. In the Name field enter the name for the User Profile. You can add an image for the User Profile here as well.

4. You will see a list of devices connected to the Roqos Core at the bottom of the page. Check the box of the devices that you would like to add to this User Profile. Then click Save.

Tracking Usage History

1. Click the User Profile that you want to review.

2. Select Usage History.

3. On the new page you can view usage by Top Visited, All Activity, and Activity Graph.

Schedule Pauses

1. Click the User Profile that you want to review.

2. Select Scheduled Pauses.

3. Click Add Schedule.

4. From here you can set the name of the schedule, the days that the schedule will be in effect, and if the schedule should be applied all day or during specific hours. Click Save.

Filters

1. Click the User Profile that you want to review.

2. Select Filters.

3. From here you can use the toggle to Block explicit websites and Block explicit search results.

4. In the Safe Youtube dropdown you can select None, Moderate, or Strict.

5. The Blocked Content area allows you to block specific services such as Games and Social Media.

6. Add specific websites to the Block Sites list if the above policies did not cover them.

7. Add specific websites to the Allowed Sites list if you want to block all websites except for a few.

Roqos Core Internet Setup and Activation

TeamFlashRouters · Mar 15, 2022 ·

Follow this article when you receive your new Roqos Core router to create your Roqos account, connect your Roqos to the Internet, and customize your network so it is ready to use.

Create your Roqos account

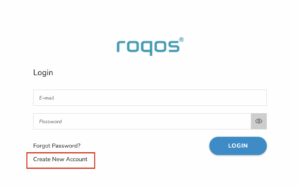
1. From any device that has a browser such as a computer, smartphone, or tablet visit login.roqos.com

Roqos Login URL

2. Select Create Account.

Roqos Create Account

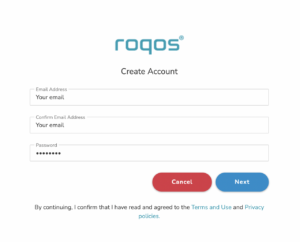
3. Enter the Email address and password you want to set for your Roqos account. This will be your login to the Roqos settings moving forward. Click Next.

Roqos Enter Email

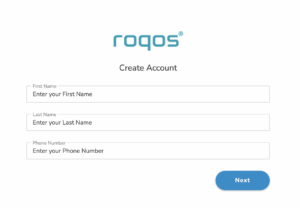
4. Enter the name and phone number you want associated with your Roqos. Click Next.

Roqos Enter Name and Number

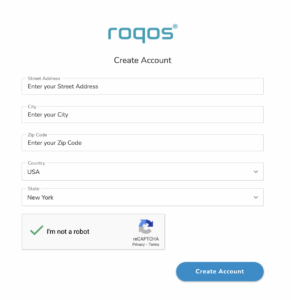
5. Enter the address where your Roqos is located. This section may require a CAPTCHA to be completed to authenticate you are human. Click Create Account.

Roqos Enter Address

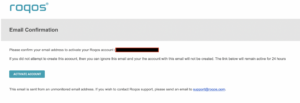
6. You have now created your Roqos account. In a new tab proceed to open the email from Roqos and click the Activate account button.

Roqos email activation

Activate your Roqos Internet

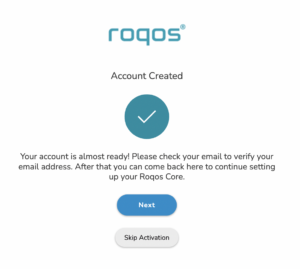
1. From the Account created page click Next to begin the Internet Setup of the Roqos.

Roqos Account Created

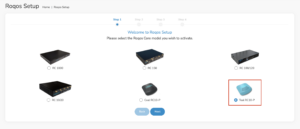
2. Select the Roqos model Teal RC10-P. Click Next.

Roqos Model

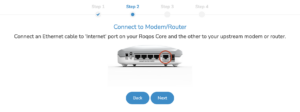
3. Connect the ethernet cable that came with your Roqos from the port labeled INTERNET on the back of your Roqos to an open ethernet port on your ISP Modem or other router in your network.

Roqos Wiring

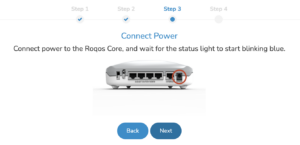
4. Then connect the power adapter that came with the Roqos to the back of the Roqos. Wait for the light on the Roqos to begin blinking blue. Once your see the blinking blue lights on the Roqos click Next.

Roqos Power On

If your Roqos lights does not begin blinking blue after a long while please see the steps in this article and contact us.

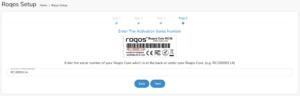
5. Enter in the Roqos serial number found on the bottom of the device exactly as it appears there. Click Next.

Roqos Activation Code

Setup your Roqos Network

1. Enter in a name that you would like to call the Roqos. This is just the Roqo’s device name and it is not the WiFi network name. Click Next.

Roqos Device Name

2. Select the Time Zone of your actual location from the dropdown. Click Next.

Roqos Time Zone

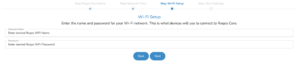
3. Set the WiFi name and password for the Roqos. The WiFi name should be unique and not a duplicate of an existing wireless network. This will be the name that appears in your wireless devices available network list and the password to join the devices to the network. Click Next.

Roqos Set WiFi Name and Password

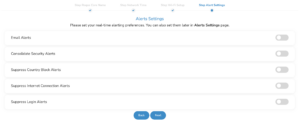
4. Select the custom alert settings as you best see fit using the toggle switches. We typically recommend having the first two toggles selected for Email Alerts and Consolidate Security Alerts. Click Next.

Begin connecting your devices to the Roqos network

You are now done setting up your Roqos to connect to the Internet and can begin joining your wireless devices to the Roqos network and exploring the Roqos Core Features.

Roqos Setup Done

TROUBLESHOOTING

Still having issues? Visit the VPN Troubleshooting section.

Troubleshoot Here

Internet and Wifi Setup on Asus Merlin Firmware

TeamFlashRouters · Sep 29, 2021 ·

Listed below are important links to setup instructions for connecting an Asus Merlin firmware router to the internet and WiFi.

How to set up ASUS Wi-Fi router via ASUS Router App? (QIS, Quick Internet Setup)

How to set up an Internet Connection?

How to enter the router setting page(Web GUI) (ASUSWRT)?

Privacy Hero Streaming Relocation

TeamFlashRouters · Apr 3, 2023 ·

Your Privacy Hero router uses Cloud Based router management which means you can access the router settings from anywhere on any device that has an internet connection. You can follow these steps while connected to your phone, other Wi-Fi network, or the Privacy Hero network.

Use these steps change your location for popular streaming services allowing you to access to regionally restricted content. Privacy Hero uses DNS routing to change your location which is a great way around VPN streaming blocks.
1. From any device that has a browser such as a computer, smartphone, or tablet visit app.privacyhero.com

App.PrivacyHero.com

2. Enter your Privacy Hero account email and password. Click Login.

Privacy Hero Access Settings

3. Click the Streaming symbol.

Privacy Hero Streaming

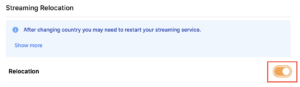
4. Set the Streaming Relocation toggle to On.

Privacy Hero enable Streaming Relocation

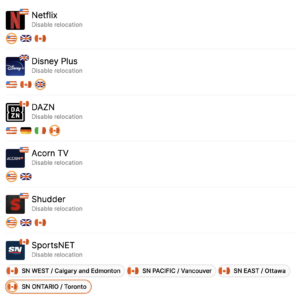
5. Click the flag of the country you would like the listed streaming service to use.

Privacy Hero select Region

This streaming relocation feature will not change your IP address in the way that a VPN does. This is why it is not able to be blocked in the same way that a VPN connection can be.
The listed services on the streaming relocation page will not be connected to VPN even if the Privacy Hero has an active VPN connection. These services are set to bypass the router’s VPN tunnel to avoid streaming blocks.

Toggling the streaming relocation feature On will also relocate many other streaming services automatically. They will be automatically optimized for the best connection with no manual selection needed for:
ABC
Adult Swim
All 4
Apple TV Channels
BBC
Britbox
CBC Gem
CBS Sports
Crackle
DirecTV Stream
DSTV Now
Filmrise
Freeform
Freevee
Frndly TV
F1 TV
FX Now
ITV
MGM+
Molotov.TV
My 5
NBC
NBC Sports
Now E
Now TV
Pandora
Paramount+
PBS
Peacock
Philo
Pluto TV
Showmax
Sling
SonyLIV
S Sports Plus
Starz
Stirr
TBS
Tennis Channel
The CW
Tubi
TVPlayer
Vudu
Xumo
Zattoo

TROUBLESHOOTING

Still having issues? Visit the VPN Troubleshooting section.

Troubleshoot Here

StrongVPN WireGuard Setup

TeamFlashRouters · Jan 8, 2021 ·

DD-WRT Router Setup for StrongVPN WireGuard

StrongVPN Wireguard DD-WRT setup is now officially supported by FlashRouters. Follow the steps below to gather all the required information to complete your Wireguard router setup.


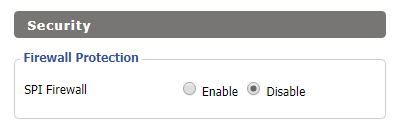
Navigate to Security > Firewall

Set SPI Firewall to Disable.

Wireless Client Bridge Setup on FlashRouter DD-WRT - Disable Firewall

Click Save at the bottom of the page.

Select your actual time zone for you physical location from the dropdown and enter 1.pool.ntp.org in the Server IP/Name dropdown.

WireGuard for StrongVPN DD-WRT set Time Zone

Click Apply Settings at the bottom of the page.

Preparing for StrongVPN WireGuard Setup

Obtain your StrongVPN WireGuard Information

If you are not already a StrongVPN user Sign Up Now.

1. Log in to your account on the StrongVPN website.

WireGuard for StrongVPN account login

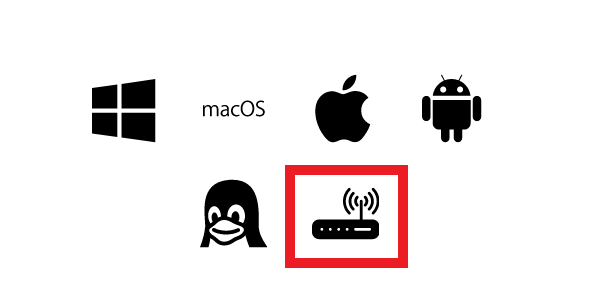
2. Select Router icon as the Platform

Select Router for StrongVPN WireGuard Platform

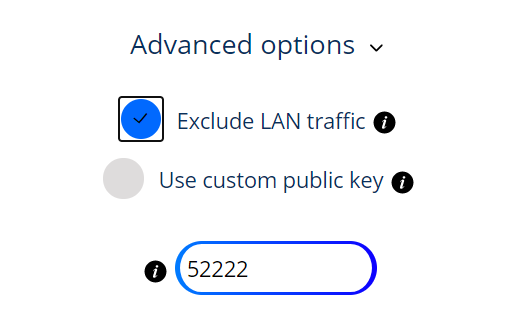
3. Select the Advanced Options dropdown and then check Exclude LAN Traffic and set any value between 52000 and 60000 in the Custom Port field.

WireGuard for StrongVPN set Custom Port

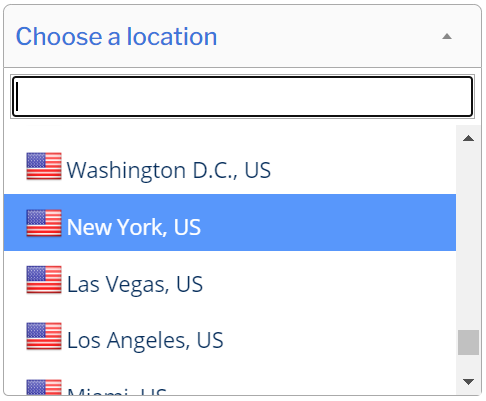
4. Select the Server Location from the dropdown that you would like to connect to.

Select the StrongVPN Wireguard server location

5. Select the Generate at the bottom of the page.

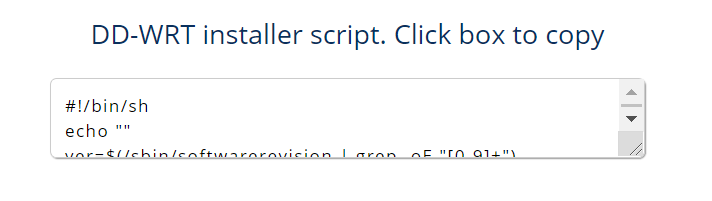
6. Click the DD-WRT installer script box to copy.

DD-WRT installer script WireGuard for StrongVPN

Enter StrongVPN WireGuard Script

Navigate to Administration > Commands

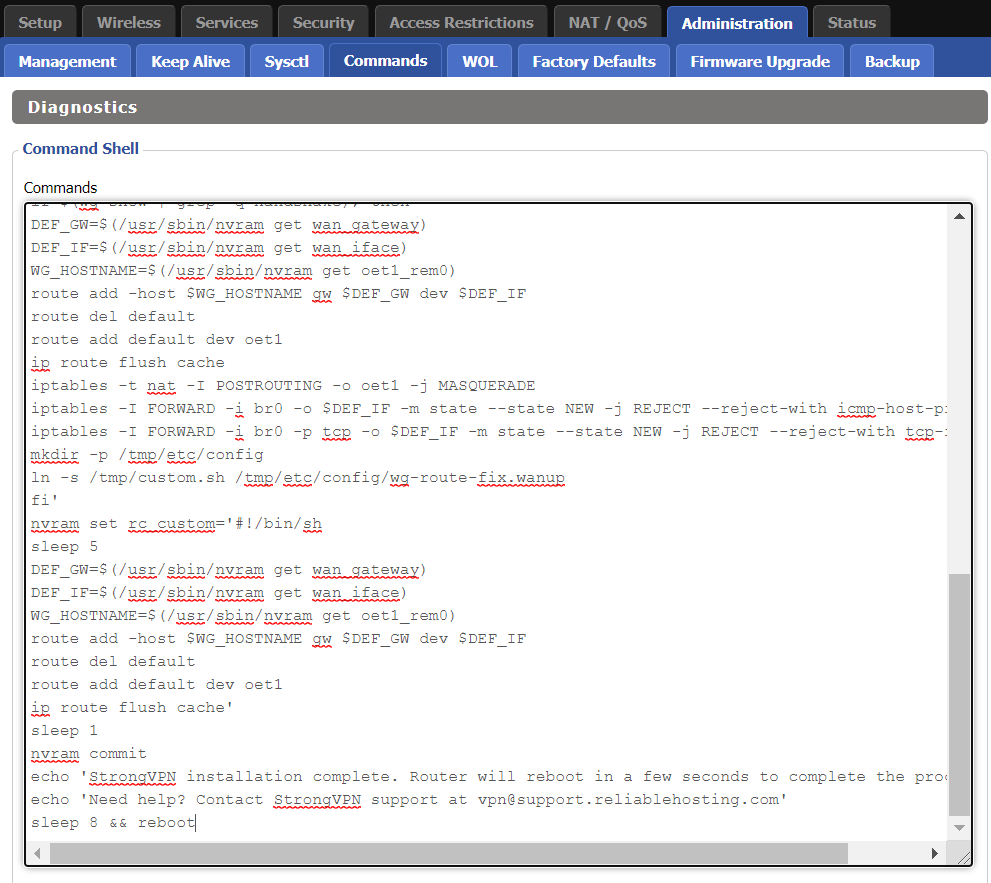
Paste the StrongVPN Script that was copied in the empty Commands Shell.

WireGuard for StrongVPN install script

Delete the very last line sleep 8 && reboot.

Click Save Custom (or Save Custom Script may appear depending on your firmware build, they are the same thing)

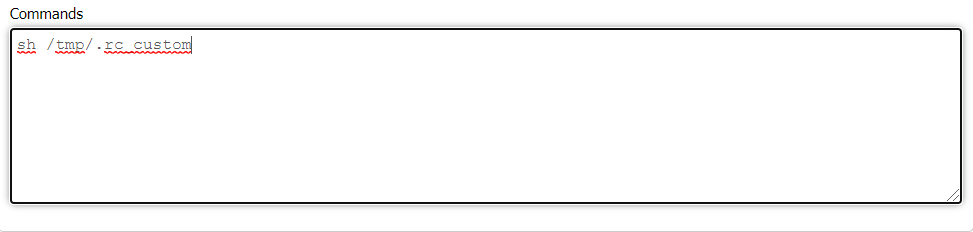
Copy the line below and paste into the empty Commands Shell.

WireGuard for StrongVPN script 2
sh /tmp/.rc_custom

Click Run Commands.

Wait two minutes and then power the FlashRouter off and back on. Reconnect to the FlashRouter’s network when it has booted back up.

Verify a successful StrongVPN WireGuard connection

Navigate to Setup > Tunnels

  1. You should now see that page filled in with WireGuard info.
  2. Visit StrongVPN’s IP Check to verify your new IP address and virtual location.

Back up your settings

Navigate to Administration > Backup

  1. Click the Backup button.
  2. A file named nvrambak.bin will be saved to your computer.
  3. You can load nvrambak.bin to restore your settings in the event of a reset.

TROUBLESHOOTING

Still having issues? Visit the VPN Troubleshooting section.

Troubleshoot Here

Change WiFi name and password on Merlin

TeamFlashRouters · Jan 19, 2022 ·

Set a custom WiFi network name and password for your devices to join the Merlin FlashRouter’s network.

Login to Asus Merlin firmware settings in a browser on any computer or smart device.

1. Under General select Network Map.

Merlin Wifi change name and pass

2. In the Network name (SSID) field enter the name you want your Asus WiFi to appear as. This can be the same or different for both 2.4GHz and 5GHz bands. We typically advise setting different names for each so you can connect your streaming devices to the 5GHz band as that is the faster WiFi band.

3. In the WPA-PSK key field enter the password you want to join your devices to the Merlin WiFi network. If your WiFi names are the same for 2.4GHz and 5GHz make sure they have the exact same wireless password set.

4. Click Apply and then rejoin the new wireless network.

CyberGhost Manual OpenVPN Setup

TeamFlashRouters · Apr 9, 2019 ·

Preparing for Manual CyberGhost Setup

Obtain your CyberGhost OpenVPN Information

If you are not already a CyberGhost user Sign Up Now.

1. Log in to your account on the CyberGhost website.

CyberGhost Website Login

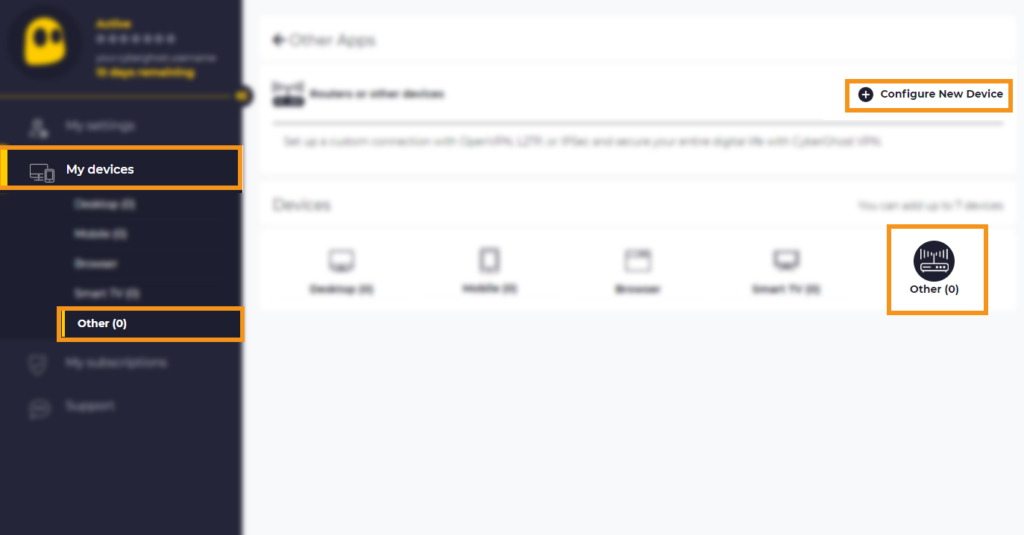
2. Select My Devices.

3. Select Other and then Configure New Device.

CyberGhost Website OpenVPN Configuration Files Generator Cyberghost - Website Screen CyberGhost Website OpenVPN Configuration Files Generator

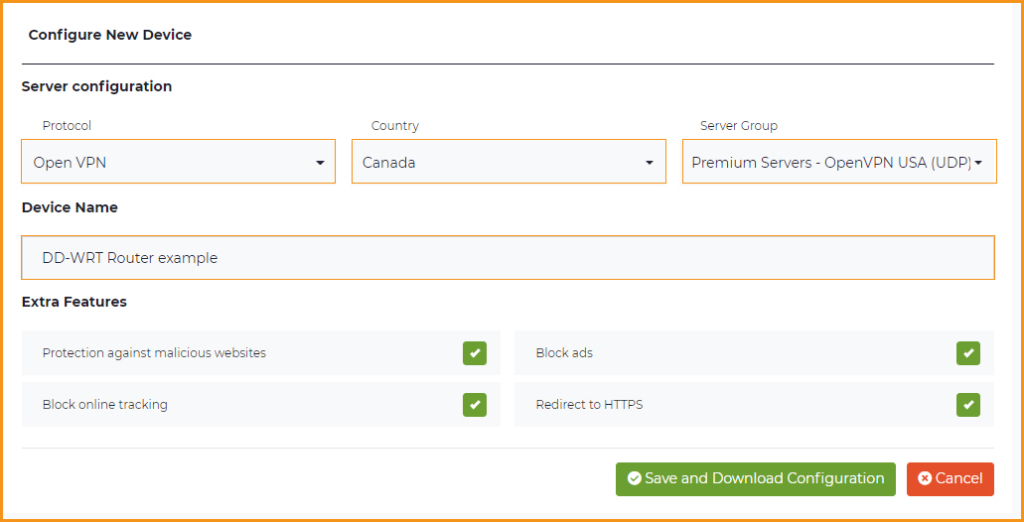
4. Set Protocol to OpenVPN. Select the Country you would like to connect to. Select the Server Group. Name the device in the Device Name field. Click Save Configuration.

CyberGhost Website OpenVPN Configuration Files Generator 3

5. Press View configuration.

CyberGhost Website OpenVPN Configuration Files Generator 2

6. Copy the Username, and Password that appear to a notepad, since you will need this information later in the setup process. Click Download Configuration.

CyberGhost Website OpenVPN Configuration Files Generator 1

Open the file that was downloaded with NotePad++ for Windows or TextEdit for Apple. You only need the ca.crt, client.crt, and client.key files. All CyberGhost servers have different keys and certificates.

DD-WRT Router Setup for CyberGhost

Navigate to Services > VPN

Enter CyberGhost settings

OpenVPN Client

Start OpenVPN Client

If you wish to disable your VPN connection simply set this to Disable at any time and click Apply Settings.

Server IP/Name

Copy and paste the server you selected in your account. Be sure there are no extra spaces or characters.

Port

443

Tunnel Device

TUN

Tunnel Protocol

UDP

Encryption cipher

AES-256-CBC

Hash Algorithm

SHA256

User Pass Authentication

Enable

Username

Enter the Username you obtained in your CyberGhost account.

Password

Enter the Password you obtained in your CyberGhost account.

Advanced Options

Enable

TLS Cipher

None

LZO Compression

Adaptive

NAT

Enable

Firewall Protection

Enable

Additional Config

tun-mtu 1500
fragment 1300
mssfix 1300

Policy Based Routing

This field can be used for split VPN and Dual Gateway routing.

CA Cert

—–BEGIN CERTIFICATE—–
MIIGWjCCBEKgAwIBAgIJAJxUG61mxDS7MA0GCSqGSIb3DQEBDQUAMHsxCzAJBgNV
BAYTAlJPMRIwEAYDVQQHEwlCdWNoYXJlc3QxGDAWBgNVBAoTD0N5YmVyR2hvc3Qg
Uy5BLjEbMBkGA1UEAxMSQ3liZXJHaG9zdCBSb290IENBMSEwHwYJKoZIhvcNAQkB
FhJpbmZvQGN5YmVyZ2hvc3Qucm8wHhcNMTcwNjE5MDgxNzI1WhcNMzcwNjE0MDgx
NzI1WjB7MQswCQYDVQQGEwJSTzESMBAGA1UEBxMJQnVjaGFyZXN0MRgwFgYDVQQK
Ew9DeWJlckdob3N0IFMuQS4xGzAZBgNVBAMTEkN5YmVyR2hvc3QgUm9vdCBDQTEh
MB8GCSqGSIb3DQEJARYSaW5mb0BjeWJlcmdob3N0LnJvMIICIjANBgkqhkiG9w0B
AQEFAAOCAg8AMIICCgKCAgEA7O8+mji2FlQhJXn/G4VLrKPjGtxgQBAdjo0dZEQz
KX08q14dLkslmOLgShStWKrOiLXGAvB1rPvvk613jtA0KjQLpgyLy9lIWohQKYjj
5jrJYXMZMkbSHBYI9L8L7iezBEFYrjYKdDo51nq99wRFhKdbyKKjDh3e2L2SVEZL
T1ogkK5gWzjvH+mjjtjUUicK+YjGwWOz6I+KKaG4Ve/D/cE6nCLbhHIMMnargZEu
7sqA6BFeS4kEP/ZdCZoTSX2n43XV1q63nJt/v0KDetbZDciFVW9h9SVPG4qT44p0
550N+Mom7zTX7S/ID5T9dplgU8sRGtIMrG0cIMD9zmpFgUnMusCrR7jJFr0sMAve
TbgZg95LmstV6R6WKZkSFdUrE0DHl4dHoZvTFX+1LhwhHgjgDLaosX0vhG/C/7Lp
oVWimd6RRQT3M9o4Fa1TuhfvBzQ20QHrmRV/yKvGNK0xckZ6EZ/QY7Z55ORU15Tg
ab4ebnblYPWoEmn0mIYP3LFFeoR5OS1EX7+j4kPv+bwPGsmpHjxmZyq2Y7sJBpbO
CJgbkn52WZdPBIRDpPdIHQ8pAJC4T0iMK9xvAwWNl/V6EYYNpR97osyEDXn+BTdA
HlhJ5fck9KlwI9mb1Kg1bhbvbmaIAiOLenSULYf3j6rI1ygo3R2cCyybtuAq8M7z
0OECAwEAAaOB4DCB3TAdBgNVHQ4EFgQU6tdK1g/He5qzjeAoM5eHt4in9iUwga0G
A1UdIwSBpTCBooAU6tdK1g/He5qzjeAoM5eHt4in9iWhf6R9MHsxCzAJBgNVBAYT
AlJPMRIwEAYDVQQHEwlCdWNoYXJlc3QxGDAWBgNVBAoTD0N5YmVyR2hvc3QgUy5B
LjEbMBkGA1UEAxMSQ3liZXJHaG9zdCBSb290IENBMSEwHwYJKoZIhvcNAQkBFhJp
bmZvQGN5YmVyZ2hvc3Qucm+CCQCcVButZsQ0uzAMBgNVHRMEBTADAQH/MA0GCSqG
SIb3DQEBDQUAA4ICAQDNyQ92kj4qiNjnHk99qvnFw9qGfwB9ofaPL74zh0G5hEe3
Wgb2o4fqUGnvUNgOu53gJksz3DcPQ8t40wfmm9I1Z8tiM9qrqvkuQ+nKcLgdooXt
EsTybPIYDZ2cWR/5E0TKRvC7RFzKgQ4D77Vbi4TdaHiDV7ZNfU1iLCoBGcYm80hc
UHEs5KIVLwUmcSOTmbZBySJxcSD0yUpS7nlZGwLY6VQrU+JFwDSisbXT4DXf3iSz
p7FzW0/u/SFvWsPHrjE0hkPoZPalYvouaJEHKAhip0ZwSmitlxbBnmm8+K/3c9mL
A5/uXrirfpuhhs8V3lyV2mczVtSiTl6gpi88gc//JY80JeHdupjO25T3XEzY9cpx
ecmkWaUEjLMx4wVoXQuUiPonfILM6OLwi+zUS8gQErdFeGvcQXbncPa4SdJuHkF8
lgiX2i8S8fPGdXvU37E9bdAXwP5nZriYq1s0D59Qfvz+vLXVkmyZp6ztxjKjKole
mPMak0Y5c1Q4RjNF6tmQoFuy/ACSkWy14Tzu2dFp7UiVbGg1FOvKhfs48zC2/IUQ
v1arqmPT/9LVq3B2DVT9UKXRUXX/f/jSSsVjkz4uUe2jUyL+XHX1nSmROTPHSAJ+
oKf0BLnfqUxFkEUTwLnayssP2nwGgq35b7wEbTFIXdrjHGFUVQIDeERz8UThew==
—–END CERTIFICATE—–

Public Client Cert

Copy and paste all contents of the client.crt file starting and ending with:
—–BEGIN CERTIFICATE—–
…
—–END CERTIFICATE—–

Private Client Key

Copy and paste all contents of the client.key file starting and ending with:
—–BEGIN PRIVATE KEY—–
…
—–END PRIVATE KEY—–

CLICK APPLY SETTINGS

Leave all settings not mentioned above as their default setting.

Verify a successful CyberGhost connection

Navigate to Status > OpenVPN

  1. You should now see a CONNECTED SUCCESS message.
  2. Visit CyberGhost’s website to verify your new IP address and virtual location.

In some cases you may notice that the location is not showing the same location as the server you have input in your router settings; this is because geo tracking tools are often tricked by VPN connections. As long as you see an IP address that is not the same as your normal Internet IP address then you are indeed connected to CyberGhost.

Back up your settings

Navigate to Administration > Backup

  1. Click the Backup button.
  2. A file named nvrambak.bin will be saved to your computer.
  3. You can load nvrambak.bin to restore your settings in the event of a reset.

How to change the CyberGhost server

  1. Follow the instructions for obtaining the OpenVPN information from above.
  2. Enter the new Server Address in the Server IP/Name field.
  3. Enter the new Username and Password.
  4. Enter the new ca.crt, client.crt, and client.key
  5. Click Apply Settings.

TROUBLESHOOTING

Still having issues? Visit the VPN Troubleshooting section.

Troubleshoot Here

Privacy Hero Creating User Profiles and Adding Devices to Profiles

TeamFlashRouters · Apr 3, 2023 ·

Your Privacy Hero router uses Cloud Based router management which means you can access the router settings from anywhere on any device that has an internet connection. You can follow these steps while connected to your phone, other Wi-Fi network, or the Privacy Hero network.

The Privacy Hero router allows for User Profile creation. Doing so allows you to group different user’s devices together to customize the following rules:

  • Internet access scheduler (Bedtime settings)
  • Internet Safe Search
  • Youtube Safe Search
  • Block Adult Content

This makes the Privacy Hero a great router option for families and internet addicts.

1. From any device that has a browser such as a computer, smartphone, or tablet visit app.privacyhero.com

App.PrivacyHero.com

2. Enter your Privacy Hero account email and password. Click Login.

Privacy Hero Access Settings

If you have not created your Privacy Hero account yet please follow these instructions.

3. Click the Profiles symbol.

Privacy Hero Profiles

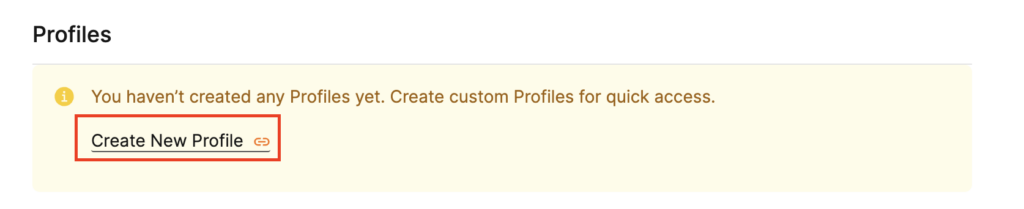
4. Click Create New Profile.

Privacy Hero Create New Profile

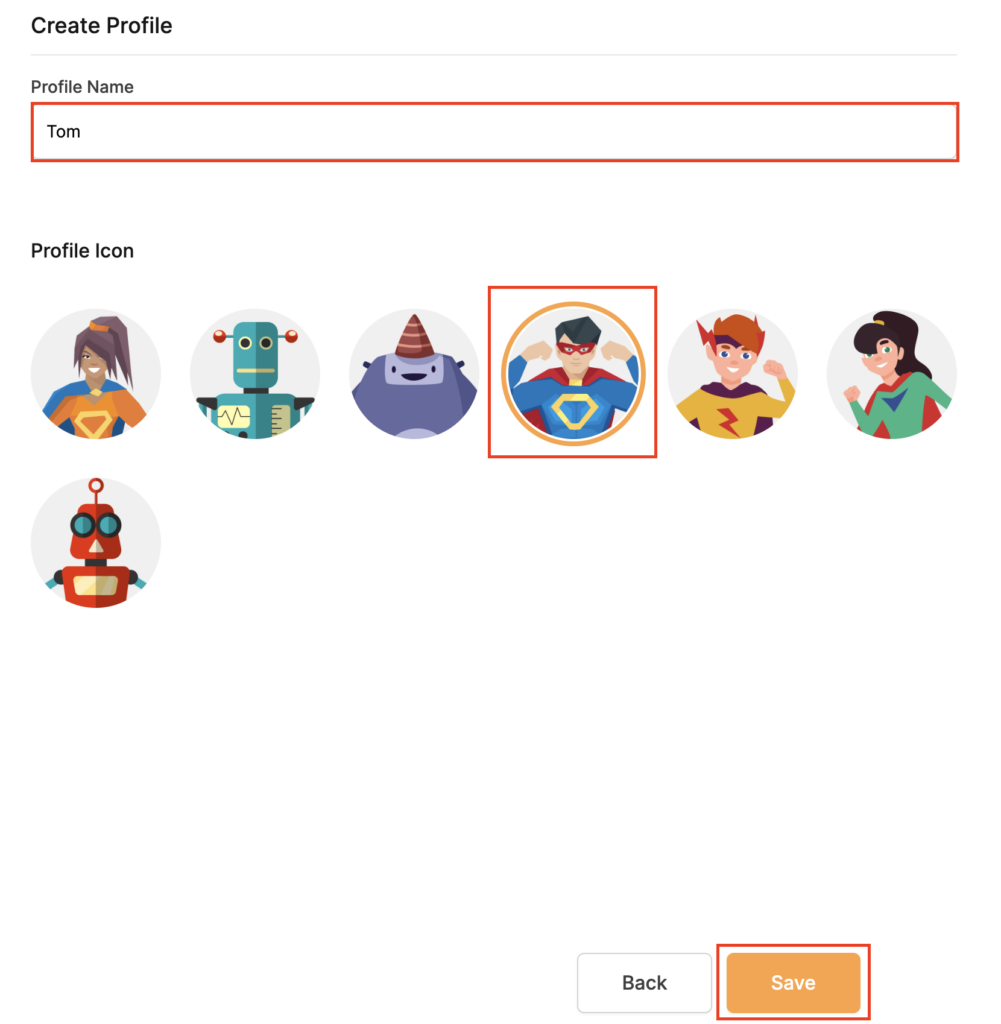
5. Set the Profile Name, select the Profile Icon, and click Save.

Privacy Hero Set Profile Name

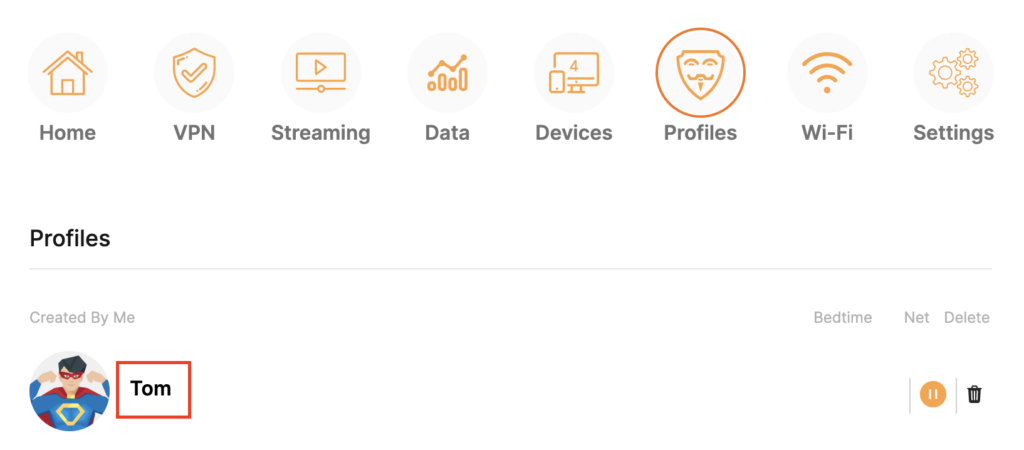
6. Click the name of the User Profile.

Privacy Hero Select Profile

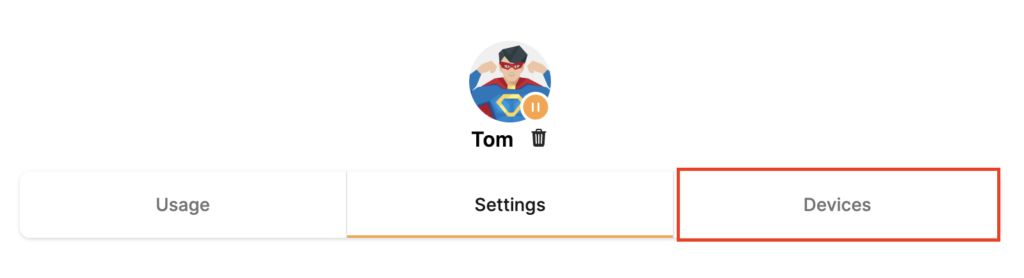
7. Select Devices.

Privacy Hero Select Devices

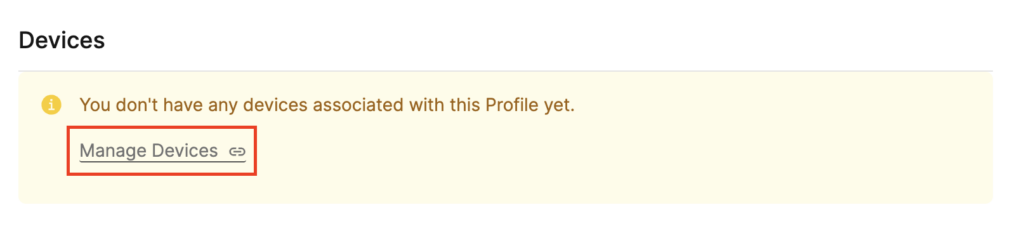
8. Select Manage Devices.

Privacy Hero Select Manage Devices

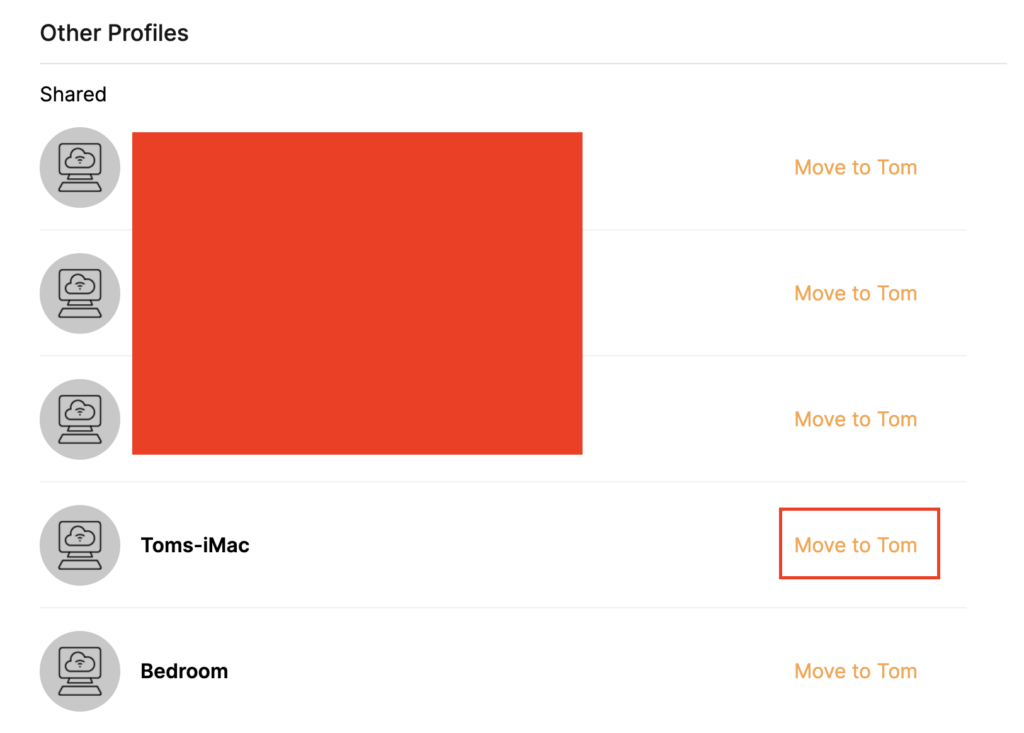
9. If you have not already connected your devices to the Privacy Hero network via wireless or ethernet you can do so now. Refresh the page after connecting a new device and it will appear in the list where you can select Move to “Profile Name” to move the device to the appropriate profile. By default new devices are in the Shared profile.

Privacy Hero Move to User Profile

If your devices were already connected to the Privacy Hero network and you are having issues identifying them I would recommend the following steps:

  1. Click the Devices icon.
  2. Select the device in question.
  3. Click Nerd and note down the IP Address of the device.
  4. Go to the network settings of your device where it will display the local IP Address and match that to the IP Address noted in Privacy Hero.

This is how you can identify a device that is not properly named.

10. Now that your devices are assigned you can set the Bedtime Settings (Internet Scheduler) and Safe Surf settings for your new Profile.

TROUBLESHOOTING

Still having issues? Visit the VPN Troubleshooting section.

Troubleshoot Here

Privacy Hero Bedtime Settings (Internet Scheduler)

TeamFlashRouters · Apr 3, 2023 ·

Your Privacy Hero router uses Cloud Based router management which means you can access the router settings from anywhere on any device that has an internet connection. You can follow these steps while connected to your phone, other Wi-Fi network, or the Privacy Hero network.

The Bedtime settings feature allows users to schedule when internet access will be turned off for specific user profiles. All devices assigned to this profile will have these rules applied.

1. From any device that has a browser such as a computer, smartphone, or tablet visit app.privacyhero.com

App.PrivacyHero.com

2. Enter your Privacy Hero account email and password. Click Login.

Privacy Hero Access Settings

If you have not created your Privacy Hero account yet please follow these instructions.

3. Click the Profiles symbol.

Privacy Hero Profiles

4. Click the name of the User Profile.

Privacy Hero Select Profile

5. Click Schoolnights or Weekends depending on which you need to set rules for.

Privacy Hero Bedtime School Nights Weekends

6. Select the time that you want the Internet to turn off and the days you want this rule to apply to. Click Save.

Privacy Hero Set Bedtime

7. Set the Bedtime toggle to On.

Privacy Hero Enable Bedtime

TROUBLESHOOTING

Still having issues? Visit the VPN Troubleshooting section.

Troubleshoot Here

How to Access Your AsusWRT FlashRouter Settings

TeamFlashRouters · Oct 16, 2025 ·

This quick guide will walk you through connecting to your AsusWRT FlashRouter and logging into the admin settings page. You’ll use either WiFi or an Ethernet cable, then access the router dashboard through your browser.

Step 1. Connect Your Device to the Router

You can connect by WiFi or Ethernet:

  • WiFi: Look for a network name like FlashRouter24 or FlashRouter50.
    • The WiFi password is set to: Wireless#[First 5 characters of your router’s MAC]
    • Example: If your MAC is CC28A07E70A8, your WiFi password is Wireless#CC28A.
    • ⚠️ Be sure to capitalize the “W” in Wireless.
  • Ethernet: Plug an Ethernet cable from your computer into one of the router’s LAN ports (usually marked or color-coded differently from the WAN port).

👉 Pro tip: Disconnect from any other WiFi networks during setup.

Step 2. Open the Router Login Page

  1. Open a web browser (Chrome, Safari, Firefox, Edge).
  2. In the address bar, type: 192.168.50.1 or go to asusrouter.com
  3. Press Enter.
Access Asus Router

This is the local router dashboard address (not a public website). If the page doesn’t load:

  • Try a different browser.
  • Clear your cache.
  • Ensure your device is connected to the FlashRouter network.

Step 3. Log In to the Router Settings

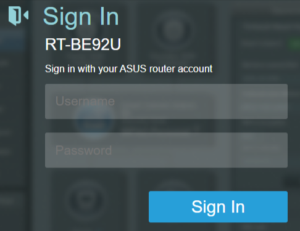
  • Default username: flashrouter
  • Default password: asuswrt-admin1
  • Some older devices may use: asuswrt1 or asuswrt
  • This is the factory default for AsusWRT routers shipped by FlashRouters.
Asus Router Login

💡 Once you’re in, you can update your admin password in the settings for extra security.

Next Steps

Now that you’ve accessed your AsusWRT FlashRouter, you can:

  • Set up your VPN service
  • Customize your WiFi name and password
  • Adjust device controls and security settings

Check our support library for your specific VPN setup guide.

ExpressVPN Setup for AsusWRT Firmware Routers

TeamFlashRouters · Apr 29, 2024 ·

You can connect to ExpressVPN on your AsusWRT router using OpenVPN.

Quick Options

  • OpenVPN: Download your preferred server .ovpn configuration file from the ExpressVPN website.

:point_right: If you are not already a ExpressVPN user Sign Up Now.

EXPRESSVPN SETUP GUIDE FOR ASUSWRT

1. Log in to your account on the ExpressVPN website.

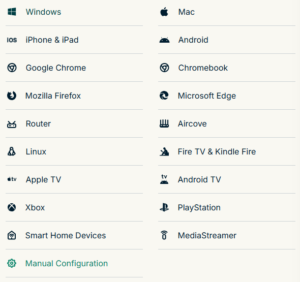
2. In the “Set up your devices” section, click More and select Manual Configuration from the menu options.

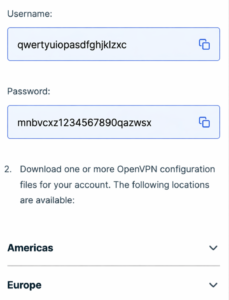
3. Copy the Username and Password that are displayed on the right

ExpressVPN Manual Service Credentials

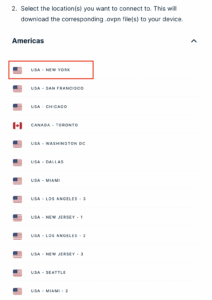
4. Download a server file from any of the available regions shown in the ExpressVPN Manual Configuration section (Americas, Europe, Asia Pacific, etc)

ExpressVPN Download .ovpn file

5. Log in to the Asus settings page by connecting to the Asus router’s WiFi (or wired LAN) on your computer. Then, enter 192.168.50.1 or asusrouter.com in the browser.

View our guide for more instructions on how to access AsusWRT firmware settings.

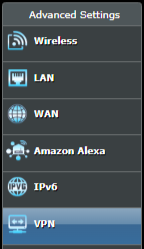
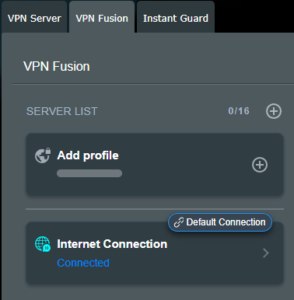
6. Navigate to the VPN tab and then click on the VPN Fusion tab, then click Add Profile

Click the VPN Button
VPN Fusion Add Profile

7.  Fill in your NordVPN information then click Apply and Enable.

  • Connection Name: Choose a name for your ExpressVPN OpenVPN connection.
  • VPN Type: Select OpenVPN
  • Import .ovpn File: Upload the OpenVPN file that you downloaded.
  • Username and Password: Copy and paste your ExpressVPN manual service credentials from step 3.

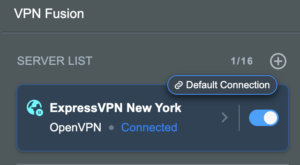
8. You should now see the Profile say Connected, indicating that the NordVPN server is successfully connected to your router.

Asus ExpressVPN Connected

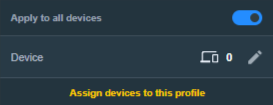
9. The VPN connection is automatically set to Apply to all devices.

If you only want certain devices to connect to the VPN, then turn off the VPN connection and switch off Apply to all devices.

Now click the pencil next to the Device section and select the devices (computer, phone, etc.) that you want to connect to VPN. Click OK and then click Apply all settings.

Apply VPN by Device
  1. Connect your devices to the Asus router network and visit the ExpressVPN website, at the top it should display Your Status: Protected.
  2. Visit ExpressVPN’s IP Check to verify your new IP address and virtual location.

🚫📱Do not run ExpressVPN apps on devices connected to your ExpressVPNrouter. Using the app at the same time as the router VPN may cause conflicts and connection issues.

TROUBLESHOOTING

Still having issues? Visit the VPN Troubleshooting section.

Troubleshoot Here

Hotspot Shield Manual OpenVPN Setup

TeamFlashRouters · Jul 15, 2020 ·

Preparing for Manual Hotspot Shield Setup

Obtain your Hotspot Shield OpenVPN Information

If you are not already a Hotspot Shield user Sign Up Now.

1. Log in to your account on the Hotspot Shield website.

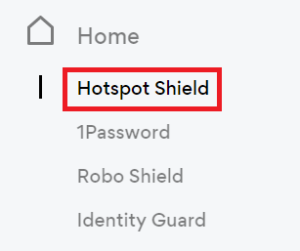
2. Click Hotspot Shield on the left side navigation.

Hotspot Shield - Website Admin

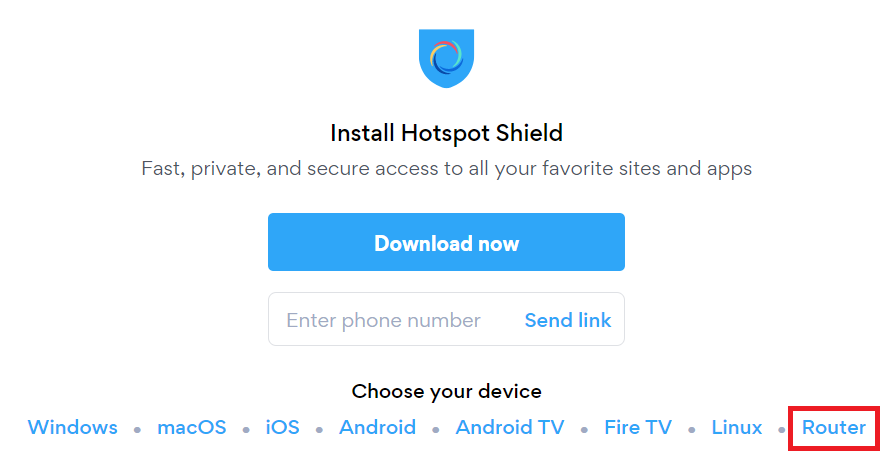
3. Under Choose your device click Router.

Hotspot Shield - Select Router

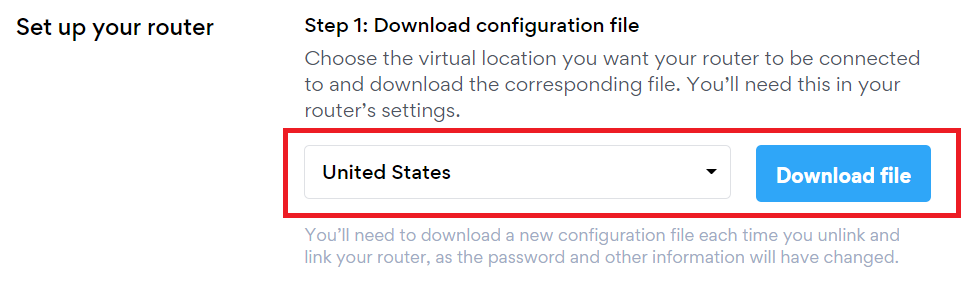
4. In the Set up your router section Select your desired virtual location and then click Download file.

Open the file that was downloaded with NotePad++ for Windows or TextEdit for Apple. You only need the <cert> and <key> from the .ovpn file. All Hotspot Shield servers have different keys and certificates.

Hotspot Shield - Download Configuration File

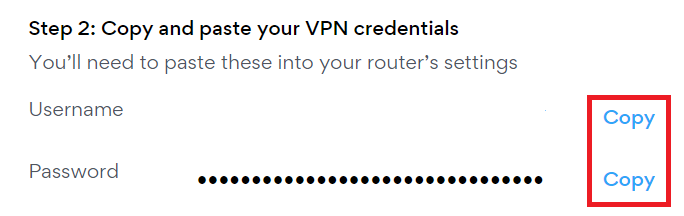
5. Copy the VPN Username, and Password that appear under Step 2 to a notepad, you will need this information later in the setup process.

Hotspot Shield - OpenVPN username and password

DD-WRT Router Setup for Hotspot Shield

Navigate to Services > VPN

Enter Hotspot Shield settings

OpenVPN Client

Start OpenVPN Client

If you wish to disable your VPN connection simply set this to Disable at any time and click Apply Settings.

Server IP/Name

At the top of the .ovpn file you downloaded above, there is a line e.g.:
remote universitycalendar.us 8041
universitycalendar.us is your Hotspot Shield server name. Enter the server name in this field.

Port

8041

Tunnel Device

TUN

Tunnel Protocol

UDP

Encryption cipher

AES-128-CBC

Hash Algorithm

SHA256

User Pass Authentication

Enable

Username

Enter the Username you obtained in your Hotspot Shield account.

Password

Enter the Password you obtained in your Hotspot Shield account.

Advanced Options

Enable

TLS Cipher

None

LZO Compression

No

NAT

Enable

Firewall Protection

Enable

Additional Config

resolv-retry infinite
remote-random
nobind
tun-mtu 1500
tun-mtu-extra 32
mssfix 1450
persist-key
persist-tun
ping 15
ping-restart 0
reneg-sec 0
remote-cert-tls server

Policy Based Routing

This field can be used for split VPN and Dual Gateway routing.

CA Cert

—–BEGIN CERTIFICATE—–
MIIFazCCA1OgAwIBAgIRAIIQz7DSQONZRGPgu2OCiwAwDQYJKoZIhvcNAQELBQAw
TzELMAkGA1UEBhMCVVMxKTAnBgNVBAoTIEludGVybmV0IFNlY3VyaXR5IFJlc2Vh
cmNoIEdyb3VwMRUwEwYDVQQDEwxJU1JHIFJvb3QgWDEwHhcNMTUwNjA0MTEwNDM4
WhcNMzUwNjA0MTEwNDM4WjBPMQswCQYDVQQGEwJVUzEpMCcGA1UEChMgSW50ZXJu
ZXQgU2VjdXJpdHkgUmVzZWFyY2ggR3JvdXAxFTATBgNVBAMTDElTUkcgUm9vdCBY
MTCCAiIwDQYJKoZIhvcNAQEBBQADggIPADCCAgoCggIBAK3oJHP0FDfzm54rVygc
h77ct984kIxuPOZXoHj3dcKi/vVqbvYATyjb3miGbESTtrFj/RQSa78f0uoxmyF+
0TM8ukj13Xnfs7j/EvEhmkvBioZxaUpmZmyPfjxwv60pIgbz5MDmgK7iS4+3mX6U
A5/TR5d8mUgjU+g4rk8Kb4Mu0UlXjIB0ttov0DiNewNwIRt18jA8+o+u3dpjq+sW
T8KOEUt+zwvo/7V3LvSye0rgTBIlDHCNAymg4VMk7BPZ7hm/ELNKjD+Jo2FR3qyH
B5T0Y3HsLuJvW5iB4YlcNHlsdu87kGJ55tukmi8mxdAQ4Q7e2RCOFvu396j3x+UC
B5iPNgiV5+I3lg02dZ77DnKxHZu8A/lJBdiB3QW0KtZB6awBdpUKD9jf1b0SHzUv
KBds0pjBqAlkd25HN7rOrFleaJ1/ctaJxQZBKT5ZPt0m9STJEadao0xAH0ahmbWn
OlFuhjuefXKnEgV4We0+UXgVCwOPjdAvBbI+e0ocS3MFEvzG6uBQE3xDk3SzynTn
jh8BCNAw1FtxNrQHusEwMFxIt4I7mKZ9YIqioymCzLq9gwQbooMDQaHWBfEbwrbw
qHyGO0aoSCqI3Haadr8faqU9GY/rOPNk3sgrDQoo//fb4hVC1CLQJ13hef4Y53CI
rU7m2Ys6xt0nUW7/vGT1M0NPAgMBAAGjQjBAMA4GA1UdDwEB/wQEAwIBBjAPBgNV
HRMBAf8EBTADAQH/MB0GA1UdDgQWBBR5tFnme7bl5AFzgAiIyBpY9umbbjANBgkq
hkiG9w0BAQsFAAOCAgEAVR9YqbyyqFDQDLHYGmkgJykIrGF1XIpu+ILlaS/V9lZL
ubhzEFnTIZd+50xx+7LSYK05qAvqFyFWhfFQDlnrzuBZ6brJFe+GnY+EgPbk6ZGQ
3BebYhtF8GaV0nxvwuo77x/Py9auJ/GpsMiu/X1+mvoiBOv/2X/qkSsisRcOj/KK
NFtY2PwByVS5uCbMiogziUwthDyC3+6WVwW6LLv3xLfHTjuCvjHIInNzktHCgKQ5
ORAzI4JMPJ+GslWYHb4phowim57iaztXOoJwTdwJx4nLCgdNbOhdjsnvzqvHu7Ur
TkXWStAmzOVyyghqpZXjFaH3pO3JLF+l+/+sKAIuvtd7u+Nxe5AW0wdeRlN8NwdC
jNPElpzVmbUq4JUagEiuTDkHzsxHpFKVK7q4+63SM1N95R1NbdWhscdCb+ZAJzVc
oyi3B43njTOQ5yOf+1CceWxG1bQVs5ZufpsMljq4Ui0/1lvh+wjChP4kqKOJ2qxq
4RgqsahDYVvTH9w7jXbyLeiNdd8XM2w9U/t7y0Ff/9yi0GE44Za4rF2LN9d11TPA
mRGunUHBcnWEvgJBQl9nJEiU0Zsnvgc/ubhPgXRR4Xq37Z0j4r7g1SgEEzwxA57d
emyPxgcYxn/eR44/KJ4EBs+lVDR3veyJm+kXQ99b21/+jh5Xos1AnX5iItreGCc=
—–END CERTIFICATE—–
—–BEGIN CERTIFICATE—–
MIIFjTCCA3WgAwIBAgIRANOxciY0IzLc9AUoUSrsnGowDQYJKoZIhvcNAQELBQAw
TzELMAkGA1UEBhMCVVMxKTAnBgNVBAoTIEludGVybmV0IFNlY3VyaXR5IFJlc2Vh
cmNoIEdyb3VwMRUwEwYDVQQDEwxJU1JHIFJvb3QgWDEwHhcNMTYxMDA2MTU0MzU1
WhcNMjExMDA2MTU0MzU1WjBKMQswCQYDVQQGEwJVUzEWMBQGA1UEChMNTGV0J3Mg
RW5jcnlwdDEjMCEGA1UEAxMaTGV0J3MgRW5jcnlwdCBBdXRob3JpdHkgWDMwggEi
MA0GCSqGSIb3DQEBAQUAA4IBDwAwggEKAoIBAQCc0wzwWuUuR7dyXTeDs2hjMOrX
NSYZJeG9vjXxcJIvt7hLQQWrqZ41CFjssSrEaIcLo+N15Obzp2JxunmBYB/XkZqf
89B4Z3HIaQ6Vkc/+5pnpYDxIzH7KTXcSJJ1HG1rrueweNwAcnKx7pwXqzkrrvUHl
Npi5y/1tPJZo3yMqQpAMhnRnyH+lmrhSYRQTP2XpgofL2/oOVvaGifOFP5eGr7Dc
Gu9rDZUWfcQroGWymQQ2dYBrrErzG5BJeC+ilk8qICUpBMZ0wNAxzY8xOJUWuqgz
uEPxsR/DMH+ieTETPS02+OP88jNquTkxxa/EjQ0dZBYzqvqEKbbUC8DYfcOTAgMB
AAGjggFnMIIBYzAOBgNVHQ8BAf8EBAMCAYYwEgYDVR0TAQH/BAgwBgEB/wIBADBU
BgNVHSAETTBLMAgGBmeBDAECATA/BgsrBgEEAYLfEwEBATAwMC4GCCsGAQUFBwIB
FiJodHRwOi8vY3BzLnJvb3QteDEubGV0c2VuY3J5cHQub3JnMB0GA1UdDgQWBBSo
SmpjBH3duubRObemRWXv86jsoTAzBgNVHR8ELDAqMCigJqAkhiJodHRwOi8vY3Js
LnJvb3QteDEubGV0c2VuY3J5cHQub3JnMHIGCCsGAQUFBwEBBGYwZDAwBggrBgEF
BQcwAYYkaHR0cDovL29jc3Aucm9vdC14MS5sZXRzZW5jcnlwdC5vcmcvMDAGCCsG
AQUFBzAChiRodHRwOi8vY2VydC5yb290LXgxLmxldHNlbmNyeXB0Lm9yZy8wHwYD
VR0jBBgwFoAUebRZ5nu25eQBc4AIiMgaWPbpm24wDQYJKoZIhvcNAQELBQADggIB
ABnPdSA0LTqmRf/Q1eaM2jLonG4bQdEnqOJQ8nCqxOeTRrToEKtwT++36gTSlBGx
A/5dut82jJQ2jxN8RI8L9QFXrWi4xXnA2EqA10yjHiR6H9cj6MFiOnb5In1eWsRM
UM2v3e9tNsCAgBukPHAg1lQh07rvFKm/Bz9BCjaxorALINUfZ9DD64j2igLIxle2
DPxW8dI/F2loHMjXZjqG8RkqZUdoxtID5+90FgsGIfkMpqgRS05f4zPbCEHqCXl1
eO5HyELTgcVlLXXQDgAWnRzut1hFJeczY1tjQQno6f6s+nMydLN26WuU4s3UYvOu
OsUxRlJu7TSRHqDC3lSE5XggVkzdaPkuKGQbGpny+01/47hfXXNB7HntWNZ6N2Vw
p7G6OfY+YQrZwIaQmhrIqJZuigsrbe3W+gdn5ykE9+Ky0VgVUsfxo52mwFYs1JKY
2PGDuWx8M6DlS6qQkvHaRUo0FMd8TsSlbF0/v965qGFKhSDeQoMpYnwcmQilRh/0
ayLThlHLN81gSkJjVrPI0Y8xCVPB4twb1PFUd2fPM3sA1tJ83sZ5v8vgFv2yofKR
PB0t6JzUA81mSqM3kxl5e+IZwhYAyO0OTg3/fs8HqGTNKd9BqoUwSRBzp06JMg5b
rUCGwbCUDI0mxadJ3Bz4WxR6fyNpBK2yAinWEsikxqEt
—–END CERTIFICATE—–

Public Client Cert

In the .ovpn file Copy and Paste all contents in between the <cert> and </cert> lines from your .ovpn file starting and ending with:
—–BEGIN CERTIFICATE—–
…
—–END CERTIFICATE—–

Private Client Key

In the .ovpn file Copy and Paste all contents in between the <key> and </key> lines from your .ovpn file starting and ending with:
—–BEGIN PRIVATE KEY—–
…
—–END PRIVATE KEY—–

CLICK APPLY SETTINGS

Leave all settings not mentioned above as their default setting.

Verify a successful Hotspot Shield connection

Navigate to Status > OpenVPN

  1. You should now see a CONNECTED SUCCESS message.
  2. Visit Hotspot Shield’s website to verify your new IP address and virtual location.

In some cases you may notice that the location is not showing the same location as the server you have input in your router settings; this is because geo tracking tools are often tricked by VPN connections. As long as you see an IP address that is not the same as your normal Internet IP address then you are indeed connected to Hotspot Shield.

Back up your settings

Navigate to Administration > Backup

  1. Click the Backup button.
  2. A file named nvrambak.bin will be saved to your computer.
  3. You can load nvrambak.bin to restore your settings in the event of a reset.

How to change the Hotspot Shield server

  1. Follow the instructions for obtaining the OpenVPN information from above.
  2. Enter the new Server Address in the Server IP/Name field.
  3. Enter the new Username and Password.
  4. Enter the new Public Client Cert and Private Client Key.
  5. Click Apply Settings.

TROUBLESHOOTING

Still having issues? Visit the VPN Troubleshooting section.

Troubleshoot Here

Flint/Slate GL.iNet Repeater Setup

TeamFlashRouters · May 29, 2023 ·

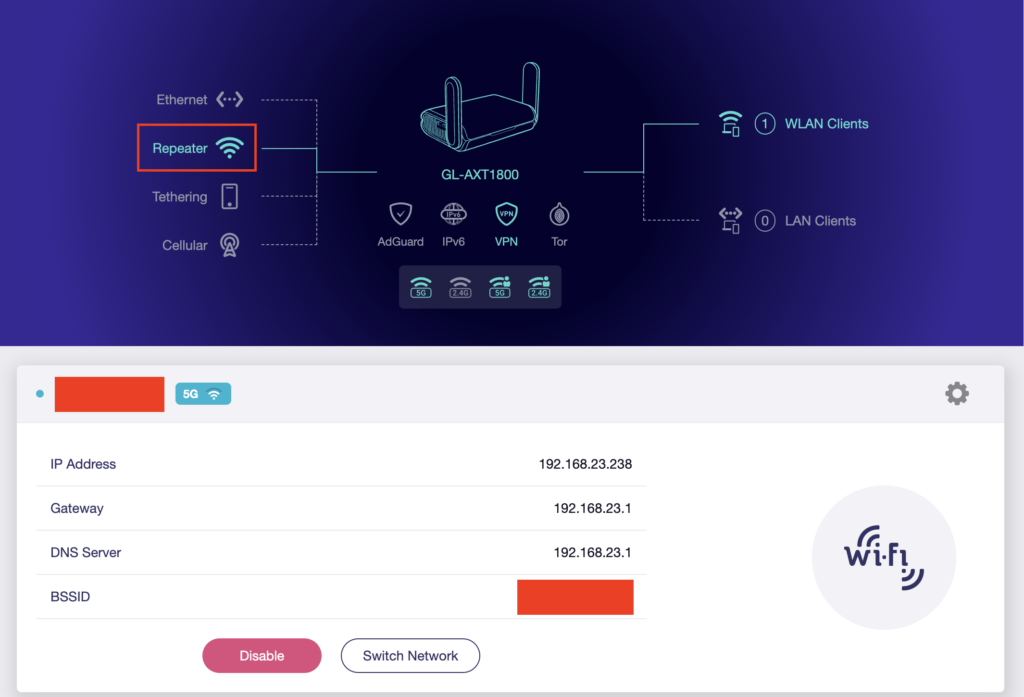
If you want to connect your FlashRouter to the Internet via Wi-Fi instead of an ethernet cable you can setup a FlashRouter as a Wireless Repeater. In Wireless Repeater mode the FlashRouter connects to an available network via WiFi and then creates a completely separate network segment for you.

1. Connect your computer, phone, or tablet to the GL.iNet router via wireless (FlashRouter24 / FlashRouter50) or via ethernet cable to one of the LAN ports on the router.

The FlashRouter WiFi password is printed on the sheet that came with the router and is set to Wireless#[First 5 characters of your router MAC]. The router MAC can be found on the bottom of your router if you cannot locate the sheet. For e.g. if your MAC is 1459C07E70A8 then your WiFi password is Wireless#1459C

Be sure to capitalize the W.

2. Once connected via wireless or ethernet on your device open your browser and go to 192.168.8.1

GL.iNet router access

3. Enter openwrt as the admin password to access the GL.iNet firmware settings.

GL.iNet admin password enter

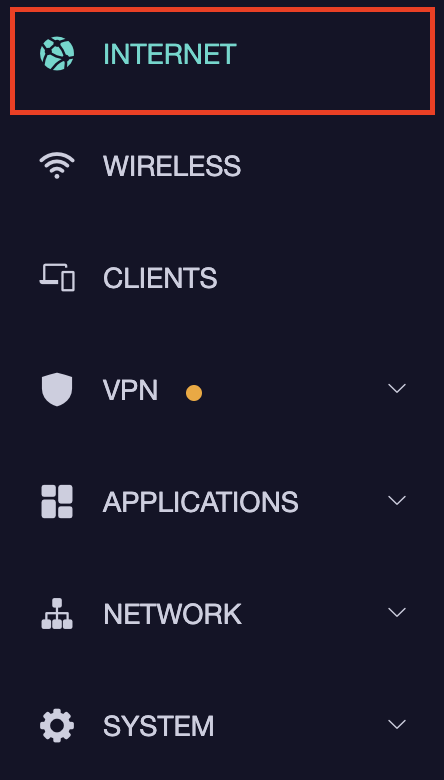
4. Select the Internet tab.

GL.iNet Internet tab

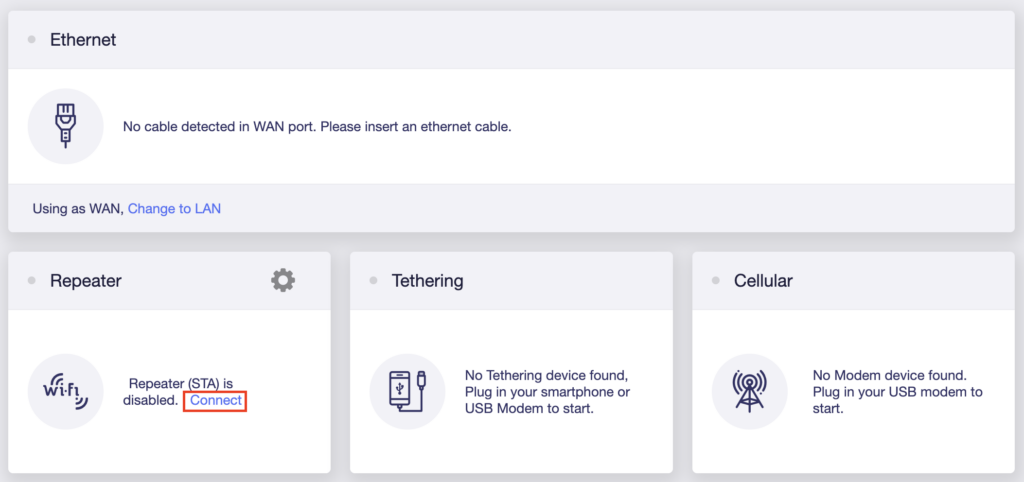
5. In the Repeater area select Connect.

GL.iNet Repeater Connect

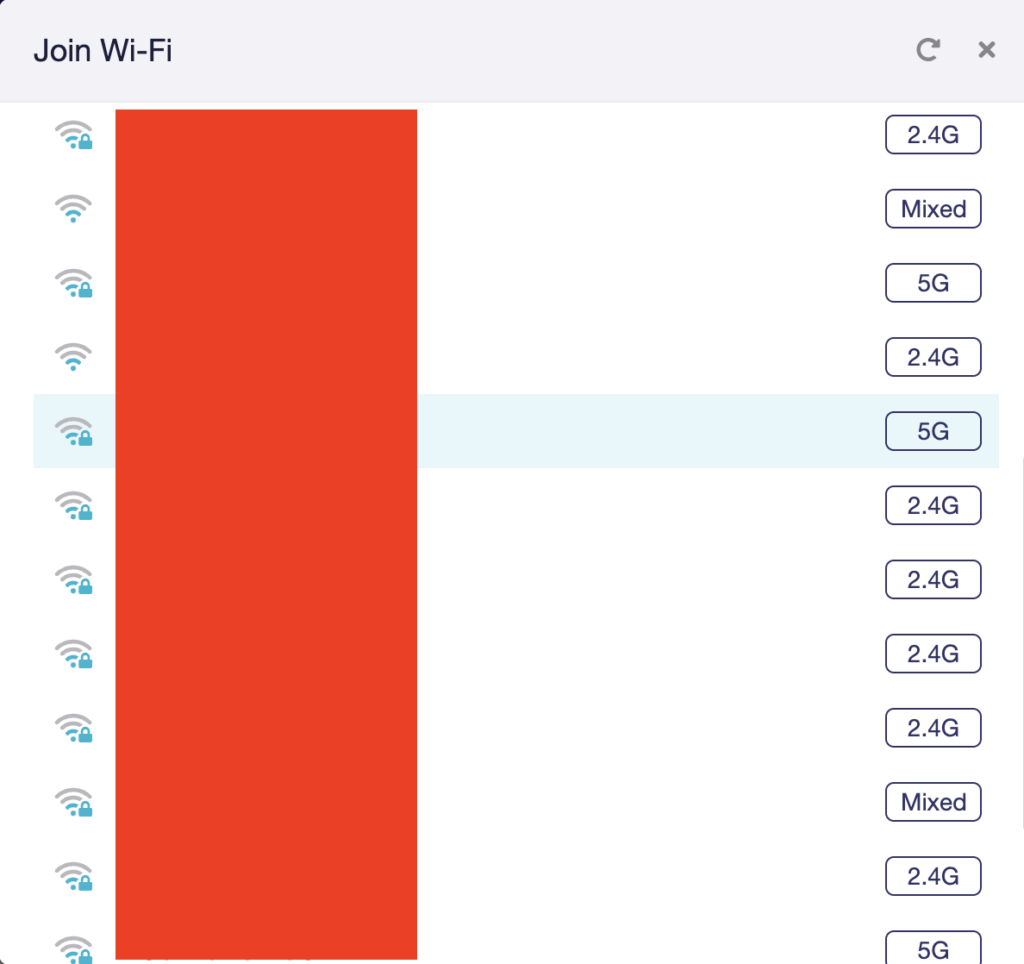
6. Select the available Wi-Fi network you want the FlashRouter to use for Internet from the list. You can use a 2.4GHz and/or 5GHz network to connect.

GL.iNet Repeater select Wi-Fi

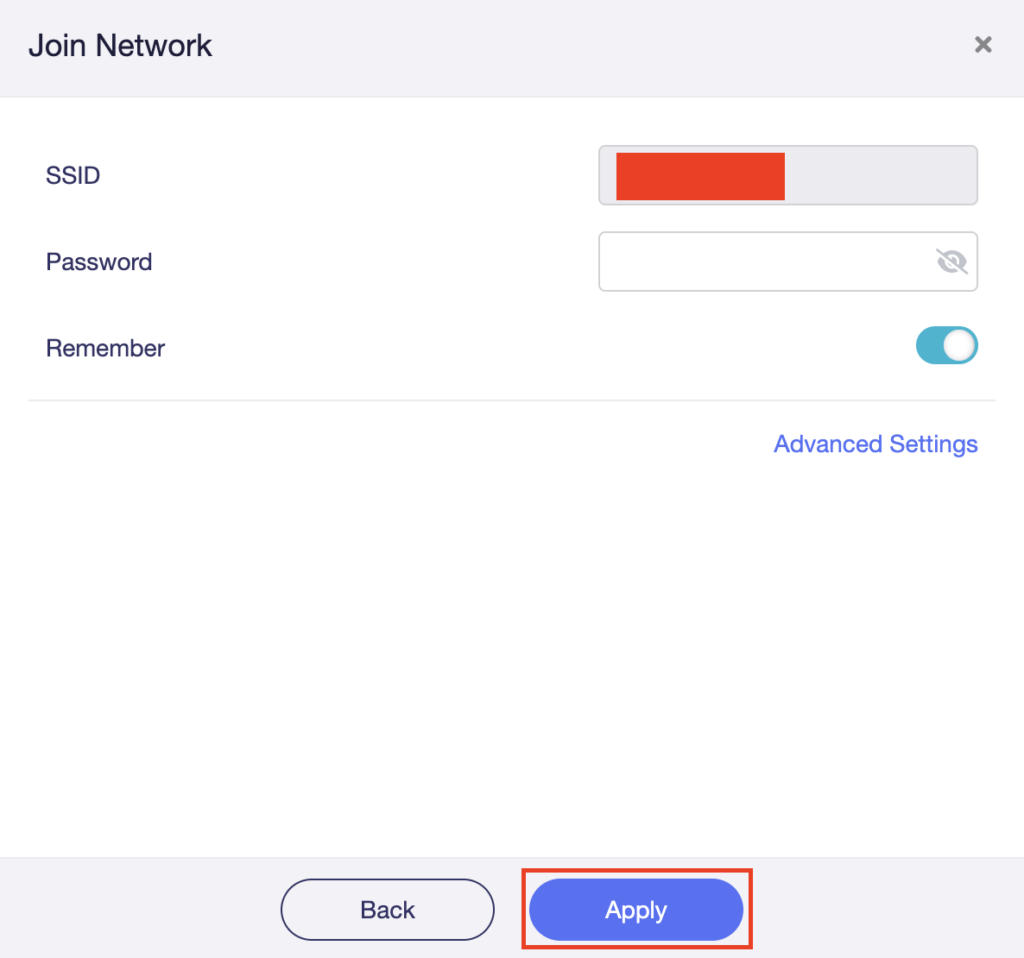
7. Enter the correct Wi-Fi password in the Password field for the network you selected. Then click Apply.

GL.iNet Repeater enter Wi-Fi password

8. You are now setup with the GL.iNet FlashRouter receiving Internet via Wi-Fi. The Repeater area should now be filled in with the network information of the connection as shown below.

GL.iNet Repeater Setup complete

TROUBLESHOOTING

Still having issues? Visit the VPN Troubleshooting section.

Troubleshoot Here

Privacy Hero Bypass certain devices from VPN

TeamFlashRouters · Apr 3, 2023 ·

Your Privacy Hero router uses Cloud Based router management which means you can access the router settings from anywhere on any device that has an internet connection. You can follow these steps while connected to your phone, other Wi-Fi network, or the Privacy Hero network.

If you have certain devices in your network that you do NOT want connecting to VPN you can follow these steps to bypass these devices from the Privacy Hero’s VPN connection.

1. From any device that has a browser such as a computer, smartphone, or tablet visit app.privacyhero.com

App.PrivacyHero.com

2. Enter your Privacy Hero account email and password. Click Login.

Privacy Hero Access Settings

If you have not created your Privacy Hero account yet please follow these instructions.

3. Click the Devices symbol.

Privacy Hero Devices

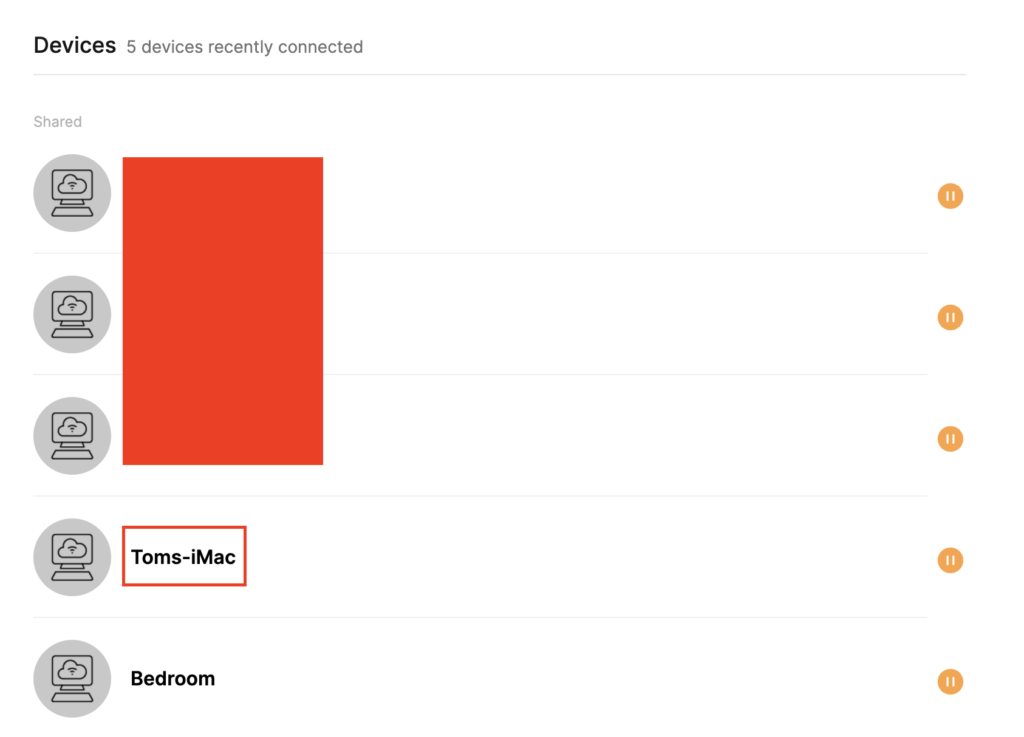
4. Click the name of the Device you want to bypass from VPN.

Privacy Hero Select Device

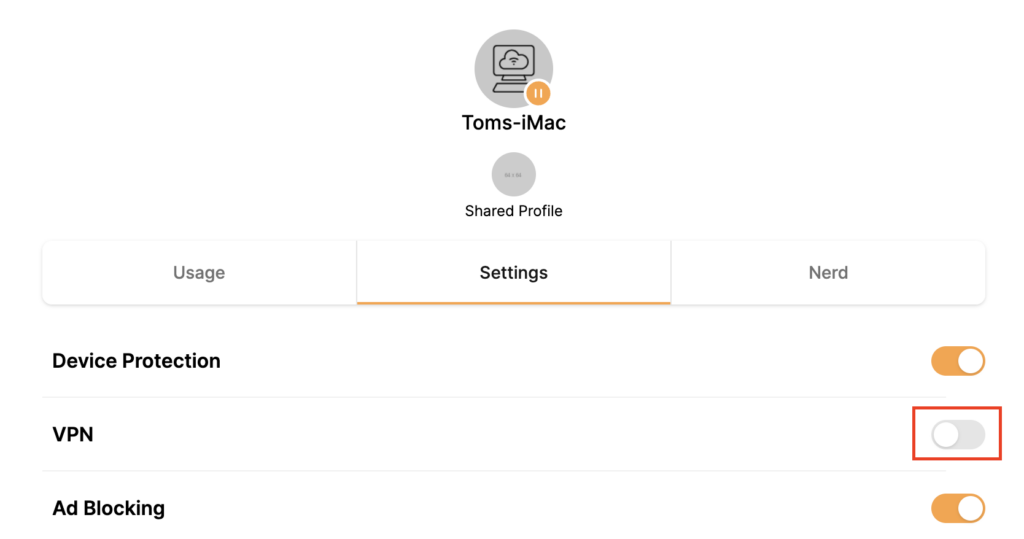
5. Set the VPN toggle to Off. You can also do the same for Adblocking and Device Protection as needed.

Privacy Hero VPN off by device

TROUBLESHOOTING

Still having issues? Visit the VPN Troubleshooting section.

Troubleshoot Here

IPVanish AsusWRT OpenVPN Setup

TeamFlashRouters · Apr 29, 2024 ·

Preparing for IPVanish AsusWRT Setup

Download your IPVanish .ovpn file

If you are not already an IPVanish user Sign Up Now.

1. Log in to your account on the IPVanish website.

IPVanish login

2. Successfully log in with your account information then go to IPVanish .ovpn file page.

3. Click on the .ovpn file for the server location you want to use to dowloand the .ovpn file. Do not open this file.

IPVanish download ovpn

AsusWRT Router Setup for IPVanish

Login to AsusWRT firmware settings in a browser on any computer or smart device connected to the AsusWRT FlashRouter’s network.

1. Navigate to the VPN tab.

Merlin VPN Tab

2. Navigate to the VPN Fusion tab.

Asus VPN Fusion

3. Click Add profile.

Asus Add profile

4. In the Connection Name field enter in the name you’d like to use for this OpenVPN Client profile. We typically advise entering in the location or server number here. Our example server was in New York so I have entered in IPVanish New York.

5. In the VPN Type dropdown select OpenVPN.

6. Click Import .ovpn file and select the .ovpn file you downloaded earlier. Then click Upload.

7. In the Username and Password fields paste in the IPVanish email and password you use to successfully login to your IPVanish website account.

8. Click Apply and Enable at the bottom of the page.

Asus IPVanish profile

If you only want certain devices to connect to the OpenVPN Client profile you are setting up instead of all the devices connected to the FlashRouter’s network click into the profile and disable Apply to all devices. Then click Devices and select the devices that you want to connect to VPN.

Asus VPN devices
Asus VPN select devices

9. At the top of the page set the Service State toggle to ON to activate the VPN connection.

Asus IPVanish Connected

Verify a successful IPVanish connection

  1. You should now see a CONNECTED message.
  2. Visit IPVanish’s IP Check to verify your new IP address and virtual location.

In some cases you may notice that the location is not showing the same location as the server you have input in your router settings; this is because geo tracking tools are often tricked by VPN connections. As long as you see an IP address that is not the same as your normal Internet IP address then you are indeed connected to IPVanish.

How to change the IPVanish server

  1. Follow the steps at the top of the page to obtain a new .ovpn file.
  2. Then proceed with the settings same as initial setup.

TROUBLESHOOTING

Still having issues? Visit the VPN Troubleshooting section.

Troubleshoot Here

Surfshark AsusWRT WireGuard Setup

TeamFlashRouters · Apr 29, 2024 ·

Preparing for Surfshark AsusWRT Setup

Copy your Surfshark Private Key

If you are not already a Surfshark user Sign Up Now.

1. Log in to your account on the Surfshark website.

Surfshark Account Login

2. Click VPN Manual Setup.

Surfshark VPN Manual Setup

3. Select Router as the Setup method.

Surfshark setup method Router

4. Select WireGuard as the Protocol.

Surfshark select WireGuard

5. Select I don’t have a key pair.

Surfshark No Key Pair

6. Enter FlashRouter as the name of the connection and click Next.

Surfshark Connection Name

7. Click Generate a new key pair.

Surfshark Generate new Key Pair

8. A Public Key and Private Key will then appear. Use the copy box to copy the Private Key. You will not need the public key.

Surfshark Private Key

AsusWRT Router Setup for Surfshark

Login to AsusWRT firmware settings in a browser on any computer or smart device connected to the AsusWRT FlashRouter’s network.

1. Navigate to the VPN tab.

Merlin VPN Tab

2. Navigate to the VPN Fusion tab.

Asus VPN Fusion

3. Click Add profile.

Asus Add profile

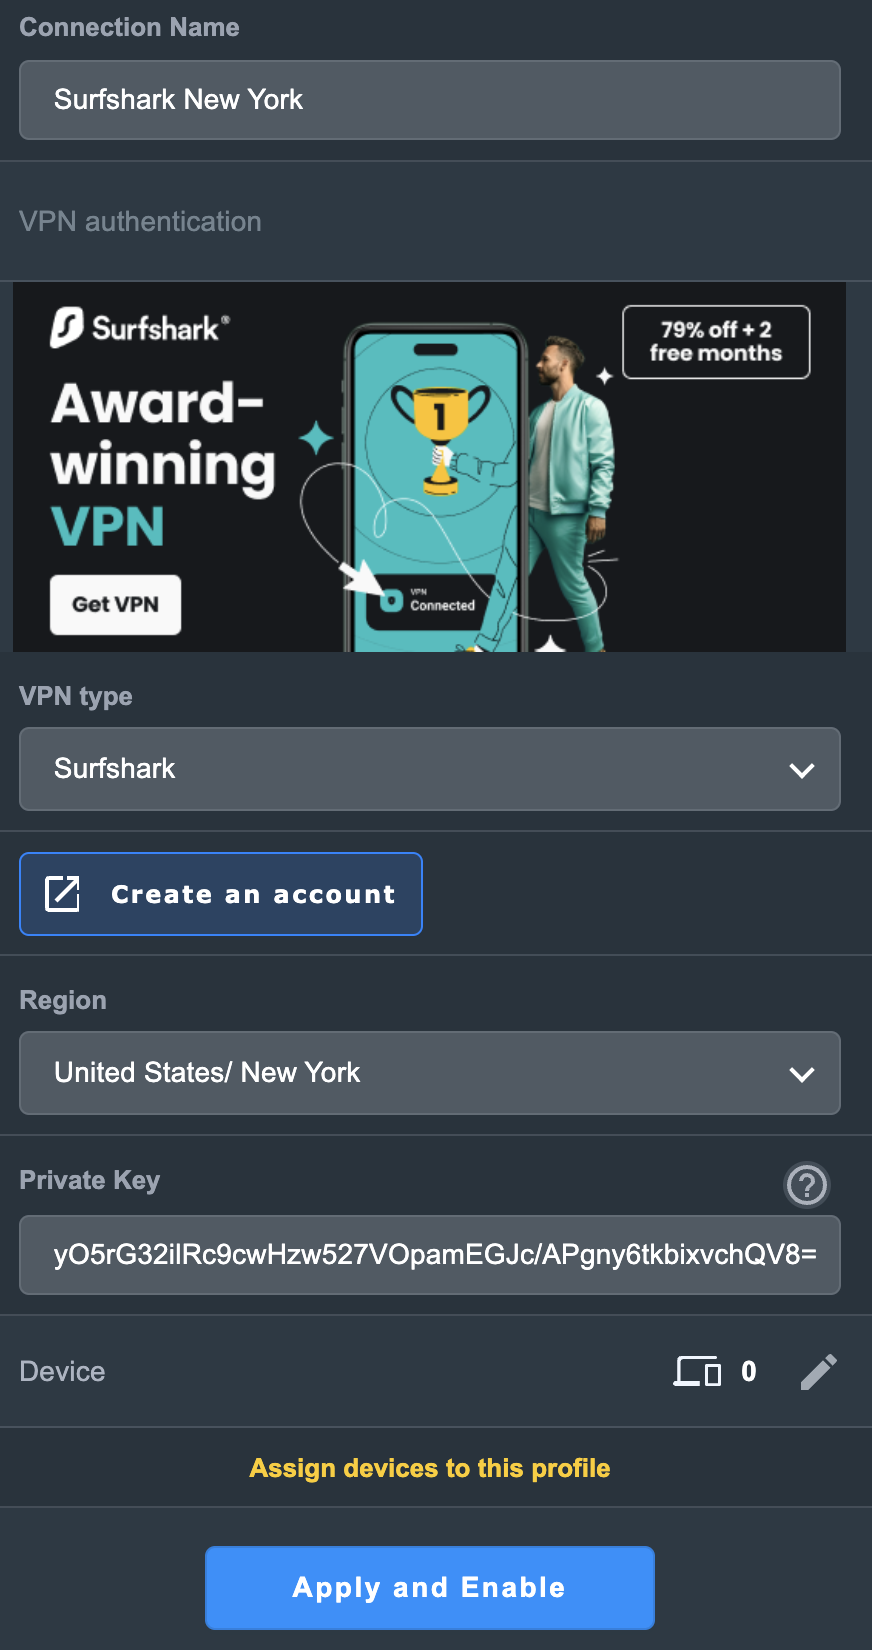
4. In the Connection Name field enter in Surfshark.

5. In the VPN Type dropdown select Surfshark.

6. In the Region dropdown select the Surfshark location you want to connect to.

7. In the Private Key field paste in the Surfshark Private Key obtained earlier.

8. Click Apply and Enable at the bottom of the page.

Asus Surfshark profile

If you only want certain devices to connect to the Surfshark profile you are setting up instead of all the devices connected to the FlashRouter’s network click into the profile and disable Apply to all devices. Then click Devices and select the devices that you want to connect to VPN.

Asus VPN devices
Asus VPN select devices

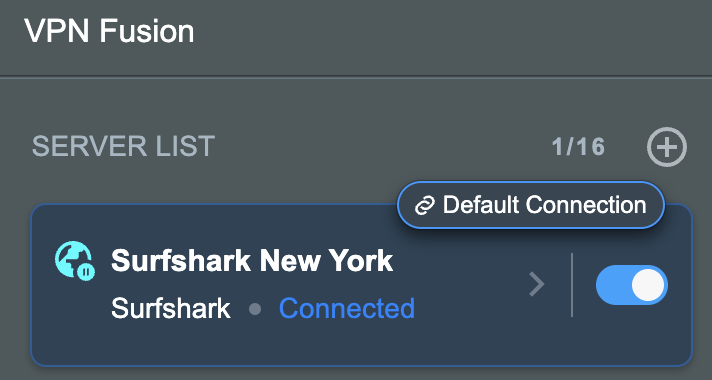
9. At the top of the page set the Service State toggle to ON to activate the VPN connection.

Asus Surfshark Connected

Verify a successful Surfshark connection

  1. You should now see a CONNECTED message.
  2. Visit Surfshark’s IP Check to verify your new IP address and virtual location.

In some cases you may notice that the location is not showing the same location as the server you have input in your router settings; this is because geo tracking tools are often tricked by VPN connections. As long as you see an IP address that is not the same as your normal Internet IP address then you are indeed connected to Surfshark.

How to change the Surfshark server

  1. Use the profile service state toggle to disconnect the currently connected location.
  2. Then click into the Surfshark profile in the router’s settings.
  3. Then adjust the Region dropdown to a new location.
  4. Click Apply all settings.
  5. Use the profile service state toggle to connect the new location.

TROUBLESHOOTING

Still having issues? Visit the VPN Troubleshooting section.

Troubleshoot Here

Flint/Slate GL.iNet Internet Setup

TeamFlashRouters · Apr 3, 2023 ·

Follow this article when you receive your new Flint or Slate GL.iNet router to connect it to the Internet.

1. Connect the ethernet cable that came with the router from an open LAN ethernet port on your ISP modem or other router to the WAN port of the Flint or Slate GL.iNet router.

Flint Internet
Slate Internet

2. Connect the power to the router and wait about 2 minutes for the router to fully boot up.

3. Connect your computer, phone, or tablet to the GL.iNet router via wireless (FlashRouter24 / FlashRouter50) or via ethernet cable to one of the LAN ports on the router.

The FlashRouter WiFi password is printed on the sheet that came with the router and is set to Wireless#[First 5 characters of your router MAC]. The router MAC can be found on the bottom of your router if you cannot locate the sheet. For e.g. if your MAC is 1459C07E70A8 then your WiFi password is Wireless#1459C

Be sure to capitalize the W.

4. Once connected via wireless or ethernet on your device open your browser and go to 192.168.8.1

GL.iNet router access

5. Enter openwrt as the admin password to access the GL.iNet firmware settings.

GL.iNet admin password enter

6. Verify that your Flint/Slate GL.iNet router is receiving a WAN IP Address and webpages are loading while connected to its network.

GL.iNet WAN Settings

TROUBLESHOOTING

Still having issues? Visit the VPN Troubleshooting section.

Troubleshoot Here

Why can’t I access router settings?

Dave · May 3, 2019 ·

Be sure to first try the preset details to access your FlashRouter’s settings.

First time setup

Are you connected to the FlashRouter's network?

In order to access the FlashRouter’s settings you need to be connected to the FlashRouter’s network via ethernet or WiFi.

It is possible that if you are connected to the FlashRouter’s network you device might have static IP settings from a previous connection preventing it from being read correctly. Check your device’s static IP settings before proceeding.

Is your FlashRouter wired correctly?

Your FlashRouter should be wired as detailed in our Connect FlashRouter to the Internet setup.

A common mistake is to connect from your modem or other router to a LAN/numbered port of the FlashRouter instead of the WAN/Internet port of the FlashRouter as it should be. Doing so results in no access to the FlashRouter’s settings.

Lost access

How to find you FlashRouter's Local IP Address?

It is possible that your Local IP Address was changed at some point. Your Local IP Address is the address that you can access the FlashRouter’s settings with. We recommend finding the Local IP Address of the FlashRouter.

Was your FlashRouter reset?

If your FlashRouter is showing a local IP Address of 192.168.1.1 and you are seeing ‘dd-wrt’ as an available network in your wireless networks, your FlashRouter was reset. Reconfigure your FlashRouter.

Keep in mind that seeing a Local IP Address of 192.168.1.1 can also mean your are wired incorrectly and the router has not been reset. Be sure to check your wireless networks for ‘dd-wrt’. If the FlashRouter’s wireless network name appears as it was set then your FlashRouter was not reset and you should see the above section.

Tried updating firmware

Why can't I access my FlashRouter after a firmware upgrade?

When performing a firmware upgrade there is a dropdown that has Don’t Reset or Reset to Default settings as options.

If you accidentally selected Reset to Default settings you will need to reconfigure your FlashRouter.

If you had Don’t Reset selected and are still unable to connect to the FlashRouter’s network after a firmware upgrade, first make sure you are connected to the FlashRouter’s network as WiFi can disconnect during an upgrade, and then Reboot the FlashRouter.

SaferVPN Manual OpenVPN Setup

TeamFlashRouters · Apr 15, 2019 ·

Preparing for Manual SaferVPN Setup

Verify your SaferVPN login information

If you are not already an SaferVPN user Sign Up Now.

Log in to your account on the SaferVPN website.

FlashRouters Privacy App - SaferVPN Login

SaferVPN Server Addresses

View a full list of SaferVPN servers.

America

East Coast:
us1.safervpn.net

West Coast:
us2.safervpn.net

United Kingdom

uk1.safervpn.net

DD-WRT Router Setup for SaferVPN

Navigate to Services > VPN

Enter SaferVPN settings

OpenVPN Client

Start OpenVPN Client

If you wish to disable your VPN connection simply set this to Disable at any time and click Apply Settings.

Server IP/Name

Copy and paste the server you would like to connect to from the server list above. Be sure there are no extra spaces or characters.

If you wish to change SaferVPN connection locations, THIS IS THE ONLY FIELD YOU NEED TO CHANGE.

Port

1194

Tunnel Device

TUN

Tunnel Protocol

UDP

Encryption cipher

AES-256-CBC

Hash Algorithm

SHA1

User Pass Authentication

Enable

Username

Enter the Username you successfully logged in to your SaferVPN account with.

Password

Enter the Password you successfully logged in to your SaferVPN account with.

Advanced Options

Enable

TLS Cipher

None

LZO Compression

Adaptive

NAT

Enable

Additional Config

persist-key
persist-tun
tun-mtu-extra 32
mssfix 1450

Policy Based Routing

This field can be used for split VPN and Dual Gateway routing.

CA Cert

-----BEGIN CERTIFICATE-----
MIIE1jCCA76gAwIBAgIJAOnRq4FWsZgYMA0GCSqGSIb3DQEBCwUAMIGiMQswCQYD
VQQGEwJVUzELMAkGA1UECBMCQ0ExFTATBgNVBAcTDFNhbkZyYW5jaXNjbzERMA8G
A1UEChMIU2FmZXJWUE4xETAPBgNVBAsTCFNhZmVyVlBOMREwDwYDVQQDEwhTYWZl
clZQTjERMA8GA1UEKRMIU2FmZXJWUE4xIzAhBgkqhkiG9w0BCQEWFHN1cHBvcnRA
c2FmZXJ2cG4uY29tMB4XDTE3MDgzMTA5NDEyM1oXDTI3MDgyOTA5NDEyM1owgaIx
CzAJBgNVBAYTAlVTMQswCQYDVQQIEwJDQTEVMBMGA1UEBxMMU2FuRnJhbmNpc2Nv
MREwDwYDVQQKEwhTYWZlclZQTjERMA8GA1UECxMIU2FmZXJWUE4xETAPBgNVBAMT
CFNhZmVyVlBOMREwDwYDVQQpEwhTYWZlclZQTjEjMCEGCSqGSIb3DQEJARYUc3Vw
cG9ydEBzYWZlcnZwbi5jb20wggEiMA0GCSqGSIb3DQEBAQUAA4IBDwAwggEKAoIB
AQCqNV7oJZrUqD/mBSWlKi/sGRE2y3Yphs5m/vmmS4GPrc8lyaI1idhv44MGZ0i1
XCkJFZmaVQk7NUz5npz9hcnxN3MiZd/5Kv8Vo4aQkL0xQ7euto71LIgTqbJvTJjW
kowsVVgartGK2ewfCd+KV6k5oBImlDdSnLW1pq82Kg+YcnXxdaFc8RpNWdBbdxBe
tb4k6JcoZHuk9Zq5gi5Nnhtjc6lheCRzTGZ2hslDfJ58yMpR0jTMC3Rd+G+sM0q3
/gEEEW34ckUgCb5j6Kq35LUlnuonnViBnEzFR/MTizMARFj7VYkzOpxSsxJ6Epan
JP8Zgbz81z4A822hosakl7kTAgMBAAGjggELMIIBBzAdBgNVHQ4EFgQUKSnUrJLQ
omrGvdncxKkKT7Rxrj8wgdcGA1UdIwSBzzCBzIAUKSnUrJLQomrGvdncxKkKT7Rx
rj+hgaikgaUwgaIxCzAJBgNVBAYTAlVTMQswCQYDVQQIEwJDQTEVMBMGA1UEBxMM
U2FuRnJhbmNpc2NvMREwDwYDVQQKEwhTYWZlclZQTjERMA8GA1UECxMIU2FmZXJW
UE4xETAPBgNVBAMTCFNhZmVyVlBOMREwDwYDVQQpEwhTYWZlclZQTjEjMCEGCSqG
SIb3DQEJARYUc3VwcG9ydEBzYWZlcnZwbi5jb22CCQDp0auBVrGYGDAMBgNVHRME
BTADAQH/MA0GCSqGSIb3DQEBCwUAA4IBAQB704c0nixfDuJ7OiFBUmkhmDUFEIhl
D35wxlthKYRs8tBzetZEipFGdyUOwuWiuwG/BuOwuP7fPS9uP4u4EPKjA5kL/Z/V
E743q50PS4L/kT3ZFyUrcisUKajAr5Gu+o6rzA6F4+QYu26iBbKewNrrb+riF1wR
GKthc6W++Awt+oVyKtVNyS2QokuBFcSu5IiVsfGqJ8TmffvFBqKUUjWopmP+qiYR
8+0qwHing/S/C9S72ZxhM9DF3et1dXFuHf/69YL8/u36tyKMqy/JVhByAlc87cRI
tcRGaviUttBeSw4j1Y6XrycVkhn4LzizWrqrmfCikhx26MrIeWK5JxYL
-----END CERTIFICATE-----

CLICK APPLY SETTINGS

Leave all settings not mentioned above as their default setting.

Verify a successful SaferVPN connection

Navigate to Status > OpenVPN

  1. You should now see a CONNECTED SUCCESS message.
  2. Visit SaferVPN’s IP Check to verify your new IP address and virtual location.

In some cases you may notice that the location is not showing the same location as the server you have input in your router settings; this is because geo tracking tools are often tricked by VPN connections. As long as you see an IP address that is not the same as your normal Internet IP address then you are indeed connected to SaferVPN.

Back up your settings

Navigate to Administration > Backup

  1. Click the Backup button.
  2. A file named nvrambak.bin will be saved to your computer.
  3. You can load nvrambak.bin to restore your settings in the event of a reset.

How to change the SaferVPN server

  1. Copy the new SaferVPN server address from the above server list.
  2. Paste the server into the Server IP/Name field.
  3. Click Apply Settings.

TROUBLESHOOTING

Still having issues? Visit the VPN Troubleshooting section.

Troubleshoot Here

PPPoE Internet Setup

TeamFlashRouters · Mar 21, 2019 ·

Most ISPs do not require PPPoE credentials. If you are certain this is an ISP requirement in your setup, we kindly ask that you get in touch with your ISP to verify that they do in fact require PPPoE authentication and to provide you with the correct credentials to enter into your FlashRouter.

Before you enter your PPPoE credentials, you should have already setup your FlashRouter in a Single Router Setup with correct wiring. Once you enter PPPoE credentials you should then be able to connect to the internet.

If you are using a Dual Router Setup there is no need to enter PPPoE credentials if they are already entered in the existing router. You can disregard this article.

Enter your PPPoE credentials

DD-WRT Firmware

Navigate to Setup > Basic Setup

Access FlashRouters DD-WRT Admin Settings - Enter PPPOE Username and Password
  1. Set the Connection Type dropdown to PPPoE.
  2. Enter your ISP assigned PPPoE username and password.
  3. Click Apply Settings.

Power cycle your network devices

  1. Power off your ISP modem and the FlashRouter.
  2. Power on the ISP modem and wait for it to fully boot up.
  3. Power on the FlashRouter.

Verify a successful Internet connection

Once the FlashRouter is booted up connect one of your devices to the FlashRouter via Ethernet or Wireless.

Visit any website and make sure the page fully loads. Once you have verified a successful Internet connection, begin connecting your network devices to the FlashRouter via wired or WiFi.

Please be aware that our support is not able to replicate PPPoE issues on our end, which makes them challenging to troubleshoot. In the event of an issue we recommend using a Dual Router Setup.

PureVPN Manual OpenVPN Setup

TeamFlashRouters · Apr 16, 2019 ·

Preparing for Manual PureVPN Setup

Verify your PureVPN login information

If you are not already an PureVPN user Sign Up Now.

Log in to your account on the PureVPN website.

PureVPN Website Login

Navigate to the Home page and note the VPN username on this page. You will need this specific username later on in the configuration process.
Ex: purevpn0s1234567

PureVPN Server Addresses

View a full list of PureVPN servers.

United States

Miami:
usfl1-ovpn-udp.pointtoserver.com

Seattle:
ussa-ovpn-udp.pointtoserver.com

Houston
:
ustx1-ovpn-tcp.pointtoserver.com

Georgia
:
usga1-ovpn-udp.pointtoserver.com

New Jersey
:
usnj1-ovpn-udp.pointtoserver.com

Washington
:
uswdc1-ovpn-udp.pointtoserver.com

Chicago
:
usil1-ovpn-udp.pointtoserver.com

Phoenix
:
usphx1-ovpn-udp.pointtoserver.com

Los Angeles
:
usla1-ovpn-udp.pointtoserver.com

Virginia
:
vlbr-usvc1-ovpn-udp.pointtoserver.com

San Francisco
:
vlsa-ussf1-ovpn-udp.pointtoserver.com

New York
:
usny1-ovpn-udp.pointtoserver.com

Ohio
:
vleu-usoh1-ovpn-udp.pointtoserver.com

United Kingdom

London:
ukl1-ovpn-udp.pointtoserver.com

Gosport:
ukg1-ovpn-udp.pointtoserver.com

Maidenhead:
ukm1-ovpn-udp.pointtoserver.com

Manchester
:
vlus-uk-man1-ovpn-udp.pointtoserver.com

Leicester
:
vlap-ukle1-ovpn-udp.pointtoserver.com

DD-WRT Router Setup for PureVPN

Navigate to Services > VPN

Enter PureVPN settings

OpenVPN Client

Start OpenVPN Client

If you wish to disable your VPN connection simply set this to Disable at any time and click Apply Settings.

Server IP/Name

Copy and paste the server you would like to connect to from the server list above. Be sure there are no extra spaces or characters.

If you wish to change PureVPN connection locations, THIS IS THE ONLY FIELD YOU NEED TO CHANGE.

Port

53

Tunnel Device

TUN

Tunnel Protocol

UDP

Encryption cipher

AES-256-CBC

Hash Algorithm

SHA1

Userpass Authentication

Enable

Username

Enter the Username you noted from the Home page above.
Ex: purevpn0s1234567

Password

Enter the Password you successfully logged in to your PureVPN account with.

Advanced Options

Enable

TLS Cipher

None

LZO Compression

Adaptive

NAT

Enable

Firewall Protection

Enable

TLS Auth Key

-----BEGIN OpenVPN Static key V1-----
e30af995f56d07426d9ba1f824730521
d4283db4b4d0cdda9c6e8759a3799dcb
7939b6a5989160c9660de0f6125cbb1f
585b41c074b2fe88ecfcf17eab9a33be
1352379cdf74952b588fb161a93e13df
9135b2b29038231e02d657a6225705e6
868ccb0c384ed11614690a1894bfbeb2
74cebf1fe9c2329bdd5c8a40fe882062
4d2ea7540cd79ab76892db51fc371a3a
c5fc9573afecb3fffe3281e61d72e915
79d9b03d8cbf7909b3aebf4d90850321
ee6b7d0a7846d15c27d8290e031e951e
19438a4654663cad975e138f5bc5af89
c737ad822f27e19057731f41e1e254cc
9c95b7175c622422cde9f1f2cfd3510a
dd94498b4d7133d3729dd214a16b27fb
-----END OpenVPN Static key V1-----

Additional Config

tls-cipher “DEFAULT:@SECLEVEL=0”

Policy Based Routing

This field can be used for split VPN and Dual Gateway routing.

CA Cert

-----BEGIN CERTIFICATE-----
MIIEoTCCA4mgAwIBAgIJANysBdFD6U2oMA0GCSqGSIb3DQEBBQUAMIGRMQswCQYD
VQQGEwJISzELMAkGA1UECBMCSEsxETAPBgNVBAcTCEhvbmdLb25nMRAwDgYDVQQK
EwdQdXJlVlBOMQswCQYDVQQLEwJJVDEQMA4GA1UEAxMHUHVyZVZQTjEQMA4GA1UE
KRMHUHVyZVZQTjEfMB0GCSqGSIb3DQEJARYQbWFpbEBob3N0LmRvbWFpbjAeFw0x
NDA0MTAwNzI5NDlaFw0yNDA0MDcwNzI5NDlaMIGRMQswCQYDVQQGEwJISzELMAkG
A1UECBMCSEsxETAPBgNVBAcTCEhvbmdLb25nMRAwDgYDVQQKEwdQdXJlVlBOMQsw
CQYDVQQLEwJJVDEQMA4GA1UEAxMHUHVyZVZQTjEQMA4GA1UEKRMHUHVyZVZQTjEf
MB0GCSqGSIb3DQEJARYQbWFpbEBob3N0LmRvbWFpbjCCASIwDQYJKoZIhvcNAQEB
BQADggEPADCCAQoCggEBAJYqtUkQTlf/pHcGXuuII8S3pfI0fwFbs7l/1RP3nX3n
v1vyuvLi7h0jWsgJU0XM7LJywiRFJ8zsMLH7KZnIg7bscb50GY75WIq7C2NnWnnS
7zzyCCm2XD/2xZPym2lVRytpnWJbpemSS6Hdz7xI3q2FmixuBa1t5FeKsXfeaGGg
+ohwLvamnGHJYUYu3Nu0EWVzzy5wgT0c2C5jleGxl3kxRimD8FpnlAVdqyt0ib/f
f9XanaotSopIHUZmpYjT+udRC2+harlNKvOXYgDRl1mpimCvlzEWpZAo8dyBCxWl
xlBIT8OA8rimGi1XviknuOlWu2cGi13Ug8mCG0MjOQ0CAwEAAaOB+TCB9jAdBgNV
HQ4EFgQUt+1vJ2X2ho12PUDhdo2CsSHYXbYwgcYGA1UdIwSBvjCBu4AUt+1vJ2X2
ho12PUDhdo2CsSHYXbahgZekgZQwgZExCzAJBgNVBAYTAkhLMQswCQYDVQQIEwJI
SzERMA8GA1UEBxMISG9uZ0tvbmcxEDAOBgNVBAoTB1B1cmVWUE4xCzAJBgNVBAsT
AklUMRAwDgYDVQQDEwdQdXJlVlBOMRAwDgYDVQQpEwdQdXJlVlBOMR8wHQYJKoZI
hvcNAQkBFhBtYWlsQGhvc3QuZG9tYWluggkA3KwF0UPpTagwDAYDVR0TBAUwAwEB
/zANBgkqhkiG9w0BAQUFAAOCAQEAAhLQQmkKWJdyGqgMSKOWXSKN2WXTDjIdb9bK
Q8uHeq0LYCcPoRh8VYJg2X4UWR/KO9pKaG+iZJw4Jqz4GQJjjJLKHfsWwj790ay0
7U5KT08qmxFaxZUYn663H9b0+Zud1spTsTJjVe1eoRk6IDbbB4OMUzN9zyWEn6er
xi6llIAjQX1qtlBQasmTAbRtbSsCsZAxL2kXysULIdLrQP0iTgMQqqkv5zvpdEKN
3ciKCd8OHEhHOlAwA0/DNy3dg3Et0F2hNMDJhqMpxXsbKtGJ/rzGXQF2geEVzLZA
o42I1wBOSZLTX1fO1gl3gAGS9aYg5o31rrpBKzQewitJgIuc+Q==
-----END CERTIFICATE-----

CLICK APPLY SETTINGS

Leave all settings not mentioned above as their default setting.

Verify a successful PureVPN connection

Navigate to Status > OpenVPN

  1. You should now see a CONNECTED SUCCESS message.
  2. Visit PureVPN’s website to verify your new IP address, virtual location, and status as Protected at the top of the page.

In some cases you may notice that the location is not showing the same location as the server you have input in your router settings; this is because geo tracking tools are often tricked by VPN connections. As long as you see an IP address that is not the same as your normal Internet IP address then you are indeed connected to PureVPN.

Back up your settings

Navigate to Administration > Backup

  1. Click the Backup button.
  2. A file named nvrambak.bin will be saved to your computer.
  3. You can load nvrambak.bin to restore your settings in the event of a reset.

How to change the PureVPN server

  1. Copy the new PureVPN server address from the above server list.
  2. Paste the server into the Server IP/Name field.
  3. Click Apply Settings.

TROUBLESHOOTING

Still having issues? Visit the VPN Troubleshooting section.

Troubleshoot Here

My WiFi password is not working

Dave · Apr 29, 2019 ·

Keep in mind that passwords are case sensitive.

The preset DD-WRT FlashRouter WiFi password is Wireless#[First 5 characters of your router MAC]. The router MAC can be found on the bottom of your router. For e.g. if your MAC is 1459C07E70A8 then your WiFi password is Wireless#1459C

Verify wireless password

Connect an ethernet cable from a numbered port on the FlashRouter to a computer and access the FlashRouter’s settings.

Navigate to Wireless > Wireless Security

Check the Unmask box and note the wireless password that is entered.

Verify the wireless settings

Make sure that you have WPA2 Personal / AES set as the security settings for all bands. For some router models make sure the CCMP-128 (AES) box is checked for all bands.

Forget network on your device

Wireless devices usually offer a “forget” network feature to remove a wireless network from the saved information of the wireless adapter. If you have updated your WiFi password and are trying to connect on a device that previously used the old WiFi password then removing the wireless network and then trying to connect fresh can help with this issue.

Access FlashRouter DD-WRT firmware settings

TeamFlashRouters · Mar 22, 2019 ·

You must be connected to the FlashRouter network via ethernet or WiFi connection on your device in order to be able to access the FlashRouter’s firmware settings.

Why do I need to access my FlashRouter's settings?

It is important to understand how to access your router if you want to:
  • Change WiFi or admin passwords
  • Switch VPN server locations
  • Attempt custom setups
  • Troubleshoot your network

Connect your device to the FlashRouter network

We recommend using a computer, tablet, or phone to access your FlashRouter firmware settings. You can connect your device to the FlashRouter via Ethernet Cable or Wireless connection.

Please note, you will NOT be able access the firmware settings unless you connect your device to the FlashRouter Network.

via Ethernet

Connect an Ethernet cable to your device’s Ethernet port.

Access FlashRouters DD-WRT Admin Settings via Ethernet Connection 1

Connect the other end of that Ethernet cable to a FlashRouter LAN/numbered port.

Access FlashRouters DD-WRT Admin Settings via Ethernet Connection 2

Be sure NOT to connect your device to the WAN/internet port of the FlashRouter. Please use the LAN/numbered ports to connect your devices.

via Wireless

Navigate to the available wireless networks in your device network settings and join any of the available FlashRouter networks – FlashRouter24, FlashRouter50, or FlashRouter80 (if you have a tri-band router).

Access the FlashRouter settings

We recommend using a Google Chrome or Mozilla Firefox incognito/private browsing window to access the FlashRouter firmware settings. You can access the main DD-WRT firmware GUI or you can go directly into the FlashRouters Privacy App settings to manage your basic router settings and VPN connection settings right away.

Please note, after accessing the FlashRouter Settings at the Local IP Address, you will be prompted to enter an admin username and password. You can find this information in the subsections below.

DD-WRT - Firmware GUI

Local IP Address: 192.168.11.1

Username: flashrouter

Password: ddwrt

Keep in mind that if you enable HTTPS and disable HTTP access you will need to add https:// in front of the Local IP Address to access your FlashRouter’s firmware settings.

If your router has been reset for any reason then you can access the router at a local IP address of 192.168.1.1.

Please note you will be required to set the administration username and password as well as your WiFi and VPN network settings after a reset.

TROUBLESHOOTING

Still having issues? Visit our Troubleshooting section to diagnose common problems here.

Troubleshoot Here
« Previous Page
Next Page »

Primary Sidebar

  • Troubleshooting
  • Router Access
  • Internet Connection Issues
  • WiFi Connectivity
  • General VPN Issues
  • TeamViewer Remote Support
  • DD-WRT Firmware
  • Facebook
  • Twitter
  • Instagram
  • Pinterest
  • YouTube

Footer