Preparing for Manual VyprVPN Setup
Verify your VyprVPN login information
If you are not already a VyprVPN user Sign Up Now.
Log in to your account on the VyprVPN website.

VyprVPN Server Addresses
United States
| Los Angeles, CA | us1.vpn.goldenfrog.com |
| Washington, DC | us2.vpn.goldenfrog.com |
| Austin, TX | us3.vpn.goldenfrog.com |
| Miami, FL | us4.vpn.goldenfrog.com |
| New York City, NY | us5.vpn.goldenfrog.com |
| Chicago, IL | us6.vpn.goldenfrog.com |
| San Francisco, CA | us7.vpn.goldenfrog.com |
| Seattle, WA | us8.vpn.goldenfrog.com |
United Kingdom
| London | uk1.vpn.goldenfrog.com |
Canada
| Toronto | ca1.vpn.goldenfrog.com |
Australia
| Sydney | au1.vpn.goldenfrog.com |
| Melbourne | au2.vpn.goldenfrog.com |
| Perth | au3.vpn.goldenfrog.com |
Germany
| Frankfurt | de1.vpn.goldenfrog.com |
Rest of the World
| UAE – Dubai | ae1.vpn.goldenfrog.com |
| Argentina – Buenos Aires | ar1.vpn.goldenfrog.com |
| Austria – Vienna | at1.vpn.goldenfrog.com |
| Belgium – Brussels | be1.vpn.goldenfrog.com |
| Bulgaria – Sofia | bg1.vpn.goldenfrog.com |
| Bahrain – Manama | bh1.vpn.goldenfrog.com |
| Brazil – São Paulo | br1.vpn.goldenfrog.com |
| Switzerland – Zurich | ch1.vpn.goldenfrog.com |
| Colombia – Bogotá | co1.vpn.goldenfrog.com |
| Costa Rica – San José | cr1.vpn.goldenfrog.com |
| Czech Republic – Prague | cz1.vpn.goldenfrog.com |
| Germany – Frankfurt | de1.vpn.goldenfrog.com |
| Denmark – Copenhagen | dk1.vpn.goldenfrog.com |
| Algeria – Algiers | dz1.vpn.goldenfrog.com |
| Egypt – Cairo | eg1.vpn.goldenfrog.com |
| Spain – Madrid | es1.vpn.goldenfrog.com |
| Netherlands – Amsterdam | eu1.vpn.goldenfrog.com |
| Finland – Helsinki | fi1.vpn.goldenfrog.com |
| France – Paris | fr1.vpn.goldenfrog.com |
| Greece – Athens | gr1.vpn.goldenfrog.com |
| Hong Kong – Hong Kong | hk1.vpn.goldenfrog.com |
| Indonesia – Jakarta | id1.vpn.goldenfrog.com |
| Ireland – Dublin | ie1.vpn.goldenfrog.com |
| Israel – Tel Aviv | il1.vpn.goldenfrog.com |
| India – Mumbai | in1.vpn.goldenfrog.com |
| Iceland – Reykjavík | is1.vpn.goldenfrog.com |
| Italy – Rome | it1.vpn.goldenfrog.com |
| Japan – Tokyo | jp1.vpn.goldenfrog.com |
| South Korea – Seoul | kr1.vpn.goldenfrog.com |
| Liechtenstein – Schaan | li1.vpn.goldenfrog.com |
| Lithuania – Vilnius | lt1.vpn.goldenfrog.com |
| Luxembourg – Luxembourg City | lu1.vpn.goldenfrog.com |
| Latvia – Riga | lv1.vpn.goldenfrog.com |
| Marshall Islands – Majuro | mh1.vpn.goldenfrog.com |
| Macao – Macao | mo1.vpn.goldenfrog.com |
| Maldives – Malé | mv1.vpn.goldenfrog.com |
| Mexico – Mexico City | mx1.vpn.goldenfrog.com |
| Malaysia – Kuala Lumpur | my1.vpn.goldenfrog.com |
| Norway – Oslo | no1.vpn.goldenfrog.com |
| New Zealand – Auckland | nz1.vpn.goldenfrog.com |
| Panama – Panama City | pa1.vpn.goldenfrog.com |
| Philippines – Manila | ph1.vpn.goldenfrog.com |
| Pakistan – Karachi | pk1.vpn.goldenfrog.com |
| Poland – Warsaw | pl1.vpn.goldenfrog.com |
| Portugal – Lisbon | pt1.vpn.goldenfrog.com |
| Qatar – Doha | qa1.vpn.goldenfrog.com |
| Romania – Bucharest | ro1.vpn.goldenfrog.com |
| Russia – Moscow | ru1.vpn.goldenfrog.com |
| Saudi Arabia – Riyadh | sa1.vpn.goldenfrog.com |
| Sweden – Stockholm | se1.vpn.goldenfrog.com |
| Singapore – Singapore | sg1.vpn.goldenfrog.com |
| Slovenia – Ljubljana | si1.vpn.goldenfrog.com |
| Slovakia – Bratislava | sk1.vpn.goldenfrog.com |
| El Salvador – San Salvador | sv1.vpn.goldenfrog.com |
| Thailand – Bangkok | th1.vpn.goldenfrog.com |
| Turkey – Istanbul | tr1.vpn.goldenfrog.com |
| Taiwan – Taipei | tw1.vpn.goldenfrog.com |
| Ukraine – Kiev | ua1.vpn.goldenfrog.com |
| Uruguay – Montevideo | uy1.vpn.goldenfrog.com |
| Vietnam – Hanoi | vn1.vpn.goldenfrog.com |
DD-WRT Router Setup for VyprVPN
Navigate to Services > VPN
VyprVPN offers two different Encryption levels:
Default Encryption (Blowfish-CBC) typically provides faster speeds.
Strong Encryption (AES-256) provides stronger encryption.
Follow the table below of the one that fits your needs.
Enter VyprVPN settings (Default Encryption)
OpenVPN Client
Start OpenVPN Client
If you wish to disable your VPN connection simply set this to Disable at any time and click Apply Settings.
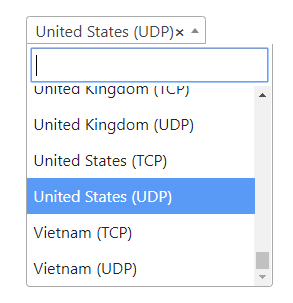
Server IP/Name
Copy and paste the server you would like to connect to from the server list above. Be sure there are no extra spaces or characters.
If you wish to change VyprVPN connection locations, THIS IS THE ONLY FIELD YOU NEED TO CHANGE.
Port
1194
Tunnel Device
TUN
Tunnel Protocol
UDP
Encryption cipher
Blowfish-CBC
Hash Algorithm
SHA1
User Pass Authentication
Enable
Username
Enter the Username you successfully logged in to your VyprVPN account with.
Password
Enter the Password you successfully logged in to your VyprVPN account with.
Advanced Options
Enable
TLS Cipher
None
LZO Compression
Adaptive
NAT
Enable
Firewall Protection
Enable
Additional Config
resolv-retry infinite
keepalive 10 60
persist-key
persist-tun
persist-remote-ip
nobind
Policy Based Routing
This field can be used for split VPN and Dual Gateway routing.
CA Cert
-----BEGIN CERTIFICATE-----
MIIGWjCCBEKgAwIBAgIJAJxUG61mxDS7MA0GCSqGSIb3DQEBDQUAMHsxCzAJBgNV
BAYTAlJPMRIwEAYDVQQHEwlCdWNoYXJlc3QxGDAWBgNVBAoTD0N5YmVyR2hvc3Qg
Uy5BLjEbMBkGA1UEAxMSQ3liZXJHaG9zdCBSb290IENBMSEwHwYJKoZIhvcNAQkB
FhJpbmZvQGN5YmVyZ2hvc3Qucm8wHhcNMTcwNjE5MDgxNzI1WhcNMzcwNjE0MDgx
NzI1WjB7MQswCQYDVQQGEwJSTzESMBAGA1UEBxMJQnVjaGFyZXN0MRgwFgYDVQQK
Ew9DeWJlckdob3N0IFMuQS4xGzAZBgNVBAMTEkN5YmVyR2hvc3QgUm9vdCBDQTEh
MB8GCSqGSIb3DQEJARYSaW5mb0BjeWJlcmdob3N0LnJvMIICIjANBgkqhkiG9w0B
AQEFAAOCAg8AMIICCgKCAgEA7O8+mji2FlQhJXn/G4VLrKPjGtxgQBAdjo0dZEQz
KX08q14dLkslmOLgShStWKrOiLXGAvB1rPvvk613jtA0KjQLpgyLy9lIWohQKYjj
5jrJYXMZMkbSHBYI9L8L7iezBEFYrjYKdDo51nq99wRFhKdbyKKjDh3e2L2SVEZL
T1ogkK5gWzjvH+mjjtjUUicK+YjGwWOz6I+KKaG4Ve/D/cE6nCLbhHIMMnargZEu
7sqA6BFeS4kEP/ZdCZoTSX2n43XV1q63nJt/v0KDetbZDciFVW9h9SVPG4qT44p0
550N+Mom7zTX7S/ID5T9dplgU8sRGtIMrG0cIMD9zmpFgUnMusCrR7jJFr0sMAve
TbgZg95LmstV6R6WKZkSFdUrE0DHl4dHoZvTFX+1LhwhHgjgDLaosX0vhG/C/7Lp
oVWimd6RRQT3M9o4Fa1TuhfvBzQ20QHrmRV/yKvGNK0xckZ6EZ/QY7Z55ORU15Tg
ab4ebnblYPWoEmn0mIYP3LFFeoR5OS1EX7+j4kPv+bwPGsmpHjxmZyq2Y7sJBpbO
CJgbkn52WZdPBIRDpPdIHQ8pAJC4T0iMK9xvAwWNl/V6EYYNpR97osyEDXn+BTdA
HlhJ5fck9KlwI9mb1Kg1bhbvbmaIAiOLenSULYf3j6rI1ygo3R2cCyybtuAq8M7z
0OECAwEAAaOB4DCB3TAdBgNVHQ4EFgQU6tdK1g/He5qzjeAoM5eHt4in9iUwga0G
A1UdIwSBpTCBooAU6tdK1g/He5qzjeAoM5eHt4in9iWhf6R9MHsxCzAJBgNVBAYT
AlJPMRIwEAYDVQQHEwlCdWNoYXJlc3QxGDAWBgNVBAoTD0N5YmVyR2hvc3QgUy5B
LjEbMBkGA1UEAxMSQ3liZXJHaG9zdCBSb290IENBMSEwHwYJKoZIhvcNAQkBFhJp
bmZvQGN5YmVyZ2hvc3Qucm+CCQCcVButZsQ0uzAMBgNVHRMEBTADAQH/MA0GCSqG
SIb3DQEBDQUAA4ICAQDNyQ92kj4qiNjnHk99qvnFw9qGfwB9ofaPL74zh0G5hEe3
Wgb2o4fqUGnvUNgOu53gJksz3DcPQ8t40wfmm9I1Z8tiM9qrqvkuQ+nKcLgdooXt
EsTybPIYDZ2cWR/5E0TKRvC7RFzKgQ4D77Vbi4TdaHiDV7ZNfU1iLCoBGcYm80hc
UHEs5KIVLwUmcSOTmbZBySJxcSD0yUpS7nlZGwLY6VQrU+JFwDSisbXT4DXf3iSz
p7FzW0/u/SFvWsPHrjE0hkPoZPalYvouaJEHKAhip0ZwSmitlxbBnmm8+K/3c9mL
A5/uXrirfpuhhs8V3lyV2mczVtSiTl6gpi88gc//JY80JeHdupjO25T3XEzY9cpx
ecmkWaUEjLMx4wVoXQuUiPonfILM6OLwi+zUS8gQErdFeGvcQXbncPa4SdJuHkF8
lgiX2i8S8fPGdXvU37E9bdAXwP5nZriYq1s0D59Qfvz+vLXVkmyZp6ztxjKjKole
mPMak0Y5c1Q4RjNF6tmQoFuy/ACSkWy14Tzu2dFp7UiVbGg1FOvKhfs48zC2/IUQ
v1arqmPT/9LVq3B2DVT9UKXRUXX/f/jSSsVjkz4uUe2jUyL+XHX1nSmROTPHSAJ+
oKf0BLnfqUxFkEUTwLnayssP2nwGgq35b7wEbTFIXdrjHGFUVQIDeERz8UThew==
-----END CERTIFICATE-----
CLICK APPLY SETTINGS
Leave all settings not mentioned above as their default setting.
Enter VyprVPN settings (Strong Encryption)
OpenVPN Client
Start OpenVPN Client
If you wish to disable your VPN connection simply set this to Disable at any time and click Apply Settings.
Server IP/Name
Copy and paste the server you would like to connect to from the server list above. Be sure there are no extra spaces or characters.
If you wish to change VyprVPN connection locations, THIS IS THE ONLY FIELD YOU NEED TO CHANGE.
Port
443
Tunnel Device
TUN
Tunnel Protocol
UDP
Encryption cipher
AES-256-CBC
Hash Algorithm
SHA256
User Pass Authentication
Enable
Username
Enter the Username you successfully logged in to your VyprVPN account with.
Password
Enter the Password you successfully logged in to your VyprVPN account with.
Advanced Options
Enable
TLS Cipher
None
LZO Compression
Adaptive
NAT
Enable
Firewall Protection
Enable
Additional Config
resolv-retry infinite
keepalive 10 60
persist-key
persist-tun
persist-remote-ip
nobind
tls-cipher TLS-DHE-RSA-WITH-AES-256-CBC-SHA
Policy Based Routing
This field can be used for split VPN and Dual Gateway routing. Learn more here.
CA Cert
-----BEGIN CERTIFICATE-----
MIIGWjCCBEKgAwIBAgIJAJxUG61mxDS7MA0GCSqGSIb3DQEBDQUAMHsxCzAJBgNV
BAYTAlJPMRIwEAYDVQQHEwlCdWNoYXJlc3QxGDAWBgNVBAoTD0N5YmVyR2hvc3Qg
Uy5BLjEbMBkGA1UEAxMSQ3liZXJHaG9zdCBSb290IENBMSEwHwYJKoZIhvcNAQkB
FhJpbmZvQGN5YmVyZ2hvc3Qucm8wHhcNMTcwNjE5MDgxNzI1WhcNMzcwNjE0MDgx
NzI1WjB7MQswCQYDVQQGEwJSTzESMBAGA1UEBxMJQnVjaGFyZXN0MRgwFgYDVQQK
Ew9DeWJlckdob3N0IFMuQS4xGzAZBgNVBAMTEkN5YmVyR2hvc3QgUm9vdCBDQTEh
MB8GCSqGSIb3DQEJARYSaW5mb0BjeWJlcmdob3N0LnJvMIICIjANBgkqhkiG9w0B
AQEFAAOCAg8AMIICCgKCAgEA7O8+mji2FlQhJXn/G4VLrKPjGtxgQBAdjo0dZEQz
KX08q14dLkslmOLgShStWKrOiLXGAvB1rPvvk613jtA0KjQLpgyLy9lIWohQKYjj
5jrJYXMZMkbSHBYI9L8L7iezBEFYrjYKdDo51nq99wRFhKdbyKKjDh3e2L2SVEZL
T1ogkK5gWzjvH+mjjtjUUicK+YjGwWOz6I+KKaG4Ve/D/cE6nCLbhHIMMnargZEu
7sqA6BFeS4kEP/ZdCZoTSX2n43XV1q63nJt/v0KDetbZDciFVW9h9SVPG4qT44p0
550N+Mom7zTX7S/ID5T9dplgU8sRGtIMrG0cIMD9zmpFgUnMusCrR7jJFr0sMAve
TbgZg95LmstV6R6WKZkSFdUrE0DHl4dHoZvTFX+1LhwhHgjgDLaosX0vhG/C/7Lp
oVWimd6RRQT3M9o4Fa1TuhfvBzQ20QHrmRV/yKvGNK0xckZ6EZ/QY7Z55ORU15Tg
ab4ebnblYPWoEmn0mIYP3LFFeoR5OS1EX7+j4kPv+bwPGsmpHjxmZyq2Y7sJBpbO
CJgbkn52WZdPBIRDpPdIHQ8pAJC4T0iMK9xvAwWNl/V6EYYNpR97osyEDXn+BTdA
HlhJ5fck9KlwI9mb1Kg1bhbvbmaIAiOLenSULYf3j6rI1ygo3R2cCyybtuAq8M7z
0OECAwEAAaOB4DCB3TAdBgNVHQ4EFgQU6tdK1g/He5qzjeAoM5eHt4in9iUwga0G
A1UdIwSBpTCBooAU6tdK1g/He5qzjeAoM5eHt4in9iWhf6R9MHsxCzAJBgNVBAYT
AlJPMRIwEAYDVQQHEwlCdWNoYXJlc3QxGDAWBgNVBAoTD0N5YmVyR2hvc3QgUy5B
LjEbMBkGA1UEAxMSQ3liZXJHaG9zdCBSb290IENBMSEwHwYJKoZIhvcNAQkBFhJp
bmZvQGN5YmVyZ2hvc3Qucm+CCQCcVButZsQ0uzAMBgNVHRMEBTADAQH/MA0GCSqG
SIb3DQEBDQUAA4ICAQDNyQ92kj4qiNjnHk99qvnFw9qGfwB9ofaPL74zh0G5hEe3
Wgb2o4fqUGnvUNgOu53gJksz3DcPQ8t40wfmm9I1Z8tiM9qrqvkuQ+nKcLgdooXt
EsTybPIYDZ2cWR/5E0TKRvC7RFzKgQ4D77Vbi4TdaHiDV7ZNfU1iLCoBGcYm80hc
UHEs5KIVLwUmcSOTmbZBySJxcSD0yUpS7nlZGwLY6VQrU+JFwDSisbXT4DXf3iSz
p7FzW0/u/SFvWsPHrjE0hkPoZPalYvouaJEHKAhip0ZwSmitlxbBnmm8+K/3c9mL
A5/uXrirfpuhhs8V3lyV2mczVtSiTl6gpi88gc//JY80JeHdupjO25T3XEzY9cpx
ecmkWaUEjLMx4wVoXQuUiPonfILM6OLwi+zUS8gQErdFeGvcQXbncPa4SdJuHkF8
lgiX2i8S8fPGdXvU37E9bdAXwP5nZriYq1s0D59Qfvz+vLXVkmyZp6ztxjKjKole
mPMak0Y5c1Q4RjNF6tmQoFuy/ACSkWy14Tzu2dFp7UiVbGg1FOvKhfs48zC2/IUQ
v1arqmPT/9LVq3B2DVT9UKXRUXX/f/jSSsVjkz4uUe2jUyL+XHX1nSmROTPHSAJ+
oKf0BLnfqUxFkEUTwLnayssP2nwGgq35b7wEbTFIXdrjHGFUVQIDeERz8UThew==
-----END CERTIFICATE-----
CLICK APPLY SETTINGS
Leave all settings not mentioned above as their default setting.
Verify a successful VyprVPN connection
Navigate to the Status > OpenVPN
- You should now see a CONNECTED SUCCESS message.
- Visit to WhatIsMyIPAddress to verify your new IP address and virtual location.
In some cases you may notice that the location is not showing the same location as the server you have input in your router settings; this is because geo tracking tools are often tricked by VPN connections. As long as you see an IP address that is not the same as your normal Internet IP address then you are indeed connected to VyprVPN.
Back up your settings
Navigate to Administration > Backup
- Click the Backup button.
- A file named nvrambak.bin will be saved to your computer.
- You can load nvrambak.bin to restore your settings in the event of a reset.
How to change the VyprVPN server
- Copy the new VyprVPN server address from the above server list.
- Paste the server into the Server IP/Name field and Click Apply Settings.