• Skip to primary navigation
  • Skip to main content
  • Skip to primary sidebar
  • Skip to footer

FlashRouters Support Portal

Prioritizing Privacy

  • SETUP GUIDES
    • Privacy Hero Router Setup Guide
    • ASUS-WRT Router Setup Guide
    • AsusWRT-Merlin Router Setup Guide
    • DD-WRT Router Setup Guide
    • ExpressVPN Router Setup Guide
    • GL.iNet Router Setup Guide
    • Roqos Core Router Setup Guide
  • TROUBLESHOOTING
    • Router Access
    • WiFi Connectivity
    • Internet Connection Issues
    • General VPN Issues
    • DD-WRT Firmware
    • TeamViewer Remote Support
  • FAQs
    • Router FAQs
    • VPN FAQs
    • Warranty and Returns FAQs
    • Sales FAQs
    • Shipping FAQs
    • Service Plan FAQs
  • Show Search
Hide Search

Search Results for: box lock phone

Private Internet Access VPN Setup Guide for Privacy Hero

TeamFlashRouters · Apr 3, 2023 ·

Your Privacy Hero router uses Cloud Based router management which means you can access the router settings from anywhere on any device that has an internet connection. You can follow these steps while connected to your phone, other Wi-Fi network, or the Privacy Hero network

Private Internet Access (PIA) Wireguard Setup for Privacy Hero (recommended)

1. From any device that has a browser such as a computer, smartphone, or tablet visit app.privacyhero.com.

App.PrivacyHero.com

2. Enter your Privacy Hero account email and password. Click Login.

Privacy Hero Access Settings

3. Click the VPN symbol.

Privacy Hero Setup VPN

4. Click the Change button and select Private Internet Access from the dropdown.

Privacy Hero Change VPN Providers

5. Enter your correct PIA account login username and password and click Save.

Privacy Hero select Private Internet Access
Privacy Hero Private Internet Access enter login

6. Click Save if you want to automatically connect to the ideal server location as recommended by Private Internet Access.

Or, connect to a specific server location click Advanced Options and then type in the PIA server name you would like to use. (All server names are noted below).

Then click Save.

Privacy Hero Private Internet Access enter VPN location

North America

bahamas.privacy.network
ca-ontario.privacy.network
ca-toronto.privacy.network
ca-vancouver.privacy.network
ca-montreal.privacy.network
greenland.privacy.network
gt-guatemala-pf.privacy.network
mexico.privacy.network
panama.privacy.network
sanjose.privacy.network
us-alabama-pf.privacy.network
us-alaska-pf.privacy.network
us-arkansas-pf.privacy.network
us-atlanta.privacy.network
us-california.privacy.network
us-chicago.privacy.network
us-connecticut-pf.privacy.network
us-denver.privacy.network
us-florida.privacy.network
us-houston.privacy.network
us-idaho-pf.privacy.network
us-indiana-pf.privacy.network
us-iowa-pf.privacy.network
us-kansas-pf.privacy.network
us-kentucky-pf.privacy.network
us-lasvegas.privacy.network
us-louisiana-pf.privacy.network
us-maine-pf.privacy.network
us-massachusetts-pf.privacy.network
us-michigan-pf.privacy.network
us-minnesota-pf.privacy.network
us-mississippi-pf.privacy.network
us-missouri-pf.privacy.network
us-montana-pf.privacy.network
us-nebraska-pf.privacy.network
us-new-hampshire-pf.privacy.network
us-new-mexico-pf.privacy.network
us-newyorkcity.privacy.network
us-north-carolina-pf.privacy.network
us-north-dakota-pf.privacy.network
us-ohio-pf.privacy.network
us-oklahoma-pf.privacy.network
us-oregon-pf.privacy.network
us-pennsylvania-pf.privacy.network
us-rhode-island-pf.privacy.network
us-seattle.privacy.network
us-siliconvalley.privacy.network
us-south-carolina-pf.privacy.network
us-south-dakota-pf.privacy.network
us-texas.privacy.network
us-tennessee-pf.privacy.network
us-vermont-pf.privacy.network
us-virginia-pf.privacy.network
us-washingtondc.privacy.network
us-west-virginia-pf.privacy.network
us-wisconsin-pf.privacy.network
us-wyoming-pf.privacy.network
us3.privacy.network
us-baltimore.privacy.network
us-honolulu.privacy.network
us-newjersey.privacy.network
us-saltlakecity.privacy.network
us-streaming-2.privacy.network
us-streaming.privacy.network
us-wilmington.privacy.network

South America

ar.privacy.network
bo-bolivia-pf.privacy.network
bogota.privacy.network
br.privacy.network
ec-ecuador-pf.privacy.network
pe-peru-pf.privacy.network
santiago.privacy.network
uy-uruguay-pf.privacy.network
venezuela.privacy.network

Europe

al.privacy.network
ad.privacy.network
austria.privacy.network
brussels.privacy.network
ba.privacy.network
sofia.privacy.network
zagreb.privacy.network
czech.privacy.network
de-berlin.privacy.network
de-frankfurt.privacy.network
denmark.privacy.network
denmark-2.privacy.network
spain.privacy.network
es-valencia.privacy.network
ee.privacy.network
fi.privacy.network
fi-2.privacy.network
france.privacy.network
gr.privacy.network
hungary.privacy.network
italy.privacy.network
italy-2.privacy.network
is.privacy.network
ireland.privacy.network
man.privacy.network
lv.privacy.network
liechtenstein.privacy.network
lt.privacy.network
lu.privacy.network
malta.privacy.network
md.privacy.network
monaco.privacy.network
montenegro.privacy.network
nl-amsterdam.privacy.network
mk.privacy.network
no.privacy.network
poland.privacy.network
pt.privacy.network
ro.privacy.network
sweden.privacy.network
sweden-2.privacy.network
rs.privacy.network
sk.privacy.network
slovenia.privacy.network
swiss.privacy.network
tr.privacy.network
uk-london.privacy.network
uk-manchester.privacy.network
uk-southampton.privacy.network
uk-2.privacy.network
ua.privacy.network

Asia

ae.privacy.network
bangladesh.privacy.network
cambodia.privacy.network
china.privacy.network
cyprus.privacy.network
georgia.privacy.network
hk.privacy.network
in.privacy.network
israel.privacy.network
jakarta.privacy.network
japan.privacy.network
japan-2.privacy.network
kazakhstan.privacy.network
kr-south-korea-pf.privacy.network
kualalumpur.privacy.network
macau.privacy.network
mongolia.privacy.network
np-nepal-pf.privacy.network
philippines.privacy.network
qatar.privacy.network
saudiarabia.privacy.network
sg.privacy.network
srilanka.privacy.network
taiwan.privacy.network
vietnam.privacy.network
yerevan.privacy.network

Oceania

au-adelaide-pf.privacy.network
au-australia-so.privacy.network
au-brisbane-pf.privacy.network
aus-melbourne.privacy.network
aus-perth.privacy.network
au-sydney.privacy.network
nz.privacy.network

Africa

dz.privacy.network
egypt.privacy.network
morocco.privacy.network
nigeria.privacy.network
za.privacy.network

8. Your Privacy Hero settings should now show a Connected message, indicating you have successfully signed in to your PIA VPN server!

Private Internet Access (PIA) OpenVPN Setup for Privacy Hero

1. From any device that has a browser such as a computer, smartphone, or tablet visit app.privacyhero.com.

App.PrivacyHero.com

2. Enter your Privacy Hero account email and password. Click Login.

Privacy Hero Access Settings

3. Click the VPN symbol.

Privacy Hero Setup VPN

4. Click the Change button and select Custom from the dropdown and choose the OpenVPN option.
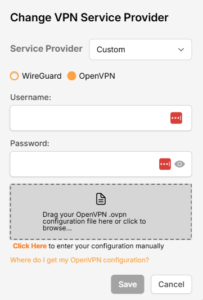
5. Enter your PIA Account login as the Username and Password.

6. Now log in to your PIA Account page.

7. Go to the Downloads section.

8. Scroll down to the bottom of the page, and go to OpenVPN Configuration Generator.

9. Choose OpenVPN 2.4 or newer and Linux.

10. From the Select Port section, choose UDP/1198 AES-128-CBC for a faster connection or choose UDP/1197 AES-256-CBC for stronger security as shown in the image below then Click Generate to download the server configuration file.

11. Drag and drop or click to Upload the server file into the Custom box on your Privacy Hero settings page then click Save.

12. Your Privacy Hero settings should now show a Connected message, indicating you have successfully signed in to your PIA VPN server!

Privacy Hero’s cloud based router settings access makes it so you can change settings while not connected to the Privacy Hero network. Visit the Private Internet Access IP Check to verify your VPN IP address. If it has not changed be sure to double check that you are indeed connected to the Privacy Hero network.

Keep in mind that the VPN connection will not change the location of the streaming services listed in the Streaming Relocation area of the Privacy Hero settings.

TROUBLESHOOTING

Still having issues? Visit the VPN Troubleshooting section.

Troubleshoot Here

How do I boost my Wireless Transmission power?

Dave · Apr 29, 2019 ·

Boost the wireless transmission power if you need to increase the wireless range of the FlashRouter.

Important Information

We recommend reading the entry in the DD-WRT Wiki to familiarize yourself with what TX Power values represent.

Broadcom routers

  • Netgear R8500
  • Netgear R7000
  • Netgear R6400 V2
  • Netgear R6300 V2
  • Asus RT-AC5300
  • Asus RT-AC66U
  • Asus RT-AC56U

Navigate to Wireless > WL# or ath# Advanced

  1. Set the TX Power to the desired value.
  2. Click Apply Settings.
Boost TX Power in DD-WRT Advanced Wireless Settings page to Increase Wireless Transmission

Atheros routers

  • Netgear R9000
  • Netgear R7800
  • Linksys WRT3200ACM
  • LinksysWRT32X
  • Linksys WRT1900AC/v2/ACS
  • LinksysWRT1200AC

Navigate to Wireless > Basic Settings

  1. Check Advanced Settings under the wireless interface you would like to boost.
  2. Set the TX Power to the desired value.
  3. Click Apply Settings.
Boost TX Power in DD-WRT Advanced Wireless Settings page to Increase Wireless Transmission

We advise to proceed with caution when setting the TX Power. This has been known to negatively effect the hardware if set too high.

SmartDNSProxy SmartDNS Setup

TeamFlashRouters · Jun 13, 2019 ·

SmartDNSProxy offers a SmartDNS service for unblocking geo-restricted content without the encryption of a VPN service. SmartDNS routes DNS servers to different regions which “tricks” the website to allow access to previously restricted content.

SmartDNS does not change your IP Address or provide the encryption that a VPN connection does. This can result in faster speeds and unblocked content.

SmartDNS and VPN should not be configured at the same time. When using a SmartDNS connection, make sure to disable your VPN connection on the FlashRouter.

Register your IP Address

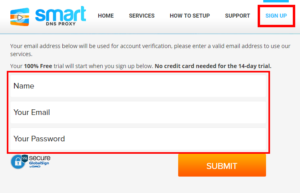
If you are not already a SmartDNSProxy user Sign Up Now.

Click on Sign Up and fill in the requested information.

SmartDNSProxy SmartDNS Account Sign Up For DD-WRT FlashRouter

Access the e-mail you entered and Verify your new account.

SmartDNSProxy SmartDNS Activate DNS for DD-WRT FlashRouter

Your account will now be verified.

Activate SmartDNSProxy SmartDNS Service and Subscription

Login to SmartDNSProxy

SmartDNSProxy Server Location Addresses for FlashRouter DD-WRT Settings

Visit SmartDNSProxy’s DNS servers list and note the DNS servers of the location you would like to access content from.

Enter SmartDNSProxy SmartDNS servers on your FlashRouter

Navigate to Setup > Basic Setup

  1. Scroll down to Network Address Server Settings (DHCP).
  2. Enter in any combination of SmartDNSProxy SmartDNS servers you noted into Static DNS fields 1 and 2.
  3. Click Apply Settings at the bottom of the page.
  4. Reboot the FlashRouter.

Once the router is fully booted back up, you can access your desired regional content on any device that connects to the FlashRouter’s network.

Getflix SmartDNS Setup

TeamFlashRouters · Apr 4, 2019 ·

Getflix offers a SmartDNS service for unblocking geo-restricted content without the encryption of a VPN service. SmartDNS routes DNS servers to different regions which “tricks” the website to allow access to previously restricted content.

SmartDNS does not change your IP Address or provide the encryption that a VPN connection does. This can result in faster speeds and unblocked content.

SmartDNS and VPN should not both be configured at the same time. When using a SmartDNS connection make sure to disable your VPN connection on the FlashRouter.

Login to Getflix

If you are not already a Getflix user Sign Up Now.

New customer Signup for GetFlix SmartDNS Service

Login to Getflix’s website login page.

Visit Getflix’s DNS servers list page and note the DNS servers of the location you would like to access content from.

Getflix DNS Server Location Addresses for FlashRouter DD-WRT Settings

Enter Getflix SmartDNS servers on your FlashRouter

Navigate to Setup > Basic Setup

  1. Scroll down to Network Address Server Settings (DHCP).
  2. Enter in any combination of Getflix SmartDNS servers you noted into Static DNS fields 1 and 2.
  3. Click Apply Settings at the bottom of the page.
  4. Reboot the FlashRouter.

Register your IP Address

When the router is fully booted back up visit your Getflix user dashboard and make sure your IP Address is registered with Getflix. If it is not click Force IP Update.

Register IP Address for Getflix use on FlashRouter DD-WRT

Once you are successfully registered you can now access your desired regional content on any device that connects to the FlashRouter’s network.

Privacy Hero Bypass certain devices from VPN

TeamFlashRouters · Apr 3, 2023 ·

Your Privacy Hero router uses Cloud Based router management which means you can access the router settings from anywhere on any device that has an internet connection. You can follow these steps while connected to your phone, other Wi-Fi network, or the Privacy Hero network.

If you have certain devices in your network that you do NOT want connecting to VPN you can follow these steps to bypass these devices from the Privacy Hero’s VPN connection.

1. From any device that has a browser such as a computer, smartphone, or tablet visit app.privacyhero.com

App.PrivacyHero.com

2. Enter your Privacy Hero account email and password. Click Login.

Privacy Hero Access Settings

If you have not created your Privacy Hero account yet please follow these instructions.

3. Click the Devices symbol.

Privacy Hero Devices

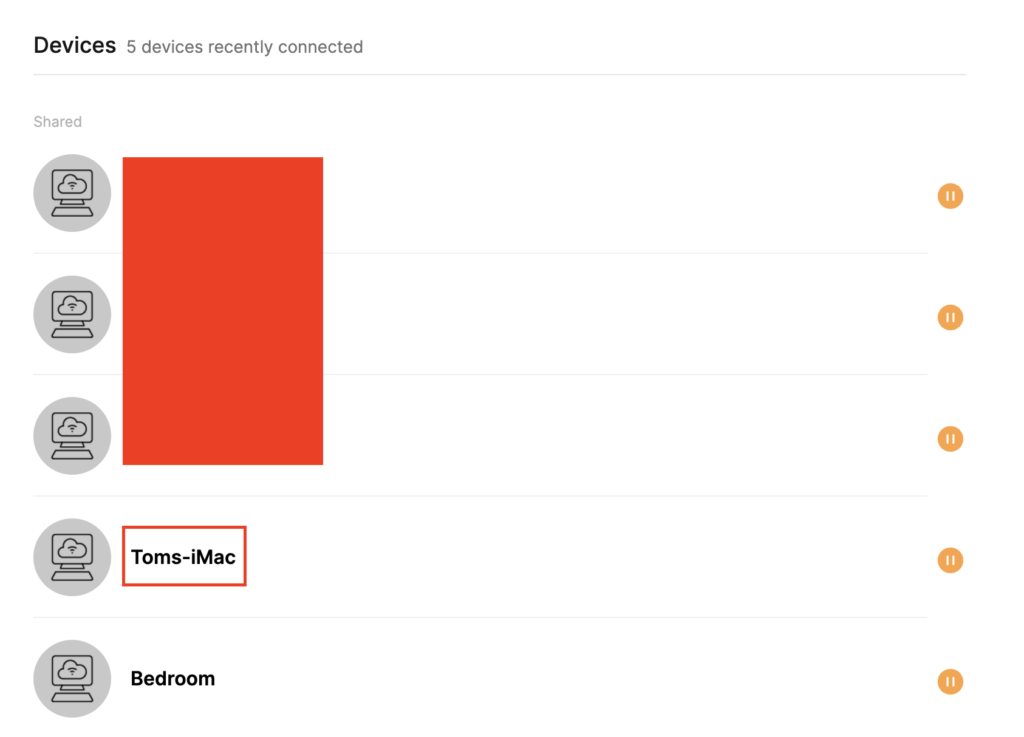
4. Click the name of the Device you want to bypass from VPN.

Privacy Hero Select Device

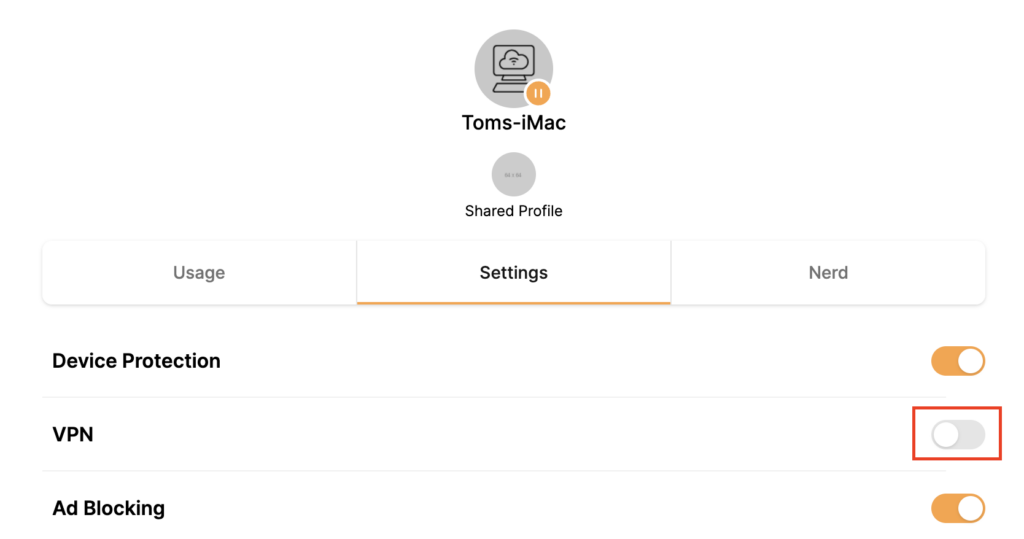
5. Set the VPN toggle to Off. You can also do the same for Adblocking and Device Protection as needed.

Privacy Hero VPN off by device

TROUBLESHOOTING

Still having issues? Visit the VPN Troubleshooting section.

Troubleshoot Here

Flint/Slate GL.iNet Internet Setup

TeamFlashRouters · Apr 3, 2023 ·

Follow this article when you receive your new Flint or Slate GL.iNet router to connect it to the Internet.

1. Connect the ethernet cable that came with the router from an open LAN ethernet port on your ISP modem or other router to the WAN port of the Flint or Slate GL.iNet router.

Flint Internet
Slate Internet

2. Connect the power to the router and wait about 2 minutes for the router to fully boot up.

3. Connect your computer, phone, or tablet to the GL.iNet router via wireless (FlashRouter24 / FlashRouter50) or via ethernet cable to one of the LAN ports on the router.

The FlashRouter WiFi password is printed on the sheet that came with the router and is set to Wireless#[First 5 characters of your router MAC]. The router MAC can be found on the bottom of your router if you cannot locate the sheet. For e.g. if your MAC is 1459C07E70A8 then your WiFi password is Wireless#1459C

Be sure to capitalize the W.

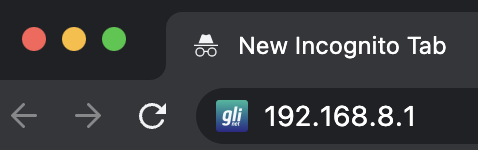
4. Once connected via wireless or ethernet on your device open your browser and go to 192.168.8.1

GL.iNet router access

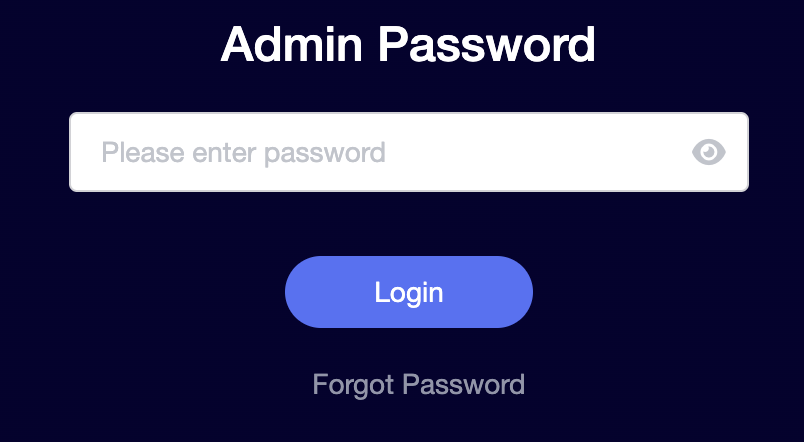
5. Enter openwrt as the admin password to access the GL.iNet firmware settings.

GL.iNet admin password enter

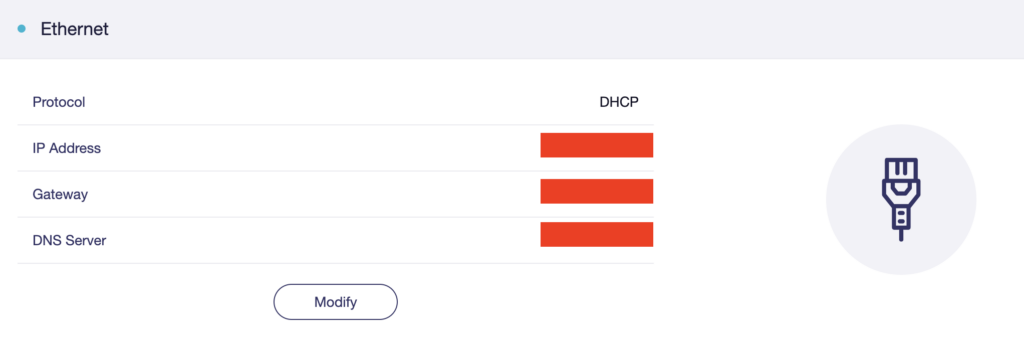
6. Verify that your Flint/Slate GL.iNet router is receiving a WAN IP Address and webpages are loading while connected to its network.

GL.iNet WAN Settings

TROUBLESHOOTING

Still having issues? Visit the VPN Troubleshooting section.

Troubleshoot Here

GL.iNet Access Router Settings and Firmware Upgrade

TeamFlashRouters · Apr 3, 2023 ·

Follow this guide to upgrade the firmware of your GL.iNet FlashRouter.

1. Connect your computer, phone, or tablet to the GL.iNet router via wireless (FlashRouter24 / FlashRouter50) or via ethernet cable to one of the LAN ports on the router.

The FlashRouter WiFi password is printed on the sheet that came with the router and is set to Wireless#[First 5 characters of your router MAC]. The router MAC can be found on the bottom of your router if you cannot locate the sheet. For e.g. if your MAC is 9483C07E70A8 then your WiFi password is Wireless#9483C

Be sure to capitalize the W.

2. Once connected via wireless or ethernet on your device open your browser and go to 192.168.8.1

GL.iNet router access

3. Enter openwrt as the admin password to access the GL.iNet firmware settings. Newer devices may have a different admin password set as openwrt1 or glopenwrt1

GL.iNet admin password enter

3. If a new firmware upgrade is available the router settings will either display a banner when you first access the router or a header. Click Install or the Upgrade arrow depending on which appears for you.

GL.iNet Firmware Upgrade Banner
GL.iNet Firmware Upgrade Header

4. Make sure the Keep Settings toggle is pushed to the right so your router does not get reset. Click the Install button to begin the firmware upgrade.

GL.iNet Install Firmware Upgrade

5. The firmware update should take about 2-3 minutes. You may need to reconnect your wireless devices after the network comes back up in your available networks.

TROUBLESHOOTING

Still having issues? Visit the VPN Troubleshooting section.

Troubleshoot Here

Flint/Slate GL.iNet Change Wi-Fi name and password

TeamFlashRouters · Apr 20, 2023 ·

Follow this guide to change the Wi-Fi name and password on your GL.iNet FlashRouter.

1. Connect your computer, phone, or tablet to the GL.iNet router via wireless (FlashRouter24 / FlashRouter50) or via ethernet cable to one of the LAN ports on the router.

The FlashRouter WiFi password is printed on the sheet that came with the router and is set to Wireless#[First 5 characters of your router MAC]. The router MAC can be found on the bottom of your router if you cannot locate the sheet. For e.g. if your MAC is 1459C07E70A8 then your WiFi password is Wireless#1459C

Be sure to capitalize the W.

2. Once connected via wireless or ethernet on your device open your browser and go to 192.168.8.1

GL.iNet router access

3. Enter openwrt as the admin password to access the GL.iNet firmware settings.

GL.iNet admin password enter

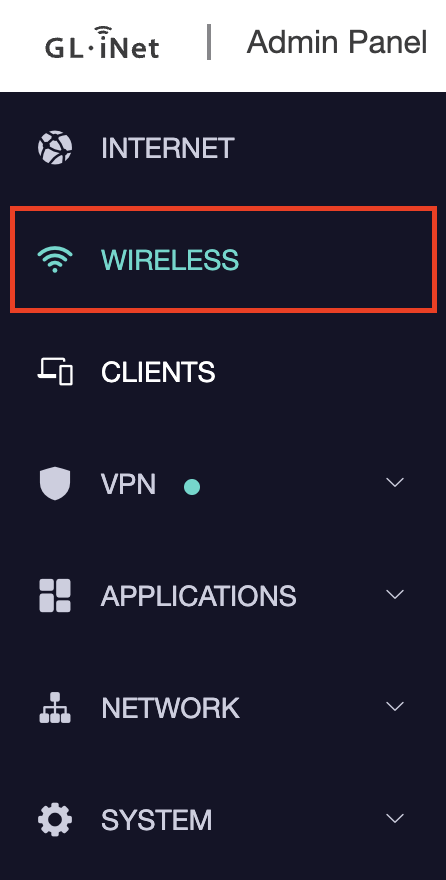
4. Click Wireless.

GL.iNet Click Wireless

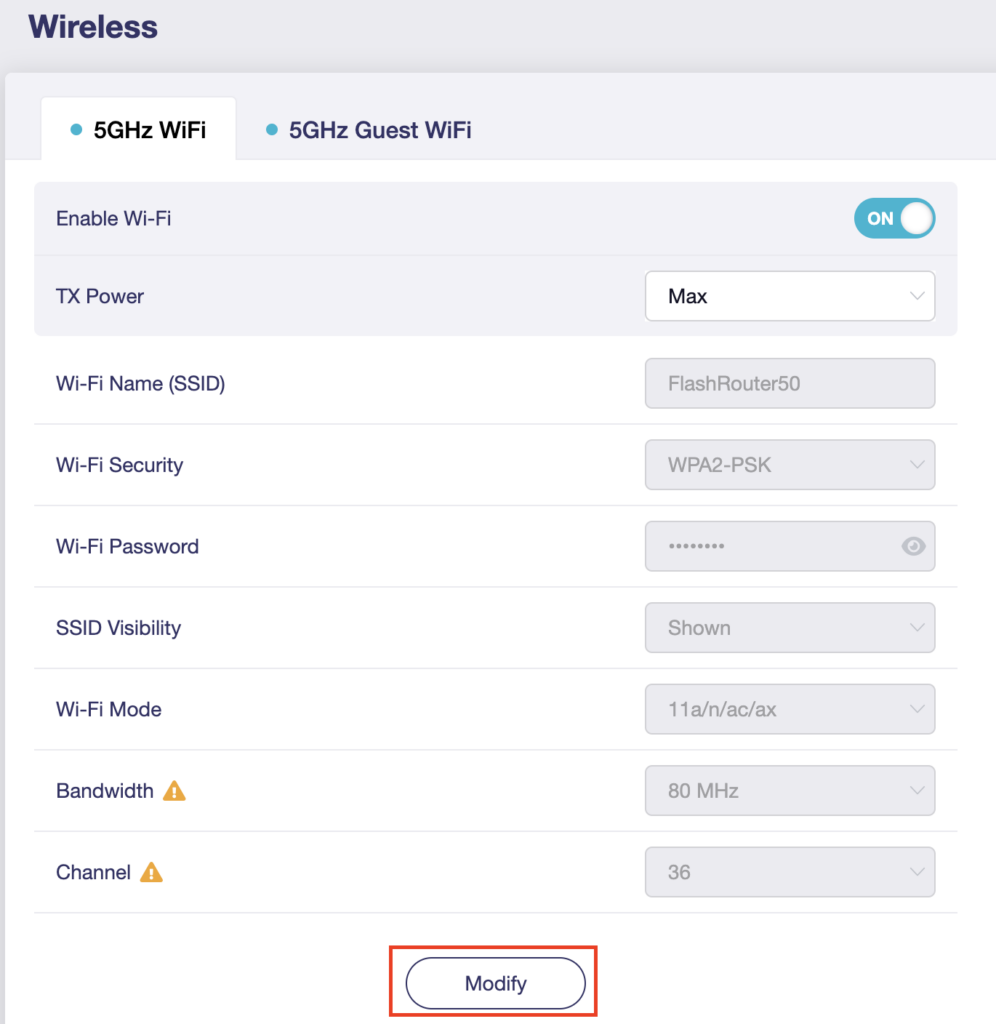
5. Click Modify under the 5GHz or 2.4GHz band.

GL.iNet Modify Wifi

The 5GHz and 2.4GHz information must be changed at separate times. Keep in mind that if you are connected to wireless when changing one band you may need to reconnect with the new info you set to be on the network again to make changes to the other band.

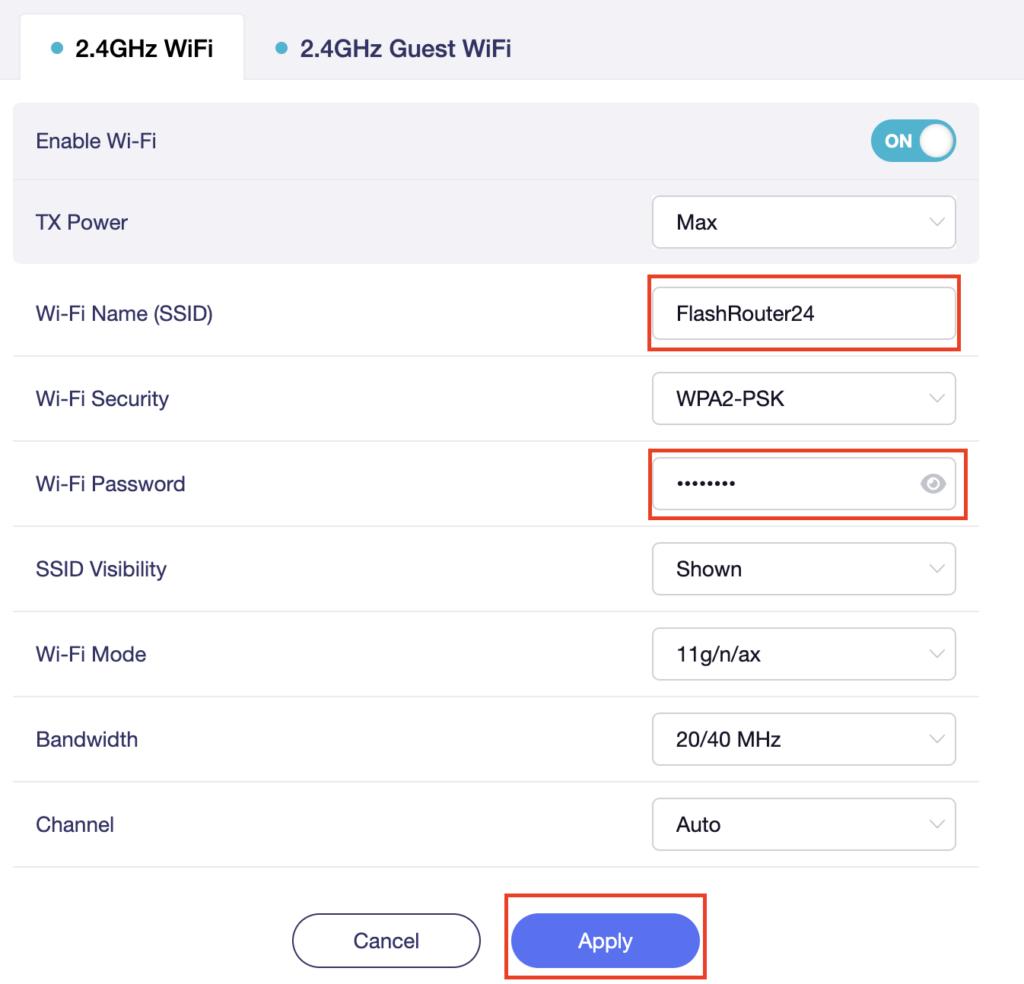
6. Change the Wi-Fi Name (SSID) and Wi-Fi Password fields to what you want to use. The SSID should be unique and NOT a duplicate of an existing network. Click Apply.

GL.iNet change Wifi name and password

7. Connect your devices to the new wireless network.

TROUBLESHOOTING

Still having issues? Visit the VPN Troubleshooting section.

Troubleshoot Here

Flint/Slate GL.iNet Disable Wi-Fi

TeamFlashRouters · Apr 20, 2023 ·

Follow this guide to disable Wi-Fi network on your GL.iNet FlashRouter.

1. Connect your computer, phone, or tablet to the GL.iNet router via wireless (FlashRouter24 / FlashRouter50) or via ethernet cable to one of the LAN ports on the router.

The FlashRouter WiFi password is printed on the sheet that came with the router and is set to Wireless#[First 5 characters of your router MAC]. The router MAC can be found on the bottom of your router if you cannot locate the sheet. For e.g. if your MAC is 1459C07E70A8 then your WiFi password is Wireless#1459C

Be sure to capitalize the W.

2. Once connected via wireless or ethernet on your device open your browser and go to 192.168.8.1

GL.iNet router access

3. Enter openwrt as the admin password to access the GL.iNet firmware settings.

GL.iNet admin password enter

4. Click Wireless.

GL.iNet Click Wireless

5. Click Modify under the 5GHz or 2.4GHz band.

GL.iNet Modify Wifi

The 5GHz and 2.4GHz bands must be disabled at separate times. Keep in mind that if you are connected to wireless when disabling one band you may need to reconnect with the other band to disable it. Also make sure you have a device that has ethernet capabilities so you can still access the settings with wireless disabled.

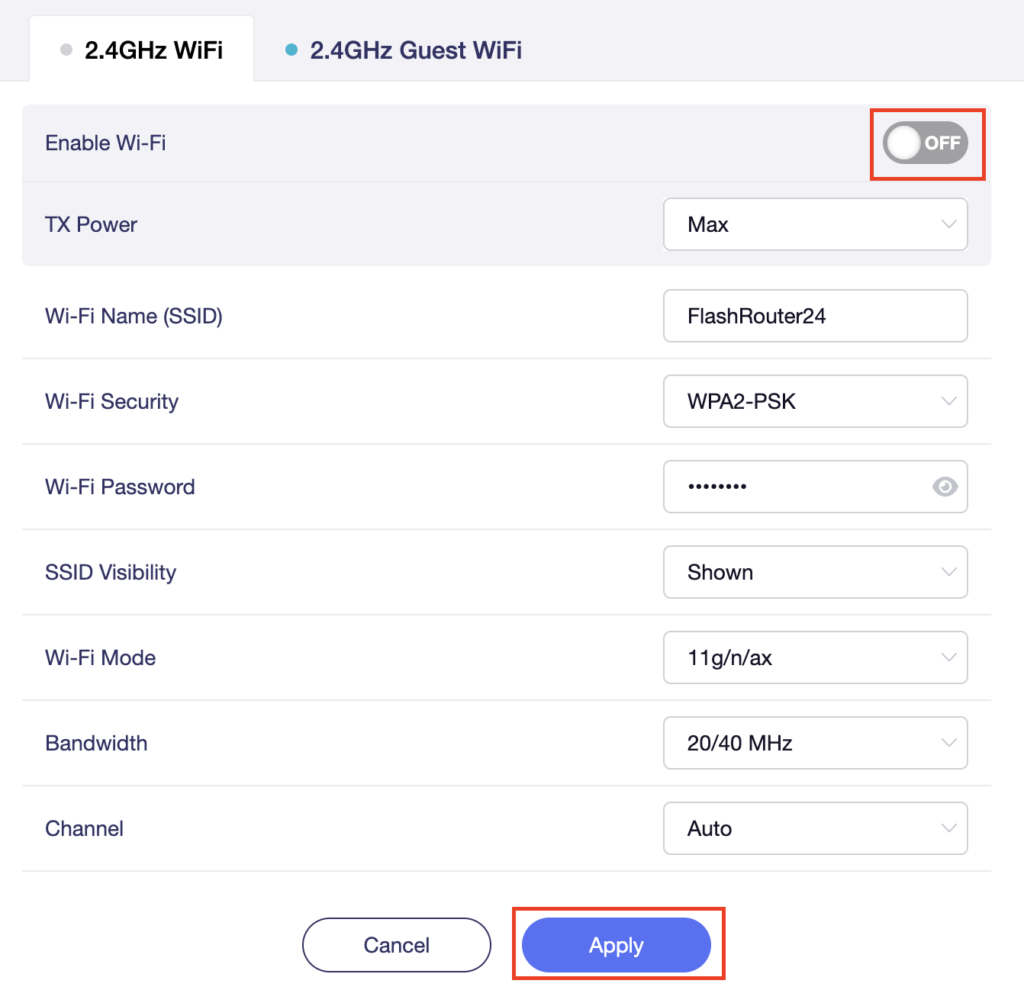
6. Set the Enable Wi-Fi toggle to the OFF position and click Apply.

GL.iNet Disable Wifi

TROUBLESHOOTING

Still having issues? Visit the VPN Troubleshooting section.

Troubleshoot Here

Flint/Slate GL.iNet Guest Network Setup

TeamFlashRouters · Apr 20, 2023 ·

Follow this guide to setup a Guest Network on your GL.iNet FlashRouter. Devices connected to the guest network will be on a separate subnet and will not have access to the router settings or be able to talk to devices on the main network.

1. Connect your computer, phone, or tablet to the GL.iNet router via wireless (FlashRouter24 / FlashRouter50) or via ethernet cable to one of the LAN ports on the router.

The FlashRouter WiFi password is printed on the sheet that came with the router and is set to Wireless#[First 5 characters of your router MAC]. The router MAC can be found on the bottom of your router if you cannot locate the sheet. For e.g. if your MAC is 1459C07E70A8 then your WiFi password is Wireless#1459C

Be sure to capitalize the W.

2. Once connected via wireless or ethernet on your device open your browser and go to 192.168.8.1

GL.iNet router access

3. Enter openwrt as the admin password to access the GL.iNet firmware settings.

GL.iNet admin password enter

4. Click Wireless.

GL.iNet Click Wireless

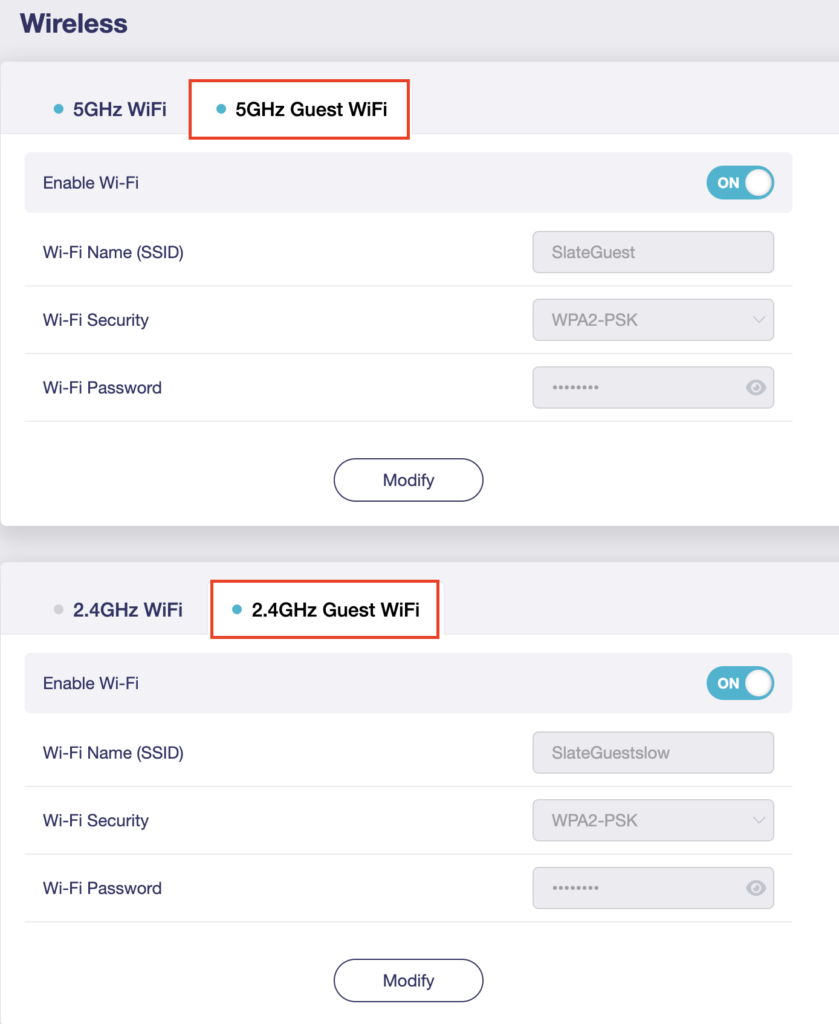
5. Click 5GHz Guest Wi-Fi or 2.4GHz Guest Wi-Fi.

GL.iNet Select Guest Wifi

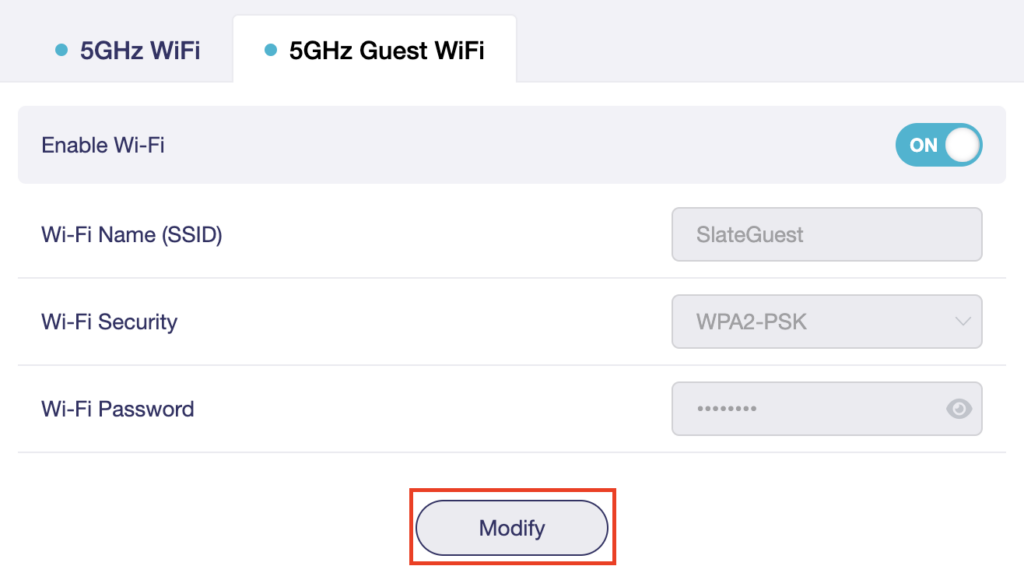
6. Click Modify.

GL.iNet Guest Modify

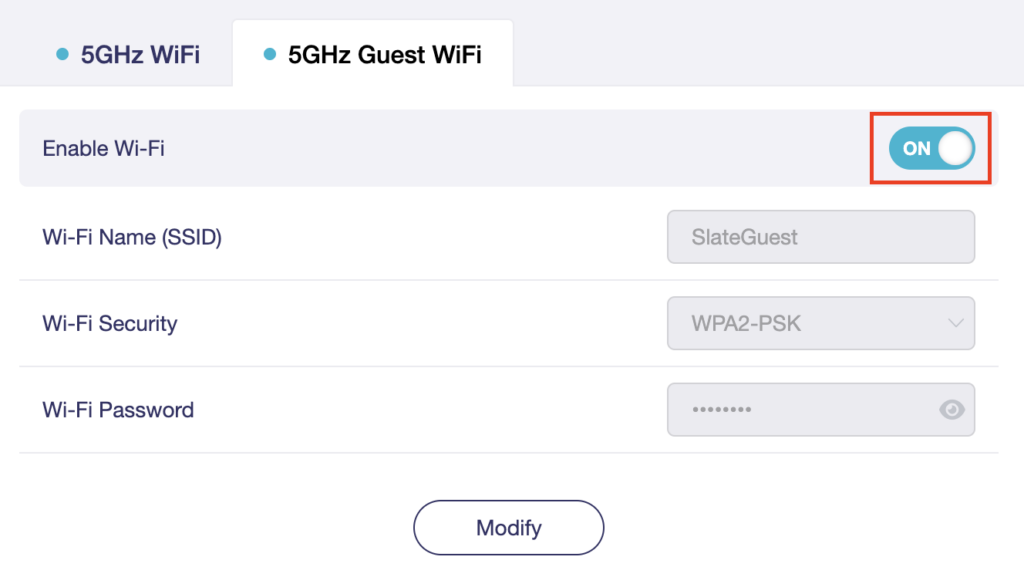
7. Set the Enable Wi-Fi toggle to the ON position.

GL.iNet Enable Guest Wifi

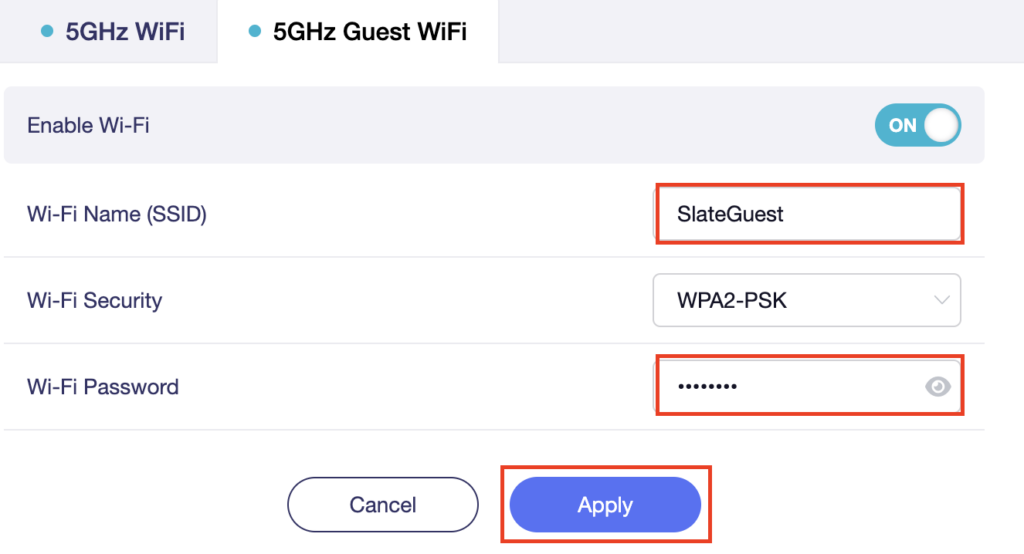
8. Change the Wi-Fi Name (SSID) and Wi-Fi Password fields to what you want to use. The SSID should be unique and NOT a duplicate of an existing network. Click Apply.

GL.iNet Guest change wifi name and pass

9. Connect your devices to the new guest wireless network.

TROUBLESHOOTING

Still having issues? Visit the VPN Troubleshooting section.

Troubleshoot Here

Access FlashRouter DD-WRT firmware settings

TeamFlashRouters · Mar 22, 2019 ·

You must be connected to the FlashRouter network via ethernet or WiFi connection on your device in order to be able to access the FlashRouter’s firmware settings.

Why do I need to access my FlashRouter's settings?

It is important to understand how to access your router if you want to:
  • Change WiFi or admin passwords
  • Switch VPN server locations
  • Attempt custom setups
  • Troubleshoot your network

Connect your device to the FlashRouter network

We recommend using a computer, tablet, or phone to access your FlashRouter firmware settings. You can connect your device to the FlashRouter via Ethernet Cable or Wireless connection.

Please note, you will NOT be able access the firmware settings unless you connect your device to the FlashRouter Network.

via Ethernet

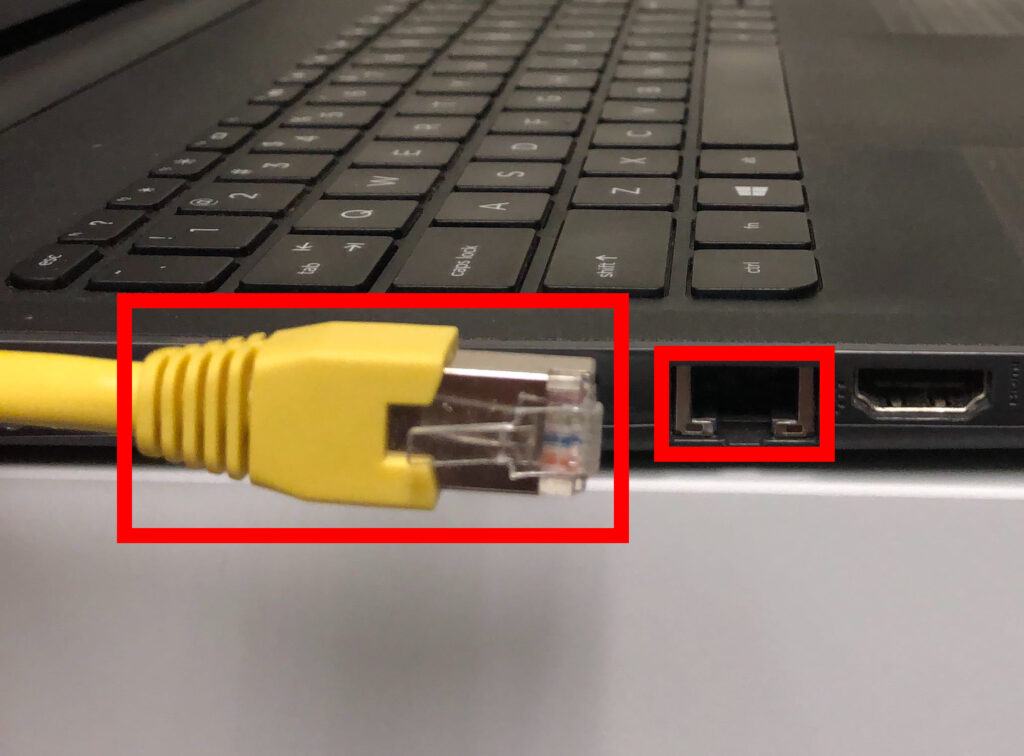
Connect an Ethernet cable to your device’s Ethernet port.

Access FlashRouters DD-WRT Admin Settings via Ethernet Connection 1

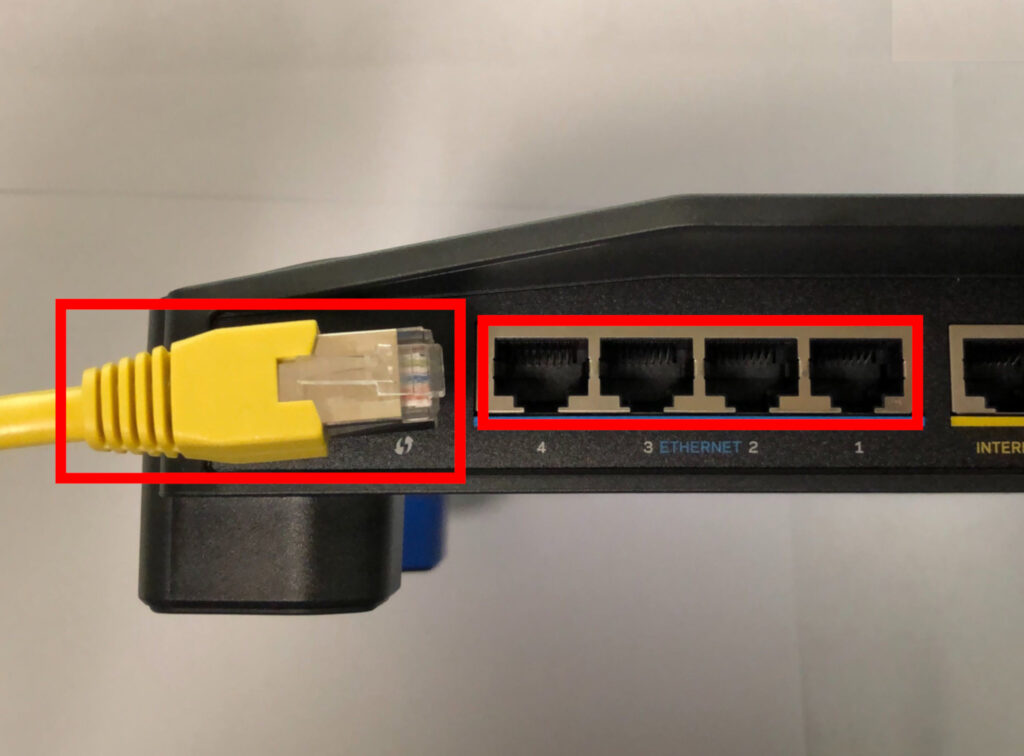
Connect the other end of that Ethernet cable to a FlashRouter LAN/numbered port.

Access FlashRouters DD-WRT Admin Settings via Ethernet Connection 2

Be sure NOT to connect your device to the WAN/internet port of the FlashRouter. Please use the LAN/numbered ports to connect your devices.

via Wireless

Navigate to the available wireless networks in your device network settings and join any of the available FlashRouter networks – FlashRouter24, FlashRouter50, or FlashRouter80 (if you have a tri-band router).

Access the FlashRouter settings

We recommend using a Google Chrome or Mozilla Firefox incognito/private browsing window to access the FlashRouter firmware settings. You can access the main DD-WRT firmware GUI or you can go directly into the FlashRouters Privacy App settings to manage your basic router settings and VPN connection settings right away.

Please note, after accessing the FlashRouter Settings at the Local IP Address, you will be prompted to enter an admin username and password. You can find this information in the subsections below.

DD-WRT - Firmware GUI

Local IP Address: 192.168.11.1

Username: flashrouter

Password: ddwrt

Keep in mind that if you enable HTTPS and disable HTTP access you will need to add https:// in front of the Local IP Address to access your FlashRouter’s firmware settings.

If your router has been reset for any reason then you can access the router at a local IP address of 192.168.1.1.

Please note you will be required to set the administration username and password as well as your WiFi and VPN network settings after a reset.

TROUBLESHOOTING

Still having issues? Visit our Troubleshooting section to diagnose common problems here.

Troubleshoot Here

Privacy Hero Activation and Setup

TeamFlashRouters · Feb 8, 2023 ·

Follow this article when you receive your new Privacy Hero router to create your Privacy Hero account, connect your Privacy Hero to the Internet, and customize your network so it is ready to use.

Your Privacy Hero router uses Cloud Based router management which means you can access the router settings from anywhere on any device that has an internet connection. You can follow these steps while connected to your phone or your other Wi-Fi network.

Create your Privacy Hero account

1. From any device that has a browser such as a computer, smartphone, or tablet visit app.privacyhero.com

App.PrivacyHero.com

2. Select Create Account.

Privacy Hero create Account

3. Enter the Email address you want to set for your Privacy Hero account. This will be your login to the Privacy Hero settings moving forward. Click Create Account.

Privacy Hero Enter account email

4. Go to your Email inbox and check for an email from Privacy Hero and click the Confirm email address link. This email may be in your Promotions or Spam inbox if it is not appearing in your main inbox.

Privacy Hero Confirm Email

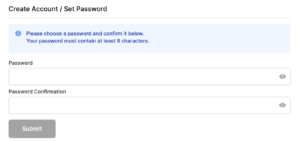
5. Enter the password that you want to use for your Privacy Hero account. Be sure to note this in a secure location so you do not forget. Click Submit.

Privacy Hero create password

6. You have now created your Privacy Hero account. You will use this login to access the Privacy Hero router settings.

Activate your Privacy Hero Internet and setup Wi-Fi

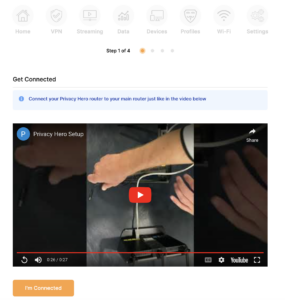
1. You will then be taken to the Router Activation steps. Connect the ethernet cable that the Privacy Hero came with from an open Ethernet port on your ISP modem or other router to the WAN/Internet (blue) port of the Privacy Hero.

Then power the Privacy Hero device on by connecting the power supply. This is shown in the video on the page as well. Wait about a minute or so for the Privacy Hero router to fully boot up and then click I’m Connected.

Wire Up Privacy Hero

2. The next page may say Router Found or ask you to enter the Activation Code. If it asks for the Activation Code that will be the code printed on the bottom of the Privacy Hero. Enter this code and click Next.

Privacy Hero Router Found

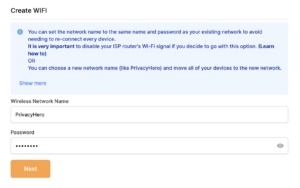
3. Set the Wi-Fi name and password for connecting your devices to the Privacy Hero network. Make sure it is not a duplicate name of an existing Wi-Fi network. Click Next.

Privacy Hero Set wifi name and password

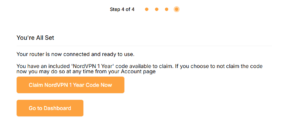
4. To activate your 1 Year NordVPN code:

Click on Claim NordVPN 1 Year Code Now

NordVPN Claim Code

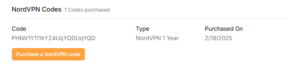
Go to the Account section of your router settings.

Copy the NordVPN code shown under Claim NordVPN 1 Year Code.

PH Nord Code

Go to the NordVPN activation page.

This code can be used with a new or existing NordVPN account.

NordVPN Activate Page

5. You are now all set to begin joining your devices to the new Privacy Hero network with the Wi-Fi name and password you entered and setting up some of the Privacy Hero features.

TROUBLESHOOTING

Still having issues? Visit the VPN Troubleshooting section.

Troubleshoot Here

Flint/Slate GL.iNet Repeater Setup

TeamFlashRouters · May 29, 2023 ·

If you want to connect your FlashRouter to the Internet via Wi-Fi instead of an ethernet cable you can setup a FlashRouter as a Wireless Repeater. In Wireless Repeater mode the FlashRouter connects to an available network via WiFi and then creates a completely separate network segment for you.

1. Connect your computer, phone, or tablet to the GL.iNet router via wireless (FlashRouter24 / FlashRouter50) or via ethernet cable to one of the LAN ports on the router.

The FlashRouter WiFi password is printed on the sheet that came with the router and is set to Wireless#[First 5 characters of your router MAC]. The router MAC can be found on the bottom of your router if you cannot locate the sheet. For e.g. if your MAC is 1459C07E70A8 then your WiFi password is Wireless#1459C

Be sure to capitalize the W.

2. Once connected via wireless or ethernet on your device open your browser and go to 192.168.8.1

GL.iNet router access

3. Enter openwrt as the admin password to access the GL.iNet firmware settings.

GL.iNet admin password enter

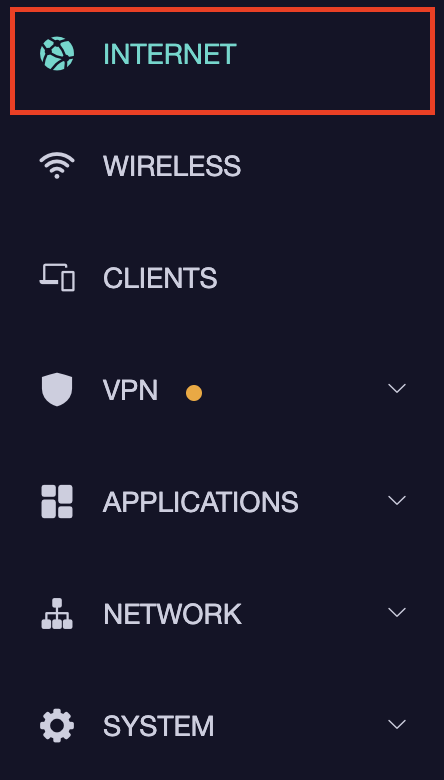
4. Select the Internet tab.

GL.iNet Internet tab

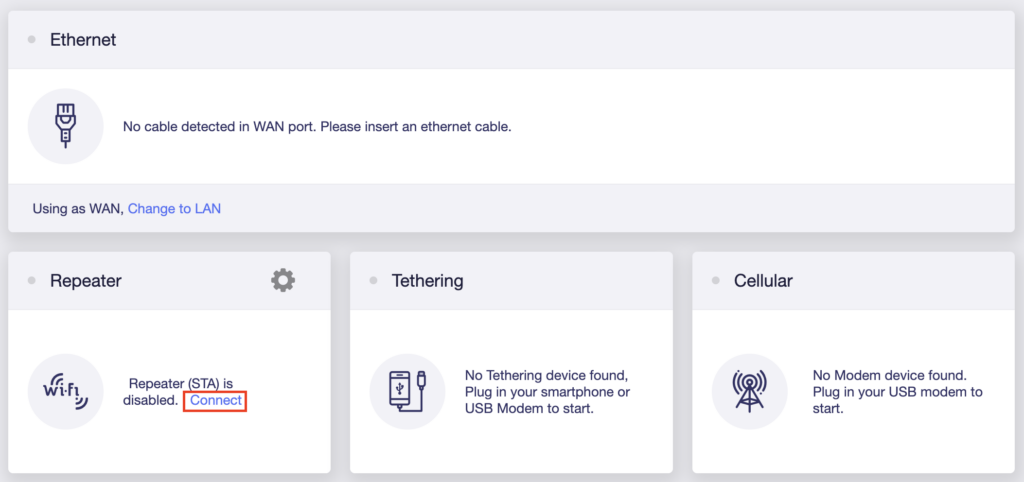
5. In the Repeater area select Connect.

GL.iNet Repeater Connect

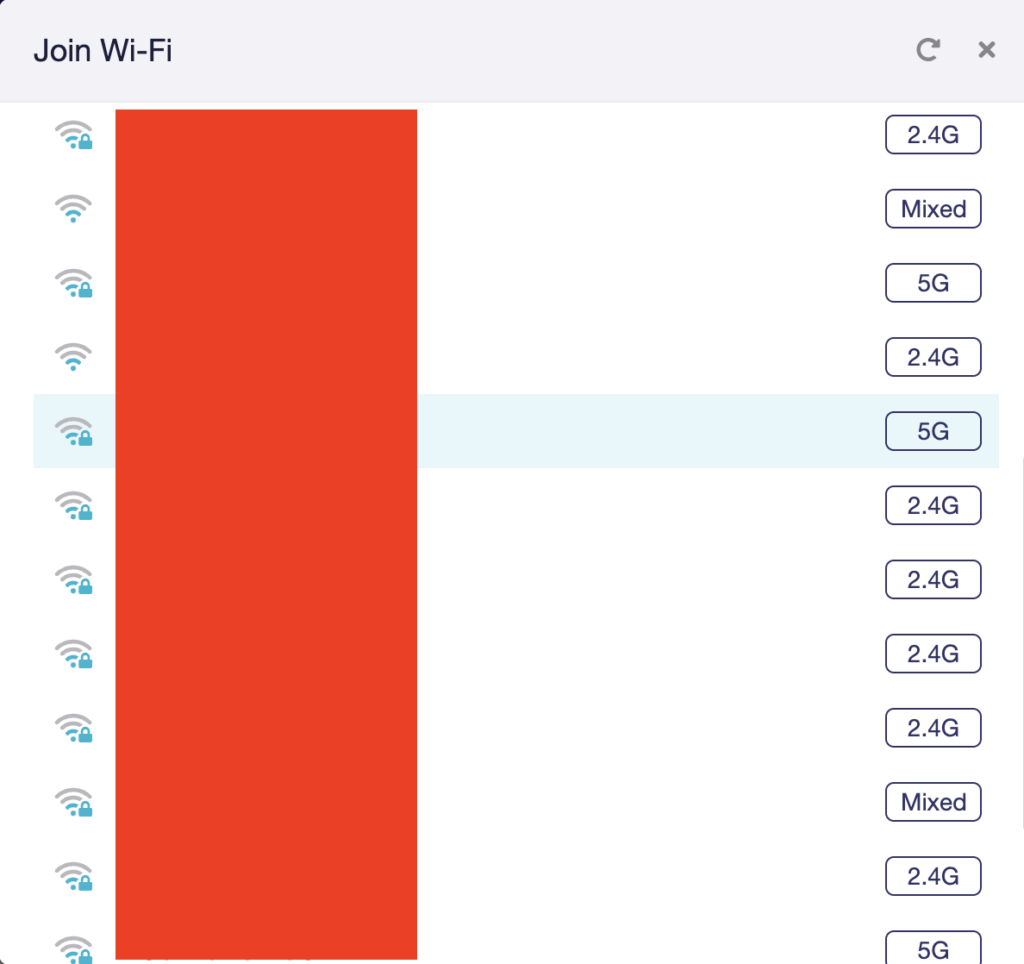
6. Select the available Wi-Fi network you want the FlashRouter to use for Internet from the list. You can use a 2.4GHz and/or 5GHz network to connect.

GL.iNet Repeater select Wi-Fi

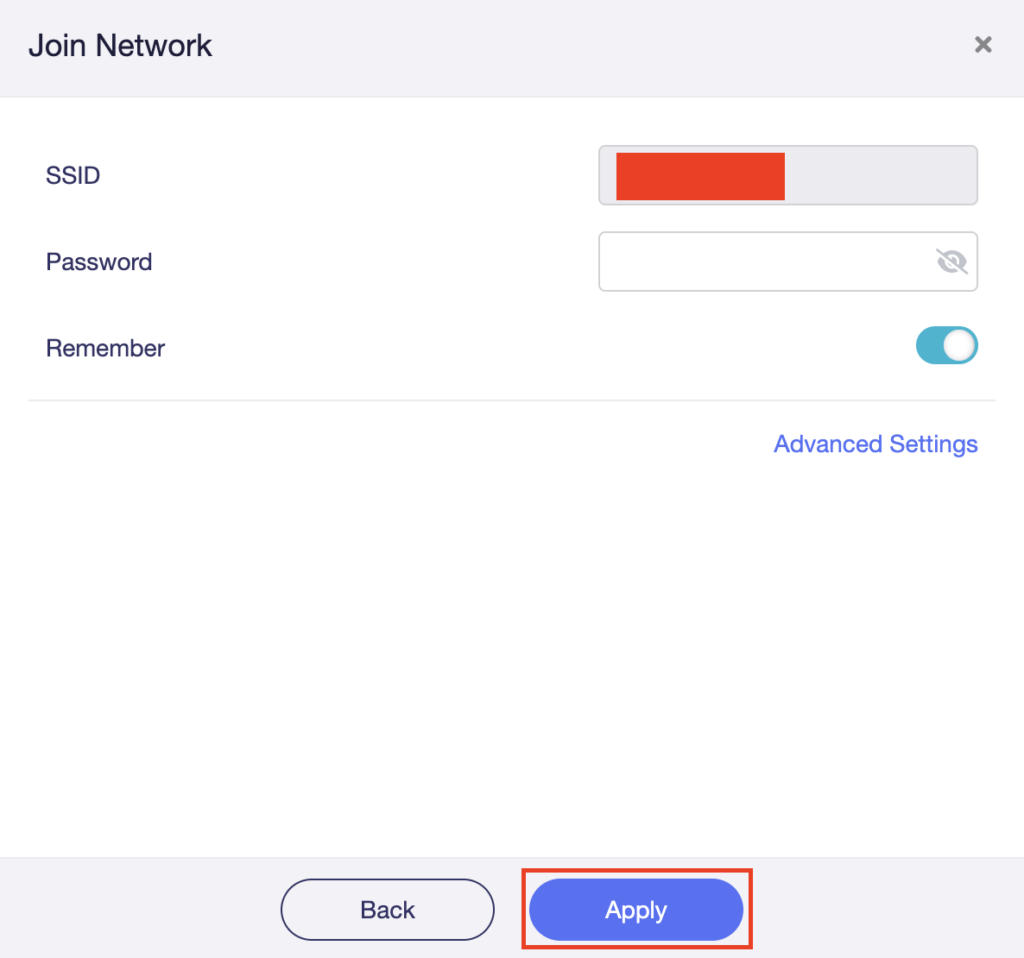
7. Enter the correct Wi-Fi password in the Password field for the network you selected. Then click Apply.

GL.iNet Repeater enter Wi-Fi password

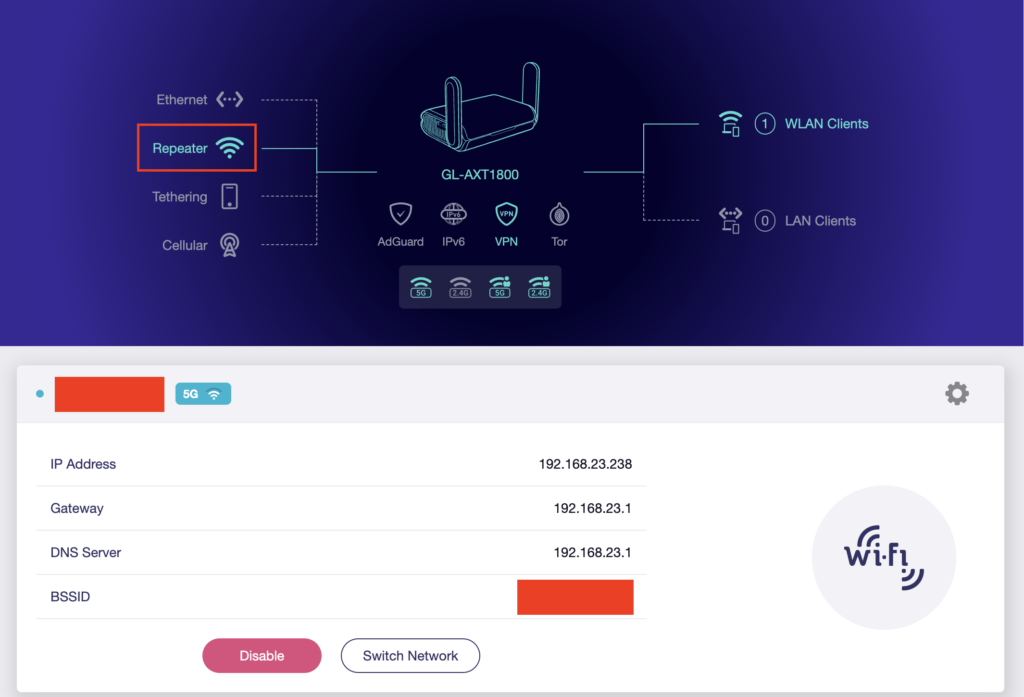
8. You are now setup with the GL.iNet FlashRouter receiving Internet via Wi-Fi. The Repeater area should now be filled in with the network information of the connection as shown below.

GL.iNet Repeater Setup complete

TROUBLESHOOTING

Still having issues? Visit the VPN Troubleshooting section.

Troubleshoot Here

Privacy Hero Access Router Settings

TeamFlashRouters · Feb 8, 2023 ·

Your Privacy Hero router uses Cloud Based router management which means you can access the router settings from anywhere on any device that has an internet connection. You can follow these steps while connected to your phone, other Wi-Fi network, or the Privacy Hero network.

1. From any device that has a browser such as a computer, smartphone, or tablet visit app.privacyhero.com

App.PrivacyHero.com

2. Enter your Privacy Hero account email and password. Click Login.

Privacy Hero Access Settings

If you have not created your Privacy Hero account yet please follow these instructions.

TROUBLESHOOTING

Still having issues? Visit the VPN Troubleshooting section.

Troubleshoot Here

Privacy Hero Disable Wi-Fi

TeamFlashRouters · Feb 8, 2023 ·

Your Privacy Hero router uses Cloud Based router management which means you can access the router settings from anywhere on any device that has an internet connection. You can follow these steps while connected to your phone, other Wi-Fi network, or the Privacy Hero network.

Use these steps to disable your Privacy Hero Wi-Fi so only ethernet connections are active. This is not a required step just a preference.

1. From any device that has a browser such as a computer, smartphone, or tablet visit app.privacyhero.com

App.PrivacyHero.com

2. Enter your Privacy Hero account email and password. Click Login.

Privacy Hero Access Settings

If you have not created your Privacy Hero account yet please follow these instructions.

3. Click the Wi-Fi symbol.

Privacy Hero Select Wifi

4. Set the toggle switches to the off position for the Wi-Fi bands you want to disable.

Privacy Hero Disable Wifi

TROUBLESHOOTING

Still having issues? Visit the VPN Troubleshooting section.

Troubleshoot Here

Cudy Internet Setup

TeamFlashRouters · Feb 26, 2024 ·

Follow this article when you receive your new Cudy FlashRouter to connect it to the Internet.

1. Connect the ethernet cable that came with the router from an open LAN ethernet port on your ISP modem or other router to the WAN port if you purchased a Cudy AX3000 or to ethernet port #1 of the device marked Primary if you purchased a Cudy M1800 or Cudy M3000.

Cudy Mesh internet wiring

2. Connect the power to the router and wait about 2 minutes for the router to fully boot up.

3. Connect your computer, phone, or tablet to the Cudy router via wireless (FlashRouter24 / FlashRouter50) or via ethernet cable to one of the LAN ports on the router.

The FlashRouter WiFi password is printed on the sheet that came with the router and is set to Wireless#[First 5 characters of your router MAC]. The router MAC can be found on the bottom of your router if you cannot locate the sheet. For e.g. if your MAC is 1459C07E70A8 then your WiFi password is Wireless#1459C

Be sure to capitalize the W.

4. Once connected via wireless or ethernet on your device open your browser and go to 192.168.10.1

Cudy local IP access

5. Enter openwrt as the admin password to access the Cudy firmware settings.

Cudy router access

6. Verify that your Cudy FlashRouter is reporting as Internet and WAN Connected.

Cudy Verify Internet

6. Verify that your Cudy FlashRouter is reporting as Internet and WAN Connected.

7. If you purchased a Cudy M1800 or Cudy M3000 mesh package you can now take the unit labeled Node to the location you want it connecting from and power it up. It will connect to the Primary network that was just setup automatically. You will then see the Mesh Units number increase according to the number that you have purchased shortly.

Cudy Verify Mesh connection

TROUBLESHOOTING

Still having issues? Visit the VPN Troubleshooting section.

Troubleshoot Here

Cudy Access Router Settings

TeamFlashRouters · Feb 26, 2024 ·

Follow this guide to access the router settings of your Cudy FlashRouter.

1. Connect your computer, phone, or tablet to the Cudy router via wireless (FlashRouter24 / FlashRouter50) or via ethernet cable to one of the LAN ports on the router.

The FlashRouter WiFi password is printed on the sheet that came with the router and is set to Wireless#[First 5 characters of your router MAC]. The router MAC can be found on the bottom of your router if you cannot locate the sheet. For e.g. if your MAC is 1459C07E70A8 then your WiFi password is Wireless#1459C

Be sure to capitalize the W.

2. Once connected via wireless or ethernet on your device open your browser and go to 192.168.10.1

Cudy local IP access

3. Enter openwrt1 or openwrt as the admin password to access the Cudy firmware settings.

Cudy router access

TROUBLESHOOTING

Still having issues? Visit the VPN Troubleshooting section.

Troubleshoot Here

Cudy Change Wi-Fi name and password

TeamFlashRouters · Feb 26, 2024 ·

Follow this guide to change the Wi-Fi name and password on your Cudy FlashRouter.

1. Connect your computer, phone, or tablet to the Cudy router via wireless (FlashRouter24 / FlashRouter50) or via ethernet cable to one of the LAN ports on the router.

The FlashRouter WiFi password is printed on the sheet that came with the router and is set to Wireless#[First 5 characters of your router MAC]. The router MAC can be found on the bottom of your router if you cannot locate the sheet. For e.g. if your MAC is 1459C07E70A8 then your WiFi password is Wireless#1459C

Be sure to capitalize the W.

2. Once connected via wireless or ethernet on your device open your browser and go to 192.168.10.1

Cudy local IP access

3. Enter openwrt as the admin password to access the Cudy firmware settings.

Cudy router access

3. Click General Settings.

Cudy General Settings

4. Click Wireless.

Cudy Wireless tab

5. Change the SSID and Password fields for both 2.4GHz and 5GHz bands.The SSIDs should be unique and NOT a duplicate of an existing network. Click Save & Apply.

Cudy Change Wifi Name and password

TROUBLESHOOTING

Still having issues? Visit the VPN Troubleshooting section.

Troubleshoot Here

Roqos Core Internet Setup and Activation

TeamFlashRouters · Mar 15, 2022 ·

Follow this article when you receive your new Roqos Core router to create your Roqos account, connect your Roqos to the Internet, and customize your network so it is ready to use.

Create your Roqos account

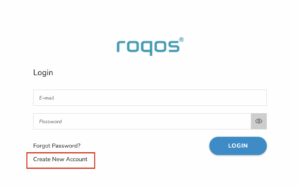
1. From any device that has a browser such as a computer, smartphone, or tablet visit login.roqos.com

Roqos Login URL

2. Select Create Account.

Roqos Create Account

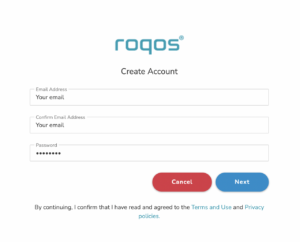
3. Enter the Email address and password you want to set for your Roqos account. This will be your login to the Roqos settings moving forward. Click Next.

Roqos Enter Email

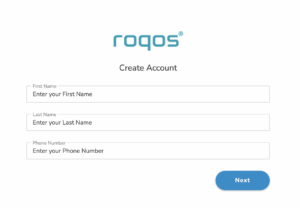
4. Enter the name and phone number you want associated with your Roqos. Click Next.

Roqos Enter Name and Number

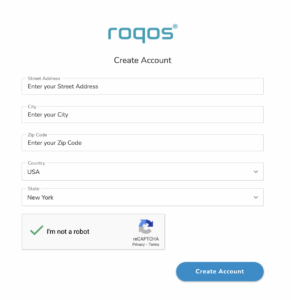
5. Enter the address where your Roqos is located. This section may require a CAPTCHA to be completed to authenticate you are human. Click Create Account.

Roqos Enter Address

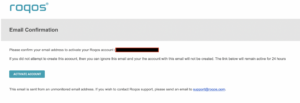
6. You have now created your Roqos account. In a new tab proceed to open the email from Roqos and click the Activate account button.

Roqos email activation

Activate your Roqos Internet

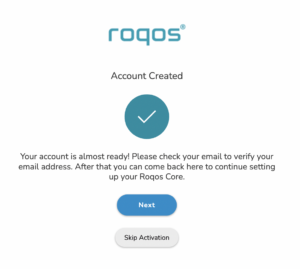
1. From the Account created page click Next to begin the Internet Setup of the Roqos.

Roqos Account Created

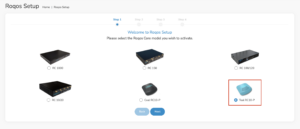
2. Select the Roqos model Teal RC10-P. Click Next.

Roqos Model

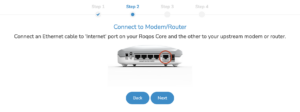
3. Connect the ethernet cable that came with your Roqos from the port labeled INTERNET on the back of your Roqos to an open ethernet port on your ISP Modem or other router in your network.

Roqos Wiring

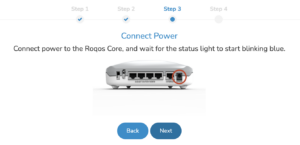
4. Then connect the power adapter that came with the Roqos to the back of the Roqos. Wait for the light on the Roqos to begin blinking blue. Once your see the blinking blue lights on the Roqos click Next.

Roqos Power On

If your Roqos lights does not begin blinking blue after a long while please see the steps in this article and contact us.

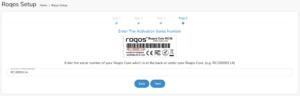
5. Enter in the Roqos serial number found on the bottom of the device exactly as it appears there. Click Next.

Roqos Activation Code

Setup your Roqos Network

1. Enter in a name that you would like to call the Roqos. This is just the Roqo’s device name and it is not the WiFi network name. Click Next.

Roqos Device Name

2. Select the Time Zone of your actual location from the dropdown. Click Next.

Roqos Time Zone

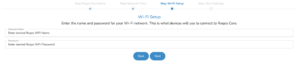
3. Set the WiFi name and password for the Roqos. The WiFi name should be unique and not a duplicate of an existing wireless network. This will be the name that appears in your wireless devices available network list and the password to join the devices to the network. Click Next.

Roqos Set WiFi Name and Password

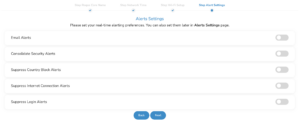
4. Select the custom alert settings as you best see fit using the toggle switches. We typically recommend having the first two toggles selected for Email Alerts and Consolidate Security Alerts. Click Next.

Begin connecting your devices to the Roqos network

You are now done setting up your Roqos to connect to the Internet and can begin joining your wireless devices to the Roqos network and exploring the Roqos Core Features.

Roqos Setup Done

TROUBLESHOOTING

Still having issues? Visit the VPN Troubleshooting section.

Troubleshoot Here

TP-Link Access Router Settings

TeamFlashRouters · Apr 11, 2024 ·

Follow this guide to access the router settings of your TP-Link FlashRouter.

1. Connect your computer, phone, or tablet to the TP-Link router via wireless (FlashRouter24 / FlashRouter50) or via ethernet cable to one of the LAN ports on the router.

The FlashRouter WiFi password is printed on the sheet that came with the router and is set to Wireless#[First 5 characters of your router MAC]. The router MAC can be found on the bottom of your router if you cannot locate the sheet. For e.g. if your MAC is 1459C07E70A8 then your WiFi password is Wireless#1459C

Be sure to capitalize the W.

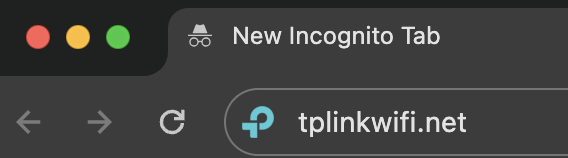
2. Once connected via wireless or ethernet on your device open your browser and go to tplinkwifi.net

TP-Link URL Access

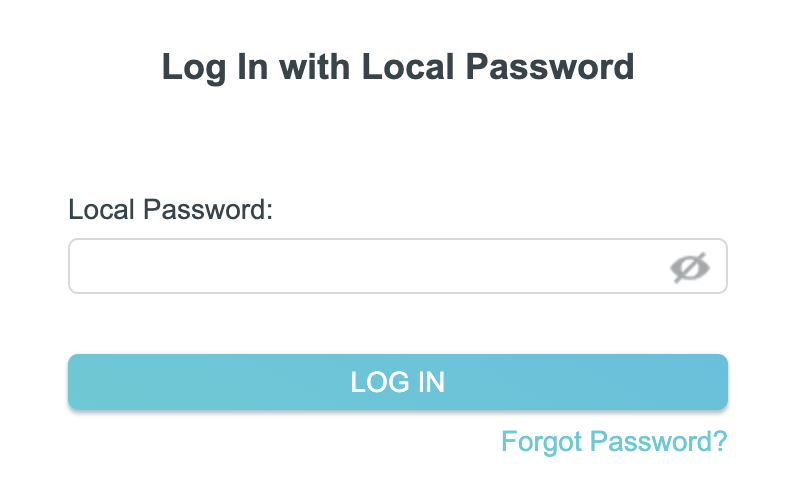
3. Enter tp-link as the admin password to access the TP-Link firmware settings.

TP-Link admin password

TROUBLESHOOTING

Still having issues? Visit the VPN Troubleshooting section.

Troubleshoot Here

TP-Link Internet Setup

TeamFlashRouters · Apr 11, 2024 ·

Follow this article when you receive your new TP-Link FlashRouter to connect it to the Internet.

1. Connect the ethernet cable that came with the router from an open LAN ethernet port on your ISP modem or other router to the WAN port of the TP-Link.

2. Connect the power to the router and wait about 2 minutes for the router to fully boot up.

3. Connect your computer, phone, or tablet to the TP-Link router via wireless (FlashRouter24 / FlashRouter50) or via ethernet cable to one of the LAN ports on the router.

The FlashRouter WiFi password is printed on the sheet that came with the router and is set to Wireless#[First 5 characters of your router MAC]. The router MAC can be found on the bottom of your router if you cannot locate the sheet. For e.g. if your MAC is 1459C07E70A8 then your WiFi password is Wireless#1459C

Be sure to capitalize the W.

4. Once connected via wireless or ethernet on your device open your browser and go to tplinkwifi.net

TP-Link URL Access

5. Enter tp-link as the admin password to access the TP-Link firmware settings.

TP-Link admin password

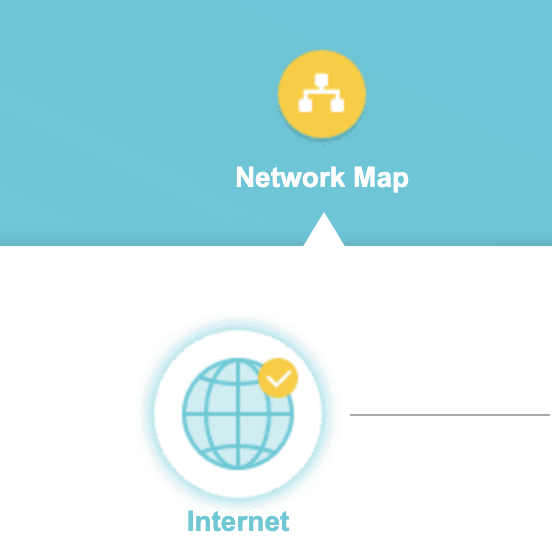
6. Verify that your TP-Link FlashRouter is reporting as Internet and WAN Connected.

TP-Link Internet Connected

TROUBLESHOOTING

Still having issues? Visit the VPN Troubleshooting section.

Troubleshoot Here

Privacy Hero Streaming Relocation

TeamFlashRouters · Apr 3, 2023 ·

Your Privacy Hero router uses Cloud Based router management which means you can access the router settings from anywhere on any device that has an internet connection. You can follow these steps while connected to your phone, other Wi-Fi network, or the Privacy Hero network.

Use these steps change your location for popular streaming services allowing you to access to regionally restricted content. Privacy Hero uses DNS routing to change your location which is a great way around VPN streaming blocks.

1. From any device that has a browser such as a computer, smartphone, or tablet visit app.privacyhero.com

App.PrivacyHero.com

2. Enter your Privacy Hero account email and password. Click Login.

Privacy Hero Access Settings

3. Click the Streaming symbol.

Privacy Hero Streaming

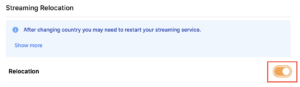
4. Set the Streaming Relocation toggle to On.

Privacy Hero enable Streaming Relocation

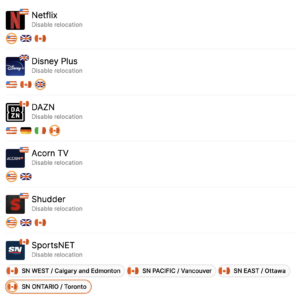
5. Click the flag of the country you would like the listed streaming service to use.

Privacy Hero select Region

This streaming relocation feature will not change your IP address in the way that a VPN does. This is why it is not able to be blocked in the same way that a VPN connection can be.

The listed services on the streaming relocation page will not be connected to VPN even if the Privacy Hero has an active VPN connection. These services are set to bypass the router’s VPN tunnel to avoid streaming blocks.

Toggling the streaming relocation feature On will also relocate many other streaming services automatically. They will be automatically optimized for the best connection with no manual selection needed for:
ABC
Adult Swim
All 4
Apple TV Channels
BBC
Britbox
CBC Gem
CBS Sports
Crackle
DirecTV Stream
DSTV Now
Filmrise
Freeform
Freevee
Frndly TV
F1 TV
FX Now
ITV
MGM+
Molotov.TV
My 5
NBC
NBC Sports
Now E
Now TV
Pandora
Paramount+
PBS
Peacock
Philo
Pluto TV
Showmax
Sling
SonyLIV
S Sports Plus
Starz
Stirr
TBS
Tennis Channel
The CW
Tubi
TVPlayer
Vudu
Xumo
Zattoo

TROUBLESHOOTING

Still having issues? Visit the VPN Troubleshooting section.

Troubleshoot Here

Privacy Hero VPN Setup Guide for Privacy Hero

TeamFlashRouters · Apr 3, 2023 ·

Your Privacy Hero router uses Cloud Based router management which means you can access the router settings from anywhere on any device that has an internet connection. You can follow these steps while connected to your phone, other Wi-Fi network, or the Privacy Hero network.

Use these steps to connect to Privacy Hero’s own WireGuard VPN servers. You will automatically be connected to the ideal USA or Canada server based on your location.

1. From any device that has a browser such as a computer, smartphone, or tablet visit app.privacyhero.com

App.PrivacyHero.com

2. Enter your Privacy Hero account email and password. Click Login.

Privacy Hero Access Settings

If you have not created your Privacy Hero account yet please follow these instructions.

3. Click the VPN symbol.

Privacy Hero Setup VPN

4. Set the VPN toggle to On.

Privacy Hero Enable VPN

5. Connect to the Privacy Hero’s via wireless or ethernet connection on your device and visit What is my IP Address from a private/incognito browser to verify your new IP address and virtual location.

Privacy Hero’s cloud based router settings access makes it so you can change settings while not connected to the Privacy Hero network so if your IP Address has not changed be sure to double check that you are indeed connected to the Privacy Hero network on the device you are checking your IP from.

Keep in mind that the VPN connection will not change the location of the streaming services listed in the Streaming Relocation area of the Privacy Hero settings.
TROUBLESHOOTING

Still having issues? Visit the VPN Troubleshooting section.

Troubleshoot Here

NordVPN Setup Guide for Privacy Hero

TeamFlashRouters · Apr 3, 2023 ·

Your Privacy Hero NordVPN Router uses cloud-based management, which means you can securely access and adjust your router settings from anywhere, on any device with an internet connection. Whether you’re connected through your phone, another Wi-Fi network, or directly to the Privacy Hero network, setup and management are always within reach.

Follow the steps below to connect your Privacy Hero to NordVPN NordLynx or OpenVPN servers. By default, you’ll automatically connect to the fastest, most reliable server available based on your location. If you prefer, you can also select a specific country server and input it directly into your Privacy Hero for more control.

:point_right: Don’t have a Privacy Hero yet? Get your Privacy Hero NordVPN Router here

NordVPN Nordlynx Setup for Privacy Hero

1. From any device that has a browser such as a computer, smartphone, or tablet visit app.privacyhero.com

App.PrivacyHero.com

2. Enter your Privacy Hero account email and password. Click Login.

Privacy Hero Access Settings

3. Click the VPN symbol.

Privacy Hero Setup VPN

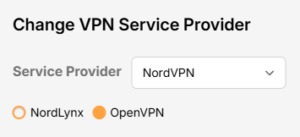
4. Click the Change button and select NordVPN from the dropdown.

Privacy Hero Change VPN Providers

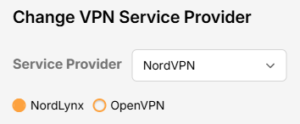
5. Click the Change button and select NordVPN from the dropdown and choose the NordLynx option. Next you will need to obtain your Token.

NordVPN Protocol Privacy Hero

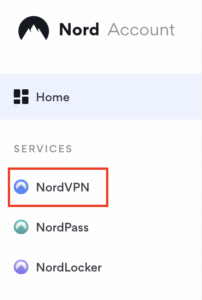
6. In a new tab login to your NordVPN account and select NordVPN from your list of Services.

NordVPN account

7. At the bottom of the page click Get Access token and you will receive a code via email. Enter this code to proceed.

NordVPN Access Token

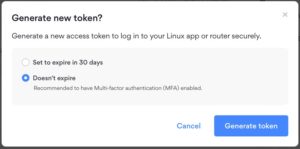
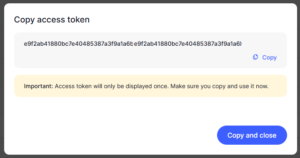
8. After you enter the email code select Generate new token and set it to Doesn’t expire. Copy this token.

NordVPN Generate new token
NordVPN Copy Token

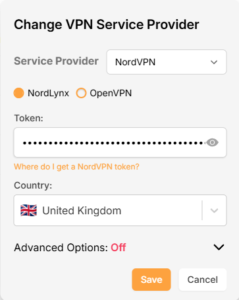
9. Paste the token and then Click Save to connect to the server address recommended by NordVPN within your country.

NordVPN Protocols Privacy Hero

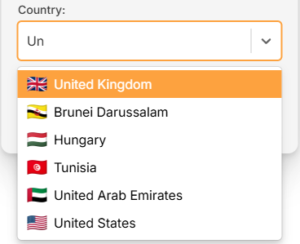
10. To connect to a specific location, click the Country dropdown menu and scroll or type to search from the available options. Choose your preferred country and you will automatically connect to the recommended server within that country at the time. Then click Save.

Nordlynx VPN Country Selection Privacy Hero

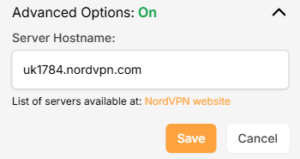
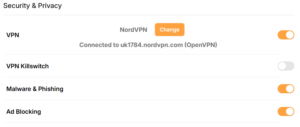
11. If you prefer to enter a specific server address number click Advanced Options and then type in the NordVPN server you would like to use as shown below e.g. uk1784.nordvpn.com. Then click Save.

Nordlynx Advanced Privacy Hero

Use the NordVPN’s server recommendation tool to select a specific country and receive a recommendation for the fastest server based on your actual location. You can then enter that server in the Privacy Hero settings manually.

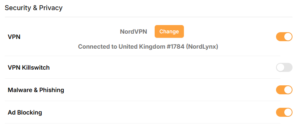
12. Your Privacy Hero settings should now show a Connected message, indicating you have successfully signed in to your NordVPN NordLynx VPN server!

Privacy Hero Nordlynx Connected

NordVPN OpenVPN Setup for Privacy Hero

1. From any device that has a browser such as a computer, smartphone, or tablet visit app.privacyhero.com

App.PrivacyHero.com

2. Enter your Privacy Hero account email and password. Click Login.

Privacy Hero Access Settings

3. Click the VPN symbol.

Privacy Hero Setup VPN

4. Click the Change button and select NordVPN from the dropdown.

Privacy Hero Change VPN Providers

5. Choose the OpenVPN option to connect to OpenVPN servers or to setup a NordVPN Dedicated IP address. Next you will need to obtain your Manual Service credentials.

NordVPN Protocol Privacy Hero

6. In a new tab login to your NordVPN account and select NordVPN from your list of Services.

NordVPN login
NordVPN account

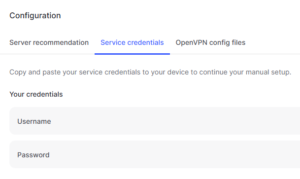
7. At the bottom of the page in the Manual Setup section click Setup NordVPN manually then under the Configuration section go to Service credentials. Click Verify email to receive a code via email and enter the code to view and copy your credentials.

NordVPN Manual OpenVPN
NordVPN Service Credentials

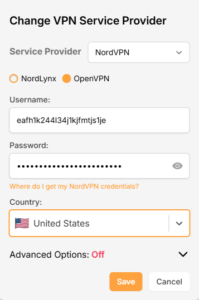
8. Enter these credentials into the OpenVPN Username and Password sections in your Privacy Hero and Click Save if you want to connect to the server address recommended by NordVPN within your country.

NordVPN OpenVPN Privacy Hero

9. To connect to a specific location, click the Country dropdown menu and scroll or type to search from the available options. Choose your preferred country and you will automatically connect to the recommended server within that country at the time. Then click Save.

Nordlynx VPN Country Selection Privacy Hero

10. To connect with a NordVPN Dedicated IP Address or if you prefer to enter a specific server address number click Advanced Options and then type in the NordVPN server you would like to use as shown below e.g. uk1784.nordvpn.com. Then click Save.

Nordlynx Advanced Privacy Hero

Use the NordVPN’s server recommendation tool to select a specific country and receive a recommendation for the fastest server based on your actual location. You can then enter that server in the Privacy Hero settings manually.

11. Your Privacy Hero settings should now show a Connected message, indicating you have successfully signed in to your NordVPN Dedicated IP address or preferred OpenVPN server!

NordVPN OpenVPN Connected Privacy Hero

Privacy Hero’s cloud based router settings access makes it so you can change settings while not connected to the Privacy Hero network. Visit the NordVPN IP Check to verify your VPN IP address. If it has not changed be sure to double check that you are indeed connected to the Privacy Hero network.

Keep in mind that the VPN connection will not change the location of the streaming services listed in the Streaming Relocation area of the Privacy Hero settings if the Streaming Relocation feature is Enabled.

Still having issues?

Feel free to submit a ticket and we will get back to you as soon as possible.

TP-Link Change Wi-Fi name and password

TeamFlashRouters · Apr 16, 2024 ·

Follow this guide to change the Wi-Fi name and password on your TP-Link FlashRouter.

1. Connect your computer, phone, or tablet to the TP-Link router via wireless (FlashRouter24 / FlashRouter50) or via ethernet cable to one of the LAN ports on the router.

The FlashRouter WiFi password is printed on the sheet that came with the router and is set to Wireless#[First 5 characters of your router MAC]. The router MAC can be found on the bottom of your router if you cannot locate the sheet. For e.g. if your MAC is 1459C07E70A8 then your WiFi password is Wireless#1459C

Be sure to capitalize the W.

2. Once connected via wireless or ethernet on your device open your browser and go to the TP-Link firmware settings.
TP-Link URL Access

3. Enter tp-link as the admin password to access the TP-Link firmware settings.
TP-Link admin password

4. Click Wireless.

TP-Link Wireless tab

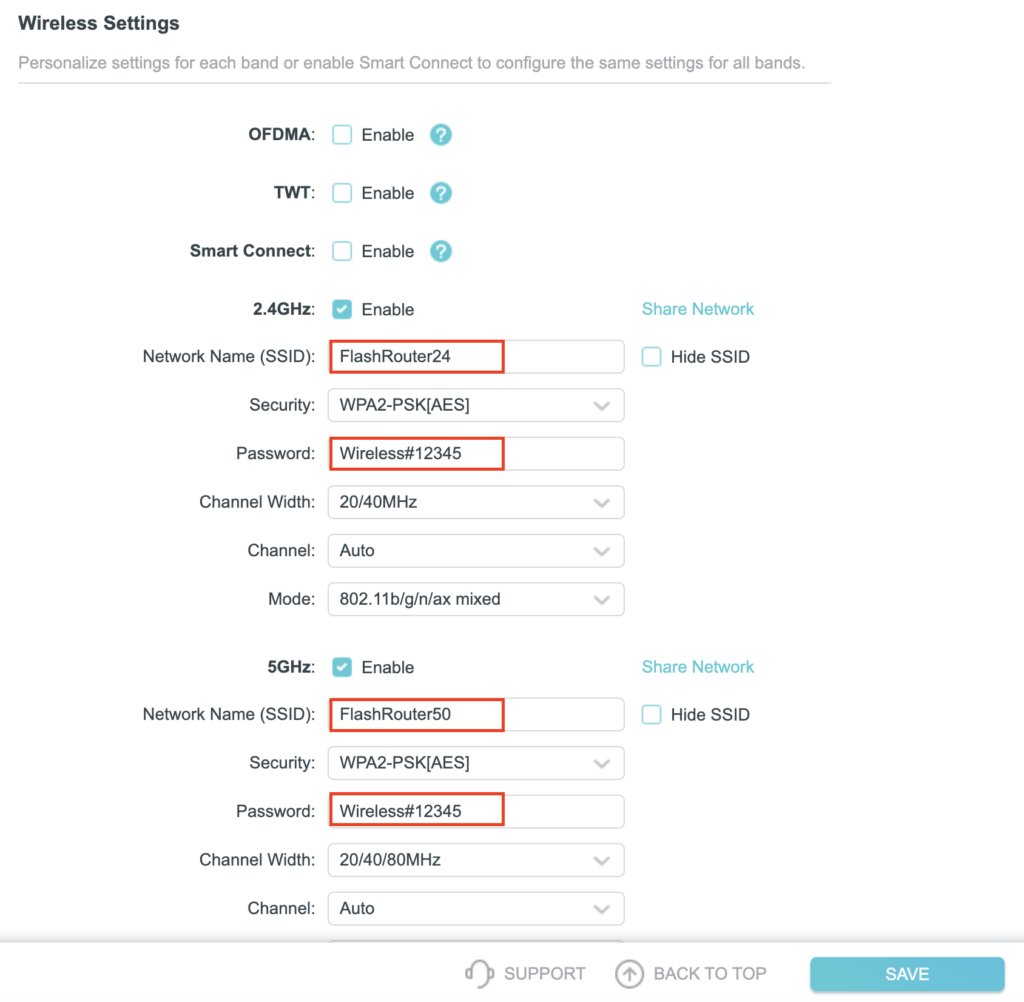
5. Change the Network Name (SSID) and Password fields to what you want to use. The SSID should be unique and NOT a duplicate of an existing network. Click Save.

TP-Link Change Wireless name and password

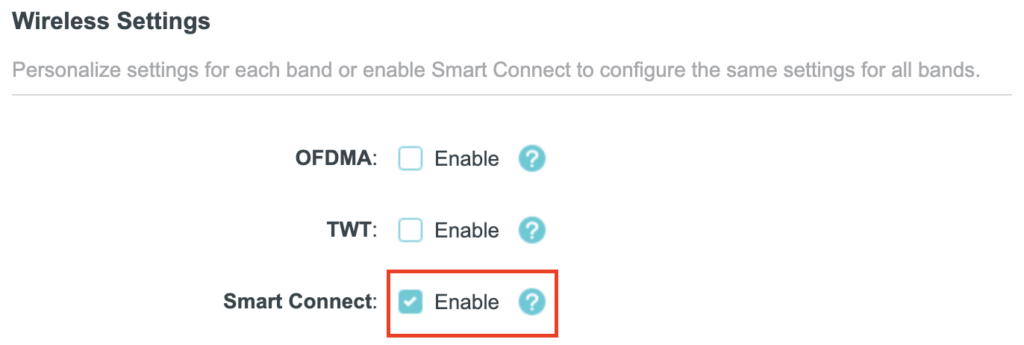
If you want both 2.4GHz and 5GHz networks to be bonded and have the same name click the Smart Connect checkbox.

TP-Link Separate Wifi

6. Connect your devices to the new wireless network.

TROUBLESHOOTING

Still having issues? Visit the VPN Troubleshooting section.

Troubleshoot Here

TP-Link Change Wireless Channel

TeamFlashRouters · Apr 16, 2024 ·

Follow this guide to change the Wireless channel on your TP-Link FlashRouter.

1. Connect your computer, phone, or tablet to the TP-Link router via wireless (FlashRouter24 / FlashRouter50) or via ethernet cable to one of the LAN ports on the router.

The FlashRouter WiFi password is printed on the sheet that came with the router and is set to Wireless#[First 5 characters of your router MAC]. The router MAC can be found on the bottom of your router if you cannot locate the sheet. For e.g. if your MAC is 1459C07E70A8 then your WiFi password is Wireless#1459C

Be sure to capitalize the W.

2. Once connected via wireless or ethernet on your device open your browser and go to the TP-Link firmware settings.
TP-Link URL Access

3. Enter tp-link as the admin password to access the TP-Link firmware settings.
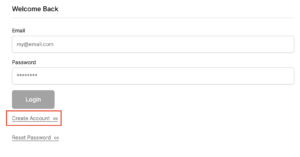
TP-Link admin password

4. Click Wireless.

TP-Link Wireless tab

5. Change the Channel setting to the number that you want to use. Click Save.

TP-Link Change Wireless Channel

6. Connect your devices to the wireless network again as they may have been disconnected when making this change.

TROUBLESHOOTING

Still having issues? Visit the VPN Troubleshooting section.

Troubleshoot Here

TP-Link Merge or Separate 2.4GHz and 5GHz Wi-Fi

TeamFlashRouters · Apr 17, 2024 ·

Your TP-Link router broadcasts a 2.4GHz and a 5GHz Wi-Fi network. These can be separated to allow you to assign your devices to the network that best suits them or merged into a single network so your devices automatically select the best band to use. Follow this guide to separate or merge your Wi-Fi bands.

1. Connect your computer, phone, or tablet to the TP-Link router via wireless (FlashRouter24 / FlashRouter50) or via ethernet cable to one of the LAN ports on the router.

The FlashRouter WiFi password is printed on the sheet that came with the router and is set to Wireless#[First 5 characters of your router MAC]. The router MAC can be found on the bottom of your router if you cannot locate the sheet. For e.g. if your MAC is 1459C07E70A8 then your WiFi password is Wireless#1459C

Be sure to capitalize the W.

2. Once connected via wireless or ethernet on your device open your browser and go to the TP-Link firmware settings.
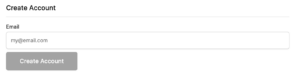
TP-Link URL Access

3. Enter tp-link as the admin password to access the TP-Link firmware settings.
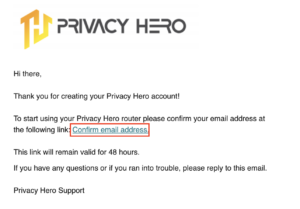
TP-Link admin password

4. Click Wireless.
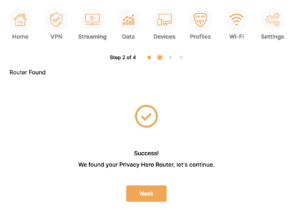
TP-Link Wireless tab

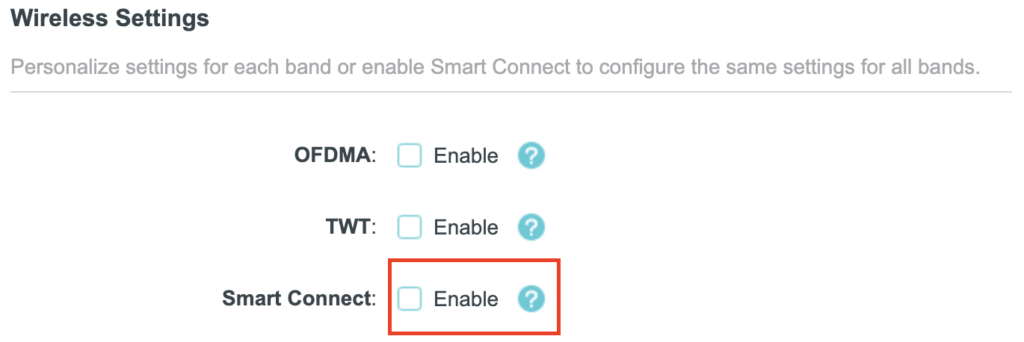
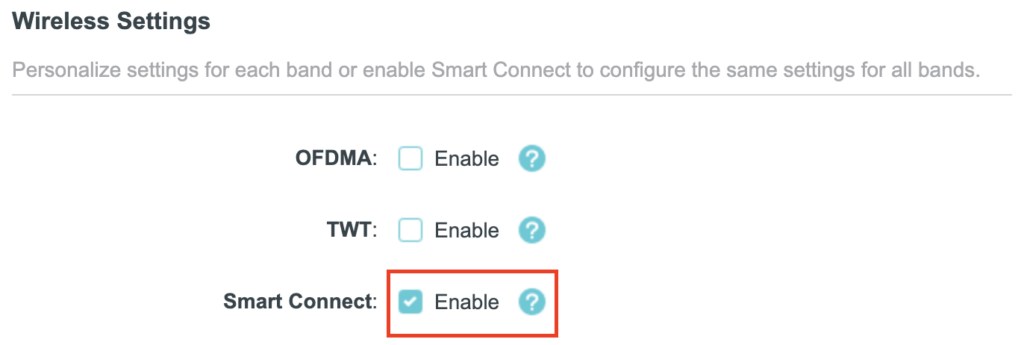
5. Check the Smart Connect checkbox to merge the two Wi-Fi bands. Uncheck the Smart Connect checkbox to separate the two Wi-Fi bands. If you have the two Wi-Fi bands separated make sure the Network Name (SSID) fields have different names for 2.4GHz and 5GHz bands. Click Save.

TP-Link Merge Wifi
TP-Link Separate Wifi

6. Connect your devices to the new wireless network.

TROUBLESHOOTING

Still having issues? Visit the VPN Troubleshooting section.

Troubleshoot Here

Privacy Hero Adblocking Malware and Phishing Prevention Setup

TeamFlashRouters · Apr 3, 2023 ·

Your Privacy Hero router uses Cloud Based router management which means you can access the router settings from anywhere on any device that has an internet connection. You can follow these steps while connected to your phone, other Wi-Fi network, or the Privacy Hero network.

Use these steps to enable Privacy Hero’s adblocking, malware, and phishing prevention settings to add extra security to your network.

1. From any device that has a browser such as a computer, smartphone, or tablet visit app.privacyhero.com

App.PrivacyHero.com

2. Enter your Privacy Hero account email and password. Click Login.

Privacy Hero Access Settings

If you have not created your Privacy Hero account yet please follow these instructions.

3. Click the VPN symbol.

Privacy Hero Setup VPN

4. Toggle the Adblocking and Malware & Phishing switches to On.

Privacy Hero Adblocking Malware and Phishing

TROUBLESHOOTING

Still having issues? Visit the VPN Troubleshooting section.

Troubleshoot Here

Privacy Hero VPN Kill Switch Setup

TeamFlashRouters · Apr 3, 2023 ·

Your Privacy Hero router uses Cloud Based router management which means you can access the router settings from anywhere on any device that has an internet connection. You can follow these steps while connected to your phone, other Wi-Fi network, or the Privacy Hero network.

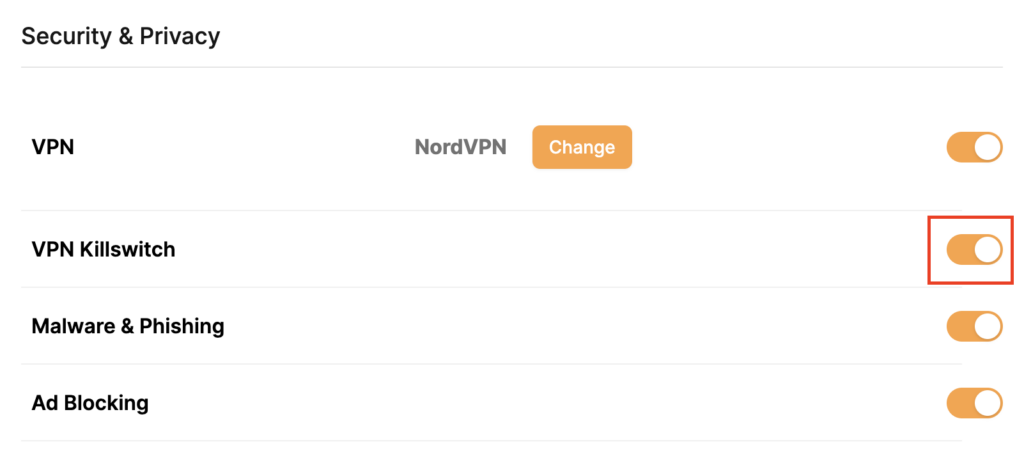
Use these steps to enable Privacy Hero’s VPN Kill Switch to make sure that no traffic goes through your router unless it is connected to VPN.

1. From any device that has a browser such as a computer, smartphone, or tablet visit app.privacyhero.com

App.PrivacyHero.com

2. Enter your Privacy Hero account email and password. Click Login.

Privacy Hero Access Settings

If you have not created your Privacy Hero account yet please follow these instructions.

3. Click the VPN symbol.

Privacy Hero Setup VPN

4. Toggle the VPN Kill Switch setting to On.

Privacy Hero VPN Kill Switch

TROUBLESHOOTING

Still having issues? Visit the VPN Troubleshooting section.

Troubleshoot Here

Privacy Hero Change VPN Providers

TeamFlashRouters · Apr 3, 2023 ·

Your Privacy Hero router uses Cloud Based router management which means you can access the router settings from anywhere on any device that has an internet connection. You can follow these steps while connected to your phone, other Wi-Fi network, or the Privacy Hero network.

Each Privacy Hero router comes with a year free of Privacy Hero WireGuard VPN and can be setup for NordVPN and Surfshark users as well. Use these steps to change between the VPN providers to find the best connection for your needs.

1. From any device that has a browser such as a computer, smartphone, or tablet visit app.privacyhero.com

App.PrivacyHero.com

2. Enter your Privacy Hero account email and password. Click Login.

Privacy Hero Access Settings

If you have not created your Privacy Hero account yet please follow these instructions.

3. Click the VPN symbol.

Privacy Hero Setup VPN

4. Click the Change button and select the VPN provider that you want to use.

Privacy Hero Change VPN Providers

Follow our guides for connecting to NordVPN or Surfshark. If you are switching to Privacy Hero VPN just select it from dropdown and toggle the VPN switch to On.

TROUBLESHOOTING

Still having issues? Visit the VPN Troubleshooting section.

Troubleshoot Here
« Previous Page
Next Page »

Primary Sidebar

  • Troubleshooting
  • Router Access
  • Internet Connection Issues
  • WiFi Connectivity
  • General VPN Issues
  • TeamViewer Remote Support
  • DD-WRT Firmware
  • Facebook
  • Twitter
  • Instagram
  • Pinterest
  • YouTube

Footer