• Skip to primary navigation
  • Skip to main content
  • Skip to primary sidebar
  • Skip to footer

FlashRouters Support Portal

Prioritizing Privacy

  • SETUP GUIDES
    • Privacy Hero Router Setup Guide
    • ASUS-WRT Router Setup Guide
    • AsusWRT-Merlin Router Setup Guide
    • DD-WRT Router Setup Guide
    • ExpressVPN Router Setup Guide
    • GL.iNet Router Setup Guide
    • Roqos Core Router Setup Guide
  • TROUBLESHOOTING
    • Router Access
    • WiFi Connectivity
    • Internet Connection Issues
    • General VPN Issues
    • DD-WRT Firmware
    • TeamViewer Remote Support
  • FAQs
    • Router FAQs
    • VPN FAQs
    • Warranty and Returns FAQs
    • Sales FAQs
    • Shipping FAQs
    • Service Plan FAQs
  • Show Search
Hide Search

Search Results for: phone connection

NordVPN Setup for AsusWRT Firmware Routers

TeamFlashRouters · Oct 15, 2025 ·

You can connect to NordVPN on your AsusWRT router using NordLynx, OpenVPN, or a Dedicated IP.

Quick Options

  • NordLynx: Choose your preferred country from NordVPN’s server list

  • OpenVPN: Choose your preferred city or country from NordVPN’s server list.

  • Dedicated IP (optional): Enter your unique configuration file if you’ve been assigned a static NordVPN IP.

:point_right: If you are not already a NordVPN user Sign Up Now.

NordVPN NordLynx Setup for AsusWRT

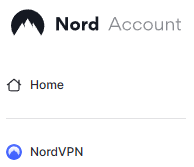
1. Get your NordVPN Access Token for NordLynx connections. Log in to your NordVPN account and select NordVPN from your list of Services.

NordVPN Services Section

2. At the bottom of the page click Get Access token and you will receive a code via email. Enter this code to proceed.

NordVPN Access Token

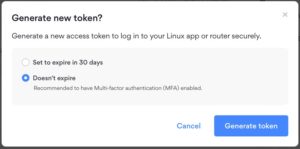
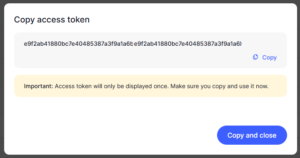
3. After you enter the email code select Generate new token and set it to Doesn’t expire. Copy this token.

NordVPN Generate new token
NordVPN Copy Token

4. Log in to the Asus settings page by connecting to the Asus router’s WiFi (or wired LAN) on your computer. Then, enter 192.168.50.1 or asusrouter.com in the browser.

View our guide for more instructions on how to access AsusWRT firmware settings.

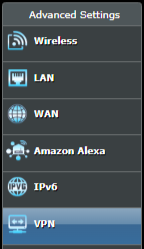
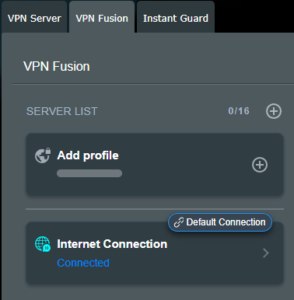
5. Navigate to the VPN tab and then select the VPN Fusion tab, then click Add profile.

Click the VPN Button
VPN Fusion Add Profile

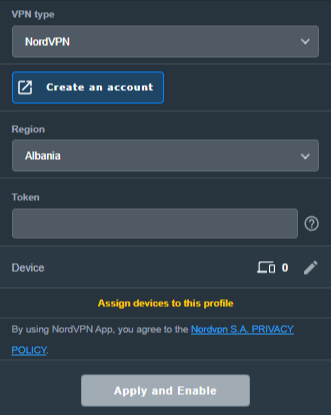
6. Fill in your NordVPN information, then click Apply and Enable.

  • Connection Name: Choose a name for your NordLynx connection.
  • VPN Type: Select NordVPN
  • Region: Choose your VPN server location
  • Token: Copy and paste your NordVPN token.
Apply NordLynx Settings

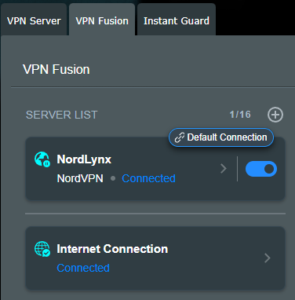
6. You should now see the Profile say Connected, indicating that the NordVPN server is successfully connected to your router!

VPN Fusion NordLynx Connected

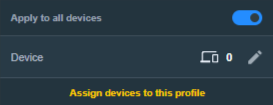
7. The VPN connection is automatically set to Apply to all devices.

If you only want certain devices to connect to the VPN, then turn off the VPN connection and switch off Apply to all devices.

Now click the pencil next to the Device section and select the devices (computer, phone, etc.) that you want to connect to VPN. Click OK and then click Apply all settings.

Apply VPN by Device

NordVPN OpenVPN Setup for AsusWRT

1. Get your NordVPN manual service credentials for OpenVPN connections. Log in to your NordVPN account and select NordVPN from your list of Services.

NordVPN Services Section

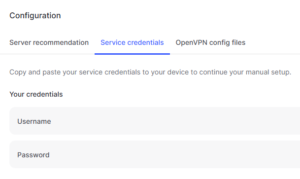
2. At the bottom of the page in the Manual Setup section click Setup NordVPN manually then under the Configuration section go to Service credentials. Click Verify email to receive a code via email and enter the code to view and copy your credentials.

NordVPN Manual OpenVPN
NordVPN Service Credentials

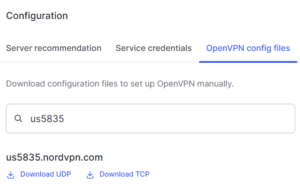
3. Click on OpenVPN config files. Search and download the server file for your preferred NordVPN location, UDP is recommended.

NordVPN OpenVPN Config Files

4. Log in to the Asus settings page by connecting to the Asus router’s WiFi (or wired LAN) on your computer. Then, enter 192.168.50.1 or asusrouter.com in the browser.

View our guide for more instructions on how to access AsusWRT firmware settings.

5. Navigate to the VPN tab and then click on the VPN Fusion tab, then click Add Profile.

Click the VPN Button
VPN Fusion Add Profile

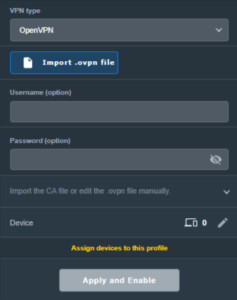
6. Fill in your NordVPN information then click Apply and Enable.

  • Connection Name: Choose a name for your NordVPN OpenVPN connection.
  • VPN Type: Select OpenVPN
  • Import .ovpn File: Upload the OpenVPN file that you downloaded.
  • Username and Password: Copy and paste your NordVPN manual service credentials.
AsusWRT OpenVPN Connection File Load

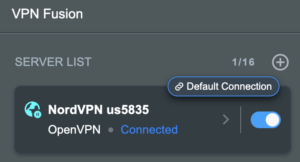
6. You should now see the Profile say Connected, indicating that the NordVPN server is successfully connected to your router!

Asus NordVPN Connected

7. The VPN connection is automatically set to Apply to all devices.

If you only want certain devices to connect to the VPN, then turn off the VPN connection and switch off Apply to all devices.

Now click the pencil next to the Device section and select the devices (computer, phone, etc.) that you want to connect to VPN. Click OK and then click Apply all settings.

Apply VPN by Device

NordVPN Dedicated IP Setup for AsusWRT

1. Get your NordVPN manual service credentials for OpenVPN connections. Log in to your NordVPN account and select NordVPN from your list of Services.

NordVPN Services Section

2. At the bottom of the page in the Manual Setup section click Setup NordVPN manually then under the Configuration section go to Service credentials. Click Verify email to receive a code via email and enter the code to view and copy your credentials.

NordVPN Manual OpenVPN
NordVPN Service Credentials

3. Now download your Dedicated IP configuration file from the NordVPN website.

4. Log in to the Asus settings page by connecting to the Asus router’s WiFi (or wired LAN) on your computer. Then, enter 192.168.50.1 or asusrouter.com in the browser.

View our guide for more instructions on how to access AsusWRT firmware settings.

5. Navigate to the VPN tab then click on the VPN Fusion tab, then click Add Profile.

Click the VPN Button
VPN Fusion Add Profile

6. Fill in your NordVPN information then click Apply and Enable.

  • Connection Name: Choose a name for your NordVPN Dedicated IP connection.
  • VPN Type: Select OpenVPN
  • Import .ovpn File: Upload the Dedicated IP OpenVPN file that you downloaded.
  • Username and Password: Copy and paste your NordVPN manual service credentials.
AsusWRT OpenVPN Connection File Load

6. You should now see the Profile say Connected, indicating that the NordVPN server is successfully connected to your router!

Asus NordVPN Connected

7. The VPN connection is automatically set to Apply to all devices.

If you only want certain devices to connect to the VPN, then turn off the VPN connection and switch off Apply to all devices.

Now click the pencil next to the Device section and select the devices (computer, phone, etc.) that you want to connect to VPN. Click OK and then click Apply all settings.

Apply VPN by Device
  1. Connect your devices to the Asus router network and visit the NordVPN website, at the top it should display Your Status: Protected.
  2. Visit NordVPN’s IP Check to verify your new IP address and virtual location.

🚫📱Do not run NordVPN apps on devices connected to your NordVPN router. Using the app at the same time as the router VPN may cause conflicts and connection issues.

Still having issues?

Feel free to submit a ticket and we will get back to you as soon as possible.

Should I be using my computer/phone/tablet VPN app while connected to the FlashRouter?

TeamFlashRouters · Jun 4, 2019 ·

  1. Do NOT connect to your VPN provider’s computer, phone, or tablet app while connected to the FlashRouter’s network. This may cause issues with access to your DD-WRT router settings as well as your internet connection.
  2. Connect any device in your home network to VPN by joining the FlashRouter’s network.

Router FAQs
admin · Jan 29, 2019 ·

Router FAQs
What is an IP Address?
An IP (Internet Protocol) Address is a numerical assignment for each device (cell phone, iPad, laptop computer, printer etc) inside a network that uses the Internet Protocol for communication. Internet Protocol is responsible for routing information packets across network boundaries. It is the main protocol establishing the Internet.

An IP address serves two predominant functions. First is to host or network interface identification. Second, it provides location addressing. To put it bluntly, an IP address tells wherever you are connecting, to whom you are visiting, and where you are located.

What is DNS?

DNS (Domain Name System) is a protocol within the TCP/IP protocol that uses a set of standards for how computers exchange data on the Internet and on many private networks.

The basic job of DNS is to convert a user-friendly domain name into an IP address that computers use to identify one another. Think of DNS like your cellphone contact list; you tap the name and the phone contacts to a phone number.

It is easier to remember flashrouters.com, rather than its IP address. Imagine if you had to remember all of the IP addresses of your favorite websites!

What is DNSMasq?

DNSMasq is a local DNS server that speeds up host-name searches from your computer/Internet connection after pressing enter.

Basically, DNSMasq gives the router some advanced enterprise functionality – caching DNS records locally so you have a faster browsing experience. Your computer only has to go to the router instead of repeatedly scouring the web for a commonly visited site.

What is Throughput and How Do I Improve it?

Throughput is the average rate of successful delivery of messages through a network. Simply put, throughput measures the speed of message delivery inside a network. If you think about it in relationship to networks and Internet connections, throughput defines the user experience. The key to a pleasing user experience is uninterrupted service and smooth data transfer.

In order to improve throughput,  you should get a router with more memory. If you notice that your network is running slowly due to congestion, you could probably benefit by upgrading your router to one with more memory. FlashMemory and RAM on a router add more room to prevent network congestion and improve throughput.

Most of FlashRouters‘ high-end units come with at least 8 MB of Flash memory and 64 MB of RAM which should be more than capable for providing for the average home users’ or small business will need in the future.

What is PPPoE?

PPPoE stands for Point-to-Point Protocol over Ethernet, a network protocol for encapsulating Point-to-Point Protocol (PPP) frames inside Ethernet frames. It is used mainly with DSL services where individual users connect to a DSL modem over Ethernet.

With PPPoE, users virtually “dial” from one machine to another over an Ethernet network, establish a point-to-point connection and then data packets are securely transported through the connection.

PPPoE offers an Internet service provider (ISP) an easier way to track exactly how much bandwidth you are using in case they want to charge for it in the future.

What is the Difference Between VPN Encryption and Wireless Network Security?

VPN Encryption: If you are connected to the VPN on your home network, then any data that flows over the Internet is entirely encrypted whether you are connected to the Internet either wired or wirelessly. This means that if your Local ISP was trying to see what you are browsing or downloading, they would not be able to see your data.

Wireless Network Security: If you leave your wireless network open or insecure, it does not matter whether Internet traffic is encrypted, because someone can directly see what you are doing on your network, or even worse, can go in and put a wireless password on your network, locking you out. They may also be able to access folders and files on your computer without your control.

Best thing to do is protect your wireless network with a WPA secured password along with your VPN connection.

Are FlashRouters Affected By the Shellshock Bug?

No.

According to our in-house testing and multiple DD-WRT community reports, we have found that the Shellshock vulnerability will not work on with DD-WRT or TomatoUSB installed router. The vulnerability is based on a shell called BASH (Bourne Again Shell) but DD-WRT & Tomato firmware use BusyBox which is confirmed to not have this issue.

Please be advised that if you are using Optware on your DD-WRT router there is a chance that implementation is BASH based. Only used trusted optware on your router.

Teamviewer FAQ and Setup

TeamFlashRouters · May 30, 2019 ·

We do NOT offer phone support here at FlashRouters. You will not receive a phone call to begin your session. Please read the information below for how to get connected during your session time.

What is a Teamviewer session?

A Teamviewer session is the most hands on method of receiving support from FlashRouters.

A support agent will connect directly to your computer and proceed to configure or troubleshoot your FlashRouter with you present.

We use Teamviewer sessions to troubleshoot any issue an eligible customer may have with a FlashRouter that was purchased from us or to configure a compatible router that your purchased independently along with a FlashRouters Support Plan.

In the session a chat window will appear so we can communicate directly with you in real time.

If you follow the information below prior to your session and all goes smoothly a Teamviewer session typically takes anywhere from 15 to 45 minutes.

Do I qualify for a Teamviewer session?

When purchasing a FlashRouter you are able to select a Quarterly or Yearly Bronze, Silver or Gold subscription plan.

Silver Yearly plan comes with one Teamviewer remote support session a year.

Gold Quarterly and Yearly plans come with one session per quarter.

If you support plan has expired or you are signed up for Bronze and you’d like to receive Teamviewer remote support assistance please email support@flashrouters.com

How do I schedule a Teamviewer session?

We are available for scheduled Teamviewer sessions from 10AM – 6:00PM ET Monday through Saturday.

To schedule a session with us open a support ticket or contact us via our live chat. We do not perform sessions that are not scheduled.

If we are available off hours we do our best to accommodate off hours session times with at least 24 hours notification.

Recommended computer and network setup

What computer should I use for Teamviewer?

Teamviewer sessions can not be performed on phones or tablets at this time. We require a Windows or Mac computer to successfully connect and configure your FlashRouter.

Below are the different scenarios from most ideal to least ideal.

I have a Dual Router Setup and a computer with WiFi and Ethernet

If you have an available wireless network NOT coming from the FlashRouter and have a computer that has wireless AND Ethernet capabilities you should be setup as follows:

  1. Connect via wireless to the other router.
  2. Once we have joined the session we will instruct you to wire from the FlashRouter to your computer.

I have a Dual Router Setup and a computer with WiFi only

If you have an available wireless network NOT coming from the FlashRouter and have a computer that has wireless only you should be setup as follows:

  1. Obtaining a USB to Ethernet adapter is ideal.
  2. If that is not possible connect to the FlashRouter’s network via wireless.

Session disconnects may occur with no backup Internet connection.

I have a Single Router Setup and a computer with WiFi and Ethernet

If the FlashRouter is your only wireless network and your computer has wireless and Ethernet capabilities you should be setup as follows:

  1. Connect an Ethernet cable from a numbered port on your FlashRouter directly to your computer.
  2. We may ask you during the session if your smartphone can broadcast an wireless hotspot we can connect to for backup Internet.

I have a Single Router Setup and a computer with WiFi only

If the FlashRouter if your only wireless network and your computer is wireless only you should be setup as follows:

  1. Obtaining a USB to Ethernet adapter is ideal.
  2. If that is not possible connect to the FlashRouter’s network via wireless.

Session disconnects may occur with no backup Internet connection.

How do I download Teamviewer?

Windows

  1. Download Teamviewer for Windows.
  2. Open the Teamviewer application.
  3. Email the User ID and Password (example displayed below) to your existing email thread or our live chat.
Access Teamviewer User ID and Password for FlashRouters Remote Support Session on Windows

Mac

  1. Download Teamviewer for Mac.
  2. Open the Teamviewer application.
  3. Email the User ID and Password (example displayed below) to your existing email thread or our live chat.
Access Teamviewer User ID and Password for FlashRouters Remote Support Session on Mac

When should I provide FlashRouters with my Teamviewer User ID and Password?

About 15 minutes before your scheduled session time update your support ticket e-mail the User ID and Password to your existing email thread, or send via our live chat.

ExpressVPN Setup for AsusWRT Firmware Routers

TeamFlashRouters · Apr 29, 2024 ·

You can connect to ExpressVPN on your AsusWRT router using OpenVPN.

Quick Options

  • OpenVPN: Download your preferred server .ovpn configuration file from the ExpressVPN website.

:point_right: If you are not already a ExpressVPN user Sign Up Now.

EXPRESSVPN SETUP GUIDE FOR ASUSWRT

1. Log in to your account on the ExpressVPN website.

2. In the “Set up your devices” section, click More and select Manual Configuration from the menu options.

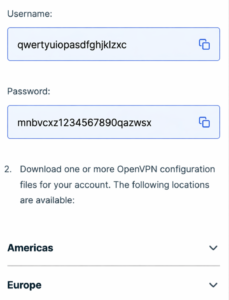
3. Copy the Username and Password that are displayed on the right

ExpressVPN Manual Service Credentials

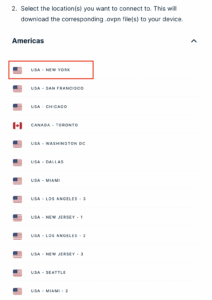
4. Download a server file from any of the available regions shown in the ExpressVPN Manual Configuration section (Americas, Europe, Asia Pacific, etc)

ExpressVPN Download .ovpn file

5. Log in to the Asus settings page by connecting to the Asus router’s WiFi (or wired LAN) on your computer. Then, enter 192.168.50.1 or asusrouter.com in the browser.

View our guide for more instructions on how to access AsusWRT firmware settings.

6. Navigate to the VPN tab and then click on the VPN Fusion tab, then click Add Profile

Click the VPN Button
VPN Fusion Add Profile

7.  Fill in your NordVPN information then click Apply and Enable.

  • Connection Name: Choose a name for your ExpressVPN OpenVPN connection.
  • VPN Type: Select OpenVPN
  • Import .ovpn File: Upload the OpenVPN file that you downloaded.
  • Username and Password: Copy and paste your ExpressVPN manual service credentials from step 3.

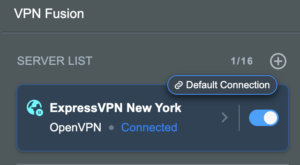
8. You should now see the Profile say Connected, indicating that the NordVPN server is successfully connected to your router.

Asus ExpressVPN Connected

9. The VPN connection is automatically set to Apply to all devices.

If you only want certain devices to connect to the VPN, then turn off the VPN connection and switch off Apply to all devices.

Now click the pencil next to the Device section and select the devices (computer, phone, etc.) that you want to connect to VPN. Click OK and then click Apply all settings.

Apply VPN by Device
  1. Connect your devices to the Asus router network and visit the ExpressVPN website, at the top it should display Your Status: Protected.
  2. Visit ExpressVPN’s IP Check to verify your new IP address and virtual location.

🚫📱Do not run ExpressVPN apps on devices connected to your ExpressVPNrouter. Using the app at the same time as the router VPN may cause conflicts and connection issues.

TROUBLESHOOTING

Still having issues? Visit the VPN Troubleshooting section.

Troubleshoot Here

Privacy Hero Streaming Relocation

TeamFlashRouters · Apr 3, 2023 ·

Your Privacy Hero router uses Cloud Based router management which means you can access the router settings from anywhere on any device that has an internet connection. You can follow these steps while connected to your phone, other Wi-Fi network, or the Privacy Hero network.

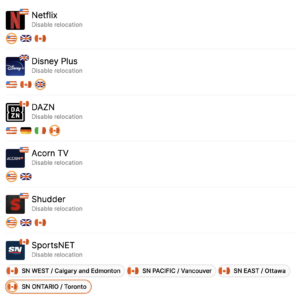
Use these steps change your location for popular streaming services allowing you to access to regionally restricted content. Privacy Hero uses DNS routing to change your location which is a great way around VPN streaming blocks.

1. From any device that has a browser such as a computer, smartphone, or tablet visit app.privacyhero.com

App.PrivacyHero.com

2. Enter your Privacy Hero account email and password. Click Login.

Privacy Hero Access Settings

3. Click the Streaming symbol.

Privacy Hero Streaming

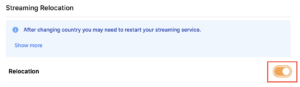
4. Set the Streaming Relocation toggle to On.

Privacy Hero enable Streaming Relocation

5. Click the flag of the country you would like the listed streaming service to use.

Privacy Hero select Region

This streaming relocation feature will not change your IP address in the way that a VPN does. This is why it is not able to be blocked in the same way that a VPN connection can be.

The listed services on the streaming relocation page will not be connected to VPN even if the Privacy Hero has an active VPN connection. These services are set to bypass the router’s VPN tunnel to avoid streaming blocks.

Toggling the streaming relocation feature On will also relocate many other streaming services automatically. They will be automatically optimized for the best connection with no manual selection needed for:
ABC
Adult Swim
All 4
Apple TV Channels
BBC
Britbox
CBC Gem
CBS Sports
Crackle
DirecTV Stream
DSTV Now
Filmrise
Freeform
Freevee
Frndly TV
F1 TV
FX Now
ITV
MGM+
Molotov.TV
My 5
NBC
NBC Sports
Now E
Now TV
Pandora
Paramount+
PBS
Peacock
Philo
Pluto TV
Showmax
Sling
SonyLIV
S Sports Plus
Starz
Stirr
TBS
Tennis Channel
The CW
Tubi
TVPlayer
Vudu
Xumo
Zattoo

TROUBLESHOOTING

Still having issues? Visit the VPN Troubleshooting section.

Troubleshoot Here

Access FlashRouter DD-WRT firmware settings

TeamFlashRouters · Mar 22, 2019 ·

You must be connected to the FlashRouter network via ethernet or WiFi connection on your device in order to be able to access the FlashRouter’s firmware settings.

Why do I need to access my FlashRouter's settings?

It is important to understand how to access your router if you want to:
  • Change WiFi or admin passwords
  • Switch VPN server locations
  • Attempt custom setups
  • Troubleshoot your network

Connect your device to the FlashRouter network

We recommend using a computer, tablet, or phone to access your FlashRouter firmware settings. You can connect your device to the FlashRouter via Ethernet Cable or Wireless connection.

Please note, you will NOT be able access the firmware settings unless you connect your device to the FlashRouter Network.

via Ethernet

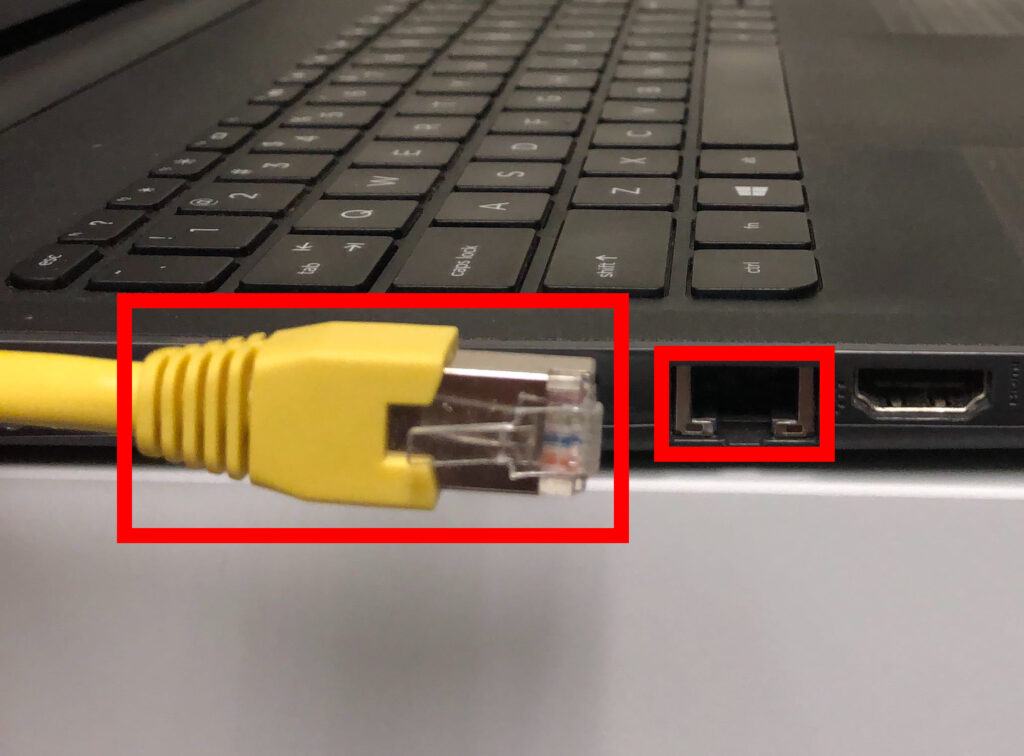
Connect an Ethernet cable to your device’s Ethernet port.

Access FlashRouters DD-WRT Admin Settings via Ethernet Connection 1

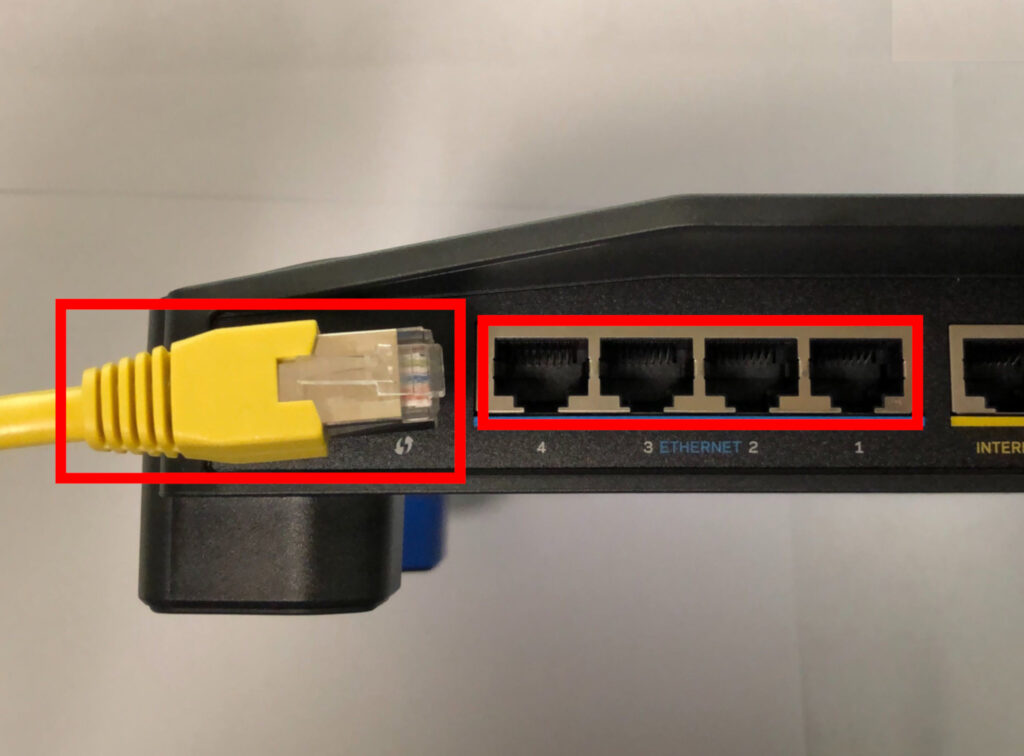
Connect the other end of that Ethernet cable to a FlashRouter LAN/numbered port.

Access FlashRouters DD-WRT Admin Settings via Ethernet Connection 2

Be sure NOT to connect your device to the WAN/internet port of the FlashRouter. Please use the LAN/numbered ports to connect your devices.

via Wireless

Navigate to the available wireless networks in your device network settings and join any of the available FlashRouter networks – FlashRouter24, FlashRouter50, or FlashRouter80 (if you have a tri-band router).

Access the FlashRouter settings

We recommend using a Google Chrome or Mozilla Firefox incognito/private browsing window to access the FlashRouter firmware settings. You can access the main DD-WRT firmware GUI or you can go directly into the FlashRouters Privacy App settings to manage your basic router settings and VPN connection settings right away.

Please note, after accessing the FlashRouter Settings at the Local IP Address, you will be prompted to enter an admin username and password. You can find this information in the subsections below.

DD-WRT - Firmware GUI

Local IP Address: 192.168.11.1

Username: flashrouter

Password: ddwrt

Keep in mind that if you enable HTTPS and disable HTTP access you will need to add https:// in front of the Local IP Address to access your FlashRouter’s firmware settings.

If your router has been reset for any reason then you can access the router at a local IP address of 192.168.1.1.

Please note you will be required to set the administration username and password as well as your WiFi and VPN network settings after a reset.

TROUBLESHOOTING

Still having issues? Visit our Troubleshooting section to diagnose common problems here.

Troubleshoot Here

Privacy Hero VPN Setup Guide for Privacy Hero

TeamFlashRouters · Apr 3, 2023 ·

Your Privacy Hero router uses Cloud Based router management which means you can access the router settings from anywhere on any device that has an internet connection. You can follow these steps while connected to your phone, other Wi-Fi network, or the Privacy Hero network.

Use these steps to connect to Privacy Hero’s own WireGuard VPN servers. You will automatically be connected to the ideal USA or Canada server based on your location.

1. From any device that has a browser such as a computer, smartphone, or tablet visit app.privacyhero.com

App.PrivacyHero.com

2. Enter your Privacy Hero account email and password. Click Login.

Privacy Hero Access Settings

If you have not created your Privacy Hero account yet please follow these instructions.

3. Click the VPN symbol.

Privacy Hero Setup VPN

4. Set the VPN toggle to On.

Privacy Hero Enable VPN

5. Connect to the Privacy Hero’s via wireless or ethernet connection on your device and visit What is my IP Address from a private/incognito browser to verify your new IP address and virtual location.

Privacy Hero’s cloud based router settings access makes it so you can change settings while not connected to the Privacy Hero network so if your IP Address has not changed be sure to double check that you are indeed connected to the Privacy Hero network on the device you are checking your IP from.

Keep in mind that the VPN connection will not change the location of the streaming services listed in the Streaming Relocation area of the Privacy Hero settings.

TROUBLESHOOTING

Still having issues? Visit the VPN Troubleshooting section.

Troubleshoot Here

Private Internet Access VPN Setup Guide for Privacy Hero

TeamFlashRouters · Apr 3, 2023 ·

Your Privacy Hero router uses Cloud Based router management which means you can access the router settings from anywhere on any device that has an internet connection. You can follow these steps while connected to your phone, other Wi-Fi network, or the Privacy Hero network

Private Internet Access (PIA) Wireguard Setup for Privacy Hero (recommended)

1. From any device that has a browser such as a computer, smartphone, or tablet visit app.privacyhero.com.

App.PrivacyHero.com

2. Enter your Privacy Hero account email and password. Click Login.

Privacy Hero Access Settings

3. Click the VPN symbol.

Privacy Hero Setup VPN

4. Click the Change button and select Private Internet Access from the dropdown.

Privacy Hero Change VPN Providers

5. Enter your correct PIA account login username and password and click Save.

Privacy Hero select Private Internet Access
Privacy Hero Private Internet Access enter login

6. Click Save if you want to automatically connect to the ideal server location as recommended by Private Internet Access.

Or, connect to a specific server location click Advanced Options and then type in the PIA server name you would like to use. (All server names are noted below).

Then click Save.

Privacy Hero Private Internet Access enter VPN location

North America

bahamas.privacy.network
ca-ontario.privacy.network
ca-toronto.privacy.network
ca-vancouver.privacy.network
ca-montreal.privacy.network
greenland.privacy.network
gt-guatemala-pf.privacy.network
mexico.privacy.network
panama.privacy.network
sanjose.privacy.network
us-alabama-pf.privacy.network
us-alaska-pf.privacy.network
us-arkansas-pf.privacy.network
us-atlanta.privacy.network
us-california.privacy.network
us-chicago.privacy.network
us-connecticut-pf.privacy.network
us-denver.privacy.network
us-florida.privacy.network
us-houston.privacy.network
us-idaho-pf.privacy.network
us-indiana-pf.privacy.network
us-iowa-pf.privacy.network
us-kansas-pf.privacy.network
us-kentucky-pf.privacy.network
us-lasvegas.privacy.network
us-louisiana-pf.privacy.network
us-maine-pf.privacy.network
us-massachusetts-pf.privacy.network
us-michigan-pf.privacy.network
us-minnesota-pf.privacy.network
us-mississippi-pf.privacy.network
us-missouri-pf.privacy.network
us-montana-pf.privacy.network
us-nebraska-pf.privacy.network
us-new-hampshire-pf.privacy.network
us-new-mexico-pf.privacy.network
us-newyorkcity.privacy.network
us-north-carolina-pf.privacy.network
us-north-dakota-pf.privacy.network
us-ohio-pf.privacy.network
us-oklahoma-pf.privacy.network
us-oregon-pf.privacy.network
us-pennsylvania-pf.privacy.network
us-rhode-island-pf.privacy.network
us-seattle.privacy.network
us-siliconvalley.privacy.network
us-south-carolina-pf.privacy.network
us-south-dakota-pf.privacy.network
us-texas.privacy.network
us-tennessee-pf.privacy.network
us-vermont-pf.privacy.network
us-virginia-pf.privacy.network
us-washingtondc.privacy.network
us-west-virginia-pf.privacy.network
us-wisconsin-pf.privacy.network
us-wyoming-pf.privacy.network
us3.privacy.network
us-baltimore.privacy.network
us-honolulu.privacy.network
us-newjersey.privacy.network
us-saltlakecity.privacy.network
us-streaming-2.privacy.network
us-streaming.privacy.network
us-wilmington.privacy.network

South America

ar.privacy.network
bo-bolivia-pf.privacy.network
bogota.privacy.network
br.privacy.network
ec-ecuador-pf.privacy.network
pe-peru-pf.privacy.network
santiago.privacy.network
uy-uruguay-pf.privacy.network
venezuela.privacy.network

Europe

al.privacy.network
ad.privacy.network
austria.privacy.network
brussels.privacy.network
ba.privacy.network
sofia.privacy.network
zagreb.privacy.network
czech.privacy.network
de-berlin.privacy.network
de-frankfurt.privacy.network
denmark.privacy.network
denmark-2.privacy.network
spain.privacy.network
es-valencia.privacy.network
ee.privacy.network
fi.privacy.network
fi-2.privacy.network
france.privacy.network
gr.privacy.network
hungary.privacy.network
italy.privacy.network
italy-2.privacy.network
is.privacy.network
ireland.privacy.network
man.privacy.network
lv.privacy.network
liechtenstein.privacy.network
lt.privacy.network
lu.privacy.network
malta.privacy.network
md.privacy.network
monaco.privacy.network
montenegro.privacy.network
nl-amsterdam.privacy.network
mk.privacy.network
no.privacy.network
poland.privacy.network
pt.privacy.network
ro.privacy.network
sweden.privacy.network
sweden-2.privacy.network
rs.privacy.network
sk.privacy.network
slovenia.privacy.network
swiss.privacy.network
tr.privacy.network
uk-london.privacy.network
uk-manchester.privacy.network
uk-southampton.privacy.network
uk-2.privacy.network
ua.privacy.network

Asia

ae.privacy.network
bangladesh.privacy.network
cambodia.privacy.network
china.privacy.network
cyprus.privacy.network
georgia.privacy.network
hk.privacy.network
in.privacy.network
israel.privacy.network
jakarta.privacy.network
japan.privacy.network
japan-2.privacy.network
kazakhstan.privacy.network
kr-south-korea-pf.privacy.network
kualalumpur.privacy.network
macau.privacy.network
mongolia.privacy.network
np-nepal-pf.privacy.network
philippines.privacy.network
qatar.privacy.network
saudiarabia.privacy.network
sg.privacy.network
srilanka.privacy.network
taiwan.privacy.network
vietnam.privacy.network
yerevan.privacy.network

Oceania

au-adelaide-pf.privacy.network
au-australia-so.privacy.network
au-brisbane-pf.privacy.network
aus-melbourne.privacy.network
aus-perth.privacy.network
au-sydney.privacy.network
nz.privacy.network

Africa

dz.privacy.network
egypt.privacy.network
morocco.privacy.network
nigeria.privacy.network
za.privacy.network

8. Your Privacy Hero settings should now show a Connected message, indicating you have successfully signed in to your PIA VPN server!

Private Internet Access (PIA) OpenVPN Setup for Privacy Hero

1. From any device that has a browser such as a computer, smartphone, or tablet visit app.privacyhero.com.

App.PrivacyHero.com

2. Enter your Privacy Hero account email and password. Click Login.

Privacy Hero Access Settings

3. Click the VPN symbol.

Privacy Hero Setup VPN

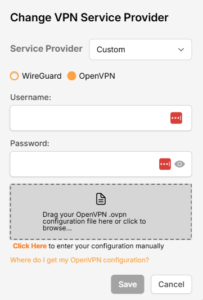
4. Click the Change button and select Custom from the dropdown and choose the OpenVPN option.

5. Enter your PIA Account login as the Username and Password.

6. Now log in to your PIA Account page.

7. Go to the Downloads section.

8. Scroll down to the bottom of the page, and go to OpenVPN Configuration Generator.

9. Choose OpenVPN 2.4 or newer and Linux.

10. From the Select Port section, choose UDP/1198 AES-128-CBC for a faster connection or choose UDP/1197 AES-256-CBC for stronger security as shown in the image below then Click Generate to download the server configuration file.

11. Drag and drop or click to Upload the server file into the Custom box on your Privacy Hero settings page then click Save.

12. Your Privacy Hero settings should now show a Connected message, indicating you have successfully signed in to your PIA VPN server!

Privacy Hero’s cloud based router settings access makes it so you can change settings while not connected to the Privacy Hero network. Visit the Private Internet Access IP Check to verify your VPN IP address. If it has not changed be sure to double check that you are indeed connected to the Privacy Hero network.

Keep in mind that the VPN connection will not change the location of the streaming services listed in the Streaming Relocation area of the Privacy Hero settings.

TROUBLESHOOTING

Still having issues? Visit the VPN Troubleshooting section.

Troubleshoot Here

ExpressVPN Setup Guide for Privacy Hero

TeamFlashRouters · Aug 14, 2025 ·

Your Privacy Hero router uses Cloud Based router management which means you can access the router settings from anywhere on any device that has an internet connection. You can follow these steps while connected to your phone, other Wi-Fi network, or the Privacy Hero network.

Use these steps to connect to ExpressVPN OpenVPN servers. First you will need to gather your unique OpenVPN login credentials and download the correct .ovpn file from the ExpressVPN website.

1. From any device that has a browser such as a computer, smartphone, or tablet visit app.privacyhero.com

App.PrivacyHero.com

2. Enter your Privacy Hero account email and password. Click Login.

Privacy Hero Access Settings

3. Click the VPN symbol.

Privacy Hero Setup VPN

4. Click the Change button and select Custom from the dropdown.

Privacy Hero Change VPN Providers

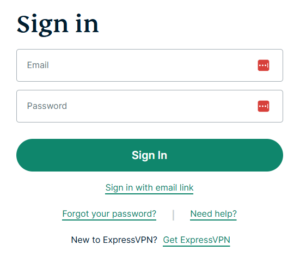
5. In a new tab login to your ExpressVPN account.

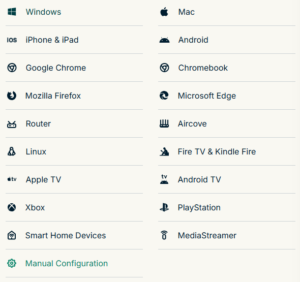
6. Select Manual Configuration from the menu options.

7. Copy and paste the username and password from the blue boxes into the Custom box on your Privacy Hero settings page.

8. Download a server file from any of the available regions shown in the ExpressVPN Manual Configuration section (Americas, Europe, Asia Pacific, etc)

9. Drag and drop or click to Upload the server file into the Custom box on your Privacy Hero settings page and then you will need to add one line to the top of the configuration.

10. At the top of your OpenVPN configuration add in the following line as shown in the picture above
proto udp
Now click the Save button.

11. Your Privacy Hero settings should now show a Connected message, indicating you have successfully signed in to your ExpressVPN server.

12. Connect to the Privacy Hero via WiFi or ethernet connection on your device and visit an IP checker from a private/incognito browser to verify your new IP address and virtual location.

Privacy Hero’s cloud based router settings access makes it so you can change settings while not connected to the Privacy Hero network so if your IP Address has not changed be sure to double check that you are indeed connected to the Privacy Hero network on the device you are checking your IP from.

Keep in mind that the VPN connection will not change the location of the streaming services listed in the Streaming Relocation area of the Privacy Hero settings if the Streaming Relocation feature is Enabled.

TROUBLESHOOTING

Still having issues? Visit the VPN Troubleshooting section.

Troubleshoot Here

Privacy Hero Bypass certain devices from VPN

TeamFlashRouters · Apr 3, 2023 ·

Your Privacy Hero router uses Cloud Based router management which means you can access the router settings from anywhere on any device that has an internet connection. You can follow these steps while connected to your phone, other Wi-Fi network, or the Privacy Hero network.

If you have certain devices in your network that you do NOT want connecting to VPN you can follow these steps to bypass these devices from the Privacy Hero’s VPN connection.

1. From any device that has a browser such as a computer, smartphone, or tablet visit app.privacyhero.com

App.PrivacyHero.com

2. Enter your Privacy Hero account email and password. Click Login.

Privacy Hero Access Settings

If you have not created your Privacy Hero account yet please follow these instructions.

3. Click the Devices symbol.

Privacy Hero Devices

4. Click the name of the Device you want to bypass from VPN.

Privacy Hero Select Device

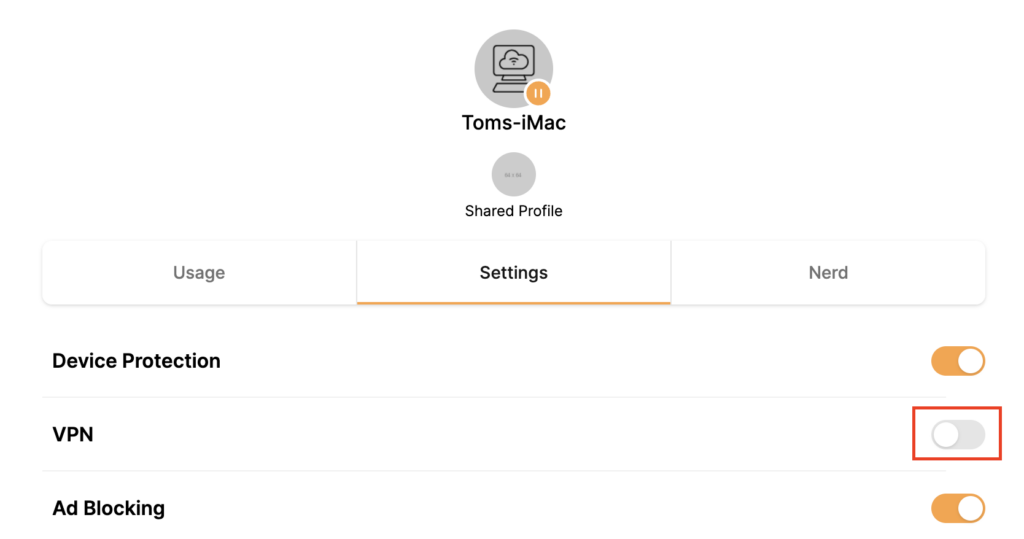
5. Set the VPN toggle to Off. You can also do the same for Adblocking and Device Protection as needed.

Privacy Hero VPN off by device

TROUBLESHOOTING

Still having issues? Visit the VPN Troubleshooting section.

Troubleshoot Here

Surfshark VPN Setup Guide for Privacy Hero

TeamFlashRouters · Sep 23, 2025 ·

Your Privacy Hero NordVPN Router uses cloud-based management, which means you can securely access and adjust your router settings from anywhere, on any device with an internet connection. Whether you’re connected through your phone, another Wi-Fi network, or directly to the Privacy Hero network, setup and management are always within reach.

Follow the steps below to connect your Privacy Hero to Surfshark WireGuard® or OpenVPN servers.

:point_right: Don’t have a Privacy Hero yet? Get your Privacy Hero Router for Surfshark here

Surfshark Wireguard Setup for Privacy Hero (recommended)

1. From any device that has a browser such as a computer, smartphone, or tablet visit app.privacyhero.com.

App.PrivacyHero.com

2. Enter your Privacy Hero account email and password. Click Login.

Privacy Hero Access Settings

3. Click the VPN symbol.

Privacy Hero Setup VPN

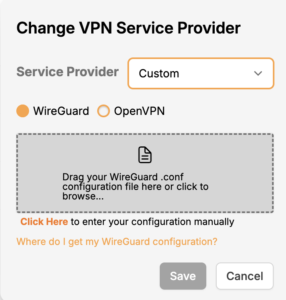
4. Click the Change button and select Custom from the dropdown and choose the Wireguard option.

Privacy Hero Change VPN Providers

5. In a new tab login to your Surfshark account.

6. Navigate to the VPN > Manual Setup tab.

7. Now choose Wireguard and go to the Router section.

8. Now go to Locations, and click on the server location you wish to use. Then, download the server file.

9. Drag and drop or click to Upload the server file into the Custom box on your Privacy Hero settings page. Then press Save.

10. Your Privacy Hero settings should now show a Connected message, indicating you have successfully signed in to your Surfshark VPN server!

Surfshark OpenVPN Setup for Privacy Hero

1. From any device that has a browser such as a computer, smartphone, or tablet visit app.privacyhero.com.

App.PrivacyHero.com

2. Enter your Privacy Hero account email and password. Click Login.

Privacy Hero Access Settings

3. Click the VPN symbol.

Privacy Hero Setup VPN

4. Click the Change button and select Custom from the dropdown and choose the OpenVPN option.

Privacy Hero Change VPN Providers

5. In a new tab login to your Surfshark account.

6. Navigate to the VPN > Manual Setup tab.

7. Now choose OpenVPN and go to the Router section.

8. Now go to Credentials and find your OpenVPN specific Username and Password.

9. Copy and paste the username and password from previous step into the Custom box on your Privacy Hero settings page.

10. Now go back to the Surfshark account page, and press Locations. 

11. Click on the country name that you want to choose, and Download any of the available server files from the list. (We recommend download the UDP version of the server file).

12. Drag and drop or click to Upload the server file into the Custom box on your Privacy Hero settings page. Then press Save.

13. Your Privacy Hero settings should now show a Connected message, indicating you have successfully signed in to your Surfshark VPN server!

Privacy Hero’s cloud based router settings access makes it so you can change settings while not connected to the Privacy Hero network. Visit the Surfshark IP Check to verify your VPN IP address. If it has not changed be sure to double check that you are indeed connected to the Privacy Hero network.

Keep in mind that the VPN connection will not change the location of the streaming services listed in the Streaming Relocation area of the Privacy Hero settings if the Streaming Relocation feature is Enabled.

TROUBLESHOOTING

Still having issues? Visit the VPN Troubleshooting section.

Troubleshoot Here

IPVanish VPN Setup Guide for Privacy Hero

TeamFlashRouters · Sep 23, 2025 ·

Your Privacy Hero router uses Cloud Based router management which means you can access the router settings from anywhere on any device that has an internet connection. You can follow these steps while connected to your phone, other Wi-Fi network, or the Privacy Hero network.

IPVanish Wireguard Setup for Privacy Hero (recommended)

1. From any device that has a browser such as a computer, smartphone, or tablet visit app.privacyhero.com.

App.PrivacyHero.com

2. Enter your Privacy Hero account email and password. Click Login.

Privacy Hero Access Settings

3. Click the VPN symbol.

Privacy Hero Setup VPN

4. Click the Change button and select Custom from the dropdown and choose the Wireguard option.

Privacy Hero Change VPN Providers

5. In a new tab login to your IPVanish account.

6. Click WireGuard on the left menu to access the WireGuard Configuration Generator.

Then select the server location and click Generate to download the WireGuard configuration file.

7. Drag and drop or click to Upload the server file into the Custom box on your Privacy Hero settings page. Then press Save.

8. Your Privacy Hero settings should now show a Connected message, indicating you have successfully signed in to your IPVanish VPN server!

IPVanish OpenVPN Setup for Privacy Hero

1. From any device that has a browser such as a computer, smartphone, or tablet visit app.privacyhero.com.

App.PrivacyHero.com

2. Enter your Privacy Hero account email and password. Click Login.

Privacy Hero Access Settings

3. Click the VPN symbol.

Privacy Hero Setup VPN

4. Click the Change button and select Custom from the dropdown and choose the OpenVPN option.

Privacy Hero Change VPN Providers

5. Download an .ovpn file from the IPVanish server list.

6. Drag and drop or click to Upload the server file into the Custom box on your Privacy Hero settings page.

7. Enter your IPVanish account login as the Username and Password. Then press Save.

8. Your Privacy Hero settings should now show a Connected message, indicating you have successfully signed in to your IPVanish VPN server!

Privacy Hero’s cloud based router settings access makes it so you can change settings while not connected to the Privacy Hero network. Visit the IPVanish IP Check to verify your VPN IP address. If it has not changed be sure to double check that you are indeed connected to the Privacy Hero network.

Keep in mind that the VPN connection will not change the location of the streaming services listed in the Streaming Relocation area of the Privacy Hero settings if the Streaming Relocation feature is Enabled.

TROUBLESHOOTING

Still having issues? Visit the VPN Troubleshooting section.

Troubleshoot Here

NordVPN Setup Guide for Privacy Hero

TeamFlashRouters · Apr 3, 2023 ·

Your Privacy Hero NordVPN Router uses cloud-based management, which means you can securely access and adjust your router settings from anywhere, on any device with an internet connection. Whether you’re connected through your phone, another Wi-Fi network, or directly to the Privacy Hero network, setup and management are always within reach.

Follow the steps below to connect your Privacy Hero to NordVPN NordLynx or OpenVPN servers. By default, you’ll automatically connect to the fastest, most reliable server available based on your location. If you prefer, you can also select a specific country server and input it directly into your Privacy Hero for more control.

:point_right: Don’t have a Privacy Hero yet? Get your Privacy Hero NordVPN Router here

NordVPN Nordlynx Setup for Privacy Hero

1. From any device that has a browser such as a computer, smartphone, or tablet visit app.privacyhero.com

App.PrivacyHero.com

2. Enter your Privacy Hero account email and password. Click Login.

Privacy Hero Access Settings

3. Click the VPN symbol.

Privacy Hero Setup VPN

4. Click the Change button and select NordVPN from the dropdown.

Privacy Hero Change VPN Providers

5. Click the Change button and select NordVPN from the dropdown and choose the NordLynx option. Next you will need to obtain your Token.

NordVPN Protocol Privacy Hero

6. In a new tab login to your NordVPN account and select NordVPN from your list of Services.

NordVPN account

7. At the bottom of the page click Get Access token and you will receive a code via email. Enter this code to proceed.

NordVPN Access Token

8. After you enter the email code select Generate new token and set it to Doesn’t expire. Copy this token.

NordVPN Generate new token
NordVPN Copy Token

9. Paste the token and then Click Save to connect to the server address recommended by NordVPN within your country.

NordVPN Protocols Privacy Hero

10. To connect to a specific location, click the Country dropdown menu and scroll or type to search from the available options. Choose your preferred country and you will automatically connect to the recommended server within that country at the time. Then click Save.

Nordlynx VPN Country Selection Privacy Hero

11. If you prefer to enter a specific server address number click Advanced Options and then type in the NordVPN server you would like to use as shown below e.g. uk1784.nordvpn.com. Then click Save.

Nordlynx Advanced Privacy Hero

Use the NordVPN’s server recommendation tool to select a specific country and receive a recommendation for the fastest server based on your actual location. You can then enter that server in the Privacy Hero settings manually.

12. Your Privacy Hero settings should now show a Connected message, indicating you have successfully signed in to your NordVPN NordLynx VPN server!

Privacy Hero Nordlynx Connected

NordVPN OpenVPN Setup for Privacy Hero

1. From any device that has a browser such as a computer, smartphone, or tablet visit app.privacyhero.com

App.PrivacyHero.com

2. Enter your Privacy Hero account email and password. Click Login.

Privacy Hero Access Settings

3. Click the VPN symbol.

Privacy Hero Setup VPN

4. Click the Change button and select NordVPN from the dropdown.

Privacy Hero Change VPN Providers

5. Choose the OpenVPN option to connect to OpenVPN servers or to setup a NordVPN Dedicated IP address. Next you will need to obtain your Manual Service credentials.

NordVPN Protocol Privacy Hero

6. In a new tab login to your NordVPN account and select NordVPN from your list of Services.

NordVPN login
NordVPN account

7. At the bottom of the page in the Manual Setup section click Setup NordVPN manually then under the Configuration section go to Service credentials. Click Verify email to receive a code via email and enter the code to view and copy your credentials.

NordVPN Manual OpenVPN
NordVPN Service Credentials

8. Enter these credentials into the OpenVPN Username and Password sections in your Privacy Hero and Click Save if you want to connect to the server address recommended by NordVPN within your country.

NordVPN OpenVPN Privacy Hero

9. To connect to a specific location, click the Country dropdown menu and scroll or type to search from the available options. Choose your preferred country and you will automatically connect to the recommended server within that country at the time. Then click Save.

Nordlynx VPN Country Selection Privacy Hero

10. To connect with a NordVPN Dedicated IP Address or if you prefer to enter a specific server address number click Advanced Options and then type in the NordVPN server you would like to use as shown below e.g. uk1784.nordvpn.com. Then click Save.

Nordlynx Advanced Privacy Hero

Use the NordVPN’s server recommendation tool to select a specific country and receive a recommendation for the fastest server based on your actual location. You can then enter that server in the Privacy Hero settings manually.

11. Your Privacy Hero settings should now show a Connected message, indicating you have successfully signed in to your NordVPN Dedicated IP address or preferred OpenVPN server!

NordVPN OpenVPN Connected Privacy Hero

Privacy Hero’s cloud based router settings access makes it so you can change settings while not connected to the Privacy Hero network. Visit the NordVPN IP Check to verify your VPN IP address. If it has not changed be sure to double check that you are indeed connected to the Privacy Hero network.

Keep in mind that the VPN connection will not change the location of the streaming services listed in the Streaming Relocation area of the Privacy Hero settings if the Streaming Relocation feature is Enabled.

Still having issues?

Feel free to submit a ticket and we will get back to you as soon as possible.

Privacy Hero Change VPN Providers

TeamFlashRouters · Apr 3, 2023 ·

Your Privacy Hero router uses Cloud Based router management which means you can access the router settings from anywhere on any device that has an internet connection. You can follow these steps while connected to your phone, other Wi-Fi network, or the Privacy Hero network.

Each Privacy Hero router comes with a year free of Privacy Hero WireGuard VPN and can be setup for NordVPN and Surfshark users as well. Use these steps to change between the VPN providers to find the best connection for your needs.

1. From any device that has a browser such as a computer, smartphone, or tablet visit app.privacyhero.com

App.PrivacyHero.com

2. Enter your Privacy Hero account email and password. Click Login.

Privacy Hero Access Settings

If you have not created your Privacy Hero account yet please follow these instructions.

3. Click the VPN symbol.

Privacy Hero Setup VPN

4. Click the Change button and select the VPN provider that you want to use.

Privacy Hero Change VPN Providers

Follow our guides for connecting to NordVPN or Surfshark. If you are switching to Privacy Hero VPN just select it from dropdown and toggle the VPN switch to On.

TROUBLESHOOTING

Still having issues? Visit the VPN Troubleshooting section.

Troubleshoot Here

ProtonVPN Setup Guide for Privacy Hero

TeamFlashRouters · Sep 17, 2025 ·

Your Privacy Hero router uses Cloud Based router management which means you can access the router settings from anywhere on any device that has an internet connection. You can follow these steps while connected to your phone, other Wi-Fi network, or the Privacy Hero network.

ProtonVPN Wireguard Setup for Privacy Hero (recommended)

1. From any device that has a browser such as a computer, smartphone, or tablet visit app.privacyhero.com.

App.PrivacyHero.com

2. Enter your Privacy Hero account email and password. Click Login.

Privacy Hero Access Settings

3. Click the VPN symbol.

Privacy Hero Setup VPN

4. Click the Change button and select Custom from the dropdown and choose the Wireguard option.

Privacy Hero Change VPN Providers

5. In a new tab login to your ProtonVPN account.

6. Go to the Downloads section of your ProtonVPN account page.

7. Scroll down to find the WireGuard configuration section. Name your configuration and then select Router as the platform, and select Standard server configs.

8. Click on the country name that you want to choose, and Download any of the available server files from the list.

9. Drag and drop or click to Upload the server file into the Custom box on your Privacy Hero settings page. Then press Save.

10. Your Privacy Hero settings should now show a Connected message, indicating you have successfully signed in to your ProtonVPN server!

Wireguard connection

ProtonVPN OpenVPN Setup for Privacy Hero

1. From any device that has a browser such as a computer, smartphone, or tablet visit app.privacyhero.com.

App.PrivacyHero.com

2. Enter your Privacy Hero account email and password. Click Login.

Privacy Hero Access Settings

3. Click the VPN symbol.

Privacy Hero Setup VPN

4. Click the Change button and select Custom from the dropdown and choose the OpenVPN option.

Privacy Hero Change VPN Providers

5. In a new tab login to your ProtonVPN account.

6. Navigate to the Account tab and find your OpenVPN specific Username and Password.

FlashRouters DD-WRT Privacy APP ProtonVPN OpenVPN Specific Username and Password

7. Copy and paste the username and password from previous step into the Custom box on your Privacy Hero settings page.

8. Go to the Downloads section of your ProtonVPN account page.

9. Scroll down to find the OpenVPN Configuration Files section. Then select “Router” as the platform, and select “Standard Server Configs.”

10. Click on the country name that you want to choose, and Download any of the available server files from the list.

11. Drag and drop or click to Upload the server file into the Custom box on your Privacy Hero settings page. Then press Save.

12. Your Privacy Hero settings should now show a Connected message, indicating you have successfully signed in to your ProtonVPN server!

Privacy Hero’s cloud based router settings access makes it so you can change settings while not connected to the Privacy Hero network. Visit the ProtonVPN IP Check to verify your VPN IP address. If it has not changed be sure to double check that you are indeed connected to the Privacy Hero network.

Keep in mind that the VPN connection will not change the location of the streaming services listed in the Streaming Relocation area of the Privacy Hero settings if the Streaming Relocation feature is Enabled.

TROUBLESHOOTING

Still having issues? Contact our Support Team.

Troubleshoot Here

Privacy Hero Activation and Setup

TeamFlashRouters · Feb 8, 2023 ·

Follow this article when you receive your new Privacy Hero router to create your Privacy Hero account, connect your Privacy Hero to the Internet, and customize your network so it is ready to use.

Your Privacy Hero router uses Cloud Based router management which means you can access the router settings from anywhere on any device that has an internet connection. You can follow these steps while connected to your phone or your other Wi-Fi network.

Create your Privacy Hero account

1. From any device that has a browser such as a computer, smartphone, or tablet visit app.privacyhero.com

App.PrivacyHero.com

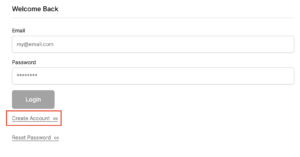
2. Select Create Account.

Privacy Hero create Account

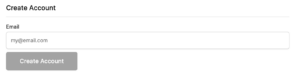
3. Enter the Email address you want to set for your Privacy Hero account. This will be your login to the Privacy Hero settings moving forward. Click Create Account.

Privacy Hero Enter account email

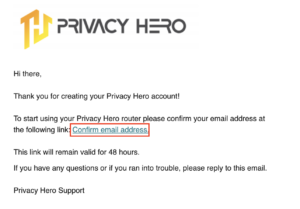
4. Go to your Email inbox and check for an email from Privacy Hero and click the Confirm email address link. This email may be in your Promotions or Spam inbox if it is not appearing in your main inbox.

Privacy Hero Confirm Email

5. Enter the password that you want to use for your Privacy Hero account. Be sure to note this in a secure location so you do not forget. Click Submit.

Privacy Hero create password

6. You have now created your Privacy Hero account. You will use this login to access the Privacy Hero router settings.

Activate your Privacy Hero Internet and setup Wi-Fi

1. You will then be taken to the Router Activation steps. Connect the ethernet cable that the Privacy Hero came with from an open Ethernet port on your ISP modem or other router to the WAN/Internet (blue) port of the Privacy Hero.

Then power the Privacy Hero device on by connecting the power supply. This is shown in the video on the page as well. Wait about a minute or so for the Privacy Hero router to fully boot up and then click I’m Connected.

Wire Up Privacy Hero

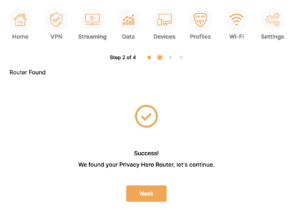
2. The next page may say Router Found or ask you to enter the Activation Code. If it asks for the Activation Code that will be the code printed on the bottom of the Privacy Hero. Enter this code and click Next.

Privacy Hero Router Found

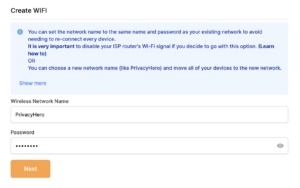
3. Set the Wi-Fi name and password for connecting your devices to the Privacy Hero network. Make sure it is not a duplicate name of an existing Wi-Fi network. Click Next.

Privacy Hero Set wifi name and password

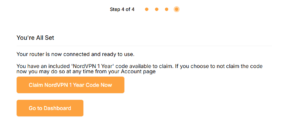
4. To activate your 1 Year NordVPN code:

Click on Claim NordVPN 1 Year Code Now

NordVPN Claim Code

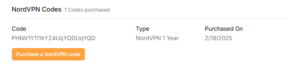
Go to the Account section of your router settings.

Copy the NordVPN code shown under Claim NordVPN 1 Year Code.

PH Nord Code

Go to the NordVPN activation page.

This code can be used with a new or existing NordVPN account.

NordVPN Activate Page

5. You are now all set to begin joining your devices to the new Privacy Hero network with the Wi-Fi name and password you entered and setting up some of the Privacy Hero features.

TROUBLESHOOTING

Still having issues? Visit the VPN Troubleshooting section.

Troubleshoot Here

Flint/Slate GL.iNet Repeater Setup

TeamFlashRouters · May 29, 2023 ·

If you want to connect your FlashRouter to the Internet via Wi-Fi instead of an ethernet cable you can setup a FlashRouter as a Wireless Repeater. In Wireless Repeater mode the FlashRouter connects to an available network via WiFi and then creates a completely separate network segment for you.

1. Connect your computer, phone, or tablet to the GL.iNet router via wireless (FlashRouter24 / FlashRouter50) or via ethernet cable to one of the LAN ports on the router.

The FlashRouter WiFi password is printed on the sheet that came with the router and is set to Wireless#[First 5 characters of your router MAC]. The router MAC can be found on the bottom of your router if you cannot locate the sheet. For e.g. if your MAC is 1459C07E70A8 then your WiFi password is Wireless#1459C

Be sure to capitalize the W.

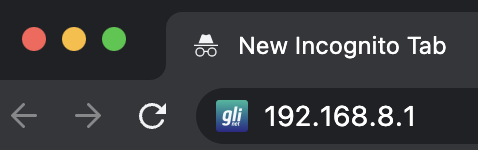
2. Once connected via wireless or ethernet on your device open your browser and go to 192.168.8.1

GL.iNet router access

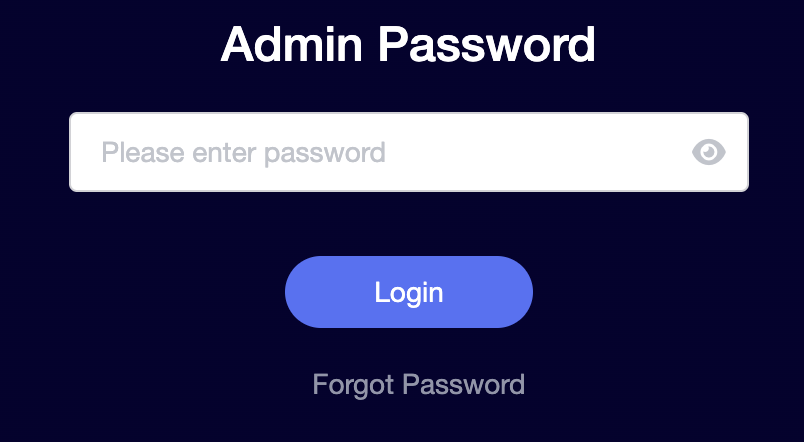
3. Enter openwrt as the admin password to access the GL.iNet firmware settings.

GL.iNet admin password enter

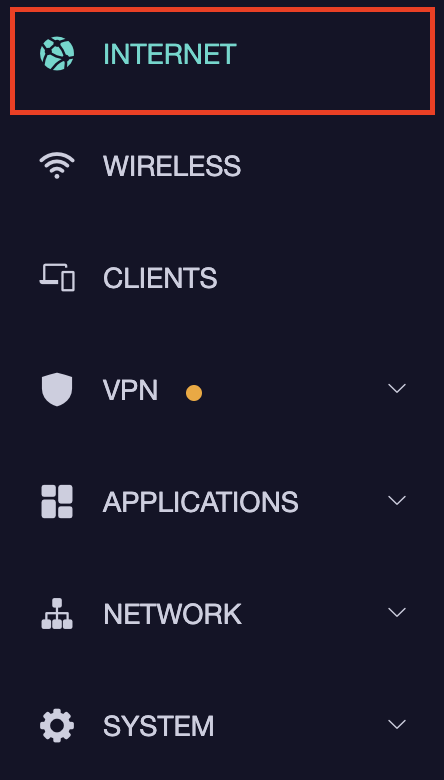
4. Select the Internet tab.

GL.iNet Internet tab

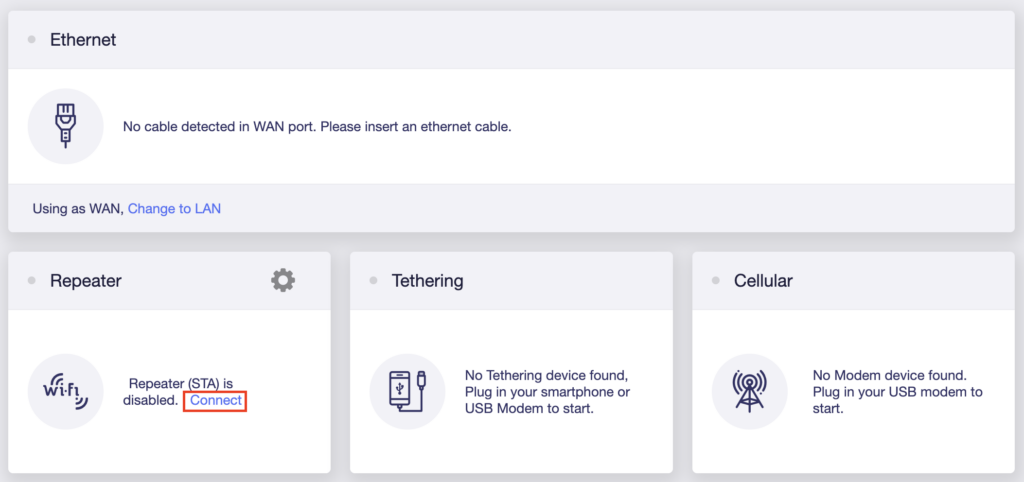
5. In the Repeater area select Connect.

GL.iNet Repeater Connect

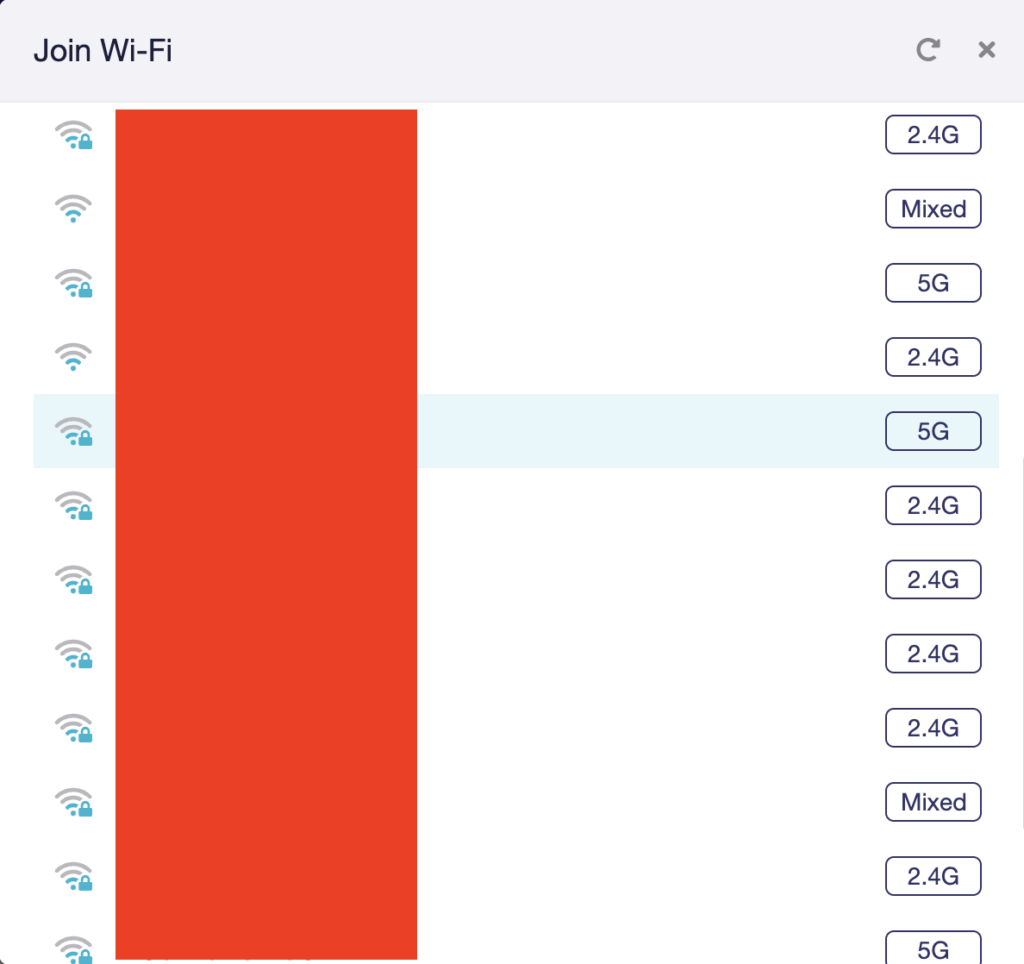
6. Select the available Wi-Fi network you want the FlashRouter to use for Internet from the list. You can use a 2.4GHz and/or 5GHz network to connect.

GL.iNet Repeater select Wi-Fi

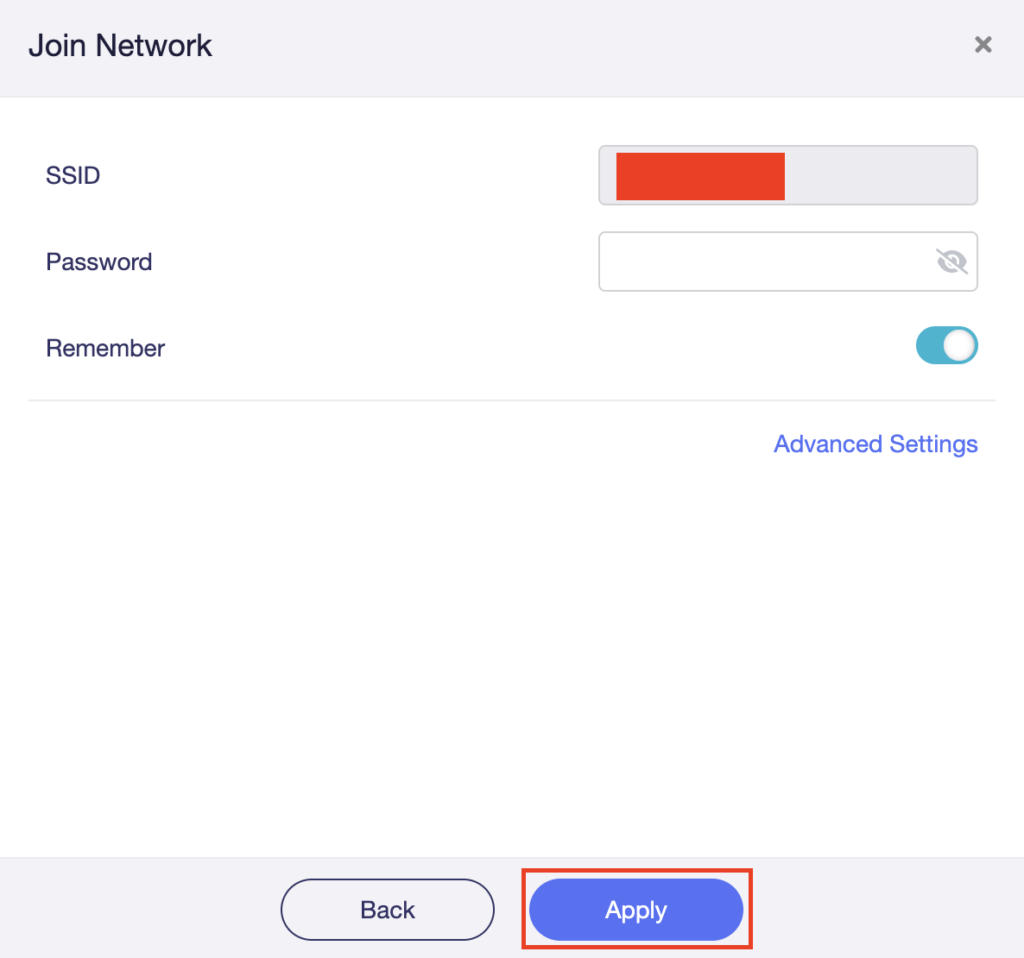
7. Enter the correct Wi-Fi password in the Password field for the network you selected. Then click Apply.

GL.iNet Repeater enter Wi-Fi password

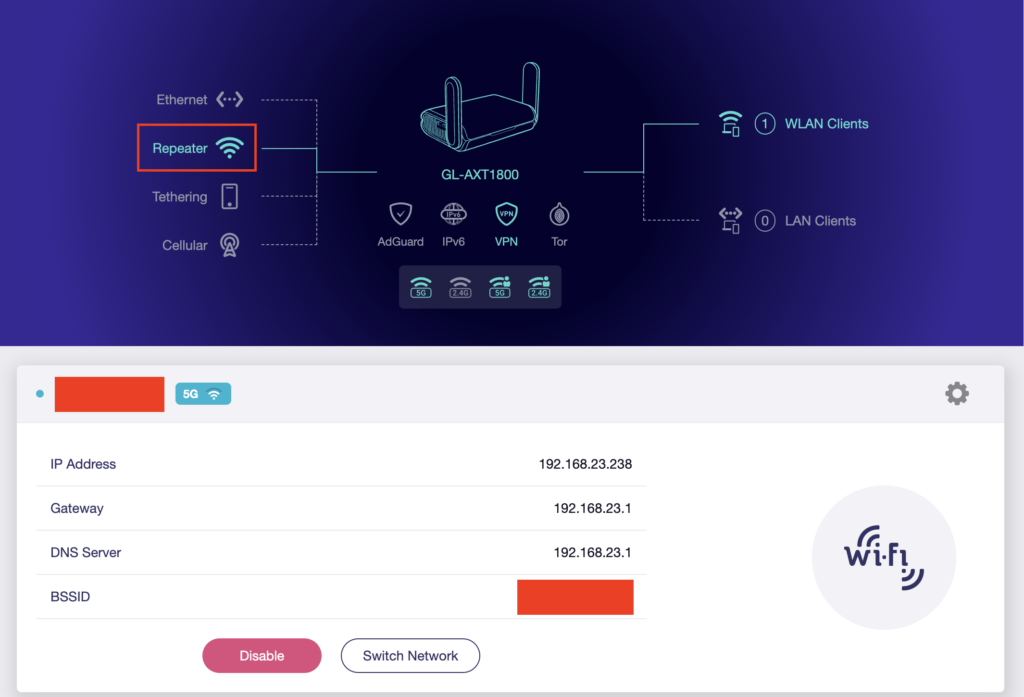
8. You are now setup with the GL.iNet FlashRouter receiving Internet via Wi-Fi. The Repeater area should now be filled in with the network information of the connection as shown below.

GL.iNet Repeater Setup complete

TROUBLESHOOTING

Still having issues? Visit the VPN Troubleshooting section.

Troubleshoot Here

Privacy Hero Access Router Settings

TeamFlashRouters · Feb 8, 2023 ·

Your Privacy Hero router uses Cloud Based router management which means you can access the router settings from anywhere on any device that has an internet connection. You can follow these steps while connected to your phone, other Wi-Fi network, or the Privacy Hero network.

1. From any device that has a browser such as a computer, smartphone, or tablet visit app.privacyhero.com

App.PrivacyHero.com

2. Enter your Privacy Hero account email and password. Click Login.

Privacy Hero Access Settings

If you have not created your Privacy Hero account yet please follow these instructions.

TROUBLESHOOTING

Still having issues? Visit the VPN Troubleshooting section.

Troubleshoot Here

Privacy Hero Change Wi-Fi Name and Password

TeamFlashRouters · Feb 8, 2023 ·

Your Privacy Hero router uses Cloud Based router management which means you can access the router settings from anywhere on any device that has an internet connection. You can follow these steps while connected to your phone, other Wi-Fi network, or the Privacy Hero network.

Use these steps to change your Privacy Hero WiFi name and password.

1. From any device that has a browser such as a computer, smartphone, or tablet visit app.privacyhero.com

App.PrivacyHero.com

2. Enter your Privacy Hero account email and password. Click Login.

Privacy Hero Access Settings

If you have not created your Privacy Hero account yet please follow these instructions.

3. Click the Wi-Fi symbol.

Privacy Hero Select Wifi

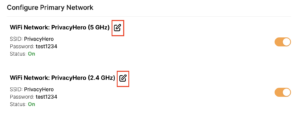
4. Click the edit box for the 5GHz network or the 2.4GHz network.

Privacy Hero Edit Wifi network

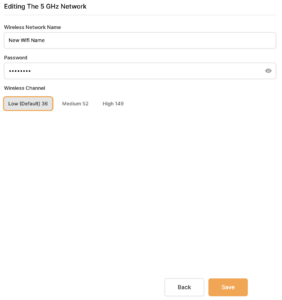
5. Enter the new Wi-Fi name and password you’d like to set. Click Save at the bottom of the page.

Privacy Hero enter new wifi name and password

TROUBLESHOOTING

Still having issues? Visit the VPN Troubleshooting section.

Troubleshoot Here

Privacy Hero Change Wireless Channel

TeamFlashRouters · Feb 8, 2023 ·

Your Privacy Hero router uses Cloud Based router management which means you can access the router settings from anywhere on any device that has an internet connection. You can follow these steps while connected to your phone, other Wi-Fi network, or the Privacy Hero network.

Use these steps to change your Privacy Hero wireless channel.

1. From any device that has a browser such as a computer, smartphone, or tablet visit app.privacyhero.com

App.PrivacyHero.com

2. Enter your Privacy Hero account email and password. Click Login.

Privacy Hero Access Settings

If you have not created your Privacy Hero account yet please follow these instructions.

3. Click the Wi-Fi symbol.

Privacy Hero Select Wifi

4. Click the edit box for the 5GHz network or the 2.4GHz network.

Privacy Hero Edit Wifi network

5. Select the new Wireless Channel that you would like to use. Click Save at the bottom of the page.

Privacy Hero enter new wifi name and password

TROUBLESHOOTING

Still having issues? Visit the VPN Troubleshooting section.

Troubleshoot Here

Privacy Hero Disable Wi-Fi

TeamFlashRouters · Feb 8, 2023 ·

Your Privacy Hero router uses Cloud Based router management which means you can access the router settings from anywhere on any device that has an internet connection. You can follow these steps while connected to your phone, other Wi-Fi network, or the Privacy Hero network.

Use these steps to disable your Privacy Hero Wi-Fi so only ethernet connections are active. This is not a required step just a preference.

1. From any device that has a browser such as a computer, smartphone, or tablet visit app.privacyhero.com

App.PrivacyHero.com

2. Enter your Privacy Hero account email and password. Click Login.

Privacy Hero Access Settings

If you have not created your Privacy Hero account yet please follow these instructions.

3. Click the Wi-Fi symbol.

Privacy Hero Select Wifi

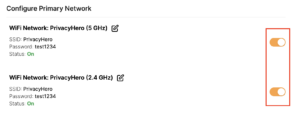
4. Set the toggle switches to the off position for the Wi-Fi bands you want to disable.

Privacy Hero Disable Wifi

TROUBLESHOOTING

Still having issues? Visit the VPN Troubleshooting section.

Troubleshoot Here

Privacy Hero Adblocking Malware and Phishing Prevention Setup

TeamFlashRouters · Apr 3, 2023 ·

Your Privacy Hero router uses Cloud Based router management which means you can access the router settings from anywhere on any device that has an internet connection. You can follow these steps while connected to your phone, other Wi-Fi network, or the Privacy Hero network.

Use these steps to enable Privacy Hero’s adblocking, malware, and phishing prevention settings to add extra security to your network.

1. From any device that has a browser such as a computer, smartphone, or tablet visit app.privacyhero.com

App.PrivacyHero.com

2. Enter your Privacy Hero account email and password. Click Login.

Privacy Hero Access Settings

If you have not created your Privacy Hero account yet please follow these instructions.

3. Click the VPN symbol.

Privacy Hero Setup VPN

4. Toggle the Adblocking and Malware & Phishing switches to On.

Privacy Hero Adblocking Malware and Phishing

TROUBLESHOOTING

Still having issues? Visit the VPN Troubleshooting section.

Troubleshoot Here

Privacy Hero VPN Kill Switch Setup

TeamFlashRouters · Apr 3, 2023 ·

Your Privacy Hero router uses Cloud Based router management which means you can access the router settings from anywhere on any device that has an internet connection. You can follow these steps while connected to your phone, other Wi-Fi network, or the Privacy Hero network.

Use these steps to enable Privacy Hero’s VPN Kill Switch to make sure that no traffic goes through your router unless it is connected to VPN.

1. From any device that has a browser such as a computer, smartphone, or tablet visit app.privacyhero.com

App.PrivacyHero.com

2. Enter your Privacy Hero account email and password. Click Login.

Privacy Hero Access Settings

If you have not created your Privacy Hero account yet please follow these instructions.

3. Click the VPN symbol.

Privacy Hero Setup VPN

4. Toggle the VPN Kill Switch setting to On.

Privacy Hero VPN Kill Switch

TROUBLESHOOTING

Still having issues? Visit the VPN Troubleshooting section.

Troubleshoot Here

Privacy Hero Creating User Profiles and Adding Devices to Profiles

TeamFlashRouters · Apr 3, 2023 ·

Your Privacy Hero router uses Cloud Based router management which means you can access the router settings from anywhere on any device that has an internet connection. You can follow these steps while connected to your phone, other Wi-Fi network, or the Privacy Hero network.

The Privacy Hero router allows for User Profile creation. Doing so allows you to group different user’s devices together to customize the following rules:

  • Internet access scheduler (Bedtime settings)
  • Internet Safe Search
  • Youtube Safe Search
  • Block Adult Content

This makes the Privacy Hero a great router option for families and internet addicts.

1. From any device that has a browser such as a computer, smartphone, or tablet visit app.privacyhero.com

App.PrivacyHero.com

2. Enter your Privacy Hero account email and password. Click Login.

Privacy Hero Access Settings

If you have not created your Privacy Hero account yet please follow these instructions.

3. Click the Profiles symbol.

Privacy Hero Profiles

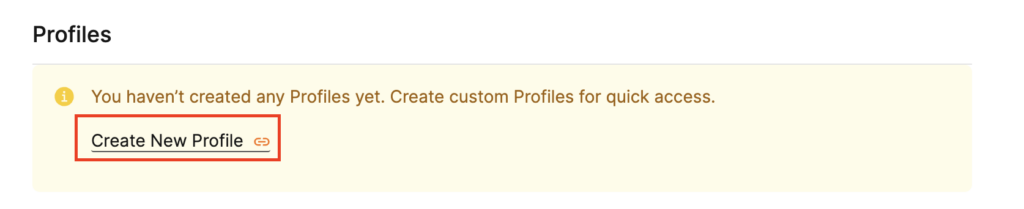
4. Click Create New Profile.

Privacy Hero Create New Profile

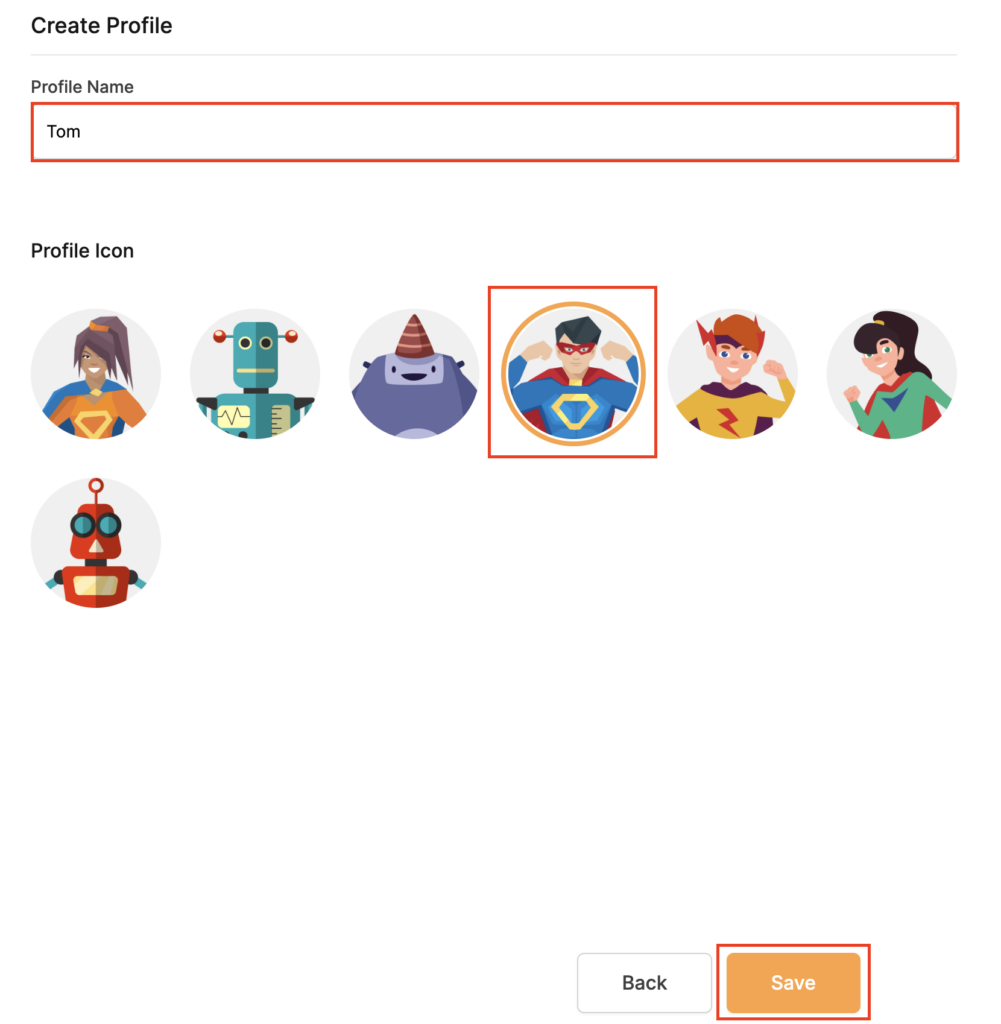
5. Set the Profile Name, select the Profile Icon, and click Save.

Privacy Hero Set Profile Name

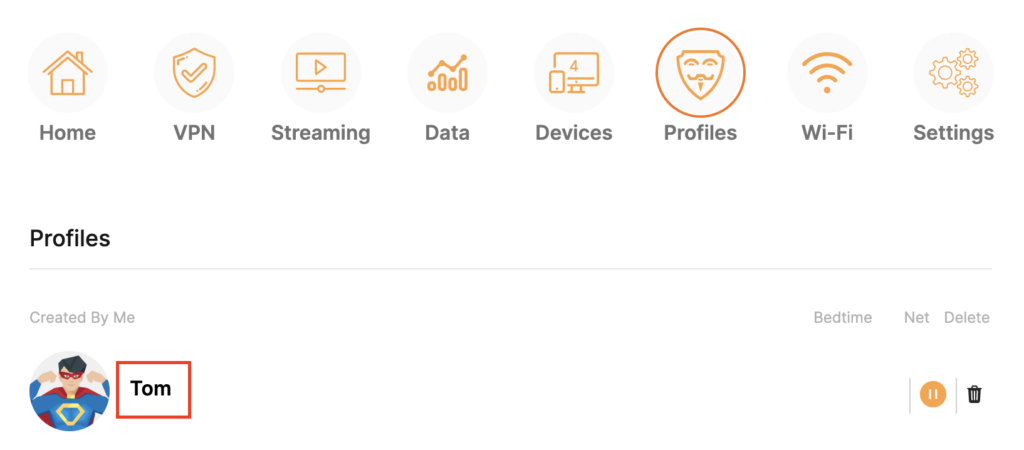
6. Click the name of the User Profile.

Privacy Hero Select Profile

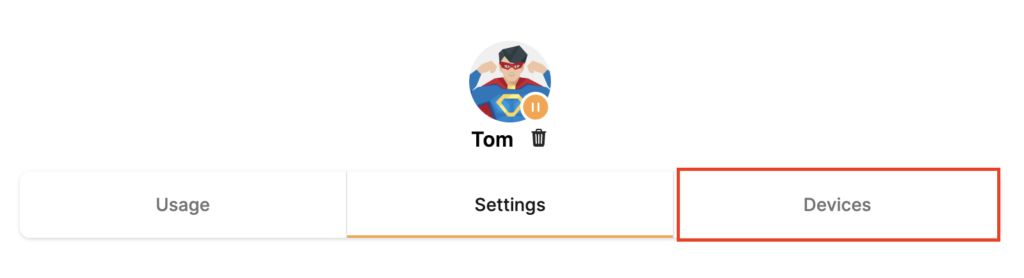
7. Select Devices.

Privacy Hero Select Devices

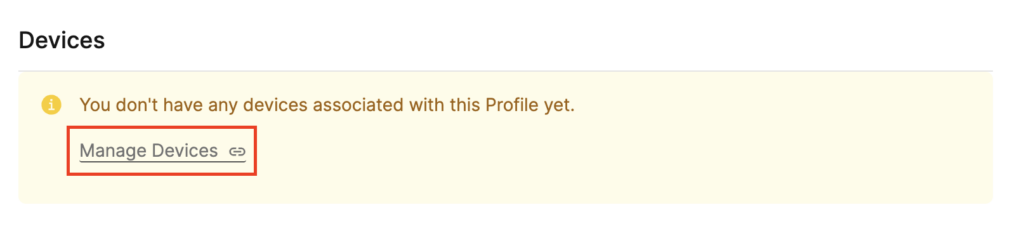
8. Select Manage Devices.

Privacy Hero Select Manage Devices

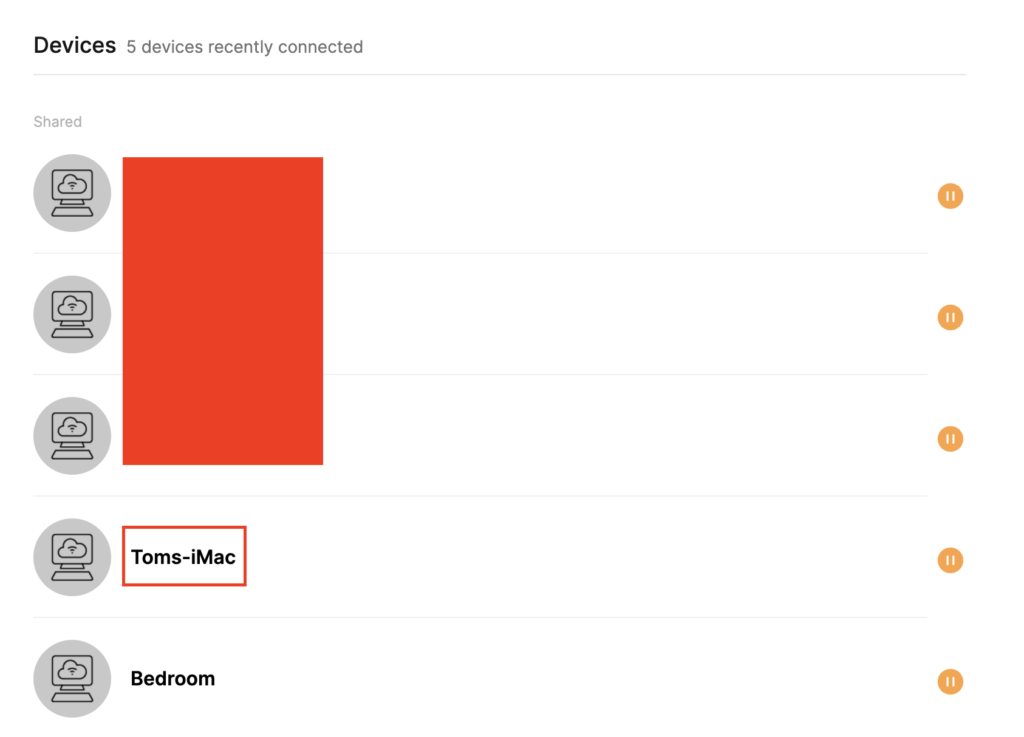
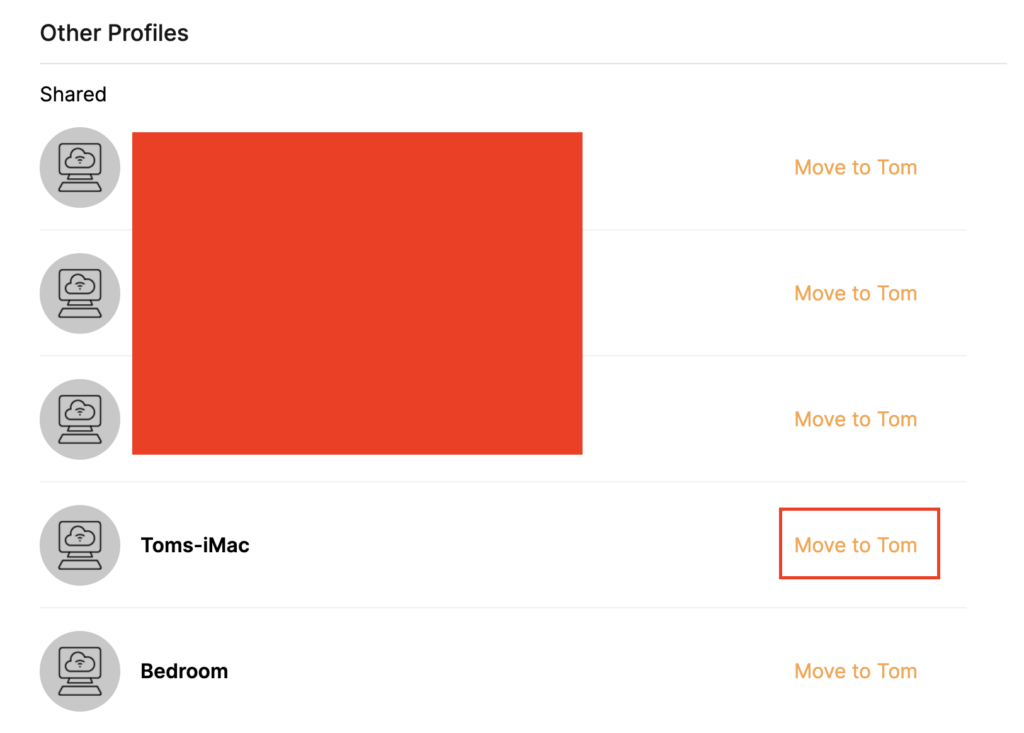
9. If you have not already connected your devices to the Privacy Hero network via wireless or ethernet you can do so now. Refresh the page after connecting a new device and it will appear in the list where you can select Move to “Profile Name” to move the device to the appropriate profile. By default new devices are in the Shared profile.

Privacy Hero Move to User Profile

If your devices were already connected to the Privacy Hero network and you are having issues identifying them I would recommend the following steps:

  1. Click the Devices icon.
  2. Select the device in question.
  3. Click Nerd and note down the IP Address of the device.
  4. Go to the network settings of your device where it will display the local IP Address and match that to the IP Address noted in Privacy Hero.

This is how you can identify a device that is not properly named.

10. Now that your devices are assigned you can set the Bedtime Settings (Internet Scheduler) and Safe Surf settings for your new Profile.

TROUBLESHOOTING

Still having issues? Visit the VPN Troubleshooting section.

Troubleshoot Here

Privacy Hero Bedtime Settings (Internet Scheduler)

TeamFlashRouters · Apr 3, 2023 ·

Your Privacy Hero router uses Cloud Based router management which means you can access the router settings from anywhere on any device that has an internet connection. You can follow these steps while connected to your phone, other Wi-Fi network, or the Privacy Hero network.

The Bedtime settings feature allows users to schedule when internet access will be turned off for specific user profiles. All devices assigned to this profile will have these rules applied.

1. From any device that has a browser such as a computer, smartphone, or tablet visit app.privacyhero.com

App.PrivacyHero.com

2. Enter your Privacy Hero account email and password. Click Login.

Privacy Hero Access Settings

If you have not created your Privacy Hero account yet please follow these instructions.

3. Click the Profiles symbol.

Privacy Hero Profiles

4. Click the name of the User Profile.

Privacy Hero Select Profile

5. Click Schoolnights or Weekends depending on which you need to set rules for.

Privacy Hero Bedtime School Nights Weekends

6. Select the time that you want the Internet to turn off and the days you want this rule to apply to. Click Save.

Privacy Hero Set Bedtime

7. Set the Bedtime toggle to On.

Privacy Hero Enable Bedtime

TROUBLESHOOTING

Still having issues? Visit the VPN Troubleshooting section.

Troubleshoot Here

Privacy Hero Safe Surf

TeamFlashRouters · Apr 3, 2023 ·

Your Privacy Hero router uses Cloud Based router management which means you can access the router settings from anywhere on any device that has an internet connection. You can follow these steps while connected to your phone, other Wi-Fi network, or the Privacy Hero network.

The Safe Surf settings feature allows users to block inappropriate search results, YouTube videos, and adult content. All devices assigned to this profile will have these rules applied.

1. From any device that has a browser such as a computer, smartphone, or tablet visit app.privacyhero.com

App.PrivacyHero.com

2. Enter your Privacy Hero account email and password. Click Login.

Privacy Hero Access Settings

If you have not created your Privacy Hero account yet please follow these instructions.

3. Click the Profiles symbol.

Privacy Hero Profiles

4. Click the name of the User Profile.

Privacy Hero Select Profile

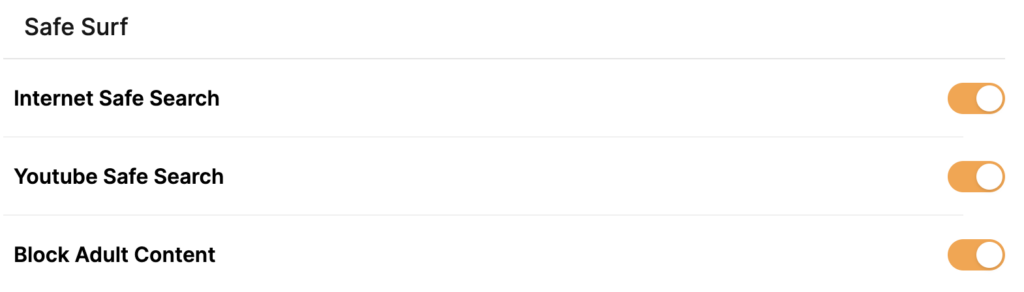
5. Toggle On the settings for Internet Safe Search, YouTube Safe Search, and Block Adult Content as needed.

Privacy Hero Safe Search

TROUBLESHOOTING

Still having issues? Visit the VPN Troubleshooting section.

Troubleshoot Here

How do I access my Roqos device settings?

TeamFlashRouters · Mar 8, 2022 ·

Your Roqos Core’s settings or UI (User Interface) is accessible via a secure cloud based connection rather than the typical local access of other routers. This means that you can manage your Roqos from anywhere in the world not just at home.

Visit the Roqos Login URL

From any device that has a browser such as a computer, smartphone, or tablet visit login.roqos.com

Roqos Login URL

Login with your Roqos account

Enter in the email and password that you set when your Roqos was initially setup. If you still need to create your Roqos account and activate your Roqos follow our Activate and Connect Roqos to Internet guide.

Roqos UI Login

Proceed with making the changes to the settings you desire

Now that you are logged in to your Roqos UI you adjust any settings as you see fit for your network. For guides on how to make specific changes to your Roqos view our Roqos Setup Guide area.

Roqos UI Logged in

Primary Sidebar

  • Troubleshooting
  • Router Access
  • Internet Connection Issues
  • WiFi Connectivity
  • General VPN Issues
  • TeamViewer Remote Support
  • DD-WRT Firmware
  • Facebook
  • Twitter
  • Instagram
  • Pinterest
  • YouTube

Footer