• Skip to primary navigation
  • Skip to main content
  • Skip to primary sidebar
  • Skip to footer

FlashRouters Support Portal

Prioritizing Privacy

  • SETUP GUIDES
    • Privacy Hero Router Setup Guide
    • ASUS-WRT Router Setup Guide
    • AsusWRT-Merlin Router Setup Guide
    • DD-WRT Router Setup Guide
    • ExpressVPN Router Setup Guide
    • GL.iNet Router Setup Guide
    • Roqos Core Router Setup Guide
  • TROUBLESHOOTING
    • Router Access
    • WiFi Connectivity
    • Internet Connection Issues
    • General VPN Issues
    • DD-WRT Firmware
    • TeamViewer Remote Support
  • FAQs
    • Router FAQs
    • VPN FAQs
    • Warranty and Returns FAQs
    • Sales FAQs
    • Shipping FAQs
    • Service Plan FAQs
  • Show Search
Hide Search

Search Results for: bottom up proc

Warranty and Returns FAQs

admin · Jan 29, 2019 ·

Warranty and Returns FAQs

At FlashRouters, we are confident that every router sold will function as advertised. We open, inspect, upgrade, configure, and then test all FlashRouters before they get shipped out. That is why we guarantee you will receive a working unit and offer our own 1-Year Hardware Warranty included with all New and Refurbished routers purchased from the FlashRouters website.

If you would like to extend the warranty coverage period to 2 years, the option is available during the FlashRouters checkout process.

Since we are so certain you will be happy with your upgraded and super secure network, all routers purchased from FlashRouters.com also come with a 30-day satisfaction guarantee.

Please read the warranty and return section in detail before placing an order or requesting an RMA. Our goal is to make the return process as smooth and transparent as possible for all customers. If the router you purchased does not work out for your needs we still want you to be satisfied with your purchasing experience.

Hardware Warranty and Return Policy

Requesting an RMA

Automated Return Merchant Authorization (RMA) requests are available from within your customer account panel. If you are eligible for a return then your RMA request will be approved. If your RMA request is not valid then it will be denied and you must e-mail FlashRouters Support for any additional information or actions. RMAs are valid for 7 days from the day they are issued. 

The following are the available options when submitting an RMA request. Continue reading for more information on all available RMA options and conditions. 

  1. Hardware Guarantee – available for 7 days after receiving your FlashRouter.
  2. Satisfaction Guarantee – available for 30 days after receiving your FlashRouter.
  3. Hardware Warranty – available for 1 year, or 2 years if upgraded when purchasing a FlashRouter.
  4. Hardware Repair – Anyone with a valid FlashRouters Support subscription is eligible for free Hardware Repair. 

Please note we can only provide prepaid labels for approved Hardware Warranty returns within the USA. Prepaid labels are not available for international customers. All return shipping for 30 Day Satisfaction refunds is paid for by the customer.

Hardware Guarantee

In the rare case you receive a faulty router, you can open a ticket to contact FlashRouter Support for an RMA or request an RMA in your customer account panel and we will work to rectify the situation immediately. If it is determined that the power supply you received was faulty, and not the router itself, our team will immediately ship you out a tested power supply at no additional cost.

Rest assured that we individually test and inspect every FlashRouter with great detail before shipment. BUT… if router gremlins (yes they do exist) snuck into your router during the shipping process and it no longer powers on, our team will supply you with a prepaid shipping label to return the unit back to our offices. As soon as we receive verified tracking on your return shipment we will ship out another thoroughly tested unit to you at no additional cost.

You must contact us within 7 days from when you received your FlashRouter to be eligible for a Hardware Guarantee prepaid shipping label from FlashRouters.

30-Day Satisfaction Guarantee

If you are not satisfied with the performance of your router after trying it out for up to 30 days, you can open a ticket to contact FlashRouter Support for an RMA or request an RMA in your customer account panel. Once the RMA is approved, you will then have the option to ship the unit back to FlashRouters.

Once we receive the return, our team inspects and refunds accordingly based on the original purchase price of your FlashRouter. Please note there is a $25 restocking fee and refunds do not include any initial shipping costs associated with your order. All restocking fees are returned as Store Credit. This means if you make another purchase at FlashRouters then your fee is refunded.

The item must also be fully functional and have no signs of cosmetic damage for you to receive the maximum refund. If you do not include the original boxing, or any router accessories you may also be charged an additional fee as indicated.

Ethernet Cable: $5

Power Source: $10 

Antennas: $5 per antenna

Router Stand: $10

Box: $10

Cosmetic Damage: Up to $25

What is covered under the 30-Day Satisfaction Guarantee?

If the VPN speeds or WiFi network speeds are not what you had hoped, if the setup is too complicated, or you just decided on another solution; these are all covered under the 30-Day Satisfaction Guarantee. 

We will not accept any returns of working routers after 30 days from the date you received your router. After 30 days, router returns/replacements will only be processed under the Hardware Warranty. 

Can I get the restocking fee waived?

If you place a new order for a different FlashRouter unit before returning your initial purchase, then we will waive the restocking fee. Otherwise the $25 restocking fee will be applied to your customer account as a store credit. You can then use this $25 store credit on any future FlashRouter purchase.

Rewards Points refunds

If you return your FlashRouter under the 30 day satisfaction guarantee then you will lose any reward points received for your initial purchase.

Hardware Warranty

A 1-year Hardware Warranty is included with the purchase of all New and Refurbished FlashRouters. If your router suffers hardware failure within 365 days from the date you received the unit then we will replace your router with another fully tested unit. You must pay for return shipping of the faulty unit back to our offices located in New Jersey, USA and our team will ship out your replacement at no additional cost.

You must contact the FlashRouter support team for an RMA number or request an RMA from your customer account panel before returning a router for warranty replacement. If you do not receive approval for a return then you will not be eligible for a replacement unit.

There are 2 options for receiving a Hardware Warranty replacement unit:

Option #1: Process another order for immediate shipping and as soon as we receive the returned device back in our offices we will issue you a refund for the initial purchase.

Option #2: Ship your faulty router back to our office, and as soon as we receive the unit our returns department will have a replacement unit shipped out to you at no extra cost.

How long do I have before my RMA expires?

RMA’s are good for 7 days from the date they are issued.

What if I upgraded to a 2 year Hardware Warranty at checkout?

All refund, replacement, RMA details, and options covered by the 1-year Warranty apply in the exact same manner for 2 year warranties over each respective warranty coverage period.

If for any reason the router you purchased is no longer in stock or discontinued then you have the option to replace your router with one of equal value or receive a refund. Hardware warranties are only eligible for refunds if we are unable to provide a replacement unit for you.

What should I do if my router is out of warranty coverage?

If your FlashRouter is out of the warranty coverage period, we are first and foremost apologetic for the passing of your router. Be sure to contact our sales team though and you can receive a special coupon as a return customer for a shiny new wireless networking centerpiece.

What is not covered with a FlashRouter Warranty?

Items that have been clearly damaged either by the customer or during the return process are not eligible for a full refund. This includes routers that have visible dents, scratches, or moving parts inside the router.

Can I upgrade to a 2 year warranty after my FlashRouter purchase?

2 year warranty upgrades are only available at the time of your FlashRouter purchase. Upgrades are not available once a FlashRouter order has been shipped. 

Can I get a Warranty on my router if I purchased a “Flash My Router” plan from FlashRouters?

Routers that have been “flashed” and configured by our support specialists for anyone who has purchased a Flash My Router Plan are not eligible for warranty coverage from FlashRouters. Only routers purchased through the FlashRouters.com website are eligible for warranty replacements or refunds.

Hardware Repair

FlashRouters is proud to offer a free repair and upgrade service for anyone with an active Silver or Gold Service Plan subscription. Any and all shipment costs associated with FlashRouter repairs or upgrade requests are the burden of the customer and will not be paid for by FlashRouters. However, the repair and upgrade service itself is FREE.

If you do choose to ship your router back to our office for repair, then you should include a prepaid shipping label in your package back to your home or office, so our team can send the router back to you whether we are able to repair the unit or not. Router accessories like power supplies, ethernet cable, or antennas do not need to be included when shipping back a unit for repair.

If our team is not able to resurrect your router from a power failure, faulty firmware upgrade, or any other reason then we can return the faulty unit back to you using the return shipping label included with your return package. Alternatively, we can destroy the unit and refund the return shipping costs if that is your preference.

Open Box Routers

What is an Open Box Router?

Open Box routers are fully functional units that have cosmetic flaws and are sold at heavy discounts. These units come with the same Support Plan options as New or RM units, which means you get the same support service with extremely discounted hardware.

Open Box routers are covered under the FlashRouter 30-Day Satisfaction Guarantee BUT come with no Hardware Warranty. We take every measure possible to ensure complete functionality and our team fully load tests these devices before shipment, but you should be very aware that you buy these discounted “open box” devices at your own risk without any Hardware Warranty.

What is the Open Box Router return policy?

Open Box Routers can only be returned within 30 days from the date you received your router. Returns will not be accepted on open box routers after 30-Day Satisfaction Guarantee window has expired. Please note that Open Box Router return shipping costs are not covered by FlashRouters and initial shipping costs are not included in any refunds. 

Accessories Warranty

All Accessories come with manufacturer warranties as listed on the respective product pages. 

FlashRouters will accept returns for refund or replacement of accessories only within 30 days from the date you received your order. After 30 days you must contact the manufacturer for any warranty replacements.

Accessories must be returned with all original packaging and with no cosmetic damage to receive a full refund. A missing box or damage to an item will result in a restocking fee per our discretion.

"Flash My Router" Refund Policy

The “Flash My Router” product offered by FlashRouters is a virtual service provided by the FlashRouters support team. This product includes a remote support session where our support team will flash your router and then complete your internet, WiFi, and VPN setup, and in certain cases support additional router features. 

Once your remote support session is completed there are absolutely no refunds on “Flash My Router” purchases. In the case we are unable to successfully flash your router we will offer a full refund for your “Flash My Router” purchase. “Flash My Router” purchases are fully refundable if you decide you would no longer like to use the service after your purchase is completed.

Service Plan Subscription Refund Policy

All FlashRouter router purchases include a recurring FlashRouters Service Plan subscription. There are 3 levels of support to choose from as either a quarterly or yearly recurring billing plan.

30-Day Satisfaction Guarantee

If you choose to return your FlashRouter under the 30-Day Satisfaction Guarantee, then you are eligible for a full refund on any Service Plan purchased with your FlashRouter.

Cancellation Policy

You may cancel your recurring billing at any time and you will not be charged again. Please note you will not be refunded for unused time from the initial billing/service period of your support plan subscription.

If you choose to cancel your 3 month FlashRouter support plan then you will retain support until the end of the 3 month period. If you choose to cancel your 1 year FlashRouter support plan then you will retain support until the end of the 1 year period. You will not lose time from your existing service plan if you cancel when a plan is active.

There is a 7-day grace period after Service Plan renewals have been charged, where you may request an immediate cancellation and full refund.

How do I change my FlashRouter Support subscription level?

How do I Upgrade my Service Plan?

You can upgrade a Service Plan at any time during a billing cycle. You must e-mail or live chat our support team and request an upgrade. Our team will then issue you store credit for any unused time on your existing Service Plan, which will then be immediately applied to your new upgraded Service Plan purchase. Your recurring billing will then continue at the new Service Plan level. Your 3 months or 1 year of upgrade service will start again from the date of the upgrade purchase. 

How do I switch from a Quarterly to a Yearly Service Plan?

If you would like to switch to a Yearly plan from a Quarterly plan of the same service level, then you must e-mail or live chat our support team and request an upgrade. Our team will then issue you store credit for any unused time on your existing Quarterly Service Plan, which will then be immediately applied to your new Yearly Service Plan purchase. Your recurring billing will then continue at the Yearly Service Plan level. Your 1 year of service will start again from the date of the upgrade purchase. 

How do I Downgrade my Service Plan?

If you are subscribed a Service Plan, but would like to switch to a lower level Service Plan then you can request that our support team cancel your recurring billing at any time. As soon your existing Service Plan is expired you can make a new purchase for the new Service Plan of your choice.

How do I switch from a Yearly to a Quarterly Service Plan?

If you would like to change the billing cycle from yearly to quarterly, you may cancel your existing subscription plan and then once your year of service has expired, you may purchase a Quarterly Service Plan instead.

If you just purchased a FlashRouter, there is a 7-day grace period from when you receive your unit if you would like an immediate change from Yearly to a Quarterly Service Plan.

How do I cancel my subscription?

You may request a Service Plan subscription cancellation by e-mailing support@flashrouters.com or from within your customer account panel at any time. You will be notified of a successful cancellation and your payment method will not be billed again.

Please note there are no refunds when cancelling your subscription. Cancellation means you will not be billed again for your Service Plan, there are no partial refunds for cancelled Service Plans.

Why is my connection speed slower?

TeamFlashRouters · Jun 4, 2019 ·

The encryption provided by a VPN connection almost always results in slower connection speed. In some cases you may have noticed that your computer or tablet was working faster when running a VPN client application or program, that is because a computer has a processor that is normally about 4-6x times as strong as a the processor on a router, and that is for managing a single VPN connection. A router has a smaller processor and is managing an entire network of devices. Encrypting an entire network does take considerable processing power.

Speed test results while connected to VPN are never going to be accurate. A speed test measures the rate at which a data packet travels from one server to another, however when you are connecting to VPN the data packets travel to an extra server where they are encrypted and then sent back into the route. We strongly recommend disabling the FlashRouter’s VPN connection when testing speeds to make sure there isn’t and issue with the router.

Connection Types

Ethernet: Wired ethernet connections will almost always be the most stable and reliable connection. To speed up your internet connection, use an ethernet cable to wire your devices to the FlashRouter.

Wireless (5.0GHz): The 5.0GHz WiFi frequency has less range than the standard 2.4GHz WiFi, but also transmits your internet connection at a significantly faster speed. If you were previously using the 2.4GHz network and experiencing slow speeds please connect to the 5GHz wireless network which should improve your speed.

Connect to the closest VPN server

Our supported VPN providers offer many servers in different countries and regions. If a server has slower connection speed we recommend connecting to the server closest to your actual location.

The process for changing servers is detailed in your provider’s setup instructions.

FlashRouters Privacy App

DD-WRT Manual VPN Configuration

Select a UDP server

UDP servers do not authenticate every data packets the way TCP servers do which results in faster connection speeds.

VPN provider server recommendation

Contact your VPN provider for a server recommendation that should provide the fastest speeds for you.

Sales FAQs

admin · Jan 29, 2019 ·

Sales FAQs

Can My Router Be Preconfigured With My VPN Information?

Plug and Play VPN Support

Yes you can!

To receive a plug and play with VPN device, you will need to provide our team with the credentials from your VPN provider subscription.

IMPORTANT NOTE: This is not required but recommended for users who wish to have the simplest, most seamless experience when the FlashRouter arrives. You can always change the password when the device arrives if you wish as well.


To have your router VPN preconfigured:

  1. Check the “Connect To VPN For Me” box under VPN – Preconfiguration on the Product Page during check out.
  2. Select your VPN provider. If you don’t see your VPN listed select “Other” and you will see an additional field to input who your provider is.
  3. You’ll receive an email after purchase with detailed instructions. If you have any questions our team is happy to help!
Please note:  If you do give a server location, we will automatically start the device with the closest/optimal server for the location we are shipping the device by default. A location has to be added to the initial configuration for plug and play encryption security to occur on the device.


Privacy Hero 2 Only:

While our team isn’t able to pre-configure the Privacy Hero 2 VPN Router before shipping it out since you’ll have to make a Privacy Hero user account and register your router, we can assist you with the VPN set up process once you receive the router and create your Privacy Hero user account via 1-on-1 remote session, email, or live chat on our site.

You can also use our step-by-step Privacy Hero VPN Router Setup Guide to complete the process.

Can I Use My Dedicated IP Address With A FlashRouter?

Dedicated IP Addresses from NordVPN, SurfShark, & TorGuard are supported on almost all of our FlashRouter options.

Check out our Dedicated IP Addresses Blog Post for more details!

Can I Use A FlashRouter With My Current Mesh System?

Yes!

You will be able to connect the FlashRouter of your choosing to your current mesh router via ethernet port as shown below:

ISP Modem/Router —- FlashRouter (VPN) —- Main Mesh Router (VPN from FlashRouter) 

This setup will allow you to keep your mesh network with added VPN protection, as well as add the FlashRouter wireless network for your devices.

You can disable the wifi on the FlashRouter also if you only wanted to use the mesh network for wifi.

Can You Flash My Router and Connect me to VPN?

At FlashRouters, we offer expert router flashing and VPN configuration services through our Flash My Router plans. Whether your router needs custom firmware flashing or just a VPN configuration, we ensure it’s set up for maximum security, privacy, and streaming performance with your chosen VPN provider.
The appointment will take place via remote software. During the appointment, our team will also answer any questions you may have about using the VPN on the router. Flashing is done out of the East Coast of the United States – we will do our best to accommodate your time zone difference if you are located in another part of the United States or another country.

👉 Explore our Flash My Router plans:
🔗 Flash My Router Plans


🔹 How It Works

✅ Flashing vs. Configuration: Some routers require custom firmware (flashing) to enable VPN, while others can be configured without flashing.
✅ Fully Optimized: Our team ensures your router is ready to securely connect to your VPN, block ISP tracking, and enhance your streaming experience.
✅ Remote Assistance Available: Get expert help setting up your VPN connection remotely if needed.


Flashing vs. Configuration: Router Compatibility

At FlashRouters, we handle VPN setup differently based on your router brand and model. Some routers require flashing custom firmware (like DD-WRT or AsusWRT-Merlin), while others can be configured without flashing.

🛠 Router Setup Types by Brand

🔹 Flashing Required (Custom Firmware Installation)

These routers require firmware flashing (DD-WRT or AsusWRT-Merlin) to enable VPN compatibility.

  • Asus – Flashed with AsusWRT-Merlin or updated to the latest AsusWRT build. Some models only require configuration.
  • Linksys – Flashed with DD-WRT firmware.
  • Netgear – Flashed with DD-WRT firmware.

🔹 Configuration Only (No Flashing Required)

These routers have built-in VPN support and only require proper setup.

  • TP-Link – Configured without flashing.
  • GL.iNet – Configured without flashing.
  • Cudy – Configured without flashing.

📌 Other brands are not supported at this time. If you have a different router, we recommend checking out our pre-flashed router options.


✅ Supported VPN Providers

We work with a wide range of VPN providers, including:

  • NordVPN
  • ExpressVPN
  • Surfshark
  • CyberGhost
  • IPVanish
  • Private Internet Access (PIA)
  • VyprVPN
  • ProtonVPN
  • PureVPN
  • Windscribe
  • IVPN
  • Mullvad
  • StrongVPN
  • AzireVPN
  • AstrillVPN
  • HotspotShield VPN

(If your provider isn’t listed, reach out – we may still be able to support it!)


🔗 Get Started Today!

👉 Explore our Flash My Router plans:
🔗 Flash My Router Plans

🔹 Need help selecting the right option? Contact our support team! We’re happy to assist.

How Can I Add The 1 Year NordVPN Service From My FlashRouters.com Order To My Current NordVPN Account?

You can easily combine the free 1 year of NordVPN included with your FlashRouter purchase once you receive the NordVPN Activation Code Email from FlashRouters.com. The email is typically received within 24 hours of order completion and will contain a link as well as an activation code.

This code can be entered at nordvpn.com/activate with the email address associated with your current NordVPN account to add the 1 year of free service to your existing service.


Privacy Hero 2 Only:

You can easily combine the free 1 year of NordVPN included with the Privacy Hero 2 VPN Router during the router activation process.

After activating the router, you’ll receive a NordVPN activation code within your privacy hero account dashboard. This code can be entered at nordvpn.com/activate with the email address associated with your current NordVPN account to add the 1 year of free service to your existing service.

What Are the Differences Between New, Recertified, And Open Box FlashRouters?

New

  • Direct from manufacturer, in new box.
  • Custom flashed on demand at time of the order.
  • 30 Day Satisfaction Guarantee / 1 Year Warranty.

Recertified (RM)

  • Direct from manufacturer/reseller, may be reboxed.
  • Custom flashed on demand at time of the order.
  • Specialists tested to guarantee same functionality as NEW routers.
  • 30 Day Satisfaction Guarantee / 1 Year Warranty.

Open Box

  • Limited quantity, discount items reboxed that may have cosmetic imperfections.
  • Same testing and functionality level and New and RM.
  • 30 Day Satisfaction Guarantee / No Warranty.

Will a FlashRouter Work With My Internet Service Provider?

US Customers (Single Router Solution):

Almost all Internet Service Providers(ISPs) require a modem in place to establish a connection to their service, however a modem by itself doesn’t provide the wifi connectivity needed in the home or office. A FlashRouter can connect directly to all known modems provided by major ISPs to create a wireless network so long as there is an Ethernet port on the modem to connect to the FlashRouter Internet port. 

US Customers (Dual Router Solution): 

Yes, FlashRouters are compatible with your ISP in what is called a Dual Router Set Up.

For this type of setup, you would use your current router or modem router to connect to your local ISP while using a FlashRouter to connect to your VPN. This is recommended as you will not overhaul your network with a new router, and you will be able to use your selected VPN service on the devices you wish to use it with.

This set up would result in the creation of two networks, which can be seen as the “Local Network” and the “FlashRouter Network”. All devices connected to the FlashRouter Network will go through the VPN service. 

For any device you would prefer to use without a VPN, you can connect to the local network. The chain of devices would be connected from LAN ton your modem or modem/router to WAN on the FlashRouter, with your current router connected to the FlashRouter via Ethernet cable. 


International Customers (Single Router Solution):

Almost all Internet Service Providers (ISPs) require a modem in place to establish a connection to their service, however a modem by itself doesn’t provide the wifi connectivity needed in the home or office. A FlashRouter can connect directly to all known modems provided by major ISPs to create a wireless network so long as there is an Ethernet port on the modem to connect to the FlashRouter Internet port. 

International Customers (Dual Router Solution):

ISPs should all be compatible. Some providers require VLAN tagging/VID settings when wiring directly from modem to FlashRouter. 

For this type of setup, you would use your current router or modem router to connect to your local ISP while using a FlashRouter to connect to your VPN. This is recommended as you will not overhaul your network with a new router, and you will be able to use your selected VPN service on the devices you wish to use it with.

This set up would result in the creation of two networks, which can be seen as the “Local Network” and the “FlashRouter Network”. All devices connected to the FlashRouter Network will go through the VPN service. 

For any device you would prefer to use without a VPN, you can connect to the local network. The chain of devices would be connected from LAN ton your modem or modem/router to WAN on the FlashRouter, with your current router connected to the FlashRouter via Ethernet cable. 

What Stock Firmware Features Will I Lose If I Flash My Router

Open Source firmware like DD-WRT or Assu Merlin has many features equivalent to what stock firmware has, in addition to adding new features to a router. However, some features are lost from the stock firmware when a router is flashed.

These are typically features that are put into the stock firmware by the manufacturers themselves. Things like the Linksys App and the NetGear Genie are examples of what would not be available or compatible on the router after flashing.
Most routers also have a WPS button. By default, the WPS button’s functionality is disabled when a router is flashed as it can be vulnerable and a security risk. It can be re-enabled by following this guide but we do not recommend it.

Does a FlashRouter or Service Plan Purchase Include a VPN Subscription?

A subscription to a VPN does not come with a FlashRouter or Service plan. If you are planning to use a VPN, you would need to sign up for one separately, directly from a provider.

Need assistance in finding a VPN Provider? Please visit our recent VPN Provider Best Seller List.

Plug and Play VPN Support

Unlike other VPN Router providers, FlashRouters is proud to offer free VPN service integration with any purchase.

To receive a plug and play with VPN device, you will need to provide our team with the credentials from your VPN provider subscription.

IMPORTANT NOTE: This is not required but recommended for users who wish to have the simplest, most seamless experience when the FlashRouter arrives. You can always change the password when the device arrives if you wish as well.

Shows what to look for when you want to preconfigure your router.

To have your router VPN pre-configured:

  1. Select Yes from the “Want Your Router Preconfigured?” on the Payment Page during checkout.
  2. Select your VPN provider. If you don’t see your VPN listed select “Other” and you will see an additional field to input who your provider is.
  3. Enter your your VPN username and password
  4. For ExpressVPN Firmware Routers there will be an additional box for your activation code.

Please note:  If you do not enter a server location request in “Order Comments”, we will automatically start the device with the closest/optimal server for the location we are shipping the device by default. A location has to be added to the initial configuration for plug and play encryption security to occur on the device.

Can I Use A FlashRouter To Work From Home?

Yes! A large number of our customers use their FlashRouters to “work from home” no matter where your travels take you. Check out our Working Remotely Blog Post for more details.

What is the Difference Between Business VPNs and VPN Services?

Location: VPN Services offer many server locations to encrypt your traffic through. They are located in several countries worldwide for creating a private VPN tunnel for your online activities. A business VPN connects to specific central servers for data or directly to your office, creating a direct tunnel for accessing sensitive work documents and information.

Logging: Most VPN services offer log-free connections for total anonymity and security when connected (it is important to check out their terms of service and privacy policy for full details). A business VPN is monitored and maintained by employers such as corporations, hospitals or universities.

Protection: VPN services secure your family’s personal data while using computers, SmartTVs and various Internet of Things devices. Business VPNs protect the data of the company while you are tunneling into work.

Are There VPN Service Providers That Offer VPN for Business?

There are in fact several trusted VPN providers that have services specially tailored for business use. NordVPN Teams and VyprVPN for Business offer a full suite of solutions like user management tools, dedicated IPs, personal product managers, global server access, business pricing, and more.

These solutions allow you to quickly deploy a safe and secure corporate network without building and maintaining your own servers. If you are a small business looking to quickly secure remote workers as they shift to work from home, and you do not have an in-house IT expert, then you should consider NordVPN Teams or VyprVPN for Business.

Even better, when choosing a business VPN provider like NordVPN or VyprVPN, employees can use routers with direct NordVPN and VyprVPN integration already included through the FR Privacy App. Meaning that a full network kill switch, routing by device, automatic connections, and more are all included as features with your business VPN connection.

Can I use a VPN on a FlashRouter With My Work/Corporate VPN?

Many of our customers have found that they can connect to both their corporate and personal VPN, however due to the variables beyond our control, we cannot guarantee this for every unique situation.

Using two VPNs at once can lead to unpredictable results. Bouncing your network traffic to multiple servers before finally arriving at it’s intended destination can sometimes introduce speed and connection issues.

Please consider that some employers and agencies are more vigilant regarding third party VPN use than others. There are tools readily available that detect the use of VPN services.

While these tools cannot decrypt and view your network traffic, they can tell your employer that you are potentially using a VPN, which can be against company policy.

If your corporate and personal VPN do not work together, then you can always set the computer using your work VPN to bypass the FlashRouter’s VPN tunnel by accessing the router admin panel for your device.

This way, your computer would only use the work VPN. Keep in mind however, your location would appear as your actual location to your work.

Every FlashRouter also comes with a 30 Day Satisfaction Guarantee.

If in the event you determine the FlashRouter is not working out for you, you can return the device within the first 30 Days. A $25 restocking fee does apply.

Can I Use a FlashRouter to Connect to a Dedicated Business VPN Network?

Of course! If you have an OpenVPN server running on a local machine or hosted on a cloud provider like Amazon Web Services (AWS), FlashRouters can create a custom router client configuration to connect the entire router and all connected devices to your OpenVPN server. Instead of employees connecting device-by-device, a router-based VPN connection allows for always-on secure VPN tunneling.

Our service team is here to work with you to test and ensure compatibility before purchasing. Interested in a router based custom client VPN solution for your remote workers? Please do not hesitate to contact us.

And, if you’re looking for a specific router, take a look at some of our most popular options!

How can I Reset the Password for My FlashRouters.com Customer Account?

To reset your password, you’ll want to click the “Account” icon in the upper right hand corner on our main website (Flashrouters.com). Once clicked, a menu will open where you can enter your login information, or select the “Forgot Password” button to trigger a reset email.

If you’re still having issues accessing your FlashRouters.com customer account after attempting a password reset, please reach out to us at support@flashrouters.com for further assistance.

What Payment Methods does FlashRouters Accept?

We accept Apple Pay, Google Pay, and all major cred/debit card providers on our payment method options page during checkout.


If you’d like to complete a purchase using PayPal as a payment method, please contact our team at support@flashrouters.com to request an invoice.

Can I Make Change/Update/Cancel My Order?

We strive to process and ship all orders within one business day. If you wish to make changes or cancellations, please contact us within 24 hours of placing your order at support@flashrouters.com with your order number and the changes you’d like to make.

While we will do our best to accommodate your request, please note that we cannot guarantee changes or cancellations.

Please note that if you need to update the shipping address, the order will require reapproval through our fraud prevention system with the new address.

Trouble Checking Out

Some customers have found that trying the methods below have helped solve any checkout errors they may have encountered:

⚡️Clearing cache
⚡️Refreshing web page
⚡️Switching web browsers
⚡️Using an incognito/private window
⚡️Confirming all billing information is accurate
⚡️Disable VPN if one is enabled
⚡️Disable Ad & Script Blockers if enabled
⚡️If you’re using a mobile device, switching to a computer or laptop would be ideal.

VPN Unlimited Manual OpenVPN Setup

TeamFlashRouters · Apr 19, 2019 ·

Preparing for Manual VPN Unlimited Setup

Verify your VPN Unlimited login information

If you are not already a VPN Unlimited user Sign Up Now.

Log in to your account on the VPN Unlimited website.

VPN Unlimited Website Login

Generate your VPN Unlimited OVPN Configuration Files

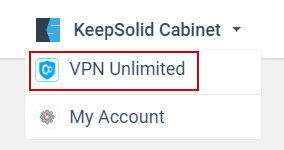
1. Navigate to the VPN Unlimited section in the dropdown on the top left.

VPN Unlimited Website Login

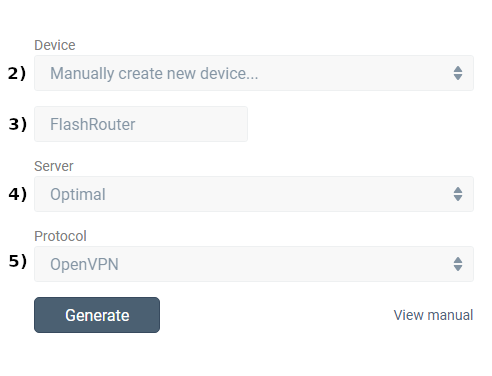
2. Set Device to “Manually create new device…”

3. Name your device.

4. Select Server.

5. Set Protocol to OpenVPN.

FlashRouters DD-WRT Privacy App - Create Open VPN Configuration files

6. Open the ‘.OVPN’ file in a word processing program.

NOTE: We highly recommend using Notepad++ for Windows or TextEdit for Apple to open these files in order to preserve text format.

DD-WRT Router Setup for VPN Unlimited

Navigate to the Services > VPN

Enter VPN Unlimited settings

OpenVPN Client

Start OpenVPN Client

If you wish to disable your VPN connection simply set this to Disable at any time and click Apply Settings.

Server IP/Name

At the bottom of the .ovpn file you downloaded above, you can find your server address, it should look something like us-la.vpnunlimitedapp.com

Port

1194 for Tunnel Protocol UDP
80 for Tunnel Protocol TCP

Tunnel Device

TUN

Tunnel Protocol

UDP or TCP

Encryption cipher

Blowfish-CBC

Hash Algorithm

SHA1

User Pass Authentication

Disabled

Advanced Options

Enable

TLS Cipher

None

LZO Compression

Adaptive

NAT

Enable

Firewall Protection

Enable

nsCertType verification

Checked

Additional Config

persist-key
persist-tun

Policy Based Routing

This field can be used for split VPN and Dual Gateway routing.

CA Cert

—–BEGIN CERTIFICATE—–
MIIEjjCCA/egAwIBAgIJAKsVbHBdakXuMA0GCSqGSIb3DQEBBQUAMIHgMQswCQYD
VQQGEwJVUzELMAkGA1UECBMCTlkxETAPBgNVBAcTCE5ldyBZb3JrMR8wHQYDVQQK
ExZTaW1wbGV4IFNvbHV0aW9ucyBJbmMuMRYwFAYDVQQLEw1WcG4gVW5saW1pdGVk
MSMwIQYDVQQDExpzZXJ2ZXIudnBudW5saW1pdGVkYXBwLmNvbTEjMCEGA1UEKRMa
c2VydmVyLnZwbnVubGltaXRlZGFwcC5jb20xLjAsBgkqhkiG9w0BCQEWH3N1cHBv
cnRAc2ltcGxleHNvbHV0aW9uc2luYy5jb20wHhcNMTMxMjE2MTM1OTQ0WhcNMjMx
MjE0MTM1OTQ0WjCB4DELMAkGA1UEBhMCVVMxCzAJBgNVBAgTAk5ZMREwDwYDVQQH
EwhOZXcgWW9yazEfMB0GA1UEChMWU2ltcGxleCBTb2x1dGlvbnMgSW5jLjEWMBQG
A1UECxMNVnBuIFVubGltaXRlZDEjMCEGA1UEAxMac2VydmVyLnZwbnVubGltaXRl
ZGFwcC5jb20xIzAhBgNVBCkTGnNlcnZlci52cG51bmxpbWl0ZWRhcHAuY29tMS4w
LAYJKoZIhvcNAQkBFh9zdXBwb3J0QHNpbXBsZXhzb2x1dGlvbnNpbmMuY29tMIGf
MA0GCSqGSIb3DQEBAQUAA4GNADCBiQKBgQDADUzS8QWGvdhLFKsEzAiq5+b0ukKj
Bza0k6/dmCeYTvCVqGKg/h1IAtQdVVLAkmEp0zvGH7PuOhXm7zZrCouBr/RiG4tE
coRHwc6AJmowkYERlY7+xGx3OuNrD00QceNTsan0bn78jwt0zhFNmHdoTtFjgK3o
qmQYSAtbEVWYgwIDAQABo4IBTDCCAUgwHQYDVR0OBBYEFKClmYP+tMNgWagUJCCH
jtaui2k+MIIBFwYDVR0jBIIBDjCCAQqAFKClmYP+tMNgWagUJCCHjtaui2k+oYHm
pIHjMIHgMQswCQYDVQQGEwJVUzELMAkGA1UECBMCTlkxETAPBgNVBAcTCE5ldyBZ
b3JrMR8wHQYDVQQKExZTaW1wbGV4IFNvbHV0aW9ucyBJbmMuMRYwFAYDVQQLEw1W
cG4gVW5saW1pdGVkMSMwIQYDVQQDExpzZXJ2ZXIudnBudW5saW1pdGVkYXBwLmNv
bTEjMCEGA1UEKRMac2VydmVyLnZwbnVubGltaXRlZGFwcC5jb20xLjAsBgkqhkiG
9w0BCQEWH3N1cHBvcnRAc2ltcGxleHNvbHV0aW9uc2luYy5jb22CCQCrFWxwXWpF
7jAMBgNVHRMEBTADAQH/MA0GCSqGSIb3DQEBBQUAA4GBALkWhfw7SSV7it+ZYZmT
+cQbExjlYgQ40zae2J2CqIYACRcfsDHvh7Q+fiwSocevv2NE0dWi6WB2H6SiudYj
vDvubAX/QbzfBxtbxCCoAIlfPCm8xOnWFN7TUJAzWwHJkKgEnu29GZHu2x8J+7Ve
DbKH5RTMHHe8FkSxh6Zz/BMN
—–END CERTIFICATE—–

Public Client Cert

Copy and Paste all contents in between the <cert> and </cert> lines from your .ovpn file starting and ending with:
—–BEGIN CERTIFICATE—–
…
—–END CERTIFICATE—–

Private Client Key

Copy and Paste all contents in between the <key> and </key> lines from your .ovpn file starting and ending with:
—–BEGIN RSA PRIVATE KEY—–
…
—–END RSA PRIVATE KEY—–

CLICK APPLY SETTINGS

Leave all settings not mentioned above as their default setting.

Verify a successful VPN Unlimited connection

Navigate to the Status > OpenVPN

  1. You should now see a CONNECTED SUCCESS message.
  2. Visit to WhatIsMyIPAddress to verify your new IP address and virtual location.

In some cases you may notice that the location is not showing the same location as the server you have input in your router settings; this is because geo tracking tools are often tricked by VPN connections. As long as you see an IP address that is not the same as your normal Internet IP address then you are indeed connected to VPN Unlimited.

Back up your settings

Navigate to the Administration > Backup

  1. Click the Backup button.
  2. A file named nvrambak.bin will be saved to your computer.
  3. You can load nvrambak.bin to restore your settings in the event of a reset.

How to change the VPN Unlimited server

  1. Follow Steps 1-6 to Generate an .OVPN file for the server you wish to connect to and open it a word processing program.
  2. Copy and paste the server IP Address into the Server IP/Name field.
  3. Copy and paste the <cert> into the Public Client Cert field.
  4. Copy and paste the <key> into the Private Client Key field.
  5. Click Apply Settings.

TROUBLESHOOTING

Still having issues? Visit the VPN Troubleshooting section.

Troubleshoot Here

ExpressVPN TP-Link OpenVPN Setup

TeamFlashRouters · Apr 8, 2024 ·

Preparing for ExpressVPN TP-Link Setup

Obtain your ExpressVPN OpenVPN Information

If you are not already an ExpressVPN user Sign Up Now.

1. Log in to your account on the ExpressVPN website.

ExpressVPN login page

2. Successfully log in with your account information. Select More.

3. Select Manual Configuration and copy the Username and Password that are displayed on the right hand side of the screen.

ExpressVPN Manual Configuration
ExpressVPN username and password

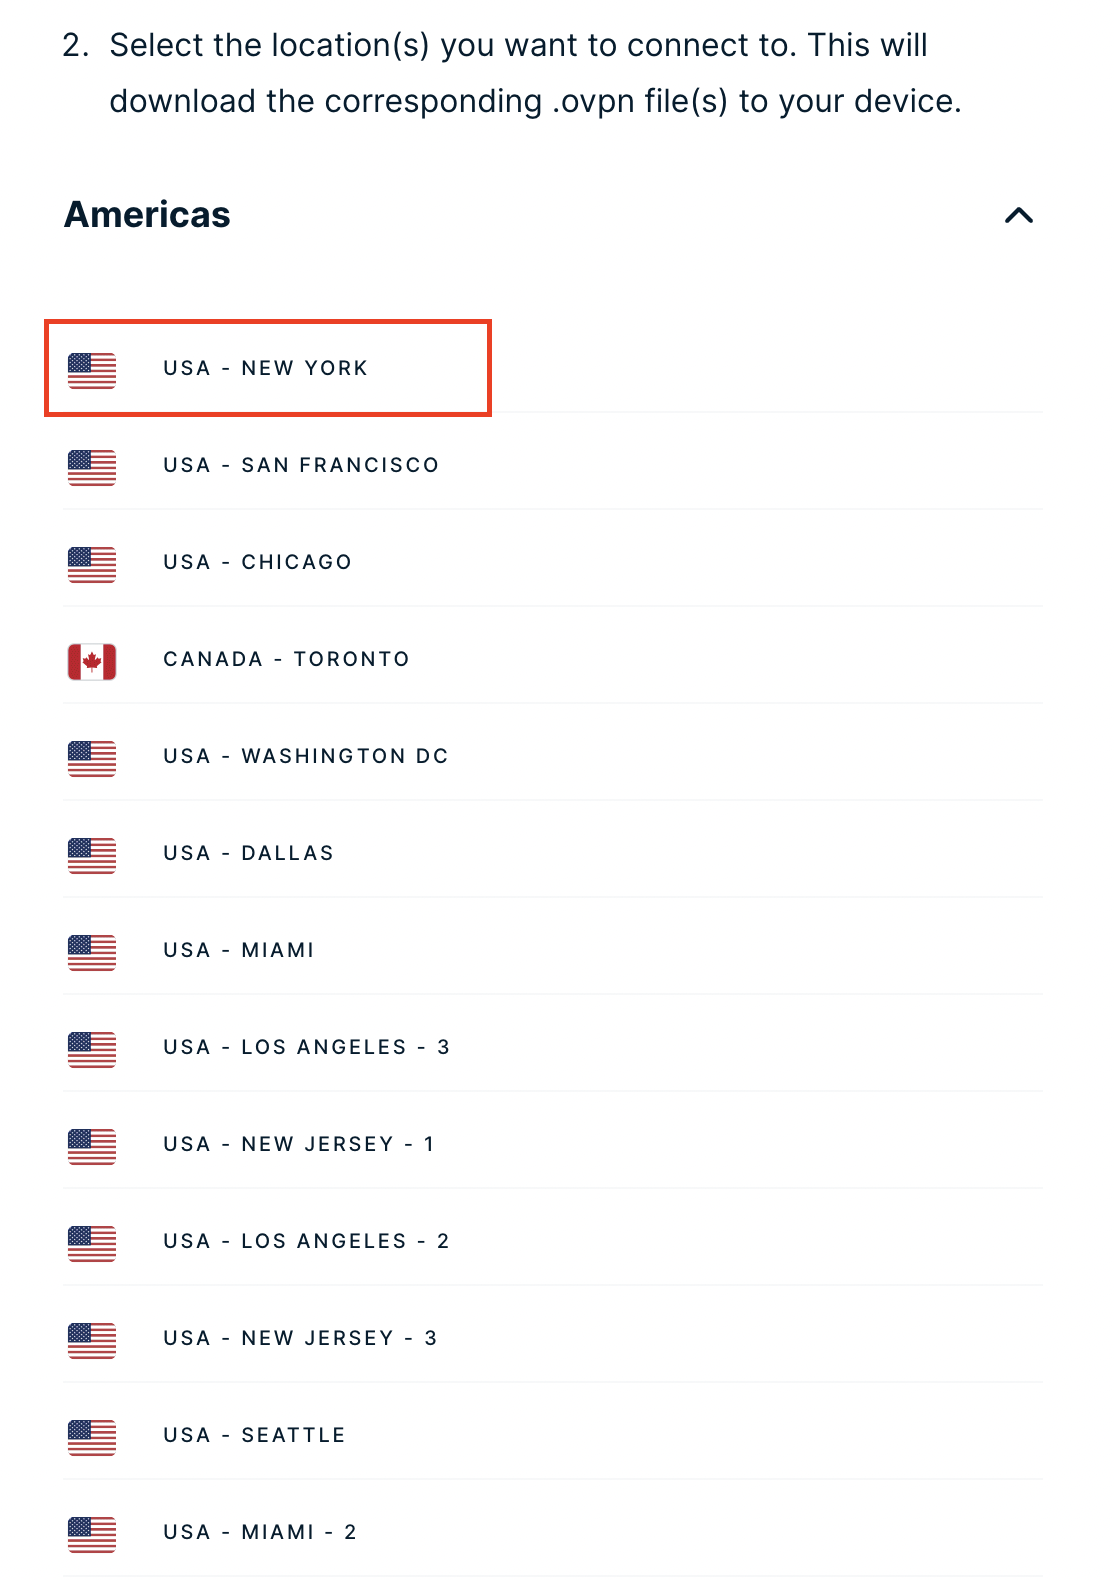
4. Click the Server Location that you want to connect to. This will download a .ovpn file to your computer that we will use later on. There is no need to open the file. For this example I have selected New York but feel free to select any server listed there.

ExpressVPN Download .ovpn file

TP-Link Router Setup for ExpressVPN

Login to TP-Link firmware settings in a browser on any computer or smart device connected to the FlashRouter’s network.

1. Navigate to the Advanced tab.

TP-Link Advanced settings

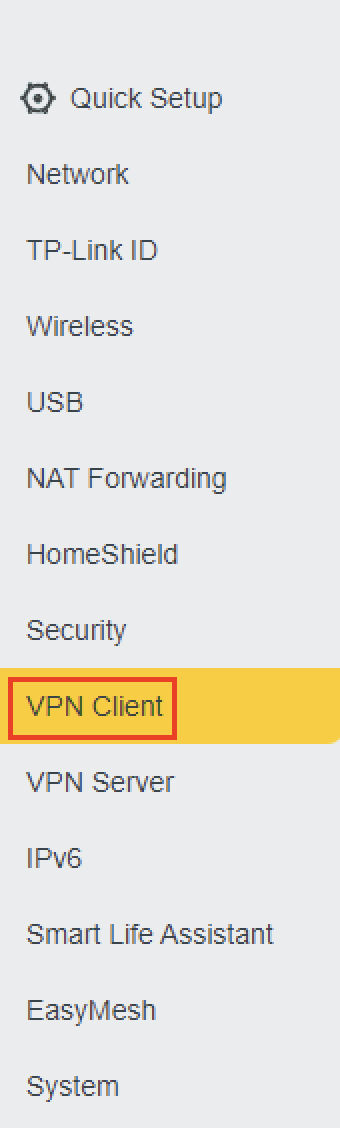
2. Navigate to the VPN Client tab.

TP-Link VPN Client

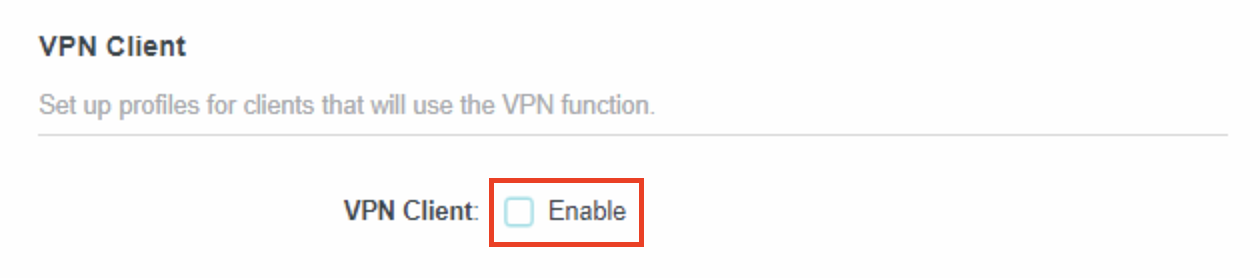
3. Check the Enable box next to VPN Client. Then click Save at the bottom of the page.

TP-Link VPN Client enable

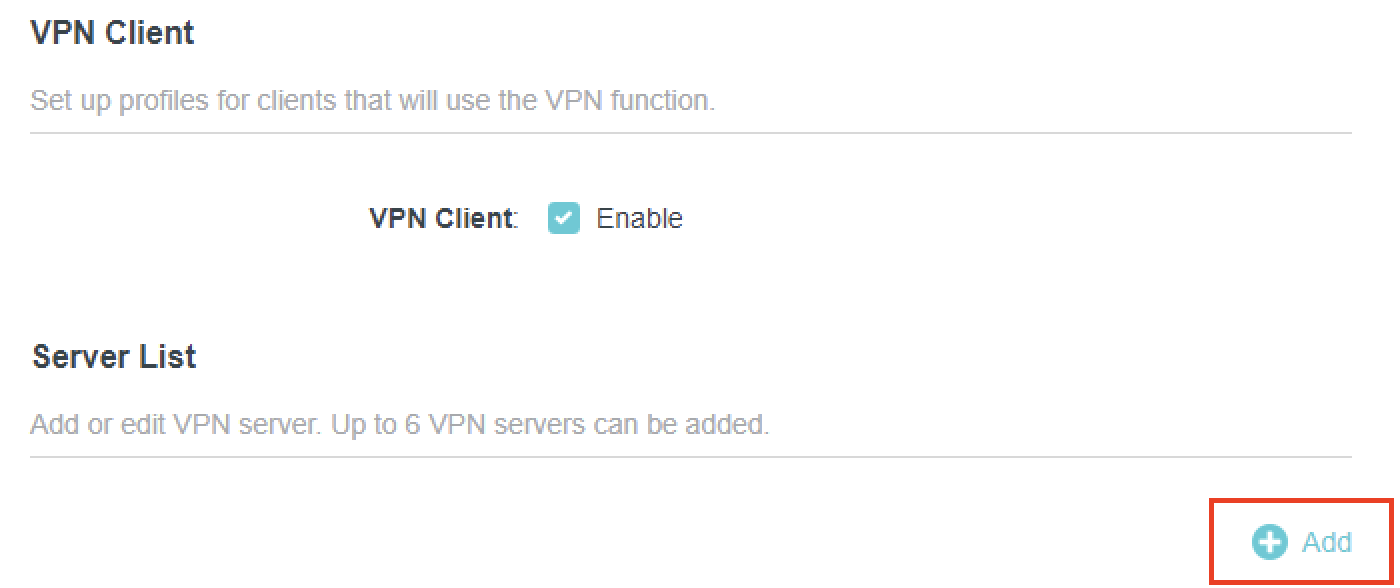
4. Click the Add button in the Server List area.

TP-Link Add server button

5. In the Description field enter in the name you’d like to use for this OpenVPN Client profile. We typically advise entering in the location or server number here. Our example server was in New York so I have entered in ExpressVPN New York.

Set the VPN Type to OpenVPN.

In the Username and Password fields paste in the ExpressVPN username and password we obtained earlier.

Click Browse and select the .ovpn file you downloaded earlier. Then click Save.

TP-Link ExpressVPN setup

By default no devices will be assigned to the VPN Tunnel. With TP-Link firmware you must manually assign the devices that you want connected to the VPN tunnel. Proceed with the next steps to do so for all devices you want connected to VPN.

6. Click the Add button in the Device List area.

TP-Link add devices to VPN tunnel

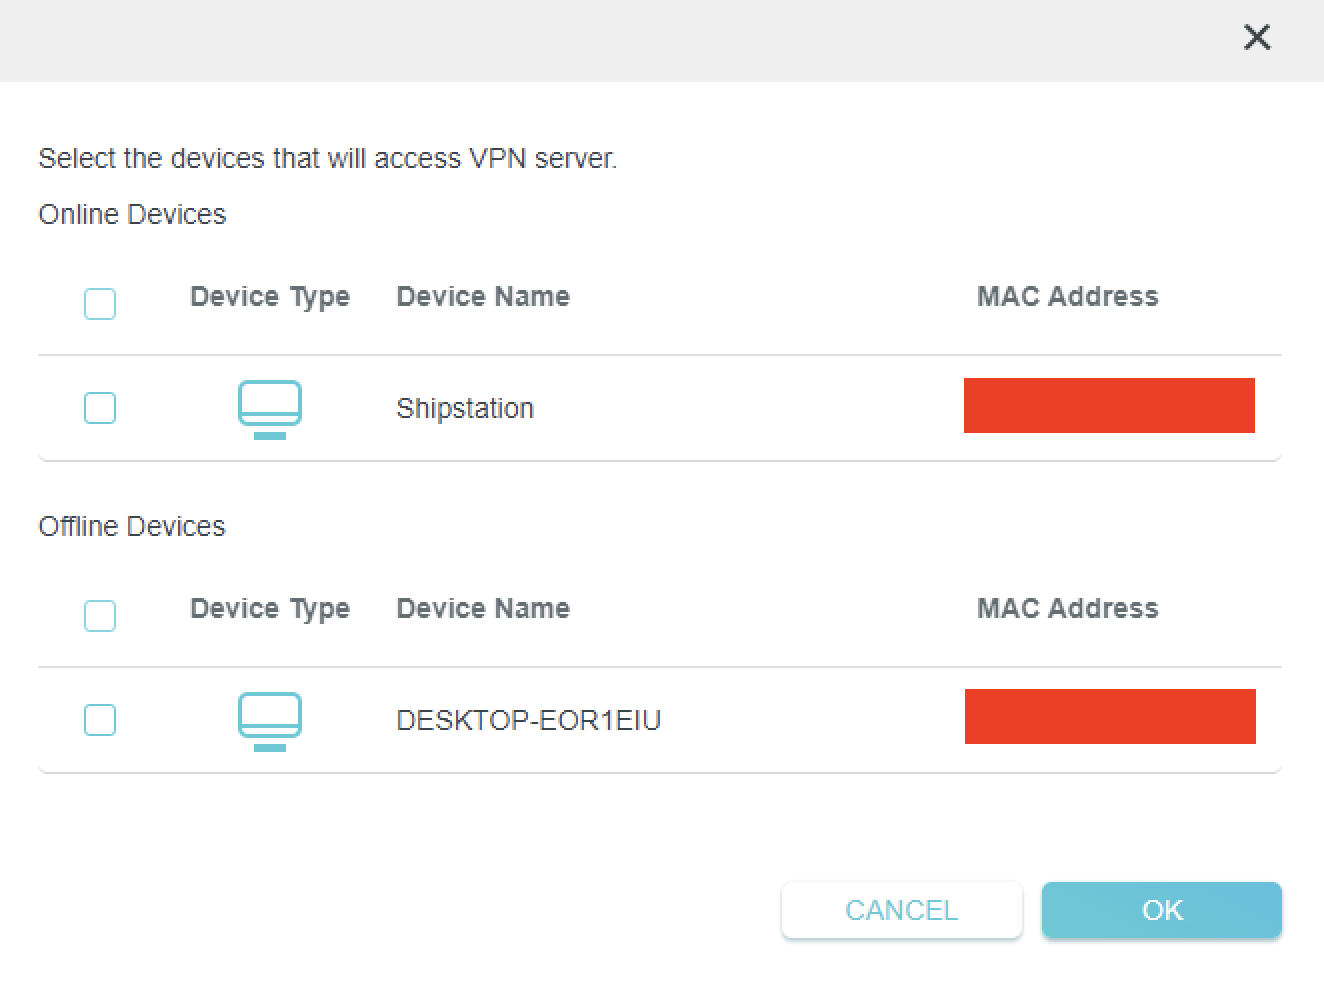
7. A list of devices connected to the FlashRouter’s network will appear. Check the devices that you want to connect to VPN. Then click OK.

TP-Link select devices to add to VPN tunnel

8. Now that the devices have been assigned to the VPN connection click the Enable toggle in the Server List area.

TP-Link ExpressVPN toggle VPN on

Verify a successful ExpressVPN connection

  1. You should now see a CONNECTED message.
  2. Visit ExpressVPN’s IP Check to verify your new IP address and virtual location.

In some cases you may notice that the location is not showing the same location as the server you have input in your router settings; this is because geo tracking tools are often tricked by VPN connections. As long as you see an IP address that is not the same as your normal Internet IP address then you are indeed connected to ExpressVPN.

How to change the ExpressVPN server

  1. Follow the steps at the top of the page to obtain a new .ovpn file.
  2. Then proceed with the settings same as initial setup.

TROUBLESHOOTING

Still having issues? Visit the VPN Troubleshooting section.

Troubleshoot Here

ExpressVPN/Aircove FlashRouter Internet Setup and Activation

TeamFlashRouters · Mar 16, 2022 ·

Follow this article when you receive your new ExpressVPN FlashRouter to connect your FlashRouter to the Internet via ExpressVPN and customize your network so it is ready to use.

Obtain your ExpressVPN Activation Code

If you are not already an ExpressVPN user Sign Up Now.

1. Visit ExpressVPN’s website login page.

ExpressVPN on FlashRouters Privacy App Setup - Sign Into ExpressVPN Dashboard

2. Copy your ExpressVPN Activation code and paste it into a document or leave this page open while you proceed with the instructions.

Access Router Settings

1. Connect to the FlashRouter’s network via ethernet cable or wireless.

The wireless network will appear as “Aircove”, “Linksys##”, “Netgear##”, or “Asus” and the password to join the network will be the default wireless password printed on the bottom of the router.

2. Open your web browser and enter expressvpnrouter.com or 192.168.132.1 in the URL.

ExpressVPNrouter.com
192.168.132.1

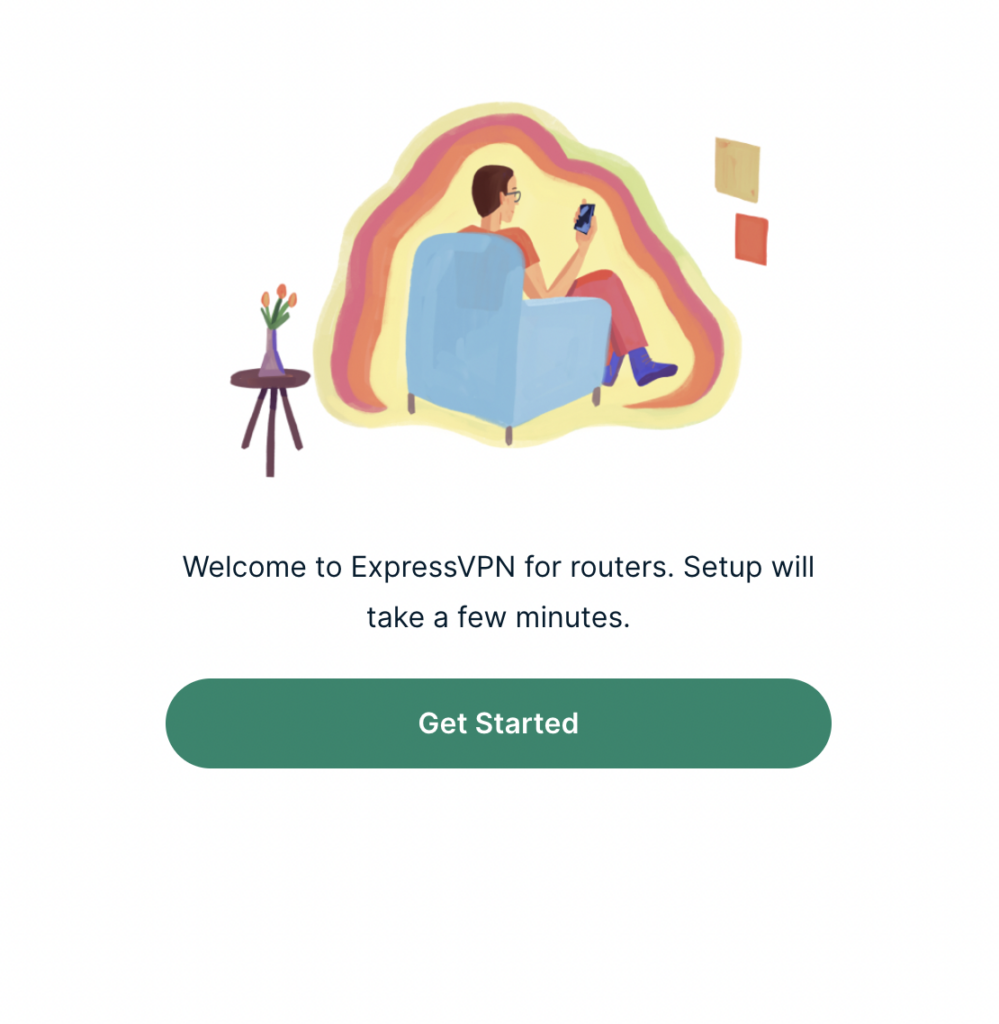
3. Click Get Started on the ExpressVPN page that is displayed.

ExpressVPN Get Started

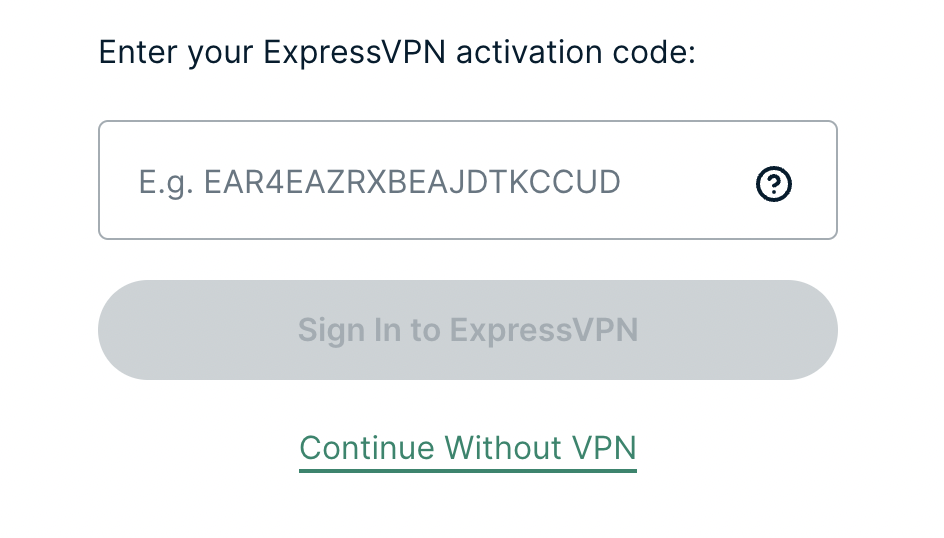
4a. If your FlashRouter is wired to the Internet correctly then you will be prompted to enter your ExpressVPN Activation Code found in your ExpressVPN account. Paste that in and click Sign in to ExpressVPN.

ExpressVPN Activation Code

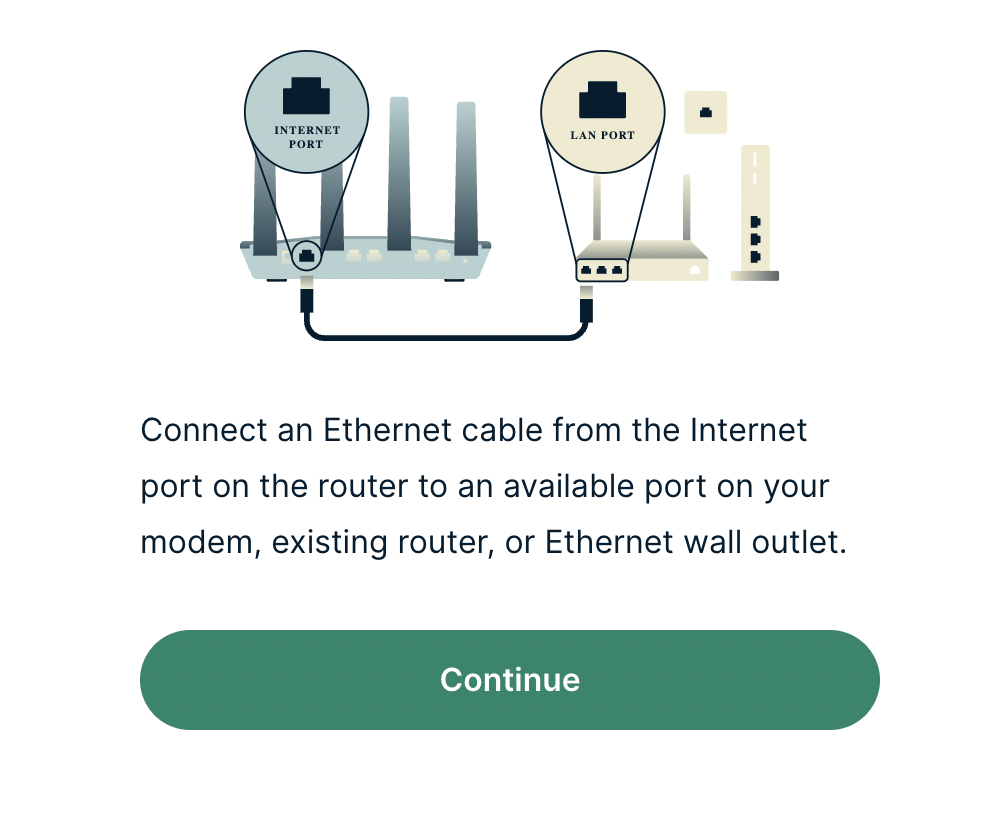
4b. If your FlashRouter is not wired correctly or is not receiving Internet properly make sure you are wired as detailed in the diagram that appears. If you are stuck at this screen we recommend powering off your ISP modem and any other router that the ExpressVPN FlashRouter is wired to and then powering them back up one by one.

Proceed with step “4a” above once the router is receiving Internet and you are prompted to enter the Activation Code.

ExpressVPN Wiring

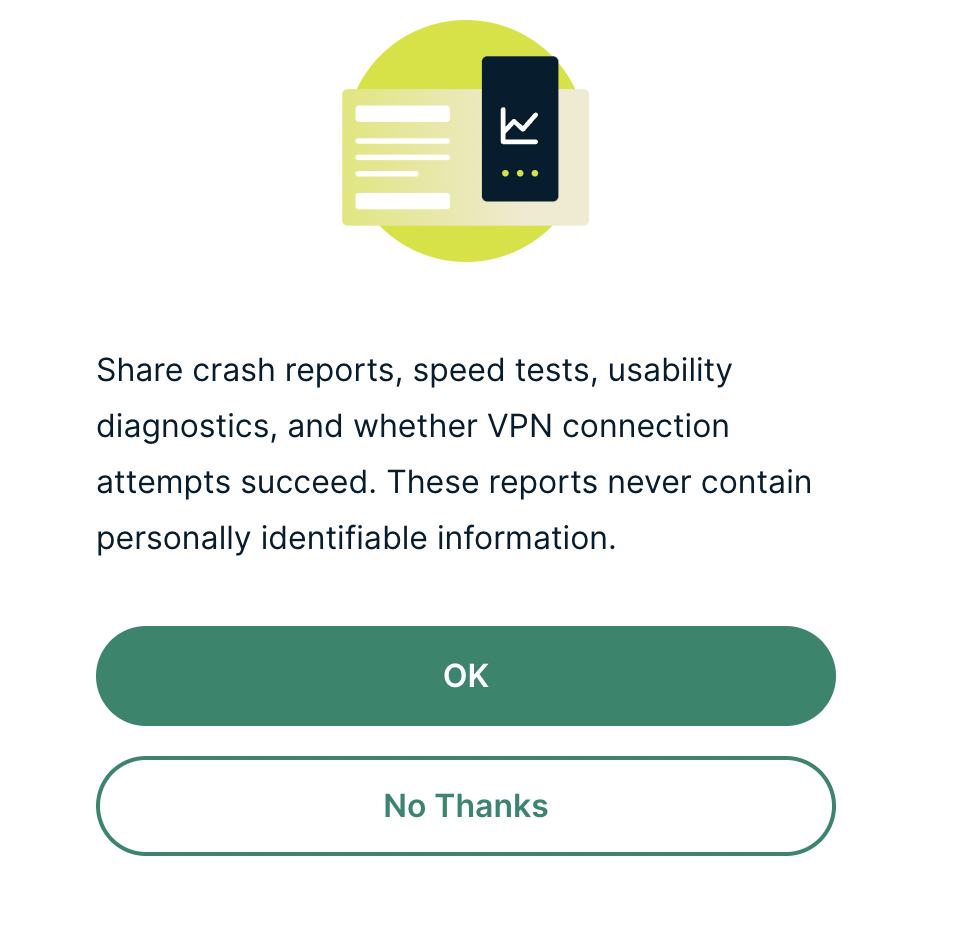
5. Select if you want to share anonymous crash report data with ExpressVPN to help them improve the firmware for future releases.

ExpressVPN Share Crash Report

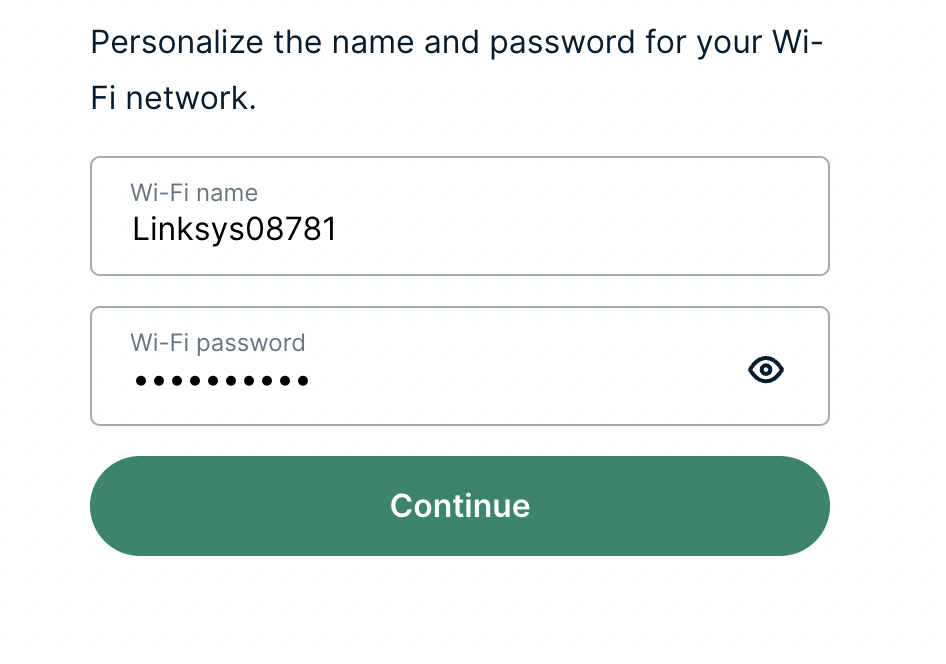
6. Set the WiFi name and password your wireless devices will use to connect to the FlashRouter’s network. Make sure the WiFi name is unique and not a duplicate of an existing WiFi name if you change it. You can also leave it as the default information if you like. Click Continue.

ExpressVPN Set WiFi Name and Password

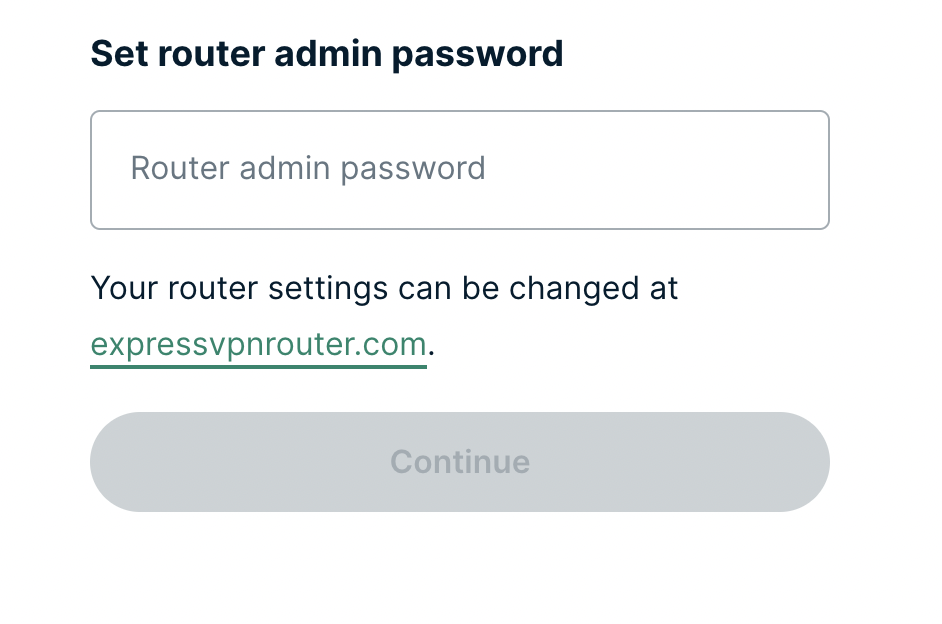
7. Enter the admin password you will use to access the ExpressVPN router settings. Be sure to TYPE CAREFULLY when setting the admin password as a typo will result in needing to reset the router again. Note this password in a secure location or commit it to memory.

ExpressVPN admin password

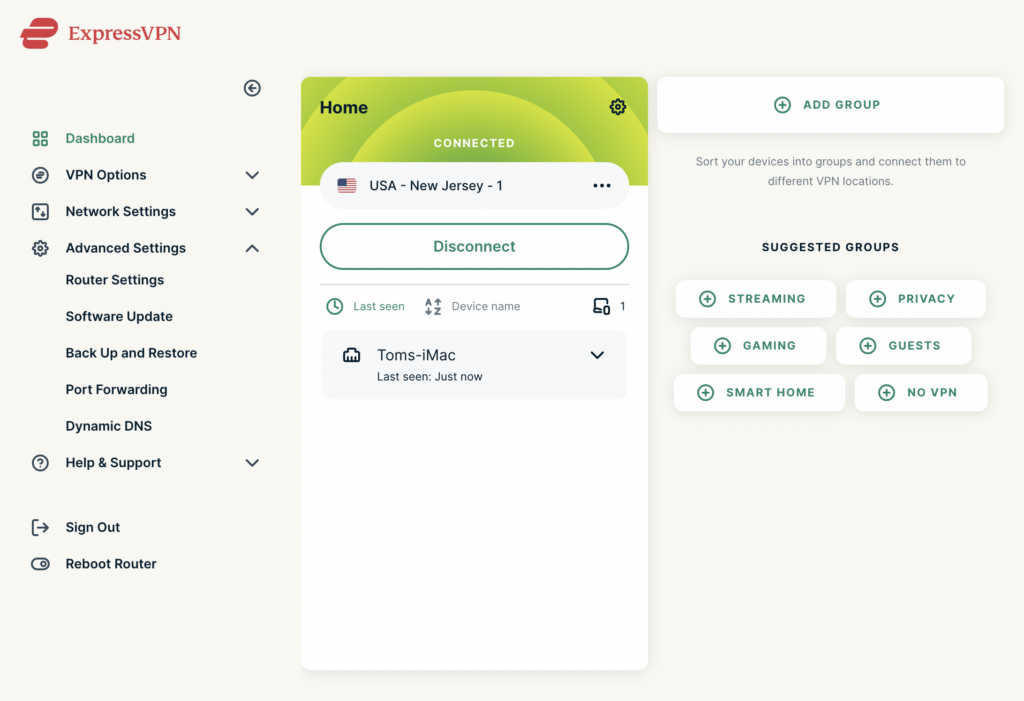
8. Your ExpressVPN FlashRouter is now fully setup!

ExpressVPN Connected

NordVPN TP-Link OpenVPN Setup

TeamFlashRouters · Apr 16, 2024 ·

Preparing for NordVPN TP-Link Setup

Obtain your NordVPN manual Username and Password

If you are not already an NordVPN user Sign Up Now.

1. Log in to your account on the NordVPN website.

NordVPN login

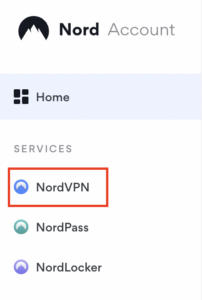
2. Click NordVPN on the left hand side and then click Setup NordVPN manually.

NordVPN setup manually

3. Enter in the verification code that was sent to your email.

NordVPN verify code

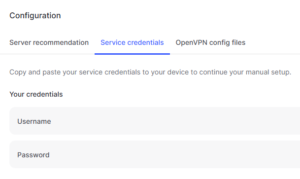
4. Copy and paste your NordVPN manual username and password to a secure location. This is the username and password you will enter into the router settings to connect to NordVPN.

NordVPN credentials

Download your NordVPN .ovpn file

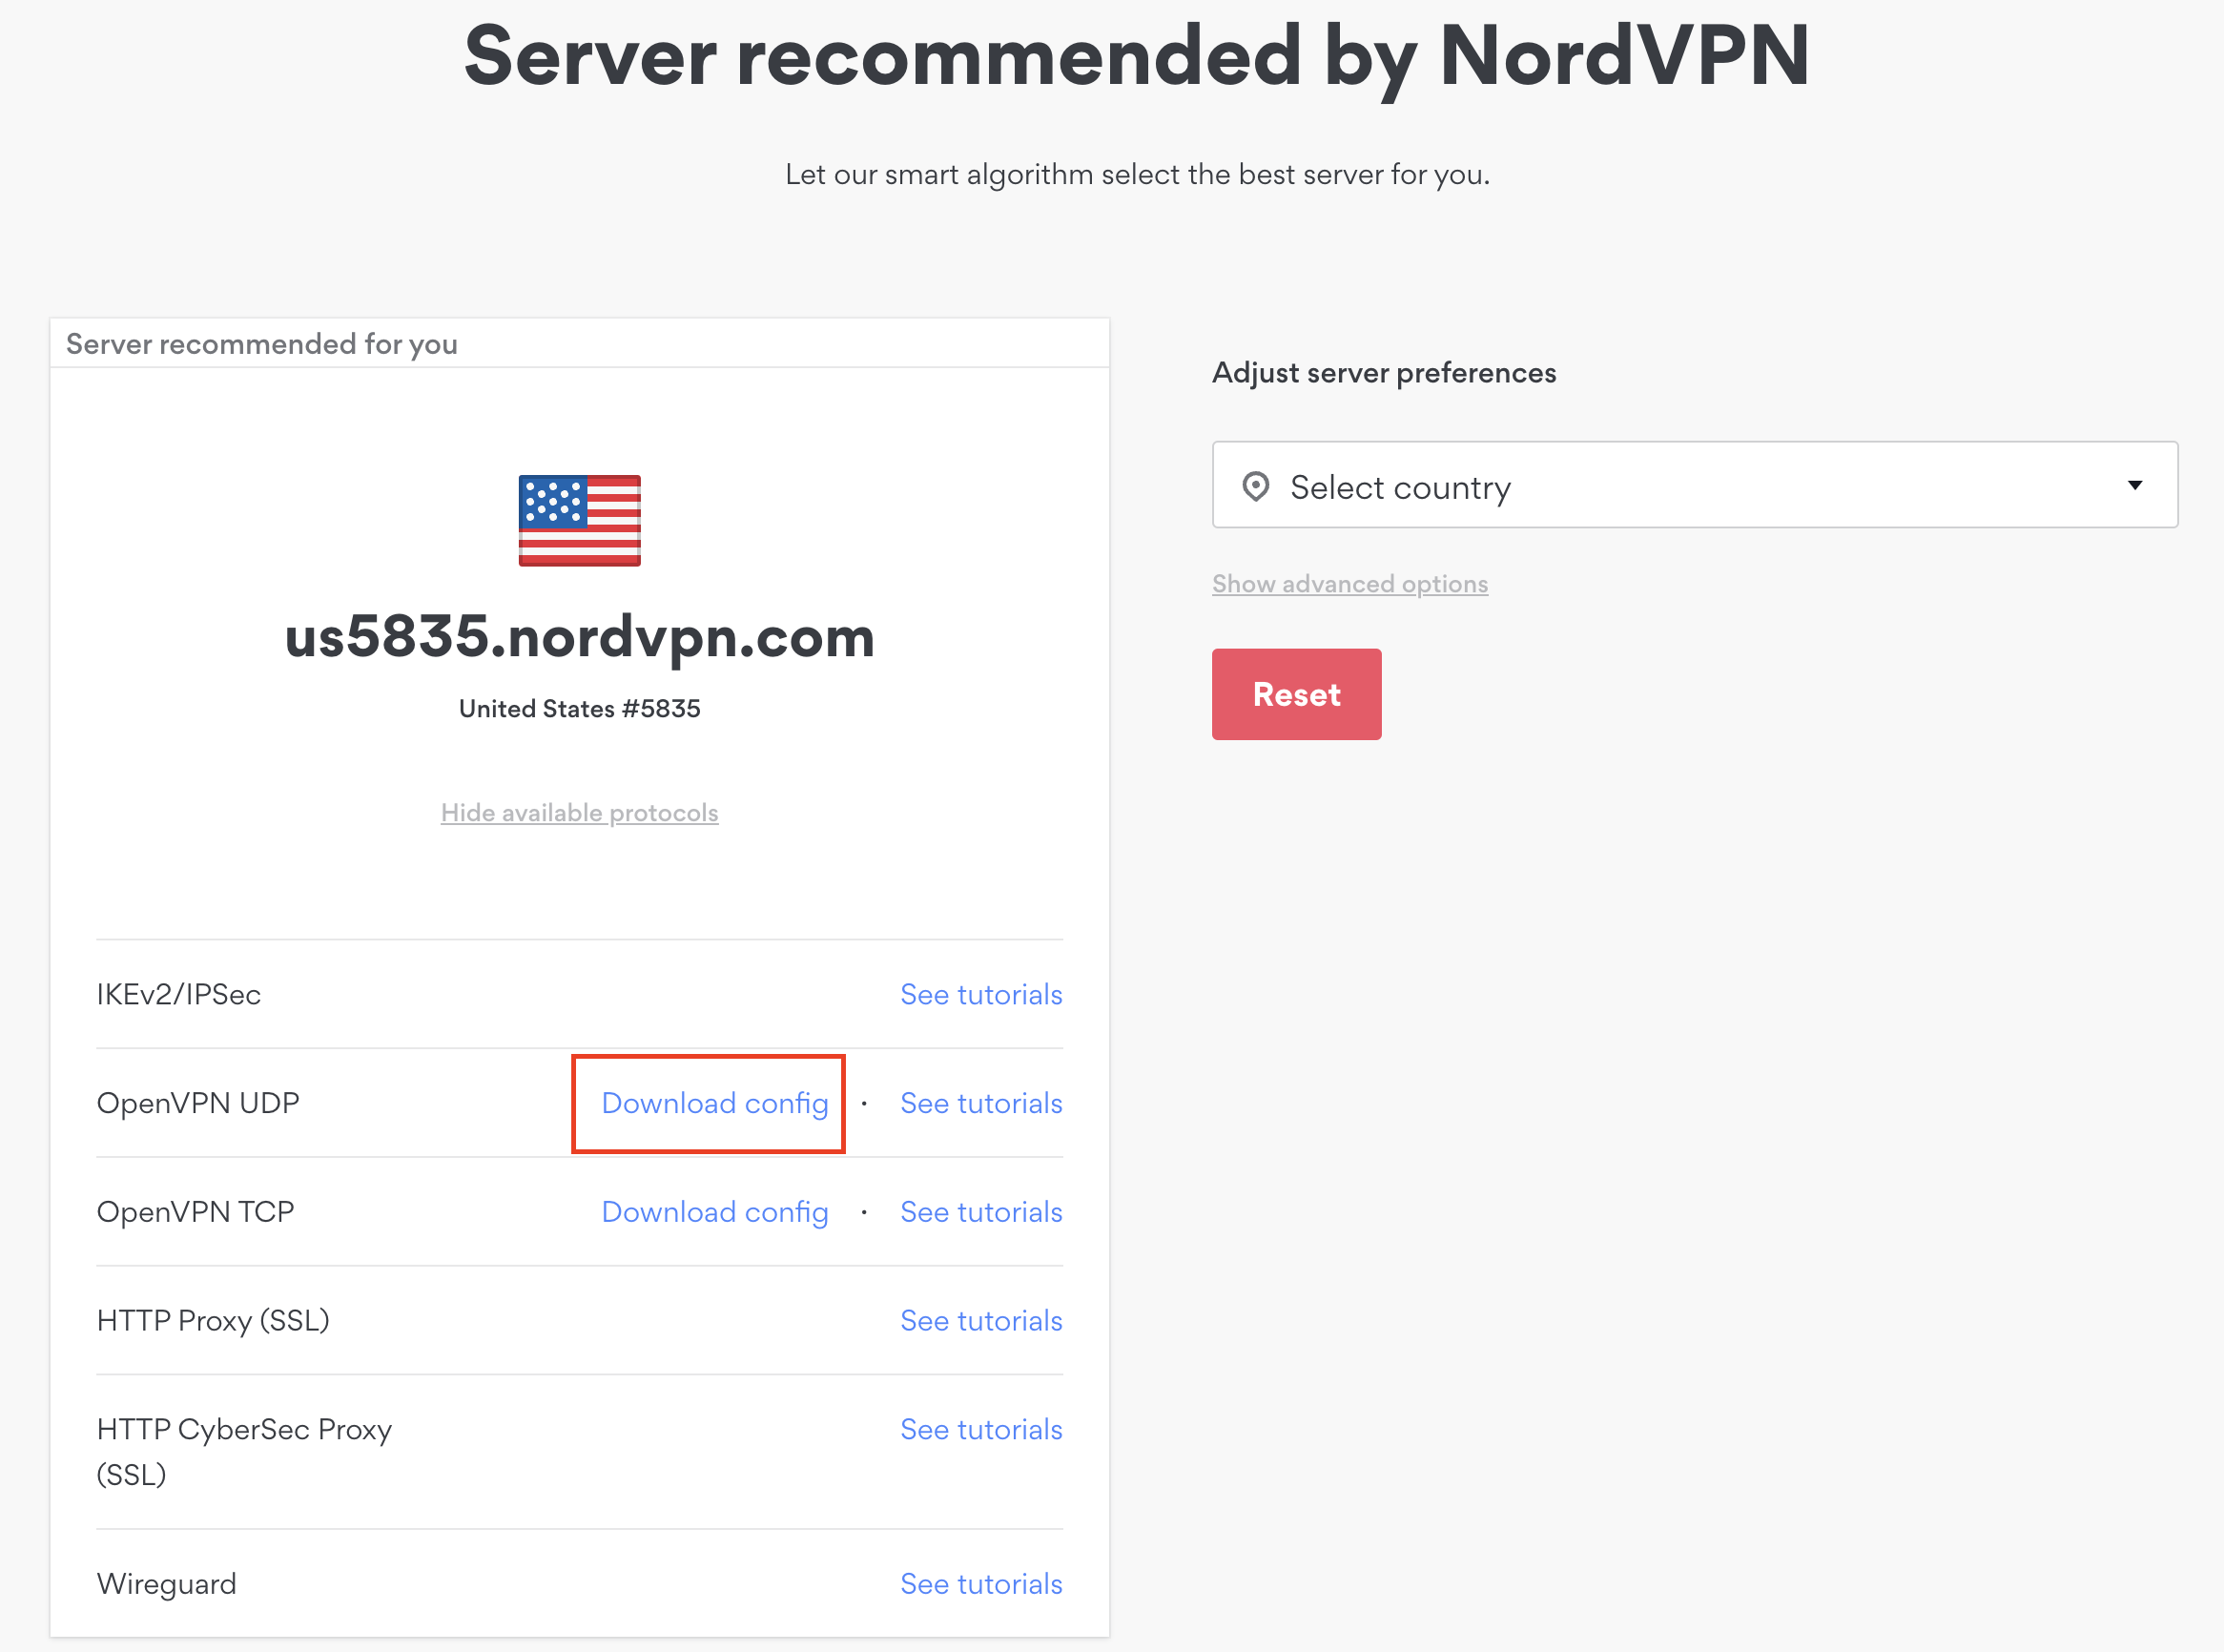
1. There are two options for obtaining the .ovpn file. The first and recommended is to navigate to NordVPN’s server recommendation page. Click Recommended Server to display the fastest server based on your actual location. You can adjust the country if you don’t want to connect to the recommended country.

Then click Show Available Protocols. Click Download Config next to OpenVPN UDP. This will download the .ovpn file to your computer for this server. Do not open this file.

NordVPN Recommended Server

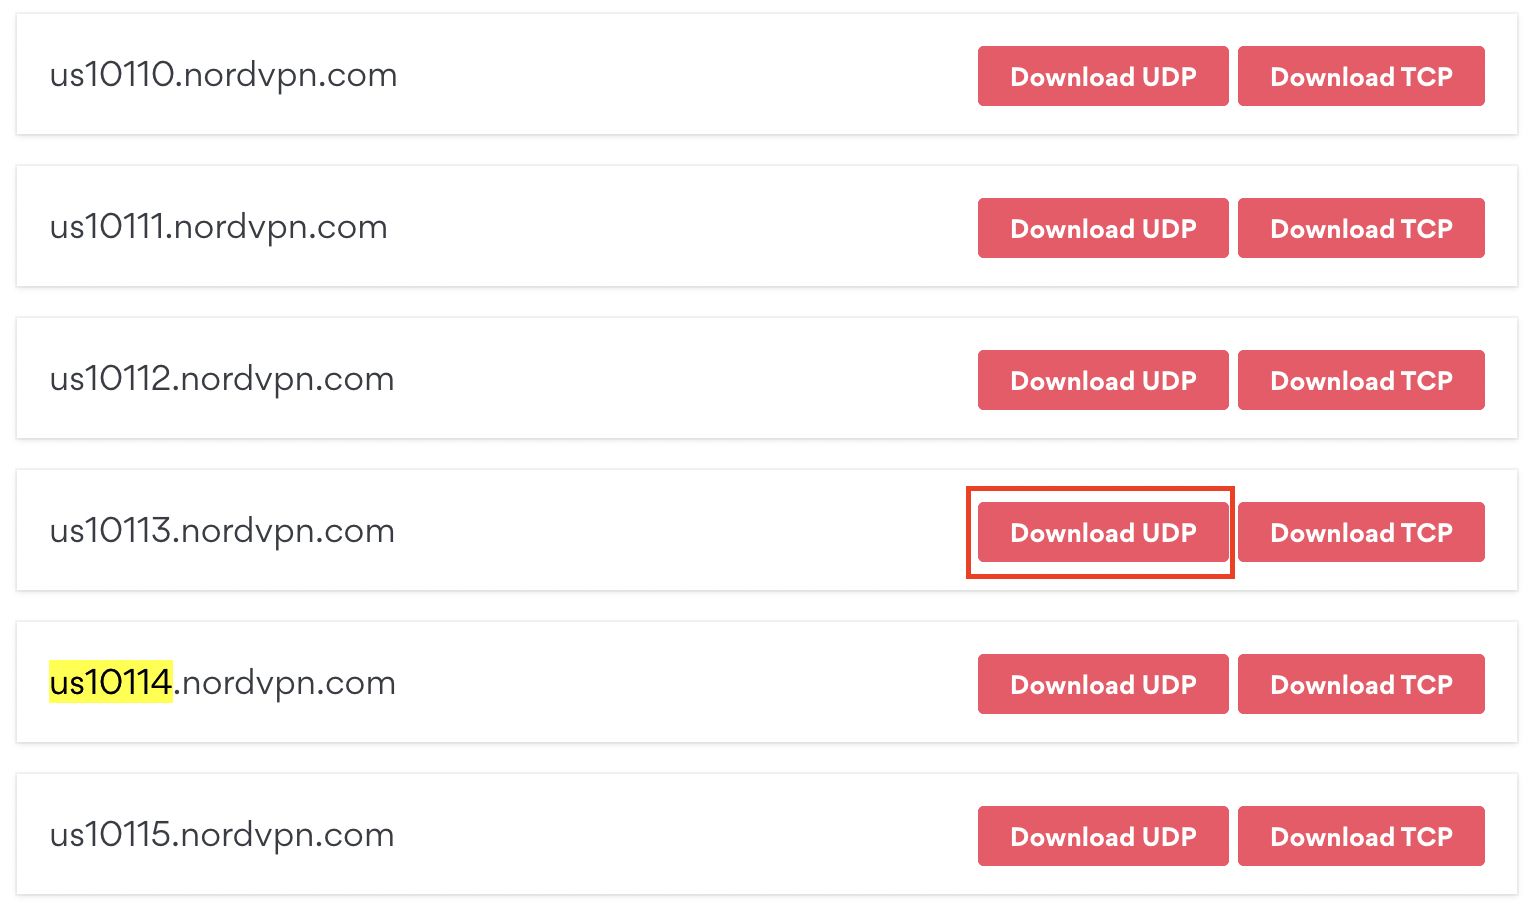
The second method to obtain a server is for connecting to a specific server number that you know you want to use. This applies to NordVPN Dedicated IP servers if you are signed up for that service. Go to NordVPN’s .ovpn file page. Then search for the server number that you want to use and click Download UDP.

NordVPN Download Specific Server

TP-Link Router Setup for NordVPN

Login to TP-Link firmware settings in a browser on any computer or smart device connected to the FlashRouter’s network.

1. Navigate to the Advanced tab.

TP-Link Advanced settings

2. Navigate to the VPN Client tab.

TP-Link VPN Client

3. Check the Enable box next to VPN Client. Then click Save at the bottom of the page.

TP-Link VPN Client enable

4. Click the Add button in the Server List area.

TP-Link Add server button

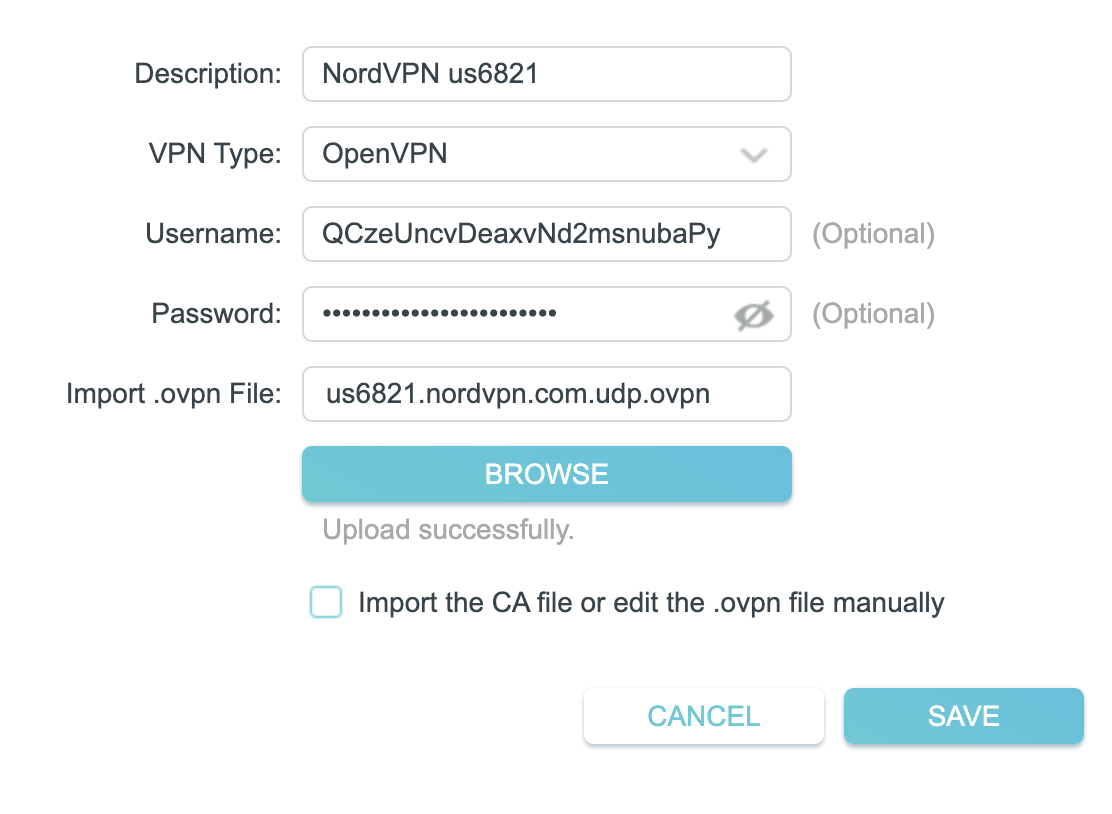
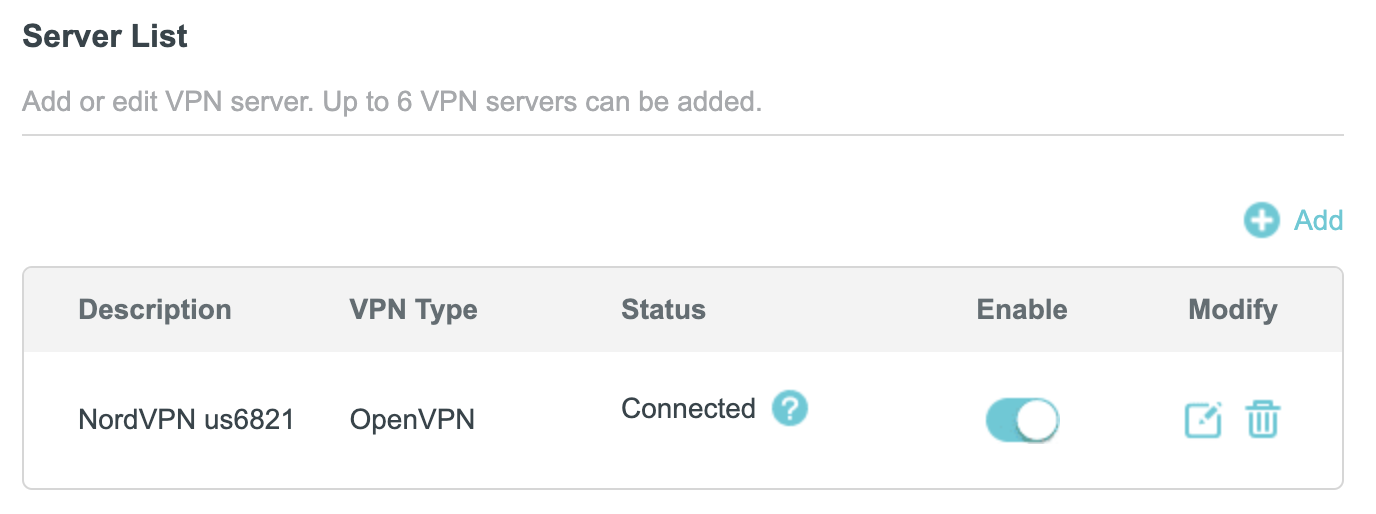
5. In the Description field enter in the name you’d like to use for this OpenVPN Client profile. We typically advise entering in the location or server number here. Our example server was us6821 so I have entered in NordVPN us6821.

Set the VPN Type to OpenVPN.

In the Username and Password fields paste in the NordVPN username and password we obtained earlier.

Click Browse and select the .ovpn file you downloaded earlier. Then click Save.

TP-Link NordVPN

By default no devices will be assigned to the VPN Tunnel. With TP-Link firmware you must manually assign the devices that you want connected to the VPN tunnel. Proceed with the next steps to do so for all devices you want connected to VPN.

6. Click the Add button in the Device List area.

TP-Link add devices to VPN tunnel

7. A list of devices connected to the FlashRouter’s network will appear. Check the devices that you want to connect to VPN. Then click OK.

TP-Link select devices to add to VPN tunnel

8. Now that the devices have been assigned to the VPN connection click the Enable toggle in the Server List area.

TP-Link NordVPN connected

Verify a successful NordVPN connection

  1. You should now see a CONNECTED message.
  2. Visit NordVPN’s IP Check to verify your new IP address and virtual location.

In some cases you may notice that the location is not showing the same location as the server you have input in your router settings; this is because geo tracking tools are often tricked by VPN connections. As long as you see an IP address that is not the same as your normal Internet IP address then you are indeed connected to NordVPN.

How to change the NordVPN server

  1. Follow the steps at the top of the page to obtain a new .ovpn file.
  2. Then proceed with the settings same as initial setup.

TROUBLESHOOTING

Still having issues? Visit the VPN Troubleshooting section.

Troubleshoot Here

PrivateInternetAccess (PIA) TP-Link OpenVPN Setup

TeamFlashRouters · Apr 29, 2024 ·

Preparing for PIA TP-Link Setup

Download your PIA .ovpn file

If you are not already a PIA user Sign Up Now.

1. Log in to your account on the PIA website.

PIA login

2. Successfully log in with your account information then go to PIA’s OpenVPN Config Generator.

3. On the OpenVPN Configuration Generator select the following:

OpenVPN Version: OpenVPN 2.4 or newer

Select Platform: Linux

Select Region: Choose the server location you’d like to connect to

Select Port: Typically we recommend UDP/1198 RSA-2048 AES-128-CBC SHA1 for best speeds but feel free to select the one you want to use.

4. Click Generate to download the .ovpn file. Do not open this file once it is downloaded.

PIA Generate .ovpn file

TP-Link Router Setup for PIA

Login to TP-Link firmware settings in a browser on any computer or smart device connected to the FlashRouter’s network.

1. Navigate to the Advanced tab.

TP-Link Advanced settings

2. Navigate to the VPN Client tab.

TP-Link VPN Client

3. Check the Enable box next to VPN Client. Then click Save at the bottom of the page.

TP-Link VPN Client enable

4. Click the Add button in the Server List area.

TP-Link Add server button

5. In the Description field enter in the name you’d like to use for this OpenVPN Client profile. We typically advise entering in the location. Our example server was New York so I have entered in PIA New York.

Set the VPN Type to OpenVPN.

In the Username and Password fields paste in the PIA username and password you use to successfully login to your PIA website account.

Click Browse and select the .ovpn file you downloaded earlier. Then click Save.

TP-Link PIA

By default no devices will be assigned to the VPN Tunnel. With TP-Link firmware you must manually assign the devices that you want connected to the VPN tunnel. Proceed with the next steps to do so for all devices you want connected to VPN.

6. Click the Add button in the Device List area.

TP-Link add devices to VPN tunnel

7. A list of devices connected to the FlashRouter’s network will appear. Check the devices that you want to connect to VPN. Then click OK.

TP-Link select devices to add to VPN tunnel

8. Now that the devices have been assigned to the VPN connection click the Enable toggle in the Server List area.

TP-Link PIA Connected

Verify a successful PIA connection

  1. You should now see a CONNECTED message.
  2. Visit PIA’s IP Check to verify your new IP address and virtual location.

In some cases you may notice that the location is not showing the same location as the server you have input in your router settings; this is because geo tracking tools are often tricked by VPN connections. As long as you see an IP address that is not the same as your normal Internet IP address then you are indeed connected to PIA.

How to change the PIA server

  1. Follow the steps at the top of the page to obtain a new .ovpn file.
  2. Then proceed with the settings same as initial setup.

TROUBLESHOOTING

Still having issues? Visit the VPN Troubleshooting section.

Troubleshoot Here

Shipping FAQs

admin · Jan 29, 2019 ·

Shipping FAQs

General Shipping FAQs

What company do you use for shipping?

For domestic shipping, we offer United State Postal Service (USPS), and a FedEx Expedited 2-3 Day delivery option.

For International shipments, we offer USPS and FedEx.

Where do you ship from?

We ship all packages from our New Jersey warehouse.

How much does shipping cost?

Domestic Customers:

  • Free Standard Shipping 3-10 day Delivery when you purchase a router with any Service Plan.
  • $20 Flat Rate FedEx 2-3 Day Express shipping

International Customers:

  • Pricing for USPS, and FedEx will vary by country. You can see rates on the Shipping Estimate tab on any FlashRouters product page. FlashRouters does not add any internal handling fees to international rates.
  • Note: Customers pay customs, duties, processing fees, and taxes (if applicable).

How fast do you ship?

We aim to ship your purchase within 1-2 business days from the original order date.

There may be a delay of up to 24 hours if our configuration team is unable to configure your router as requested. In these cases, our support team will reach out to you in an attempt to find a solution. If the team does not hear back from you within 24 hours they will ship out the unit to avoid further delays. Keep in mind  our support team will be available to assist if you have any setup issues once you receive your router.

Who pays for shipping?

Domestic customers can choose Free standard shipping. Customers pay shipping costs including customs, duties, processing fees, and taxes (if applicable) for all other options.

Can you ship to my country?

We ship to almost all countries around the world with some exclusions. If you would like to ship to any of these excluded countries, we recommend using PayPal and a Freight forwarding service such as Aramex, MyUS, or Shipito.

Another option if you are located in a country we do not ship to is to purchase a compatible router locally that we can flash remotely for you via our Flash My Router plan. A full list of compatible routers are listed there.

Known excluded countries are:
  • Afghanistan
  • Algeria
  • Angola
  • Bangladesh
  • Benin
  • Bhutan
  • Bosnia & Herzegovina
  • Botswana
  • Brazil
  • Burkina Faso
  • Burundi
  • Cape Verde
  • Central African Republic
  • Chad
  • Comoros
  • Congo – Brazzaville
  • Congo – Kinshasa
  • Cuba
  • Djibouti
  • Egypt
  • Eritrea
  • Eswatini
  • Ethiopia
  • Gabon
  • Gambia
  • Ghana
  • Guinea-Bissau
  • India
  • Indonesia
  • Iran
  • Iraq
  • Kenya
  • Kiribati
  • Kosovo
  • Laos
  • Lesotho
  • Liberia
  • Libya
  • Madagascar
  • Malawi
  • Malaysia
  • Mali
  • Mauritania
  • Mauritius
  • Mayotte
  • Mozambique
  • Myanmar (Burma)
  • Namibia
  • Nauru
  • Niger
  • Nigeria
  • Niue
  • North Korea
  • Palastinian Territories
  • Russia
  • Rwanda
  • Sao Tome & Principe
  • Senegal
  • Seychelles
  • Sierra Leone
  • Solomon Islands
  • Somalia
  • Sudan
  • Syria
  • Tajikistan
  • Tanzania
  • Togo
  • Tokelau
  • Tunisia
  • Turkmenistan
  • Tuvalu
  • Uganda
  • Wallis & Futuna
  • Western Sahara
  • Zambia
  • Zimbabwe

2025 - Postal Calendar

We will not be able to ship on the dates below. Your package will be shipped the following business day.

  • New Year’s Day: January-01
  • Martin Luther King Jr. Day: January-20
  • President’s Day: February-17
  • Memorial Day: May-26
  • Independence Day: July-04
  • Labor Day: September-01
  • Columbus Day: October-13
  • Veteran’s Day: November-11
  • Thanksgiving Day: November-27
  • Christmas Eve: December-24
  • New Year’s Eve: December-31


2025 Holiday Shipping Deadlines
In order to ensure timely delivery of your packages for the holiday season, please refer to the following shipping deadline dates for the following types of mail.

PLEASE NOTE: All deadlines are at 1PM EST of the designated.

US

  • USPS Priority 12/18
  • USPS APO/FPO/DPO 12/11
  • FedEx 12/21

International

International dates are for estimated delivery dates. However, customs can cause issues and may take longer.

  • Puerto Rico 12/21
  • Canada  12/21
  • Mexico 12/21
  • UK 12/20
  • Hong Kong 12/19
  • Australia 12/19
  • Middle East 12/19

Regardless of your carrier or country, we recommend that you place your holiday orders as soon as possible to ensure timely delivery.

Customs and Expenses

Will there be extra customs charges when my FlashRouter arrives?

There may be additional customs fees incurred based on the local importation laws of your country. You (the recipient) are responsible for all customs fees charged by your country’s customs agency.

Customs charges are NOT factored into the FlashRouters shipping cost.

All customs fees will be a separate charge and must be paid for by the recipient of the package.

We do our best to inform you of possible customs fees to the best of our ability, however we will not accept returns because of refusal to pay these fees.

If we receive a return due to failure to pay customs fees, you will be refunded but ONLY for the price of the FlashRouter. Original Shipping charges will NOT be refunded.

We do our best to make FlashRouters’ shipping quick and affordable but are unable to foresee all customs-related issues. Please be sure to check before ordering if you are concerned with local customs fees.

Do you charge sales tax?

We will charge sales tax in any state where we are required to do so. Currently that is within New Jersey, due to the fact that this is the physical location of our business and New York but that is subject to change as law dictates.

Any taxes or customs fees that are incurred to your country’s current policies are out of our hands. We do our best to make the router and the shipping quick and affordable.

IPVanish TP-Link OpenVPN Setup

TeamFlashRouters · Apr 29, 2024 ·

Preparing for IPVanish TP-Link Setup

Download your IPVanish .ovpn file

If you are not already an IPVanish user Sign Up Now.

1. Log in to your account on the IPVanish website.

IPVanish login

2. Successfully log in with your account information then go to IPVanish .ovpn file page.

3. Click on the .ovpn file for the server location you want to use to dowloand the .ovpn file. Do not open this file.

IPVanish download ovpn

TP-Link Router Setup for IPVanish

Login to TP-Link firmware settings in a browser on any computer or smart device connected to the FlashRouter’s network.

1. Navigate to the Advanced tab.

TP-Link Advanced settings

2. Navigate to the VPN Client tab.

TP-Link VPN Client

3. Check the Enable box next to VPN Client. Then click Save at the bottom of the page.

TP-Link VPN Client enable

4. Click the Add button in the Server List area.

TP-Link Add server button

5. In the Description field enter in the name you’d like to use for this OpenVPN Client profile. We typically advise entering in the location. Our example server was New York so I have entered in IPVanish New York.

Set the VPN Type to OpenVPN.

In the Username and Password fields paste in the IPVanish email and password you use to successfully login to your IPVanish website account.

Click Browse and select the .ovpn file you downloaded earlier. Then click Save.

TP-Link IPVanish

By default no devices will be assigned to the VPN Tunnel. With TP-Link firmware you must manually assign the devices that you want connected to the VPN tunnel. Proceed with the next steps to do so for all devices you want connected to VPN.

6. Click the Add button in the Device List area.

TP-Link add devices to VPN tunnel

7. A list of devices connected to the FlashRouter’s network will appear. Check the devices that you want to connect to VPN. Then click OK.

TP-Link select devices to add to VPN tunnel

8. Now that the devices have been assigned to the VPN connection click the Enable toggle in the Server List area.

TP-Link IPVanish Connected

Verify a successful IPVanish connection

  1. You should now see a CONNECTED message.
  2. Visit IPVanish’s IP Check to verify your new IP address and virtual location.

In some cases you may notice that the location is not showing the same location as the server you have input in your router settings; this is because geo tracking tools are often tricked by VPN connections. As long as you see an IP address that is not the same as your normal Internet IP address then you are indeed connected to IPVanish.

How to change the IPVanish server

  1. Follow the steps at the top of the page to obtain a new .ovpn file.
  2. Then proceed with the settings same as initial setup.

TROUBLESHOOTING

Still having issues? Visit the VPN Troubleshooting section.

Troubleshoot Here

Surfshark TP-Link WireGuard Setup

TeamFlashRouters · Apr 29, 2024 ·

Preparing for Surfshark TP-Link Setup

Download your Surfshark .conf file

If you are not already a Surfshark user Sign Up Now.

1. Log in to your account on the Surfshark website.

Surfshark Account Login

2. Click VPN Manual Setup.

Surfshark VPN Manual Setup

3. Select Router as the Setup method.

Surfshark setup method Router

4. Select WireGuard as the Protocol.

Surfshark select WireGuard

5. Select I don’t have a key pair.

Surfshark No Key Pair

6. Enter FlashRouter as the name of the connection and click Next.

Surfshark Connection Name

7. Click Generate a new key pair.

Surfshark Generate new Key Pair

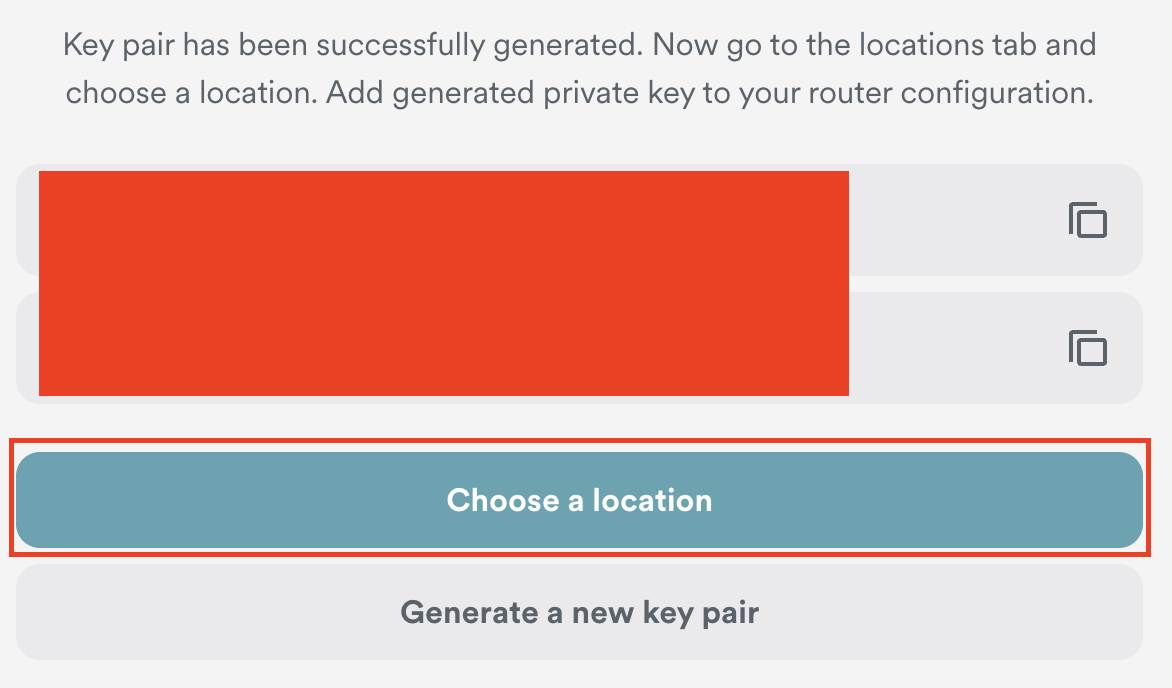
8. Click Choose a location.

Surfshark Choose a Location

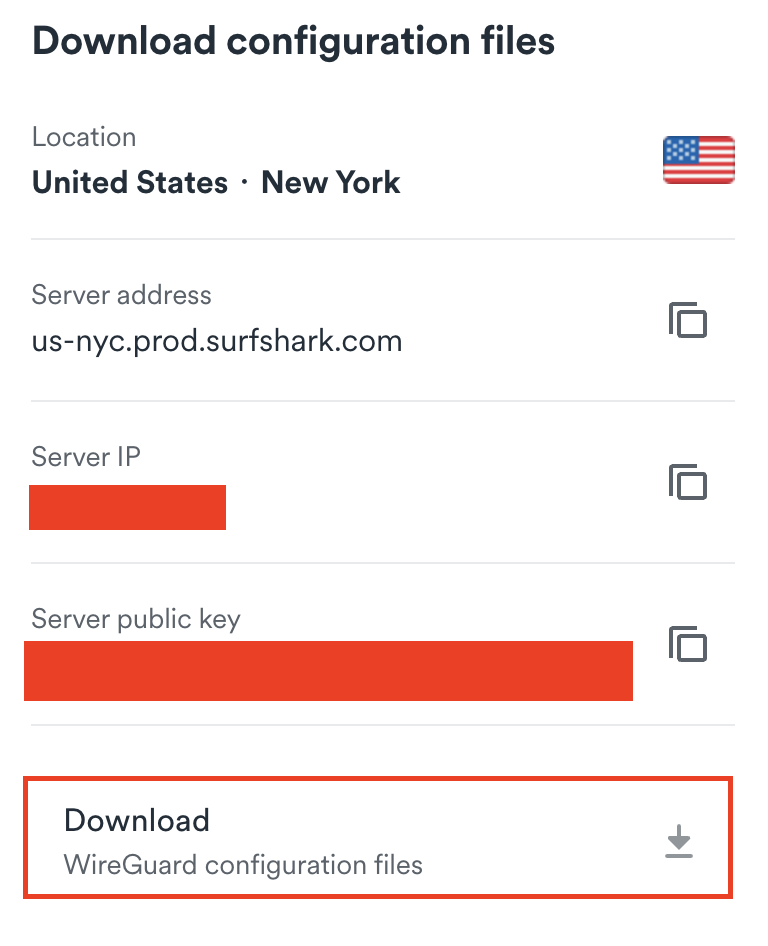
9. Select the server location you want to connect to. Unless you need a specific location we recommend using Surfshark’s recommended Fastest server. Click Download to download the .conf file for this Surfshark server location.

Surfshark download conf file

TP-Link Router Setup for Surfshark

Login to TP-Link firmware settings in a browser on any computer or smart device connected to the FlashRouter’s network.

1. Navigate to the Advanced tab.

TP-Link Advanced settings

2. Navigate to the VPN Client tab.

TP-Link VPN Client

3. Check the Enable box next to VPN Client. Then click Save at the bottom of the page.

TP-Link VPN Client enable

4. Click the Add button in the Server List area.

TP-Link Add server button

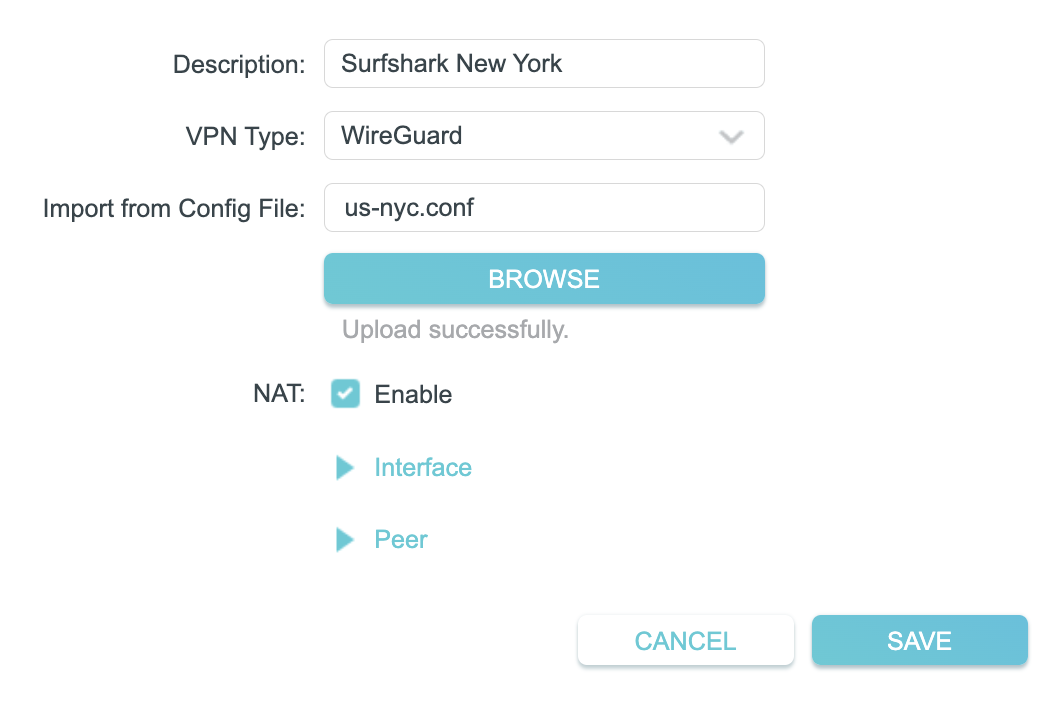
5. In the Description field enter in the name you’d like to use for this WireGuard Client profile. We typically advise entering in the location. Our example server was New York so I have entered in Surfshark New York.

Set the VPN Type to WireGuard.

Click Browse and select the .conf file you downloaded earlier. Then click Save.

TP-Link Surfshark WireGuard

By default no devices will be assigned to the VPN Tunnel. With TP-Link firmware you must manually assign the devices that you want connected to the VPN tunnel. Proceed with the next steps to do so for all devices you want connected to VPN.

6. Click the Add button in the Device List area.

TP-Link add devices to VPN tunnel

7. A list of devices connected to the FlashRouter’s network will appear. Check the devices that you want to connect to VPN. Then click OK.

TP-Link select devices to add to VPN tunnel

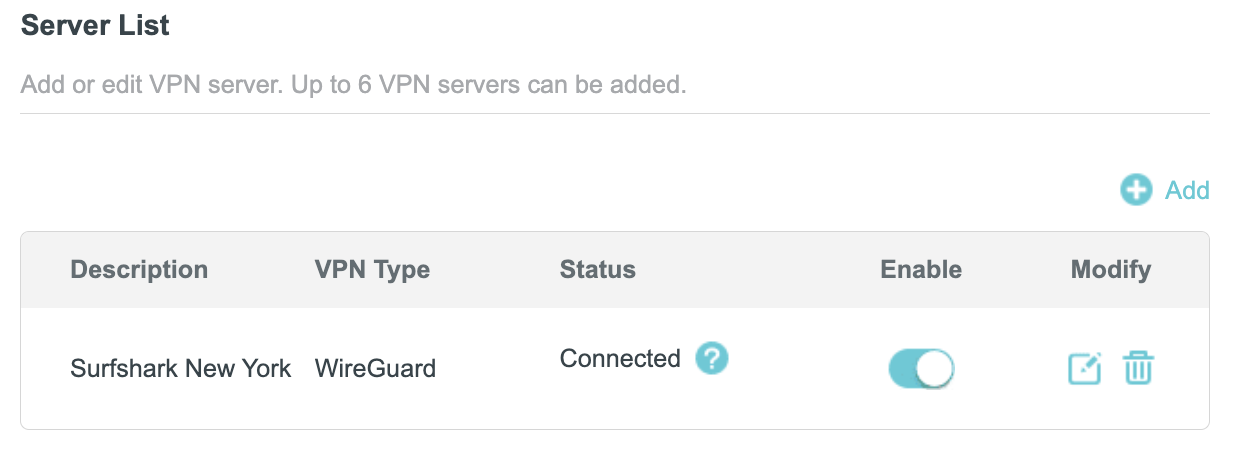
8. Now that the devices have been assigned to the VPN connection click the Enable toggle in the Server List area.

TP-Link Surfshark WireGuard Connected

Verify a successful Surfshark connection

  1. You should now see a CONNECTED message.
  2. Visit Surfshark’s IP Check to verify your new IP address and virtual location.

In some cases you may notice that the location is not showing the same location as the server you have input in your router settings; this is because geo tracking tools are often tricked by VPN connections. As long as you see an IP address that is not the same as your normal Internet IP address then you are indeed connected to Surfshark.

How to change the Surfshark server

  1. Follow the steps at the top of the page to obtain a new .conf file.
  2. Then proceed with the settings same as initial setup.

TROUBLESHOOTING

Still having issues? Visit the VPN Troubleshooting section.

Troubleshoot Here

Surfshark TP-Link OpenVPN Setup

TeamFlashRouters · Apr 29, 2024 ·

Preparing for Surfshark TP-Link Setup

Download your Surfshark .ovpn file

If you are not already a Surfshark user Sign Up Now.

1. Log in to your account on the Surfshark website.

Surfshark Account Login

2. Click VPN Manual Setup.

Surfshark VPN Manual Setup

3. Select Router as the Setup method.

Surfshark setup method Router

4. Select OpenVPN as the Protocol.

Surfshark OpenVPN Protocol

5. Copy and paste your Surfshark manual username and password to a secure location. This is the username and password you will enter into the router settings to connect to Surfshark.

Surfshark OpenVPN credentials

6. Click Location and select the server location you want to connect to. Unless you need a specific location we recommend using Surfshark’s recommended Fastest server. Click Download to download the UDP .ovpn file for this Surfshark server location.

Surfshark download .ovpn file

TP-Link Router Setup for Surfshark

Login to TP-Link firmware settings in a browser on any computer or smart device connected to the FlashRouter’s network.

1. Navigate to the Advanced tab.

TP-Link Advanced settings

2. Navigate to the VPN Client tab.

TP-Link VPN Client

3. Check the Enable box next to VPN Client. Then click Save at the bottom of the page.

TP-Link VPN Client enable

4. Click the Add button in the Server List area.

TP-Link Add server button

5. In the Description field enter in the name you’d like to use for this OpenVPN Client profile. We typically advise entering in the location. Our example server was New York so I have entered in Surfshark New York.

Set the VPN Type to OpenVPN.

In the Username and Password fields paste in the Surfshark username and password we obtained earlier.

Click Browse and select the .ovpn file you downloaded earlier. Then click Save.

TP-Link Surfshark OpenVPN

By default no devices will be assigned to the VPN Tunnel. With TP-Link firmware you must manually assign the devices that you want connected to the VPN tunnel. Proceed with the next steps to do so for all devices you want connected to VPN.

6. Click the Add button in the Device List area.

TP-Link add devices to VPN tunnel

7. A list of devices connected to the FlashRouter’s network will appear. Check the devices that you want to connect to VPN. Then click OK.

TP-Link select devices to add to VPN tunnel

8. Now that the devices have been assigned to the VPN connection click the Enable toggle in the Server List area.

TP-Link Surfshark OpenVPN connected

Verify a successful Surfshark connection

  1. You should now see a CONNECTED message.
  2. Visit Surfshark’s IP Check to verify your new IP address and virtual location.

In some cases you may notice that the location is not showing the same location as the server you have input in your router settings; this is because geo tracking tools are often tricked by VPN connections. As long as you see an IP address that is not the same as your normal Internet IP address then you are indeed connected to Surfshark.

How to change the Surfshark server

  1. Follow the steps at the top of the page to obtain a new .ovpn file.
  2. Then proceed with the settings same as initial setup.

TROUBLESHOOTING

Still having issues? Visit the VPN Troubleshooting section.

Troubleshoot Here

ProtonVPN TP-Link WireGuard Setup

TeamFlashRouters · Apr 29, 2024 ·

Preparing for ProtonVPN TP-Link Setup

Download your ProtonVPN .conf file

If you are not already an ProtonVPN user Sign Up Now.

1. Log in to your account on the ProtonVPN website.

ProtonVPN Account Sign in

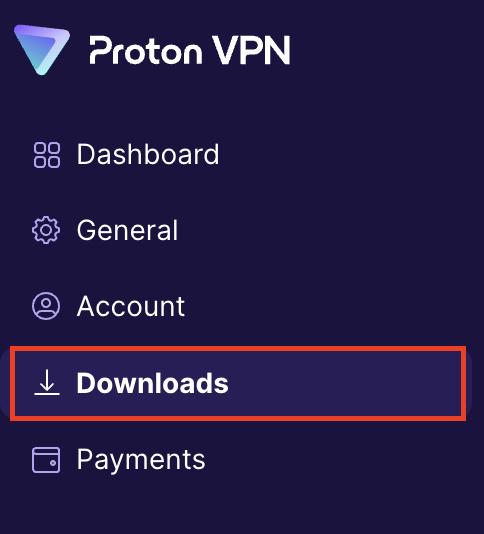
2. Click Downloads.

ProtonVPN Downloads

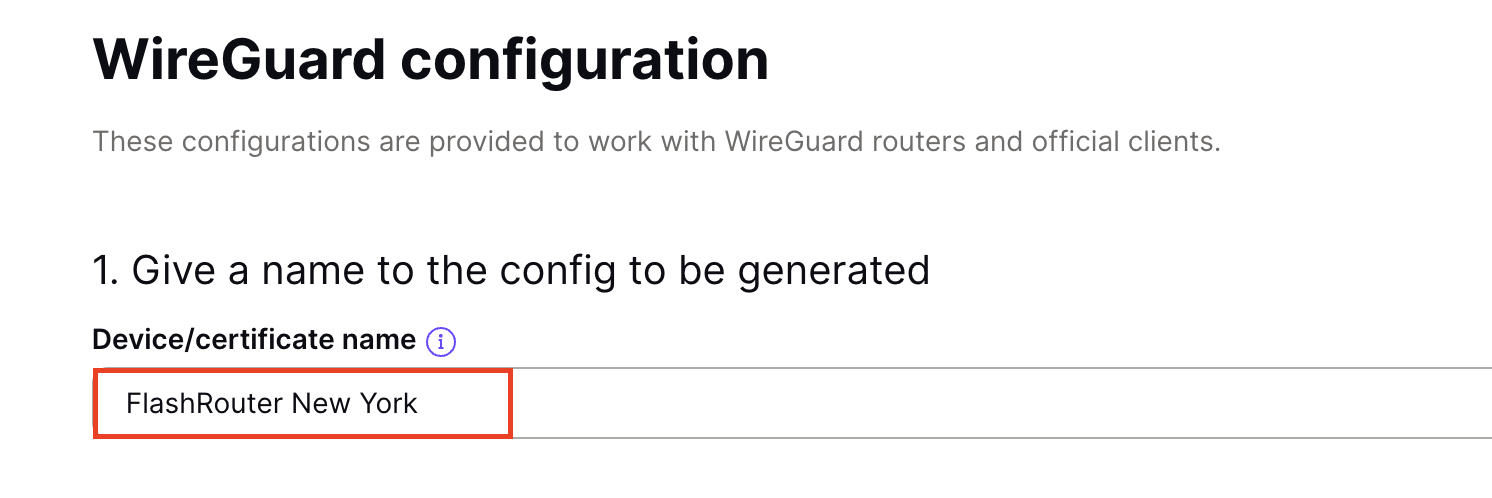
3. Scroll down to WireGuard configuration and name the device FlashRouter.

ProtonVPN WireGuard Configuration Name

4. Select Router as the platform.

ProtonVPN WireGuard select Platform

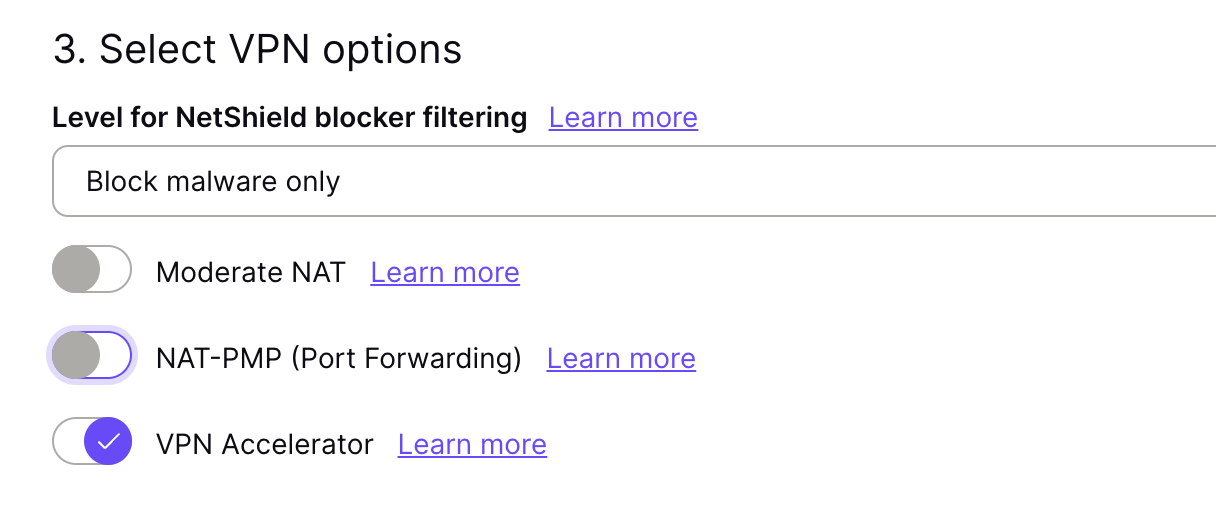
5. Select the VPN options that best fit your needs. We typically use the settings as seen in the screenshot here if you are unsure.

ProtonVPN WireGuard VPN options

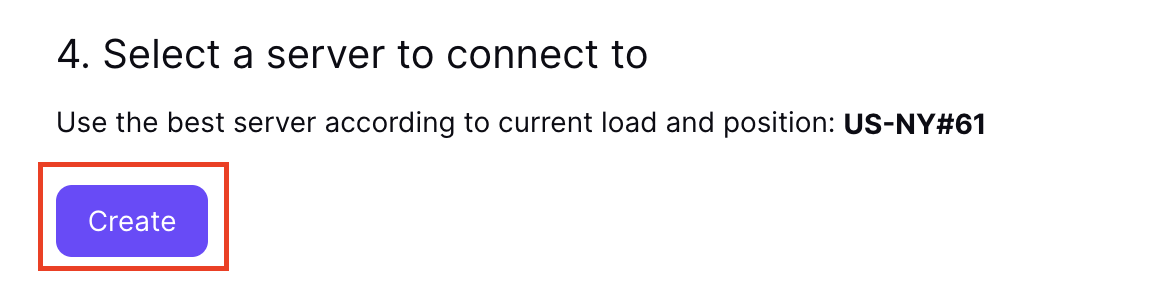
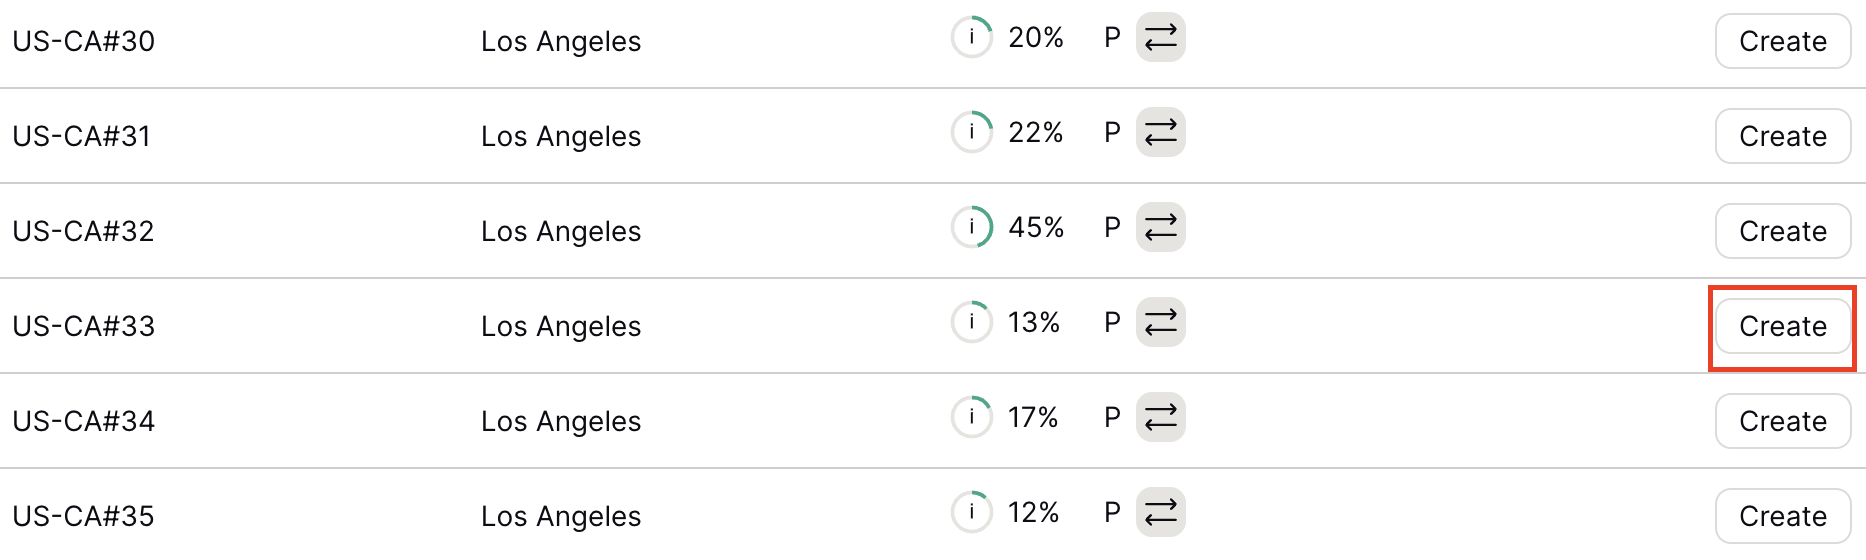
6. Next select the server that you would like to connect to and click Create. At the top of the page you’ll see ProtonVPN’s recommended server which we recommend using unless you need to connect to a specific location.

If you need a specific server location find it in the list and click Create.

ProtonVPN WireGuard recommended server
ProtonVPN WireGuard specific server

7. After clicking Create a new window will appear. Click Download to download the .conf file to your computer.

TP-Link Router Setup for ProtonVPN

Login to TP-Link firmware settings in a browser on any computer or smart device connected to the FlashRouter’s network.

1. Navigate to the Advanced tab.

TP-Link Advanced settings

2. Navigate to the VPN Client tab.

TP-Link VPN Client

3. Check the Enable box next to VPN Client. Then click Save at the bottom of the page.

TP-Link VPN Client enable

4. Click the Add button in the Server List area.

TP-Link Add server button

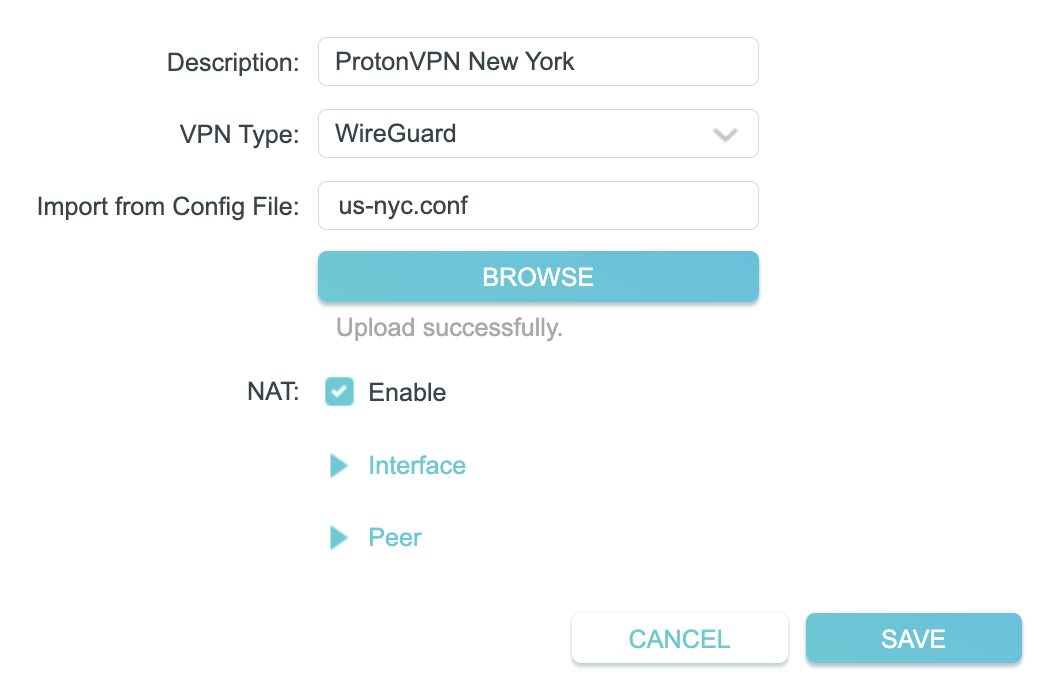
5. In the Description field enter in the name you’d like to use for this WireGuard Client profile. We typically advise entering in the location. Our example server was New York so I have entered in ProtonVPN New York.

Set the VPN Type to WireGuard.

Click Browse and select the .conf file you downloaded earlier. Then click Save.

TP-Link ProtonVPN WireGuard

By default no devices will be assigned to the VPN Tunnel. With TP-Link firmware you must manually assign the devices that you want connected to the VPN tunnel. Proceed with the next steps to do so for all devices you want connected to VPN.

6. Click the Add button in the Device List area.

TP-Link add devices to VPN tunnel

7. A list of devices connected to the FlashRouter’s network will appear. Check the devices that you want to connect to VPN. Then click OK.

TP-Link select devices to add to VPN tunnel

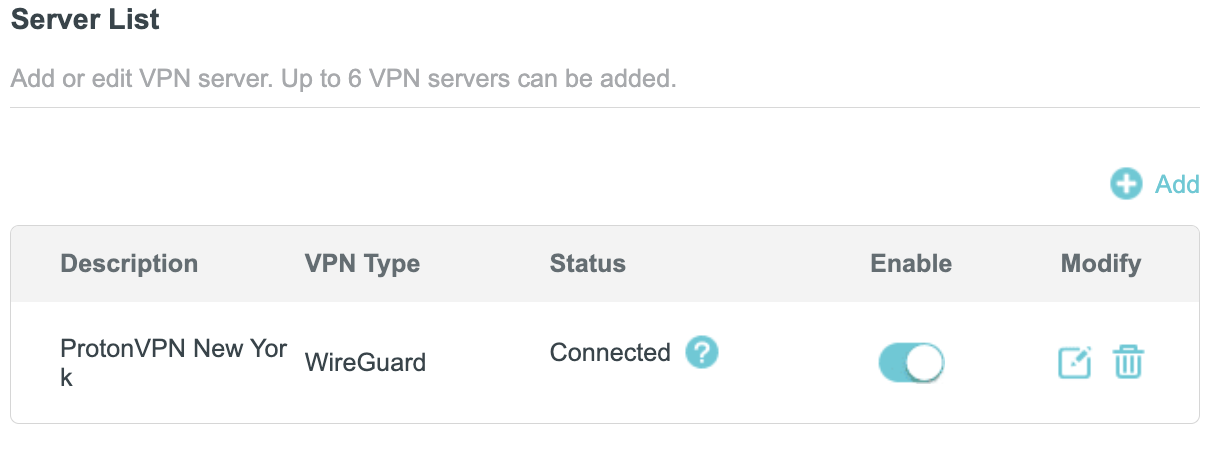
8. Now that the devices have been assigned to the VPN connection click the Enable toggle in the Server List area.

TP-Link ProtonVPN WireGuard connected

Verify a successful ProtonVPN connection

  1. You should now see a CONNECTED message.
  2. Visit ProtonVPN’s IP Check to verify your new IP address and virtual location.

In some cases you may notice that the location is not showing the same location as the server you have input in your router settings; this is because geo tracking tools are often tricked by VPN connections. As long as you see an IP address that is not the same as your normal Internet IP address then you are indeed connected to ProtonVPN.

How to change the ProtonVPN server

  1. Follow the steps at the top of the page to obtain a new .conf file.
  2. Then proceed with the settings same as initial setup.

TROUBLESHOOTING

Still having issues? Visit the VPN Troubleshooting section.

Troubleshoot Here

CyberGhost AsusWRT OpenVPN Setup

TeamFlashRouters · Apr 29, 2024 ·

Preparing for CyberGhost Setup

Obtain your CyberGhost OpenVPN information

If you are not already a CyberGhost user Sign Up Now.

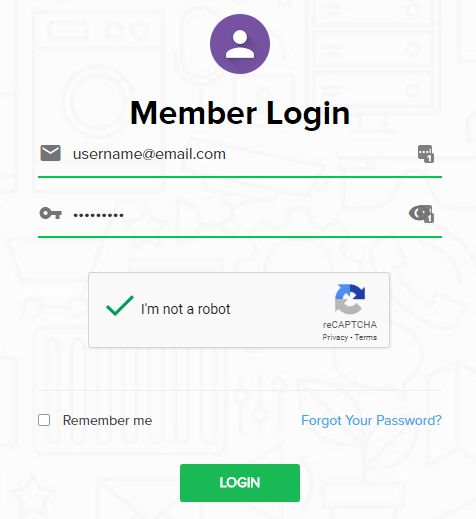
1. Log in to your account on the CyberGhost website.

CyberGhost Website Login

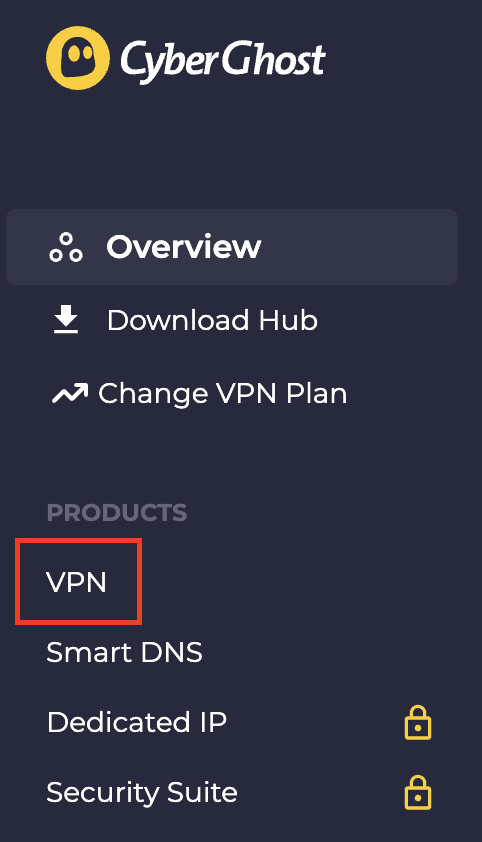
2. Select VPN.

CyberGhost VPN

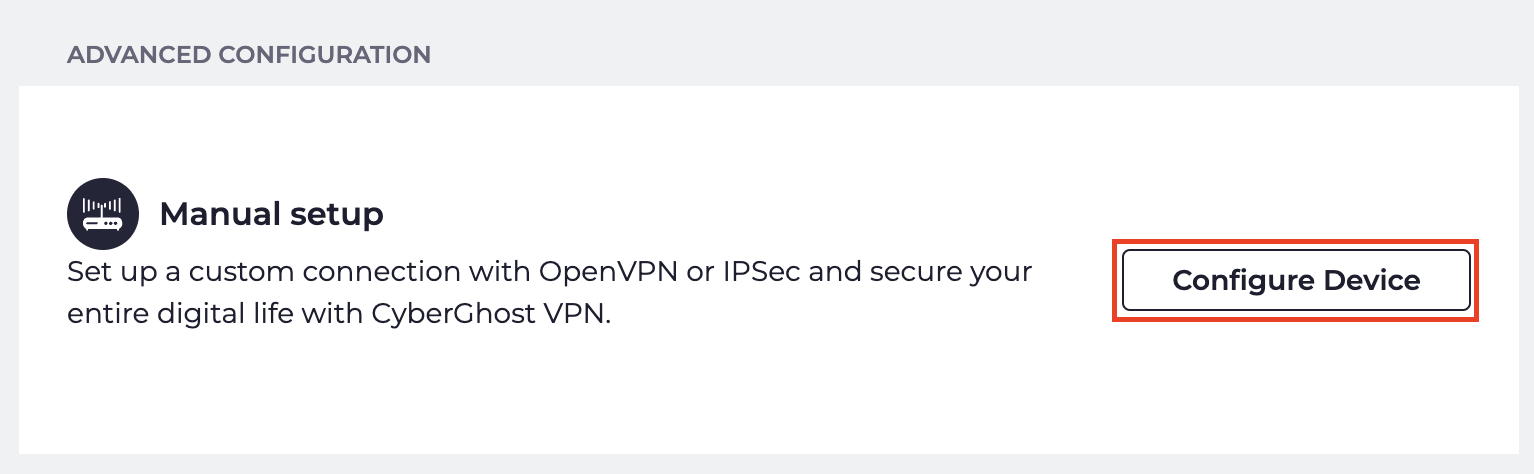
3. Click Configure New Device.

CyberGhost Configure Device

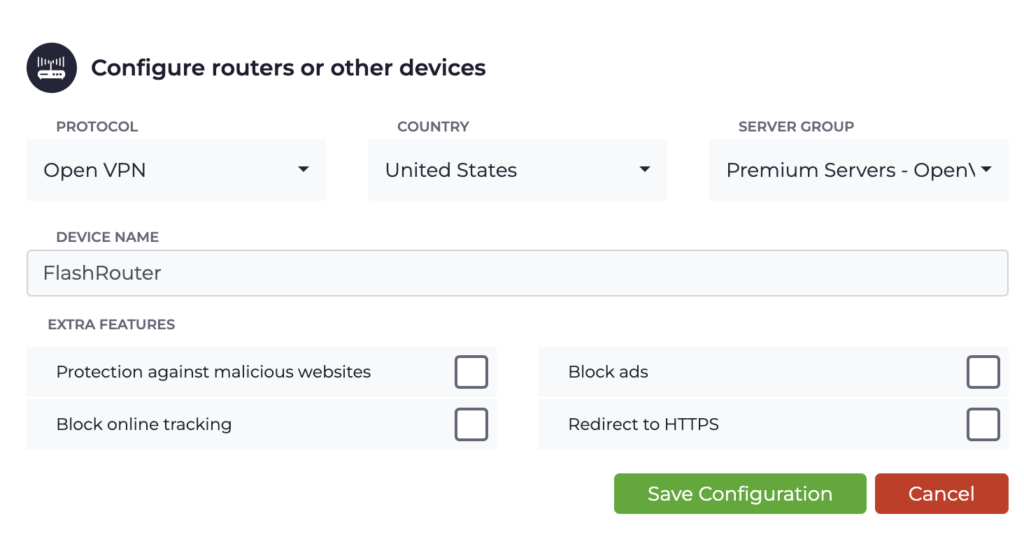
4. Set Protocol to OpenVPN. Select the Country you would like to connect to. Select the Server Group. Name the device in the Device Name field. Click Save Configuration.

CyberGhost protocol and location

5. Press View configuration.

CyberGhost view configuration

6. Copy the Username, and Password that appear to a notepad, since you will need this information later in the setup process. Click Download Configuration.

CyberGhost Website OpenVPN Configuration Files Generator 1

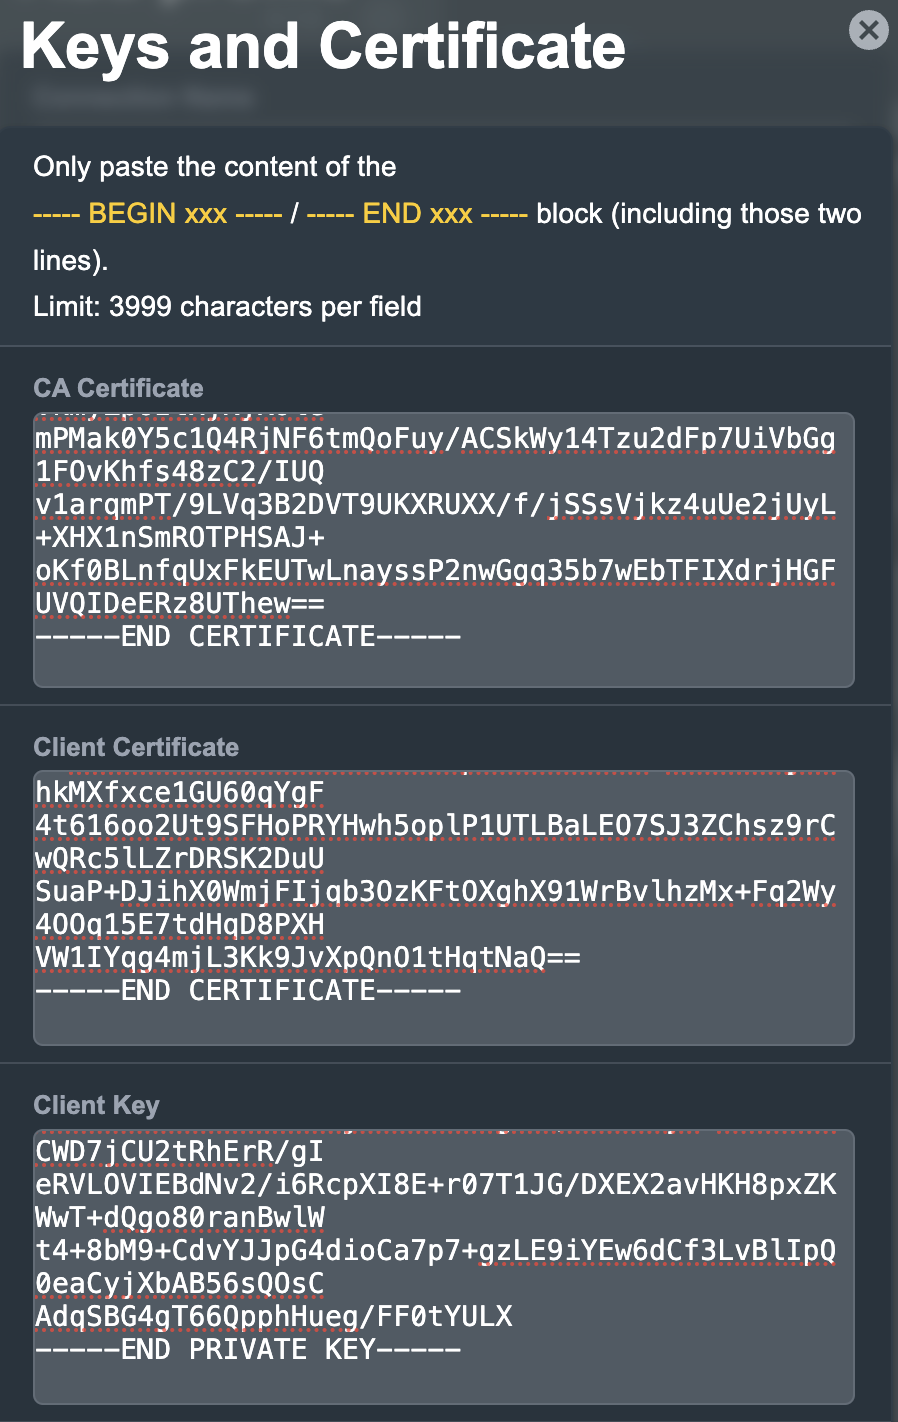
Open the folder that was downloaded. Then open the ca.crt the client.crt, and client.key files with NotePad++ for Windows or TextEdit for Apple. All CyberGhost servers have different keys and certificates.

AsusWRT Router Setup for CyberGhost

Login to AsusWRT firmware settings in a browser on any computer or smart device connected to the AsusWRT FlashRouter’s network.

1. Navigate to the VPN tab.

Merlin VPN Tab

2. Navigate to the VPN Fusion tab.

Asus VPN Fusion

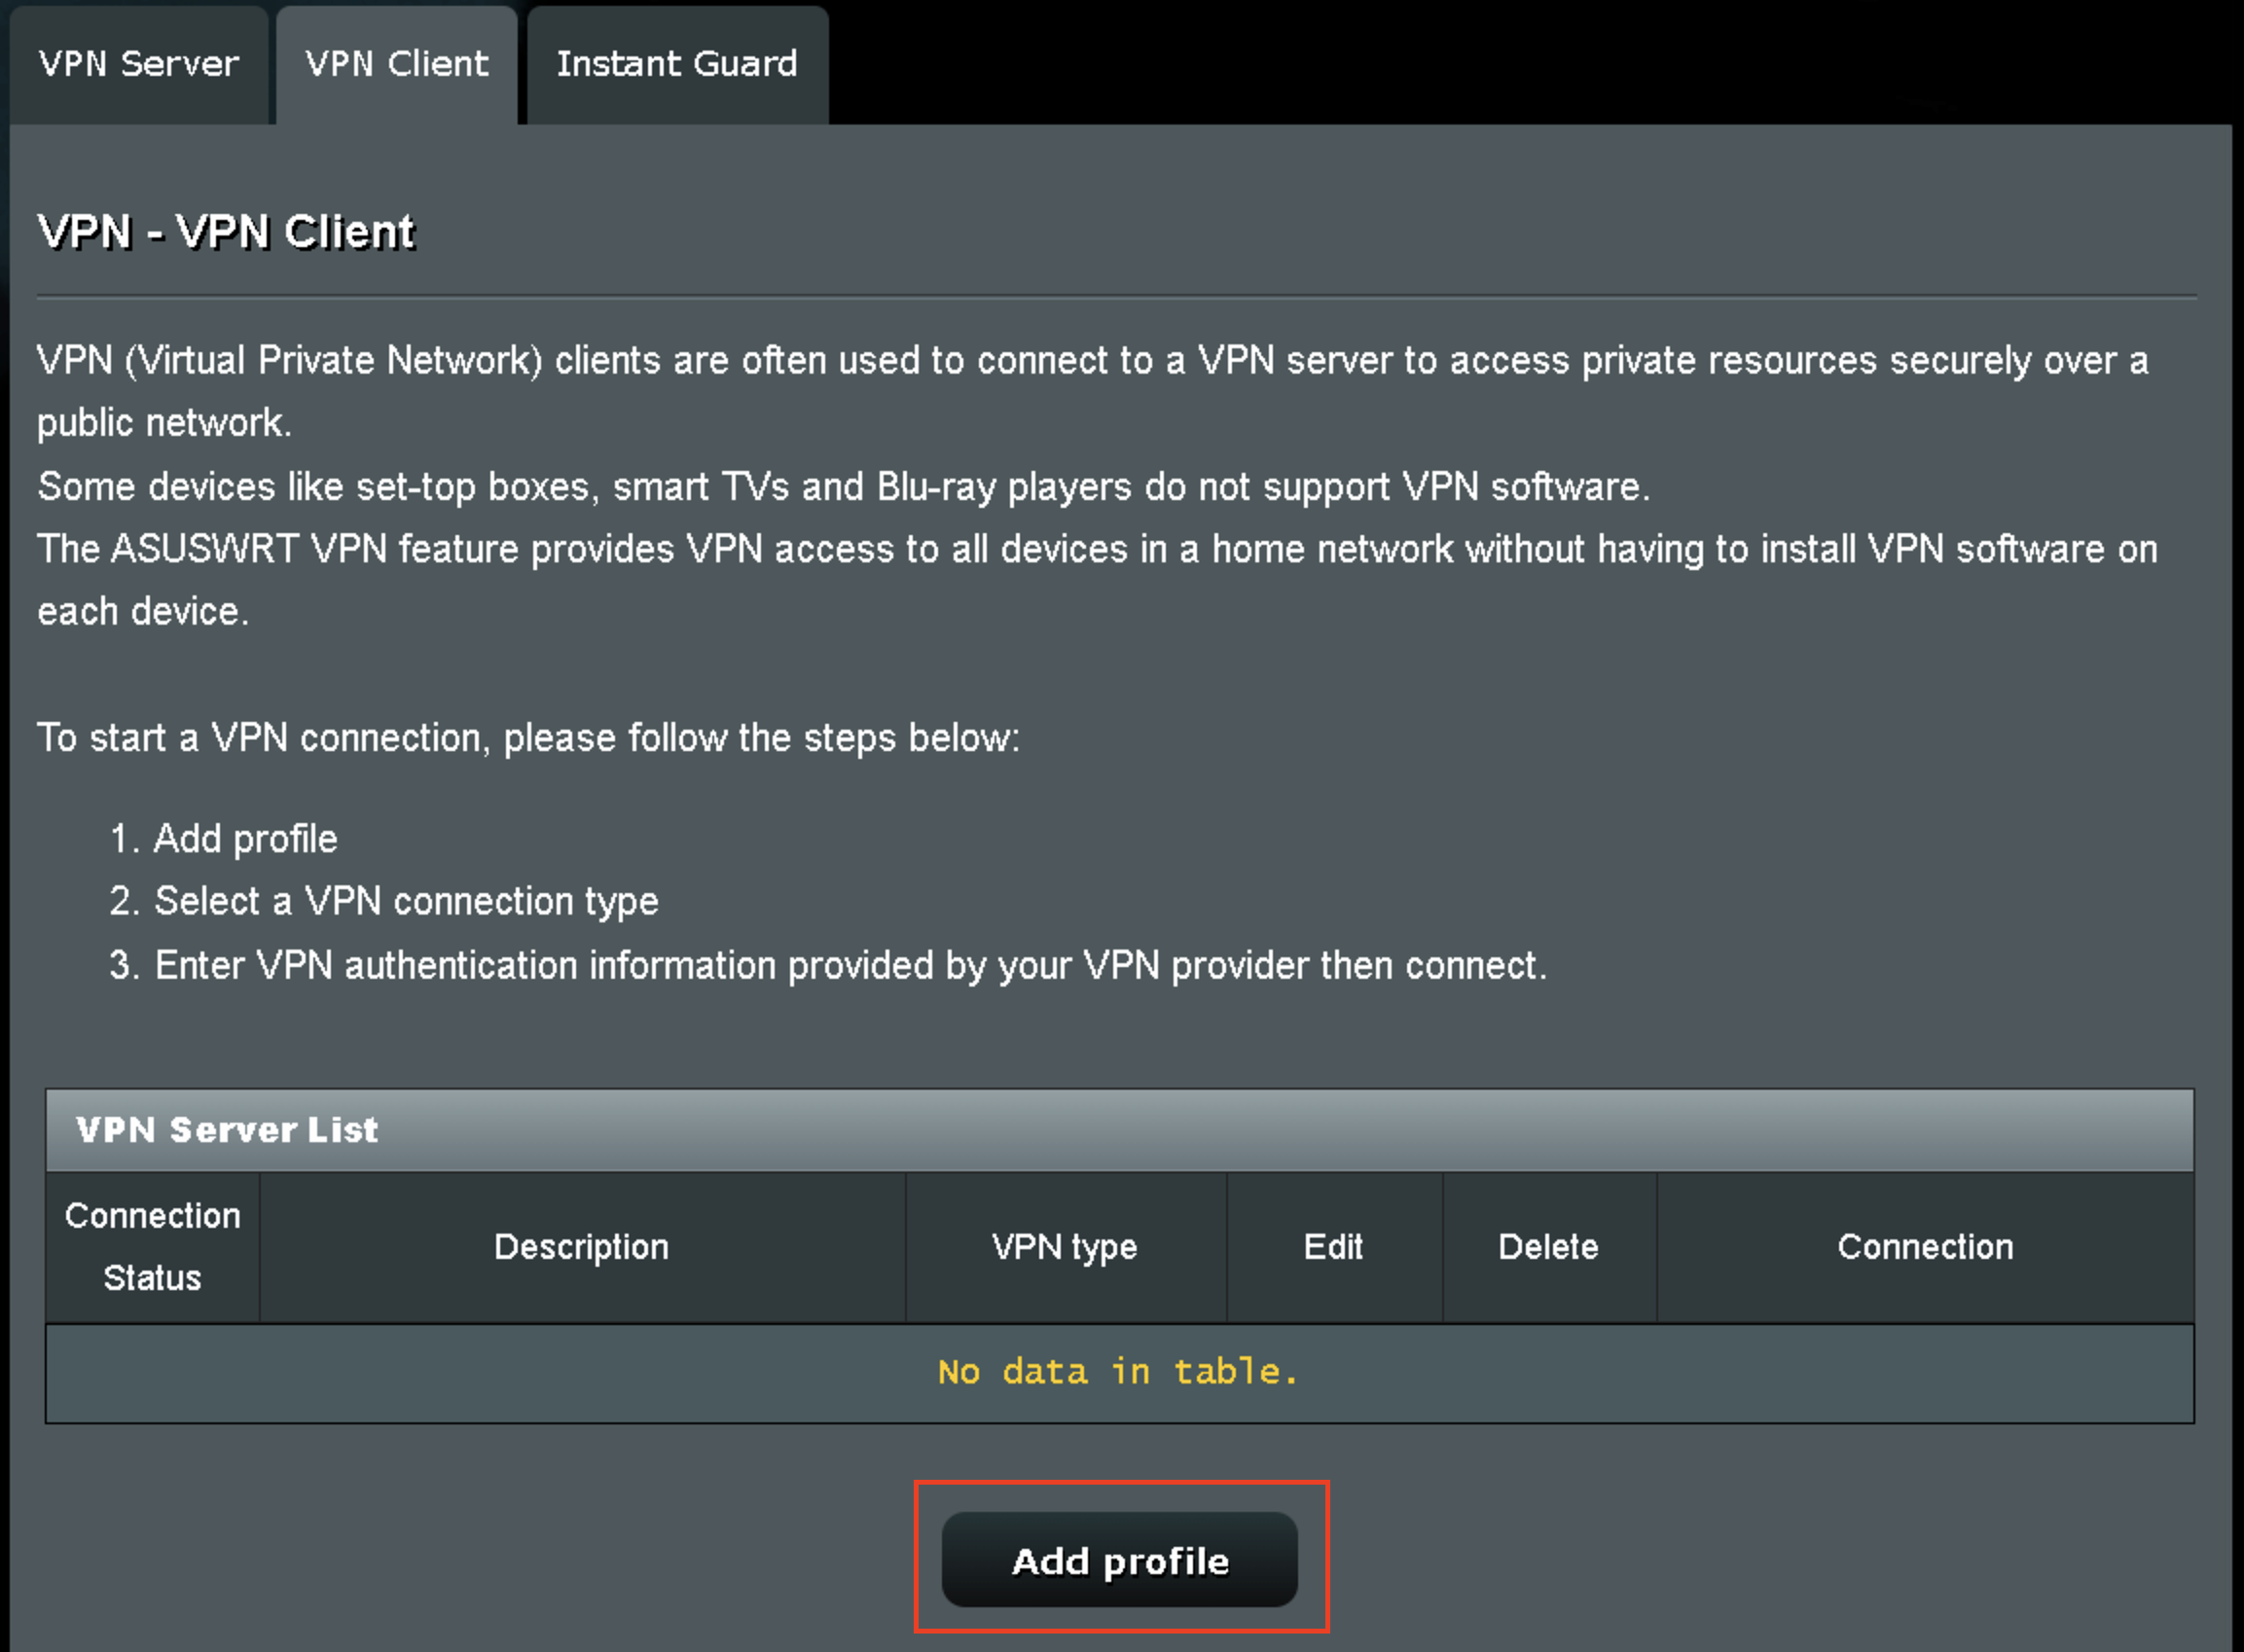
3. Click Add profile.

Asus Add profile

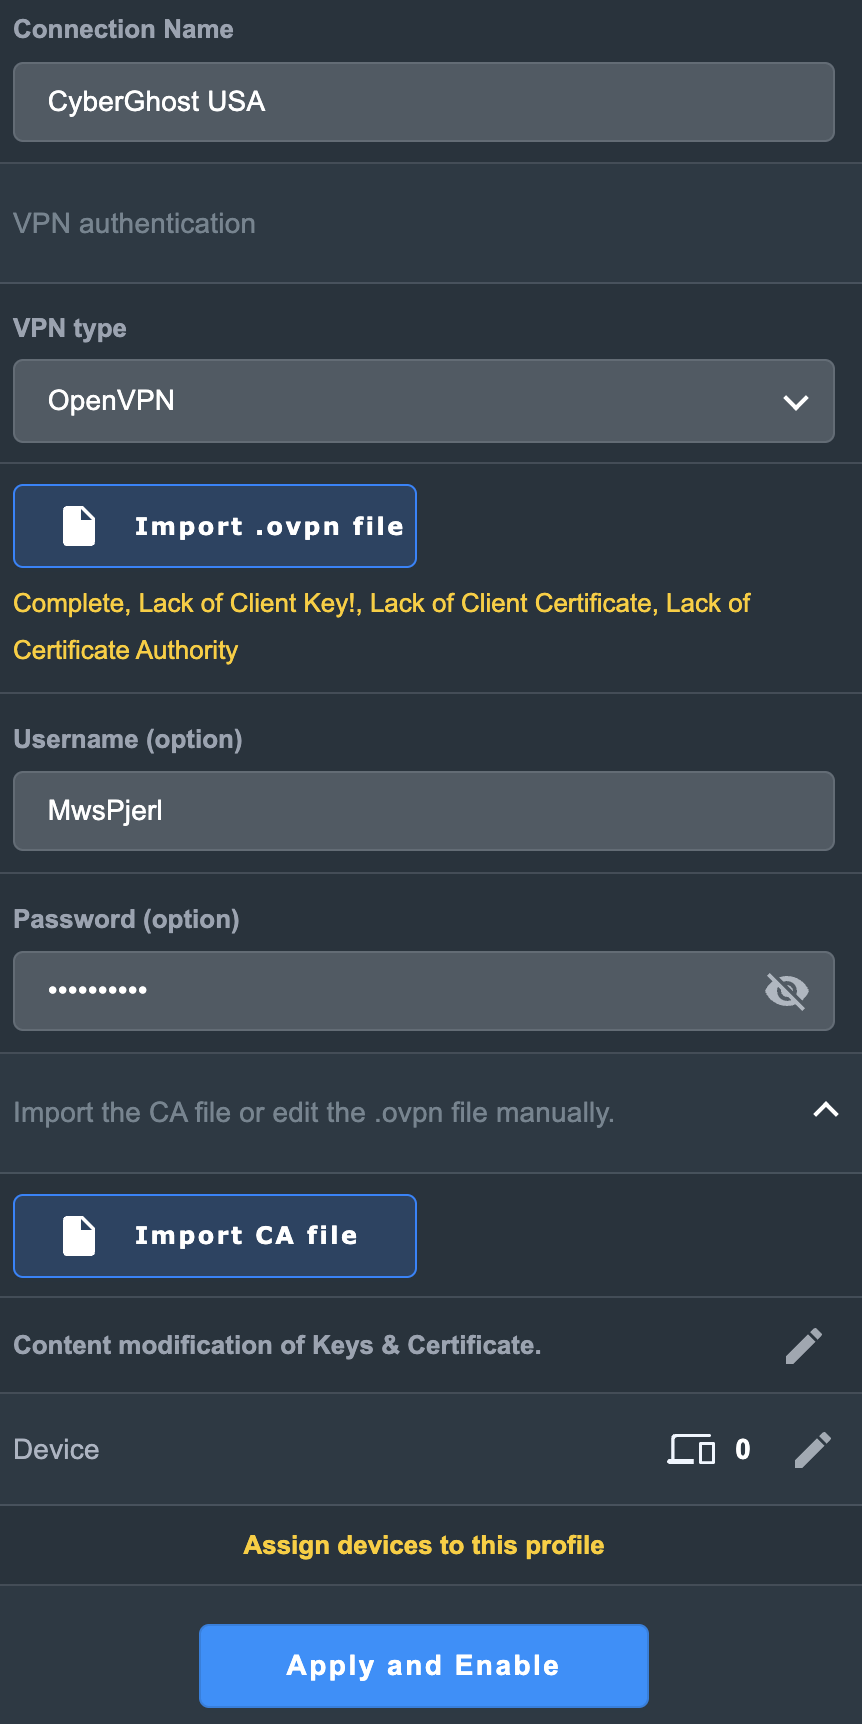
4. In the Connection Name field enter in the name you’d like to use for this OpenVPN Client profile. We typically advise entering in the location or server number here. Our example server was in USA so I have entered in CyberGhost USA.

5. In the VPN Type dropdown select OpenVPN.

6. Click Import .ovpn file and select the openvpn.ovpn file from the folder you downloaded earlier. Then click Upload.

7. In the Username and Password fields enter in the CyberGhost assigned username and password that you obtained earlier.

8. After uploading the openvpn.ovpn file you will get a message that says “Complete, Lack of Client Key!, Lack of Client Certificate, Lack of Certificate Authority”. For CyberGhost you need to enter in these details manually. Click Import the CA file or edit the .ovpn file manually and then click the edit icon next to Content modification of Keys and Certificate.

Asus CyberGhost import certs and keys

9. In the Certificate Authority field paste in the entire content of the ca.crt file.

—– BEGIN xxx —– / —– END xxx —– block (including those two lines).

10. In the Client Certificate field paste in the entire content of the client.crt file.

—– BEGIN xxx —– / —– END xxx —– block (including those two lines).

11. In the Client Key field paste in the entire content of the client.key file.

—– BEGIN xxx —– / —– END xxx —– block (including those two lines).

Then click OK.

Asus CyberGhost enter certs and keys

8. Click Apply and Enable at the bottom of the page.

Asus CyberGhost profile

If you only want certain devices to connect to the OpenVPN Client profile you are setting up instead of all the devices connected to the FlashRouter’s network click into the profile and disable Apply to all devices. Then click Devices and select the devices that you want to connect to VPN.

Asus VPN devices
Asus VPN select devices

9. At the top of the page set the Service State toggle to ON to activate the VPN connection.

Asus CyberGhost connected

Verify a successful CyberGhost connection

  1. You should now see a CONNECTED message.
  2. Visit What is my IP Address from a private/incognito browser to verify your new IP address and virtual location.

In some cases you may notice that the location is not showing the same location as the server you have input in your router settings; this is because geo tracking tools are often tricked by VPN connections. As long as you see an IP address that is not the same as your normal Internet IP address then you are indeed connected to CyberGhost.

How to change the CyberGhost server

  1. Follow the steps at the top of the page to create a new CyberGhost location profile in your account.
  2. Then proceed with the settings same as initial setup.

TROUBLESHOOTING

Still having issues? Visit the VPN Troubleshooting section.

Troubleshoot Here

IPVanish AsusWRT OpenVPN Setup

TeamFlashRouters · Apr 29, 2024 ·

Preparing for IPVanish AsusWRT Setup

Download your IPVanish .ovpn file

If you are not already an IPVanish user Sign Up Now.

1. Log in to your account on the IPVanish website.

IPVanish login

2. Successfully log in with your account information then go to IPVanish .ovpn file page.

3. Click on the .ovpn file for the server location you want to use to dowloand the .ovpn file. Do not open this file.

IPVanish download ovpn

AsusWRT Router Setup for IPVanish

Login to AsusWRT firmware settings in a browser on any computer or smart device connected to the AsusWRT FlashRouter’s network.

1. Navigate to the VPN tab.

Merlin VPN Tab

2. Navigate to the VPN Fusion tab.

Asus VPN Fusion

3. Click Add profile.

Asus Add profile

4. In the Connection Name field enter in the name you’d like to use for this OpenVPN Client profile. We typically advise entering in the location or server number here. Our example server was in New York so I have entered in IPVanish New York.

5. In the VPN Type dropdown select OpenVPN.

6. Click Import .ovpn file and select the .ovpn file you downloaded earlier. Then click Upload.

7. In the Username and Password fields paste in the IPVanish email and password you use to successfully login to your IPVanish website account.

8. Click Apply and Enable at the bottom of the page.

Asus IPVanish profile

If you only want certain devices to connect to the OpenVPN Client profile you are setting up instead of all the devices connected to the FlashRouter’s network click into the profile and disable Apply to all devices. Then click Devices and select the devices that you want to connect to VPN.

Asus VPN devices
Asus VPN select devices

9. At the top of the page set the Service State toggle to ON to activate the VPN connection.

Asus IPVanish Connected

Verify a successful IPVanish connection

  1. You should now see a CONNECTED message.
  2. Visit IPVanish’s IP Check to verify your new IP address and virtual location.

In some cases you may notice that the location is not showing the same location as the server you have input in your router settings; this is because geo tracking tools are often tricked by VPN connections. As long as you see an IP address that is not the same as your normal Internet IP address then you are indeed connected to IPVanish.

How to change the IPVanish server

  1. Follow the steps at the top of the page to obtain a new .ovpn file.
  2. Then proceed with the settings same as initial setup.

TROUBLESHOOTING

Still having issues? Visit the VPN Troubleshooting section.

Troubleshoot Here

Why can’t I access router settings?

Dave · May 3, 2019 ·

Be sure to first try the preset details to access your FlashRouter’s settings.

First time setup

Are you connected to the FlashRouter's network?

In order to access the FlashRouter’s settings you need to be connected to the FlashRouter’s network via ethernet or WiFi.

It is possible that if you are connected to the FlashRouter’s network you device might have static IP settings from a previous connection preventing it from being read correctly. Check your device’s static IP settings before proceeding.

Is your FlashRouter wired correctly?

Your FlashRouter should be wired as detailed in our Connect FlashRouter to the Internet setup.

A common mistake is to connect from your modem or other router to a LAN/numbered port of the FlashRouter instead of the WAN/Internet port of the FlashRouter as it should be. Doing so results in no access to the FlashRouter’s settings.

Lost access

How to find you FlashRouter's Local IP Address?

It is possible that your Local IP Address was changed at some point. Your Local IP Address is the address that you can access the FlashRouter’s settings with. We recommend finding the Local IP Address of the FlashRouter.

Was your FlashRouter reset?

If your FlashRouter is showing a local IP Address of 192.168.1.1 and you are seeing ‘dd-wrt’ as an available network in your wireless networks, your FlashRouter was reset. Reconfigure your FlashRouter.

Keep in mind that seeing a Local IP Address of 192.168.1.1 can also mean your are wired incorrectly and the router has not been reset. Be sure to check your wireless networks for ‘dd-wrt’. If the FlashRouter’s wireless network name appears as it was set then your FlashRouter was not reset and you should see the above section.

Tried updating firmware

Why can't I access my FlashRouter after a firmware upgrade?

When performing a firmware upgrade there is a dropdown that has Don’t Reset or Reset to Default settings as options.

If you accidentally selected Reset to Default settings you will need to reconfigure your FlashRouter.

If you had Don’t Reset selected and are still unable to connect to the FlashRouter’s network after a firmware upgrade, first make sure you are connected to the FlashRouter’s network as WiFi can disconnect during an upgrade, and then Reboot the FlashRouter.

PureVPN Manual OpenVPN Setup

TeamFlashRouters · Apr 16, 2019 ·

Preparing for Manual PureVPN Setup

Verify your PureVPN login information

If you are not already an PureVPN user Sign Up Now.

Log in to your account on the PureVPN website.

PureVPN Website Login

Navigate to the Home page and note the VPN username on this page. You will need this specific username later on in the configuration process.
Ex: purevpn0s1234567

PureVPN Server Addresses

View a full list of PureVPN servers.

United States

Miami:
usfl1-ovpn-udp.pointtoserver.com

Seattle:
ussa-ovpn-udp.pointtoserver.com

Houston
:
ustx1-ovpn-tcp.pointtoserver.com

Georgia
:
usga1-ovpn-udp.pointtoserver.com

New Jersey
:
usnj1-ovpn-udp.pointtoserver.com

Washington
:
uswdc1-ovpn-udp.pointtoserver.com

Chicago
:
usil1-ovpn-udp.pointtoserver.com

Phoenix
:
usphx1-ovpn-udp.pointtoserver.com

Los Angeles
:
usla1-ovpn-udp.pointtoserver.com

Virginia
:
vlbr-usvc1-ovpn-udp.pointtoserver.com

San Francisco
:
vlsa-ussf1-ovpn-udp.pointtoserver.com

New York
:
usny1-ovpn-udp.pointtoserver.com

Ohio
:
vleu-usoh1-ovpn-udp.pointtoserver.com

United Kingdom

London:
ukl1-ovpn-udp.pointtoserver.com

Gosport:
ukg1-ovpn-udp.pointtoserver.com

Maidenhead:
ukm1-ovpn-udp.pointtoserver.com

Manchester
:
vlus-uk-man1-ovpn-udp.pointtoserver.com

Leicester
:
vlap-ukle1-ovpn-udp.pointtoserver.com

DD-WRT Router Setup for PureVPN

Navigate to Services > VPN

Enter PureVPN settings

OpenVPN Client

Start OpenVPN Client

If you wish to disable your VPN connection simply set this to Disable at any time and click Apply Settings.

Server IP/Name

Copy and paste the server you would like to connect to from the server list above. Be sure there are no extra spaces or characters.

If you wish to change PureVPN connection locations, THIS IS THE ONLY FIELD YOU NEED TO CHANGE.

Port

53

Tunnel Device

TUN

Tunnel Protocol

UDP

Encryption cipher

AES-256-CBC

Hash Algorithm

SHA1

Userpass Authentication

Enable

Username

Enter the Username you noted from the Home page above.
Ex: purevpn0s1234567

Password

Enter the Password you successfully logged in to your PureVPN account with.

Advanced Options

Enable

TLS Cipher

None

LZO Compression

Adaptive

NAT

Enable

Firewall Protection

Enable

TLS Auth Key

-----BEGIN OpenVPN Static key V1-----
e30af995f56d07426d9ba1f824730521
d4283db4b4d0cdda9c6e8759a3799dcb
7939b6a5989160c9660de0f6125cbb1f
585b41c074b2fe88ecfcf17eab9a33be
1352379cdf74952b588fb161a93e13df
9135b2b29038231e02d657a6225705e6
868ccb0c384ed11614690a1894bfbeb2
74cebf1fe9c2329bdd5c8a40fe882062
4d2ea7540cd79ab76892db51fc371a3a
c5fc9573afecb3fffe3281e61d72e915
79d9b03d8cbf7909b3aebf4d90850321
ee6b7d0a7846d15c27d8290e031e951e
19438a4654663cad975e138f5bc5af89
c737ad822f27e19057731f41e1e254cc
9c95b7175c622422cde9f1f2cfd3510a
dd94498b4d7133d3729dd214a16b27fb
-----END OpenVPN Static key V1-----

Additional Config

tls-cipher “DEFAULT:@SECLEVEL=0”

Policy Based Routing

This field can be used for split VPN and Dual Gateway routing.

CA Cert

-----BEGIN CERTIFICATE-----
MIIEoTCCA4mgAwIBAgIJANysBdFD6U2oMA0GCSqGSIb3DQEBBQUAMIGRMQswCQYD
VQQGEwJISzELMAkGA1UECBMCSEsxETAPBgNVBAcTCEhvbmdLb25nMRAwDgYDVQQK
EwdQdXJlVlBOMQswCQYDVQQLEwJJVDEQMA4GA1UEAxMHUHVyZVZQTjEQMA4GA1UE
KRMHUHVyZVZQTjEfMB0GCSqGSIb3DQEJARYQbWFpbEBob3N0LmRvbWFpbjAeFw0x
NDA0MTAwNzI5NDlaFw0yNDA0MDcwNzI5NDlaMIGRMQswCQYDVQQGEwJISzELMAkG
A1UECBMCSEsxETAPBgNVBAcTCEhvbmdLb25nMRAwDgYDVQQKEwdQdXJlVlBOMQsw
CQYDVQQLEwJJVDEQMA4GA1UEAxMHUHVyZVZQTjEQMA4GA1UEKRMHUHVyZVZQTjEf
MB0GCSqGSIb3DQEJARYQbWFpbEBob3N0LmRvbWFpbjCCASIwDQYJKoZIhvcNAQEB
BQADggEPADCCAQoCggEBAJYqtUkQTlf/pHcGXuuII8S3pfI0fwFbs7l/1RP3nX3n
v1vyuvLi7h0jWsgJU0XM7LJywiRFJ8zsMLH7KZnIg7bscb50GY75WIq7C2NnWnnS
7zzyCCm2XD/2xZPym2lVRytpnWJbpemSS6Hdz7xI3q2FmixuBa1t5FeKsXfeaGGg
+ohwLvamnGHJYUYu3Nu0EWVzzy5wgT0c2C5jleGxl3kxRimD8FpnlAVdqyt0ib/f
f9XanaotSopIHUZmpYjT+udRC2+harlNKvOXYgDRl1mpimCvlzEWpZAo8dyBCxWl
xlBIT8OA8rimGi1XviknuOlWu2cGi13Ug8mCG0MjOQ0CAwEAAaOB+TCB9jAdBgNV
HQ4EFgQUt+1vJ2X2ho12PUDhdo2CsSHYXbYwgcYGA1UdIwSBvjCBu4AUt+1vJ2X2
ho12PUDhdo2CsSHYXbahgZekgZQwgZExCzAJBgNVBAYTAkhLMQswCQYDVQQIEwJI
SzERMA8GA1UEBxMISG9uZ0tvbmcxEDAOBgNVBAoTB1B1cmVWUE4xCzAJBgNVBAsT
AklUMRAwDgYDVQQDEwdQdXJlVlBOMRAwDgYDVQQpEwdQdXJlVlBOMR8wHQYJKoZI
hvcNAQkBFhBtYWlsQGhvc3QuZG9tYWluggkA3KwF0UPpTagwDAYDVR0TBAUwAwEB
/zANBgkqhkiG9w0BAQUFAAOCAQEAAhLQQmkKWJdyGqgMSKOWXSKN2WXTDjIdb9bK
Q8uHeq0LYCcPoRh8VYJg2X4UWR/KO9pKaG+iZJw4Jqz4GQJjjJLKHfsWwj790ay0
7U5KT08qmxFaxZUYn663H9b0+Zud1spTsTJjVe1eoRk6IDbbB4OMUzN9zyWEn6er
xi6llIAjQX1qtlBQasmTAbRtbSsCsZAxL2kXysULIdLrQP0iTgMQqqkv5zvpdEKN
3ciKCd8OHEhHOlAwA0/DNy3dg3Et0F2hNMDJhqMpxXsbKtGJ/rzGXQF2geEVzLZA
o42I1wBOSZLTX1fO1gl3gAGS9aYg5o31rrpBKzQewitJgIuc+Q==
-----END CERTIFICATE-----

CLICK APPLY SETTINGS

Leave all settings not mentioned above as their default setting.

Verify a successful PureVPN connection

Navigate to Status > OpenVPN

  1. You should now see a CONNECTED SUCCESS message.
  2. Visit PureVPN’s website to verify your new IP address, virtual location, and status as Protected at the top of the page.

In some cases you may notice that the location is not showing the same location as the server you have input in your router settings; this is because geo tracking tools are often tricked by VPN connections. As long as you see an IP address that is not the same as your normal Internet IP address then you are indeed connected to PureVPN.

Back up your settings

Navigate to Administration > Backup

  1. Click the Backup button.
  2. A file named nvrambak.bin will be saved to your computer.
  3. You can load nvrambak.bin to restore your settings in the event of a reset.

How to change the PureVPN server

  1. Copy the new PureVPN server address from the above server list.
  2. Paste the server into the Server IP/Name field.
  3. Click Apply Settings.

TROUBLESHOOTING

Still having issues? Visit the VPN Troubleshooting section.

Troubleshoot Here

How do I boost my Wireless Transmission power?

Dave · Apr 29, 2019 ·

Boost the wireless transmission power if you need to increase the wireless range of the FlashRouter.

Important Information

We recommend reading the entry in the DD-WRT Wiki to familiarize yourself with what TX Power values represent.

Broadcom routers

  • Netgear R8500
  • Netgear R7000
  • Netgear R6400 V2
  • Netgear R6300 V2
  • Asus RT-AC5300
  • Asus RT-AC66U
  • Asus RT-AC56U

Navigate to Wireless > WL# or ath# Advanced

  1. Set the TX Power to the desired value.
  2. Click Apply Settings.
Boost TX Power in DD-WRT Advanced Wireless Settings page to Increase Wireless Transmission

Atheros routers

  • Netgear R9000
  • Netgear R7800
  • Linksys WRT3200ACM
  • LinksysWRT32X
  • Linksys WRT1900AC/v2/ACS
  • LinksysWRT1200AC

Navigate to Wireless > Basic Settings

  1. Check Advanced Settings under the wireless interface you would like to boost.
  2. Set the TX Power to the desired value.
  3. Click Apply Settings.
Boost TX Power in DD-WRT Advanced Wireless Settings page to Increase Wireless Transmission

We advise to proceed with caution when setting the TX Power. This has been known to negatively effect the hardware if set too high.

NordVPN Merlin OpenVPN Setup

TeamFlashRouters · Jan 11, 2023 ·

Preparing for NordVPN Merlin Setup

Obtain your NordVPN manual Username and Password

If you are not already an NordVPN user Sign Up Now.

1. Log in to your account on the NordVPN website.

NordVPN login

2. Click NordVPN on the left hand side and then click Setup NordVPN manually.

NordVPN setup manually

3. Enter in the verification code that was sent to your email.

NordVPN verify code

4. Copy and paste your NordVPN manual username and password to a secure location. This is the username and password you will enter into the router settings to connect to NordVPN.

NordVPN credentials

Download your NordVPN .ovpn file

1. There are two options for obtaining the .ovpn file. The first and recommended is to navigate to NordVPN’s server recommendation page. Click Recommended Server to display the fastest server based on your actual location. You can adjust the country if you don’t want to connect to the recommended country.

Then click Show Available Protocols. Click Download Config next to OpenVPN UDP. This will download the .ovpn file to your computer for this server. Do not open this file.

NordVPN Recommended Server

The second method to obtain a server is for connecting to a specific server number that you know you want to use. This applies to NordVPN Dedicated IP servers if you are signed up for that service. Go to NordVPN’s .ovpn file page. Then search for the server number that you want to use and click Download UDP.

NordVPN Download Specific Server

Merlin Router Setup for NordVPN

Login to Asus Merlin firmware settings in a browser on any computer or smart device connected to the Merlin FlashRouter’s network.

1. Navigate to the VPN tab.

Merlin VPN Tab

2. Navigate to the VPN Client tab.

Merlin VPN Client Tab

3. Click Choose file and select the .ovpn file you downloaded earlier. Then click Upload.

Merlin Choose File Upload

4. Set Automatic Start at boot time to Yes if you want the VPN connection to begin automatically when the router is powered off and back on.

Merlin Automatic Start at boot time

5. In the Description field enter in the name you’d like to use for this OpenVPN Client profile. We typically advise entering in the location or server number here. Our example server was in us5835.nordvpn.com so I have entered in NordVPN us5835.

Merlin NordVPN Description

6. Set Accept DNS Configuration to Strict. Set Redirect Internet traffic through tunnel to Yes (all). Set Kill Switch to Yes or No depending on if you want the Internet to be killed if the VPN connection drops.

Merlin Accept DNS configuration Redirect Internet and Kill Switch

If you only want certain devices to connect to the OpenVPN Client profile you are setting up instead of all the devices connected to the FlashRouter’s network please set the Redirect Internet traffic through tunnel to VPN Director. Then complete the instructions on this page and then view our VPN Director guide.

7. Enter your NordVPN username and password that you obtained earlier in the Username and Password. Note that these are different from your NordVPN email login and password.

Merlin VPN Username and Password

8. Click Apply at the bottom of the page.

9. At the top of the page set the Service State toggle to ON to activate the VPN connection.

Merlin Service State All Providers

Verify a successful NordVPN connection

  1. You should now see a CONNECTED message.
  2. Visit NordVPN’s IP Check to verify your new IP address and virtual location.

In some cases you may notice that the location is not showing the same location as the server you have input in your router settings; this is because geo tracking tools are often tricked by VPN connections. As long as you see an IP address that is not the same as your normal Internet IP address then you are indeed connected to NordVPN.

How to change the NordVPN server

  1. Follow the steps at the top of the page to obtain a new .ovpn file.
  2. Then proceed with the settings same as initial setup.

TROUBLESHOOTING

Still having issues? Visit the VPN Troubleshooting section.

Troubleshoot Here

Wireless Repeater Bridge Setup

TeamFlashRouters · Apr 22, 2019 ·

If you need to extend your connection capabilities and you are not able to wire directly into your main router, you can setup a FlashRouter as a Wireless Repeater Bridge. In Wireless Repeater Bridge mode the FlashRouter connects to your main router on the same subnet via WiFi, and then transmits your internet signal via the FlashRouter for internet access anywhere in your home or office.

Preparing for Wireless Repeater Bridge Setup

Verify your wireless information

In order to setup your FlashRouter as a Wireless Repeater Bridge, you will need the exact SSID and password of your existing wireless network. Make sure you have this information before proceeding.

We recommend using a 2.4GHz network to repeat as this network will have more range. Be sure to click Add under the 2.4GHz settings and not the 5GHz settings.

Locate the Local IP Address of the existing wireless network

Locate the Local IP Address of the existing router that the FlashRouter will be bridged to.

DD-WRT Router Setup for Wireless Repeater Bridge

Disable Firewall

Navigate to Security > Firewall

Wireless Repeater Bridge Setup on FlashRouter DD-WRT - Disable Firewall and Enable Filter Multicast
  1. Set SPI Firewall to Disable.
  2. Uncheck all boxes except for Filter Multicast.
  3. Click Save.

Disable DNSmasq

Navigate to Services > Services

Wireless Repeater Bridge Setup on FlashRouter DD-WRT - Disable DNSMasqButton
  1. Set DNSmasq to Disable.
  2. Click Save.

Enter Wireless settings

Navigate to Wireless > Basic Settings

Select Add in the Virtual Interface area.

Wireless Repeater Setup on DD-WRT FlashRouter - Add Virtual Interface

In the Wireless Physical Interface settings for the 2.4GHz network set the Wireless Mode to Repeater Bridge.

Change the Wireless Network Name (SSID) to match exactly with the Wireless Network Name of the network that you will bridge to.

Set Wireless Mode to Repeater Bridge in FlashRouter DD-WRT Basic Wireless Settings Page

In the Virtual Interfaces settings change the Wireless Network Name (SSID) to FlashRouter24 or any other unique SSID.

Wireless Repeater Setup on DD-WRT FlashRouter - Set SSID for Repeated Band

CLICK SAVE

Enter Wireless Security settings

Navigate to Wireless > Wireless Security

Wireless Repeater Setup on DD-WRT FlashRouter - Set Wireless Password
  1. Duplicate the wireless security settings that are set for the other bands for the newly created virtual interface.
  2. Change the WPA Shared Key to match exactly with the Wireless Password of the network that you will bridge to.
  3. Click Save.

Change the FlashRouter's Local IP Address

Navigate to Setup > Basic Setup

Wireless Repeater Bridge Setup on FlashRouter DD-WRT - Set Local Router IP, Gateway, Local DNS
  1. Set the Local IP Address to a different address on the same subnet as the existing network that you noted early. (example: if the existing network is 192.168.1.1 then set the Local IP Address to 192.168.1.2)
  2. Set the Gateway to the Local IP Address of the existing network. (example: 192.168.1.1)
  3. Set the Local DNS to the Local IP Address of the existing network. (example: 192.168.1.1)
  4. Click Save.

Change the FlashRouter's Operating Mode

Navigate to Setup > Advanced Routing

Set Operating Mode to Router in FlashRouter DD-WRT Basic Wireless Settings Page
  1. Set the Operating Mode to Router.
  2. Click Apply Settings.

Reboot your FlashRouter

Power off the FlashRouter for 30 seconds and then power it back on. When it boots back up you will be able to access the FlashRouter’s settings at the new Local IP Address that you set. Your existing network and the FlashRouter’s network will now be bridged wirelessly.

Back up your settings

Navigate to Administration > Backup

  1. Click the Backup button.
  2. A file named nvrambak.bin will be saved to your computer.
  3. You can load nvrambak.bin to restore your settings in the event of a reset.

TROUBLESHOOTING

Still having issues? Visit our Troubleshooting section to diagnose common problems here.

Troubleshoot Here

PrivateInternetAccess (PIA) Merlin OpenVPN Setup

TeamFlashRouters · Jan 11, 2023 ·

Preparing for PIA Merlin Setup

Download your PIA .ovpn file

If you are not already a PIA user Sign Up Now.

1. Log in to your account on the PIA website.

PIA login

2. Successfully log in with your account information then go to PIA’s OpenVPN Config Generator.

3. On the OpenVPN Configuration Generator select the following:

OpenVPN Version: OpenVPN 2.4 or newer

Select Platform: Linux

Select Region: Choose the server location you’d like to connect to

Select Port: Typically we recommend UDP/1198 RSA-2048 AES-128-CBC SHA1 for best speeds but feel free to select the one you want to use.

4. Click Generate to download the .ovpn file. Do not open this file once it is downloaded.

PIA Generate .ovpn file

Merlin Router Setup for PIA

Login to Asus Merlin firmware settings in a browser on any computer or smart device connected to the Merlin FlashRouter’s network.

1. Navigate to the VPN tab.

Merlin VPN Tab

2. Navigate to the VPN Client tab.

Merlin VPN Client Tab

3. Click Choose file and select the .ovpn file you downloaded earlier. Then click Upload.

Merlin Choose File Upload

4. Set Automatic Start at boot time to Yes if you want the VPN connection to begin automatically when the router is powered off and back on.

Merlin Automatic Start at boot time

5. In the Description field enter in the name you’d like to use for this OpenVPN Client profile. We typically advise entering in the location here. Our example server was in US East Streaming so I have entered in PIA US East Streaming.

PIA Description

6. Set Accept DNS Configuration to Strict. Set Redirect Internet traffic through tunnel to Yes (all). Set Kill Switch to Yes or No depending on if you want the Internet to be killed if the VPN connection drops.

Merlin Accept DNS configuration Redirect Internet and Kill Switch

If you only want certain devices to connect to the OpenVPN Client profile you are setting up instead of all the devices connected to the FlashRouter’s network please set the Redirect Internet traffic through tunnel to VPN Director. Then complete the instructions on this page and then view our VPN Director guide.

7. Enter your PIA account username and password.

Merlin VPN Username and Password

8. Click Apply at the bottom of the page.

9. At the top of the page set the Service State toggle to ON to activate the VPN connection.

Merlin Service State All Providers

Verify a successful PIA connection

  1. You should now see a CONNECTED message.
  2. Visit PIA’s IP Check to verify your new IP address and virtual location.

In some cases you may notice that the location is not showing the same location as the server you have input in your router settings; this is because geo tracking tools are often tricked by VPN connections. As long as you see an IP address that is not the same as your normal Internet IP address then you are indeed connected to PIA.

How to change the PIA server

  1. Follow the steps at the top of the page to obtain a new .ovpn file.
  2. Then proceed with the settings same as initial setup.

TROUBLESHOOTING

Still having issues? Visit the VPN Troubleshooting section.

Troubleshoot Here

IPVanish Merlin OpenVPN Setup

TeamFlashRouters · Jan 11, 2023 ·

Preparing for IPVanish Merlin Setup

Download your IPVanish .ovpn file

If you are not already an IPVanish user Sign Up Now.

1. Log in to your account on the IPVanish website.

IPVanish login

2. Successfully log in with your account information then go to IPVanish .ovpn file page.

3. Click on the .ovpn file for the server location you want to use to dowloand the .ovpn file. Do not open this file.

IPVanish download ovpn

Merlin Router Setup for IPVanish

Login to Asus Merlin firmware settings in a browser on any computer or smart device connected to the Merlin FlashRouter’s network.

1. Navigate to the VPN tab.

Merlin VPN Tab

2. Navigate to the VPN Client tab.

Merlin VPN Client Tab

3. Click Choose file and select the .ovpn file you downloaded earlier. Then click Upload.

Merlin Choose File Upload

4. Set Automatic Start at boot time to Yes if you want the VPN connection to begin automatically when the router is powered off and back on.

Merlin Automatic Start at boot time

5. In the Description field enter in the name you’d like to use for this OpenVPN Client profile. We typically advise entering in the location here. Our example server was in nyc-a50 so I have entered in IPVanish a-50.

IPVanish Description

6. Set Accept DNS Configuration to Strict. Set Redirect Internet traffic through tunnel to Yes (all). Set Kill Switch to Yes or No depending on if you want the Internet to be killed if the VPN connection drops.

Merlin Accept DNS configuration Redirect Internet and Kill Switch

If you only want certain devices to connect to the OpenVPN Client profile you are setting up instead of all the devices connected to the FlashRouter’s network please set the Redirect Internet traffic through tunnel to VPN Director. Then complete the instructions on this page and then view our VPN Director guide.

7. Enter your IPVanish account email/username and password.

Merlin VPN Username and Password

8. Click Apply at the bottom of the page.

9. At the top of the page set the Service State toggle to ON to activate the VPN connection.

Merlin Service State All Providers

Verify a successful IPVanish connection

  1. You should now see a CONNECTED message.
  2. Visit IPVanish’s IP Check to verify your new IP address and virtual location.

In some cases you may notice that the location is not showing the same location as the server you have input in your router settings; this is because geo tracking tools are often tricked by VPN connections. As long as you see an IP address that is not the same as your normal Internet IP address then you are indeed connected to IPVanish.

How to change the IPVanish server

  1. Follow the steps at the top of the page to obtain a new .ovpn file.
  2. Then proceed with the settings same as initial setup.

TROUBLESHOOTING

Still having issues? Visit the VPN Troubleshooting section.

Troubleshoot Here

NordVPN Asus AX1800S OpenVPN Setup

TeamFlashRouters · Feb 26, 2024 ·

Preparing for NordVPN Asus AX1800S Setup

Obtain your NordVPN manual Username and Password

If you are not already an NordVPN user Sign Up Now.

1. Log in to your account on the NordVPN website.

NordVPN login

2. Click NordVPN on the left hand side and then click Setup NordVPN manually.

NordVPN setup manually

3. Enter in the verification code that was sent to your email.

NordVPN verify code

4. Copy and paste your NordVPN manual username and password to a secure location. This is the username and password you will enter into the router settings to connect to NordVPN.

NordVPN credentials

Download your NordVPN .ovpn file

1. There are two options for obtaining the .ovpn file. The first and recommended is to navigate to NordVPN’s server recommendation page. Click Recommended Server to display the fastest server based on your actual location. You can adjust the country if you don’t want to connect to the recommended country.

Then click Show Available Protocols. Click Download Config next to OpenVPN UDP. This will download the .ovpn file to your computer for this server. Do not open this file.

NordVPN Recommended Server

The second method to obtain a server is for connecting to a specific server number that you know you want to use. This applies to NordVPN Dedicated IP servers if you are signed up for that service. Go to NordVPN’s .ovpn file page. Then search for the server number that you want to use and click Download UDP.

NordVPN Download Specific Server

Asus AX1800S Router Setup for NordVPN

Login to Asus firmware settings in a browser on any computer or smart device connected to the FlashRouter’s network.

1. Navigate to the VPN tab.

Merlin VPN Tab

2. Navigate to the VPN Client tab.

Asus AX1800S VPN Settings

3. Click Add Profile.

Asus AX1800S VPN Settings

4. Click Choose file and select the .ovpn file you downloaded earlier. Then click Upload.

Asus AX1800S OpenVPN upload

5. In the Description field enter in the name you’d like to use for this OpenVPN Client profile. We typically advise entering in the location or server number here.

6. Enter your NordVPN username and password that you obtained earlier in the Username and Password. Note that these are different from your NordVPN email login and password. Click OK.

7. Click the Activate button.

Verify a successful NordVPN connection

  1. You should now see a check mark in the Connection Status area.
  2. Visit NordVPN’s IP Check to verify your new IP address and virtual location.

In some cases you may notice that the location is not showing the same location as the server you have input in your router settings; this is because geo tracking tools are often tricked by VPN connections. As long as you see an IP address that is not the same as your normal Internet IP address then you are indeed connected to NordVPN.

How to change the NordVPN server

  1. Follow the steps at the top of the page to obtain a new .ovpn file.
  2. Then proceed with the settings same as initial setup.
  3. Be sure to deactivate a previously active connection before activating the new one. You do not want to connect to two at the same time.

TROUBLESHOOTING

Still having issues? Visit the VPN Troubleshooting section.

Troubleshoot Here

ExpressVPN Asus AX1800S OpenVPN Setup

TeamFlashRouters · Feb 26, 2024 ·

Preparing for ExpressVPN Asus AX1800S Setup

Obtain your ExpressVPN OpenVPN Information

If you are not already an ExpressVPN user Sign Up Now.

1. Log in to your account on the ExpressVPN website.

ExpressVPN login page

2. Successfully log in with your account information. Select More.

3. Select Manual Configuration and copy the Username and Password that are displayed on the right hand side of the screen.

ExpressVPN Manual Configuration
ExpressVPN username and password

4. Click the Server Location that you want to connect to. This will download a .ovpn file to your computer that we will use later on. There is no need to open the file. For this example I have selected New York but feel free to select any server listed there.

ExpressVPN Download .ovpn file

Asus AX1800S Router Setup for ExpressVPN

Login to Asus firmware settings in a browser on any computer or smart device connected to the FlashRouter’s network.

1. Navigate to the VPN tab.

Merlin VPN Tab

2. Navigate to the VPN Client tab.

Asus AX1800S VPN Settings

3. Click Add Profile.

Asus AX1800S VPN Settings

4. Click Choose file and select the .ovpn file you downloaded earlier. Then click Upload.

Asus AX1800S OpenVPN upload

5. In the Description field enter in the name you’d like to use for this OpenVPN Client profile. We typically advise entering in the location or server number here.

6. Enter your ExpressVPN username and password that you obtained earlier in the Username and Password. Note that these are different from your ExpressVPN email login and password.

7. Click the Activate button.

Verify a successful ExpressVPN connection

  1. You should now see a check mark in the Connection Status area.
  2. Visit ExpressVPN’s IP Check to verify your new IP address and virtual location.

In some cases you may notice that the location is not showing the same location as the server you have input in your router settings; this is because geo tracking tools are often tricked by VPN connections. As long as you see an IP address that is not the same as your normal Internet IP address then you are indeed connected to ExpressVPN.

How to change the ExpressVPN server

  1. Follow the steps at the top of the page to obtain a new .ovpn file.
  2. Then proceed with the settings same as initial setup.
  3. Be sure to deactivate a previously active connection before activating the new one. You do not want to connect to two at the same time.

TROUBLESHOOTING

Still having issues? Visit the VPN Troubleshooting section.

Troubleshoot Here

IPVanish Asus AX1800S OpenVPN Setup

TeamFlashRouters · Feb 26, 2024 ·

Preparing for IPVanish Asus AX1800S Setup

Download your IPVanish .ovpn file

If you are not already an IPVanish user Sign Up Now.

1. Log in to your account on the IPVanish website.

IPVanish login

2. Successfully log in with your account information then go to IPVanish .ovpn file page.

3. Click on the .ovpn file for the server location you want to use to dowloand the .ovpn file. Do not open this file.

IPVanish download ovpn

Asus AX1800S Router Setup for IPVanish

Login to Asus firmware settings in a browser on any computer or smart device connected to the FlashRouter’s network.

1. Navigate to the VPN tab.

Merlin VPN Tab

2. Navigate to the VPN Client tab.

Asus AX1800S VPN Settings

3. Click Add Profile.

Asus AX1800S VPN Settings

4. Click Choose file and select the .ovpn file you downloaded earlier. Then click Upload.

Asus AX1800S OpenVPN upload

5. In the Description field enter in the name you’d like to use for this OpenVPN Client profile. We typically advise entering in the location or server number here.

6. Enter your IPVanish account email/username and password.

7. Click the Activate button.

Verify a successful IPVanish connection

  1. You should now see a check mark in the Connection Status area.
  2. Visit IPVanish’s IP Check to verify your new IP address and virtual location.

In some cases you may notice that the location is not showing the same location as the server you have input in your router settings; this is because geo tracking tools are often tricked by VPN connections. As long as you see an IP address that is not the same as your normal Internet IP address then you are indeed connected to IPVanish.

How to change the IPVanish server

  1. Follow the steps at the top of the page to obtain a new .ovpn file.
  2. Then proceed with the settings same as initial setup.
  3. Be sure to deactivate a previously active connection before activating the new one. You do not want to connect to two at the same time.

TROUBLESHOOTING

Still having issues? Visit the VPN Troubleshooting section.

Troubleshoot Here

PrivateInternetAccess (PIA) Asus AX1800S OpenVPN Setup

TeamFlashRouters · Feb 26, 2024 ·

Preparing for PIA Asus AX1800S Setup

Download your PIA .ovpn file

If you are not already a PIA user Sign Up Now.

1. Log in to your account on the PIA website.

PIA login

2. Successfully log in with your account information then go to PIA’s OpenVPN Config Generator.

3. On the OpenVPN Configuration Generator select the following:

OpenVPN Version: OpenVPN 2.4 or newer

Select Platform: Linux

Select Region: Choose the server location you’d like to connect to

Select Port: Typically we recommend UDP/1198 RSA-2048 AES-128-CBC SHA1 for best speeds but feel free to select the one you want to use.

4. Click Generate to download the .ovpn file. Do not open this file once it is downloaded.

PIA Generate .ovpn file

Asus AX1800S Router Setup for PIA

Login to Asus firmware settings in a browser on any computer or smart device connected to the FlashRouter’s network.

1. Navigate to the VPN tab.

Merlin VPN Tab

2. Navigate to the VPN Client tab.

Asus AX1800S VPN Settings

3. Click Add Profile.

Asus AX1800S VPN Settings

4. Click Choose file and select the .ovpn file you downloaded earlier. Then click Upload.

Asus AX1800S OpenVPN upload

5. In the Description field enter in the name you’d like to use for this OpenVPN Client profile. We typically advise entering in the location here.

6. Enter your PIA account username and password.

7. Click the Activate button.

Verify a successful PIA connection

  1. You should now see a check mark in the Connection Status area.
  2. Visit PIA’s IP Check to verify your new IP address and virtual location.

In some cases you may notice that the location is not showing the same location as the server you have input in your router settings; this is because geo tracking tools are often tricked by VPN connections. As long as you see an IP address that is not the same as your normal Internet IP address then you are indeed connected to PIA.

How to change the PIA server

  1. Follow the steps at the top of the page to obtain a new .ovpn file.
  2. Then proceed with the settings same as initial setup.
  3. Be sure to deactivate a previously active connection before activating the new one. You do not want to connect to two at the same time.

TROUBLESHOOTING

Still having issues? Visit the VPN Troubleshooting section.

Troubleshoot Here

Why can’t I send emails while connected to VPN?

TeamFlashRouters · Jun 4, 2019 ·

Can’t send or receive emails? Connecting to a VPN server can result in your email client not being able to send or receive emails. This can happen for several reasons:

  • The VPN provider you are connected to is blocking the ports the email client is using (SMTP).
  • Your email service is blocking access to datacenter IPs
  • Your email service is only allowing access to residential IPs
  • Your email service is only allowing access to IPs of its own country
  • Your email service is only allowing access to certain ISPs

This issue will only occur with email client applications and not with web browser email.

Steps to take if your email is not working

Change SMTP port

Access the settings of your email client and change the SMTP port to 587 or 465.

Change the VPN server

Connect to a different VPN server. The process for changing servers is detailed in your provider’s setup instructions.

FlashRouters Privacy App

DD-WRT Manual VPN Configuration

Disconnect from VPN

Disconnect from VPN on the FlashRouter and use your ISP Internet connection when using email.

Dual router setup users can leave the VPN running on the FlashRouter and simply connect to the other router’s network when using email.

Contact your VPN Service Provider

In some cases if you contact your VPN service provider they will be able to give you access to a specifically requested e-mail service.

Wireless Client Bridge Setup

TeamFlashRouters · Apr 22, 2019 ·

If you need to extend your wired connection capabilities and you are not able to wire directly into your main router, you can setup a FlashRouter as a Wireless Client Bridge. In Wireless Client Bridge mode the FlashRouter connects to your main router via WiFi, and then transmits your internet signal via the FlashRouter LAN ports for wired internet access anywhere in your home or office.

Preparing for Wireless Client Bridge Setup

Verify your wireless information

In order to setup your FlashRouter as a Wireless Client Bridge, you will need the exact SSID and password of your existing wireless network. Make sure you have this information before proceeding.

We recommend using a 2.4GHz network to repeat as this network will have more range.

Locate the Local IP Address of the existing wireless network

Locate the Local IP Address of the existing router that the FlashRouter will be bridged to.

DD-WRT Router Setup for Wireless Client Bridge

Disable Firewall

Navigate to Security > Firewall

Wireless Repeater Bridge Setup on FlashRouter DD-WRT - Disable Firewall and Enable Filter Multicast
  1. Set SPI Firewall to Disable.
  2. Uncheck all boxes except for Filter Multicast.
  3. Click Save.

Disable DNSmasq

Navigate to Services > Services

Wireless Repeater Bridge Setup on FlashRouter DD-WRT - Disable DNSMasqButton
  1. Set DNSmasq to Disable.
  2. Click Save.

Enter Wireless settings

Navigate to Wireless > Basic Settings

Wireless Client Bridge Setup on FlashRouter DD-WRT - Set Wireless Mode to Client Bridge
  1. In the Wireless Physical Interface settings for the 2.4GHz network set the Wireless Mode to Client Bridge.
  2. Change the Wireless Network Name (SSID) to match exactly with the Wireless Network Name of the network that you will bridge to.
  3. Click Save.

Enter Wireless Security settings

Navigate to Wireless > Wireless Security

Wireless Client Bridge Setup on FlashRouter DD-WRT - Set Wireless Password
  1. Change the WPA Shared Key to match exactly with the Wireless Password of the network that you will bridge to.
  2. Click Save.

Change the FlashRouter's Local IP Address

Navigate to Setup > Basic Setup

  1. Set the Local IP Address to a different address on the same subnet as the existing network that you noted early. (example: if the existing network is 192.168.1.1 then set the Local IP Address to 192.168.1.2)
  2. Set the Gateway to the Local IP Address of the existing network. (example: 192.168.1.1)
  3. Set the Local DNS to the Local IP Address of the existing network. (example: 192.168.1.1)
  4. Click Apply Settings.

Reboot your FlashRouter

Power off the FlashRouter for 30 seconds and then power it back on. When it boots back up you will be able to access the FlashRouter’s settings at the new Local IP Address that you set. Your existing network and the FlashRouter’s network will now be bridged wirelessly.

Your FlashRouter is now providing wired connection access to your main router network. Wireless connections to the FlashRouter are disabled in this setup.

Back up your settings

Navigate to Administration > Backup

  1. Click the Backup button.
  2. A file named nvrambak.bin will be saved to your computer.
  3. You can load nvrambak.bin to restore your settings in the event of a reset.

TROUBLESHOOTING

Still having issues? Visit our Troubleshooting section to diagnose common problems here.

Troubleshoot Here

NordVPN Setup for GL.iNet Routers

TeamFlashRouters · May 29, 2023 ·

You can connect to NordVPN on your GL.iNet router using NordLynx, OpenVPN, or a Dedicated IP.

Quick Options

  • NordLynx: Choose your preferred city or country from NordVPN’s server list

  • OpenVPN: Choose your preferred city or country from NordVPN’s server list.

  • Dedicated IP (optional): Enter your unique configuration file if you’ve been assigned a static NordVPN IP.

:point_right: If you are not already a NordVPN user Sign Up Now.

NordVPN NordLynx Setup for GLiNet

1. Get your NordVPN Access Token for NordLynx connections. Log in to your NordVPN account and select NordVPN from your list of Services.

NordVPN Services Section

2. At the bottom of the page click Get Access token and you will receive a code via email. Enter this code to proceed.

NordVPN Access Token

3. After you enter the email code select Generate new token and set it to Doesn’t expire. Copy this token.

NordVPN Generate new token
NordVPN Copy Token

4. Login to GL.iNet firmware settings (usually 192.168.8.1) in a browser on any computer or smart device connected to the GL.iNet FlashRouter’s network.

View our guide for more instructions on how to access GL.iNet firmware settings.

5. Navigate to the VPN tab and select Wireguard Client then choose NordVPN. Enter your Token then click Save and Continue

GLiNet NordVPN Wireguard

6. Select your preferred server locations, and click Apply.

GLiNet Select NordLynx Servers

7. Start a connection by clicking the 3 dots (…) > Start next to your chosen server.

GLiNet NordLynx Start

8. A green dot confirms success. You can also switch between Global Mode or Policy Mode for routing in the VPN Dashboard.

GLiNet NordLynx Connected

NordVPN OpenVPN Setup for GLiNet

1. Get your NordVPN manual service credentials for OpenVPN connections. Log in to your NordVPN account and select NordVPN from your list of Services.

NordVPN Service

2. At the bottom of the page in the Manual Setup section click Setup NordVPN manually then under the Configuration section go to Service credentials. Click Verify email to receive a code via email and enter the code to view and copy your credentials.

NordVPN Manual OpenVPN
NordVPN Service Credentials

3. Login to GL.iNet firmware settings (usually 192.168.8.1) in a browser on any computer or smart device connected to the GL.iNet FlashRouter’s network.

View our guide for more instructions on how to access GL.iNet firmware settings.

4. Navigate to the VPN tab and select OpenVPN Client.

GL.iNet VPN OpenVPN Client

5. Select the NordVPN group, enter your manual credentials, then click Save Credentials & Get Servers.

GL.iNet NordVPN Group
GL.iNet NordVPN Login

6. Choose UDP (recommended), select your preferred server locations, and click Apply.

GL.iNet NordVPN select servers

7. Start a connection by clicking the 3 dots (…) > Start next to your chosen server.

NordVPN GLiNet OpenVPN Start

8. A green dot confirms success. You can also switch between Global Mode or Policy Mode for routing in the VPN Dashboard.

GLiNet VPN Dashboard

NordVPN Dedicated IP Setup for GLiNet

1. Get your NordVPN manual service credentials for OpenVPN connections. Log in to your NordVPN account and select NordVPN from your list of Services.

NordVPN Service

2. At the bottom of the page in the Manual Setup section click Setup NordVPN manually then under the Configuration section go to Service credentials. Click Verify email to receive a code via email and enter the code to view and copy your credentials.

NordVPN Manual OpenVPN
NordVPN Service Credentials

3. Login to GL.iNet firmware settings (usually 192.168.8.1) in a browser on any computer or smart device connected to the GL.iNet FlashRouter’s network.

View our guide for more instructions on how to access GL.iNet firmware settings.

4. Navigate to the VPN tab and select OpenVPN Client.

GLiNet VPN Dashboard

5. Download your Dedicated IP configuration file from the NordVPN website.

6. Click +New Group and name your NordVPN Dedicated IP connection, then upload the configuration file, enter your manual service credentials and click Apply.

GLiNet Dedicated IP Address Load

7. Start a connection by clicking the 3 dots (…) > Start next to your chosen server.

GLiNet Dedicated IP

8. A green dot confirms success. You can also switch between Global Mode or Policy Mode for routing in the VPN Dashboard.

GLiNet Dedicated IP Dashboard
  1. You should now see information appear in the Server Address, Server Listen Port, Traffic Statistics, and Client Virtual IP areas.
  2. Visit NordVPN’s IP Check to verify your new IP address and virtual location.

In some cases you may notice that the location is not showing the same location as the server you have input in your router settings; this is because geo tracking tools are often tricked by VPN connections. As long as you see an IP address that is not the same as your normal Internet IP address then you are indeed connected to NordVPN.

🚫📱Do not run NordVPN apps on devices connected to your NordVPN router. Using the app at the same time as the router VPN may cause conflicts and connection issues.

Still having issues?

Feel free to submit a ticket and we will get back to you as soon as possible.

NordVPN Cudy OpenVPN Setup

TeamFlashRouters · Feb 29, 2024 ·

Preparing for NordVPN Cudy Setup

Obtain your NordVPN manual Username and Password

If you are not already an NordVPN user Sign Up Now.

1. Log in to your account on the NordVPN website.

NordVPN login

2. Click NordVPN on the left hand side and then click Setup NordVPN manually.

NordVPN setup manually

3. Enter in the verification code that was sent to your email.

NordVPN verify code

4. Copy and paste your NordVPN manual username and password to a secure location. This is the username and password you will enter into the router settings to connect to NordVPN.

NordVPN credentials

Download your NordVPN .ovpn file

1. There are two options for obtaining the .ovpn file. The first and recommended is to navigate to NordVPN’s server recommendation page. Click Recommended Server to display the fastest server based on your actual location. You can adjust the country if you don’t want to connect to the recommended country.

Then click Show Available Protocols. Click Download Config next to OpenVPN UDP. This will download the .ovpn file to your computer for this server. Do not open this file.

NordVPN Recommended Server

The second method to obtain a server is for connecting to a specific server number that you know you want to use. This applies to NordVPN Dedicated IP servers if you are signed up for that service. Go to NordVPN’s .ovpn file page. Then search for the server number that you want to use and click Download UDP.

NordVPN Download Specific Server

Cudy Router Setup for NordVPN

Login to Cudy firmware settings in a browser on any computer or smart device connected to the Cudy FlashRouter’s network.

1. Click General Settings.

Cudy General Settings

2. Click VPN.

Cudy VPN Tab

3. Toggle the Enable switch to On.

Cudy enable VPN

4. Select OpenVPN Client from the Protocol dropdown.

Cudy select OpenVPN Client

5. Click Browse and select the .ovpn file you downloaded earlier. You should see the server file name listed next to Current Config File after doing so.

Cudy OpenVPN Browse button

6. Enter your NordVPN username and password that you obtained earlier in the Username and Password. Note that these are different from your NordVPN email login and password.

Cudy NordVPN enter username and password

7. Click Save & Apply at the bottom of the page.

Verify a successful NordVPN connection

  1. You should now see a CONNECTED message.
  2. Visit NordVPN’s IP Check to verify your new IP address and virtual location.

In some cases you may notice that the location is not showing the same location as the server you have input in your router settings; this is because geo tracking tools are often tricked by VPN connections. As long as you see an IP address that is not the same as your normal Internet IP address then you are indeed connected to NordVPN.

How to change the NordVPN server

  1. Follow the steps at the top of the page to obtain a new .ovpn file.
  2. Then proceed with the settings same as initial setup.

TROUBLESHOOTING

Still having issues? Visit the VPN Troubleshooting section.

Troubleshoot Here
Next Page »

Primary Sidebar

  • Troubleshooting
  • Router Access
  • Internet Connection Issues
  • WiFi Connectivity
  • General VPN Issues
  • TeamViewer Remote Support
  • DD-WRT Firmware
  • Facebook
  • Twitter
  • Instagram
  • Pinterest
  • YouTube

Footer