• Skip to primary navigation
  • Skip to main content
  • Skip to primary sidebar
  • Skip to footer

FlashRouters Support Portal

Prioritizing Privacy

  • SETUP GUIDES
    • Privacy Hero Router Setup Guide
    • ASUS-WRT Router Setup Guide
    • AsusWRT-Merlin Router Setup Guide
    • DD-WRT Router Setup Guide
    • ExpressVPN Router Setup Guide
    • GL.iNet Router Setup Guide
    • Roqos Core Router Setup Guide
  • TROUBLESHOOTING
    • Router Access
    • WiFi Connectivity
    • Internet Connection Issues
    • General VPN Issues
    • DD-WRT Firmware
    • TeamViewer Remote Support
  • FAQs
    • Router FAQs
    • VPN FAQs
    • Warranty and Returns FAQs
    • Sales FAQs
    • Shipping FAQs
    • Service Plan FAQs
  • Show Search
Hide Search

Search Results for: bottom up proc

CyberGhost Merlin OpenVPN Setup

TeamFlashRouters · Mar 30, 2023 ·

Preparing for CyberGhost Setup

Obtain your CyberGhost OpenVPN information

If you are not already a CyberGhost user Sign Up Now.

1. Log in to your account on the CyberGhost website.
CyberGhost Website Login

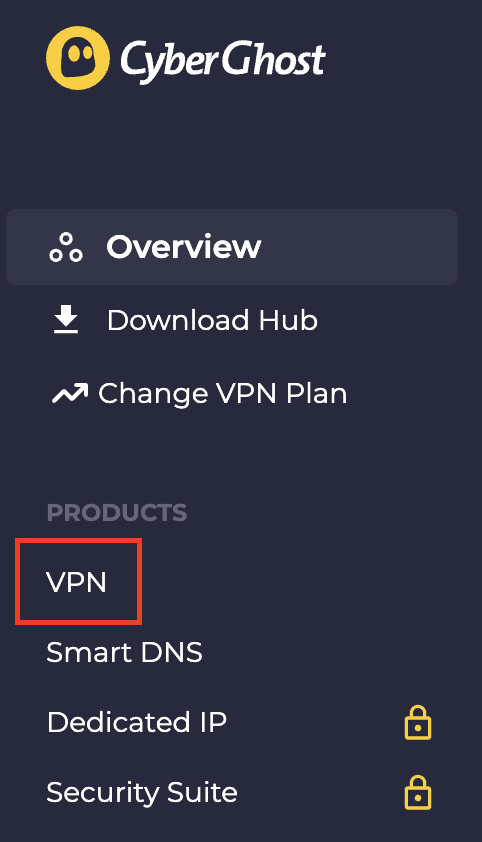
2. Select VPN.

CyberGhost VPN

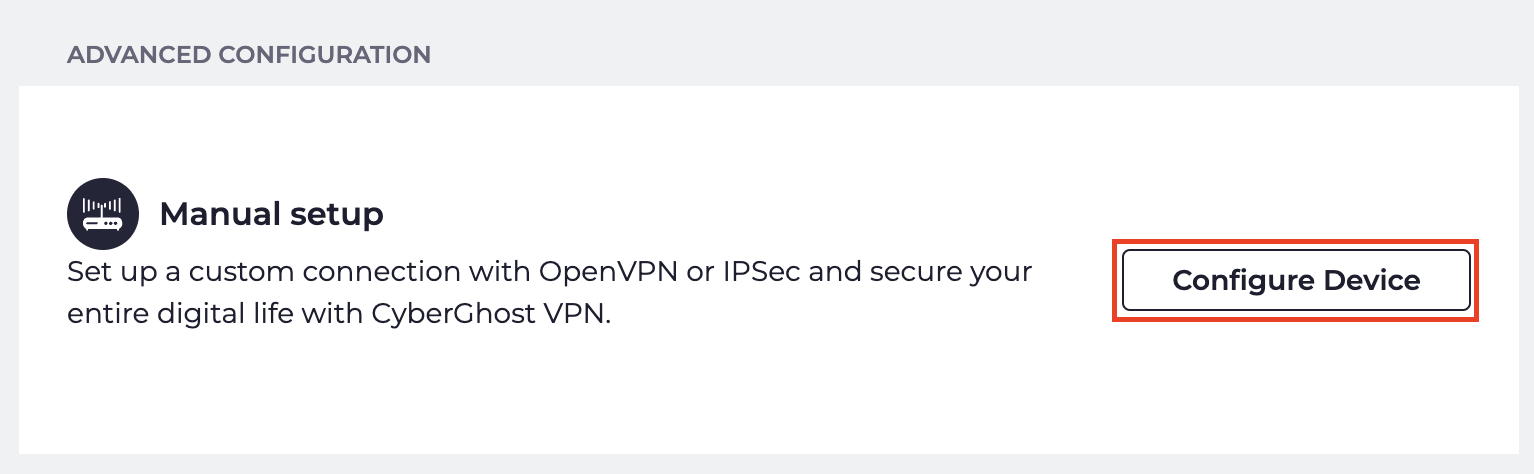
3. Click Configure New Device.

CyberGhost Configure Device

4. Set Protocol to OpenVPN. Select the Country you would like to connect to. Select the Server Group. Name the device in the Device Name field. Click Save Configuration.
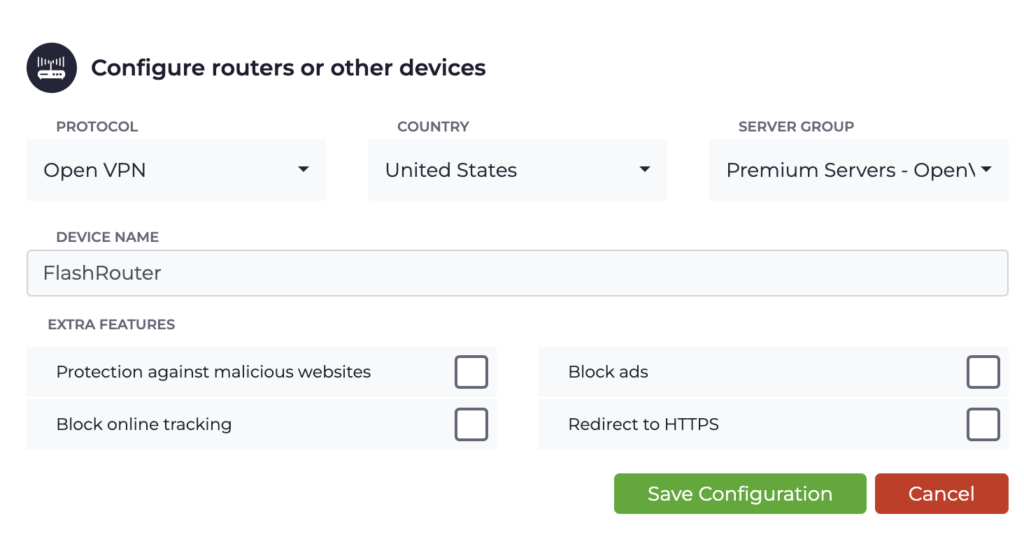
CyberGhost protocol and location

5. Press View configuration.

CyberGhost view configuration

6. Copy the Username, and Password that appear to a notepad, since you will need this information later in the setup process. Click Download Configuration.

CyberGhost Website OpenVPN Configuration Files Generator 1

Open the folder that was downloaded. Then open the ca.crt the client.crt, and client.key files with NotePad++ for Windows or TextEdit for Apple. All CyberGhost servers have different keys and certificates.

Merlin Router Setup for CyberGhost

Login to Asus Merlin firmware settings in a browser on any computer or smart device connected to the Merlin FlashRouter’s network.

1. Navigate to the VPN tab.
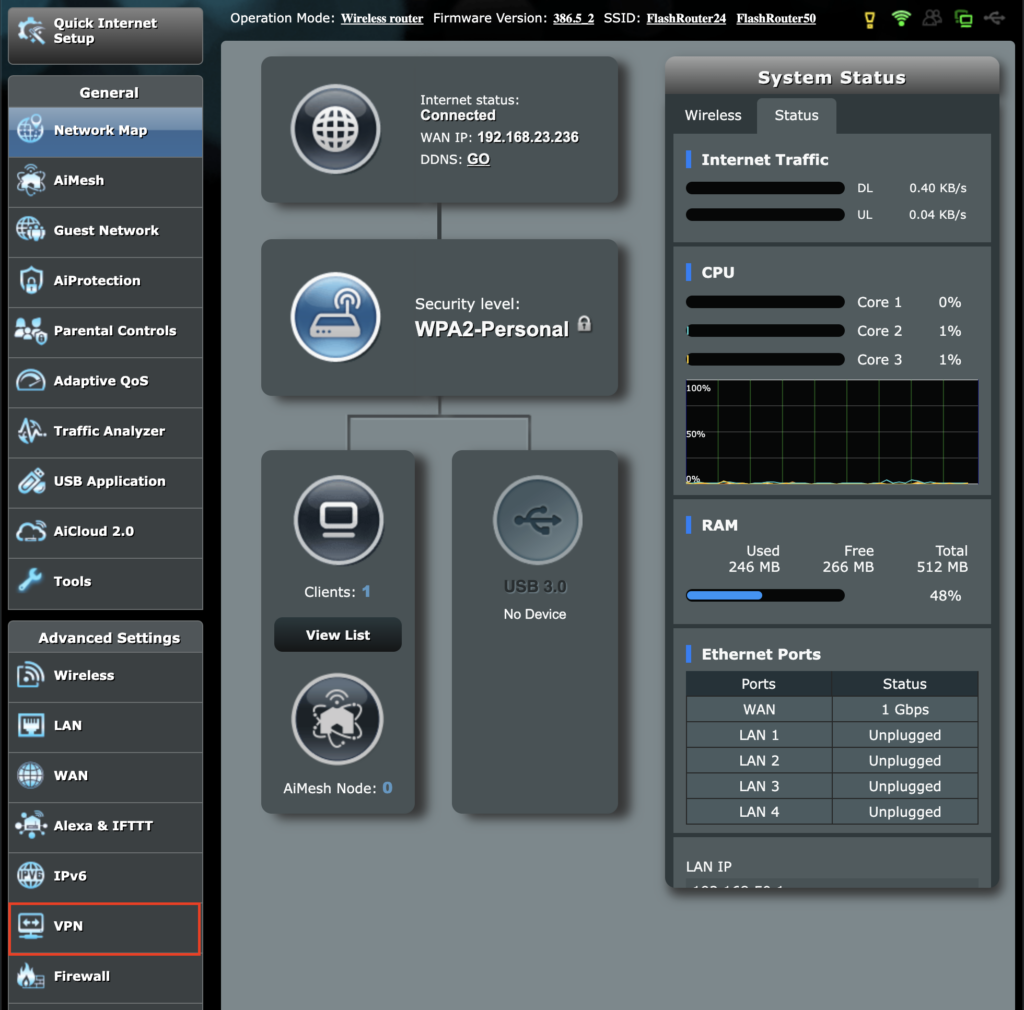
Merlin VPN Tab

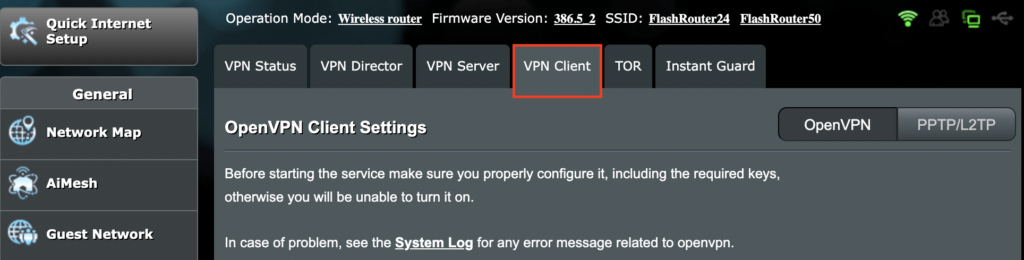
2. Navigate to the VPN Client tab.

Merlin VPN Client Tab

3. Click Choose file and select the .ovpn file from the folder you downloaded earlier. Then click Upload.
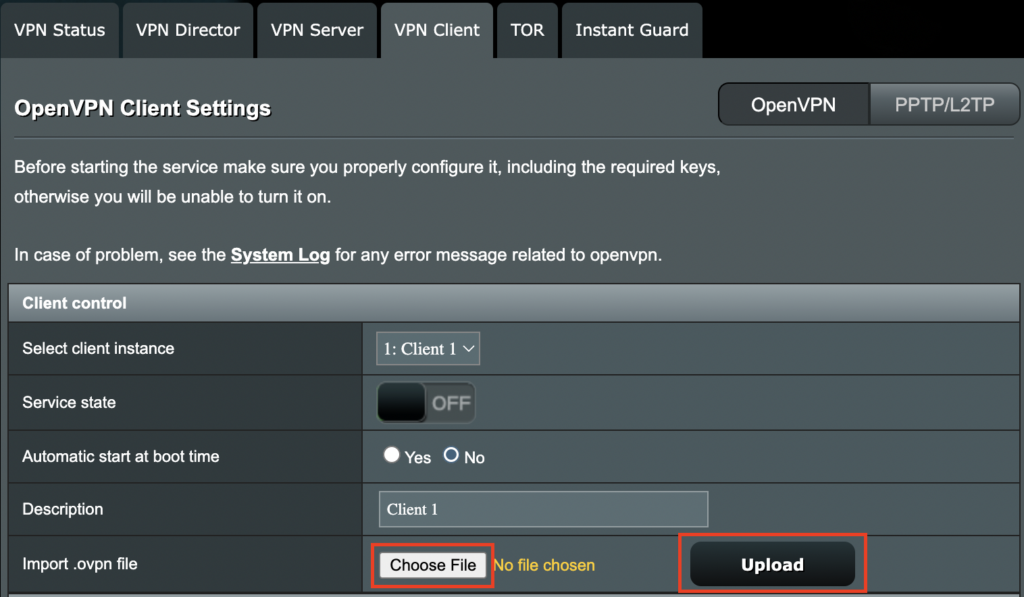
Merlin Choose File Upload

4. Set Automatic Start at boot time to Yes if you want the VPN connection to begin automatically when the router is powered off and back on.
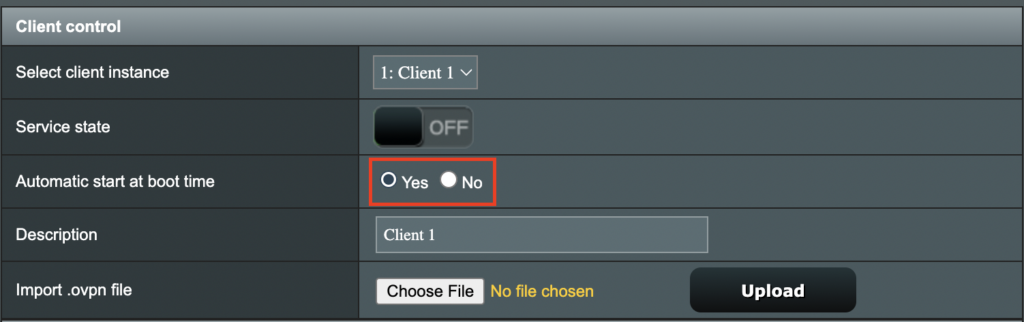
Merlin Automatic Start at boot time

5. In the Description field enter in the name you’d like to use for this OpenVPN Client profile. We typically advise entering in the location here. Our example server was in USA so I have entered in CyberGhost USA.
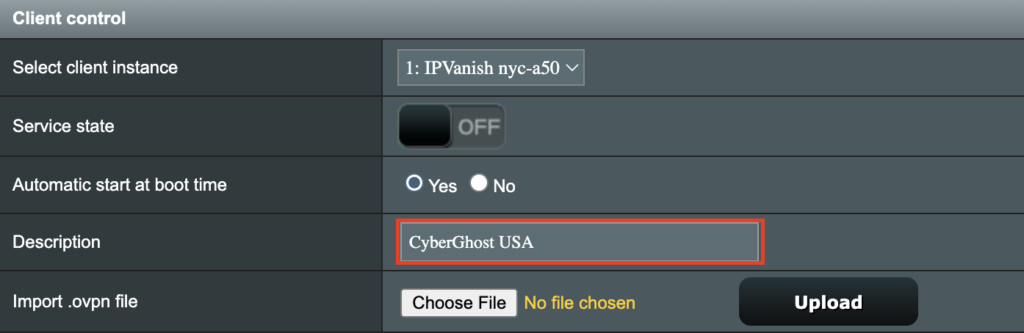
Merlin CyberGhost Description field

6. Set Accept DNS Configuration to Strict. Set Redirect Internet traffic through tunnel to Yes (all). Set Kill Switch to Yes or No depending on if you want the Internet to be killed if the VPN connection drops.
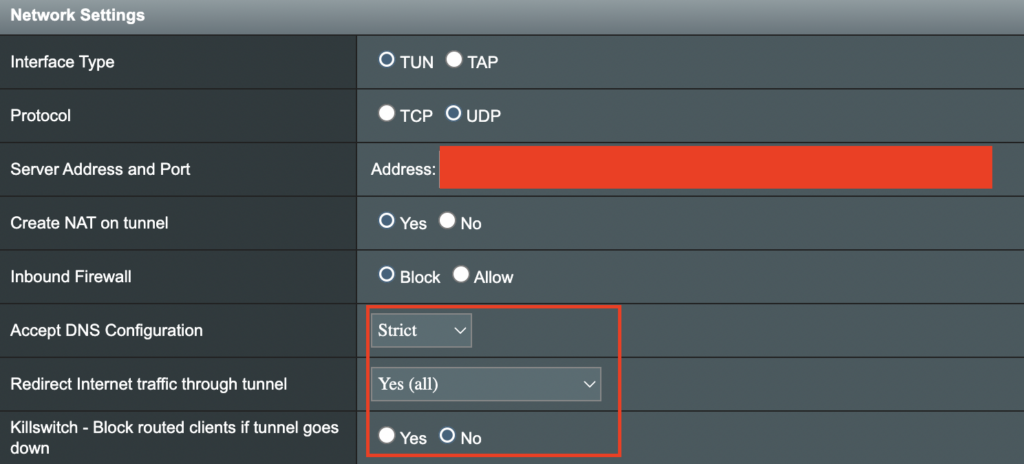
Merlin Accept DNS configuration Redirect Internet and Kill Switch

If you only want certain devices to connect to the OpenVPN Client profile you are setting up instead of all the devices connected to the FlashRouter’s network please set the Redirect Internet traffic through tunnel to VPN Director. Then complete the instructions on this page and then view our VPN Director guide.

7. Enter your CyberGhost OpenVPN username and password that you obtained earlier. Do not enter your account login.
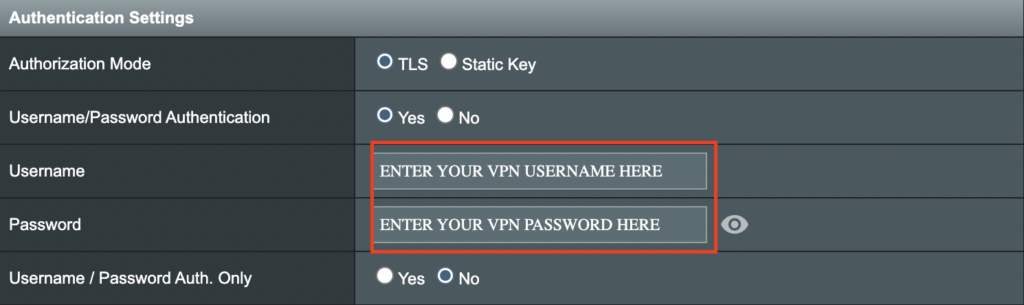
Merlin VPN Username and Password

8. Click the Edit button in the Keys and Certificates area.
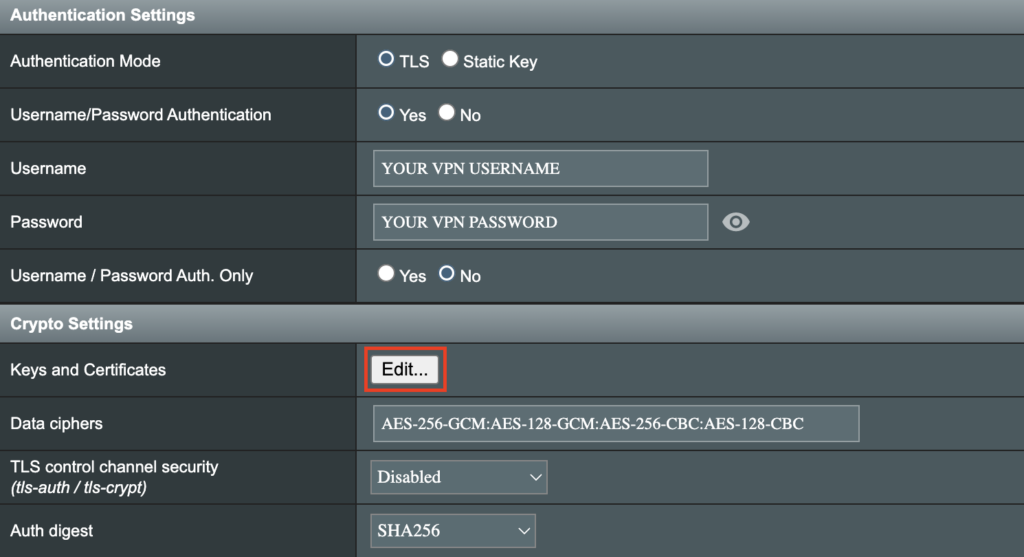
Merlin Keys and Certificates Edit button

9. In the Certificate Authority field paste in the entire content of the ca.crt file.

—– BEGIN xxx —– / —– END xxx —– block (including those two lines).
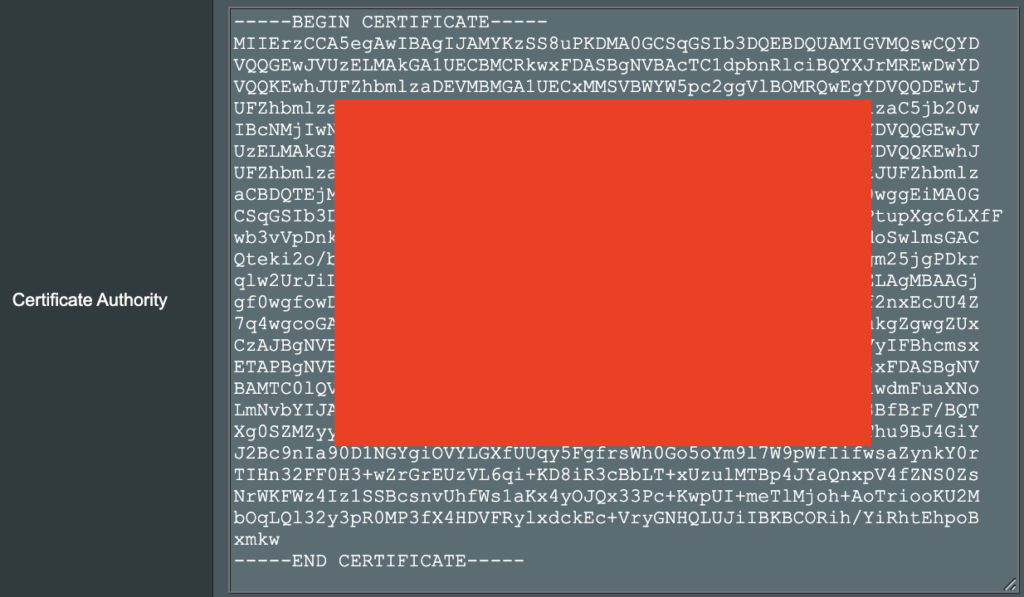
Merlin Certificate Authority

10. In the Client Certificate field paste in the entire content of the client.crt file.

—– BEGIN xxx —– / —– END xxx —– block (including those two lines).
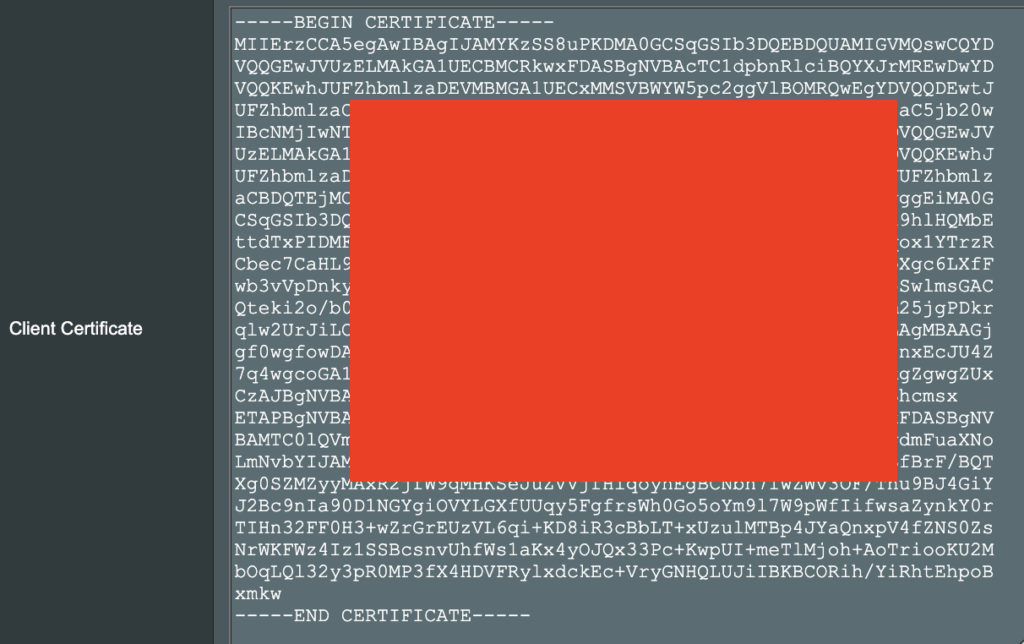
Merlin Client Certificate

11. In the Client Key field paste in the entire content of the client.key file.

—– BEGIN xxx —– / —– END xxx —– block (including those two lines).
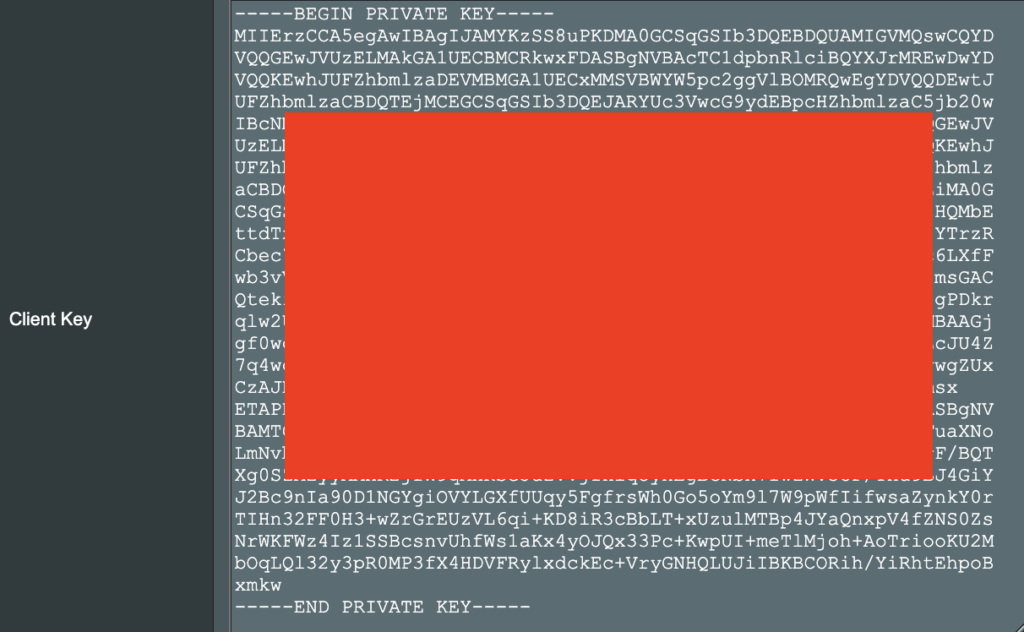
Merlin Client Key

12. Click Save at the bottom of that window.

13. Click Apply at the bottom of the page.

14. At the top of the page set the Service State toggle to ON to activate the VPN connection.

Merlin Service State All Providers

Verify a successful CyberGhost connection

  1. You should now see a CONNECTED message.
  2. Visit What is my IP Address from a private/incognito browser to verify your new IP address and virtual location.


TROUBLESHOOTING

Still having issues? Visit the FR Privacy App Troubleshooting section.

Troubleshoot Here

ExpressVPN Cudy OpenVPN Setup

TeamFlashRouters · Feb 29, 2024 ·

Preparing for ExpressVPN Cudy Setup

Obtain your ExpressVPN OpenVPN Information

If you are not already an ExpressVPN user Sign Up Now.

1. Log in to your account on the ExpressVPN website.

ExpressVPN login page

2. Successfully log in with your account information. Select More.

3. Select Manual Configuration and copy the Username and Password that are displayed on the right hand side of the screen.

ExpressVPN Manual Configuration
ExpressVPN username and password

4. Click the Server Location that you want to connect to. This will download a .ovpn file to your computer that we will use later on. There is no need to open the file. For this example I have selected New York but feel free to select any server listed there.

ExpressVPN Download .ovpn file

Cudy Router Setup for ExpressVPN

Login to Cudy firmware settings in a browser on any computer or smart device connected to the Cudy FlashRouter’s network.

1. Click General Settings.

Cudy General Settings

2. Click VPN.

Cudy VPN Tab

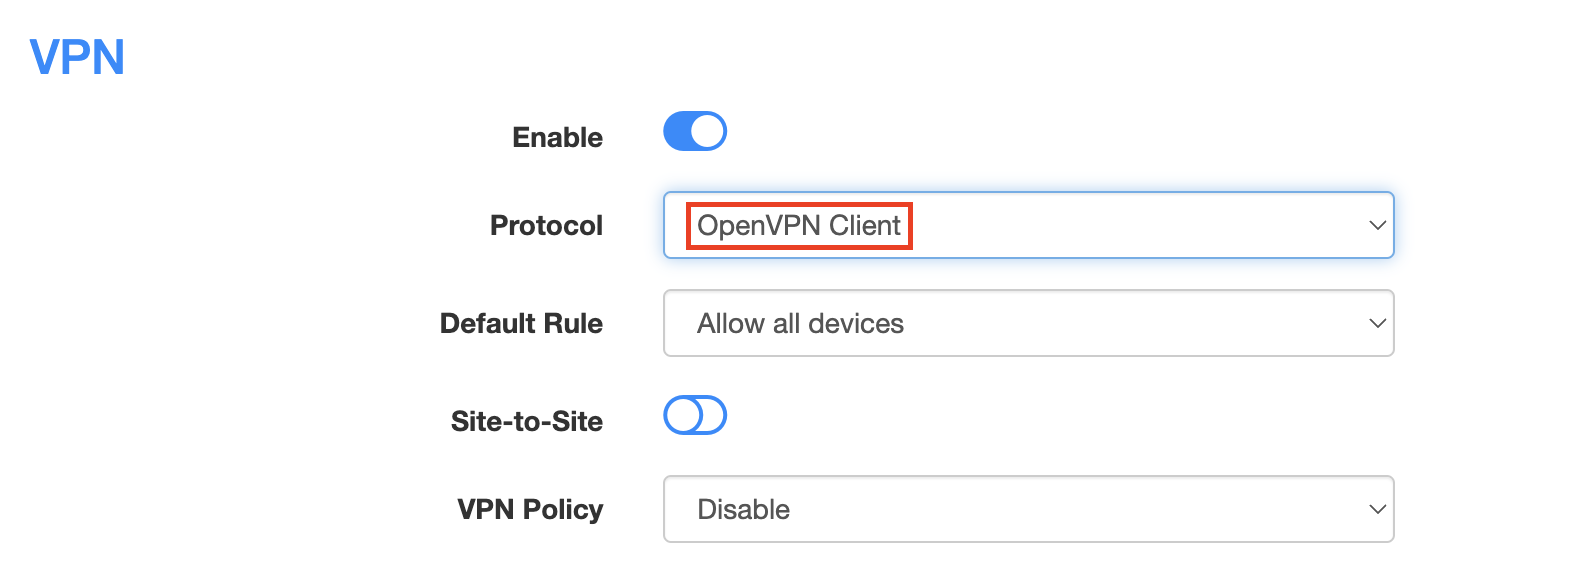
3. Toggle the Enable switch to On.

Cudy enable VPN

4. Select OpenVPN Client from the Protocol dropdown.

Cudy select OpenVPN Client

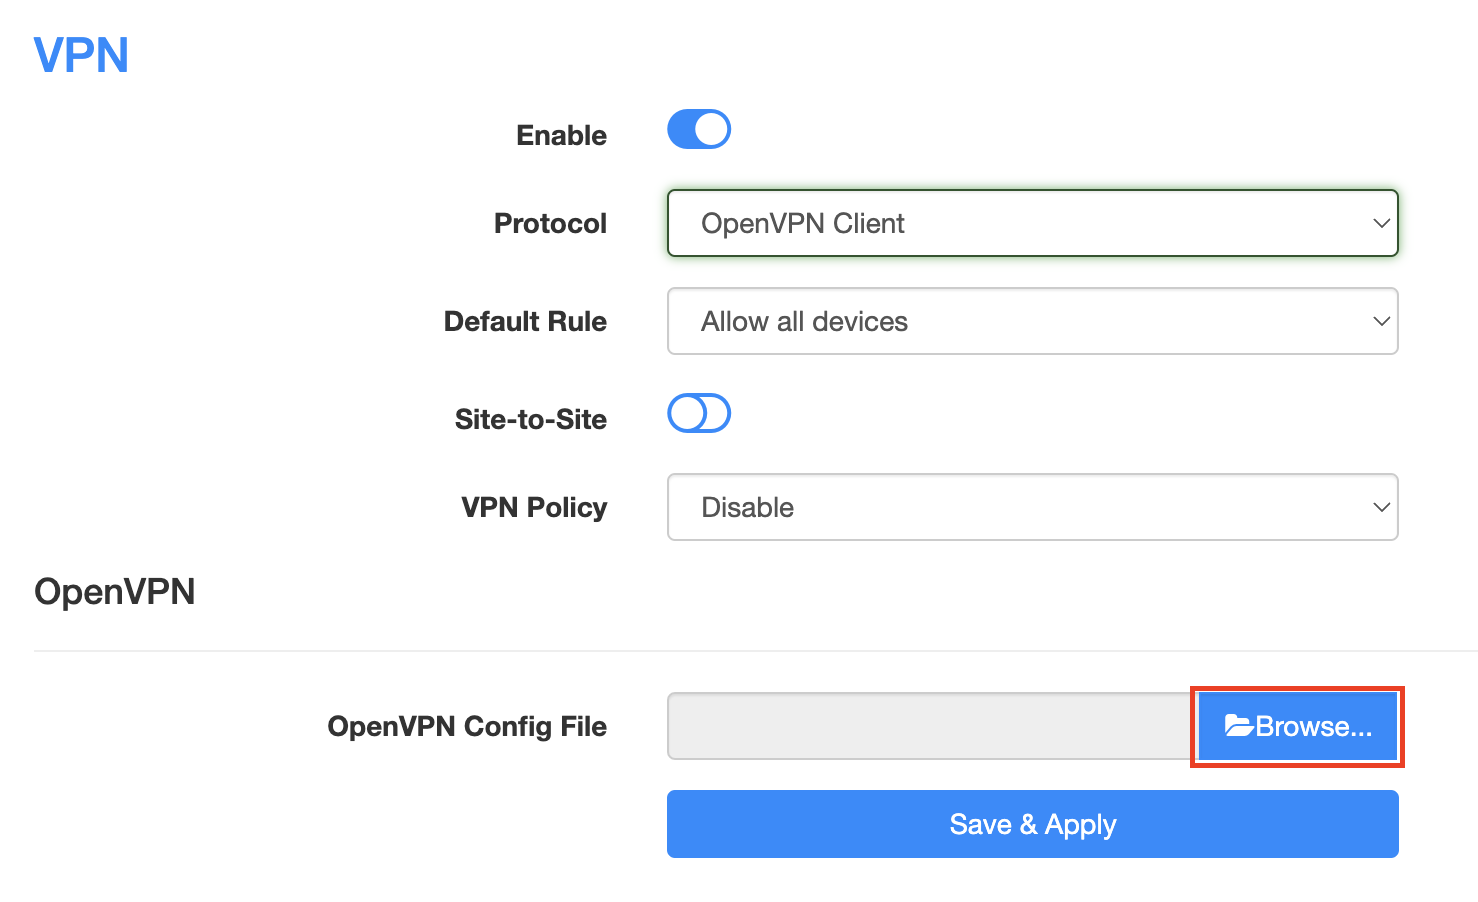
5. Click Browse and select the .ovpn file you downloaded earlier. You should see the server file name listed next to Current Config File after doing so.

Cudy OpenVPN Browse button

6. Enter your ExpressVPN username and password that you obtained earlier in the Username and Password. Note that these are different from your ExpressVPN email login and password.

Cudy ExpressVPN enter username and password

7. Click Save & Apply at the bottom of the page.

Verify a successful ExpressVPN connection

  1. You should now see a CONNECTED message.
  2. Visit ExpressVPN’s IP Check to verify your new IP address and virtual location.

In some cases you may notice that the location is not showing the same location as the server you have input in your router settings; this is because geo tracking tools are often tricked by VPN connections. As long as you see an IP address that is not the same as your normal Internet IP address then you are indeed connected to ExpressVPN.

How to change the ExpressVPN server

  1. Follow the steps at the top of the page to obtain a new .ovpn file.
  2. Then proceed with the settings same as initial setup.

TROUBLESHOOTING

Still having issues? Visit the VPN Troubleshooting section.

Troubleshoot Here

IPVanish Cudy OpenVPN Setup

TeamFlashRouters · Feb 29, 2024 ·

Preparing for IPVanish Cudy Setup

Download your IPVanish .ovpn file

If you are not already an IPVanish user Sign Up Now.

1. Log in to your account on the IPVanish website.

IPVanish login

2. Successfully log in with your account information then go to IPVanish .ovpn file page.

3. Click on the .ovpn file for the server location you want to use to dowloand the .ovpn file. Do not open this file.

IPVanish download ovpn

Cudy Router Setup for IPVanish

Login to Cudy firmware settings in a browser on any computer or smart device connected to the Cudy FlashRouter’s network.

1. Click General Settings.

Cudy General Settings

2. Click VPN.

Cudy VPN Tab

3. Toggle the Enable switch to On.

Cudy enable VPN

4. Select OpenVPN Client from the Protocol dropdown.

Cudy select OpenVPN Client

5. Click Browse and select the .ovpn file you downloaded earlier. You should see the server file name listed next to Current Config File after doing so.

Cudy OpenVPN Browse button

6. Enter your IPVanish account login email and password that you obtained earlier in the Username and Password.

Cudy IPVanish enter username and password

7. Click Save & Apply at the bottom of the page.

Verify a successful IPVanish connection

  1. You should now see a CONNECTED message.
  2. Visit IPVanish’s IP Check to verify your new IP address and virtual location.

In some cases you may notice that the location is not showing the same location as the server you have input in your router settings; this is because geo tracking tools are often tricked by VPN connections. As long as you see an IP address that is not the same as your normal Internet IP address then you are indeed connected to IPVanish.

How to change the IPVanish server

  1. Follow the steps at the top of the page to obtain a new .ovpn file.
  2. Then proceed with the settings same as initial setup.

TROUBLESHOOTING

Still having issues? Visit the VPN Troubleshooting section.

Troubleshoot Here

PrivateInternetAccess (PIA) Cudy OpenVPN Setup

TeamFlashRouters · Feb 29, 2024 ·

Preparing for PIA Cudy Setup

Download your PIA .ovpn file

If you are not already a PIA user Sign Up Now.

1. Log in to your account on the PIA website.

PIA login

2. Successfully log in with your account information then go to PIA’s OpenVPN Config Generator.

3. On the OpenVPN Configuration Generator select the following:

OpenVPN Version: OpenVPN 2.4 or newer

Select Platform: Linux

Select Region: Choose the server location you’d like to connect to

Select Port: Typically we recommend UDP/1198 RSA-2048 AES-128-CBC SHA1 for best speeds but feel free to select the one you want to use.

4. Click Generate to download the .ovpn file. Do not open this file once it is downloaded.

PIA Generate .ovpn file

Cudy Router Setup for PIA

Login to Cudy firmware settings in a browser on any computer or smart device connected to the Cudy FlashRouter’s network.

1. Click General Settings.

Cudy General Settings

2. Click VPN.

Cudy VPN Tab

3. Toggle the Enable switch to On.

Cudy enable VPN

4. Select OpenVPN Client from the Protocol dropdown.

Cudy select OpenVPN Client

5. Click Browse and select the .ovpn file you downloaded earlier. You should see the server file name listed next to Current Config File after doing so.

Cudy OpenVPN Browse button

6. Enter your PIA account login username and password in the Username and Password.

Cudy PIA enter username and password

7. Click Save & Apply at the bottom of the page.

Verify a successful PIA connection

  1. You should now see a CONNECTED message.
  2. Visit PIA’s IP Check to verify your new IP address and virtual location.
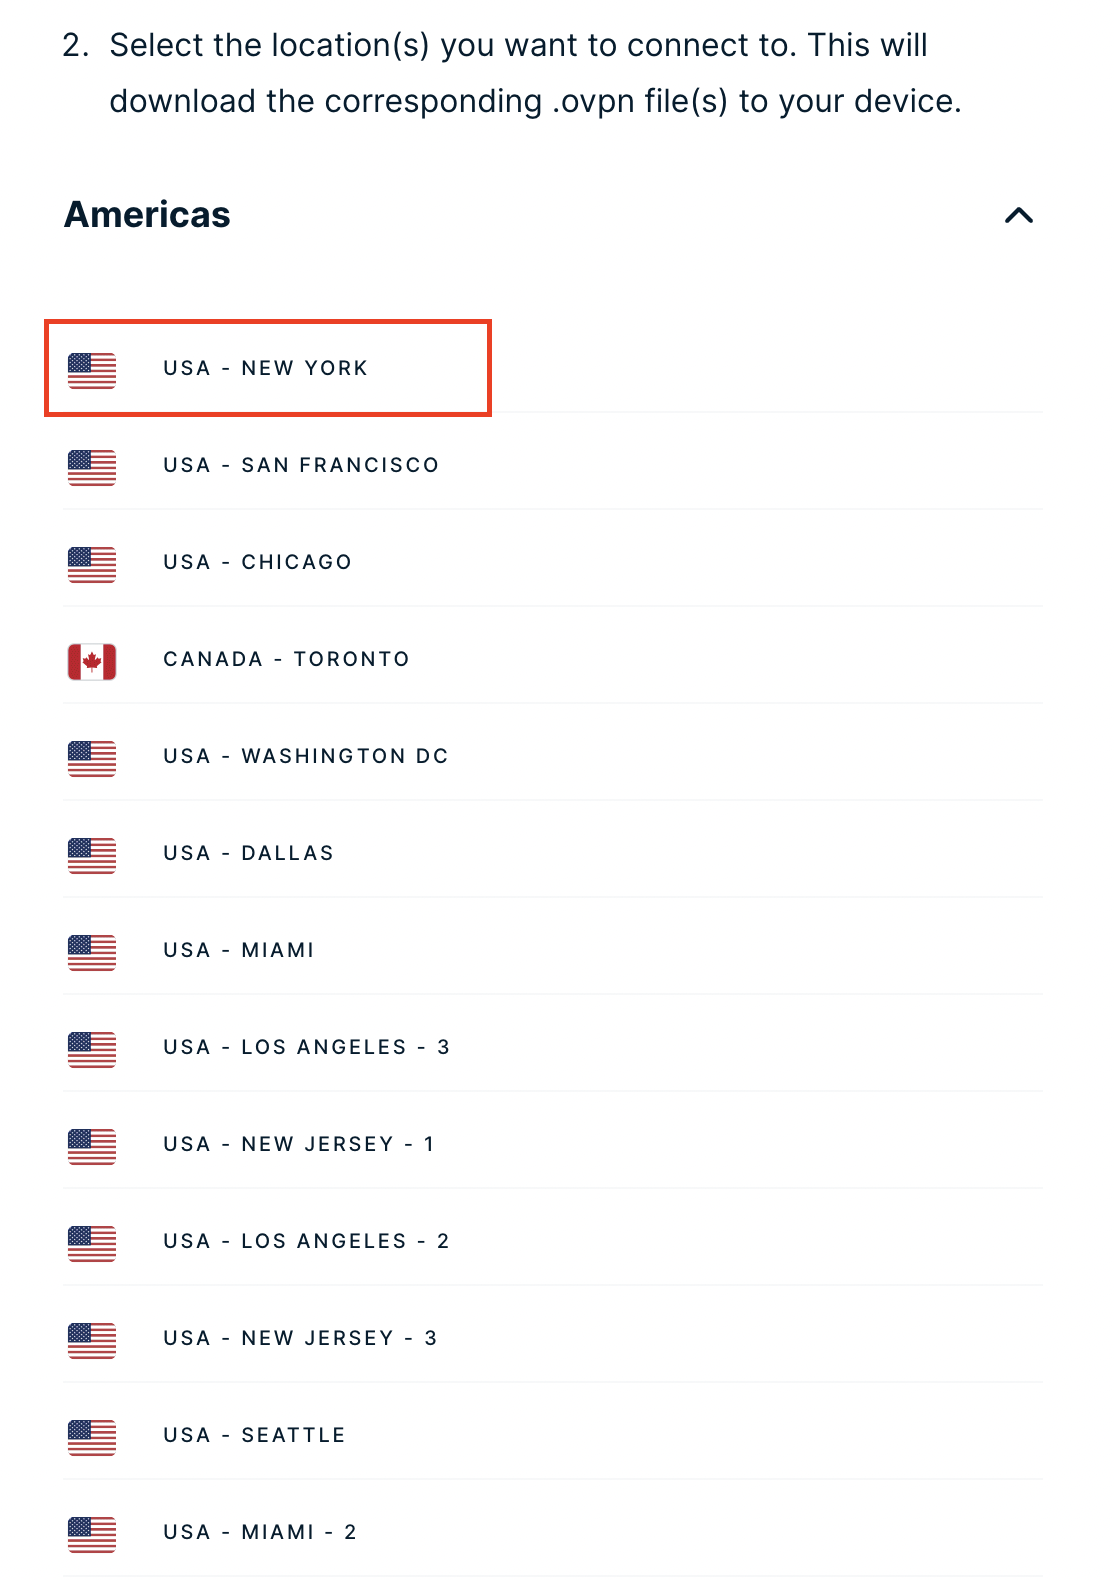
In some cases you may notice that the location is not showing the same location as the server you have input in your router settings; this is because geo tracking tools are often tricked by VPN connections. As long as you see an IP address that is not the same as your normal Internet IP address then you are indeed connected to PIA.

How to change the PIA server

  1. Follow the steps at the top of the page to obtain a new .ovpn file.
  2. Then proceed with the settings same as initial setup.

TROUBLESHOOTING

Still having issues? Visit the VPN Troubleshooting section.

Troubleshoot Here

ProtonVPN Merlin WireGuard Setup

TeamFlashRouters · Mar 30, 2023 ·

Preparing for ProtonVPN Merlin Setup

Download your ProtonVPN .conf file

If you are not already an ProtonVPN user Sign Up Now.

1. Log in to your account on the ProtonVPN website.

ProtonVPN Account Sign in

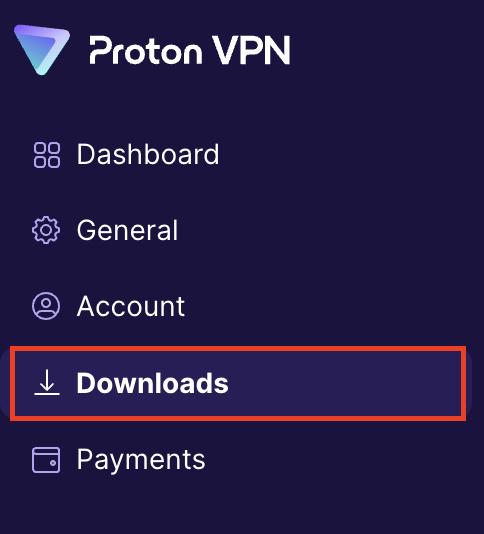
2. Click Downloads.

ProtonVPN Downloads

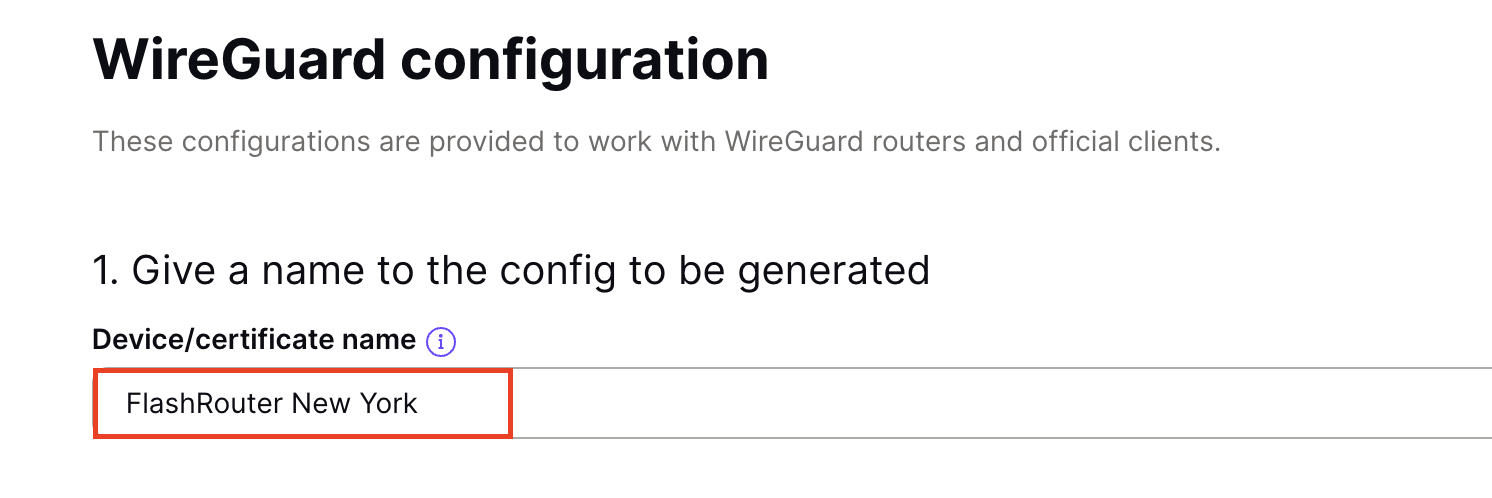
3. Scroll down to WireGuard configuration and name the device FlashRouter.

ProtonVPN WireGuard Configuration Name

4. Select Router as the platform.

ProtonVPN WireGuard select Platform

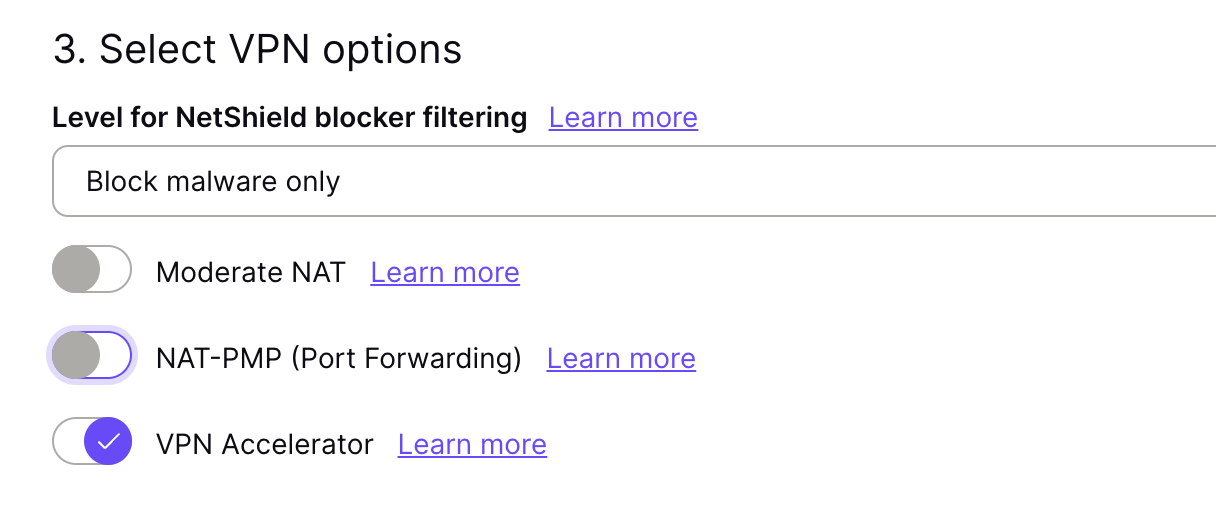
5. Select the VPN options that best fit your needs. We typically use the settings as seen in the screenshot here if you are unsure.

ProtonVPN WireGuard VPN options

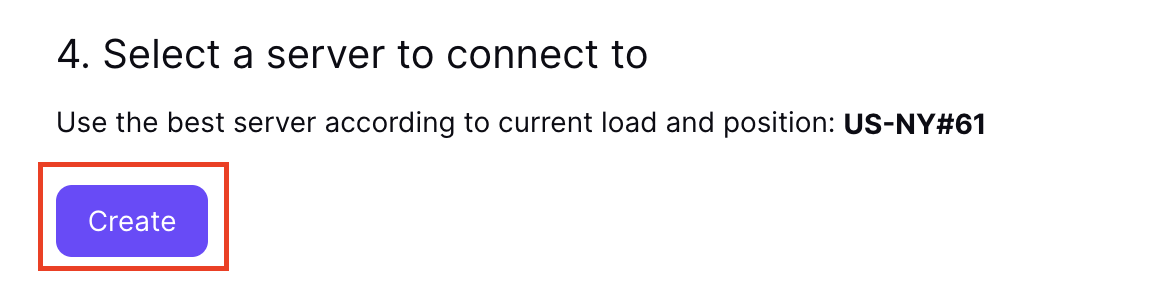
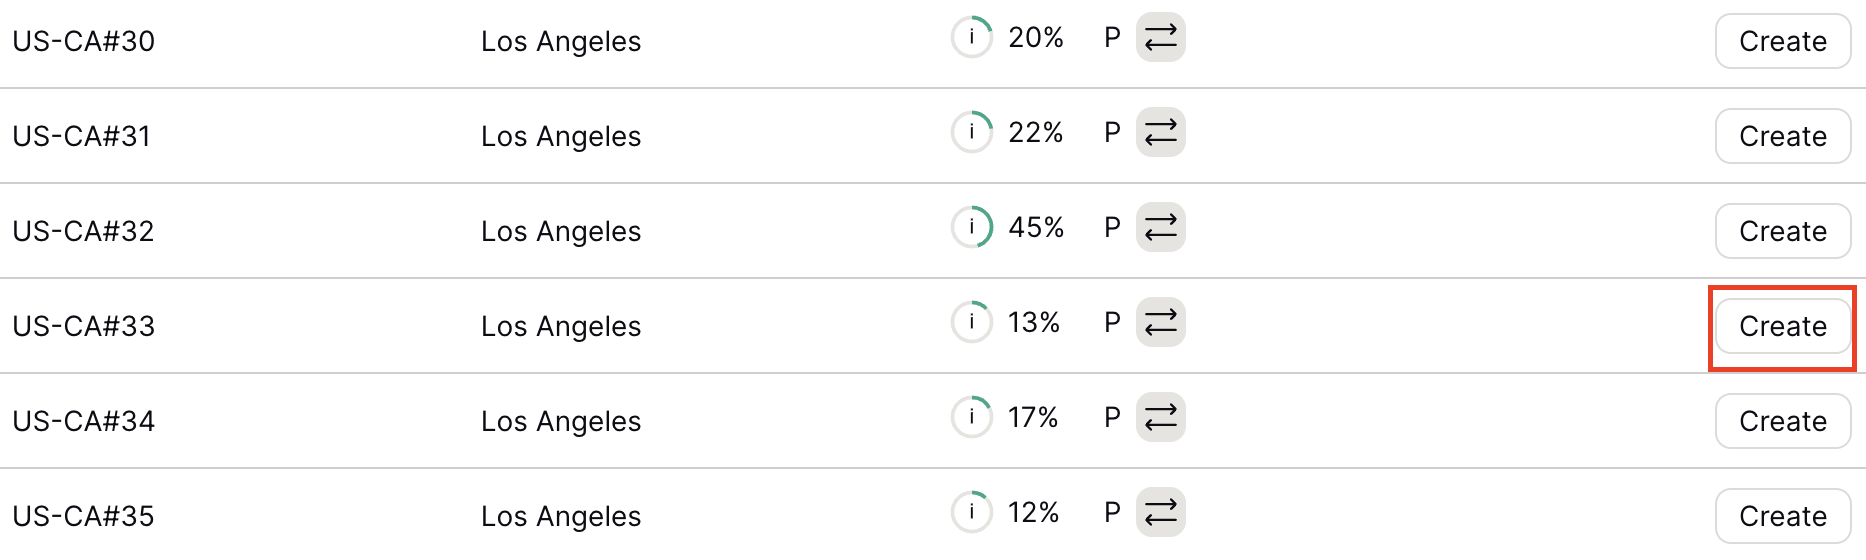
6. Next select the server that you would like to connect to and click Create. At the top of the page you’ll see ProtonVPN’s recommended server which we recommend using unless you need to connect to a specific location.

If you need a specific server location find it in the list and click Create.

ProtonVPN WireGuard recommended server
ProtonVPN WireGuard specific server

7. After clicking Create a new window will appear. Click Download to download the .conf file to your computer.

Merlin Router Setup for ProtonVPN

Login to Asus Merlin firmware settings in a browser on any computer or smart device connected to the Merlin FlashRouter’s network.

1. Navigate to the VPN tab.

Merlin VPN Tab

2. Navigate to the VPN Client tab.

Merlin VPN Client Tab

3. Select WireGuard as the VPN Protocol.

Merlin VPN Client WireGuard

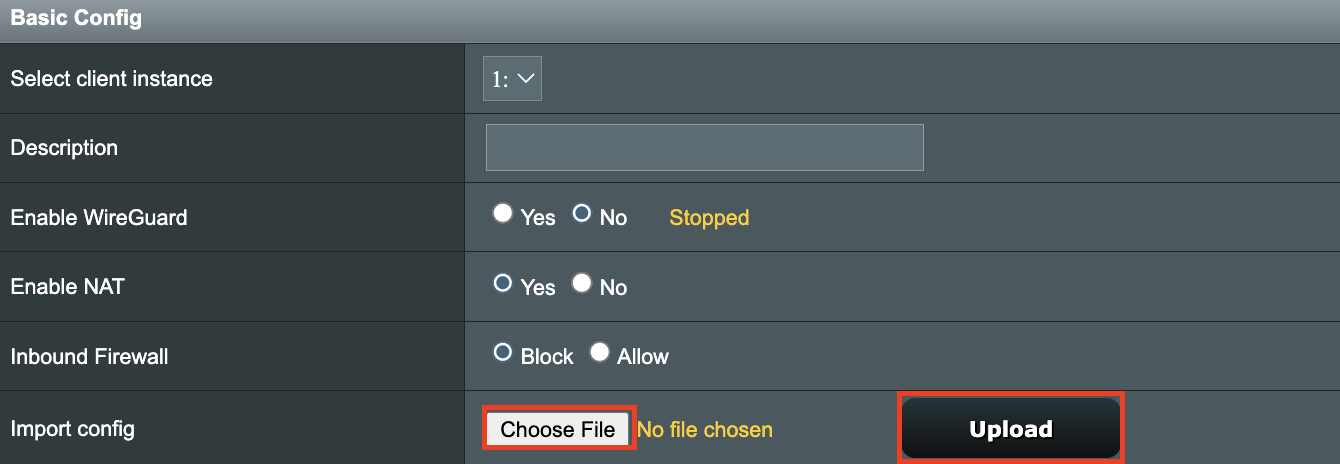
4. Click Choose file and select the .conf file you downloaded earlier. Then click Upload.

Merlin WireGuard Choose File Upload

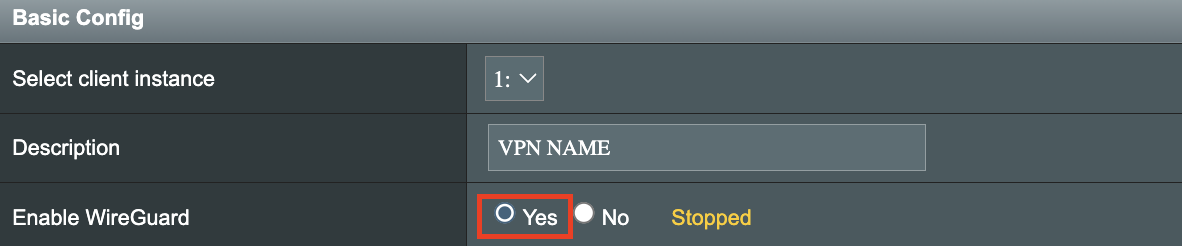
5. In the Description field enter in the name you’d like to use for this WireGuard Client profile. We typically advise entering in the location here. Our example server was in US-NY#61 so I have entered in ProtonVPN NY-61.

Merlin WireGuard ProtonVPN Description

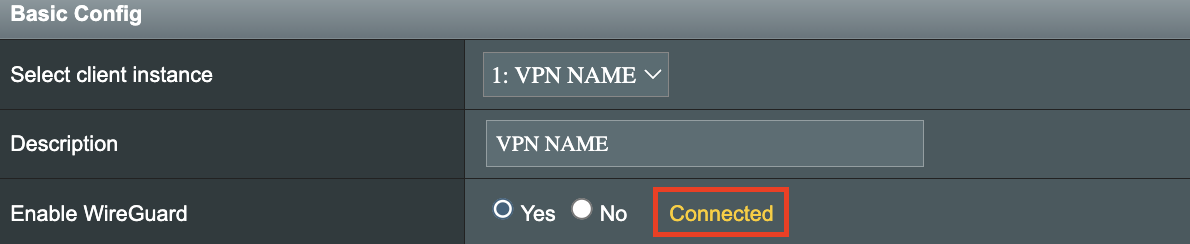
6. Set Enable WireGuard to Yes.

Merlin Enable WireGuard

7. Click Apply at the bottom of the page and you should then see a Connected message appear.

Merlin WireGuard Connected

8. By default no devices are assigned to the new active WireGuard connection profile. Click the VPN Director tab to assign specific devices to the new WireGuard profile. Your IP will not be changed on your devices yet.

WireGuard select VPN Director

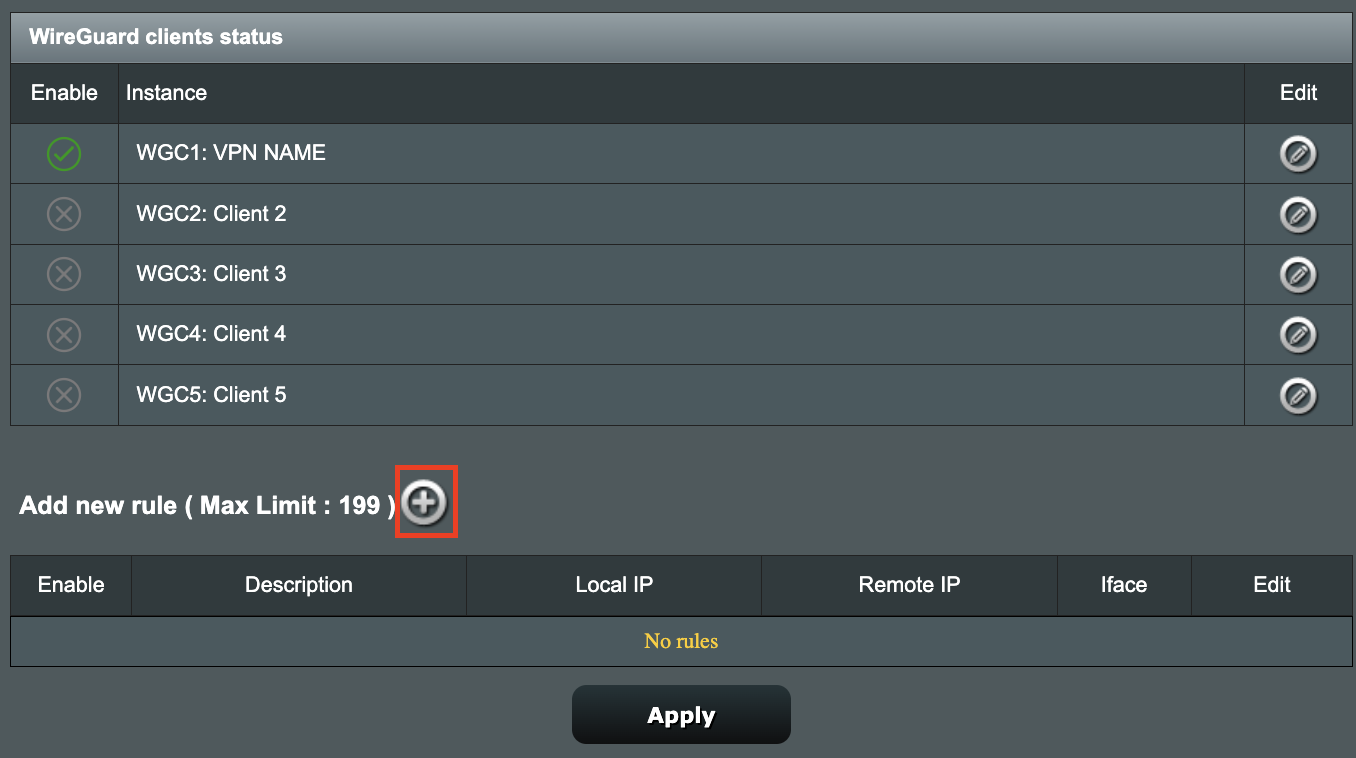
9. On the VPN Director page click the + symbol next to Add new rule.

WireGuard VPN Director Add new rule

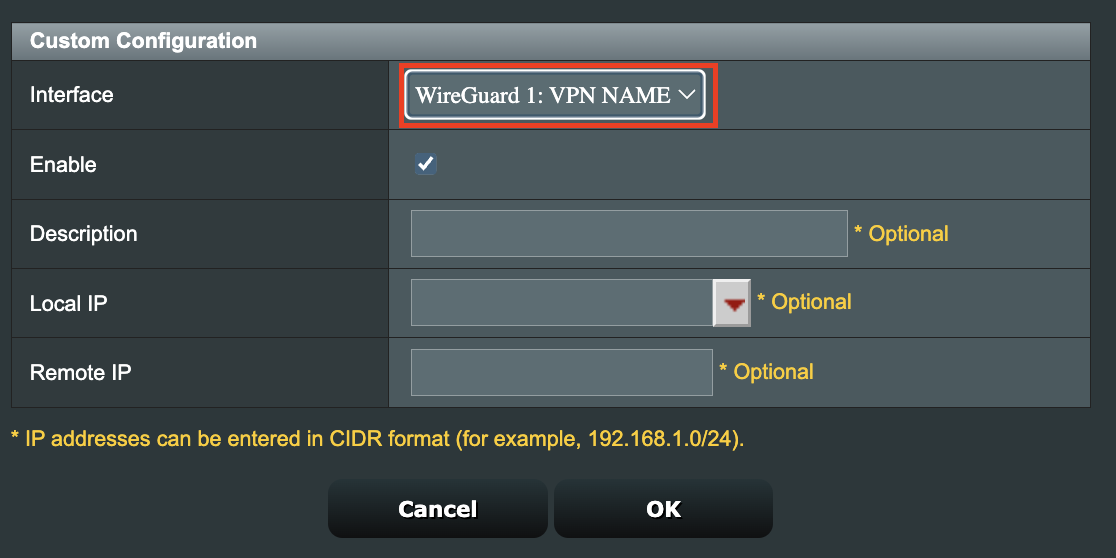
10. Select the new WireGuard profile in the Interface dropdown.

WireGuard VPN Director select Interface

11. In the Local IP field enter in 192.168.50.0/24 if you want ALL devices connected to the FlashRouter’s network to use the WireGuard VPN connection. Click OK.

If you only want certain devices to connect to the WireGuard Client profile you have setting up instead of all the devices connected to the FlashRouter’s network please complete the instructions on our VPN Director guide.

12. Then click Apply at the bottom of the page.

Verify a successful ProtonVPN connection

Visit ProtonVPN’s IP Check from a private/incognito browsing window to verify your new IP address and virtual location.

In some cases you may notice that the location is not showing the same location as the server you have input in your router settings; this is because geo tracking tools are often tricked by VPN connections. As long as you see an IP address that is not the same as your normal Internet IP address then you are indeed connected to ProtonVPN.

How to change the ProtonVPN server

  1. Follow the steps at the top of the page to obtain a new .conf file.
  2. Then proceed with the settings same as initial setup.

TROUBLESHOOTING

Still having issues? Visit the VPN Troubleshooting section.

Troubleshoot Here

Roqos Core Internet Setup and Activation

TeamFlashRouters · Mar 15, 2022 ·

Follow this article when you receive your new Roqos Core router to create your Roqos account, connect your Roqos to the Internet, and customize your network so it is ready to use.

Create your Roqos account

1. From any device that has a browser such as a computer, smartphone, or tablet visit login.roqos.com

Roqos Login URL

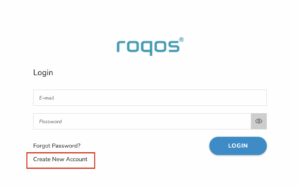
2. Select Create Account.

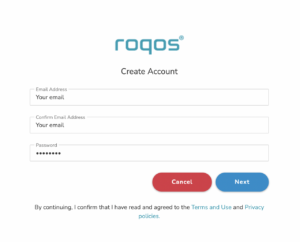
Roqos Create Account

3. Enter the Email address and password you want to set for your Roqos account. This will be your login to the Roqos settings moving forward. Click Next.

Roqos Enter Email

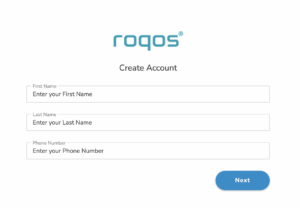
4. Enter the name and phone number you want associated with your Roqos. Click Next.

Roqos Enter Name and Number

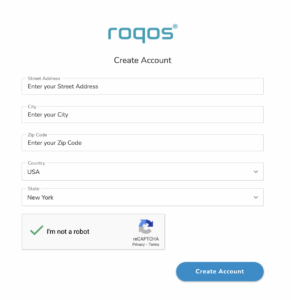
5. Enter the address where your Roqos is located. This section may require a CAPTCHA to be completed to authenticate you are human. Click Create Account.

Roqos Enter Address

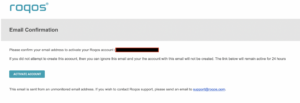
6. You have now created your Roqos account. In a new tab proceed to open the email from Roqos and click the Activate account button.

Roqos email activation

Activate your Roqos Internet

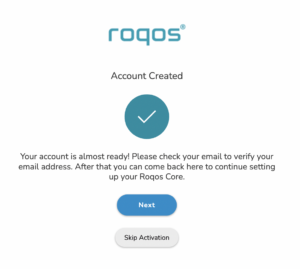
1. From the Account created page click Next to begin the Internet Setup of the Roqos.

Roqos Account Created

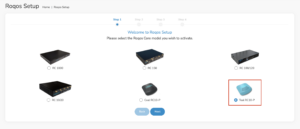
2. Select the Roqos model Teal RC10-P. Click Next.

Roqos Model

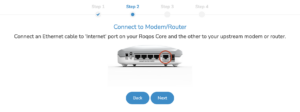
3. Connect the ethernet cable that came with your Roqos from the port labeled INTERNET on the back of your Roqos to an open ethernet port on your ISP Modem or other router in your network.

Roqos Wiring

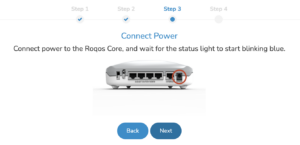
4. Then connect the power adapter that came with the Roqos to the back of the Roqos. Wait for the light on the Roqos to begin blinking blue. Once your see the blinking blue lights on the Roqos click Next.

Roqos Power On

If your Roqos lights does not begin blinking blue after a long while please see the steps in this article and contact us.

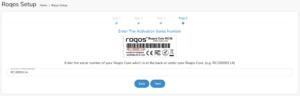
5. Enter in the Roqos serial number found on the bottom of the device exactly as it appears there. Click Next.

Roqos Activation Code

Setup your Roqos Network

1. Enter in a name that you would like to call the Roqos. This is just the Roqo’s device name and it is not the WiFi network name. Click Next.

Roqos Device Name

2. Select the Time Zone of your actual location from the dropdown. Click Next.

Roqos Time Zone

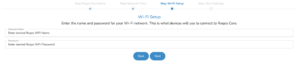
3. Set the WiFi name and password for the Roqos. The WiFi name should be unique and not a duplicate of an existing wireless network. This will be the name that appears in your wireless devices available network list and the password to join the devices to the network. Click Next.

Roqos Set WiFi Name and Password

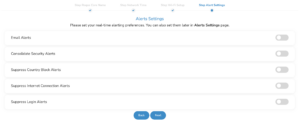
4. Select the custom alert settings as you best see fit using the toggle switches. We typically recommend having the first two toggles selected for Email Alerts and Consolidate Security Alerts. Click Next.

Begin connecting your devices to the Roqos network

You are now done setting up your Roqos to connect to the Internet and can begin joining your wireless devices to the Roqos network and exploring the Roqos Core Features.

Roqos Setup Done

TROUBLESHOOTING

Still having issues? Visit the VPN Troubleshooting section.

Troubleshoot Here

How do I reset and reconfigure my ExpressVPN/Aircove FlashRouter?

TeamFlashRouters · Mar 16, 2022 ·

When is a router reset needed?

A reset of the FlashRouter should only be performed in the following instances:

  • You have exhausted all other troubleshooting methods and cannot access your router settings.
  • Password to access the FlashRouter’s settings are not working.
  • Power light on the router is blinking steadily.
  • Router is not accessible after upgrading the firmware

Reset Router

Asus FlashRouters:

  1. While the router is powered off press and hold the WPS button on the back or side of the router. Power up the router while continuing to hold the WPS. Continue to hold for 15 seconds as the router powers on (note this could be up to 45 seconds on some models before lights flash).
  2. You will see the lights on the router flashing steadily and this is how you know you have reset the router.
  3. Let the router sit for about a minute and then reboot the router.

Aircove, Linksys and Netgear FlashRouters:

  1. While the router is plugged in, find the reset button located on the back of the router. You will need a pin or pencil to hold down the button for 15 seconds.
  2. You will see the lights on the back of the router flash simultaneously and this is how you know you have reset the router.
  3. Let the router sit for about a minute and then reboot the router.

Access Router Settings

1. Connect to the FlashRouter’s network via ethernet cable or wireless.

The wireless network will appear as “Aircove”, “Linksys##”, “Netgear##”, or “Asus” and the password to join the network will be the default wireless password printed on the bottom of the router.

2. Open your web browser and enter expressvpnrouter.com or 192.168.132.1 in the URL.

ExpressVPNrouter.com
192.168.132.1

3. Click Get Started on the ExpressVPN page that is displayed.

ExpressVPN Get Started

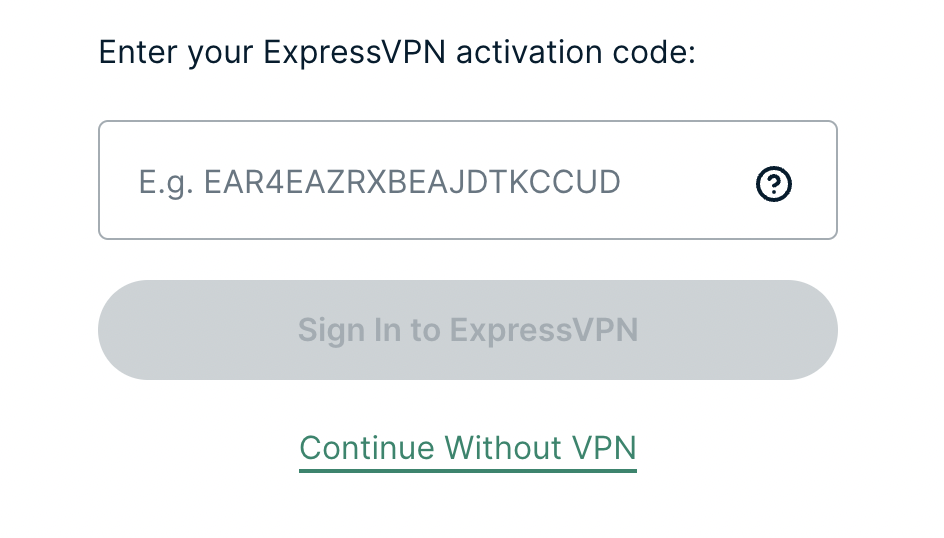
4a. If your FlashRouter is wired to the Internet correctly then you will be prompted to enter your ExpressVPN Activation Code found in your ExpressVPN account. Paste that in and click Sign in to ExpressVPN.

ExpressVPN Activation Code

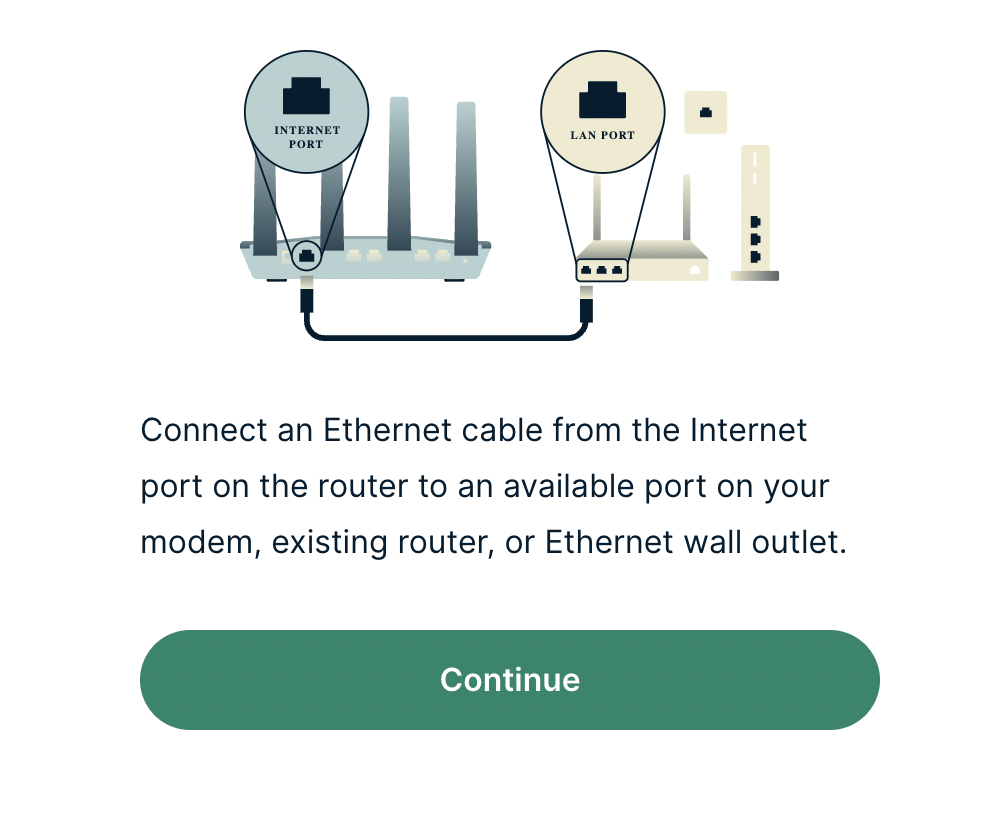
4b. If your FlashRouter is not wired correctly or is not receiving Internet properly make sure you are wired as detailed in the diagram that appears. If you are stuck at this screen we recommend powering off your ISP modem and any other router that the ExpressVPN FlashRouter is wired to and then powering them back up one by one.

Proceed with step “4a” above once the router is receiving Internet and you are prompted to enter the Activation Code.

ExpressVPN Wiring

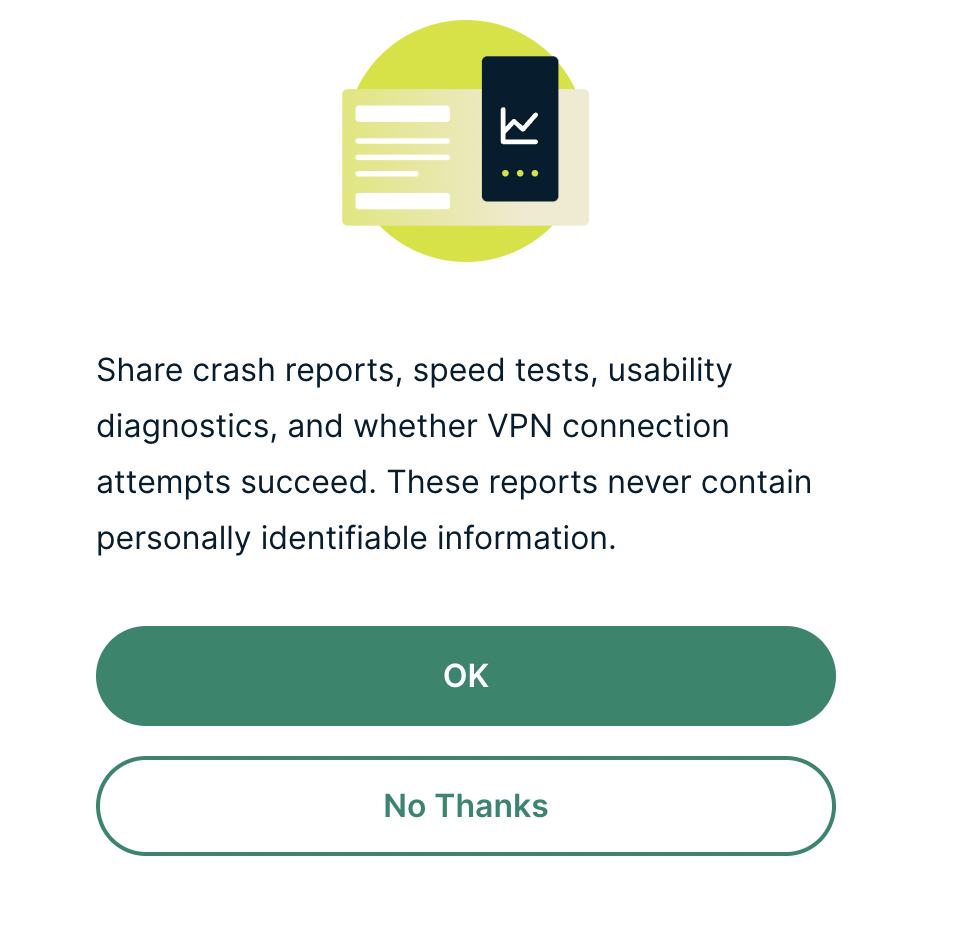
5. Select if you want to share anonymous crash report data with ExpressVPN to help them improve the firmware for future releases.

ExpressVPN Share Crash Report

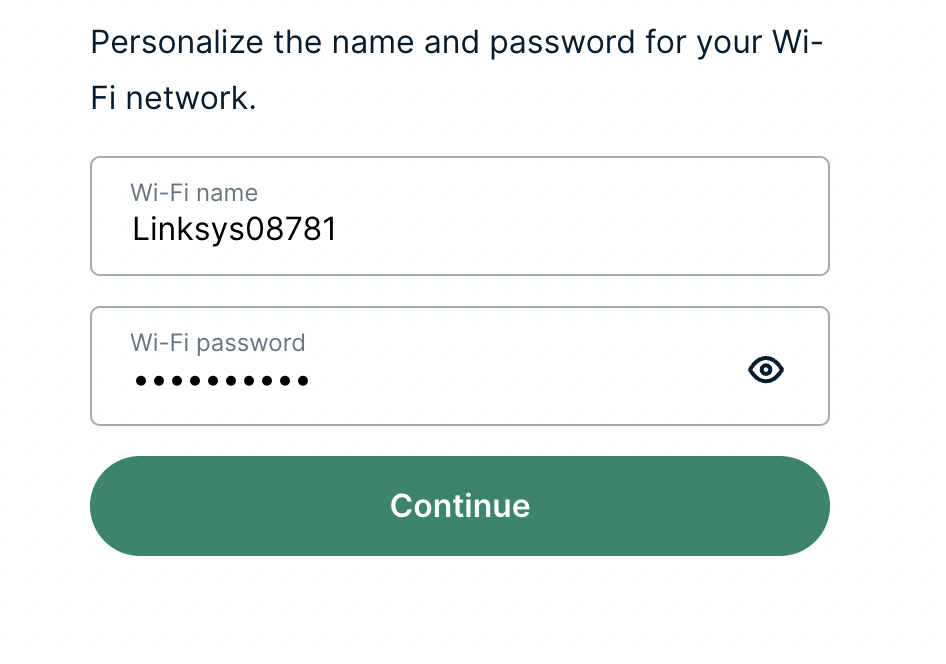
6. Set the WiFi name and password your wireless devices will use to connect to the FlashRouter’s network. Make sure the WiFi name is unique and not a duplicate of an existing WiFi name if you change it. You can also leave it as the default information if you like. Click Continue.

ExpressVPN Set WiFi Name and Password

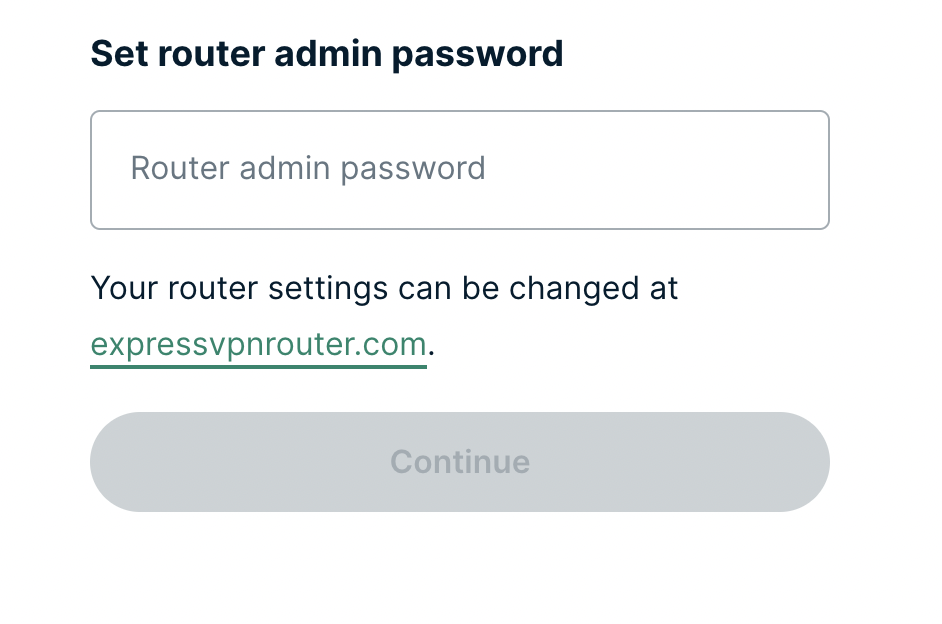
7. Enter the admin password you will use to access the ExpressVPN router settings. Be sure to TYPE CAREFULLY when setting the admin password as a typo will result in needing to reset the router again. Note this password in a secure location or commit it to memory.

ExpressVPN admin password

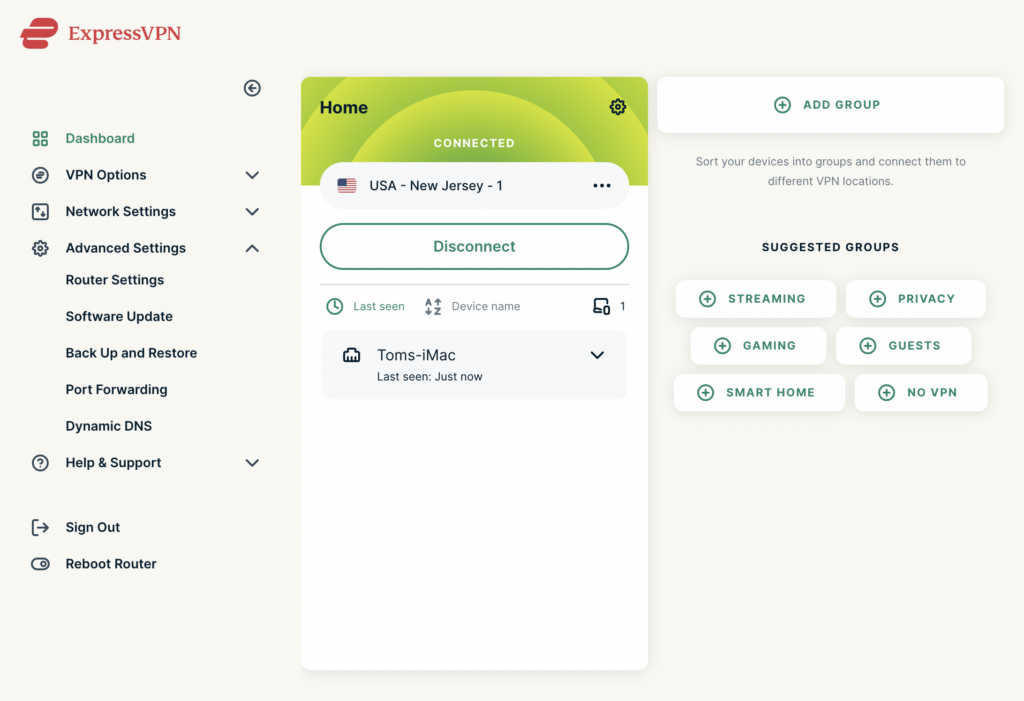
8. Your ExpressVPN FlashRouter is now fully setup!

ExpressVPN Connected

Surfshark Merlin WireGuard Setup

TeamFlashRouters · Mar 30, 2023 ·

Preparing for Surfshark Merlin Setup

Download your Surfshark .conf file

If you are not already a Surfshark user Sign Up Now.

1. Log in to your account on the Surfshark website.

Surfshark Account Login

2. Click VPN Manual Setup.

Surfshark VPN Manual Setup

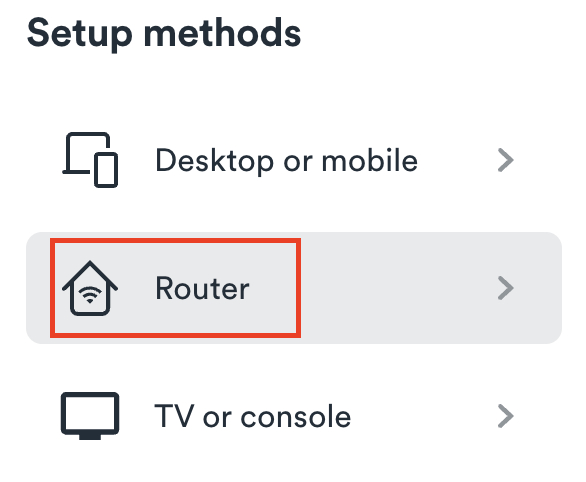
3. Select Router as the Setup Method.

Surfshark setup method Router

4. Select WireGuard as the Protocol.

Surfshark select WireGuard

5. Select I don’t have a key pair.

Surfshark No Key Pair

6. Enter FlashRouter as the name of the connection and click Next.

Surfshark Connection Name

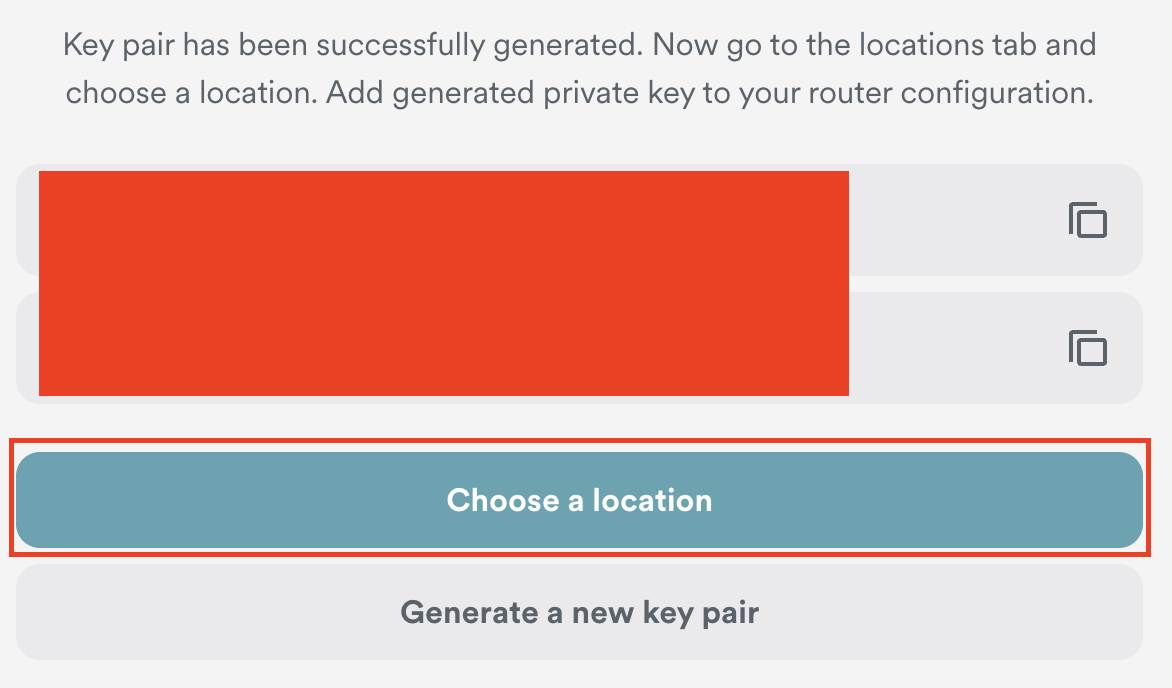
7. Click Generate a new key pair.

Surfshark Generate new Key Pair

8. Click Choose a location.

Surfshark Choose a Location

9. Select the server location you want to connect to. Unless you need a specific location we recommend using Surfshark’s recommended Fastest server. Click Download to download the .conf file for this Surfshark server location.

Surfshark download conf file

Merlin Router Setup for Surfshark

Login to Asus Merlin firmware settings in a browser on any computer or smart device connected to the Merlin FlashRouter’s network.

1. Navigate to the VPN tab.

Merlin VPN Tab

2. Navigate to the VPN Client tab.

Merlin VPN Client Tab

3. Select WireGuard as the VPN Protocol.

Merlin VPN Client WireGuard

4. Click Choose file and select the .conf file you downloaded earlier. Then click Upload.

Merlin WireGuard Choose File Upload

5. In the Description field enter in the name you’d like to use for this WireGuard Client profile. We typically advise entering in the location here. Our example server was in New York so I have entered in Surfshark New York.

Merlin WireGuard ProtonVPN Description

6. Set Enable WireGuard to Yes.

Merlin Enable WireGuard

7. Click Apply at the bottom of the page and you should then see a Connected message appear.

Merlin WireGuard Connected

8. By default no devices are assigned to the new active WireGuard connection profile. Click the VPN Director tab to assign specific devices to the new WireGuard profile. Your IP will not be changed on your devices yet.

WireGuard select VPN Director

9. On the VPN Director page click the + symbol next to Add new rule.

WireGuard VPN Director Add new rule

10. Select the new WireGuard profile in the Interface dropdown.

WireGuard VPN Director select Interface

11. In the Local IP field enter in 192.168.50.0/24 if you want ALL devices connected to the FlashRouter’s network to use the WireGuard VPN connection. Click OK.

If you only want certain devices to connect to the WireGuard Client profile you have setting up instead of all the devices connected to the FlashRouter’s network please complete the instructions on our VPN Director guide.

12. Then click Apply at the bottom of the page.

Verify a successful Surfshark connection

Visit Surfshark’s IP Check from a private/incognito browsing window to verify your new IP address and virtual location.
In some cases you may notice that the location is not showing the same location as the server you have input in your router settings; this is because geo tracking tools are often tricked by VPN connections. As long as you see an IP address that is not the same as your normal Internet IP address then you are indeed connected to Surfshark.

How to change the Surfshark server

  1. Follow the steps at the top of the page to obtain a new .conf file.
  2. Then proceed with the settings same as initial setup.

TROUBLESHOOTING

Still having issues? Visit the VPN Troubleshooting section.

Troubleshoot Here

Teamviewer FAQ and Setup

TeamFlashRouters · May 30, 2019 ·

We do NOT offer phone support here at FlashRouters. You will not receive a phone call to begin your session. Please read the information below for how to get connected during your session time.

What is a Teamviewer session?

A Teamviewer session is the most hands on method of receiving support from FlashRouters.

A support agent will connect directly to your computer and proceed to configure or troubleshoot your FlashRouter with you present.

We use Teamviewer sessions to troubleshoot any issue an eligible customer may have with a FlashRouter that was purchased from us or to configure a compatible router that your purchased independently along with a FlashRouters Support Plan.

In the session a chat window will appear so we can communicate directly with you in real time.

If you follow the information below prior to your session and all goes smoothly a Teamviewer session typically takes anywhere from 15 to 45 minutes.

Do I qualify for a Teamviewer session?

When purchasing a FlashRouter you are able to select a Quarterly or Yearly Bronze, Silver or Gold subscription plan.

Silver Yearly plan comes with one Teamviewer remote support session a year.

Gold Quarterly and Yearly plans come with one session per quarter.

If you support plan has expired or you are signed up for Bronze and you’d like to receive Teamviewer remote support assistance please email support@flashrouters.com

How do I schedule a Teamviewer session?

We are available for scheduled Teamviewer sessions from 10AM – 6:00PM ET Monday through Saturday.

To schedule a session with us open a support ticket or contact us via our live chat. We do not perform sessions that are not scheduled.

If we are available off hours we do our best to accommodate off hours session times with at least 24 hours notification.

Recommended computer and network setup

What computer should I use for Teamviewer?

Teamviewer sessions can not be performed on phones or tablets at this time. We require a Windows or Mac computer to successfully connect and configure your FlashRouter.

Below are the different scenarios from most ideal to least ideal.

I have a Dual Router Setup and a computer with WiFi and Ethernet

If you have an available wireless network NOT coming from the FlashRouter and have a computer that has wireless AND Ethernet capabilities you should be setup as follows:

  1. Connect via wireless to the other router.
  2. Once we have joined the session we will instruct you to wire from the FlashRouter to your computer.

I have a Dual Router Setup and a computer with WiFi only

If you have an available wireless network NOT coming from the FlashRouter and have a computer that has wireless only you should be setup as follows:

  1. Obtaining a USB to Ethernet adapter is ideal.
  2. If that is not possible connect to the FlashRouter’s network via wireless.

Session disconnects may occur with no backup Internet connection.

I have a Single Router Setup and a computer with WiFi and Ethernet

If the FlashRouter is your only wireless network and your computer has wireless and Ethernet capabilities you should be setup as follows:

  1. Connect an Ethernet cable from a numbered port on your FlashRouter directly to your computer.
  2. We may ask you during the session if your smartphone can broadcast an wireless hotspot we can connect to for backup Internet.

I have a Single Router Setup and a computer with WiFi only

If the FlashRouter if your only wireless network and your computer is wireless only you should be setup as follows:

  1. Obtaining a USB to Ethernet adapter is ideal.
  2. If that is not possible connect to the FlashRouter’s network via wireless.

Session disconnects may occur with no backup Internet connection.

How do I download Teamviewer?

Windows

  1. Download Teamviewer for Windows.
  2. Open the Teamviewer application.
  3. Email the User ID and Password (example displayed below) to your existing email thread or our live chat.
Access Teamviewer User ID and Password for FlashRouters Remote Support Session on Windows

Mac

  1. Download Teamviewer for Mac.
  2. Open the Teamviewer application.
  3. Email the User ID and Password (example displayed below) to your existing email thread or our live chat.
Access Teamviewer User ID and Password for FlashRouters Remote Support Session on Mac

When should I provide FlashRouters with my Teamviewer User ID and Password?

About 15 minutes before your scheduled session time update your support ticket e-mail the User ID and Password to your existing email thread, or send via our live chat.

NordVPN Setup for AsusWRT Firmware Routers

TeamFlashRouters · Oct 15, 2025 ·

You can connect to NordVPN on your AsusWRT router using NordLynx, OpenVPN, or a Dedicated IP.

Quick Options

  • NordLynx: Choose your preferred country from NordVPN’s server list

  • OpenVPN: Choose your preferred city or country from NordVPN’s server list.

  • Dedicated IP (optional): Enter your unique configuration file if you’ve been assigned a static NordVPN IP.

:point_right: If you are not already a NordVPN user Sign Up Now.

NordVPN NordLynx Setup for AsusWRT

1. Get your NordVPN Access Token for NordLynx connections. Log in to your NordVPN account and select NordVPN from your list of Services.

NordVPN Services Section

2. At the bottom of the page click Get Access token and you will receive a code via email. Enter this code to proceed.

NordVPN Access Token

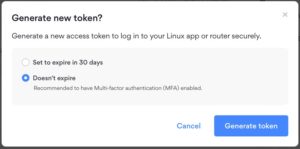
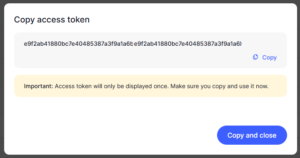
3. After you enter the email code select Generate new token and set it to Doesn’t expire. Copy this token.

NordVPN Generate new token
NordVPN Copy Token

4. Log in to the Asus settings page by connecting to the Asus router’s WiFi (or wired LAN) on your computer. Then, enter 192.168.50.1 or asusrouter.com in the browser.

View our guide for more instructions on how to access AsusWRT firmware settings.

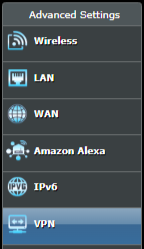
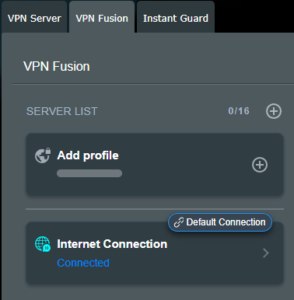
5. Navigate to the VPN tab and then select the VPN Fusion tab, then click Add profile.

Click the VPN Button
VPN Fusion Add Profile

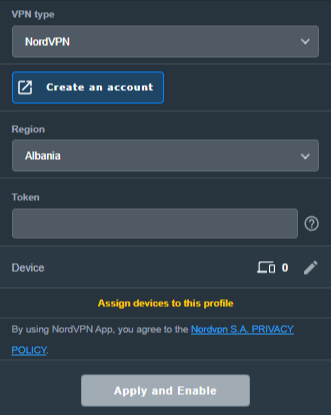
6. Fill in your NordVPN information, then click Apply and Enable.

  • Connection Name: Choose a name for your NordLynx connection.
  • VPN Type: Select NordVPN
  • Region: Choose your VPN server location
  • Token: Copy and paste your NordVPN token.
Apply NordLynx Settings

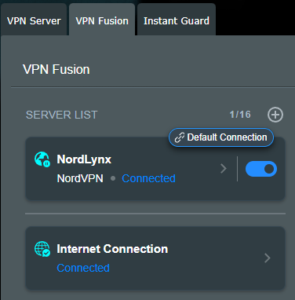
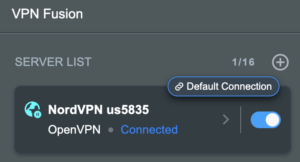
6. You should now see the Profile say Connected, indicating that the NordVPN server is successfully connected to your router!

VPN Fusion NordLynx Connected

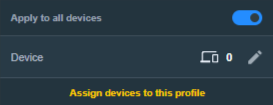
7. The VPN connection is automatically set to Apply to all devices.

If you only want certain devices to connect to the VPN, then turn off the VPN connection and switch off Apply to all devices.

Now click the pencil next to the Device section and select the devices (computer, phone, etc.) that you want to connect to VPN. Click OK and then click Apply all settings.

Apply VPN by Device

NordVPN OpenVPN Setup for AsusWRT

1. Get your NordVPN manual service credentials for OpenVPN connections. Log in to your NordVPN account and select NordVPN from your list of Services.

NordVPN Services Section

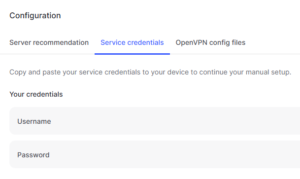
2. At the bottom of the page in the Manual Setup section click Setup NordVPN manually then under the Configuration section go to Service credentials. Click Verify email to receive a code via email and enter the code to view and copy your credentials.

NordVPN Manual OpenVPN
NordVPN Service Credentials

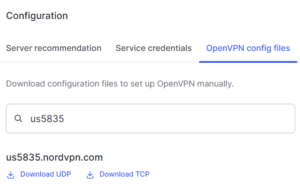
3. Click on OpenVPN config files. Search and download the server file for your preferred NordVPN location, UDP is recommended.

NordVPN OpenVPN Config Files

4. Log in to the Asus settings page by connecting to the Asus router’s WiFi (or wired LAN) on your computer. Then, enter 192.168.50.1 or asusrouter.com in the browser.

View our guide for more instructions on how to access AsusWRT firmware settings.

5. Navigate to the VPN tab and then click on the VPN Fusion tab, then click Add Profile.

Click the VPN Button
VPN Fusion Add Profile

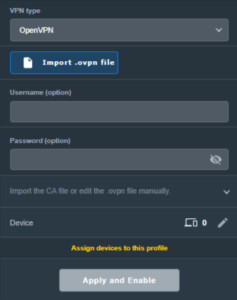
6. Fill in your NordVPN information then click Apply and Enable.

  • Connection Name: Choose a name for your NordVPN OpenVPN connection.
  • VPN Type: Select OpenVPN
  • Import .ovpn File: Upload the OpenVPN file that you downloaded.
  • Username and Password: Copy and paste your NordVPN manual service credentials.
AsusWRT OpenVPN Connection File Load

6. You should now see the Profile say Connected, indicating that the NordVPN server is successfully connected to your router!

Asus NordVPN Connected

7. The VPN connection is automatically set to Apply to all devices.

If you only want certain devices to connect to the VPN, then turn off the VPN connection and switch off Apply to all devices.

Now click the pencil next to the Device section and select the devices (computer, phone, etc.) that you want to connect to VPN. Click OK and then click Apply all settings.

Apply VPN by Device

NordVPN Dedicated IP Setup for AsusWRT

1. Get your NordVPN manual service credentials for OpenVPN connections. Log in to your NordVPN account and select NordVPN from your list of Services.

NordVPN Services Section

2. At the bottom of the page in the Manual Setup section click Setup NordVPN manually then under the Configuration section go to Service credentials. Click Verify email to receive a code via email and enter the code to view and copy your credentials.

NordVPN Manual OpenVPN
NordVPN Service Credentials

3. Now download your Dedicated IP configuration file from the NordVPN website.

4. Log in to the Asus settings page by connecting to the Asus router’s WiFi (or wired LAN) on your computer. Then, enter 192.168.50.1 or asusrouter.com in the browser.

View our guide for more instructions on how to access AsusWRT firmware settings.

5. Navigate to the VPN tab then click on the VPN Fusion tab, then click Add Profile.

Click the VPN Button
VPN Fusion Add Profile

6. Fill in your NordVPN information then click Apply and Enable.

  • Connection Name: Choose a name for your NordVPN Dedicated IP connection.
  • VPN Type: Select OpenVPN
  • Import .ovpn File: Upload the Dedicated IP OpenVPN file that you downloaded.
  • Username and Password: Copy and paste your NordVPN manual service credentials.
AsusWRT OpenVPN Connection File Load

6. You should now see the Profile say Connected, indicating that the NordVPN server is successfully connected to your router!

Asus NordVPN Connected

7. The VPN connection is automatically set to Apply to all devices.

If you only want certain devices to connect to the VPN, then turn off the VPN connection and switch off Apply to all devices.

Now click the pencil next to the Device section and select the devices (computer, phone, etc.) that you want to connect to VPN. Click OK and then click Apply all settings.

Apply VPN by Device
  1. Connect your devices to the Asus router network and visit the NordVPN website, at the top it should display Your Status: Protected.
  2. Visit NordVPN’s IP Check to verify your new IP address and virtual location.
🚫📱Do not run NordVPN apps on devices connected to your NordVPN router. Using the app at the same time as the router VPN may cause conflicts and connection issues.

Still having issues?

Feel free to submit a ticket and we will get back to you as soon as possible.

PureVPN Merlin WireGuard Setup

TeamFlashRouters · Jul 20, 2023 ·

Preparing for PureVPN Merlin Setup

Download your PureVPN .conf file

If you are not already an PureVPN user Sign Up Now.

1. Log in to your account on the PureVPN website.

PureVPN Login

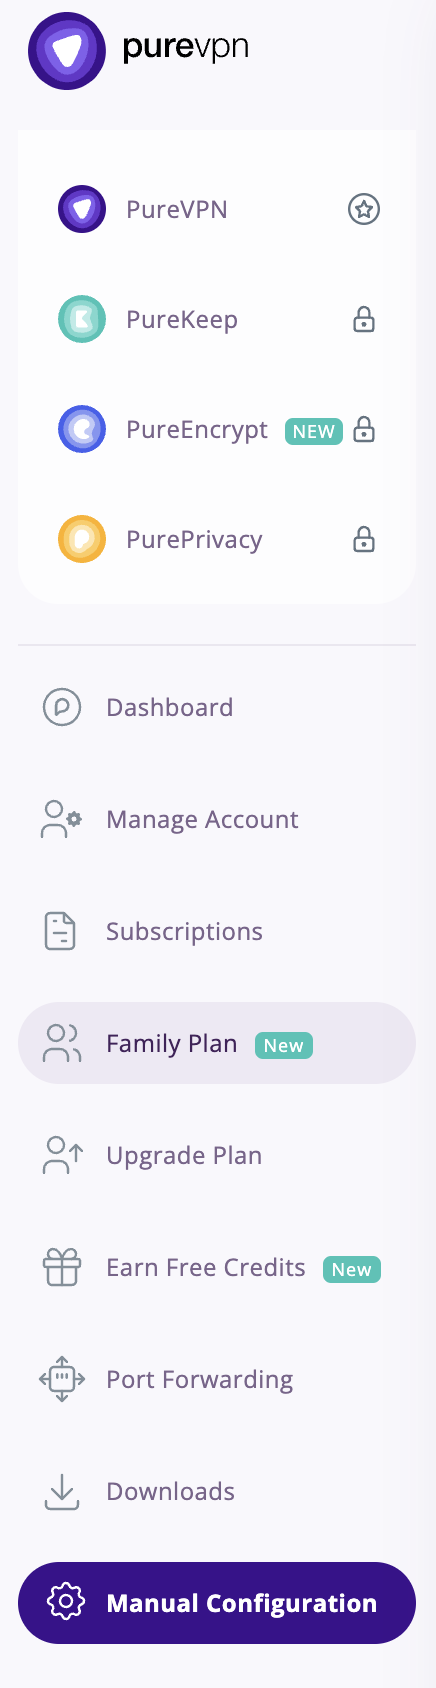
2. Select Manual Configuration.

PureVPN Manual Configuration

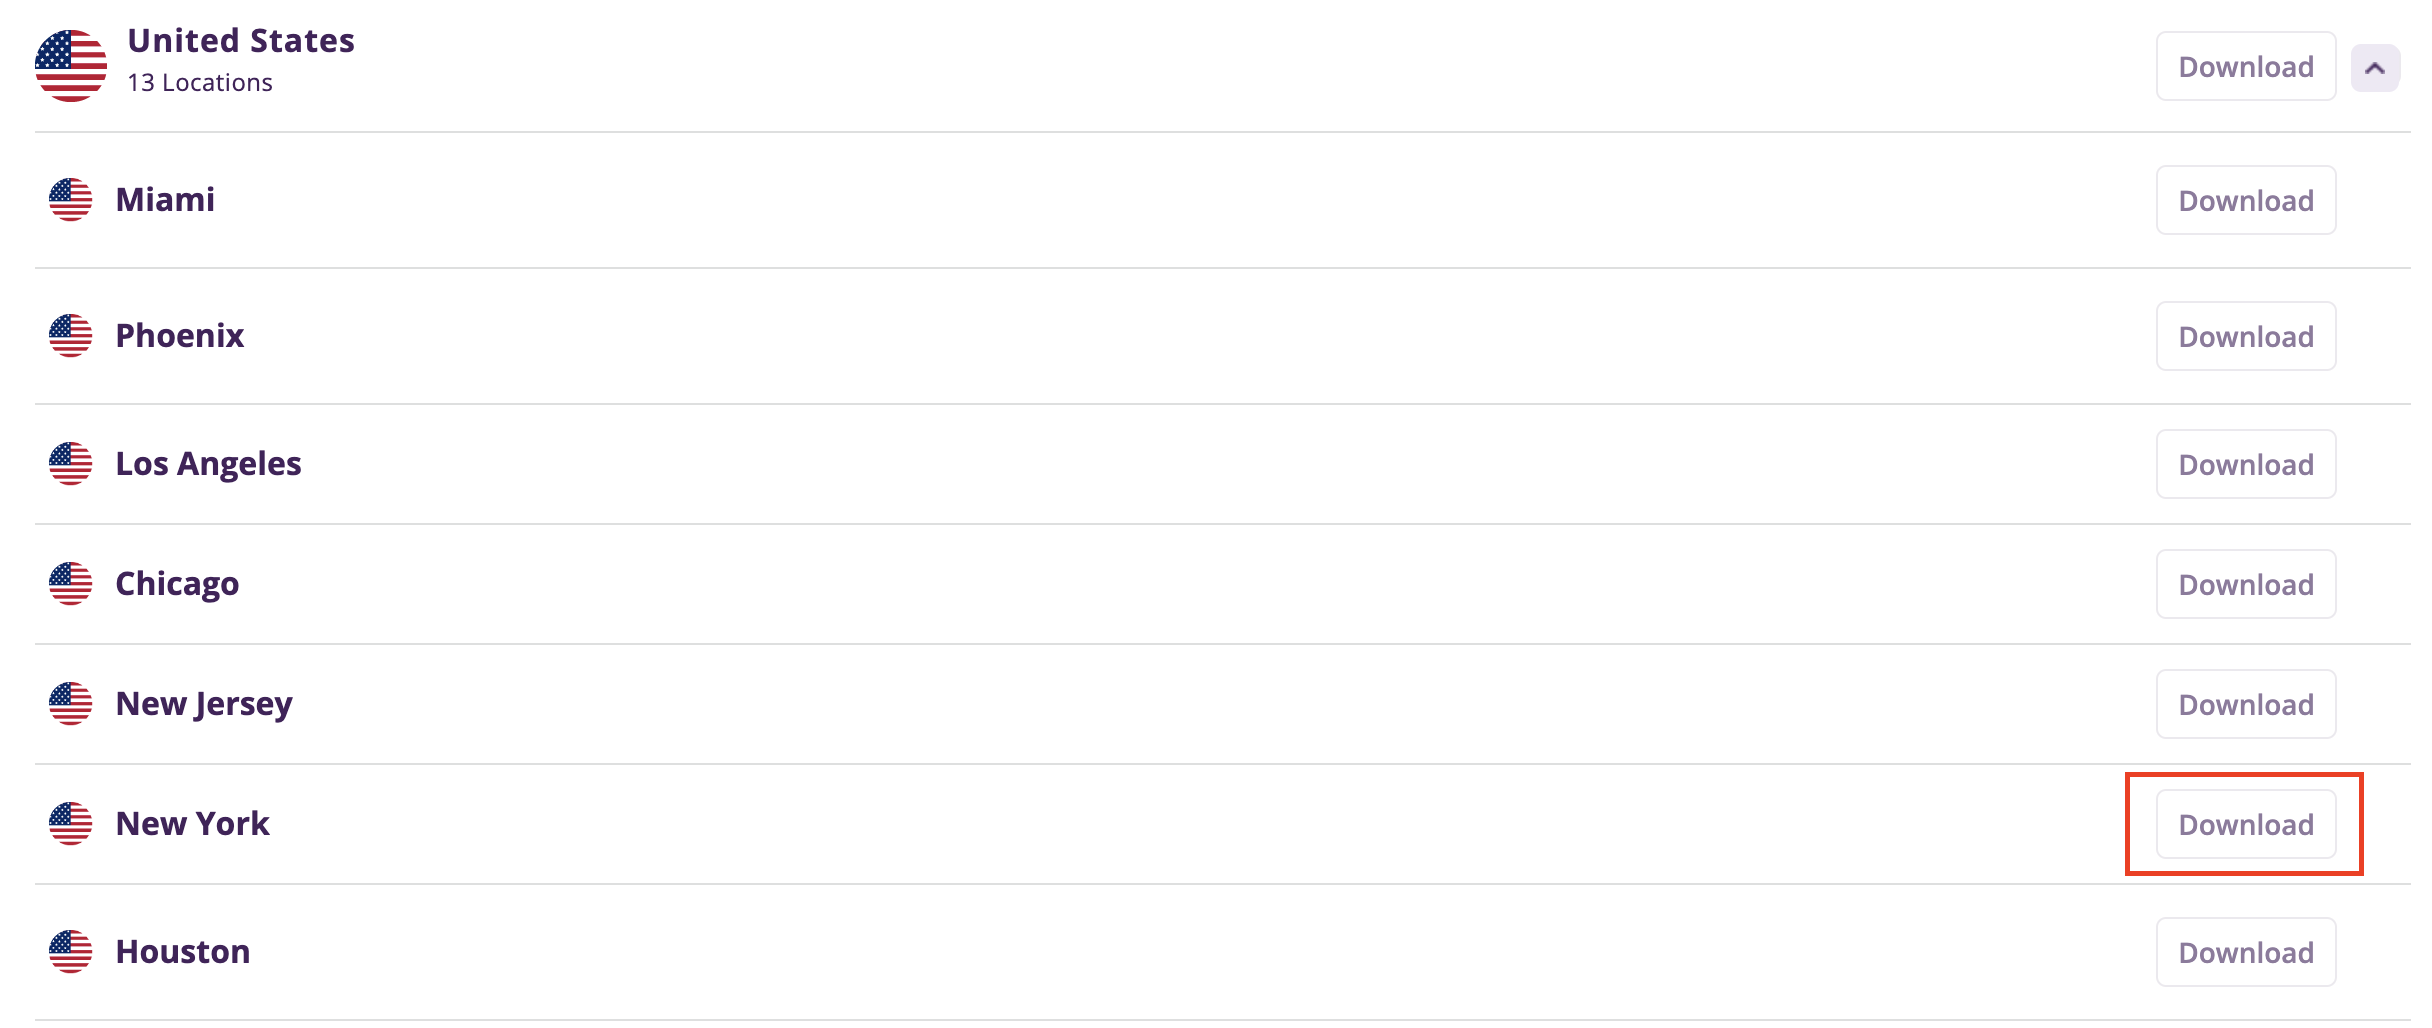
3. Select the Server Location you want to connect to and then click Download.

PureVPN select server location

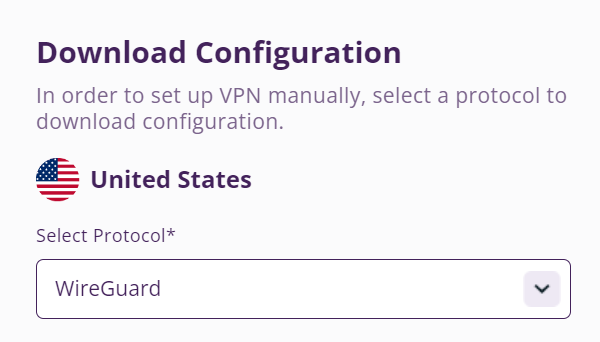
4. In the Select Protocol dropdown choose WireGuard.

PureVPN WireGuard

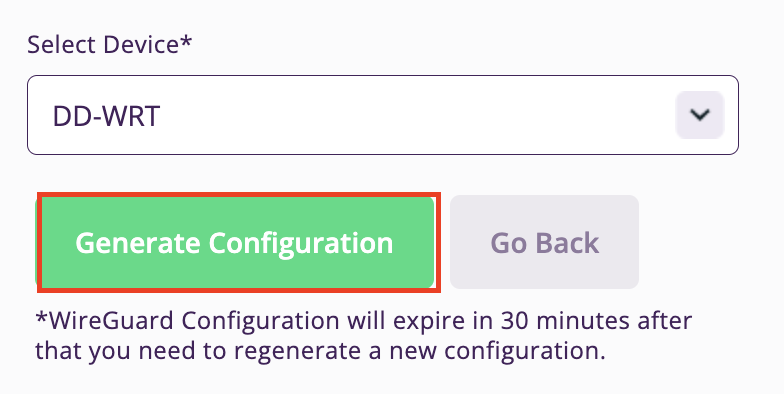
5. In the Select Device dropdown choose DD-WRT. Then click Generate Configuration. This will save a .conf file to your computer.

PureVPN Generate Config

Merlin Router Setup for PureVPN

Login to Asus Merlin firmware settings in a browser on any computer or smart device connected to the Merlin FlashRouter’s network.

1. Navigate to the VPN tab.

Merlin VPN Tab

2. Navigate to the VPN Client tab.

Merlin VPN Client Tab

3. Select WireGuard as the VPN Protocol.

Merlin VPN Client WireGuard

4. Click Choose file and select the .conf file you downloaded earlier. Then click Upload.

Merlin WireGuard Choose File Upload

5. In the Description field enter in the name you’d like to use for this WireGuard Client profile. We typically advise entering in the location here.

Merlin WireGuard ProtonVPN Description

6. Set Enable WireGuard to Yes.

Merlin Enable WireGuard

7. Click Apply at the bottom of the page and you should then see a Connected message appear.

Merlin WireGuard Connected

8. By default no devices are assigned to the new active WireGuard connection profile. Click the VPN Director tab to assign specific devices to the new WireGuard profile. Your IP will not be changed on your devices yet.

WireGuard select VPN Director

9. On the VPN Director page click the + symbol next to Add new rule.

WireGuard VPN Director Add new rule

10. Select the new WireGuard profile in the Interface dropdown.

WireGuard VPN Director select Interface

11. In the Local IP field enter in 192.168.50.0/24 if you want ALL devices connected to the FlashRouter’s network to use the WireGuard VPN connection. Click OK.

If you only want certain devices to connect to the WireGuard Client profile you have setting up instead of all the devices connected to the FlashRouter’s network please complete the instructions on our VPN Director guide.

12. Then click Apply at the bottom of the page.

Verify a successful PureVPN connection

Visit PureVPN’s IP Check to verify your new IP address and virtual location.
In some cases you may notice that the location is not showing the same location as the server you have input in your router settings; this is because geo tracking tools are often tricked by VPN connections. As long as you see an IP address that is not the same as your normal Internet IP address then you are indeed connected to PureVPN.

How to change the PureVPN server

  1. Follow the steps at the top of the page to obtain a new .conf file.
  2. Then proceed with the settings same as initial setup.

TROUBLESHOOTING

Still having issues? Visit the VPN Troubleshooting section.

Troubleshoot Here

NordVPN Setup Guide for Privacy Hero

TeamFlashRouters · Apr 3, 2023 ·

Your Privacy Hero NordVPN Router uses cloud-based management, which means you can securely access and adjust your router settings from anywhere, on any device with an internet connection. Whether you’re connected through your phone, another Wi-Fi network, or directly to the Privacy Hero network, setup and management are always within reach.

Follow the steps below to connect your Privacy Hero to NordVPN NordLynx or OpenVPN servers. By default, you’ll automatically connect to the fastest, most reliable server available based on your location. If you prefer, you can also select a specific country server and input it directly into your Privacy Hero for more control.

:point_right: Don’t have a Privacy Hero yet? Get your Privacy Hero NordVPN Router here

NordVPN Nordlynx Setup for Privacy Hero

1. From any device that has a browser such as a computer, smartphone, or tablet visit app.privacyhero.com

App.PrivacyHero.com

2. Enter your Privacy Hero account email and password. Click Login.

Privacy Hero Access Settings

3. Click the VPN symbol.

Privacy Hero Setup VPN

4. Click the Change button and select NordVPN from the dropdown.

Privacy Hero Change VPN Providers

5. Click the Change button and select NordVPN from the dropdown and choose the NordLynx option. Next you will need to obtain your Token.

NordVPN Protocol Privacy Hero

6. In a new tab login to your NordVPN account and select NordVPN from your list of Services.

NordVPN account

7. At the bottom of the page click Get Access token and you will receive a code via email. Enter this code to proceed.

NordVPN Access Token

8. After you enter the email code select Generate new token and set it to Doesn’t expire. Copy this token.

NordVPN Generate new token
NordVPN Copy Token

9. Paste the token and then Click Save to connect to the server address recommended by NordVPN within your country.

NordVPN Protocols Privacy Hero

10. To connect to a specific location, click the Country dropdown menu and scroll or type to search from the available options. Choose your preferred country and you will automatically connect to the recommended server within that country at the time. Then click Save.

Nordlynx VPN Country Selection Privacy Hero

11. If you prefer to enter a specific server address number click Advanced Options and then type in the NordVPN server you would like to use as shown below e.g. uk1784.nordvpn.com. Then click Save.

Nordlynx Advanced Privacy Hero

Use the NordVPN’s server recommendation tool to select a specific country and receive a recommendation for the fastest server based on your actual location. You can then enter that server in the Privacy Hero settings manually.

12. Your Privacy Hero settings should now show a Connected message, indicating you have successfully signed in to your NordVPN NordLynx VPN server!

Privacy Hero Nordlynx Connected

NordVPN OpenVPN Setup for Privacy Hero

1. From any device that has a browser such as a computer, smartphone, or tablet visit app.privacyhero.com

App.PrivacyHero.com

2. Enter your Privacy Hero account email and password. Click Login.

Privacy Hero Access Settings

3. Click the VPN symbol.

Privacy Hero Setup VPN

4. Click the Change button and select NordVPN from the dropdown.

Privacy Hero Change VPN Providers

5. Choose the OpenVPN option to connect to OpenVPN servers or to setup a NordVPN Dedicated IP address. Next you will need to obtain your Manual Service credentials.

NordVPN Protocol Privacy Hero

6. In a new tab login to your NordVPN account and select NordVPN from your list of Services.

NordVPN login
NordVPN account

7. At the bottom of the page in the Manual Setup section click Setup NordVPN manually then under the Configuration section go to Service credentials. Click Verify email to receive a code via email and enter the code to view and copy your credentials.

NordVPN Manual OpenVPN
NordVPN Service Credentials

8. Enter these credentials into the OpenVPN Username and Password sections in your Privacy Hero and Click Save if you want to connect to the server address recommended by NordVPN within your country.

NordVPN OpenVPN Privacy Hero

9. To connect to a specific location, click the Country dropdown menu and scroll or type to search from the available options. Choose your preferred country and you will automatically connect to the recommended server within that country at the time. Then click Save.

Nordlynx VPN Country Selection Privacy Hero

10. To connect with a NordVPN Dedicated IP Address or if you prefer to enter a specific server address number click Advanced Options and then type in the NordVPN server you would like to use as shown below e.g. uk1784.nordvpn.com. Then click Save.

Nordlynx Advanced Privacy Hero

Use the NordVPN’s server recommendation tool to select a specific country and receive a recommendation for the fastest server based on your actual location. You can then enter that server in the Privacy Hero settings manually.

11. Your Privacy Hero settings should now show a Connected message, indicating you have successfully signed in to your NordVPN Dedicated IP address or preferred OpenVPN server!

NordVPN OpenVPN Connected Privacy Hero

Privacy Hero’s cloud based router settings access makes it so you can change settings while not connected to the Privacy Hero network. Visit the NordVPN IP Check to verify your VPN IP address. If it has not changed be sure to double check that you are indeed connected to the Privacy Hero network.

Keep in mind that the VPN connection will not change the location of the streaming services listed in the Streaming Relocation area of the Privacy Hero settings if the Streaming Relocation feature is Enabled.

Still having issues?

Feel free to submit a ticket and we will get back to you as soon as possible.

VPN FAQs

admin · Jan 29, 2019 ·

VPN FAQs

General VPN FAQ Answers

What is a VPN?

VPN is an acronym for ‘Virtual Private Network’, historically used by private organizations to seamlessly link geographically diverse locations via the Internet. A VPN ‘tunnels’ traffic between two devices by transmitting it over a secure network. There are also clearly identifiable benefits to individual Internet users accessing a VPN.

  • A VPN provides you with top-level security and privacy for all your Internet downloading, streaming and browsing. As long as you are signed into your VPN account, all data you transmit over the Internet is encrypted.
  • A VPN encrypts your device by hiding the IP address assigned by your Internet Service Provider (ISP) and replacing it with the IP address of your choosing from the list of server locations belonging to your VPN provider. This masks your identity when visiting sites that geo-restricted content, and helps you avoid devious local Internet marketing and advertising schemes that track you through your IP address.

Will a FlashRouter with a built-in VPN client speed up my connection?

FlashRouters are relatively new models that may enhance data transfers across your home network or extend the range of your Wireless signal. However, the speed at which you download or stream content can not exceed the speed of the connection you pay for through your ISP. Purchasing a FlashRouter or signing up for VPN service WILL NOT transform your regular connection into a high-speed broadband connection.

At the same time, if you do have a broadband connection, a FlashRouter with a VPN connection may slow down your transfer speeds due to the processor encrypting all of your data. In certain cases a FlashRouter with a VPN can also prevent throttling by an ISP of specific service like Netflix or Amazon Video.

Which VPN provider should I use?

Our routers have been tested to perform with many of the most popular VPN providers such as ExpressVPN, NordVPN, IPVanish, PrivateInternetAccess & CyberGhost among 50+ VPN providers so that subscribers can get the maximum benefit from their VPN service. If you prefer another provider, that is not an issue at all. You can still use a DD-WRT VPN FlashRouter with any VPN provider that offers DD-WRT router integration support. Contact our team for further information about using our routers with your VPN service of choice or if you need a VPN provider recommendation based on your location.

Should my FlashRouter replace my old router?

A FlashRouter will work as a standalone router by connecting your modem to its Wide Area Network (WAN) port, or using it in a Dual Router Network by connecting it to your existing router through a Local Area Network (LAN)/Ethernet port. Either way a FlashRouter can be configured to tunnel all traffic through the VPN server of your choosing.

If you would like to set up your Home Network so that some devices are being tunneled through a VPN server, and others are connecting to your Internet Service Provider (ISP) within your home country, then using your FlashRouter as an auxiliary device is recommended.

VPN Security FAQ Answers

Can I change my IP address to one in another country?

YES! The countries that you can change your IP address to depend on the offerings of your specific VPN providers. Prices and server locations vary across all VPN providers.

If you choose to purchase a FlashRouter then you will not have to install any VPN client software on your computer to change your IP address; the VPN will already be configured within the router. Therefore, any device you plug into this FlashRouter is automatically assigned the IP address of your selected VPN server.

When is my connection secure?

As long as the VPN account preset into your FlashRouter is active, any device that is connected to the Internet through this router has its network traffic encrypted, and IP address masked. With a FlashRouter you never have to physically login to your VPN account, as the settings have been stored in the router’s DD-WRT firmware.

Don’t worry though! If you are not at home, and using Wi-Fi in a public location, you can still use your VPN account on a laptop or mobile device through various other methods.

How can I be sure my connection is safe and encrypted?

In order to make sure that the connection on your FlashRouter is being rerouted appropriately through your VPN service, visit What is my IP address and make sure the location listed is the one you have chosen in your VPN settings, NOT your actual location.

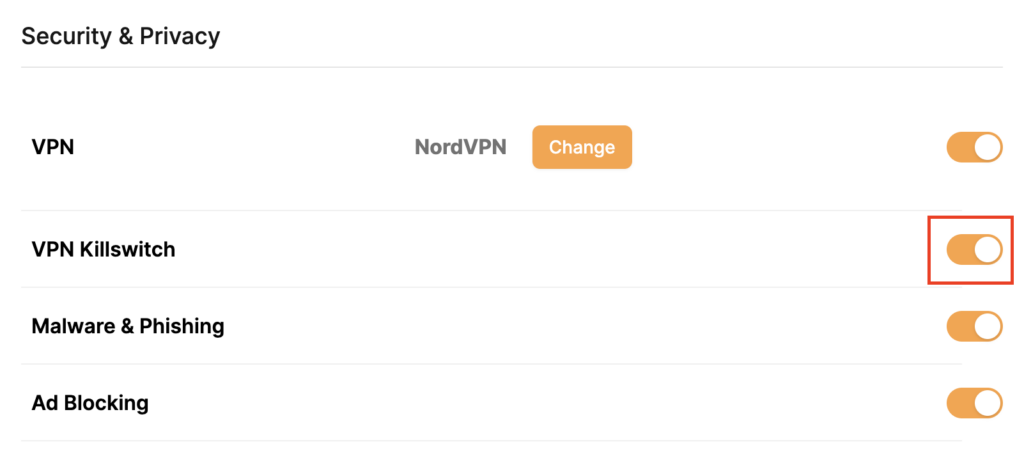
If you wish, there is an Internet Kill Switch available as well for your router which will block the internet whenever you disconnect from VPN.

What VPN connection standards are supported on a FlashRouter?

Currently we support the OpenVPN protocol for VPN client connections. PPTP VPN has been deemed as insecure by the privacy community and so we no longer offer support for PPTP VPN connections.

Technical VPN FAQ Answers

What operating systems do you support?

A FlashRouter can be used with any operating system, be it Windows, Mac OS or Linux. A FlashRouter can also be used as a wireless access point for iPhones, iPads, and Android devices.

Our routers also work in conjunction with any other brand of router of ADSL or DSL modem/router combo from ISPs across the world.

Can I set up a VPN on a PS4, Xbox One, Kindle Fire, Roku, AppleTV or other devices without native VPN support?

THAT’S WHAT WE ARE HERE FOR!

If you purchase one of our FlashRouters loaded with DD-WRT firmware, you can run the client VPN connection from your router. Once you do this every device connected to the router will tunnel through the VPN.

Now you can stream content like Netflix, BBC iPlayer, Pandora Hulu, or Amazon Instant to your TV through any of these devices, instead of being constrained to streaming content on your computer!

If you need a recommendation for a VPN service with a specific streaming platform do not hesitate to contact our support team.

CyberGhost Manual OpenVPN Setup

TeamFlashRouters · Apr 9, 2019 ·

Preparing for Manual CyberGhost Setup

Obtain your CyberGhost OpenVPN Information

If you are not already a CyberGhost user Sign Up Now.

1. Log in to your account on the CyberGhost website.

CyberGhost Website Login

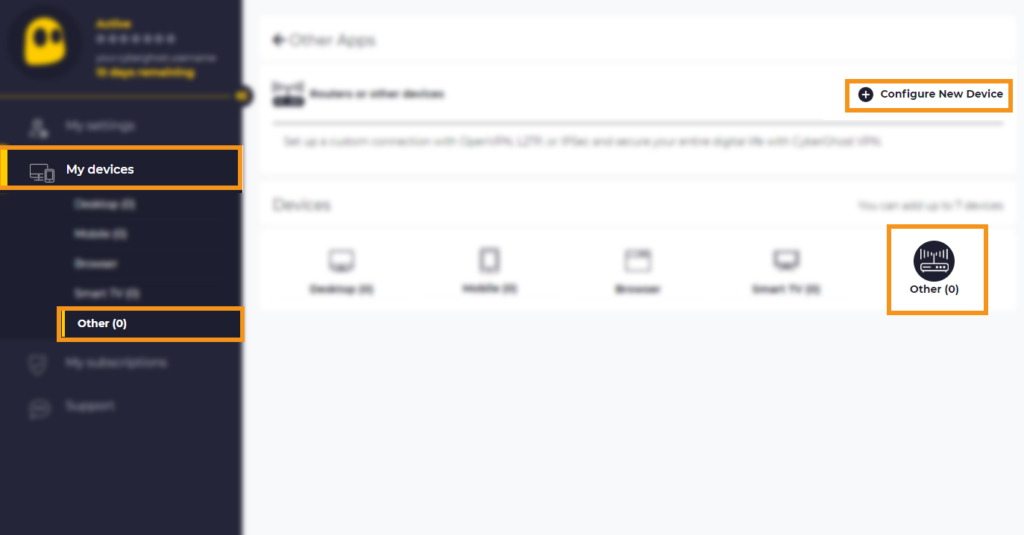
2. Select My Devices.

3. Select Other and then Configure New Device.

CyberGhost Website OpenVPN Configuration Files Generator Cyberghost - Website Screen CyberGhost Website OpenVPN Configuration Files Generator

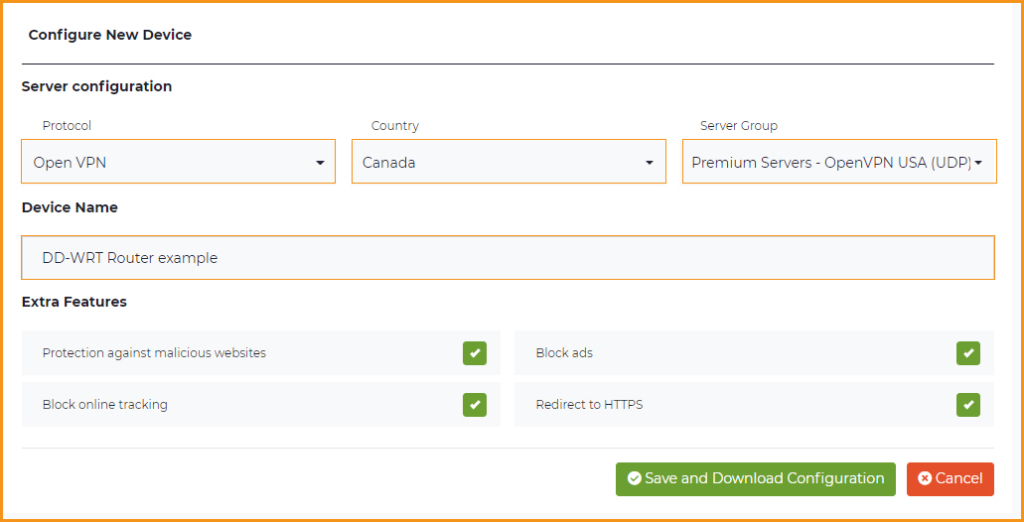
4. Set Protocol to OpenVPN. Select the Country you would like to connect to. Select the Server Group. Name the device in the Device Name field. Click Save Configuration.

CyberGhost Website OpenVPN Configuration Files Generator 3

5. Press View configuration.

CyberGhost Website OpenVPN Configuration Files Generator 2

6. Copy the Username, and Password that appear to a notepad, since you will need this information later in the setup process. Click Download Configuration.

CyberGhost Website OpenVPN Configuration Files Generator 1

Open the file that was downloaded with NotePad++ for Windows or TextEdit for Apple. You only need the ca.crt, client.crt, and client.key files. All CyberGhost servers have different keys and certificates.

DD-WRT Router Setup for CyberGhost

Navigate to Services > VPN

Enter CyberGhost settings

OpenVPN Client

Start OpenVPN Client

If you wish to disable your VPN connection simply set this to Disable at any time and click Apply Settings.

Server IP/Name

Copy and paste the server you selected in your account. Be sure there are no extra spaces or characters.

Port

443

Tunnel Device

TUN

Tunnel Protocol

UDP

Encryption cipher

AES-256-CBC

Hash Algorithm

SHA256

User Pass Authentication

Enable

Username

Enter the Username you obtained in your CyberGhost account.

Password

Enter the Password you obtained in your CyberGhost account.

Advanced Options

Enable

TLS Cipher

None

LZO Compression

Adaptive

NAT

Enable

Firewall Protection

Enable

Additional Config

tun-mtu 1500
fragment 1300
mssfix 1300

Policy Based Routing

This field can be used for split VPN and Dual Gateway routing.

CA Cert

—–BEGIN CERTIFICATE—–
MIIGWjCCBEKgAwIBAgIJAJxUG61mxDS7MA0GCSqGSIb3DQEBDQUAMHsxCzAJBgNV
BAYTAlJPMRIwEAYDVQQHEwlCdWNoYXJlc3QxGDAWBgNVBAoTD0N5YmVyR2hvc3Qg
Uy5BLjEbMBkGA1UEAxMSQ3liZXJHaG9zdCBSb290IENBMSEwHwYJKoZIhvcNAQkB
FhJpbmZvQGN5YmVyZ2hvc3Qucm8wHhcNMTcwNjE5MDgxNzI1WhcNMzcwNjE0MDgx
NzI1WjB7MQswCQYDVQQGEwJSTzESMBAGA1UEBxMJQnVjaGFyZXN0MRgwFgYDVQQK
Ew9DeWJlckdob3N0IFMuQS4xGzAZBgNVBAMTEkN5YmVyR2hvc3QgUm9vdCBDQTEh
MB8GCSqGSIb3DQEJARYSaW5mb0BjeWJlcmdob3N0LnJvMIICIjANBgkqhkiG9w0B
AQEFAAOCAg8AMIICCgKCAgEA7O8+mji2FlQhJXn/G4VLrKPjGtxgQBAdjo0dZEQz
KX08q14dLkslmOLgShStWKrOiLXGAvB1rPvvk613jtA0KjQLpgyLy9lIWohQKYjj
5jrJYXMZMkbSHBYI9L8L7iezBEFYrjYKdDo51nq99wRFhKdbyKKjDh3e2L2SVEZL
T1ogkK5gWzjvH+mjjtjUUicK+YjGwWOz6I+KKaG4Ve/D/cE6nCLbhHIMMnargZEu
7sqA6BFeS4kEP/ZdCZoTSX2n43XV1q63nJt/v0KDetbZDciFVW9h9SVPG4qT44p0
550N+Mom7zTX7S/ID5T9dplgU8sRGtIMrG0cIMD9zmpFgUnMusCrR7jJFr0sMAve
TbgZg95LmstV6R6WKZkSFdUrE0DHl4dHoZvTFX+1LhwhHgjgDLaosX0vhG/C/7Lp
oVWimd6RRQT3M9o4Fa1TuhfvBzQ20QHrmRV/yKvGNK0xckZ6EZ/QY7Z55ORU15Tg
ab4ebnblYPWoEmn0mIYP3LFFeoR5OS1EX7+j4kPv+bwPGsmpHjxmZyq2Y7sJBpbO
CJgbkn52WZdPBIRDpPdIHQ8pAJC4T0iMK9xvAwWNl/V6EYYNpR97osyEDXn+BTdA
HlhJ5fck9KlwI9mb1Kg1bhbvbmaIAiOLenSULYf3j6rI1ygo3R2cCyybtuAq8M7z
0OECAwEAAaOB4DCB3TAdBgNVHQ4EFgQU6tdK1g/He5qzjeAoM5eHt4in9iUwga0G
A1UdIwSBpTCBooAU6tdK1g/He5qzjeAoM5eHt4in9iWhf6R9MHsxCzAJBgNVBAYT
AlJPMRIwEAYDVQQHEwlCdWNoYXJlc3QxGDAWBgNVBAoTD0N5YmVyR2hvc3QgUy5B
LjEbMBkGA1UEAxMSQ3liZXJHaG9zdCBSb290IENBMSEwHwYJKoZIhvcNAQkBFhJp
bmZvQGN5YmVyZ2hvc3Qucm+CCQCcVButZsQ0uzAMBgNVHRMEBTADAQH/MA0GCSqG
SIb3DQEBDQUAA4ICAQDNyQ92kj4qiNjnHk99qvnFw9qGfwB9ofaPL74zh0G5hEe3
Wgb2o4fqUGnvUNgOu53gJksz3DcPQ8t40wfmm9I1Z8tiM9qrqvkuQ+nKcLgdooXt
EsTybPIYDZ2cWR/5E0TKRvC7RFzKgQ4D77Vbi4TdaHiDV7ZNfU1iLCoBGcYm80hc
UHEs5KIVLwUmcSOTmbZBySJxcSD0yUpS7nlZGwLY6VQrU+JFwDSisbXT4DXf3iSz
p7FzW0/u/SFvWsPHrjE0hkPoZPalYvouaJEHKAhip0ZwSmitlxbBnmm8+K/3c9mL
A5/uXrirfpuhhs8V3lyV2mczVtSiTl6gpi88gc//JY80JeHdupjO25T3XEzY9cpx
ecmkWaUEjLMx4wVoXQuUiPonfILM6OLwi+zUS8gQErdFeGvcQXbncPa4SdJuHkF8
lgiX2i8S8fPGdXvU37E9bdAXwP5nZriYq1s0D59Qfvz+vLXVkmyZp6ztxjKjKole
mPMak0Y5c1Q4RjNF6tmQoFuy/ACSkWy14Tzu2dFp7UiVbGg1FOvKhfs48zC2/IUQ
v1arqmPT/9LVq3B2DVT9UKXRUXX/f/jSSsVjkz4uUe2jUyL+XHX1nSmROTPHSAJ+
oKf0BLnfqUxFkEUTwLnayssP2nwGgq35b7wEbTFIXdrjHGFUVQIDeERz8UThew==
—–END CERTIFICATE—–

Public Client Cert

Copy and paste all contents of the client.crt file starting and ending with:
—–BEGIN CERTIFICATE—–
…
—–END CERTIFICATE—–

Private Client Key

Copy and paste all contents of the client.key file starting and ending with:
—–BEGIN PRIVATE KEY—–
…
—–END PRIVATE KEY—–

CLICK APPLY SETTINGS

Leave all settings not mentioned above as their default setting.

Verify a successful CyberGhost connection

Navigate to Status > OpenVPN

  1. You should now see a CONNECTED SUCCESS message.
  2. Visit CyberGhost’s website to verify your new IP address and virtual location.
In some cases you may notice that the location is not showing the same location as the server you have input in your router settings; this is because geo tracking tools are often tricked by VPN connections. As long as you see an IP address that is not the same as your normal Internet IP address then you are indeed connected to CyberGhost.

Back up your settings

Navigate to Administration > Backup

  1. Click the Backup button.
  2. A file named nvrambak.bin will be saved to your computer.
  3. You can load nvrambak.bin to restore your settings in the event of a reset.

How to change the CyberGhost server

  1. Follow the instructions for obtaining the OpenVPN information from above.
  2. Enter the new Server Address in the Server IP/Name field.
  3. Enter the new Username and Password.
  4. Enter the new ca.crt, client.crt, and client.key
  5. Click Apply Settings.

TROUBLESHOOTING

Still having issues? Visit the VPN Troubleshooting section.

Troubleshoot Here

Wireless Guest Network Setup – Bridged (Advanced)

TeamFlashRouters · Jun 12, 2019 ·

If you would like to prevent visitors from connecting to your main WiFi network then you can create a Bridged Guest Network that will prevent access to the main router. This setup also allows you to create different rules for different WiFi SSID’s in your home ranging from QoS controls, access restrictions, VPN network segmentation, and more.

Preparing for Wireless Guest Network Setup

If you have a Dual-band or Tri-Band router you can setup a WiFi Guest Network, creating a separate VLAN (virtual local area network) for your visitors, or in order to segment your VPN networks on any band you like. We recommend using the 2.4GHz network for your DD-WRT Guest Wireless Network so it is compatible with the most possible WiFi devices. Setting up a guest network for visitors in your home allows you to keep them off of your main WiFi network.

We recommend performing this setup while connected to the FlashRouter via ethernet cable. If your computer does not have an ethernet port and you must proceed via wireless connection to the FlashRouter pay attention to the wireless connection as you may need to rejoin the FlashRouter’s network after making changes.

DD-WRT Router Setup for Wireless Guest Network

Enter Wireless settings

Navigate to Wireless > Basic Settings

Bridged Wireless Guest Network Setup on DD-WRT FlashRouter – Setting SSID for Guest Network
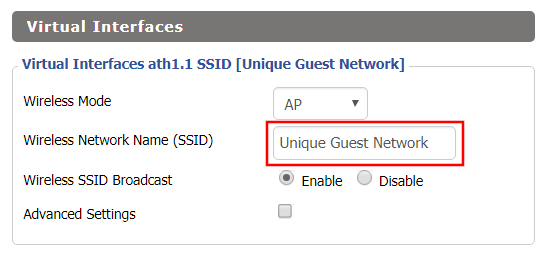
  1. Under the 2.4GHz or 5GHz Interface click the Add button.
  2. In the Wireless Network Name (SSID) field enter the unique network name of the guest network.
  3. Click Save.

Enter Wireless Security settings

Navigate to Wireless > Wireless Security

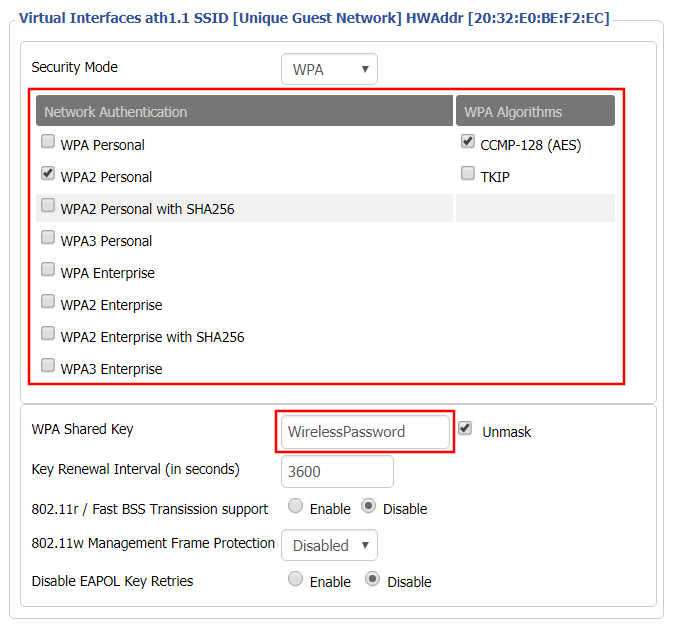
Bridged Wireless Guest Network Setup on DD-WRT FlashRouter – Setting Guest Network Wireless Password
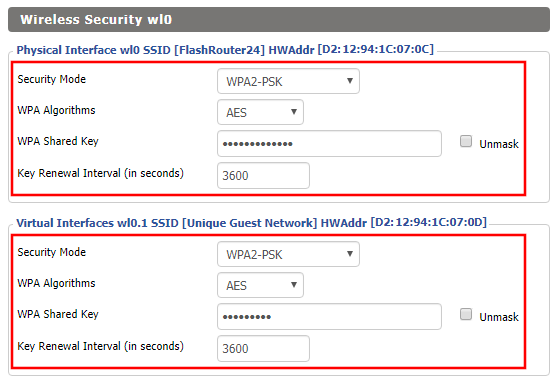
  1. Duplicate the wireless security settings that are set for the other bands for the newly created virtual interface.
  2. Click Apply Settings.
  3. Reboot your router.

Create Bridge

Navigate to Setup > Networking

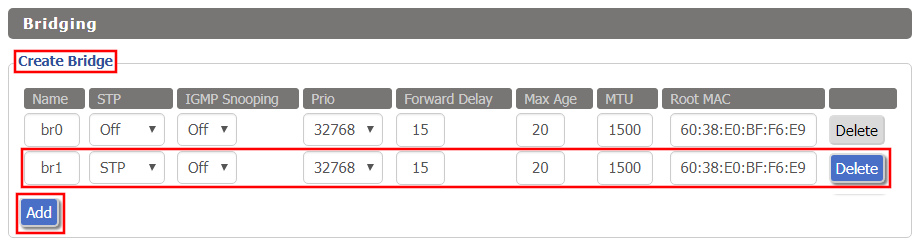
Bridged Wireless Guest Network Setup on DD-WRT FlashRouter – Create Bridge
  1. Under Create Bridge click Add. Name the newly created bridge br1.
  2. Click Apply Settings

Assign to Bridge

Bridged Wireless Guest Network Setup on DD-WRT FlashRouter – Assign Bridge
  1. Under Assign to Bridge select br1 from the Assignment dropdown. Select wl1.1 or ath1.1 depending on your router model.
  2. Click Apply Settings.

Depending on the router model and WiFi band you are using, the wireless interfaces will be labelled differently.

This setting can be labelled wl1.1, ath0.1, wl2.1, and so on. Make sure when you get up to the bridge assignment section that you are using the correct guest network Virtual Interface.

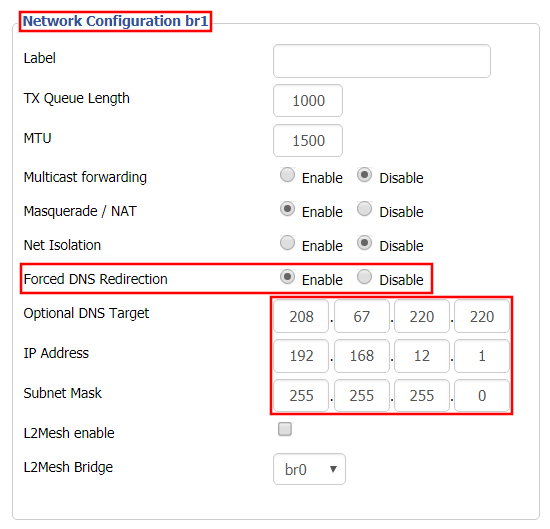
Network Configuration br1

Bridged Wireless Guest Network Setup on DD-WRT FlashRouter – Configure Bridge DNS Redirection
  1. Under Network Configuration br1 select Enable for Forced DNS Redirection.
  2. Set Optional DNS Target to 208.67.220.220
  3. Set IP Address to 192.168.12.1
  4. Set Subnet Mask to 255.255.255.0
  5. Click Apply Settings.

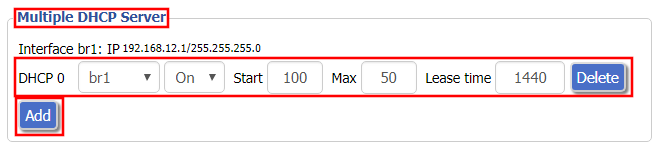
Multiple DHCP Server

Bridged Wireless Guest Network Setup on DD-WRT FlashRouter – Configure DHCP Server Settings
  1. Under Multiple DHCP Server click Add.
  2. Set the first dropdown to br1.
  3. Click Apply Settings.
  4. Reboot your router.

Firewall Rules

Navigate to Administration > Commands

  1. Copy the fire script from below and paste into the empty Commands shell
  2. Click Save Firewall.
  3. Wait one minute and then reboot your router.

iptables -I FORWARD -i br1 -o br0 -m state –state NEW -j DROP
iptables -I FORWARD -i br0 -o br1 -m state –state NEW -j DROP
iptables -I INPUT -i br1 -p tcp –dport telnet -j REJECT –reject-with tcp-reset
iptables -I INPUT -i br1 -p tcp –dport ssh -j REJECT –reject-with tcp-reset
iptables -I INPUT -i br1 -p tcp –dport www -j REJECT –reject-with tcp-reset
iptables -I INPUT -i br1 -p tcp –dport https -j REJECT –reject-with tcp-reset

You will now have a working Bridged Guest Network on the FlashRouter. By inputting the firewall rules, this will also prevent any guests on your network from gaining access to your router settings.

Back up your settings

Navigate to Administration > Backup

  1. Click the Backup button.
  2. A file named nvrambak.bin will be saved to your computer.
  3. You can load nvrambak.bin to restore your settings in the event of a reset.

TROUBLESHOOTING

Still having issues? Visit our Troubleshooting section to diagnose common problems here.

Troubleshoot Here

Wireless Guest Network Setup – Unbridged (Recommended)

TeamFlashRouters · Jun 12, 2019 ·

If you would like to prevent visitors from connecting to your main WiFi network then you can create a separate Guest Network that will prevent access to the main router. This setup also allows you to create different rules for different WiFi SSID’s in your home ranging from QoS controls, access restrictions, VPN network segmentation, and more.

Preparing for Wireless Guest Network Setup

If you have a Dual-band or Tri-Band router you can setup a WiFi Guest Network, creating a separate VLAN (virtual local area network) for your visitors, or in order to segment your VPN networks on any band you like. We recommend using the 2.4GHz network for your DD-WRT Guest Wireless Network so it is compatible with the most possible WiFi devices. Setting up a guest network for visitors in your home allows you to keep them off of your main WiFi network.

We recommend performing this setup while connected to the FlashRouter via ethernet cable. If your computer does not have an ethernet port and you must proceed via wireless connection to the FlashRouter. Be sure to pay attention to the wireless connection as you may need to rejoin the FlashRouter’s network after making changes.

DD-WRT Router Setup for Wireless Guest Network

Enter Wireless settings

Navigate to Wireless > Basic Settings

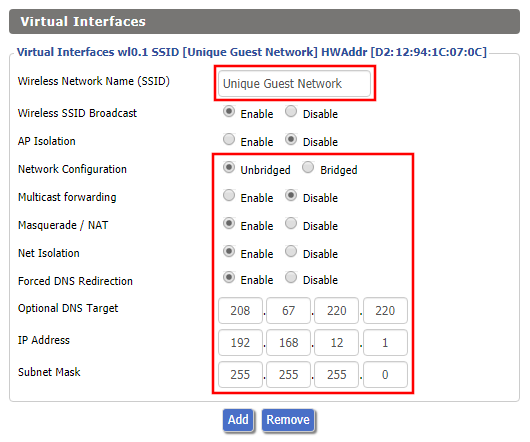
FlashRouter DD-WRT Wireless Guest Network Settings Unbridged

Under the 2.4GHz or 5GHz Interface click the Add button.

Wireless Network Name (SSID)

Enter the a unique network name for the guest network.

Network Configuration

Unbridged

Force DNS Redirection

Enable

Optional DNS Target

208.67.220.220

IP Address

192.168.12.1

Subnet Mask

255.255.255.0

CLICK SAVE

Enter Wireless Security settings

Navigate to Wireless > Wireless Security

Wireless Guest Network Setup on DD-WRT FlashRouter Unbridged
  1. Duplicate the wireless security settings that are set for the other bands for the newly created virtual interface.
  2. Click Apply Settings.
  3. Reboot your router.

Enable DHCP for Guest Network

Navigate to Setup > Networking

Wireless Guest Network Setup on DD-WRT FlashRouter Unbridged Setting DHCP Server
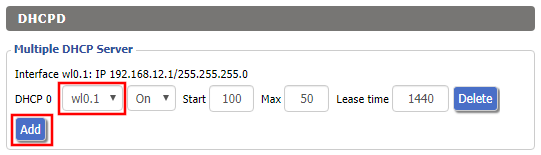
  1. Scroll to the very bottom of the page and under DHCPD click Add.
  2. Select wl0.1 or ath1.1 depending on your router model.
  3. Click Apply Settings.
  4. Reboot your router.

Depending on the router model and WiFi band you are using, the wireless interfaces will be labelled differently.

This setting can be labelled wl1.1, ath0.1, wl2.1, and so on. Make sure when you get up to the bridge assignment section that you are using the correct guest network Virtual Interface.

Back up your settings

Navigate to Administration > Backup

  1. Click the Backup button.
  2. A file named nvrambak.bin will be saved to your computer.
  3. You can load nvrambak.bin to restore your settings in the event of a reset.

TROUBLESHOOTING

Still having issues? Visit our Troubleshooting section to diagnose common problems here.

Troubleshoot Here

Hotspot Shield Manual OpenVPN Setup

TeamFlashRouters · Jul 15, 2020 ·

Preparing for Manual Hotspot Shield Setup

Obtain your Hotspot Shield OpenVPN Information

If you are not already a Hotspot Shield user Sign Up Now.

1. Log in to your account on the Hotspot Shield website.

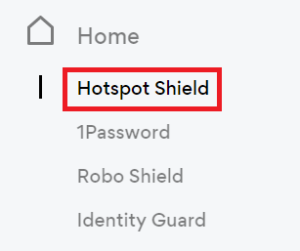
2. Click Hotspot Shield on the left side navigation.

Hotspot Shield - Website Admin

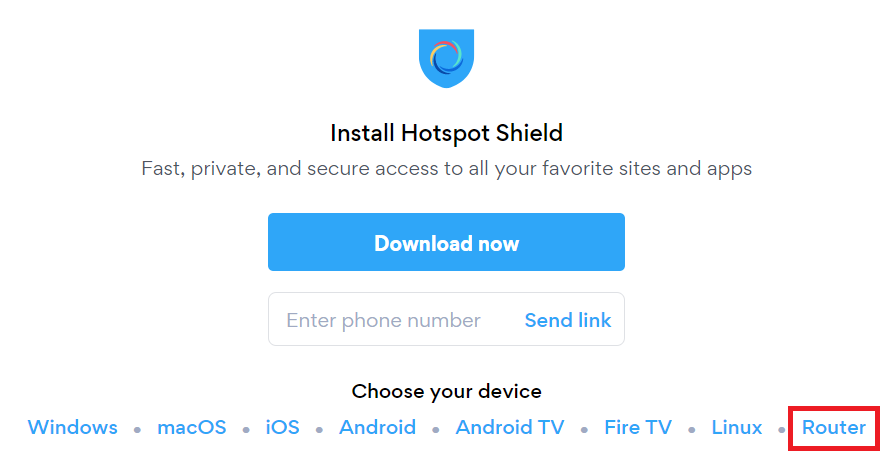
3. Under Choose your device click Router.

Hotspot Shield - Select Router

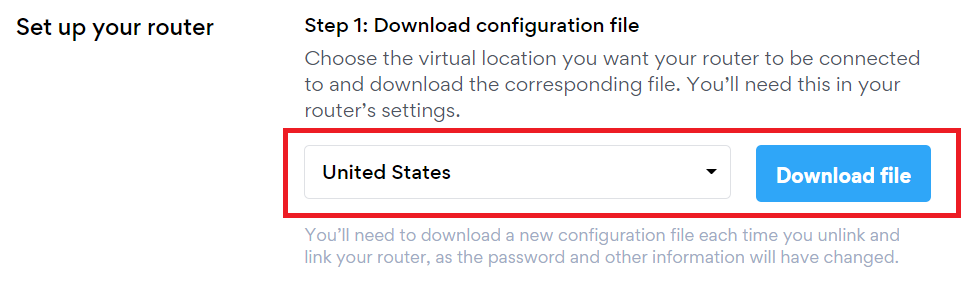
4. In the Set up your router section Select your desired virtual location and then click Download file.

Open the file that was downloaded with NotePad++ for Windows or TextEdit for Apple. You only need the <cert> and <key> from the .ovpn file. All Hotspot Shield servers have different keys and certificates.

Hotspot Shield - Download Configuration File

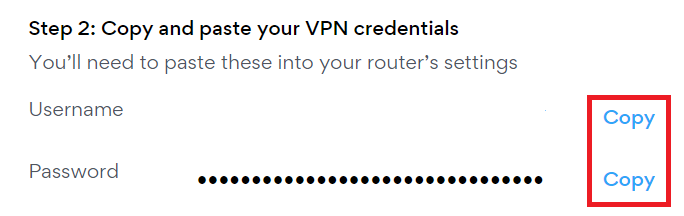
5. Copy the VPN Username, and Password that appear under Step 2 to a notepad, you will need this information later in the setup process.

Hotspot Shield - OpenVPN username and password

DD-WRT Router Setup for Hotspot Shield

Navigate to Services > VPN

Enter Hotspot Shield settings

OpenVPN Client

Start OpenVPN Client

If you wish to disable your VPN connection simply set this to Disable at any time and click Apply Settings.

Server IP/Name

At the top of the .ovpn file you downloaded above, there is a line e.g.:
remote universitycalendar.us 8041
universitycalendar.us is your Hotspot Shield server name. Enter the server name in this field.

Port

8041

Tunnel Device

TUN

Tunnel Protocol

UDP

Encryption cipher

AES-128-CBC

Hash Algorithm

SHA256

User Pass Authentication

Enable

Username

Enter the Username you obtained in your Hotspot Shield account.

Password

Enter the Password you obtained in your Hotspot Shield account.

Advanced Options

Enable

TLS Cipher

None

LZO Compression

No

NAT

Enable

Firewall Protection

Enable

Additional Config

resolv-retry infinite
remote-random
nobind
tun-mtu 1500
tun-mtu-extra 32
mssfix 1450
persist-key
persist-tun
ping 15
ping-restart 0
reneg-sec 0
remote-cert-tls server

Policy Based Routing

This field can be used for split VPN and Dual Gateway routing.

CA Cert

—–BEGIN CERTIFICATE—–
MIIFazCCA1OgAwIBAgIRAIIQz7DSQONZRGPgu2OCiwAwDQYJKoZIhvcNAQELBQAw
TzELMAkGA1UEBhMCVVMxKTAnBgNVBAoTIEludGVybmV0IFNlY3VyaXR5IFJlc2Vh
cmNoIEdyb3VwMRUwEwYDVQQDEwxJU1JHIFJvb3QgWDEwHhcNMTUwNjA0MTEwNDM4
WhcNMzUwNjA0MTEwNDM4WjBPMQswCQYDVQQGEwJVUzEpMCcGA1UEChMgSW50ZXJu
ZXQgU2VjdXJpdHkgUmVzZWFyY2ggR3JvdXAxFTATBgNVBAMTDElTUkcgUm9vdCBY
MTCCAiIwDQYJKoZIhvcNAQEBBQADggIPADCCAgoCggIBAK3oJHP0FDfzm54rVygc
h77ct984kIxuPOZXoHj3dcKi/vVqbvYATyjb3miGbESTtrFj/RQSa78f0uoxmyF+
0TM8ukj13Xnfs7j/EvEhmkvBioZxaUpmZmyPfjxwv60pIgbz5MDmgK7iS4+3mX6U
A5/TR5d8mUgjU+g4rk8Kb4Mu0UlXjIB0ttov0DiNewNwIRt18jA8+o+u3dpjq+sW
T8KOEUt+zwvo/7V3LvSye0rgTBIlDHCNAymg4VMk7BPZ7hm/ELNKjD+Jo2FR3qyH
B5T0Y3HsLuJvW5iB4YlcNHlsdu87kGJ55tukmi8mxdAQ4Q7e2RCOFvu396j3x+UC
B5iPNgiV5+I3lg02dZ77DnKxHZu8A/lJBdiB3QW0KtZB6awBdpUKD9jf1b0SHzUv
KBds0pjBqAlkd25HN7rOrFleaJ1/ctaJxQZBKT5ZPt0m9STJEadao0xAH0ahmbWn
OlFuhjuefXKnEgV4We0+UXgVCwOPjdAvBbI+e0ocS3MFEvzG6uBQE3xDk3SzynTn
jh8BCNAw1FtxNrQHusEwMFxIt4I7mKZ9YIqioymCzLq9gwQbooMDQaHWBfEbwrbw
qHyGO0aoSCqI3Haadr8faqU9GY/rOPNk3sgrDQoo//fb4hVC1CLQJ13hef4Y53CI
rU7m2Ys6xt0nUW7/vGT1M0NPAgMBAAGjQjBAMA4GA1UdDwEB/wQEAwIBBjAPBgNV
HRMBAf8EBTADAQH/MB0GA1UdDgQWBBR5tFnme7bl5AFzgAiIyBpY9umbbjANBgkq
hkiG9w0BAQsFAAOCAgEAVR9YqbyyqFDQDLHYGmkgJykIrGF1XIpu+ILlaS/V9lZL
ubhzEFnTIZd+50xx+7LSYK05qAvqFyFWhfFQDlnrzuBZ6brJFe+GnY+EgPbk6ZGQ
3BebYhtF8GaV0nxvwuo77x/Py9auJ/GpsMiu/X1+mvoiBOv/2X/qkSsisRcOj/KK
NFtY2PwByVS5uCbMiogziUwthDyC3+6WVwW6LLv3xLfHTjuCvjHIInNzktHCgKQ5
ORAzI4JMPJ+GslWYHb4phowim57iaztXOoJwTdwJx4nLCgdNbOhdjsnvzqvHu7Ur
TkXWStAmzOVyyghqpZXjFaH3pO3JLF+l+/+sKAIuvtd7u+Nxe5AW0wdeRlN8NwdC
jNPElpzVmbUq4JUagEiuTDkHzsxHpFKVK7q4+63SM1N95R1NbdWhscdCb+ZAJzVc
oyi3B43njTOQ5yOf+1CceWxG1bQVs5ZufpsMljq4Ui0/1lvh+wjChP4kqKOJ2qxq
4RgqsahDYVvTH9w7jXbyLeiNdd8XM2w9U/t7y0Ff/9yi0GE44Za4rF2LN9d11TPA
mRGunUHBcnWEvgJBQl9nJEiU0Zsnvgc/ubhPgXRR4Xq37Z0j4r7g1SgEEzwxA57d
emyPxgcYxn/eR44/KJ4EBs+lVDR3veyJm+kXQ99b21/+jh5Xos1AnX5iItreGCc=
—–END CERTIFICATE—–
—–BEGIN CERTIFICATE—–
MIIFjTCCA3WgAwIBAgIRANOxciY0IzLc9AUoUSrsnGowDQYJKoZIhvcNAQELBQAw
TzELMAkGA1UEBhMCVVMxKTAnBgNVBAoTIEludGVybmV0IFNlY3VyaXR5IFJlc2Vh
cmNoIEdyb3VwMRUwEwYDVQQDEwxJU1JHIFJvb3QgWDEwHhcNMTYxMDA2MTU0MzU1
WhcNMjExMDA2MTU0MzU1WjBKMQswCQYDVQQGEwJVUzEWMBQGA1UEChMNTGV0J3Mg
RW5jcnlwdDEjMCEGA1UEAxMaTGV0J3MgRW5jcnlwdCBBdXRob3JpdHkgWDMwggEi
MA0GCSqGSIb3DQEBAQUAA4IBDwAwggEKAoIBAQCc0wzwWuUuR7dyXTeDs2hjMOrX
NSYZJeG9vjXxcJIvt7hLQQWrqZ41CFjssSrEaIcLo+N15Obzp2JxunmBYB/XkZqf
89B4Z3HIaQ6Vkc/+5pnpYDxIzH7KTXcSJJ1HG1rrueweNwAcnKx7pwXqzkrrvUHl
Npi5y/1tPJZo3yMqQpAMhnRnyH+lmrhSYRQTP2XpgofL2/oOVvaGifOFP5eGr7Dc
Gu9rDZUWfcQroGWymQQ2dYBrrErzG5BJeC+ilk8qICUpBMZ0wNAxzY8xOJUWuqgz
uEPxsR/DMH+ieTETPS02+OP88jNquTkxxa/EjQ0dZBYzqvqEKbbUC8DYfcOTAgMB
AAGjggFnMIIBYzAOBgNVHQ8BAf8EBAMCAYYwEgYDVR0TAQH/BAgwBgEB/wIBADBU
BgNVHSAETTBLMAgGBmeBDAECATA/BgsrBgEEAYLfEwEBATAwMC4GCCsGAQUFBwIB
FiJodHRwOi8vY3BzLnJvb3QteDEubGV0c2VuY3J5cHQub3JnMB0GA1UdDgQWBBSo
SmpjBH3duubRObemRWXv86jsoTAzBgNVHR8ELDAqMCigJqAkhiJodHRwOi8vY3Js
LnJvb3QteDEubGV0c2VuY3J5cHQub3JnMHIGCCsGAQUFBwEBBGYwZDAwBggrBgEF
BQcwAYYkaHR0cDovL29jc3Aucm9vdC14MS5sZXRzZW5jcnlwdC5vcmcvMDAGCCsG
AQUFBzAChiRodHRwOi8vY2VydC5yb290LXgxLmxldHNlbmNyeXB0Lm9yZy8wHwYD
VR0jBBgwFoAUebRZ5nu25eQBc4AIiMgaWPbpm24wDQYJKoZIhvcNAQELBQADggIB
ABnPdSA0LTqmRf/Q1eaM2jLonG4bQdEnqOJQ8nCqxOeTRrToEKtwT++36gTSlBGx
A/5dut82jJQ2jxN8RI8L9QFXrWi4xXnA2EqA10yjHiR6H9cj6MFiOnb5In1eWsRM
UM2v3e9tNsCAgBukPHAg1lQh07rvFKm/Bz9BCjaxorALINUfZ9DD64j2igLIxle2
DPxW8dI/F2loHMjXZjqG8RkqZUdoxtID5+90FgsGIfkMpqgRS05f4zPbCEHqCXl1
eO5HyELTgcVlLXXQDgAWnRzut1hFJeczY1tjQQno6f6s+nMydLN26WuU4s3UYvOu
OsUxRlJu7TSRHqDC3lSE5XggVkzdaPkuKGQbGpny+01/47hfXXNB7HntWNZ6N2Vw
p7G6OfY+YQrZwIaQmhrIqJZuigsrbe3W+gdn5ykE9+Ky0VgVUsfxo52mwFYs1JKY
2PGDuWx8M6DlS6qQkvHaRUo0FMd8TsSlbF0/v965qGFKhSDeQoMpYnwcmQilRh/0
ayLThlHLN81gSkJjVrPI0Y8xCVPB4twb1PFUd2fPM3sA1tJ83sZ5v8vgFv2yofKR
PB0t6JzUA81mSqM3kxl5e+IZwhYAyO0OTg3/fs8HqGTNKd9BqoUwSRBzp06JMg5b
rUCGwbCUDI0mxadJ3Bz4WxR6fyNpBK2yAinWEsikxqEt
—–END CERTIFICATE—–

Public Client Cert

In the .ovpn file Copy and Paste all contents in between the <cert> and </cert> lines from your .ovpn file starting and ending with:
—–BEGIN CERTIFICATE—–
…
—–END CERTIFICATE—–

Private Client Key

In the .ovpn file Copy and Paste all contents in between the <key> and </key> lines from your .ovpn file starting and ending with:
—–BEGIN PRIVATE KEY—–
…
—–END PRIVATE KEY—–

CLICK APPLY SETTINGS

Leave all settings not mentioned above as their default setting.

Verify a successful Hotspot Shield connection

Navigate to Status > OpenVPN

  1. You should now see a CONNECTED SUCCESS message.
  2. Visit Hotspot Shield’s website to verify your new IP address and virtual location.

In some cases you may notice that the location is not showing the same location as the server you have input in your router settings; this is because geo tracking tools are often tricked by VPN connections. As long as you see an IP address that is not the same as your normal Internet IP address then you are indeed connected to Hotspot Shield.

Back up your settings

Navigate to Administration > Backup

  1. Click the Backup button.
  2. A file named nvrambak.bin will be saved to your computer.
  3. You can load nvrambak.bin to restore your settings in the event of a reset.

How to change the Hotspot Shield server

  1. Follow the instructions for obtaining the OpenVPN information from above.
  2. Enter the new Server Address in the Server IP/Name field.
  3. Enter the new Username and Password.
  4. Enter the new Public Client Cert and Private Client Key.
  5. Click Apply Settings.

TROUBLESHOOTING

Still having issues? Visit the VPN Troubleshooting section.

Troubleshoot Here

PrivateInternetAccess (PIA) AsusWRT OpenVPN Setup

TeamFlashRouters · Apr 29, 2024 ·

Preparing for PIA AsusWRT Setup

Download your PIA .ovpn file

If you are not already a PIA user Sign Up Now.

1. Log in to your account on the PIA website.

PIA login

2. Successfully log in with your account information then go to PIA’s OpenVPN Config Generator.

3. On the OpenVPN Configuration Generator select the following:

OpenVPN Version: OpenVPN 2.4 or newer

Select Platform: Linux

Select Region: Choose the server location you’d like to connect to

Select Port: Typically we recommend UDP/1198 RSA-2048 AES-128-CBC SHA1 for best speeds but feel free to select the one you want to use.

4. Click Generate to download the .ovpn file. Do not open this file once it is downloaded.

PIA Generate .ovpn file

AsusWRT Router Setup for PIA

Login to AsusWRT firmware settings in a browser on any computer or smart device connected to the AsusWRT FlashRouter’s network.

1. Navigate to the VPN tab.

Merlin VPN Tab

2. Navigate to the VPN Fusion tab.

Asus VPN Fusion

3. Click Add profile.

Asus Add profile

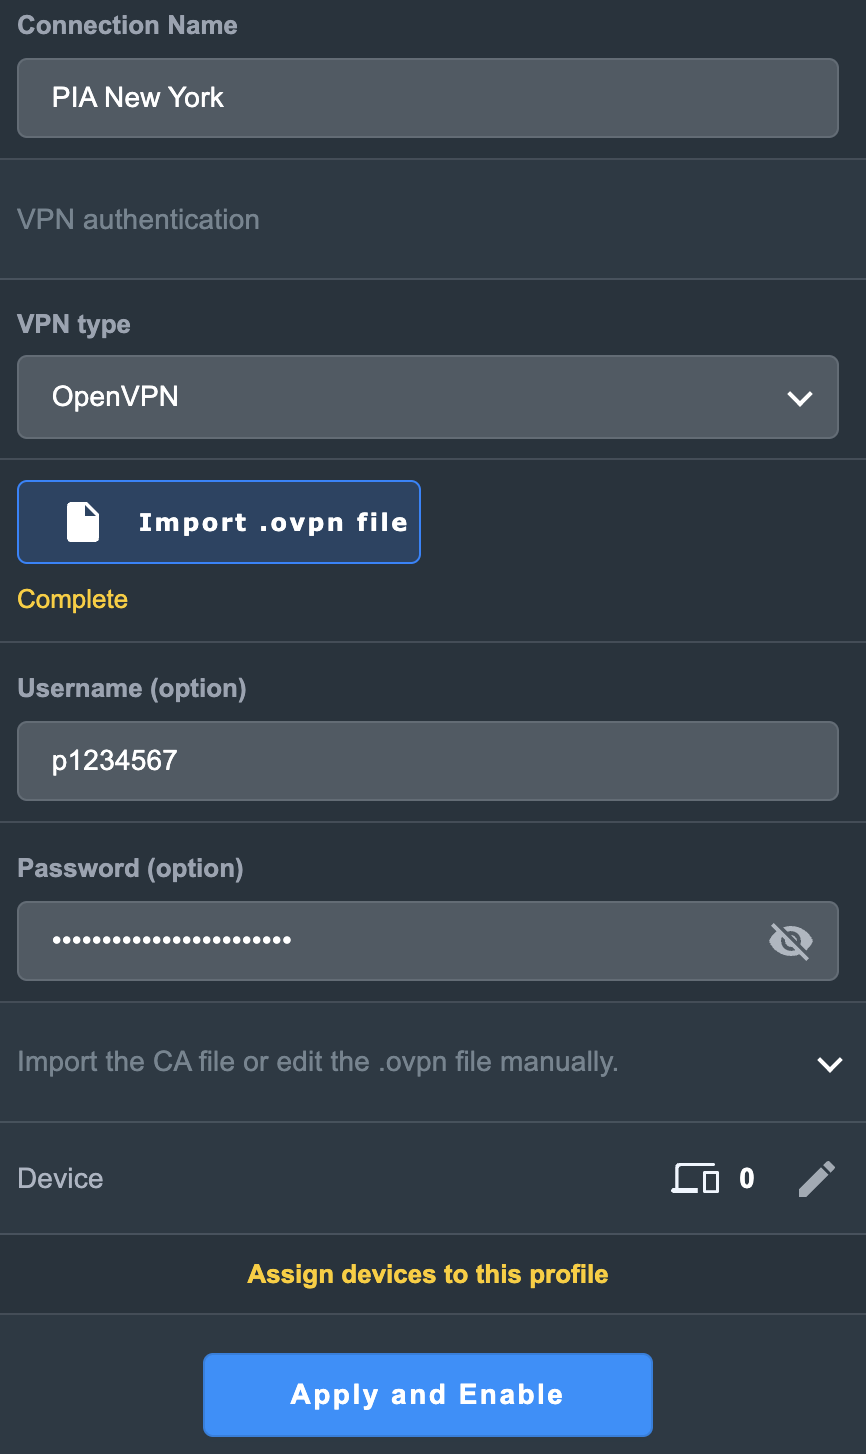
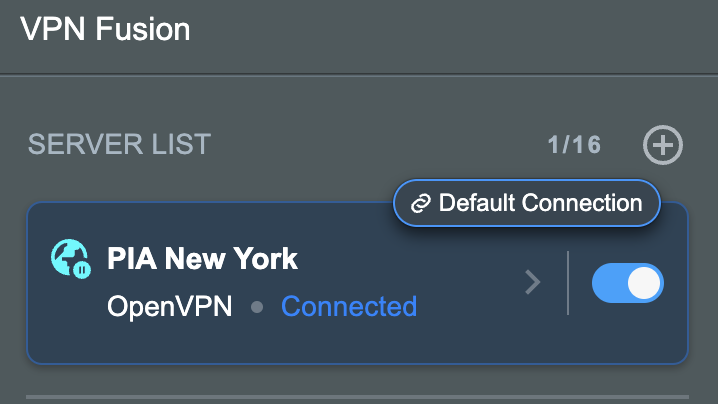
4. In the Connection Name field enter in the name you’d like to use for this OpenVPN Client profile. We typically advise entering in the location or server number here. Our example server was in New York so I have entered in PIA New York.

5. In the VPN Type dropdown select OpenVPN.

6. Click Import .ovpn file and select the .ovpn file you downloaded earlier. Then click Upload.

7. In the Username and Password fields paste in the PIA username and password you use to successfully login to your PIA website account.

8. Click Apply and Enable at the bottom of the page.

Asus PIA profile

If you only want certain devices to connect to the OpenVPN Client profile you are setting up instead of all the devices connected to the FlashRouter’s network click into the profile and disable Apply to all devices. Then click Devices and select the devices that you want to connect to VPN.

Asus VPN devices
Asus VPN select devices

9. At the top of the page set the Service State toggle to ON to activate the VPN connection.

Asus PIA Connected

Verify a successful PIA connection

  1. You should now see a CONNECTED message.
  2. Visit PIA’s IP Check to verify your new IP address and virtual location.

In some cases you may notice that the location is not showing the same location as the server you have input in your router settings; this is because geo tracking tools are often tricked by VPN connections. As long as you see an IP address that is not the same as your normal Internet IP address then you are indeed connected to PIA.

How to change the PIA server

  1. Follow the steps at the top of the page to obtain a new .ovpn file.
  2. Then proceed with the settings same as initial setup.

TROUBLESHOOTING

Still having issues? Visit the VPN Troubleshooting section.

Troubleshoot Here
« Previous Page

Primary Sidebar

  • Troubleshooting
  • Router Access
  • Internet Connection Issues
  • WiFi Connectivity
  • General VPN Issues
  • TeamViewer Remote Support
  • DD-WRT Firmware
  • Facebook
  • Twitter
  • Instagram
  • Pinterest
  • YouTube

Footer