• Skip to primary navigation
  • Skip to main content
  • Skip to primary sidebar
  • Skip to footer

FlashRouters Support Portal

Prioritizing Privacy

  • SETUP GUIDES
    • Privacy Hero Router Setup Guide
    • ASUS-WRT Router Setup Guide
    • AsusWRT-Merlin Router Setup Guide
    • DD-WRT Router Setup Guide
    • ExpressVPN Router Setup Guide
    • GL.iNet Router Setup Guide
    • Roqos Core Router Setup Guide
  • TROUBLESHOOTING
    • Router Access
    • WiFi Connectivity
    • Internet Connection Issues
    • General VPN Issues
    • DD-WRT Firmware
    • TeamViewer Remote Support
  • FAQs
    • Router FAQs
    • VPN FAQs
    • Warranty and Returns FAQs
    • Sales FAQs
    • Shipping FAQs
    • Service Plan FAQs
  • Show Search
Hide Search

Search Results for: next steps

Roqos Core Internet Setup and Activation

TeamFlashRouters · Mar 15, 2022 ·

Follow this article when you receive your new Roqos Core router to create your Roqos account, connect your Roqos to the Internet, and customize your network so it is ready to use.

Create your Roqos account

1. From any device that has a browser such as a computer, smartphone, or tablet visit login.roqos.com

Roqos Login URL

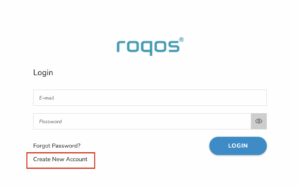
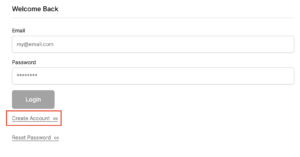
2. Select Create Account.

Roqos Create Account

3. Enter the Email address and password you want to set for your Roqos account. This will be your login to the Roqos settings moving forward. Click Next.
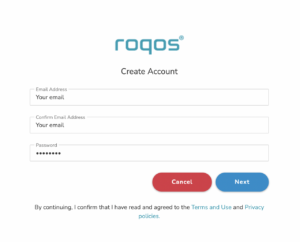
Roqos Enter Email

4. Enter the name and phone number you want associated with your Roqos. Click Next.
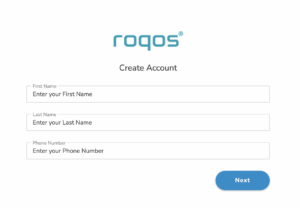
Roqos Enter Name and Number

5. Enter the address where your Roqos is located. This section may require a CAPTCHA to be completed to authenticate you are human. Click Create Account.
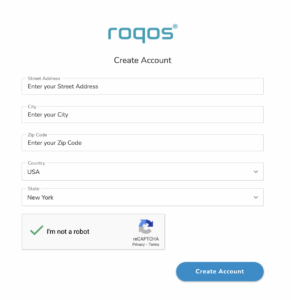
Roqos Enter Address

6. You have now created your Roqos account. In a new tab proceed to open the email from Roqos and click the Activate account button.
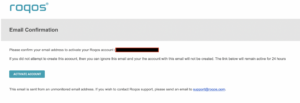
Roqos email activation

Activate your Roqos Internet

1. From the Account created page click Next to begin the Internet Setup of the Roqos.
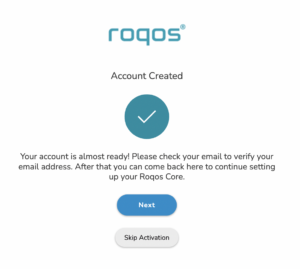
Roqos Account Created

2. Select the Roqos model Teal RC10-P. Click Next.
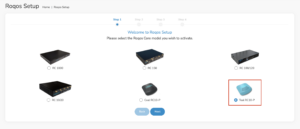
Roqos Model

3. Connect the ethernet cable that came with your Roqos from the port labeled INTERNET on the back of your Roqos to an open ethernet port on your ISP Modem or other router in your network.
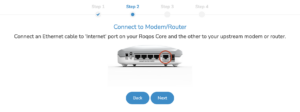
Roqos Wiring

4. Then connect the power adapter that came with the Roqos to the back of the Roqos. Wait for the light on the Roqos to begin blinking blue. Once your see the blinking blue lights on the Roqos click Next.
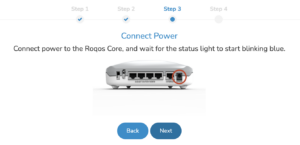
Roqos Power On

If your Roqos lights does not begin blinking blue after a long while please see the steps in this article and contact us.

5. Enter in the Roqos serial number found on the bottom of the device exactly as it appears there. Click Next.
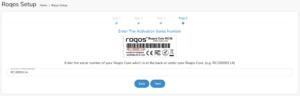
Roqos Activation Code

Setup your Roqos Network

1. Enter in a name that you would like to call the Roqos. This is just the Roqo’s device name and it is not the WiFi network name. Click Next.

Roqos Device Name

2. Select the Time Zone of your actual location from the dropdown. Click Next.

Roqos Time Zone

3. Set the WiFi name and password for the Roqos. The WiFi name should be unique and not a duplicate of an existing wireless network. This will be the name that appears in your wireless devices available network list and the password to join the devices to the network. Click Next.
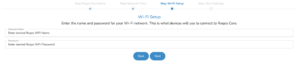
Roqos Set WiFi Name and Password

4. Select the custom alert settings as you best see fit using the toggle switches. We typically recommend having the first two toggles selected for Email Alerts and Consolidate Security Alerts. Click Next.
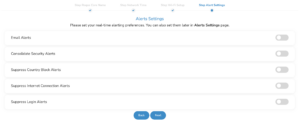
Begin connecting your devices to the Roqos network

You are now done setting up your Roqos to connect to the Internet and can begin joining your wireless devices to the Roqos network and exploring the Roqos Core Features.


Roqos Setup Done

TROUBLESHOOTING

Still having issues? Visit the VPN Troubleshooting section.

Troubleshoot Here

NordVPN TP-Link OpenVPN Setup

TeamFlashRouters · Apr 16, 2024 ·

Preparing for NordVPN TP-Link Setup

Obtain your NordVPN manual Username and Password

If you are not already an NordVPN user Sign Up Now.

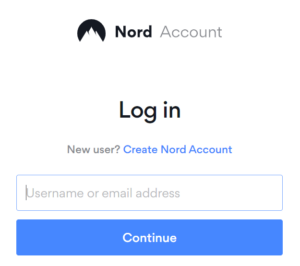
1. Log in to your account on the NordVPN website.

NordVPN login

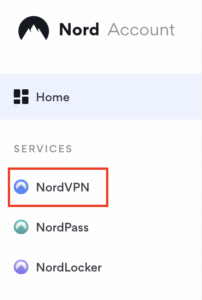
2. Click NordVPN on the left hand side and then click Setup NordVPN manually.

NordVPN setup manually

3. Enter in the verification code that was sent to your email.

NordVPN verify code

4. Copy and paste your NordVPN manual username and password to a secure location. This is the username and password you will enter into the router settings to connect to NordVPN.

NordVPN credentials

Download your NordVPN .ovpn file

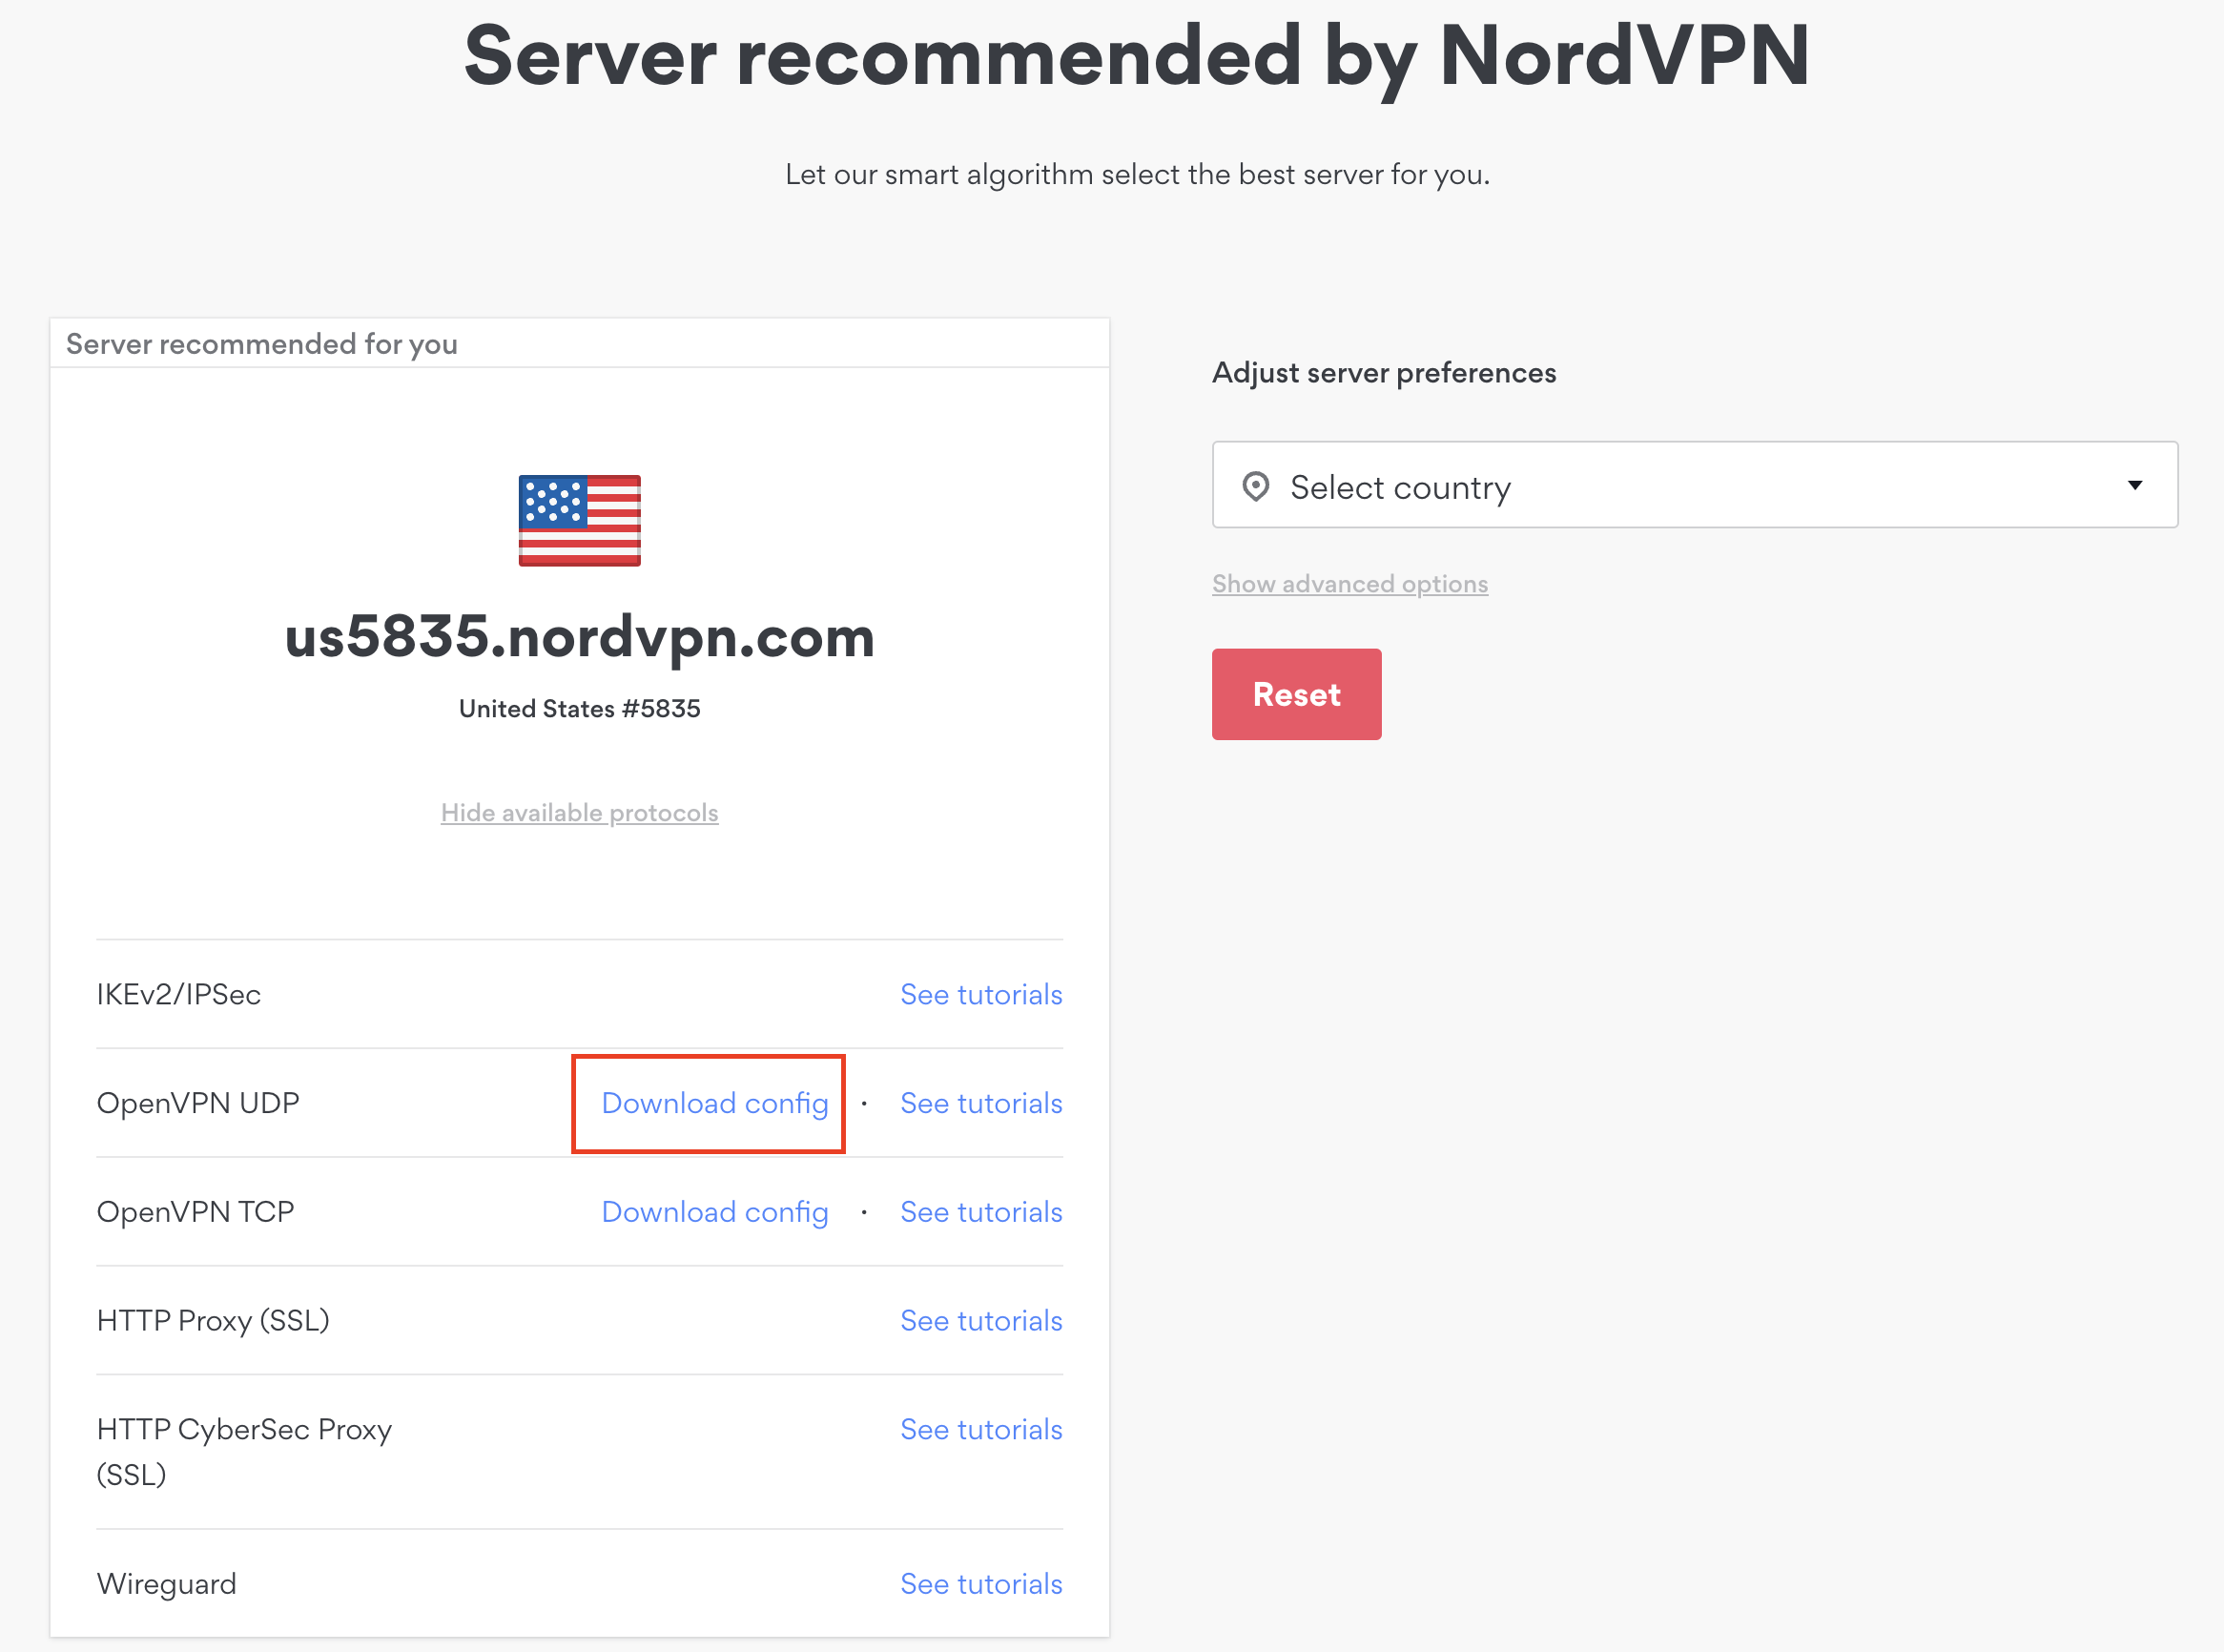
1. There are two options for obtaining the .ovpn file. The first and recommended is to navigate to NordVPN’s server recommendation page. Click Recommended Server to display the fastest server based on your actual location. You can adjust the country if you don’t want to connect to the recommended country.

Then click Show Available Protocols. Click Download Config next to OpenVPN UDP. This will download the .ovpn file to your computer for this server. Do not open this file.

NordVPN Recommended Server

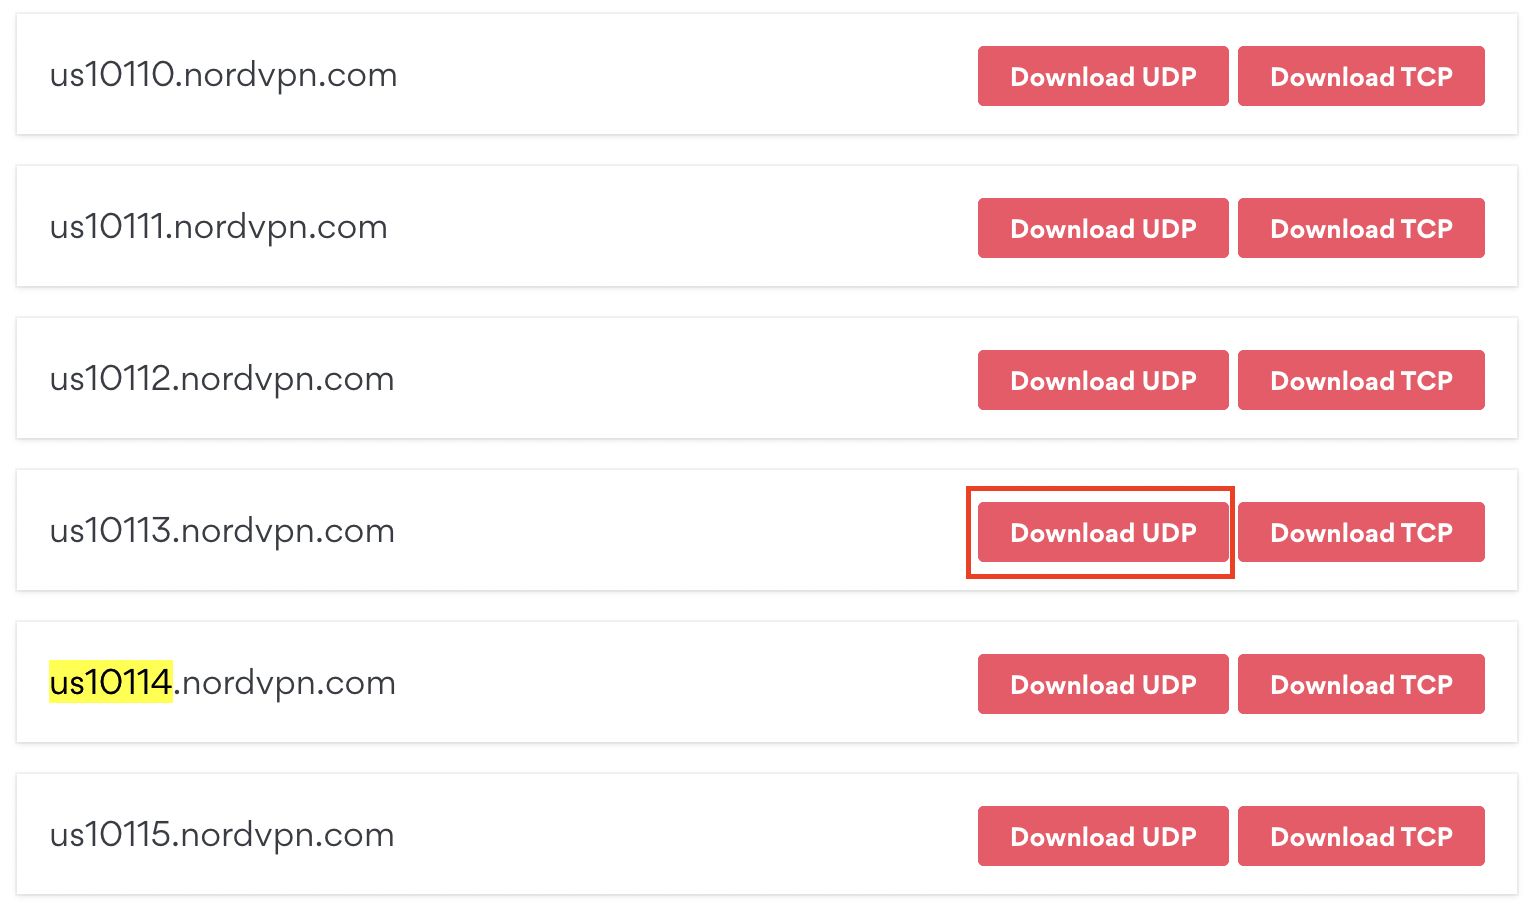
The second method to obtain a server is for connecting to a specific server number that you know you want to use. This applies to NordVPN Dedicated IP servers if you are signed up for that service. Go to NordVPN’s .ovpn file page. Then search for the server number that you want to use and click Download UDP.

NordVPN Download Specific Server

TP-Link Router Setup for NordVPN

Login to TP-Link firmware settings in a browser on any computer or smart device connected to the FlashRouter’s network.

1. Navigate to the Advanced tab.

TP-Link Advanced settings

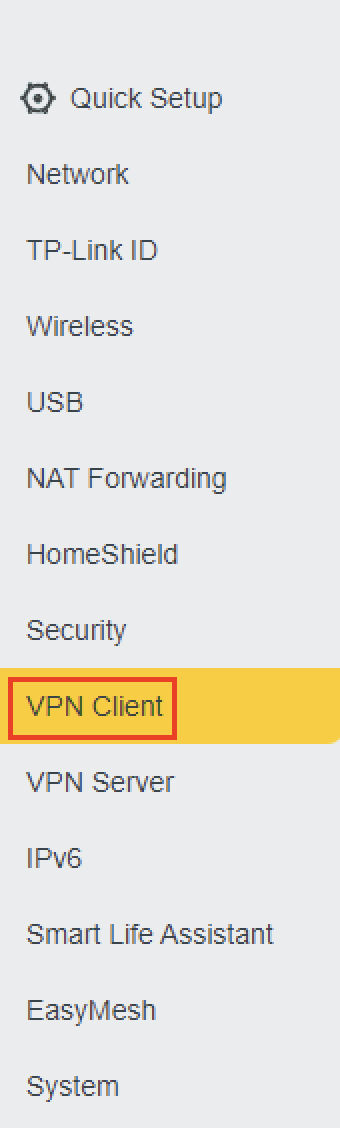
2. Navigate to the VPN Client tab.

TP-Link VPN Client

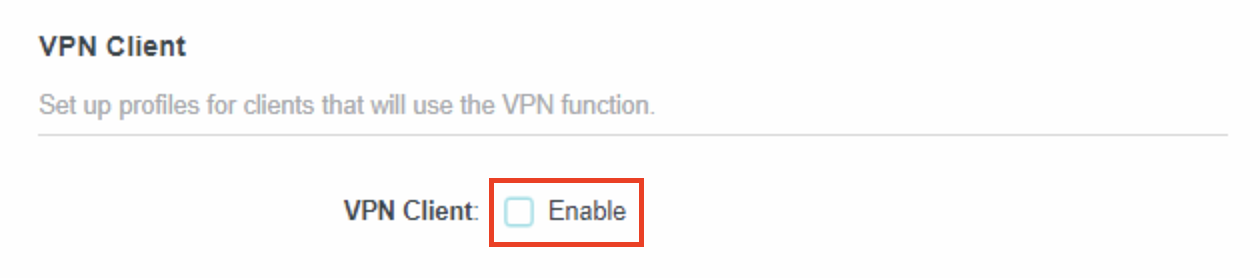
3. Check the Enable box next to VPN Client. Then click Save at the bottom of the page.

TP-Link VPN Client enable

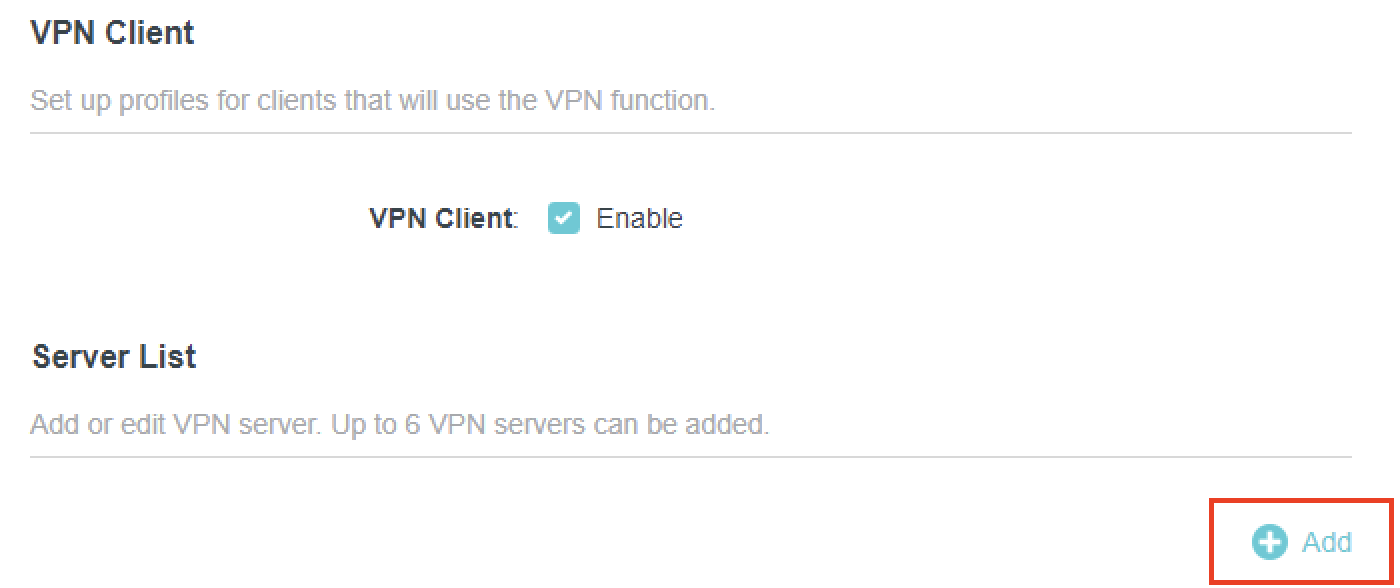
4. Click the Add button in the Server List area.

TP-Link Add server button

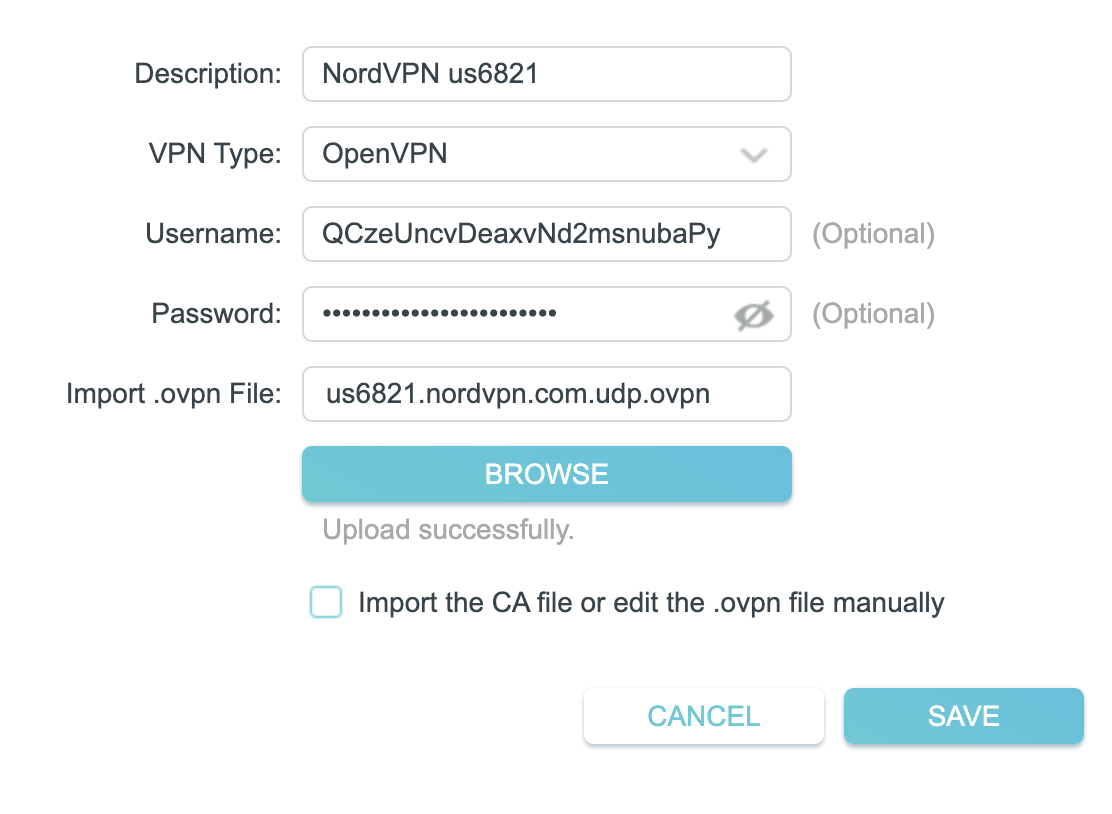
5. In the Description field enter in the name you’d like to use for this OpenVPN Client profile. We typically advise entering in the location or server number here. Our example server was us6821 so I have entered in NordVPN us6821.

Set the VPN Type to OpenVPN.

In the Username and Password fields paste in the NordVPN username and password we obtained earlier.

Click Browse and select the .ovpn file you downloaded earlier. Then click Save.

TP-Link NordVPN

By default no devices will be assigned to the VPN Tunnel. With TP-Link firmware you must manually assign the devices that you want connected to the VPN tunnel. Proceed with the next steps to do so for all devices you want connected to VPN.

6. Click the Add button in the Device List area.

TP-Link add devices to VPN tunnel

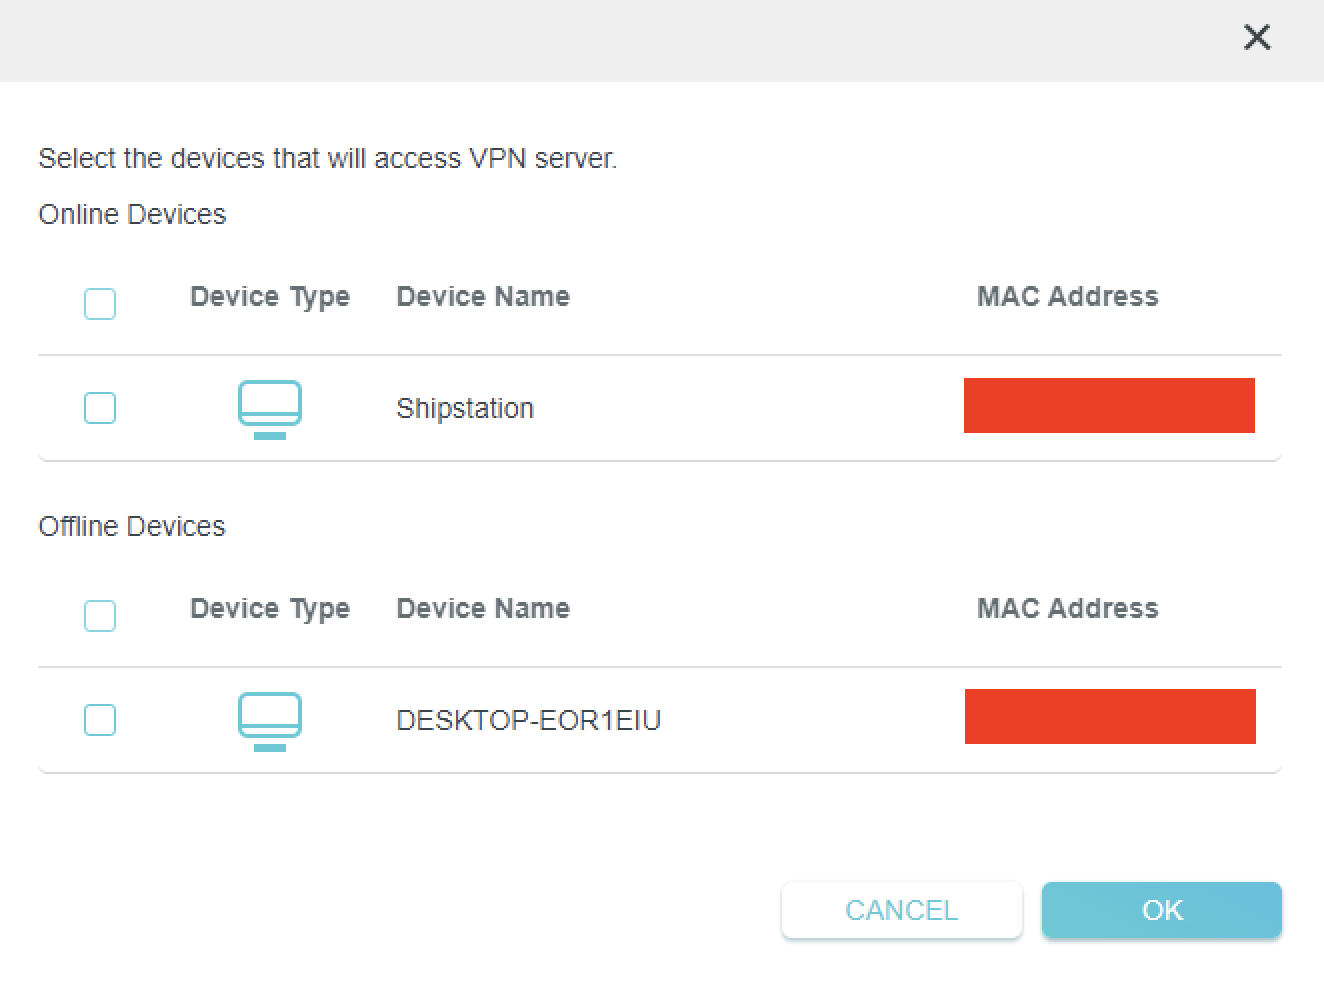
7. A list of devices connected to the FlashRouter’s network will appear. Check the devices that you want to connect to VPN. Then click OK.

TP-Link select devices to add to VPN tunnel

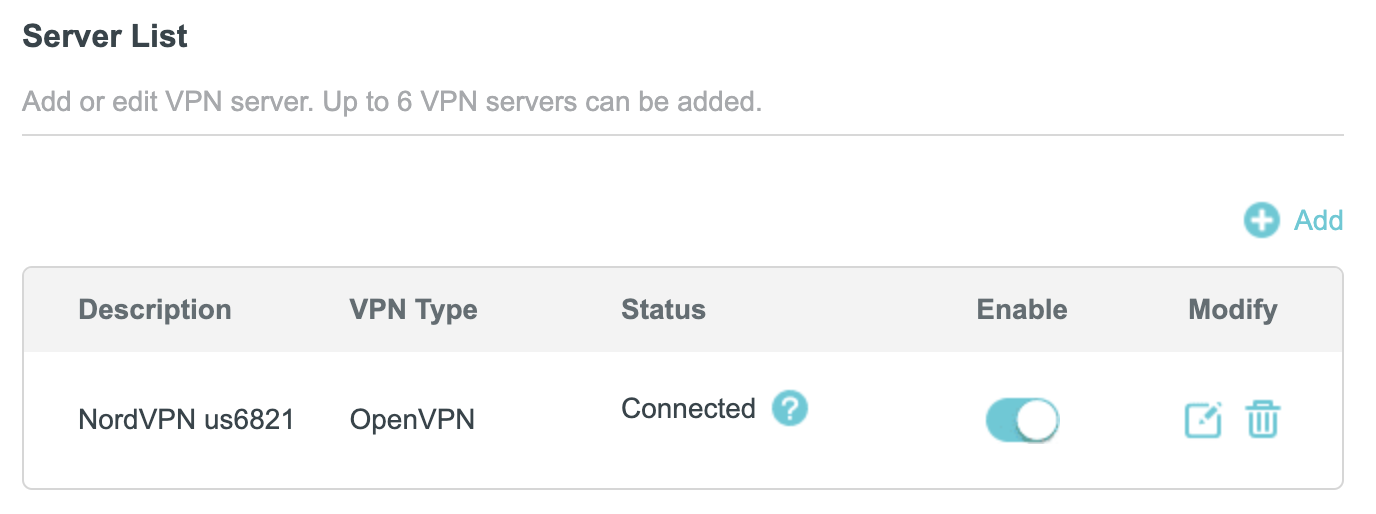
8. Now that the devices have been assigned to the VPN connection click the Enable toggle in the Server List area.

TP-Link NordVPN connected

Verify a successful NordVPN connection

  1. You should now see a CONNECTED message.
  2. Visit NordVPN’s IP Check to verify your new IP address and virtual location.

In some cases you may notice that the location is not showing the same location as the server you have input in your router settings; this is because geo tracking tools are often tricked by VPN connections. As long as you see an IP address that is not the same as your normal Internet IP address then you are indeed connected to NordVPN.

How to change the NordVPN server

  1. Follow the steps at the top of the page to obtain a new .ovpn file.
  2. Then proceed with the settings same as initial setup.

TROUBLESHOOTING

Still having issues? Visit the VPN Troubleshooting section.

Troubleshoot Here

Surfshark TP-Link WireGuard Setup

TeamFlashRouters · Apr 29, 2024 ·

Preparing for Surfshark TP-Link Setup

Download your Surfshark .conf file

If you are not already a Surfshark user Sign Up Now.

1. Log in to your account on the Surfshark website.

Surfshark Account Login

2. Click VPN Manual Setup.

Surfshark VPN Manual Setup

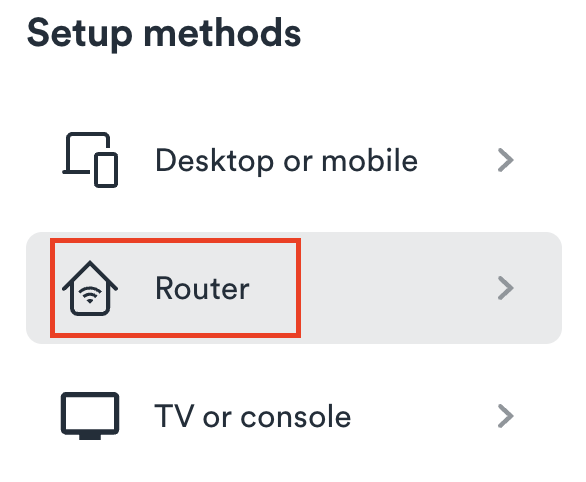
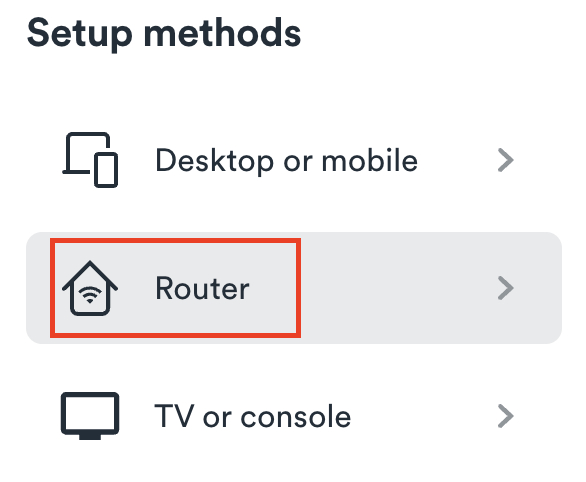
3. Select Router as the Setup method.

Surfshark setup method Router

4. Select WireGuard as the Protocol.

Surfshark select WireGuard

5. Select I don’t have a key pair.

Surfshark No Key Pair

6. Enter FlashRouter as the name of the connection and click Next.

Surfshark Connection Name

7. Click Generate a new key pair.

Surfshark Generate new Key Pair

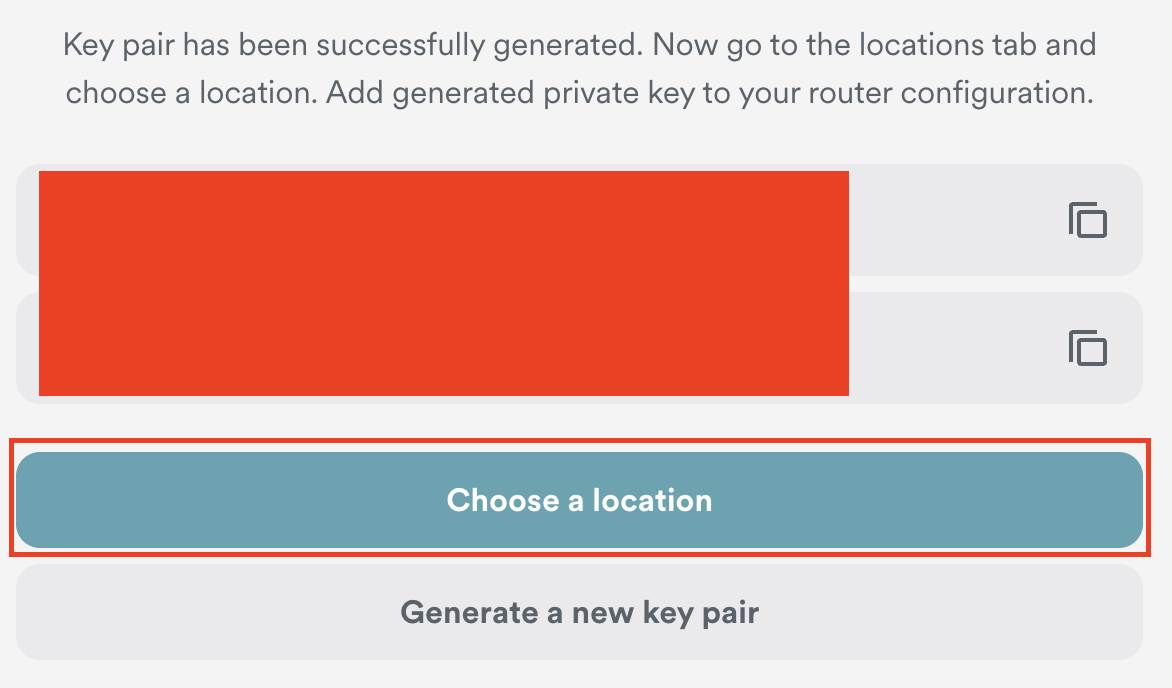
8. Click Choose a location.

Surfshark Choose a Location

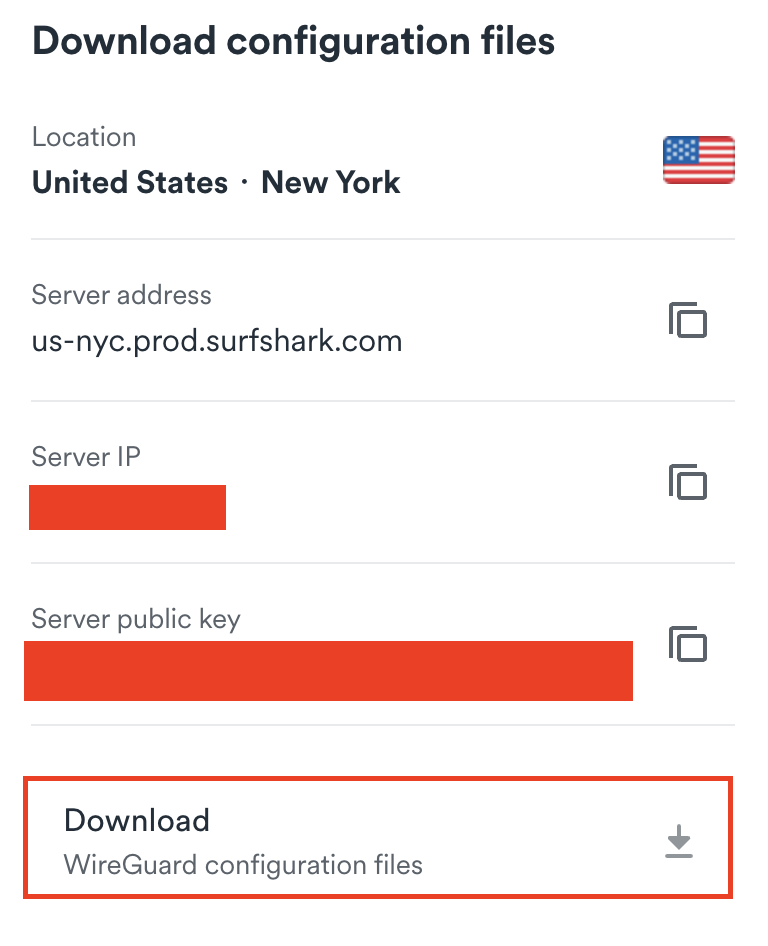
9. Select the server location you want to connect to. Unless you need a specific location we recommend using Surfshark’s recommended Fastest server. Click Download to download the .conf file for this Surfshark server location.

Surfshark download conf file

TP-Link Router Setup for Surfshark

Login to TP-Link firmware settings in a browser on any computer or smart device connected to the FlashRouter’s network.

1. Navigate to the Advanced tab.

TP-Link Advanced settings

2. Navigate to the VPN Client tab.

TP-Link VPN Client

3. Check the Enable box next to VPN Client. Then click Save at the bottom of the page.

TP-Link VPN Client enable

4. Click the Add button in the Server List area.

TP-Link Add server button

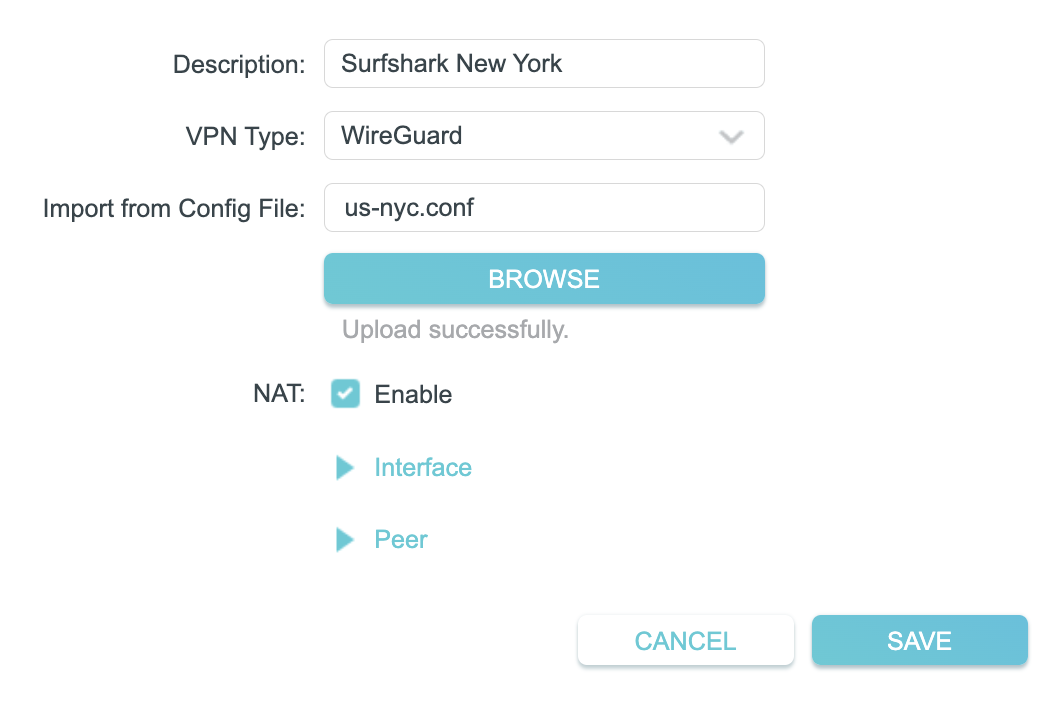
5. In the Description field enter in the name you’d like to use for this WireGuard Client profile. We typically advise entering in the location. Our example server was New York so I have entered in Surfshark New York.

Set the VPN Type to WireGuard.

Click Browse and select the .conf file you downloaded earlier. Then click Save.

TP-Link Surfshark WireGuard

By default no devices will be assigned to the VPN Tunnel. With TP-Link firmware you must manually assign the devices that you want connected to the VPN tunnel. Proceed with the next steps to do so for all devices you want connected to VPN.

6. Click the Add button in the Device List area.

TP-Link add devices to VPN tunnel

7. A list of devices connected to the FlashRouter’s network will appear. Check the devices that you want to connect to VPN. Then click OK.

TP-Link select devices to add to VPN tunnel

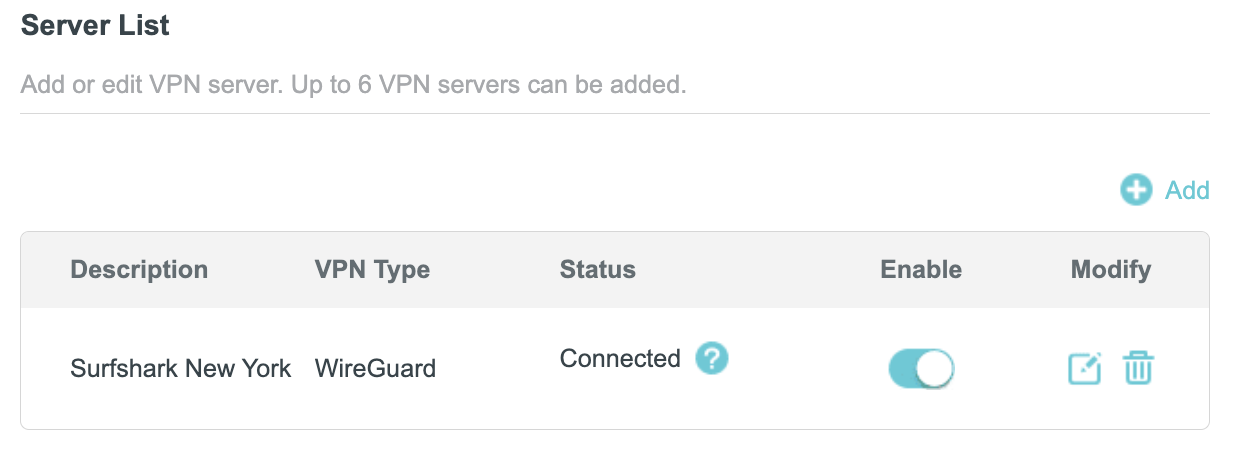
8. Now that the devices have been assigned to the VPN connection click the Enable toggle in the Server List area.

TP-Link Surfshark WireGuard Connected

Verify a successful Surfshark connection

  1. You should now see a CONNECTED message.
  2. Visit Surfshark’s IP Check to verify your new IP address and virtual location.

In some cases you may notice that the location is not showing the same location as the server you have input in your router settings; this is because geo tracking tools are often tricked by VPN connections. As long as you see an IP address that is not the same as your normal Internet IP address then you are indeed connected to Surfshark.

How to change the Surfshark server

  1. Follow the steps at the top of the page to obtain a new .conf file.
  2. Then proceed with the settings same as initial setup.

TROUBLESHOOTING

Still having issues? Visit the VPN Troubleshooting section.

Troubleshoot Here

ProtonVPN TP-Link WireGuard Setup

TeamFlashRouters · Apr 29, 2024 ·

Preparing for ProtonVPN TP-Link Setup

Download your ProtonVPN .conf file

If you are not already an ProtonVPN user Sign Up Now.

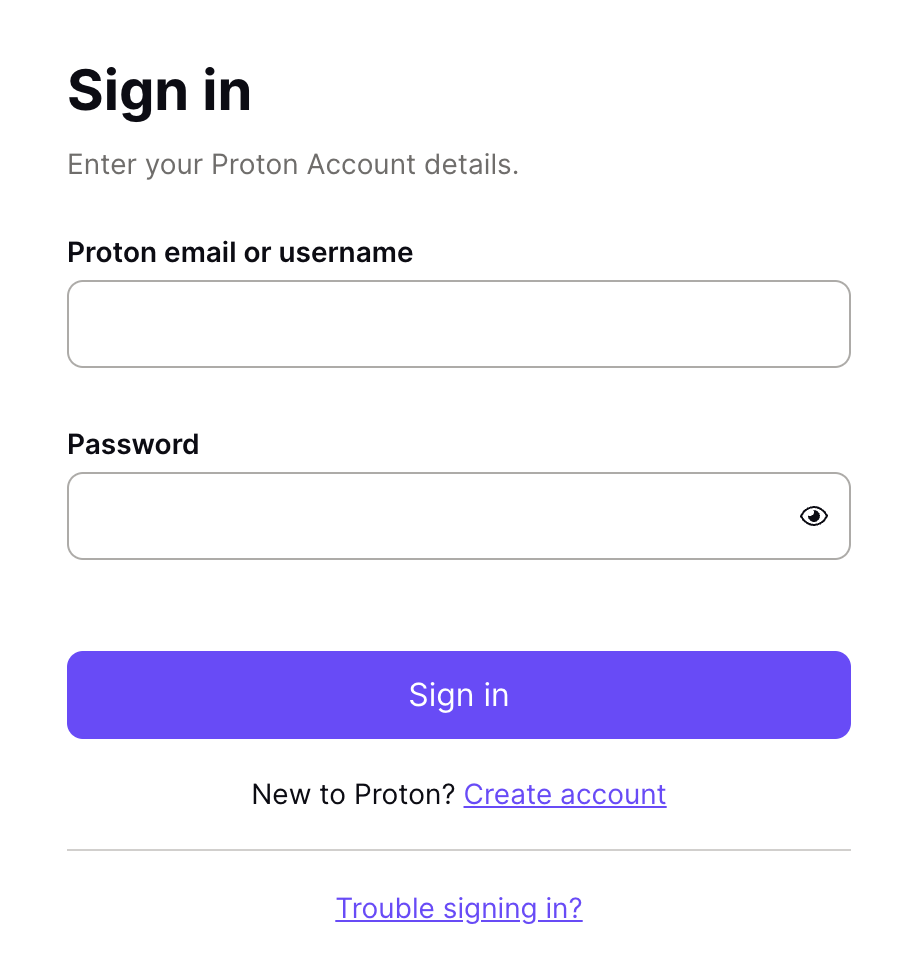
1. Log in to your account on the ProtonVPN website.

ProtonVPN Account Sign in

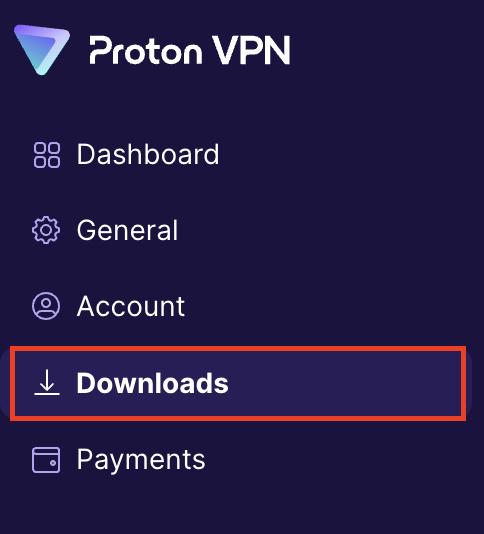
2. Click Downloads.

ProtonVPN Downloads

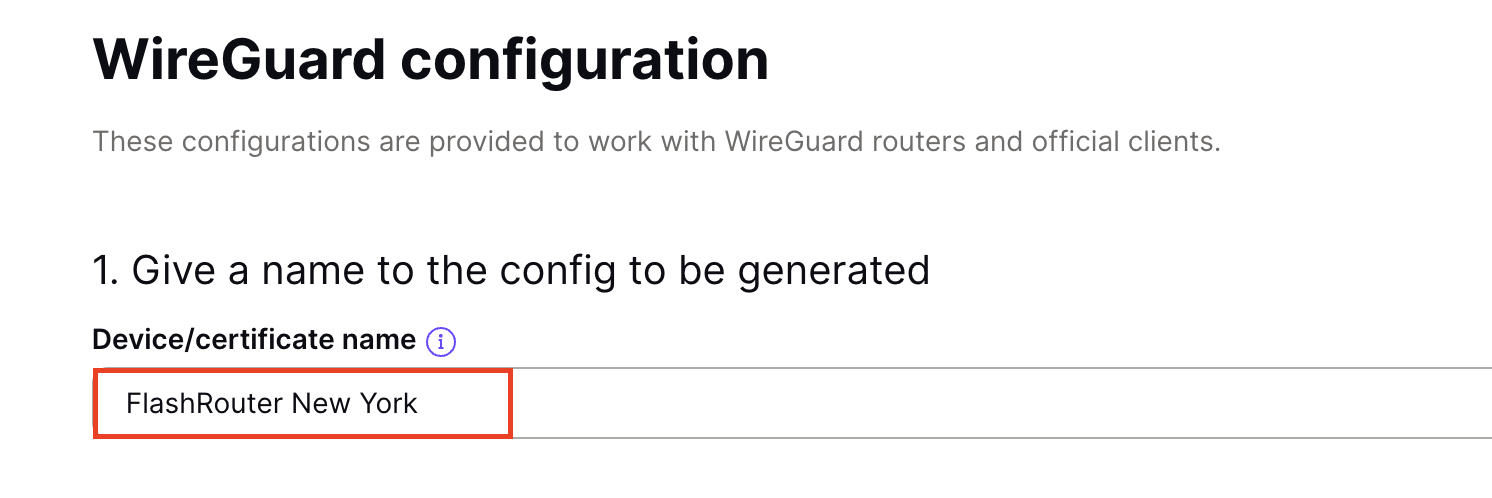
3. Scroll down to WireGuard configuration and name the device FlashRouter.

ProtonVPN WireGuard Configuration Name

4. Select Router as the platform.

ProtonVPN WireGuard select Platform

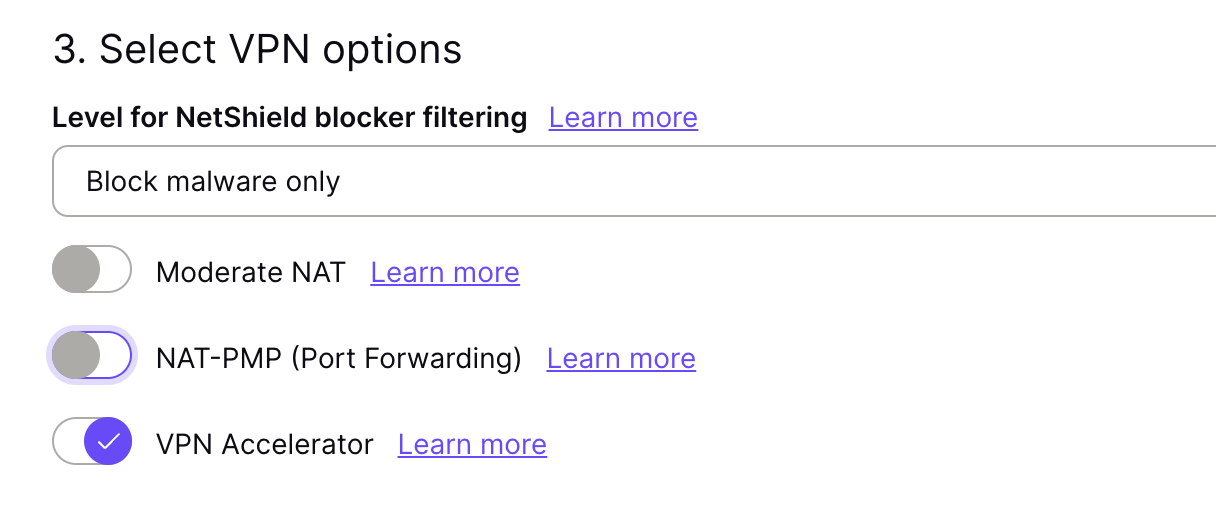
5. Select the VPN options that best fit your needs. We typically use the settings as seen in the screenshot here if you are unsure.

ProtonVPN WireGuard VPN options

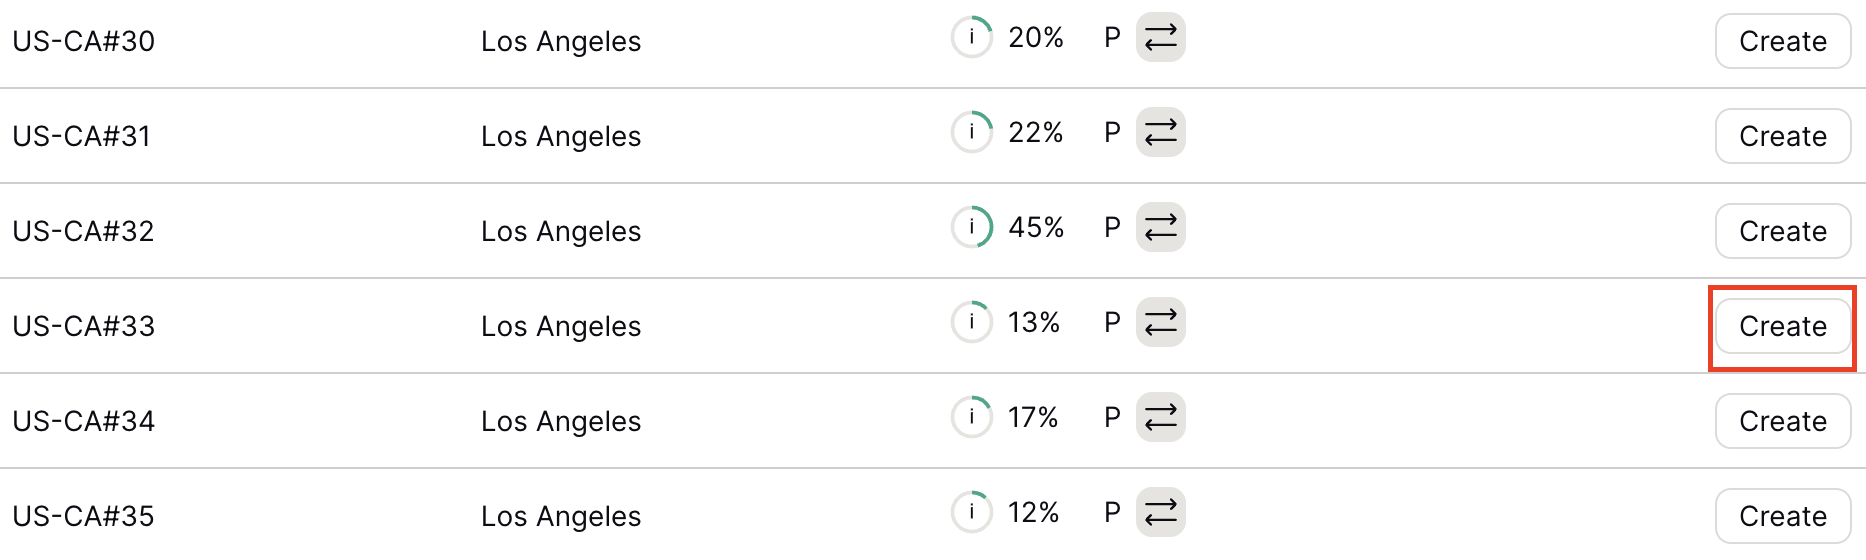
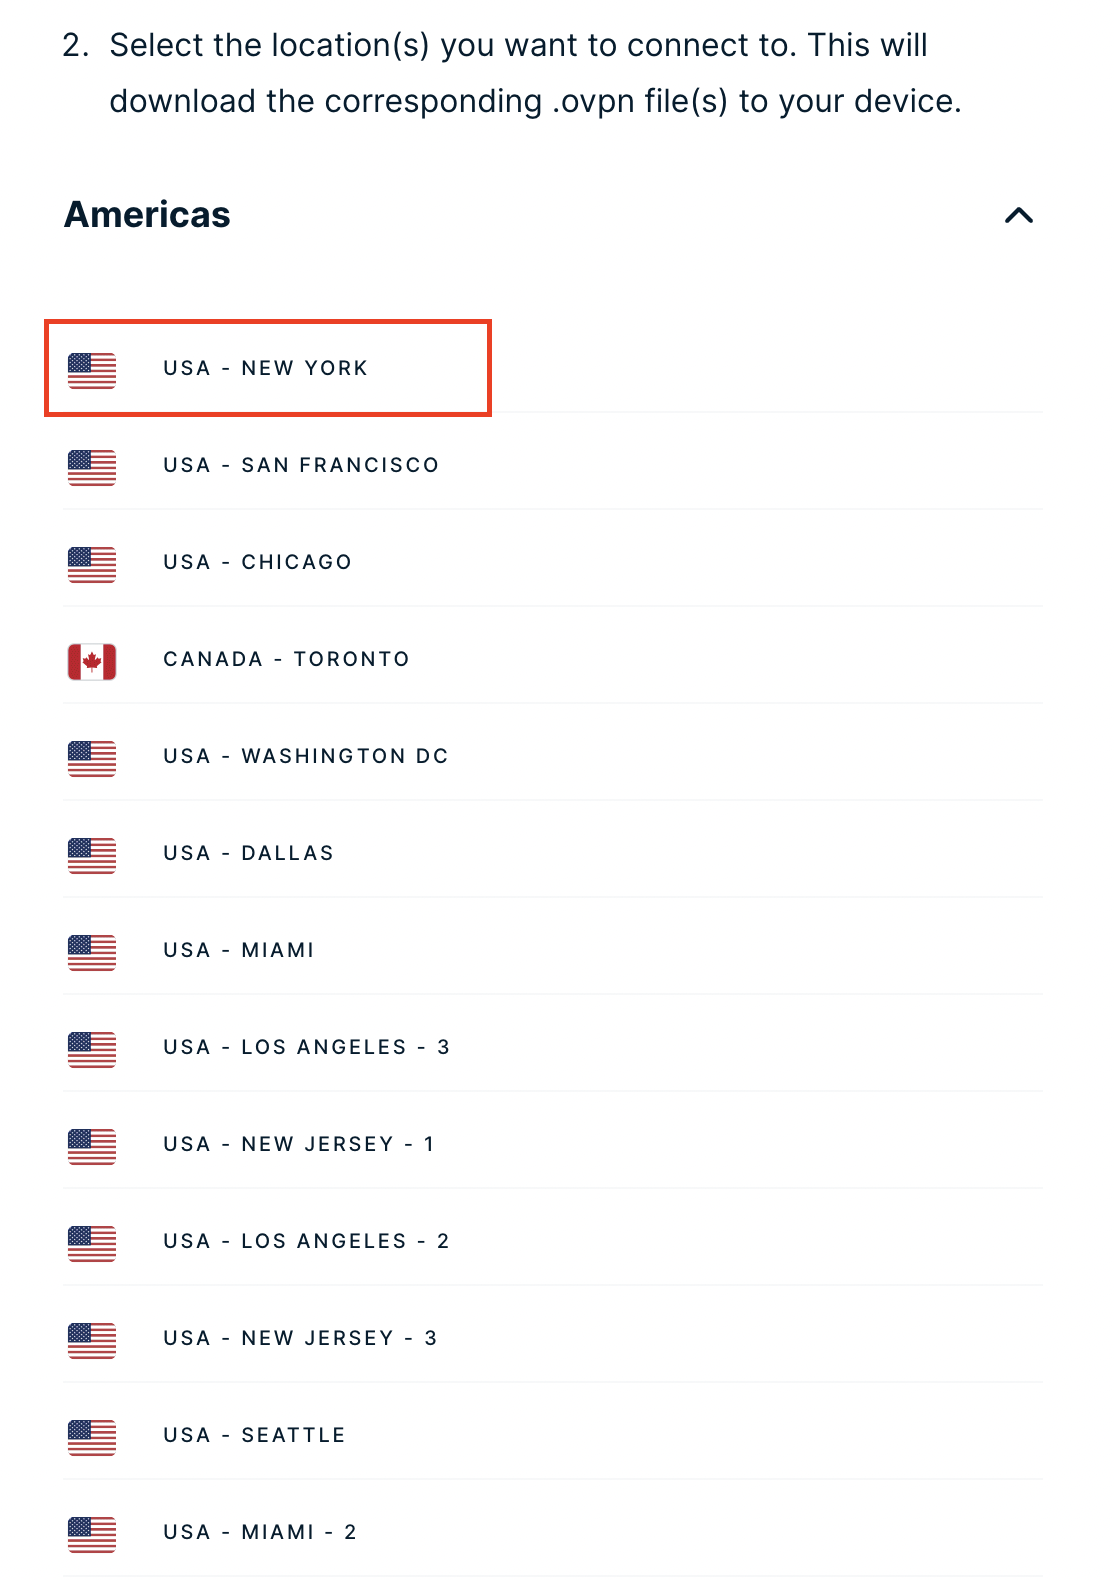
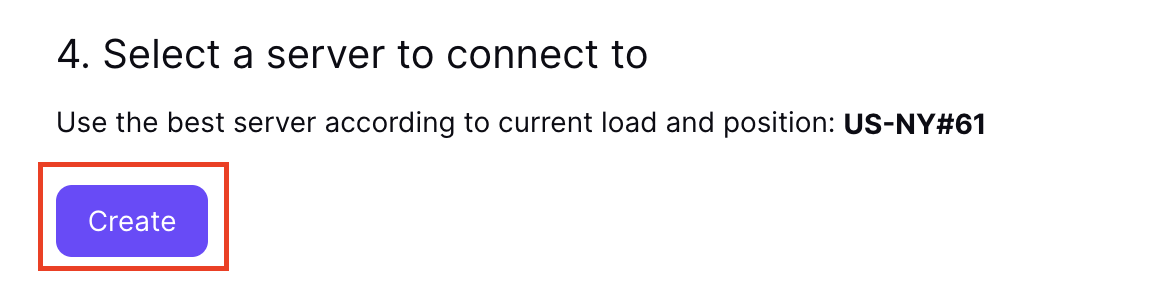
6. Next select the server that you would like to connect to and click Create. At the top of the page you’ll see ProtonVPN’s recommended server which we recommend using unless you need to connect to a specific location.

If you need a specific server location find it in the list and click Create.

ProtonVPN WireGuard recommended server
ProtonVPN WireGuard specific server

7. After clicking Create a new window will appear. Click Download to download the .conf file to your computer.

TP-Link Router Setup for ProtonVPN

Login to TP-Link firmware settings in a browser on any computer or smart device connected to the FlashRouter’s network.

1. Navigate to the Advanced tab.

TP-Link Advanced settings

2. Navigate to the VPN Client tab.

TP-Link VPN Client

3. Check the Enable box next to VPN Client. Then click Save at the bottom of the page.

TP-Link VPN Client enable

4. Click the Add button in the Server List area.

TP-Link Add server button

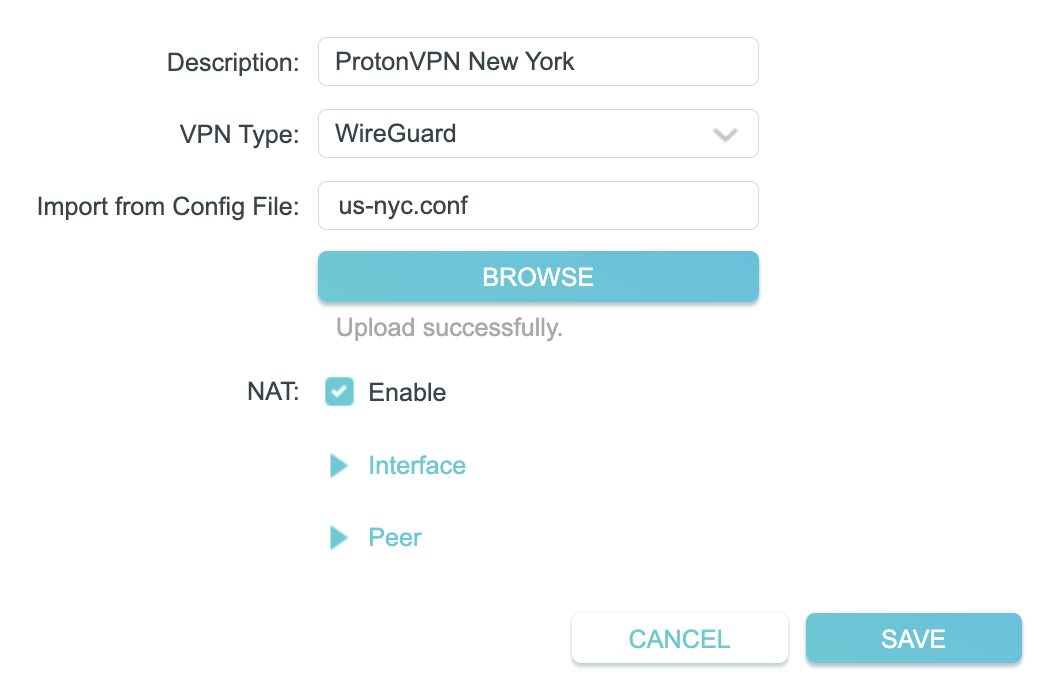
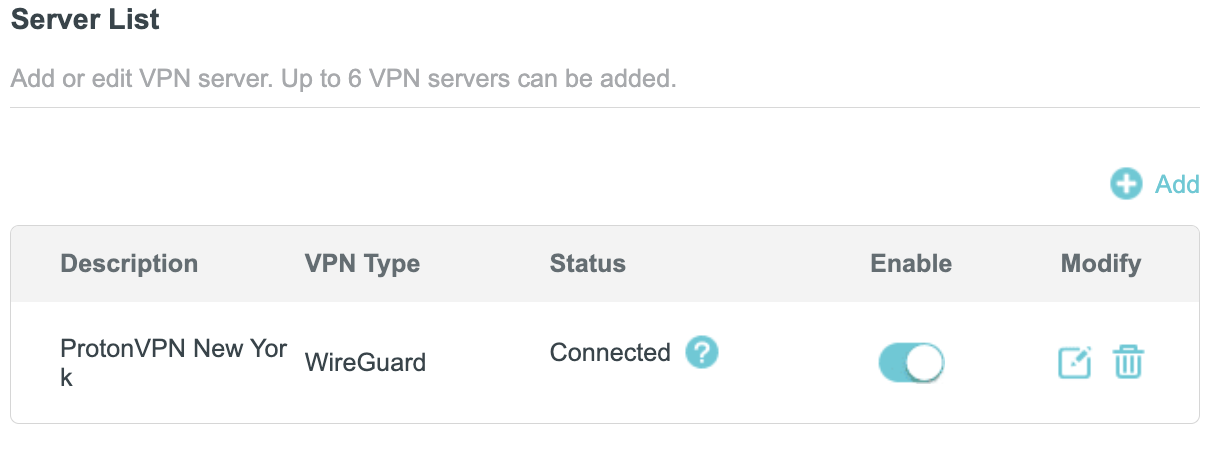
5. In the Description field enter in the name you’d like to use for this WireGuard Client profile. We typically advise entering in the location. Our example server was New York so I have entered in ProtonVPN New York.

Set the VPN Type to WireGuard.

Click Browse and select the .conf file you downloaded earlier. Then click Save.

TP-Link ProtonVPN WireGuard

By default no devices will be assigned to the VPN Tunnel. With TP-Link firmware you must manually assign the devices that you want connected to the VPN tunnel. Proceed with the next steps to do so for all devices you want connected to VPN.

6. Click the Add button in the Device List area.

TP-Link add devices to VPN tunnel

7. A list of devices connected to the FlashRouter’s network will appear. Check the devices that you want to connect to VPN. Then click OK.

TP-Link select devices to add to VPN tunnel

8. Now that the devices have been assigned to the VPN connection click the Enable toggle in the Server List area.

TP-Link ProtonVPN WireGuard connected

Verify a successful ProtonVPN connection

  1. You should now see a CONNECTED message.
  2. Visit ProtonVPN’s IP Check to verify your new IP address and virtual location.

In some cases you may notice that the location is not showing the same location as the server you have input in your router settings; this is because geo tracking tools are often tricked by VPN connections. As long as you see an IP address that is not the same as your normal Internet IP address then you are indeed connected to ProtonVPN.

How to change the ProtonVPN server

  1. Follow the steps at the top of the page to obtain a new .conf file.
  2. Then proceed with the settings same as initial setup.

TROUBLESHOOTING

Still having issues? Visit the VPN Troubleshooting section.

Troubleshoot Here

ExpressVPN TP-Link OpenVPN Setup

TeamFlashRouters · Apr 8, 2024 ·

Preparing for ExpressVPN TP-Link Setup

Obtain your ExpressVPN OpenVPN Information

If you are not already an ExpressVPN user Sign Up Now.

1. Log in to your account on the ExpressVPN website.

ExpressVPN login page

2. Successfully log in with your account information. Select More.

3. Select Manual Configuration and copy the Username and Password that are displayed on the right hand side of the screen.

ExpressVPN Manual Configuration
ExpressVPN username and password

4. Click the Server Location that you want to connect to. This will download a .ovpn file to your computer that we will use later on. There is no need to open the file. For this example I have selected New York but feel free to select any server listed there.

ExpressVPN Download .ovpn file

TP-Link Router Setup for ExpressVPN

Login to TP-Link firmware settings in a browser on any computer or smart device connected to the FlashRouter’s network.

1. Navigate to the Advanced tab.

TP-Link Advanced settings

2. Navigate to the VPN Client tab.

TP-Link VPN Client

3. Check the Enable box next to VPN Client. Then click Save at the bottom of the page.

TP-Link VPN Client enable

4. Click the Add button in the Server List area.

TP-Link Add server button

5. In the Description field enter in the name you’d like to use for this OpenVPN Client profile. We typically advise entering in the location or server number here. Our example server was in New York so I have entered in ExpressVPN New York.

Set the VPN Type to OpenVPN.

In the Username and Password fields paste in the ExpressVPN username and password we obtained earlier.

Click Browse and select the .ovpn file you downloaded earlier. Then click Save.

TP-Link ExpressVPN setup

By default no devices will be assigned to the VPN Tunnel. With TP-Link firmware you must manually assign the devices that you want connected to the VPN tunnel. Proceed with the next steps to do so for all devices you want connected to VPN.

6. Click the Add button in the Device List area.

TP-Link add devices to VPN tunnel

7. A list of devices connected to the FlashRouter’s network will appear. Check the devices that you want to connect to VPN. Then click OK.

TP-Link select devices to add to VPN tunnel

8. Now that the devices have been assigned to the VPN connection click the Enable toggle in the Server List area.

TP-Link ExpressVPN toggle VPN on

Verify a successful ExpressVPN connection

  1. You should now see a CONNECTED message.
  2. Visit ExpressVPN’s IP Check to verify your new IP address and virtual location.

In some cases you may notice that the location is not showing the same location as the server you have input in your router settings; this is because geo tracking tools are often tricked by VPN connections. As long as you see an IP address that is not the same as your normal Internet IP address then you are indeed connected to ExpressVPN.

How to change the ExpressVPN server

  1. Follow the steps at the top of the page to obtain a new .ovpn file.
  2. Then proceed with the settings same as initial setup.

TROUBLESHOOTING

Still having issues? Visit the VPN Troubleshooting section.

Troubleshoot Here

PrivateInternetAccess (PIA) TP-Link OpenVPN Setup

TeamFlashRouters · Apr 29, 2024 ·

Preparing for PIA TP-Link Setup

Download your PIA .ovpn file

If you are not already a PIA user Sign Up Now.

1. Log in to your account on the PIA website.

PIA login

2. Successfully log in with your account information then go to PIA’s OpenVPN Config Generator.

3. On the OpenVPN Configuration Generator select the following:

OpenVPN Version: OpenVPN 2.4 or newer

Select Platform: Linux

Select Region: Choose the server location you’d like to connect to

Select Port: Typically we recommend UDP/1198 RSA-2048 AES-128-CBC SHA1 for best speeds but feel free to select the one you want to use.

4. Click Generate to download the .ovpn file. Do not open this file once it is downloaded.

PIA Generate .ovpn file

TP-Link Router Setup for PIA

Login to TP-Link firmware settings in a browser on any computer or smart device connected to the FlashRouter’s network.

1. Navigate to the Advanced tab.

TP-Link Advanced settings

2. Navigate to the VPN Client tab.

TP-Link VPN Client

3. Check the Enable box next to VPN Client. Then click Save at the bottom of the page.

TP-Link VPN Client enable

4. Click the Add button in the Server List area.

TP-Link Add server button

5. In the Description field enter in the name you’d like to use for this OpenVPN Client profile. We typically advise entering in the location. Our example server was New York so I have entered in PIA New York.

Set the VPN Type to OpenVPN.

In the Username and Password fields paste in the PIA username and password you use to successfully login to your PIA website account.

Click Browse and select the .ovpn file you downloaded earlier. Then click Save.

TP-Link PIA

By default no devices will be assigned to the VPN Tunnel. With TP-Link firmware you must manually assign the devices that you want connected to the VPN tunnel. Proceed with the next steps to do so for all devices you want connected to VPN.

6. Click the Add button in the Device List area.

TP-Link add devices to VPN tunnel

7. A list of devices connected to the FlashRouter’s network will appear. Check the devices that you want to connect to VPN. Then click OK.

TP-Link select devices to add to VPN tunnel

8. Now that the devices have been assigned to the VPN connection click the Enable toggle in the Server List area.

TP-Link PIA Connected

Verify a successful PIA connection

  1. You should now see a CONNECTED message.
  2. Visit PIA’s IP Check to verify your new IP address and virtual location.

In some cases you may notice that the location is not showing the same location as the server you have input in your router settings; this is because geo tracking tools are often tricked by VPN connections. As long as you see an IP address that is not the same as your normal Internet IP address then you are indeed connected to PIA.

How to change the PIA server

  1. Follow the steps at the top of the page to obtain a new .ovpn file.
  2. Then proceed with the settings same as initial setup.

TROUBLESHOOTING

Still having issues? Visit the VPN Troubleshooting section.

Troubleshoot Here

IPVanish TP-Link OpenVPN Setup

TeamFlashRouters · Apr 29, 2024 ·

Preparing for IPVanish TP-Link Setup

Download your IPVanish .ovpn file

If you are not already an IPVanish user Sign Up Now.

1. Log in to your account on the IPVanish website.

IPVanish login

2. Successfully log in with your account information then go to IPVanish .ovpn file page.

3. Click on the .ovpn file for the server location you want to use to dowloand the .ovpn file. Do not open this file.

IPVanish download ovpn

TP-Link Router Setup for IPVanish

Login to TP-Link firmware settings in a browser on any computer or smart device connected to the FlashRouter’s network.

1. Navigate to the Advanced tab.

TP-Link Advanced settings

2. Navigate to the VPN Client tab.

TP-Link VPN Client

3. Check the Enable box next to VPN Client. Then click Save at the bottom of the page.

TP-Link VPN Client enable

4. Click the Add button in the Server List area.

TP-Link Add server button

5. In the Description field enter in the name you’d like to use for this OpenVPN Client profile. We typically advise entering in the location. Our example server was New York so I have entered in IPVanish New York.

Set the VPN Type to OpenVPN.

In the Username and Password fields paste in the IPVanish email and password you use to successfully login to your IPVanish website account.

Click Browse and select the .ovpn file you downloaded earlier. Then click Save.

TP-Link IPVanish

By default no devices will be assigned to the VPN Tunnel. With TP-Link firmware you must manually assign the devices that you want connected to the VPN tunnel. Proceed with the next steps to do so for all devices you want connected to VPN.

6. Click the Add button in the Device List area.

TP-Link add devices to VPN tunnel

7. A list of devices connected to the FlashRouter’s network will appear. Check the devices that you want to connect to VPN. Then click OK.

TP-Link select devices to add to VPN tunnel

8. Now that the devices have been assigned to the VPN connection click the Enable toggle in the Server List area.

TP-Link IPVanish Connected

Verify a successful IPVanish connection

  1. You should now see a CONNECTED message.
  2. Visit IPVanish’s IP Check to verify your new IP address and virtual location.

In some cases you may notice that the location is not showing the same location as the server you have input in your router settings; this is because geo tracking tools are often tricked by VPN connections. As long as you see an IP address that is not the same as your normal Internet IP address then you are indeed connected to IPVanish.

How to change the IPVanish server

  1. Follow the steps at the top of the page to obtain a new .ovpn file.
  2. Then proceed with the settings same as initial setup.

TROUBLESHOOTING

Still having issues? Visit the VPN Troubleshooting section.

Troubleshoot Here

Surfshark TP-Link OpenVPN Setup

TeamFlashRouters · Apr 29, 2024 ·

Preparing for Surfshark TP-Link Setup

Download your Surfshark .ovpn file

If you are not already a Surfshark user Sign Up Now.

1. Log in to your account on the Surfshark website.

Surfshark Account Login

2. Click VPN Manual Setup.

Surfshark VPN Manual Setup

3. Select Router as the Setup method.

Surfshark setup method Router

4. Select OpenVPN as the Protocol.

Surfshark OpenVPN Protocol

5. Copy and paste your Surfshark manual username and password to a secure location. This is the username and password you will enter into the router settings to connect to Surfshark.

Surfshark OpenVPN credentials

6. Click Location and select the server location you want to connect to. Unless you need a specific location we recommend using Surfshark’s recommended Fastest server. Click Download to download the UDP .ovpn file for this Surfshark server location.

Surfshark download .ovpn file

TP-Link Router Setup for Surfshark

Login to TP-Link firmware settings in a browser on any computer or smart device connected to the FlashRouter’s network.

1. Navigate to the Advanced tab.

TP-Link Advanced settings

2. Navigate to the VPN Client tab.

TP-Link VPN Client

3. Check the Enable box next to VPN Client. Then click Save at the bottom of the page.

TP-Link VPN Client enable

4. Click the Add button in the Server List area.

TP-Link Add server button

5. In the Description field enter in the name you’d like to use for this OpenVPN Client profile. We typically advise entering in the location. Our example server was New York so I have entered in Surfshark New York.

Set the VPN Type to OpenVPN.

In the Username and Password fields paste in the Surfshark username and password we obtained earlier.

Click Browse and select the .ovpn file you downloaded earlier. Then click Save.

TP-Link Surfshark OpenVPN

By default no devices will be assigned to the VPN Tunnel. With TP-Link firmware you must manually assign the devices that you want connected to the VPN tunnel. Proceed with the next steps to do so for all devices you want connected to VPN.

6. Click the Add button in the Device List area.

TP-Link add devices to VPN tunnel

7. A list of devices connected to the FlashRouter’s network will appear. Check the devices that you want to connect to VPN. Then click OK.

TP-Link select devices to add to VPN tunnel

8. Now that the devices have been assigned to the VPN connection click the Enable toggle in the Server List area.

TP-Link Surfshark OpenVPN connected

Verify a successful Surfshark connection

  1. You should now see a CONNECTED message.
  2. Visit Surfshark’s IP Check to verify your new IP address and virtual location.

In some cases you may notice that the location is not showing the same location as the server you have input in your router settings; this is because geo tracking tools are often tricked by VPN connections. As long as you see an IP address that is not the same as your normal Internet IP address then you are indeed connected to Surfshark.

How to change the Surfshark server

  1. Follow the steps at the top of the page to obtain a new .ovpn file.
  2. Then proceed with the settings same as initial setup.

TROUBLESHOOTING

Still having issues? Visit the VPN Troubleshooting section.

Troubleshoot Here

Privacy Hero Activation and Setup

TeamFlashRouters · Feb 8, 2023 ·

Follow this article when you receive your new Privacy Hero router to create your Privacy Hero account, connect your Privacy Hero to the Internet, and customize your network so it is ready to use.

Your Privacy Hero router uses Cloud Based router management which means you can access the router settings from anywhere on any device that has an internet connection. You can follow these steps while connected to your phone or your other Wi-Fi network.

Create your Privacy Hero account

1. From any device that has a browser such as a computer, smartphone, or tablet visit app.privacyhero.com

App.PrivacyHero.com

2. Select Create Account.

Privacy Hero create Account

3. Enter the Email address you want to set for your Privacy Hero account. This will be your login to the Privacy Hero settings moving forward. Click Create Account.

Privacy Hero Enter account email

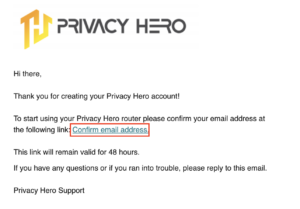
4. Go to your Email inbox and check for an email from Privacy Hero and click the Confirm email address link. This email may be in your Promotions or Spam inbox if it is not appearing in your main inbox.

Privacy Hero Confirm Email

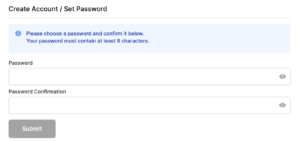
5. Enter the password that you want to use for your Privacy Hero account. Be sure to note this in a secure location so you do not forget. Click Submit.

Privacy Hero create password

6. You have now created your Privacy Hero account. You will use this login to access the Privacy Hero router settings.

Activate your Privacy Hero Internet and setup Wi-Fi

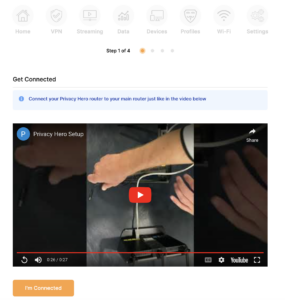
1. You will then be taken to the Router Activation steps. Connect the ethernet cable that the Privacy Hero came with from an open Ethernet port on your ISP modem or other router to the WAN/Internet (blue) port of the Privacy Hero.

Then power the Privacy Hero device on by connecting the power supply. This is shown in the video on the page as well. Wait about a minute or so for the Privacy Hero router to fully boot up and then click I’m Connected.

Wire Up Privacy Hero

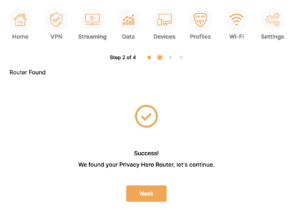
2. The next page may say Router Found or ask you to enter the Activation Code. If it asks for the Activation Code that will be the code printed on the bottom of the Privacy Hero. Enter this code and click Next.

Privacy Hero Router Found

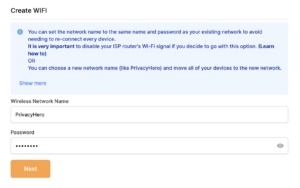
3. Set the Wi-Fi name and password for connecting your devices to the Privacy Hero network. Make sure it is not a duplicate name of an existing Wi-Fi network. Click Next.

Privacy Hero Set wifi name and password

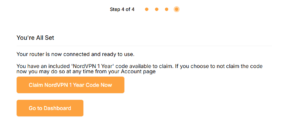
4. To activate your 1 Year NordVPN code:

Click on Claim NordVPN 1 Year Code Now

NordVPN Claim Code

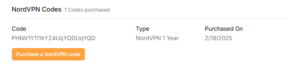
Go to the Account section of your router settings.

Copy the NordVPN code shown under Claim NordVPN 1 Year Code.

PH Nord Code

Go to the NordVPN activation page.

This code can be used with a new or existing NordVPN account.

NordVPN Activate Page

5. You are now all set to begin joining your devices to the new Privacy Hero network with the Wi-Fi name and password you entered and setting up some of the Privacy Hero features.
TROUBLESHOOTING

Still having issues? Visit the VPN Troubleshooting section.

Troubleshoot Here

How to Access Your GL.iNet FlashRouter Settings

TeamFlashRouters · Feb 26, 2024 ·

This quick guide walk you through connecting to your GL.iNet FlashRouter (Flint, Slate, Beryl, or Marble) and logging into the admin settings page. You’ll use either WiFi or an Ethernet cable, then access the router dashboard through your browser.

Step 1. Connect Your Device to the Router

You can connect by WiFi or Ethernet:

  • WiFi: Look for a network name like FlashRouter24 or FlashRouter50
    • The WiFi password has been set to: Wireless#9483C
    • ⚠️ Be sure to capitalize the “W” in
  • Ethernet: Plug an Ethernet cable from your computer into one of the router’s LAN ports (usually marked or color-coded differently from the WAN port).

👉 Pro tip: Disconnect from any other WiFi networks during setup.

Step 2. Open the Router Login Page

  1. Open a web browser (Chrome, Safari, Firefox, Edge).
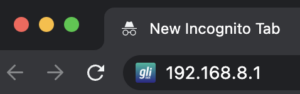
  2. In the address bar, type: 192.168.8.1
  3. Press Enter.
GL.iNet router access

This is the local router dashboard address (not a public website). If the page doesn’t load:

  • Try a different browser.
  • Clear your cache.
  • Ensure your device is connected to the FlashRouter network.

Step 3. Log In to the Router Settings

  • Default password: glopenwrt1 or openwrt
  • This is the factory default for all GL.iNet routers shipped by FlashRouters.
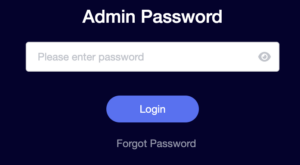
GL.iNet admin password enter

💡 Once you’re in, you can update your admin password in the settings for extra security.

Next Steps

Now that you’ve accessed your GL.iNet FlashRouter, you can:

  • Set up your VPN service
  • Customize your WiFi name and password
  • Adjust device controls and security settings

Check our support library for your specific VPN setup guide.

How to Access Your AsusWRT FlashRouter Settings

TeamFlashRouters · Oct 16, 2025 ·

This quick guide will walk you through connecting to your AsusWRT FlashRouter and logging into the admin settings page. You’ll use either WiFi or an Ethernet cable, then access the router dashboard through your browser.

Step 1. Connect Your Device to the Router

You can connect by WiFi or Ethernet:

  • WiFi: Look for a network name like FlashRouter24 or FlashRouter50.
    • The WiFi password is set to: Wireless#[First 5 characters of your router’s MAC]
    • Example: If your MAC is CC28A07E70A8, your WiFi password is Wireless#CC28A.
    • ⚠️ Be sure to capitalize the “W” in Wireless.
  • Ethernet: Plug an Ethernet cable from your computer into one of the router’s LAN ports (usually marked or color-coded differently from the WAN port).

👉 Pro tip: Disconnect from any other WiFi networks during setup.

Step 2. Open the Router Login Page

  1. Open a web browser (Chrome, Safari, Firefox, Edge).
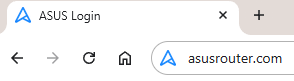
  2. In the address bar, type: 192.168.50.1 or go to asusrouter.com
  3. Press Enter.
Access Asus Router

This is the local router dashboard address (not a public website). If the page doesn’t load:

  • Try a different browser.
  • Clear your cache.
  • Ensure your device is connected to the FlashRouter network.

Step 3. Log In to the Router Settings

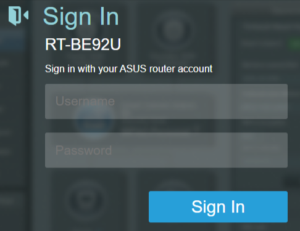
  • Default username: flashrouter
  • Default password: asuswrt-admin1
  • Some older devices may use: asuswrt1 or asuswrt
  • This is the factory default for AsusWRT routers shipped by FlashRouters.
Asus Router Login

💡 Once you’re in, you can update your admin password in the settings for extra security.

Next Steps

Now that you’ve accessed your AsusWRT FlashRouter, you can:

  • Set up your VPN service
  • Customize your WiFi name and password
  • Adjust device controls and security settings

Check our support library for your specific VPN setup guide.

NordVPN Cudy OpenVPN Setup

TeamFlashRouters · Feb 29, 2024 ·

Preparing for NordVPN Cudy Setup

Obtain your NordVPN manual Username and Password

If you are not already an NordVPN user Sign Up Now.

1. Log in to your account on the NordVPN website.

NordVPN login

2. Click NordVPN on the left hand side and then click Setup NordVPN manually.

NordVPN setup manually

3. Enter in the verification code that was sent to your email.

NordVPN verify code

4. Copy and paste your NordVPN manual username and password to a secure location. This is the username and password you will enter into the router settings to connect to NordVPN.

NordVPN credentials

Download your NordVPN .ovpn file

1. There are two options for obtaining the .ovpn file. The first and recommended is to navigate to NordVPN’s server recommendation page. Click Recommended Server to display the fastest server based on your actual location. You can adjust the country if you don’t want to connect to the recommended country.

Then click Show Available Protocols. Click Download Config next to OpenVPN UDP. This will download the .ovpn file to your computer for this server. Do not open this file.

NordVPN Recommended Server

The second method to obtain a server is for connecting to a specific server number that you know you want to use. This applies to NordVPN Dedicated IP servers if you are signed up for that service. Go to NordVPN’s .ovpn file page. Then search for the server number that you want to use and click Download UDP.

NordVPN Download Specific Server

Cudy Router Setup for NordVPN

Login to Cudy firmware settings in a browser on any computer or smart device connected to the Cudy FlashRouter’s network.

1. Click General Settings.

Cudy General Settings

2. Click VPN.

Cudy VPN Tab

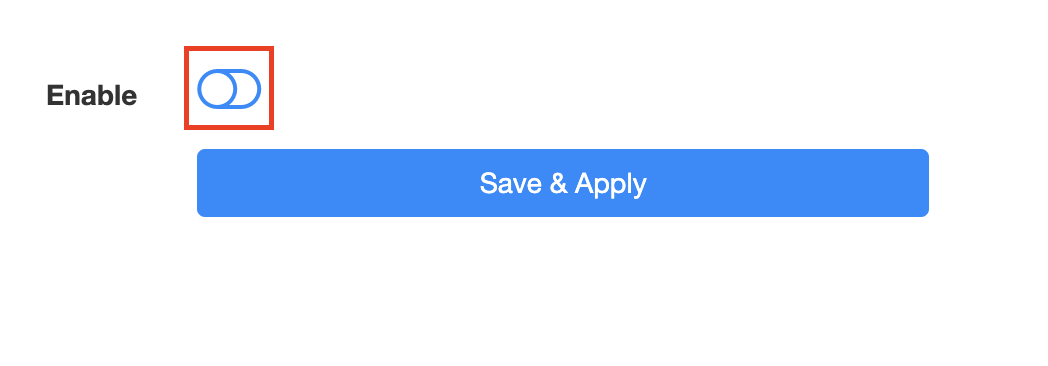
3. Toggle the Enable switch to On.

Cudy enable VPN

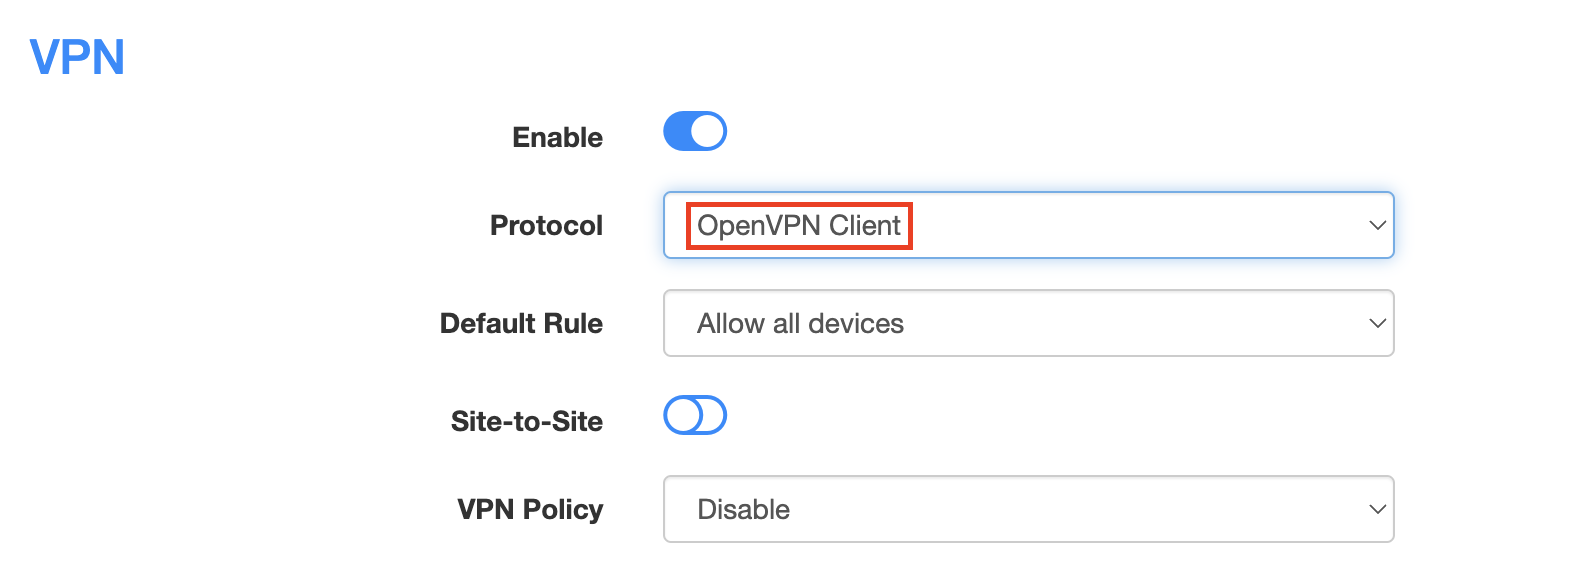
4. Select OpenVPN Client from the Protocol dropdown.

Cudy select OpenVPN Client

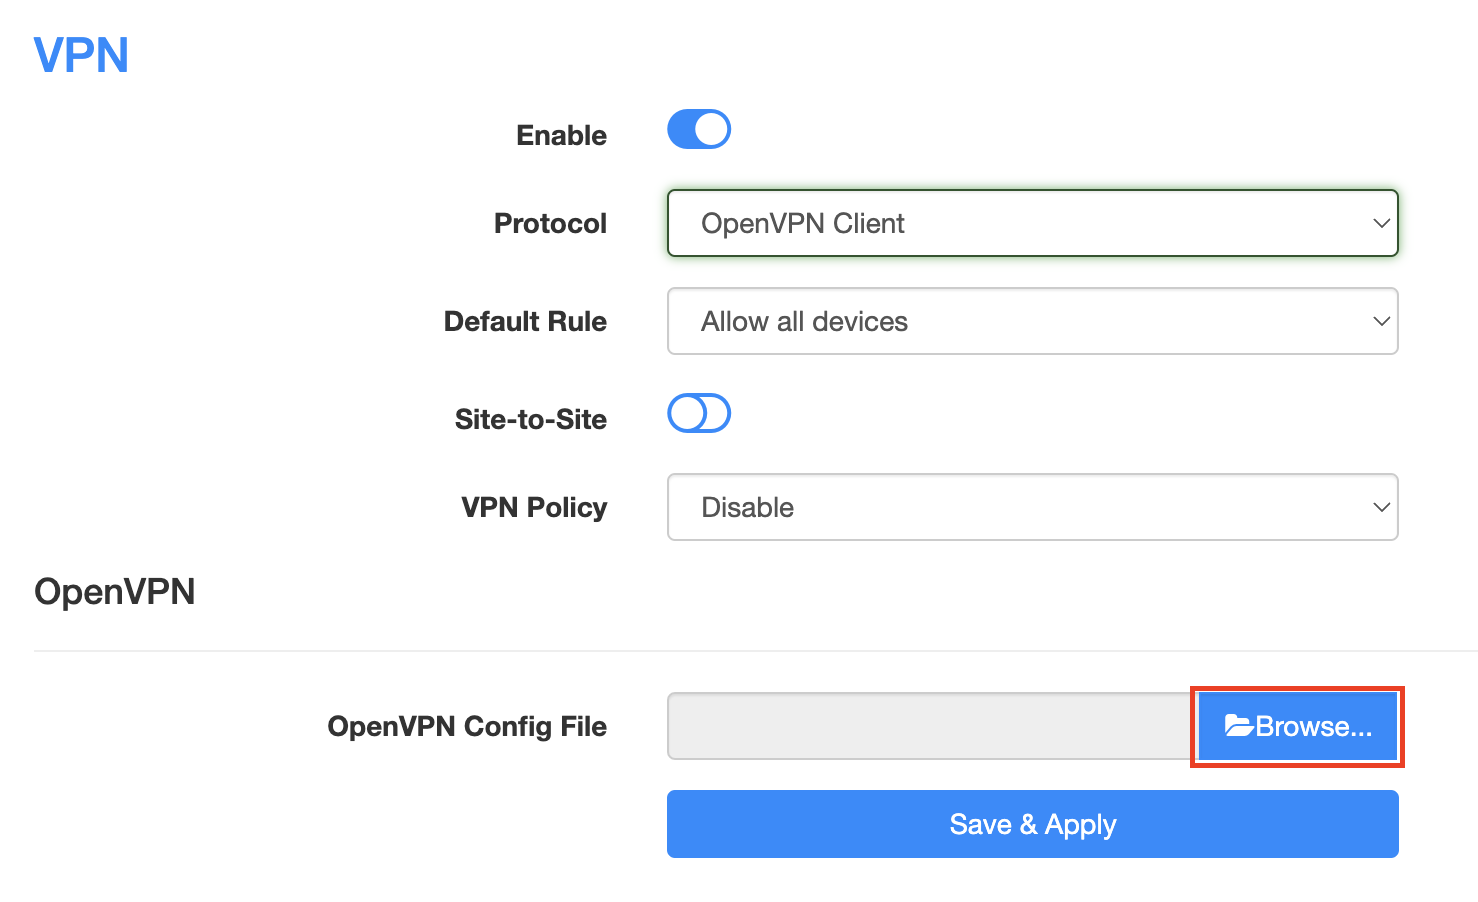
5. Click Browse and select the .ovpn file you downloaded earlier. You should see the server file name listed next to Current Config File after doing so.

Cudy OpenVPN Browse button

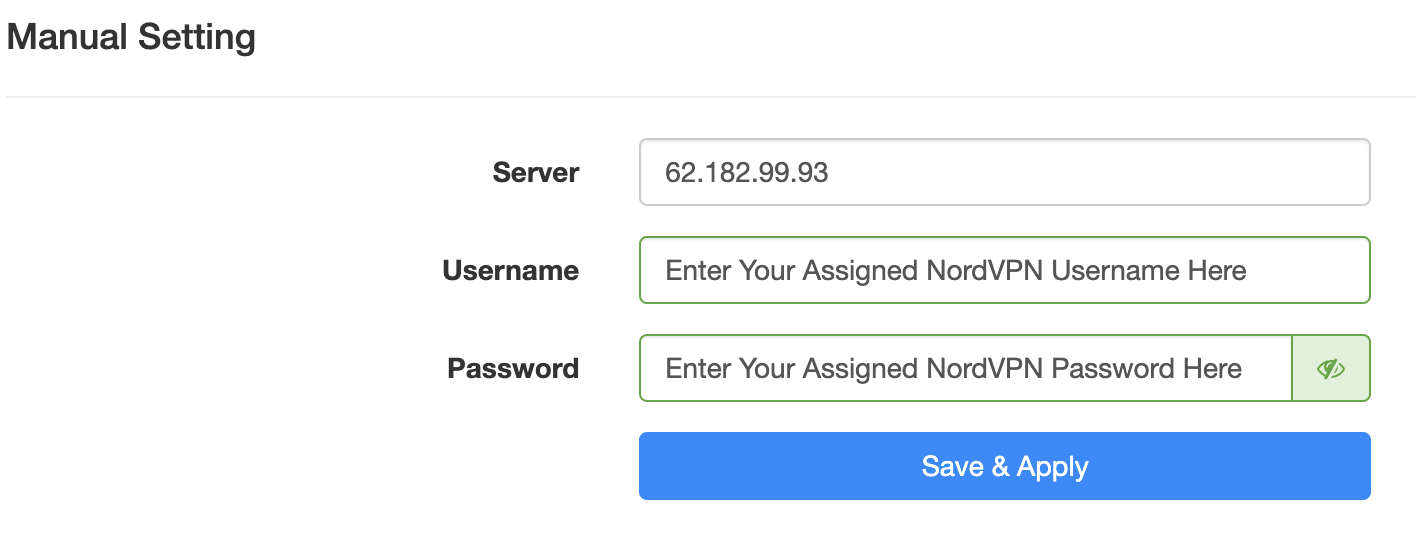
6. Enter your NordVPN username and password that you obtained earlier in the Username and Password. Note that these are different from your NordVPN email login and password.

Cudy NordVPN enter username and password

7. Click Save & Apply at the bottom of the page.

Verify a successful NordVPN connection

  1. You should now see a CONNECTED message.
  2. Visit NordVPN’s IP Check to verify your new IP address and virtual location.

In some cases you may notice that the location is not showing the same location as the server you have input in your router settings; this is because geo tracking tools are often tricked by VPN connections. As long as you see an IP address that is not the same as your normal Internet IP address then you are indeed connected to NordVPN.

How to change the NordVPN server

  1. Follow the steps at the top of the page to obtain a new .ovpn file.
  2. Then proceed with the settings same as initial setup.

TROUBLESHOOTING

Still having issues? Visit the VPN Troubleshooting section.

Troubleshoot Here

ProtonVPN Merlin WireGuard Setup

TeamFlashRouters · Mar 30, 2023 ·

Preparing for ProtonVPN Merlin Setup

Download your ProtonVPN .conf file

If you are not already an ProtonVPN user Sign Up Now.

1. Log in to your account on the ProtonVPN website.

ProtonVPN Account Sign in

2. Click Downloads.

ProtonVPN Downloads

3. Scroll down to WireGuard configuration and name the device FlashRouter.

ProtonVPN WireGuard Configuration Name

4. Select Router as the platform.

ProtonVPN WireGuard select Platform

5. Select the VPN options that best fit your needs. We typically use the settings as seen in the screenshot here if you are unsure.

ProtonVPN WireGuard VPN options

6. Next select the server that you would like to connect to and click Create. At the top of the page you’ll see ProtonVPN’s recommended server which we recommend using unless you need to connect to a specific location.

If you need a specific server location find it in the list and click Create.

ProtonVPN WireGuard recommended server
ProtonVPN WireGuard specific server

7. After clicking Create a new window will appear. Click Download to download the .conf file to your computer.

Merlin Router Setup for ProtonVPN

Login to Asus Merlin firmware settings in a browser on any computer or smart device connected to the Merlin FlashRouter’s network.

1. Navigate to the VPN tab.

Merlin VPN Tab

2. Navigate to the VPN Client tab.

Merlin VPN Client Tab

3. Select WireGuard as the VPN Protocol.

Merlin VPN Client WireGuard

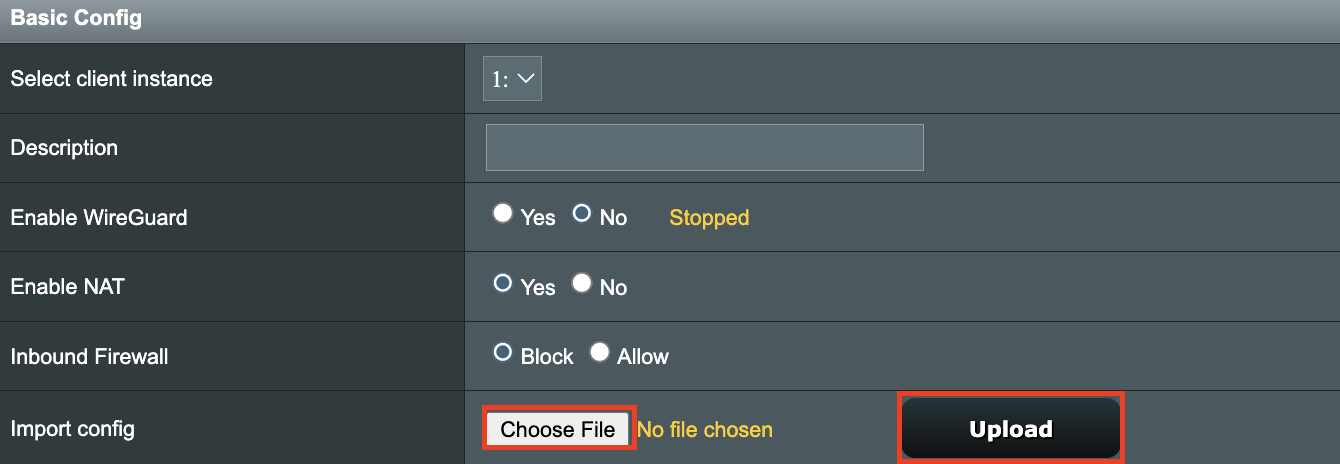
4. Click Choose file and select the .conf file you downloaded earlier. Then click Upload.

Merlin WireGuard Choose File Upload

5. In the Description field enter in the name you’d like to use for this WireGuard Client profile. We typically advise entering in the location here. Our example server was in US-NY#61 so I have entered in ProtonVPN NY-61.

Merlin WireGuard ProtonVPN Description

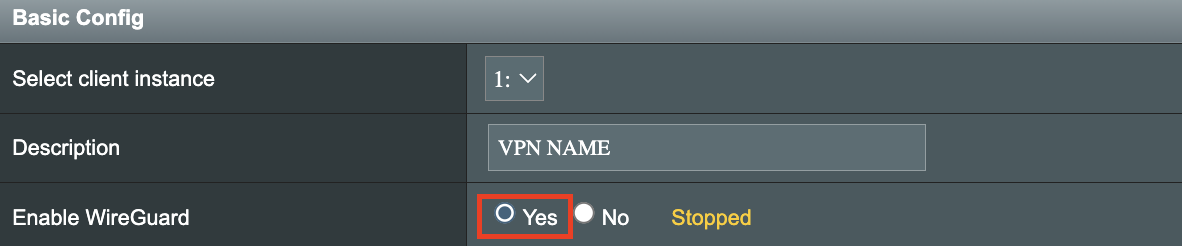
6. Set Enable WireGuard to Yes.

Merlin Enable WireGuard

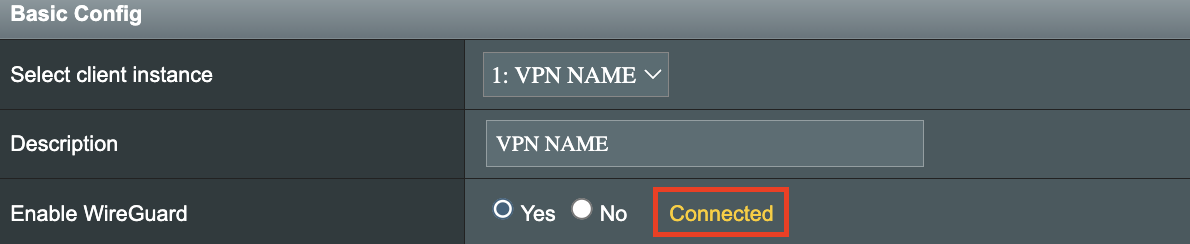
7. Click Apply at the bottom of the page and you should then see a Connected message appear.

Merlin WireGuard Connected

8. By default no devices are assigned to the new active WireGuard connection profile. Click the VPN Director tab to assign specific devices to the new WireGuard profile. Your IP will not be changed on your devices yet.

WireGuard select VPN Director

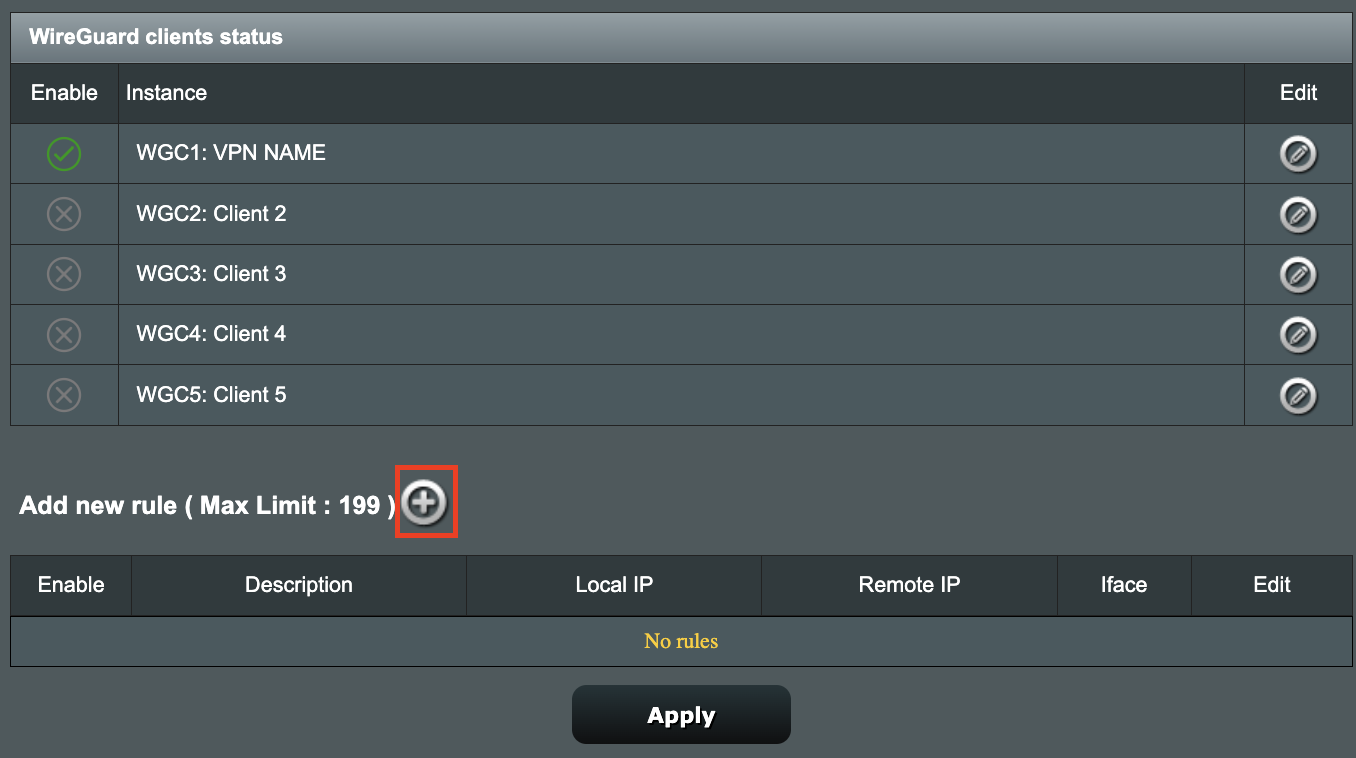
9. On the VPN Director page click the + symbol next to Add new rule.

WireGuard VPN Director Add new rule

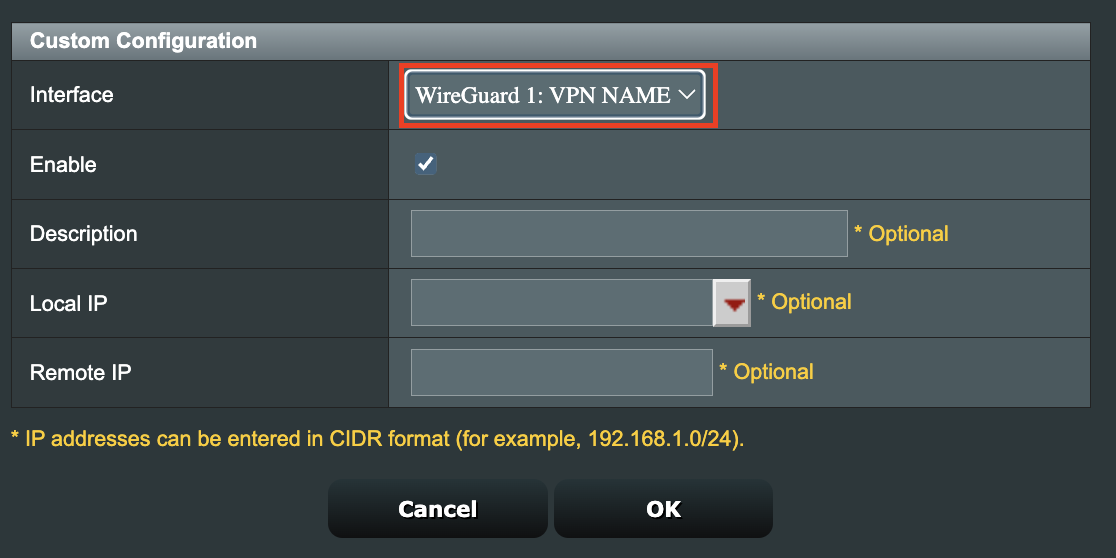
10. Select the new WireGuard profile in the Interface dropdown.

WireGuard VPN Director select Interface

11. In the Local IP field enter in 192.168.50.0/24 if you want ALL devices connected to the FlashRouter’s network to use the WireGuard VPN connection. Click OK.

If you only want certain devices to connect to the WireGuard Client profile you have setting up instead of all the devices connected to the FlashRouter’s network please complete the instructions on our VPN Director guide.

12. Then click Apply at the bottom of the page.

Verify a successful ProtonVPN connection

Visit ProtonVPN’s IP Check from a private/incognito browsing window to verify your new IP address and virtual location.

In some cases you may notice that the location is not showing the same location as the server you have input in your router settings; this is because geo tracking tools are often tricked by VPN connections. As long as you see an IP address that is not the same as your normal Internet IP address then you are indeed connected to ProtonVPN.


How to change the ProtonVPN server

  1. Follow the steps at the top of the page to obtain a new .conf file.
  2. Then proceed with the settings same as initial setup.

TROUBLESHOOTING

Still having issues? Visit the VPN Troubleshooting section.

Troubleshoot Here

Surfshark Merlin WireGuard Setup

TeamFlashRouters · Mar 30, 2023 ·

Preparing for Surfshark Merlin Setup

Download your Surfshark .conf file

If you are not already a Surfshark user Sign Up Now.

1. Log in to your account on the Surfshark website.

Surfshark Account Login

2. Click VPN Manual Setup.

Surfshark VPN Manual Setup

3. Select Router as the Setup Method.

Surfshark setup method Router

4. Select WireGuard as the Protocol.

Surfshark select WireGuard

5. Select I don’t have a key pair.

Surfshark No Key Pair

6. Enter FlashRouter as the name of the connection and click Next.

Surfshark Connection Name

7. Click Generate a new key pair.

Surfshark Generate new Key Pair

8. Click Choose a location.

Surfshark Choose a Location

9. Select the server location you want to connect to. Unless you need a specific location we recommend using Surfshark’s recommended Fastest server. Click Download to download the .conf file for this Surfshark server location.

Surfshark download conf file

Merlin Router Setup for Surfshark

Login to Asus Merlin firmware settings in a browser on any computer or smart device connected to the Merlin FlashRouter’s network.

1. Navigate to the VPN tab.

Merlin VPN Tab

2. Navigate to the VPN Client tab.

Merlin VPN Client Tab

3. Select WireGuard as the VPN Protocol.

Merlin VPN Client WireGuard

4. Click Choose file and select the .conf file you downloaded earlier. Then click Upload.

Merlin WireGuard Choose File Upload

5. In the Description field enter in the name you’d like to use for this WireGuard Client profile. We typically advise entering in the location here. Our example server was in New York so I have entered in Surfshark New York.

Merlin WireGuard ProtonVPN Description

6. Set Enable WireGuard to Yes.
Merlin Enable WireGuard

7. Click Apply at the bottom of the page and you should then see a Connected message appear.

Merlin WireGuard Connected

8. By default no devices are assigned to the new active WireGuard connection profile. Click the VPN Director tab to assign specific devices to the new WireGuard profile. Your IP will not be changed on your devices yet.

WireGuard select VPN Director

9. On the VPN Director page click the + symbol next to Add new rule.

WireGuard VPN Director Add new rule

10. Select the new WireGuard profile in the Interface dropdown.

WireGuard VPN Director select Interface

11. In the Local IP field enter in 192.168.50.0/24 if you want ALL devices connected to the FlashRouter’s network to use the WireGuard VPN connection. Click OK.

If you only want certain devices to connect to the WireGuard Client profile you have setting up instead of all the devices connected to the FlashRouter’s network please complete the instructions on our VPN Director guide.

12. Then click Apply at the bottom of the page.

Verify a successful Surfshark connection

Visit Surfshark’s IP Check from a private/incognito browsing window to verify your new IP address and virtual location.

In some cases you may notice that the location is not showing the same location as the server you have input in your router settings; this is because geo tracking tools are often tricked by VPN connections. As long as you see an IP address that is not the same as your normal Internet IP address then you are indeed connected to Surfshark.
How to change the Surfshark server

  1. Follow the steps at the top of the page to obtain a new .conf file.
  2. Then proceed with the settings same as initial setup.

TROUBLESHOOTING

Still having issues? Visit the VPN Troubleshooting section.

Troubleshoot Here

NordVPN Setup Guide for Privacy Hero

TeamFlashRouters · Apr 3, 2023 ·

Your Privacy Hero NordVPN Router uses cloud-based management, which means you can securely access and adjust your router settings from anywhere, on any device with an internet connection. Whether you’re connected through your phone, another Wi-Fi network, or directly to the Privacy Hero network, setup and management are always within reach.

Follow the steps below to connect your Privacy Hero to NordVPN NordLynx or OpenVPN servers. By default, you’ll automatically connect to the fastest, most reliable server available based on your location. If you prefer, you can also select a specific country server and input it directly into your Privacy Hero for more control.

:point_right: Don’t have a Privacy Hero yet? Get your Privacy Hero NordVPN Router here

NordVPN Nordlynx Setup for Privacy Hero

1. From any device that has a browser such as a computer, smartphone, or tablet visit app.privacyhero.com

App.PrivacyHero.com

2. Enter your Privacy Hero account email and password. Click Login.

Privacy Hero Access Settings

3. Click the VPN symbol.

Privacy Hero Setup VPN

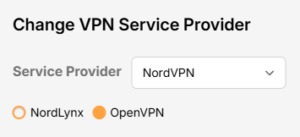
4. Click the Change button and select NordVPN from the dropdown.

Privacy Hero Change VPN Providers

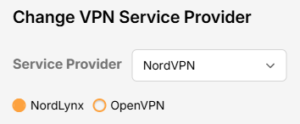
5. Click the Change button and select NordVPN from the dropdown and choose the NordLynx option. Next you will need to obtain your Token.

NordVPN Protocol Privacy Hero

6. In a new tab login to your NordVPN account and select NordVPN from your list of Services.

NordVPN account

7. At the bottom of the page click Get Access token and you will receive a code via email. Enter this code to proceed.

NordVPN Access Token

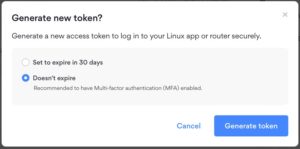
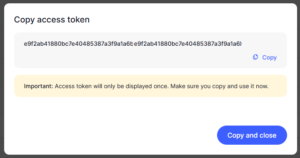
8. After you enter the email code select Generate new token and set it to Doesn’t expire. Copy this token.

NordVPN Generate new token
NordVPN Copy Token

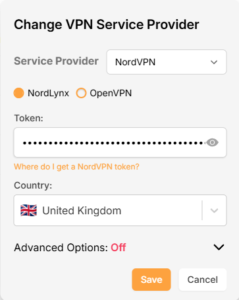
9. Paste the token and then Click Save to connect to the server address recommended by NordVPN within your country.

NordVPN Protocols Privacy Hero

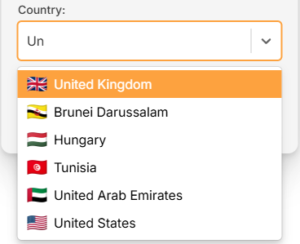
10. To connect to a specific location, click the Country dropdown menu and scroll or type to search from the available options. Choose your preferred country and you will automatically connect to the recommended server within that country at the time. Then click Save.

Nordlynx VPN Country Selection Privacy Hero

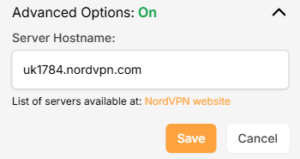
11. If you prefer to enter a specific server address number click Advanced Options and then type in the NordVPN server you would like to use as shown below e.g. uk1784.nordvpn.com. Then click Save.

Nordlynx Advanced Privacy Hero

Use the NordVPN’s server recommendation tool to select a specific country and receive a recommendation for the fastest server based on your actual location. You can then enter that server in the Privacy Hero settings manually.

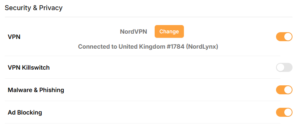
12. Your Privacy Hero settings should now show a Connected message, indicating you have successfully signed in to your NordVPN NordLynx VPN server!

Privacy Hero Nordlynx Connected

NordVPN OpenVPN Setup for Privacy Hero

1. From any device that has a browser such as a computer, smartphone, or tablet visit app.privacyhero.com

App.PrivacyHero.com

2. Enter your Privacy Hero account email and password. Click Login.

Privacy Hero Access Settings

3. Click the VPN symbol.

Privacy Hero Setup VPN

4. Click the Change button and select NordVPN from the dropdown.

Privacy Hero Change VPN Providers

5. Choose the OpenVPN option to connect to OpenVPN servers or to setup a NordVPN Dedicated IP address. Next you will need to obtain your Manual Service credentials.

NordVPN Protocol Privacy Hero

6. In a new tab login to your NordVPN account and select NordVPN from your list of Services.

NordVPN login
NordVPN account

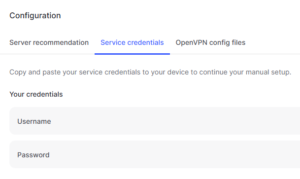
7. At the bottom of the page in the Manual Setup section click Setup NordVPN manually then under the Configuration section go to Service credentials. Click Verify email to receive a code via email and enter the code to view and copy your credentials.

NordVPN Manual OpenVPN
NordVPN Service Credentials

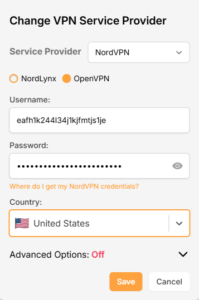
8. Enter these credentials into the OpenVPN Username and Password sections in your Privacy Hero and Click Save if you want to connect to the server address recommended by NordVPN within your country.

NordVPN OpenVPN Privacy Hero

9. To connect to a specific location, click the Country dropdown menu and scroll or type to search from the available options. Choose your preferred country and you will automatically connect to the recommended server within that country at the time. Then click Save.

Nordlynx VPN Country Selection Privacy Hero

10. To connect with a NordVPN Dedicated IP Address or if you prefer to enter a specific server address number click Advanced Options and then type in the NordVPN server you would like to use as shown below e.g. uk1784.nordvpn.com. Then click Save.

Nordlynx Advanced Privacy Hero

Use the NordVPN’s server recommendation tool to select a specific country and receive a recommendation for the fastest server based on your actual location. You can then enter that server in the Privacy Hero settings manually.

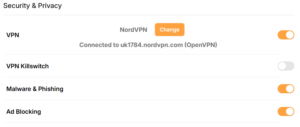
11. Your Privacy Hero settings should now show a Connected message, indicating you have successfully signed in to your NordVPN Dedicated IP address or preferred OpenVPN server!

NordVPN OpenVPN Connected Privacy Hero

Privacy Hero’s cloud based router settings access makes it so you can change settings while not connected to the Privacy Hero network. Visit the NordVPN IP Check to verify your VPN IP address. If it has not changed be sure to double check that you are indeed connected to the Privacy Hero network.

Keep in mind that the VPN connection will not change the location of the streaming services listed in the Streaming Relocation area of the Privacy Hero settings if the Streaming Relocation feature is Enabled.

Still having issues?

Feel free to submit a ticket and we will get back to you as soon as possible.

CyberGhost AsusWRT OpenVPN Setup

TeamFlashRouters · Apr 29, 2024 ·

Preparing for CyberGhost Setup

Obtain your CyberGhost OpenVPN information

If you are not already a CyberGhost user Sign Up Now.

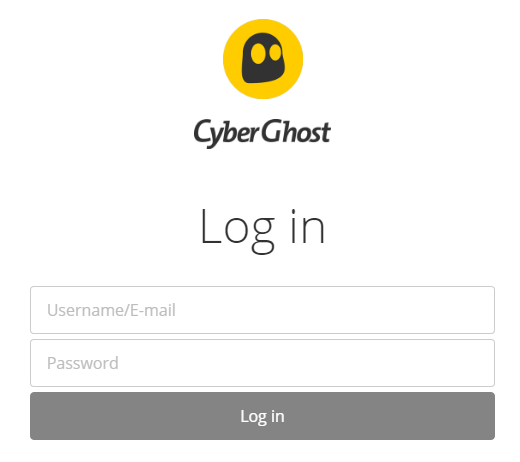
1. Log in to your account on the CyberGhost website.

CyberGhost Website Login

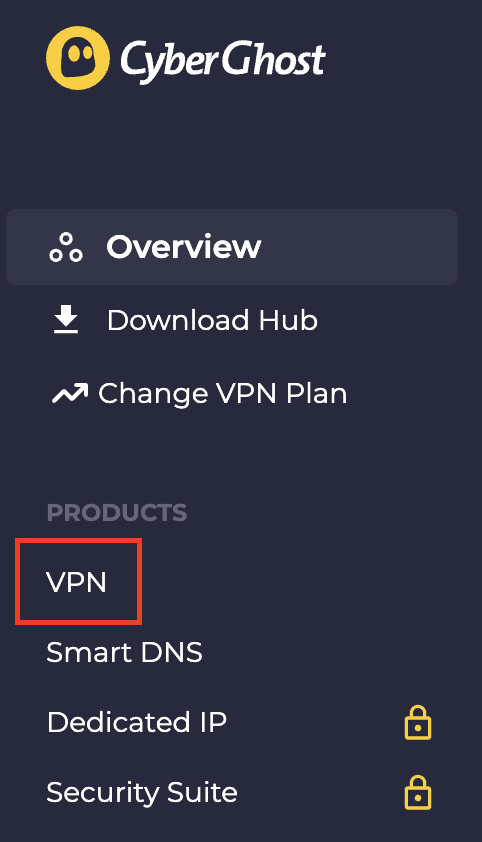
2. Select VPN.

CyberGhost VPN

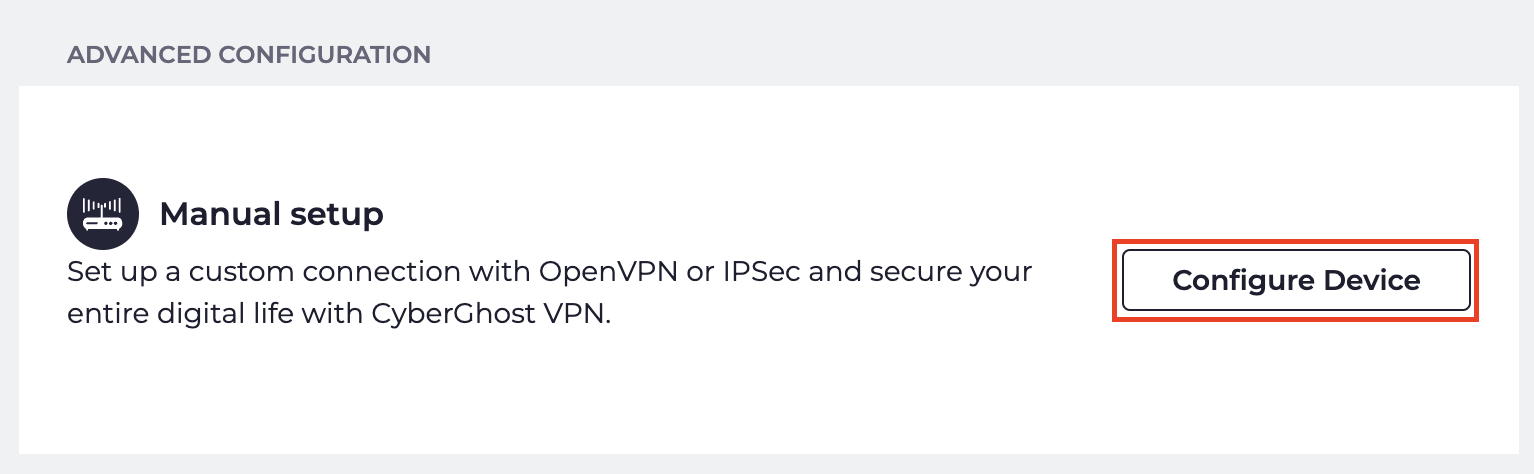
3. Click Configure New Device.

CyberGhost Configure Device

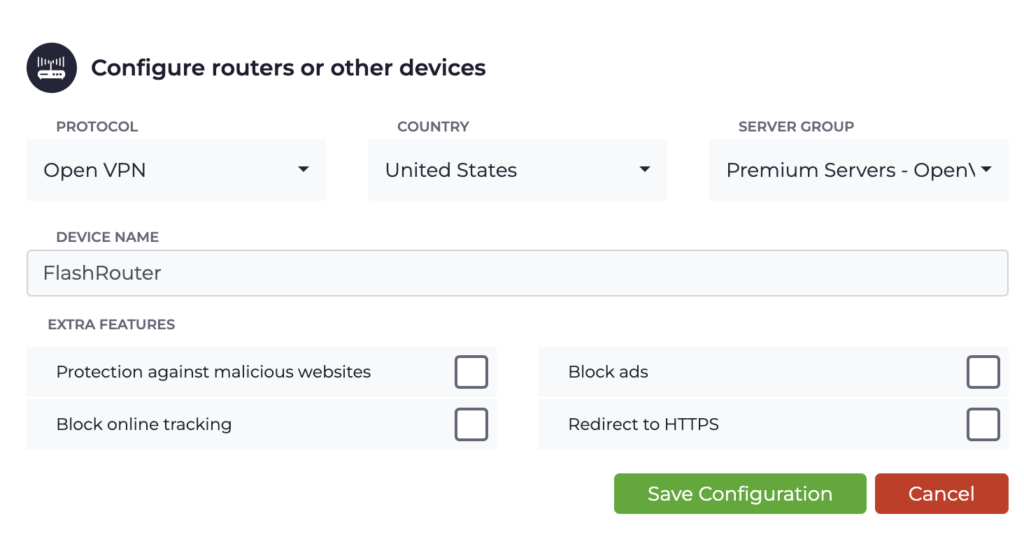
4. Set Protocol to OpenVPN. Select the Country you would like to connect to. Select the Server Group. Name the device in the Device Name field. Click Save Configuration.

CyberGhost protocol and location

5. Press View configuration.

CyberGhost view configuration

6. Copy the Username, and Password that appear to a notepad, since you will need this information later in the setup process. Click Download Configuration.

CyberGhost Website OpenVPN Configuration Files Generator 1

Open the folder that was downloaded. Then open the ca.crt the client.crt, and client.key files with NotePad++ for Windows or TextEdit for Apple. All CyberGhost servers have different keys and certificates.

AsusWRT Router Setup for CyberGhost

Login to AsusWRT firmware settings in a browser on any computer or smart device connected to the AsusWRT FlashRouter’s network.

1. Navigate to the VPN tab.

Merlin VPN Tab

2. Navigate to the VPN Fusion tab.

Asus VPN Fusion

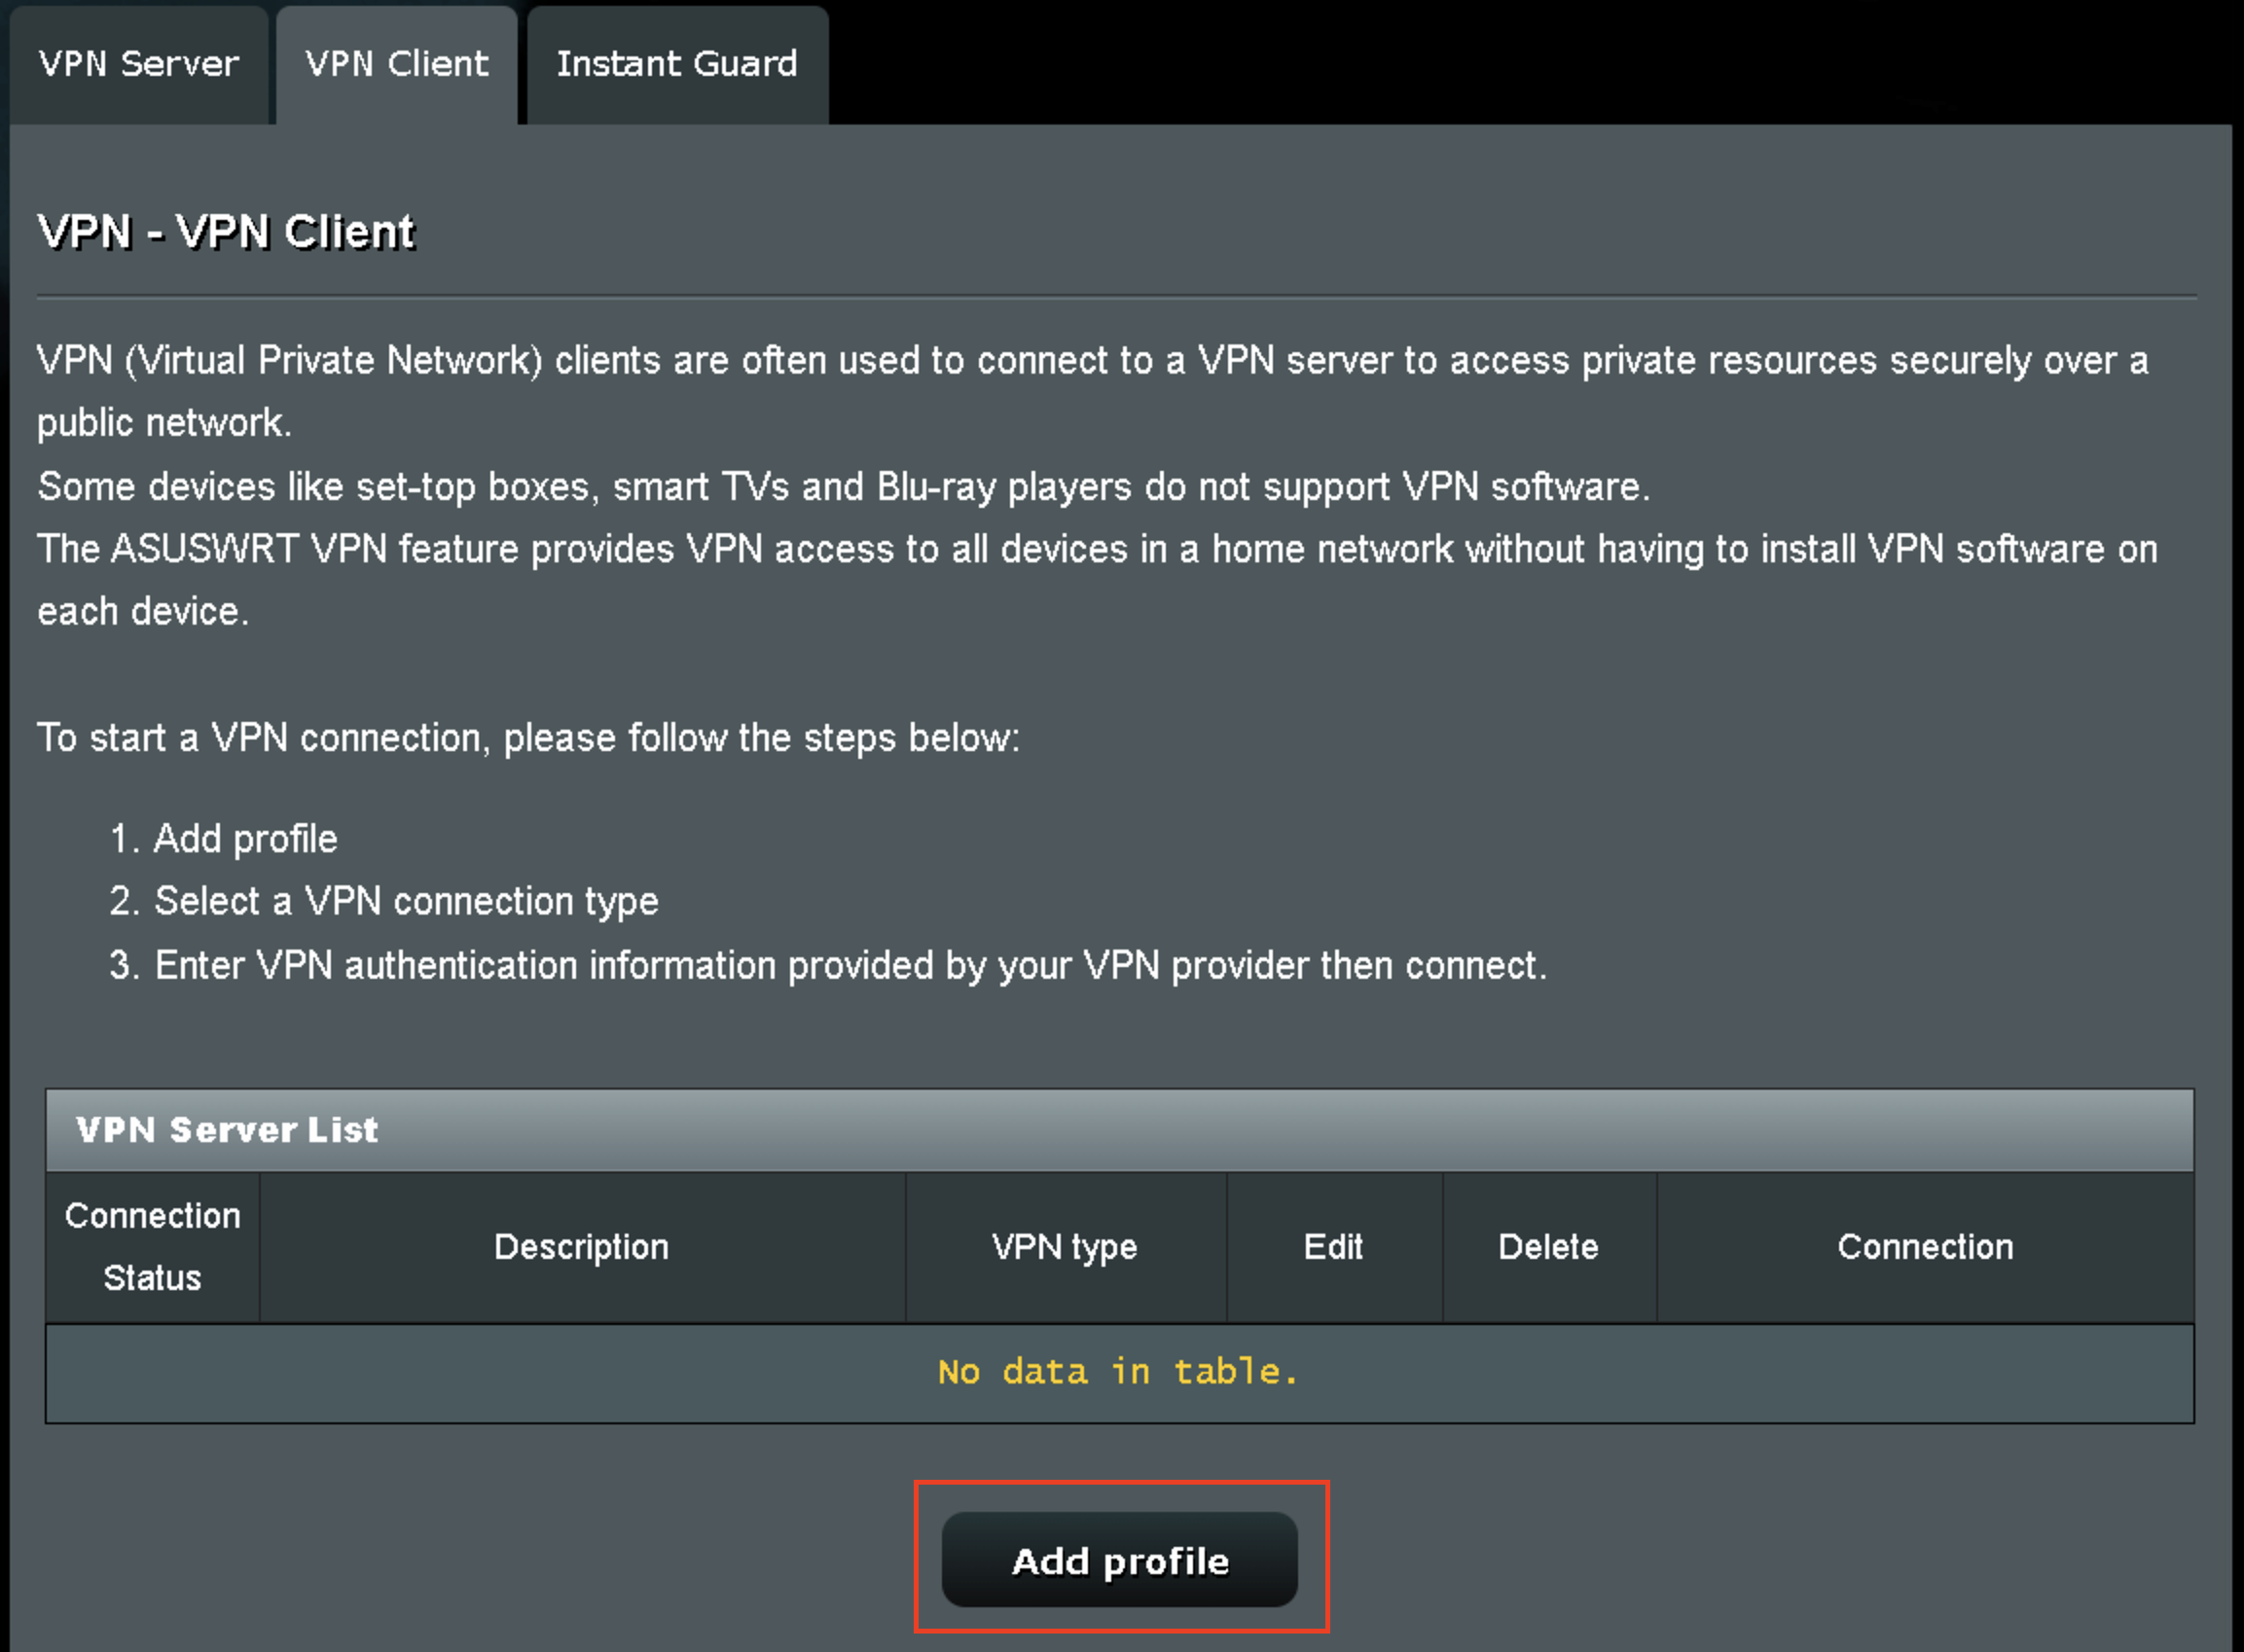
3. Click Add profile.

Asus Add profile

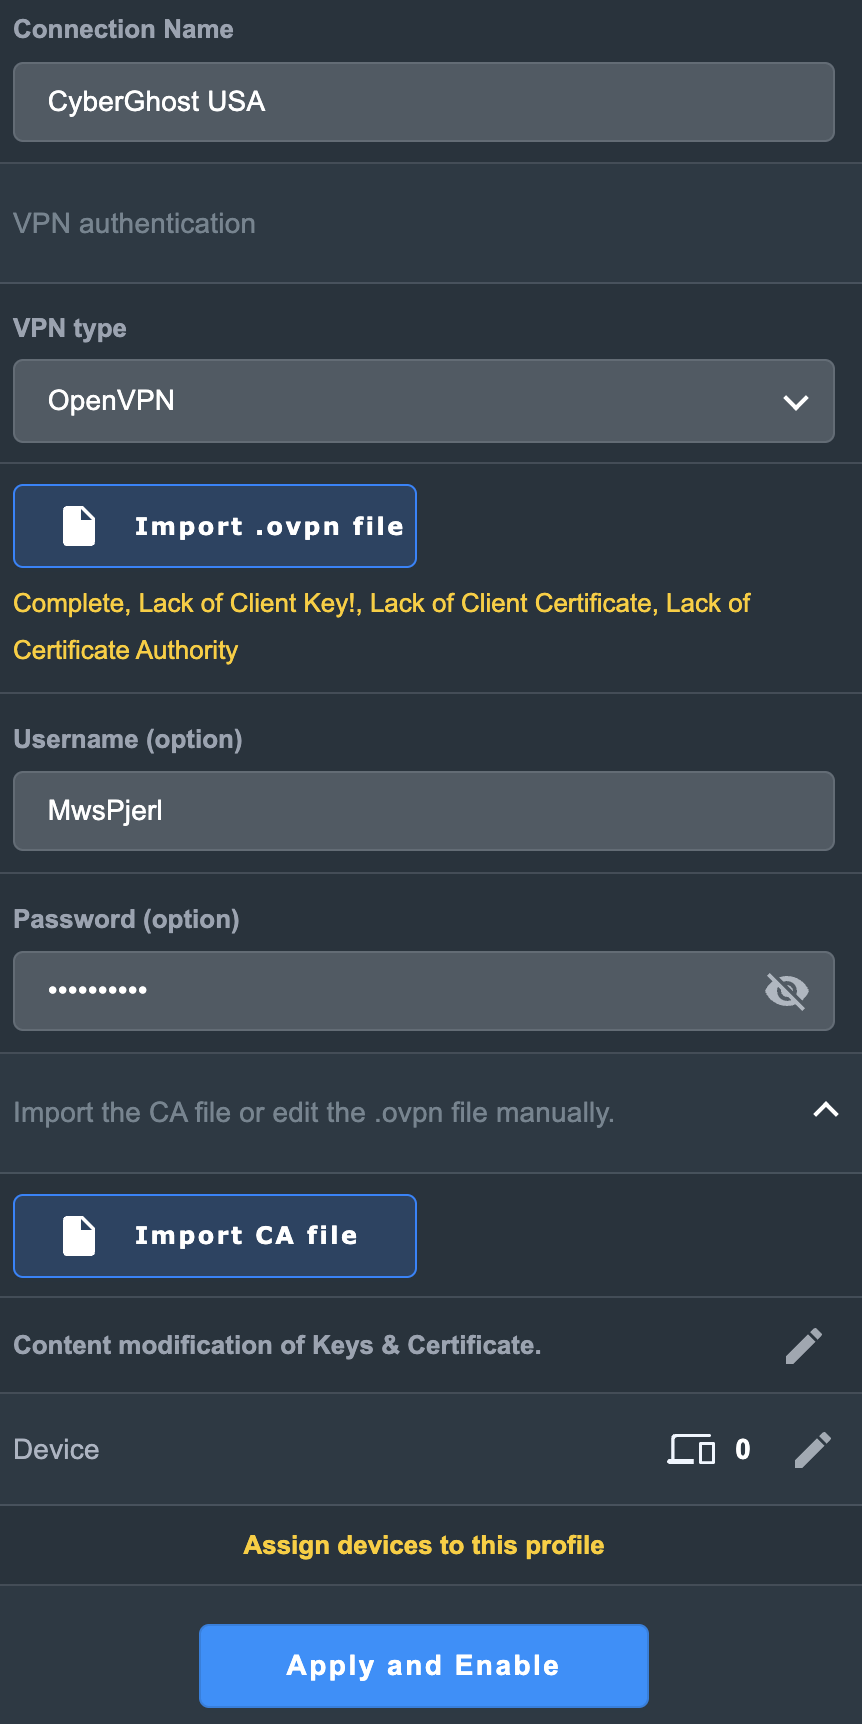
4. In the Connection Name field enter in the name you’d like to use for this OpenVPN Client profile. We typically advise entering in the location or server number here. Our example server was in USA so I have entered in CyberGhost USA.

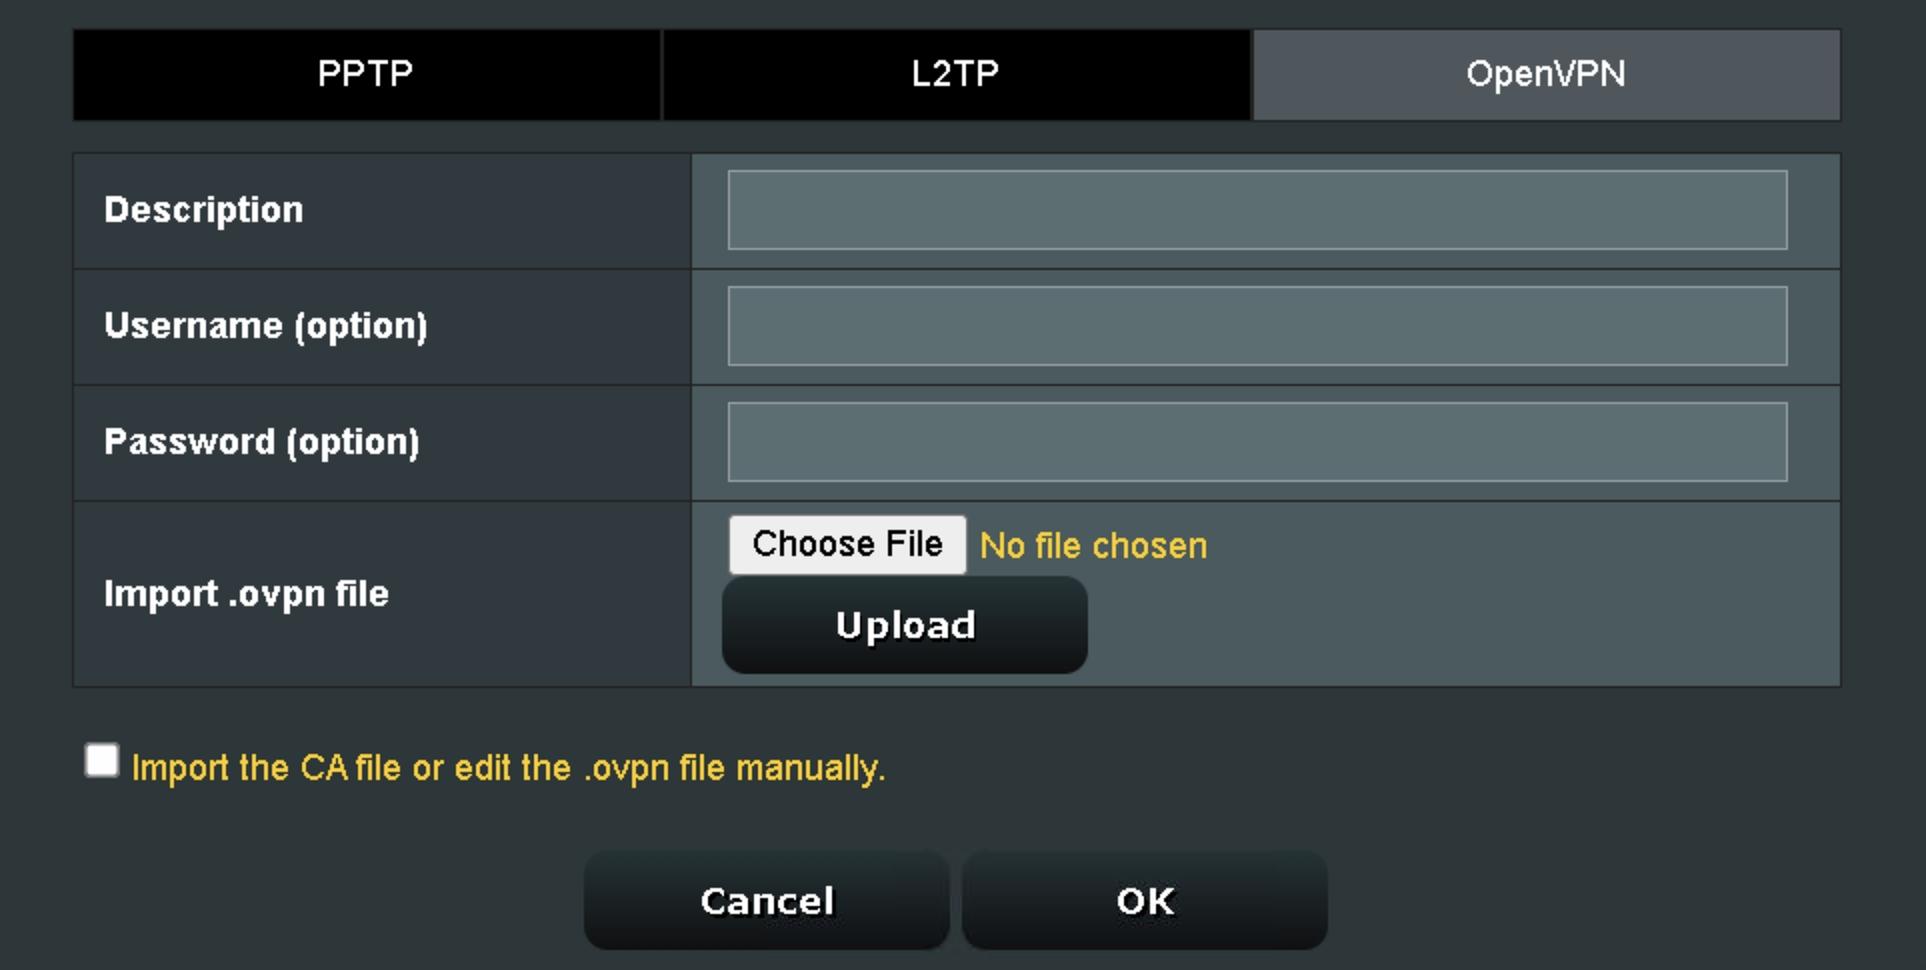
5. In the VPN Type dropdown select OpenVPN.

6. Click Import .ovpn file and select the openvpn.ovpn file from the folder you downloaded earlier. Then click Upload.

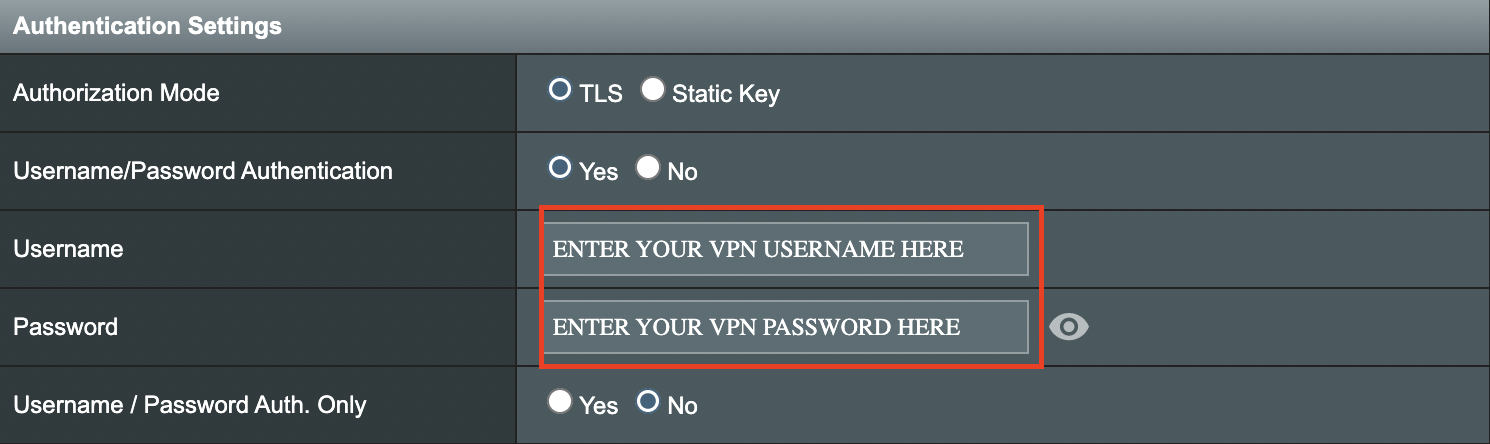
7. In the Username and Password fields enter in the CyberGhost assigned username and password that you obtained earlier.

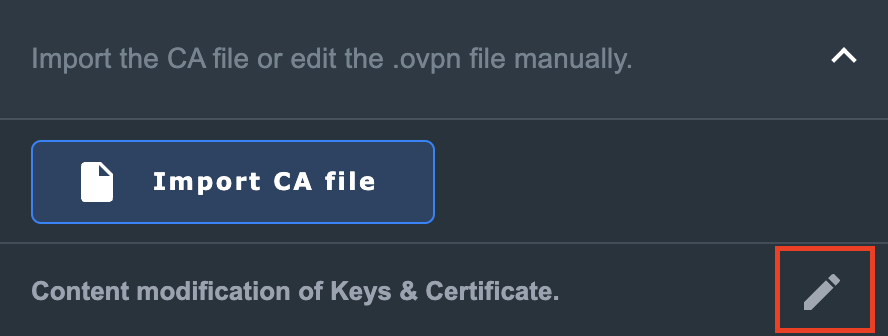
8. After uploading the openvpn.ovpn file you will get a message that says “Complete, Lack of Client Key!, Lack of Client Certificate, Lack of Certificate Authority”. For CyberGhost you need to enter in these details manually. Click Import the CA file or edit the .ovpn file manually and then click the edit icon next to Content modification of Keys and Certificate.

Asus CyberGhost import certs and keys

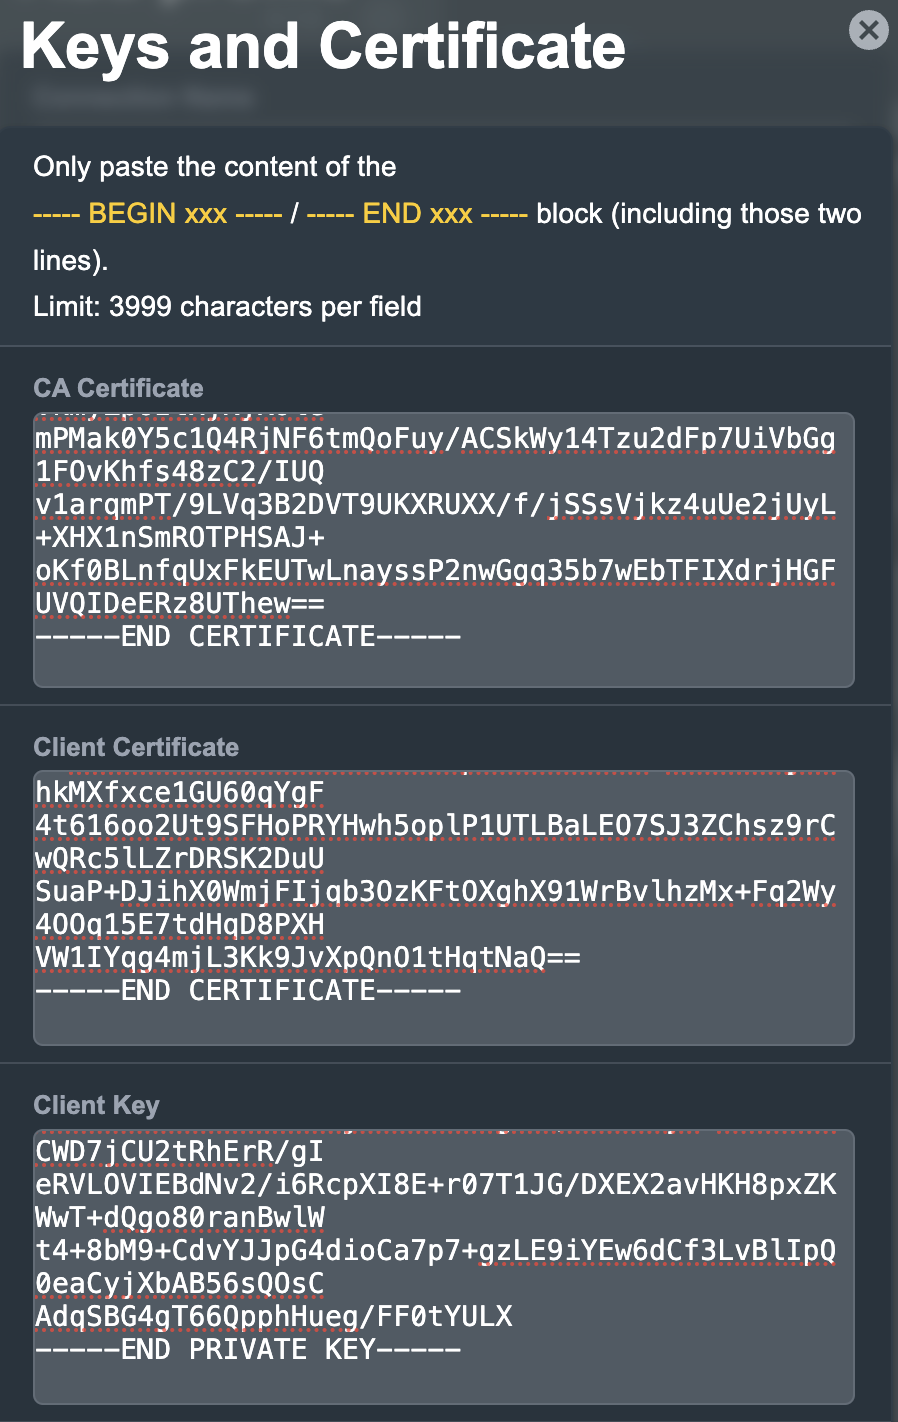
9. In the Certificate Authority field paste in the entire content of the ca.crt file.

—– BEGIN xxx —– / —– END xxx —– block (including those two lines).

10. In the Client Certificate field paste in the entire content of the client.crt file.

—– BEGIN xxx —– / —– END xxx —– block (including those two lines).

11. In the Client Key field paste in the entire content of the client.key file.

—– BEGIN xxx —– / —– END xxx —– block (including those two lines).

Then click OK.

Asus CyberGhost enter certs and keys

8. Click Apply and Enable at the bottom of the page.

Asus CyberGhost profile

If you only want certain devices to connect to the OpenVPN Client profile you are setting up instead of all the devices connected to the FlashRouter’s network click into the profile and disable Apply to all devices. Then click Devices and select the devices that you want to connect to VPN.

Asus VPN devices
Asus VPN select devices

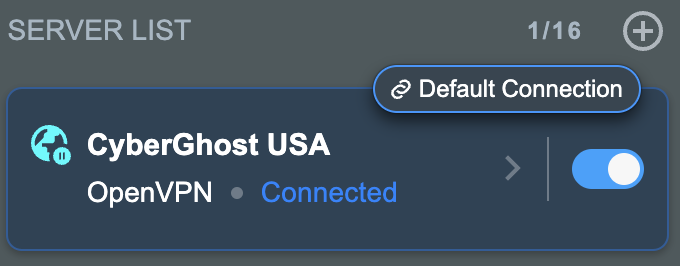
9. At the top of the page set the Service State toggle to ON to activate the VPN connection.

Asus CyberGhost connected

Verify a successful CyberGhost connection

  1. You should now see a CONNECTED message.
  2. Visit What is my IP Address from a private/incognito browser to verify your new IP address and virtual location.

In some cases you may notice that the location is not showing the same location as the server you have input in your router settings; this is because geo tracking tools are often tricked by VPN connections. As long as you see an IP address that is not the same as your normal Internet IP address then you are indeed connected to CyberGhost.

How to change the CyberGhost server

  1. Follow the steps at the top of the page to create a new CyberGhost location profile in your account.
  2. Then proceed with the settings same as initial setup.

TROUBLESHOOTING

Still having issues? Visit the VPN Troubleshooting section.

Troubleshoot Here

NordVPN Merlin OpenVPN Setup

TeamFlashRouters · Jan 11, 2023 ·

Preparing for NordVPN Merlin Setup

Obtain your NordVPN manual Username and Password

If you are not already an NordVPN user Sign Up Now.

1. Log in to your account on the NordVPN website.

NordVPN login

2. Click NordVPN on the left hand side and then click Setup NordVPN manually.

NordVPN setup manually

3. Enter in the verification code that was sent to your email.

NordVPN verify code

4. Copy and paste your NordVPN manual username and password to a secure location. This is the username and password you will enter into the router settings to connect to NordVPN.

NordVPN credentials

Download your NordVPN .ovpn file

1. There are two options for obtaining the .ovpn file. The first and recommended is to navigate to NordVPN’s server recommendation page. Click Recommended Server to display the fastest server based on your actual location. You can adjust the country if you don’t want to connect to the recommended country.

Then click Show Available Protocols. Click Download Config next to OpenVPN UDP. This will download the .ovpn file to your computer for this server. Do not open this file.

NordVPN Recommended Server

The second method to obtain a server is for connecting to a specific server number that you know you want to use. This applies to NordVPN Dedicated IP servers if you are signed up for that service. Go to NordVPN’s .ovpn file page. Then search for the server number that you want to use and click Download UDP.

NordVPN Download Specific Server

Merlin Router Setup for NordVPN

Login to Asus Merlin firmware settings in a browser on any computer or smart device connected to the Merlin FlashRouter’s network.

1. Navigate to the VPN tab.

Merlin VPN Tab

2. Navigate to the VPN Client tab.

Merlin VPN Client Tab

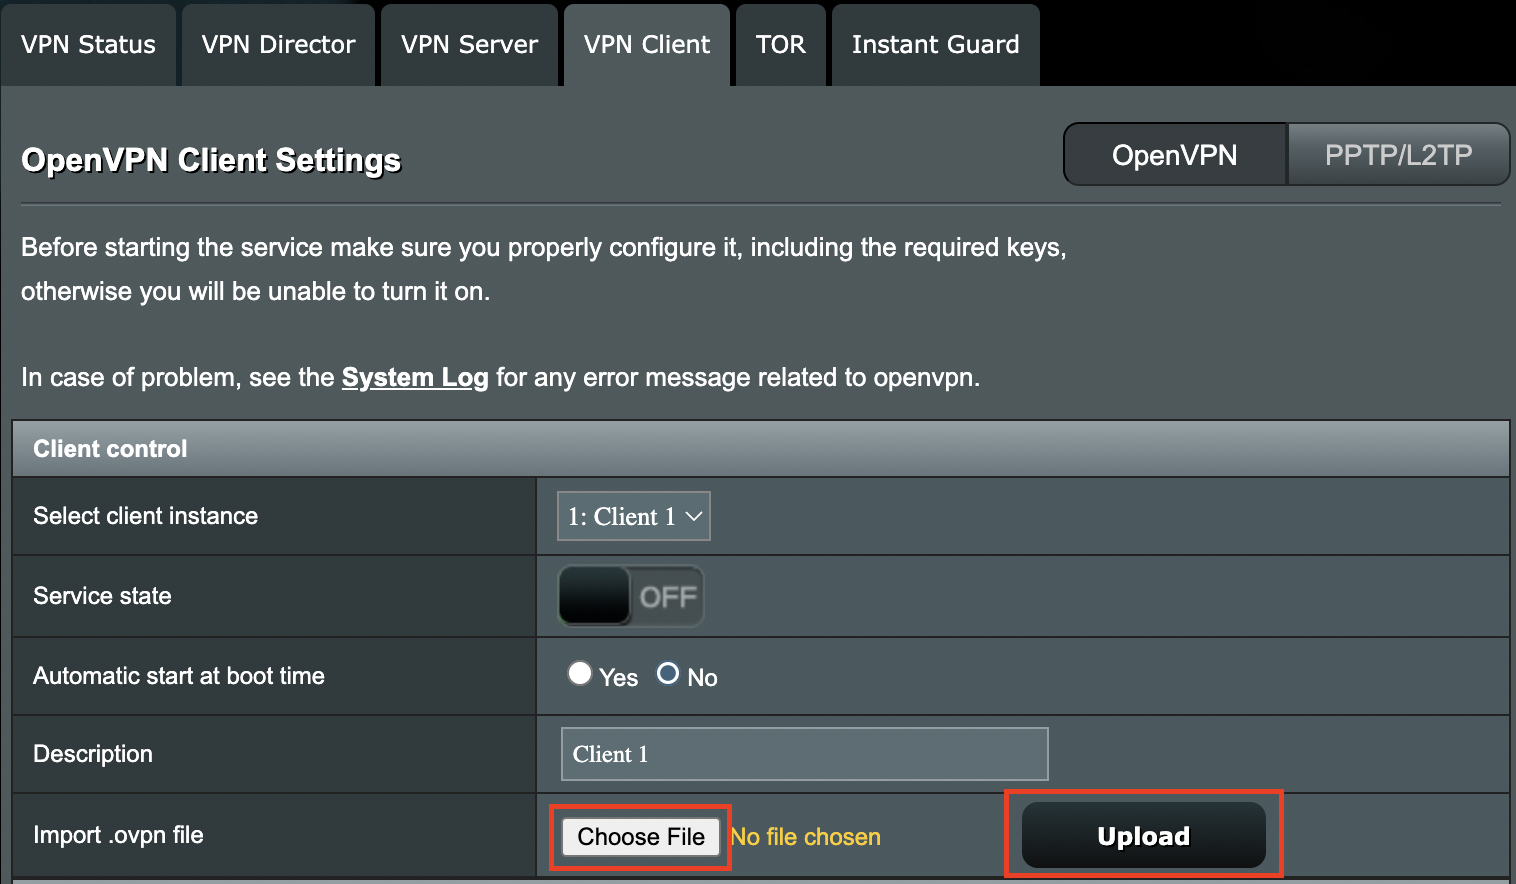
3. Click Choose file and select the .ovpn file you downloaded earlier. Then click Upload.

Merlin Choose File Upload

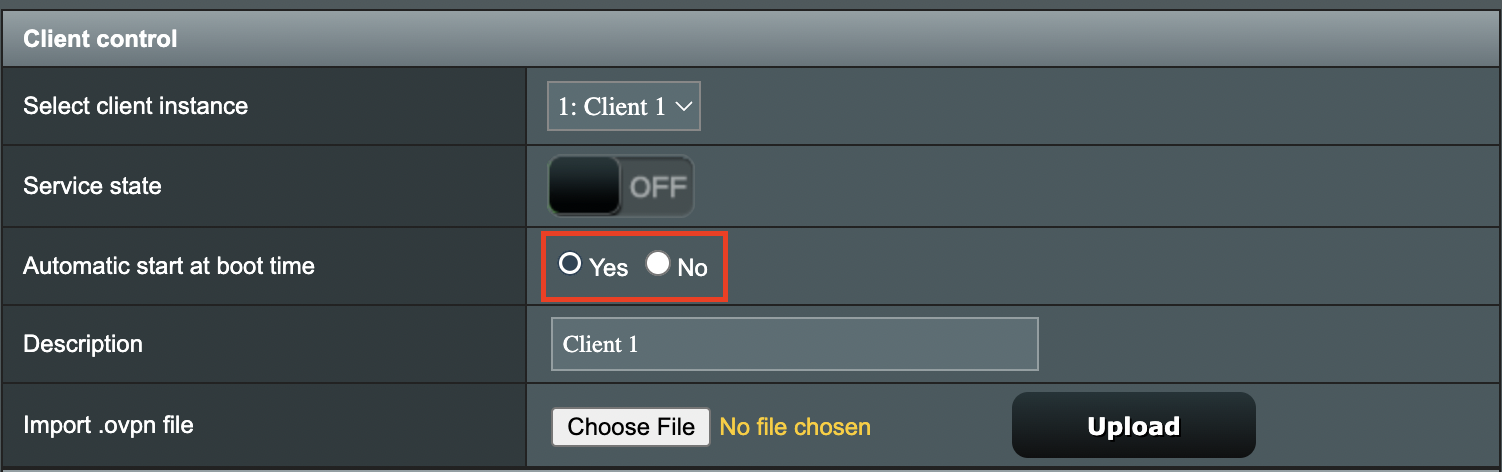
4. Set Automatic Start at boot time to Yes if you want the VPN connection to begin automatically when the router is powered off and back on.

Merlin Automatic Start at boot time

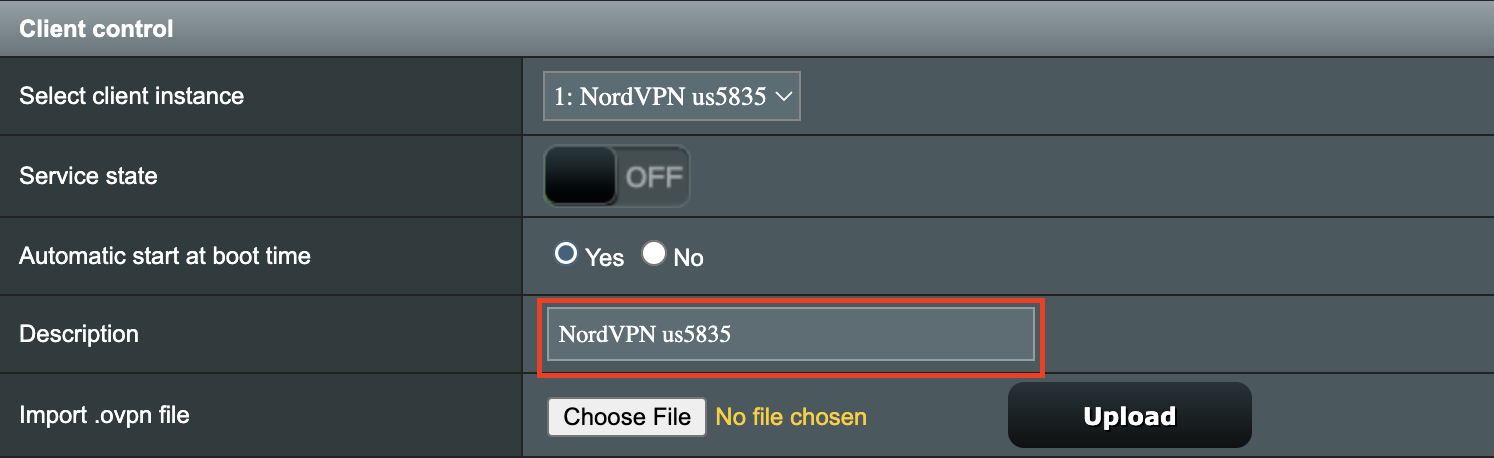
5. In the Description field enter in the name you’d like to use for this OpenVPN Client profile. We typically advise entering in the location or server number here. Our example server was in us5835.nordvpn.com so I have entered in NordVPN us5835.

Merlin NordVPN Description

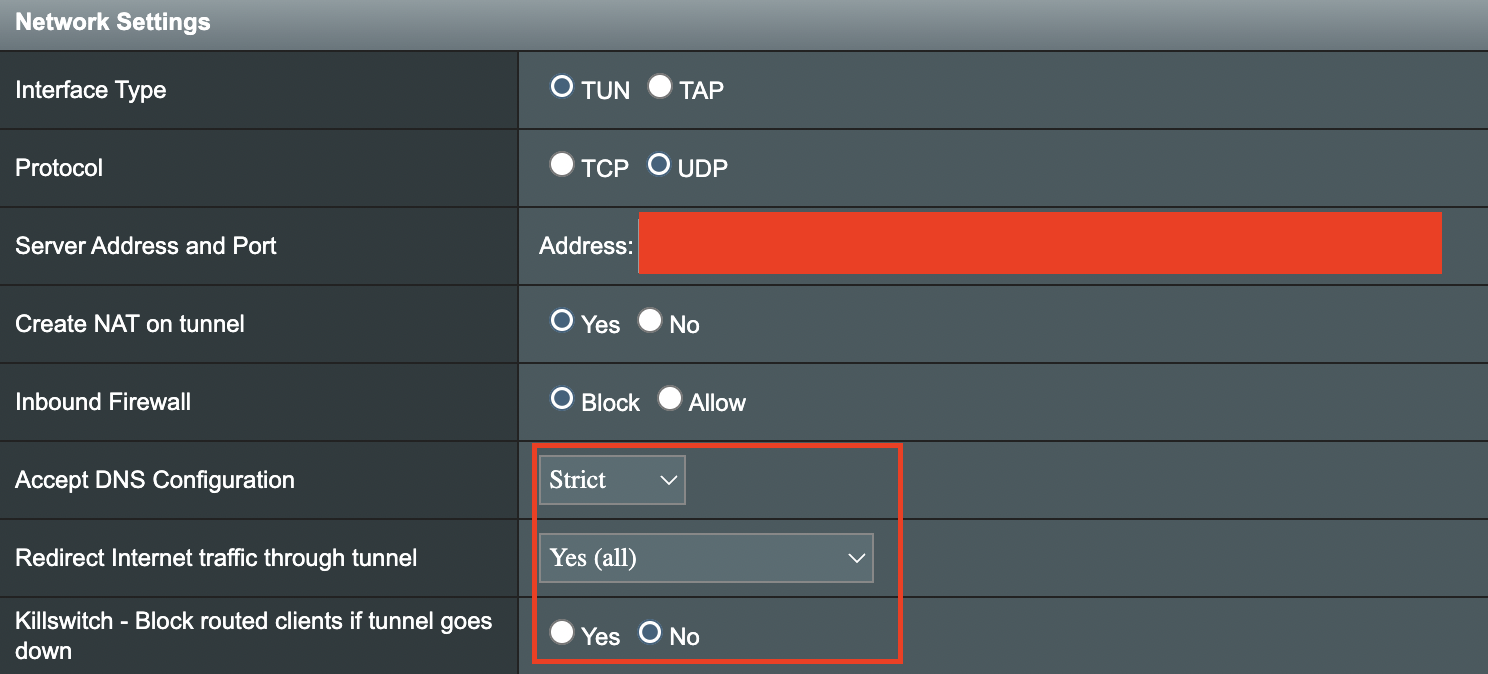
6. Set Accept DNS Configuration to Strict. Set Redirect Internet traffic through tunnel to Yes (all). Set Kill Switch to Yes or No depending on if you want the Internet to be killed if the VPN connection drops.

Merlin Accept DNS configuration Redirect Internet and Kill Switch

If you only want certain devices to connect to the OpenVPN Client profile you are setting up instead of all the devices connected to the FlashRouter’s network please set the Redirect Internet traffic through tunnel to VPN Director. Then complete the instructions on this page and then view our VPN Director guide.

7. Enter your NordVPN username and password that you obtained earlier in the Username and Password. Note that these are different from your NordVPN email login and password.

Merlin VPN Username and Password

8. Click Apply at the bottom of the page.

9. At the top of the page set the Service State toggle to ON to activate the VPN connection.

Merlin Service State All Providers

Verify a successful NordVPN connection

  1. You should now see a CONNECTED message.
  2. Visit NordVPN’s IP Check to verify your new IP address and virtual location.

In some cases you may notice that the location is not showing the same location as the server you have input in your router settings; this is because geo tracking tools are often tricked by VPN connections. As long as you see an IP address that is not the same as your normal Internet IP address then you are indeed connected to NordVPN.

How to change the NordVPN server

  1. Follow the steps at the top of the page to obtain a new .ovpn file.
  2. Then proceed with the settings same as initial setup.

TROUBLESHOOTING

Still having issues? Visit the VPN Troubleshooting section.

Troubleshoot Here

NordVPN Asus AX1800S OpenVPN Setup

TeamFlashRouters · Feb 26, 2024 ·

Preparing for NordVPN Asus AX1800S Setup

Obtain your NordVPN manual Username and Password

If you are not already an NordVPN user Sign Up Now.

1. Log in to your account on the NordVPN website.

NordVPN login

2. Click NordVPN on the left hand side and then click Setup NordVPN manually.

NordVPN setup manually

3. Enter in the verification code that was sent to your email.

NordVPN verify code

4. Copy and paste your NordVPN manual username and password to a secure location. This is the username and password you will enter into the router settings to connect to NordVPN.

NordVPN credentials

Download your NordVPN .ovpn file

1. There are two options for obtaining the .ovpn file. The first and recommended is to navigate to NordVPN’s server recommendation page. Click Recommended Server to display the fastest server based on your actual location. You can adjust the country if you don’t want to connect to the recommended country.

Then click Show Available Protocols. Click Download Config next to OpenVPN UDP. This will download the .ovpn file to your computer for this server. Do not open this file.

NordVPN Recommended Server

The second method to obtain a server is for connecting to a specific server number that you know you want to use. This applies to NordVPN Dedicated IP servers if you are signed up for that service. Go to NordVPN’s .ovpn file page. Then search for the server number that you want to use and click Download UDP.

NordVPN Download Specific Server

Asus AX1800S Router Setup for NordVPN

Login to Asus firmware settings in a browser on any computer or smart device connected to the FlashRouter’s network.

1. Navigate to the VPN tab.

Merlin VPN Tab

2. Navigate to the VPN Client tab.

Asus AX1800S VPN Settings

3. Click Add Profile.

Asus AX1800S VPN Settings

4. Click Choose file and select the .ovpn file you downloaded earlier. Then click Upload.

Asus AX1800S OpenVPN upload

5. In the Description field enter in the name you’d like to use for this OpenVPN Client profile. We typically advise entering in the location or server number here.

6. Enter your NordVPN username and password that you obtained earlier in the Username and Password. Note that these are different from your NordVPN email login and password. Click OK.

7. Click the Activate button.

Verify a successful NordVPN connection

  1. You should now see a check mark in the Connection Status area.
  2. Visit NordVPN’s IP Check to verify your new IP address and virtual location.

In some cases you may notice that the location is not showing the same location as the server you have input in your router settings; this is because geo tracking tools are often tricked by VPN connections. As long as you see an IP address that is not the same as your normal Internet IP address then you are indeed connected to NordVPN.

How to change the NordVPN server

  1. Follow the steps at the top of the page to obtain a new .ovpn file.
  2. Then proceed with the settings same as initial setup.
  3. Be sure to deactivate a previously active connection before activating the new one. You do not want to connect to two at the same time.

TROUBLESHOOTING

Still having issues? Visit the VPN Troubleshooting section.

Troubleshoot Here

ExpressVPN Cudy OpenVPN Setup

TeamFlashRouters · Feb 29, 2024 ·

Preparing for ExpressVPN Cudy Setup

Obtain your ExpressVPN OpenVPN Information

If you are not already an ExpressVPN user Sign Up Now.

1. Log in to your account on the ExpressVPN website.

ExpressVPN login page

2. Successfully log in with your account information. Select More.

3. Select Manual Configuration and copy the Username and Password that are displayed on the right hand side of the screen.

ExpressVPN Manual Configuration
ExpressVPN username and password

4. Click the Server Location that you want to connect to. This will download a .ovpn file to your computer that we will use later on. There is no need to open the file. For this example I have selected New York but feel free to select any server listed there.

ExpressVPN Download .ovpn file

Cudy Router Setup for ExpressVPN

Login to Cudy firmware settings in a browser on any computer or smart device connected to the Cudy FlashRouter’s network.

1. Click General Settings.

Cudy General Settings

2. Click VPN.

Cudy VPN Tab

3. Toggle the Enable switch to On.

Cudy enable VPN

4. Select OpenVPN Client from the Protocol dropdown.

Cudy select OpenVPN Client

5. Click Browse and select the .ovpn file you downloaded earlier. You should see the server file name listed next to Current Config File after doing so.

Cudy OpenVPN Browse button

6. Enter your ExpressVPN username and password that you obtained earlier in the Username and Password. Note that these are different from your ExpressVPN email login and password.

Cudy ExpressVPN enter username and password

7. Click Save & Apply at the bottom of the page.

Verify a successful ExpressVPN connection

  1. You should now see a CONNECTED message.
  2. Visit ExpressVPN’s IP Check to verify your new IP address and virtual location.

In some cases you may notice that the location is not showing the same location as the server you have input in your router settings; this is because geo tracking tools are often tricked by VPN connections. As long as you see an IP address that is not the same as your normal Internet IP address then you are indeed connected to ExpressVPN.

How to change the ExpressVPN server

  1. Follow the steps at the top of the page to obtain a new .ovpn file.
  2. Then proceed with the settings same as initial setup.

TROUBLESHOOTING

Still having issues? Visit the VPN Troubleshooting section.

Troubleshoot Here

IPVanish Cudy OpenVPN Setup

TeamFlashRouters · Feb 29, 2024 ·

Preparing for IPVanish Cudy Setup

Download your IPVanish .ovpn file

If you are not already an IPVanish user Sign Up Now.

1. Log in to your account on the IPVanish website.

IPVanish login

2. Successfully log in with your account information then go to IPVanish .ovpn file page.

3. Click on the .ovpn file for the server location you want to use to dowloand the .ovpn file. Do not open this file.

IPVanish download ovpn

Cudy Router Setup for IPVanish

Login to Cudy firmware settings in a browser on any computer or smart device connected to the Cudy FlashRouter’s network.

1. Click General Settings.

Cudy General Settings

2. Click VPN.

Cudy VPN Tab

3. Toggle the Enable switch to On.

Cudy enable VPN

4. Select OpenVPN Client from the Protocol dropdown.

Cudy select OpenVPN Client

5. Click Browse and select the .ovpn file you downloaded earlier. You should see the server file name listed next to Current Config File after doing so.

Cudy OpenVPN Browse button

6. Enter your IPVanish account login email and password that you obtained earlier in the Username and Password.

Cudy IPVanish enter username and password

7. Click Save & Apply at the bottom of the page.

Verify a successful IPVanish connection

  1. You should now see a CONNECTED message.
  2. Visit IPVanish’s IP Check to verify your new IP address and virtual location.

In some cases you may notice that the location is not showing the same location as the server you have input in your router settings; this is because geo tracking tools are often tricked by VPN connections. As long as you see an IP address that is not the same as your normal Internet IP address then you are indeed connected to IPVanish.

How to change the IPVanish server

  1. Follow the steps at the top of the page to obtain a new .ovpn file.
  2. Then proceed with the settings same as initial setup.

TROUBLESHOOTING

Still having issues? Visit the VPN Troubleshooting section.

Troubleshoot Here

PrivateInternetAccess (PIA) Cudy OpenVPN Setup

TeamFlashRouters · Feb 29, 2024 ·

Preparing for PIA Cudy Setup

Download your PIA .ovpn file

If you are not already a PIA user Sign Up Now.

1. Log in to your account on the PIA website.

PIA login

2. Successfully log in with your account information then go to PIA’s OpenVPN Config Generator.

3. On the OpenVPN Configuration Generator select the following:

OpenVPN Version: OpenVPN 2.4 or newer

Select Platform: Linux

Select Region: Choose the server location you’d like to connect to

Select Port: Typically we recommend UDP/1198 RSA-2048 AES-128-CBC SHA1 for best speeds but feel free to select the one you want to use.

4. Click Generate to download the .ovpn file. Do not open this file once it is downloaded.

PIA Generate .ovpn file

Cudy Router Setup for PIA

Login to Cudy firmware settings in a browser on any computer or smart device connected to the Cudy FlashRouter’s network.

1. Click General Settings.

Cudy General Settings

2. Click VPN.

Cudy VPN Tab

3. Toggle the Enable switch to On.

Cudy enable VPN

4. Select OpenVPN Client from the Protocol dropdown.

Cudy select OpenVPN Client

5. Click Browse and select the .ovpn file you downloaded earlier. You should see the server file name listed next to Current Config File after doing so.

Cudy OpenVPN Browse button

6. Enter your PIA account login username and password in the Username and Password.

Cudy PIA enter username and password

7. Click Save & Apply at the bottom of the page.

Verify a successful PIA connection

  1. You should now see a CONNECTED message.
  2. Visit PIA’s IP Check to verify your new IP address and virtual location.

In some cases you may notice that the location is not showing the same location as the server you have input in your router settings; this is because geo tracking tools are often tricked by VPN connections. As long as you see an IP address that is not the same as your normal Internet IP address then you are indeed connected to PIA.

How to change the PIA server

  1. Follow the steps at the top of the page to obtain a new .ovpn file.
  2. Then proceed with the settings same as initial setup.

TROUBLESHOOTING

Still having issues? Visit the VPN Troubleshooting section.

Troubleshoot Here

PureVPN Merlin WireGuard Setup

TeamFlashRouters · Jul 20, 2023 ·

Preparing for PureVPN Merlin Setup

Download your PureVPN .conf file

If you are not already an PureVPN user Sign Up Now.

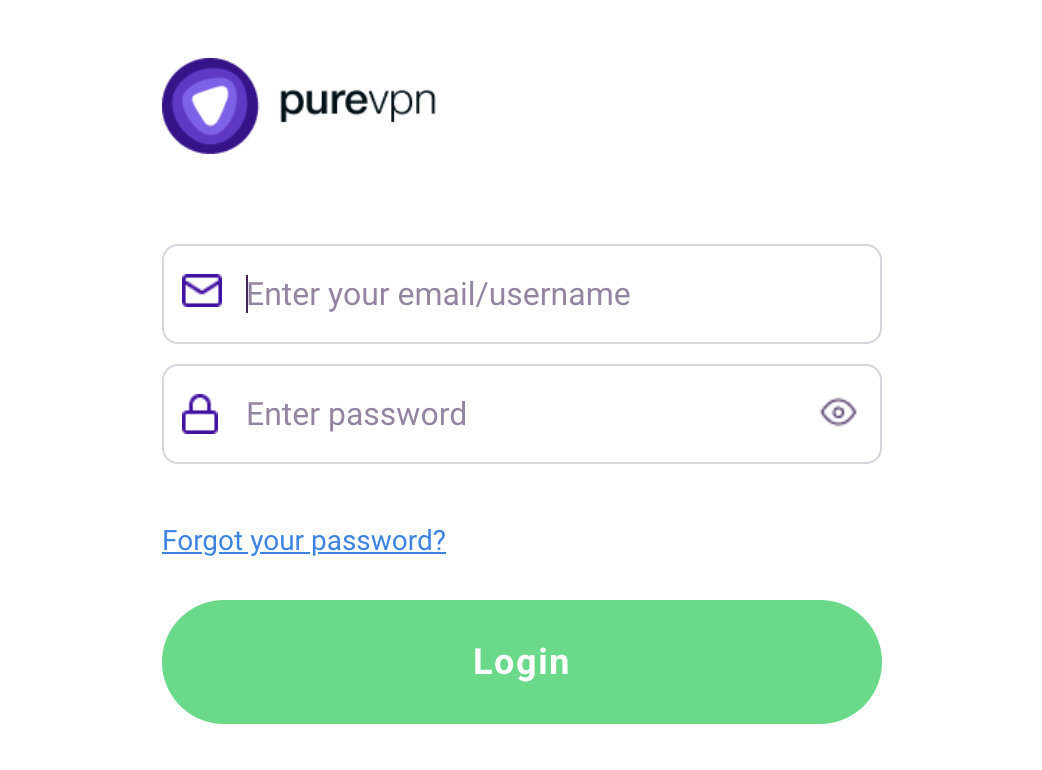
1. Log in to your account on the PureVPN website.

PureVPN Login

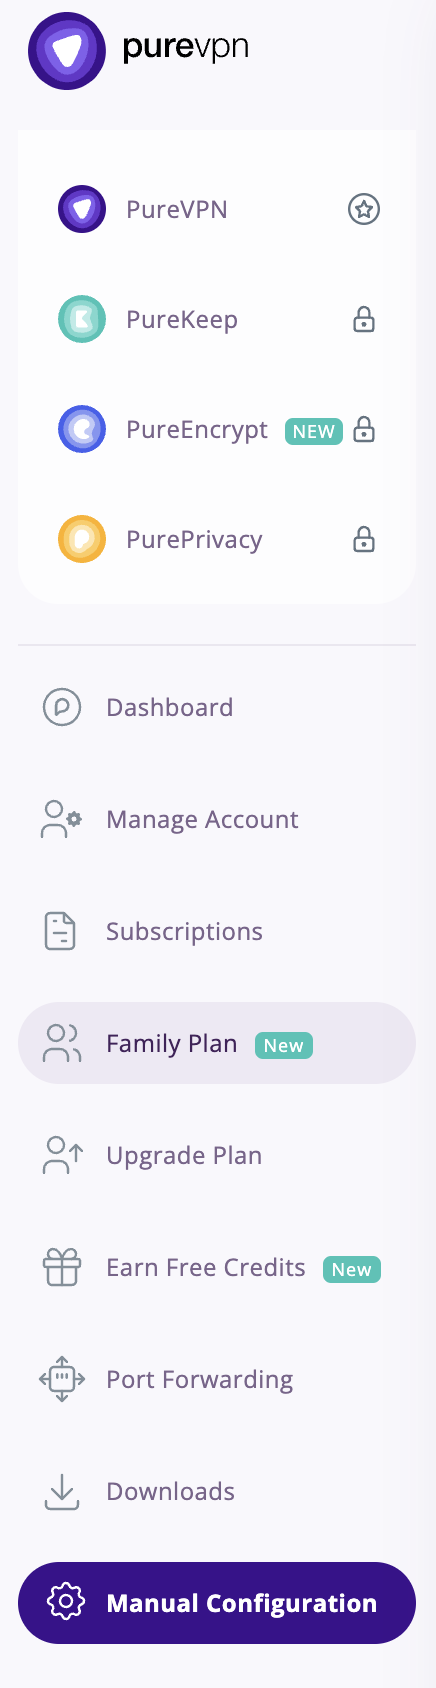
2. Select Manual Configuration.

PureVPN Manual Configuration

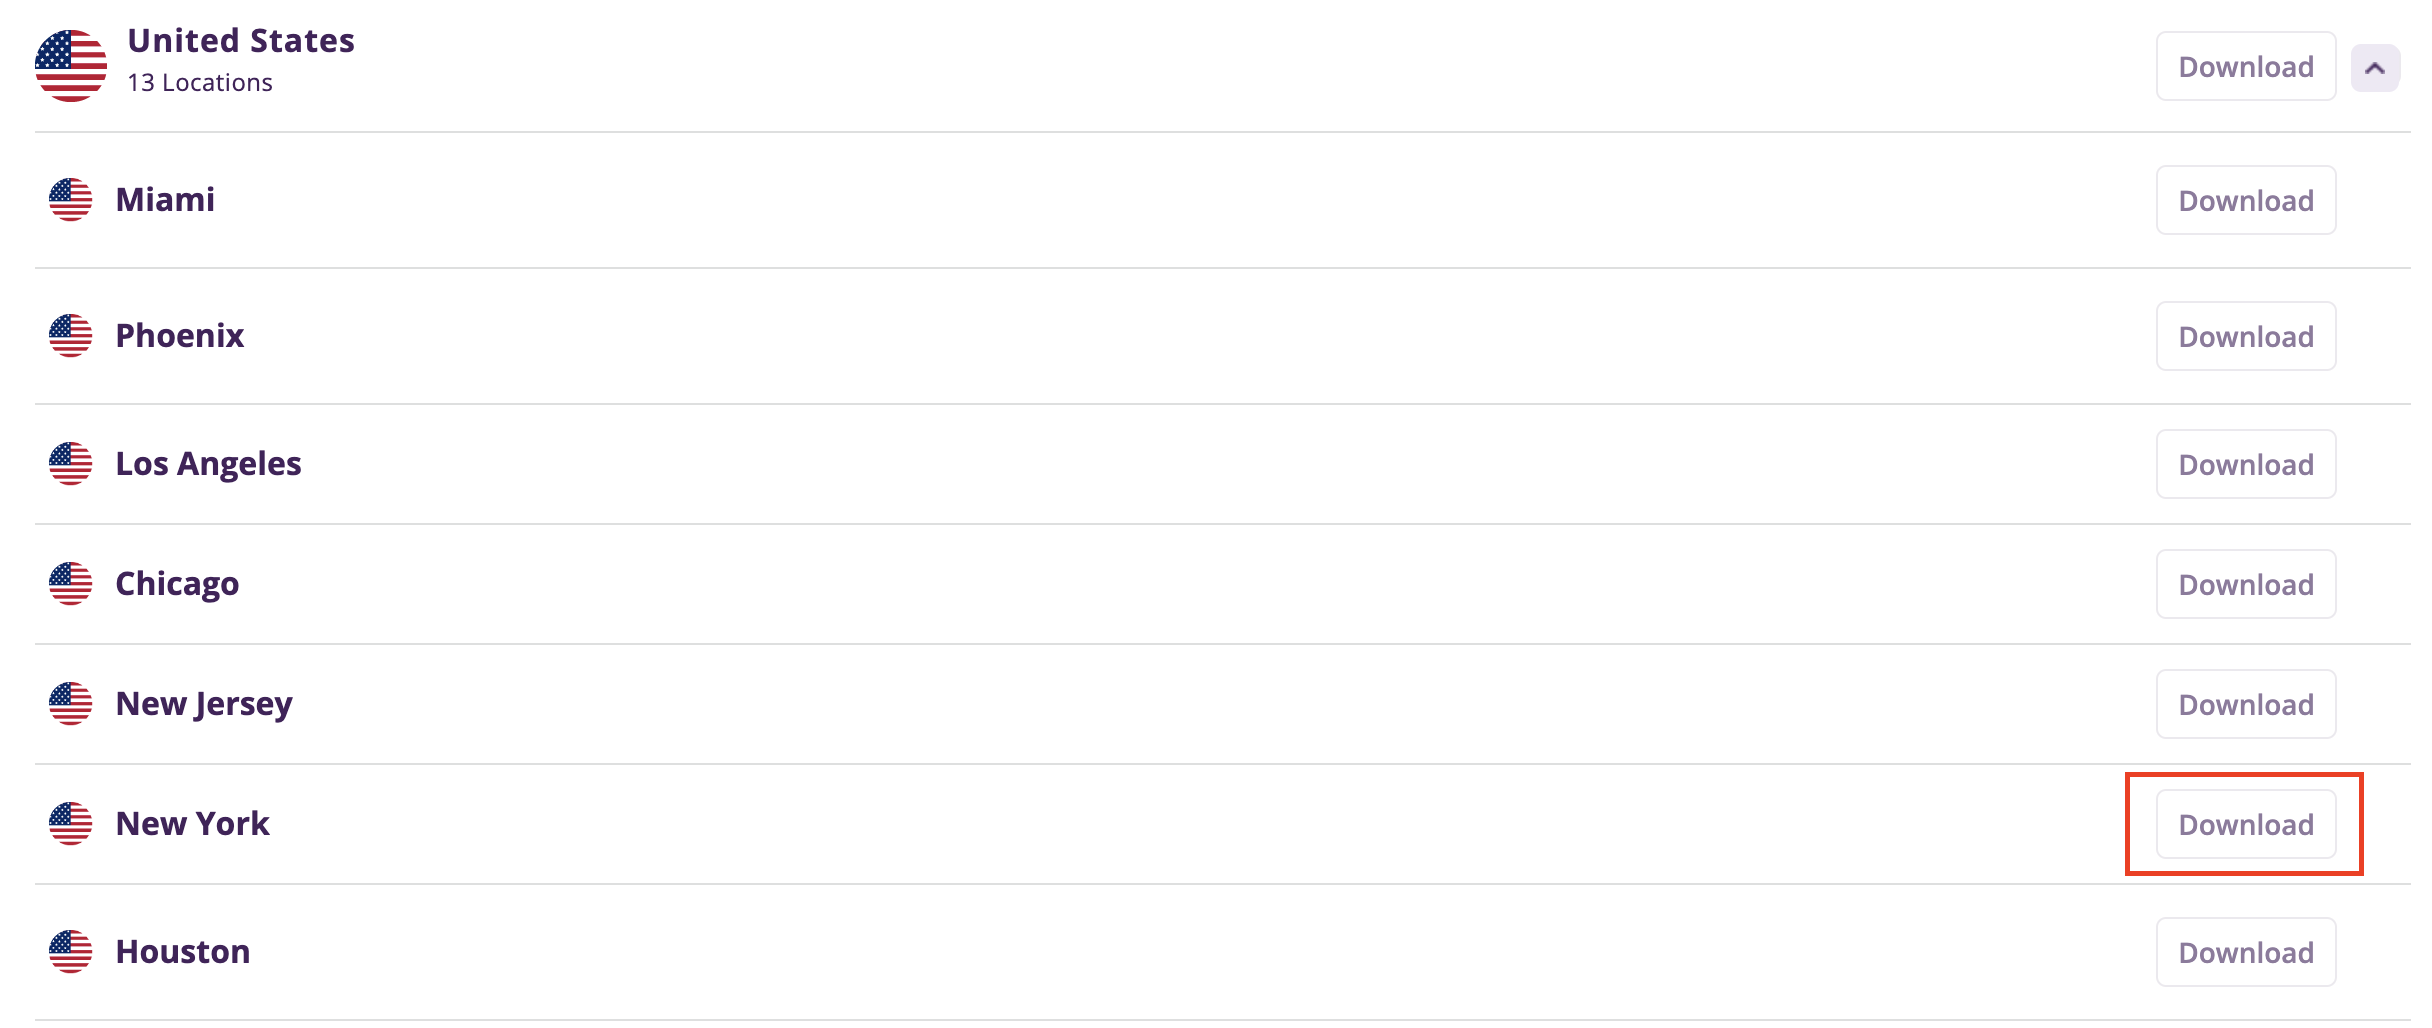
3. Select the Server Location you want to connect to and then click Download.

PureVPN select server location

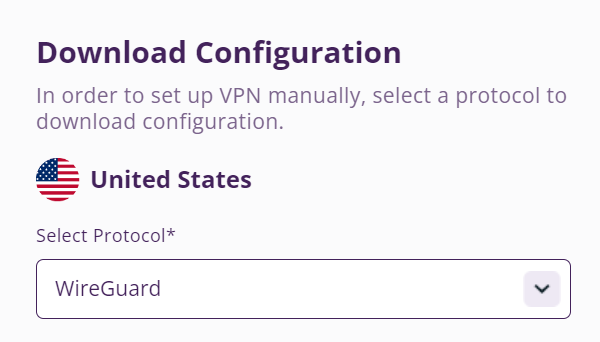
4. In the Select Protocol dropdown choose WireGuard.

PureVPN WireGuard

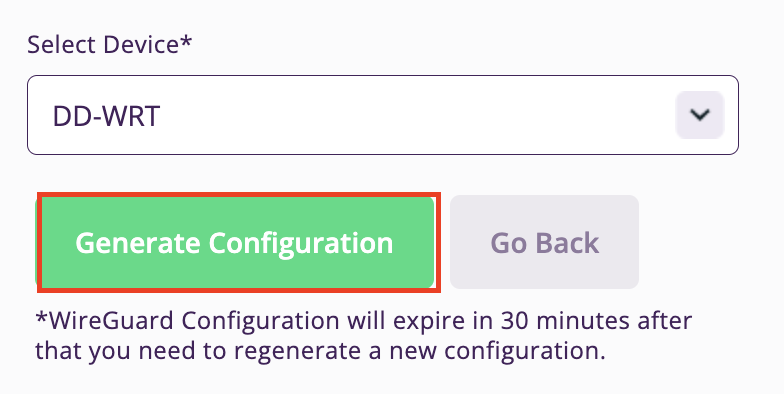
5. In the Select Device dropdown choose DD-WRT. Then click Generate Configuration. This will save a .conf file to your computer.

PureVPN Generate Config

Merlin Router Setup for PureVPN

Login to Asus Merlin firmware settings in a browser on any computer or smart device connected to the Merlin FlashRouter’s network.

1. Navigate to the VPN tab.

Merlin VPN Tab

2. Navigate to the VPN Client tab.

Merlin VPN Client Tab

3. Select WireGuard as the VPN Protocol.

Merlin VPN Client WireGuard

4. Click Choose file and select the .conf file you downloaded earlier. Then click Upload.

Merlin WireGuard Choose File Upload

5. In the Description field enter in the name you’d like to use for this WireGuard Client profile. We typically advise entering in the location here.

Merlin WireGuard ProtonVPN Description

6. Set Enable WireGuard to Yes.

Merlin Enable WireGuard

7. Click Apply at the bottom of the page and you should then see a Connected message appear.

Merlin WireGuard Connected

8. By default no devices are assigned to the new active WireGuard connection profile. Click the VPN Director tab to assign specific devices to the new WireGuard profile. Your IP will not be changed on your devices yet.

WireGuard select VPN Director

9. On the VPN Director page click the + symbol next to Add new rule.

WireGuard VPN Director Add new rule

10. Select the new WireGuard profile in the Interface dropdown.

WireGuard VPN Director select Interface

11. In the Local IP field enter in 192.168.50.0/24 if you want ALL devices connected to the FlashRouter’s network to use the WireGuard VPN connection. Click OK.

If you only want certain devices to connect to the WireGuard Client profile you have setting up instead of all the devices connected to the FlashRouter’s network please complete the instructions on our VPN Director guide.

12. Then click Apply at the bottom of the page.

Verify a successful PureVPN connection

Visit PureVPN’s IP Check to verify your new IP address and virtual location.

In some cases you may notice that the location is not showing the same location as the server you have input in your router settings; this is because geo tracking tools are often tricked by VPN connections. As long as you see an IP address that is not the same as your normal Internet IP address then you are indeed connected to PureVPN.

How to change the PureVPN server

  1. Follow the steps at the top of the page to obtain a new .conf file.
  2. Then proceed with the settings same as initial setup.

TROUBLESHOOTING

Still having issues? Visit the VPN Troubleshooting section.

Troubleshoot Here

Primary Sidebar

  • Troubleshooting
  • Router Access
  • Internet Connection Issues
  • WiFi Connectivity
  • General VPN Issues
  • TeamViewer Remote Support
  • DD-WRT Firmware
  • Facebook
  • Twitter
  • Instagram
  • Pinterest
  • YouTube

Footer