• Skip to primary navigation
  • Skip to main content
  • Skip to primary sidebar
  • Skip to footer

FlashRouters Support Portal

Prioritizing Privacy

  • SETUP GUIDES
    • Privacy Hero Router Setup Guide
    • ASUS-WRT Router Setup Guide
    • AsusWRT-Merlin Router Setup Guide
    • DD-WRT Router Setup Guide
    • ExpressVPN Router Setup Guide
    • GL.iNet Router Setup Guide
    • Roqos Core Router Setup Guide
  • TROUBLESHOOTING
    • Router Access
    • WiFi Connectivity
    • Internet Connection Issues
    • General VPN Issues
    • DD-WRT Firmware
    • TeamViewer Remote Support
  • FAQs
    • Router FAQs
    • VPN FAQs
    • Warranty and Returns FAQs
    • Sales FAQs
    • Shipping FAQs
    • Service Plan FAQs
  • Show Search
Hide Search

Search Results for: article 107 un

Roqos Core Internet Setup and Activation

TeamFlashRouters · Mar 15, 2022 ·

Follow this article when you receive your new Roqos Core router to create your Roqos account, connect your Roqos to the Internet, and customize your network so it is ready to use.

Create your Roqos account

1. From any device that has a browser such as a computer, smartphone, or tablet visit login.roqos.com

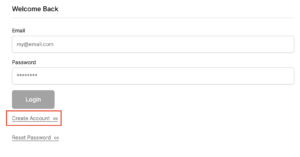
Roqos Login URL

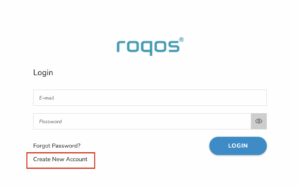
2. Select Create Account.

Roqos Create Account

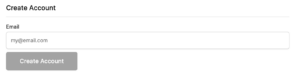
3. Enter the Email address and password you want to set for your Roqos account. This will be your login to the Roqos settings moving forward. Click Next.
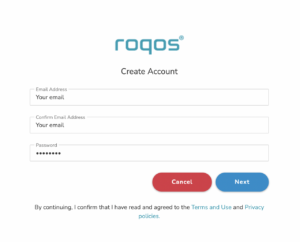
Roqos Enter Email

4. Enter the name and phone number you want associated with your Roqos. Click Next.
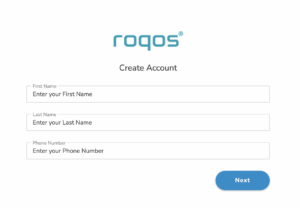
Roqos Enter Name and Number

5. Enter the address where your Roqos is located. This section may require a CAPTCHA to be completed to authenticate you are human. Click Create Account.
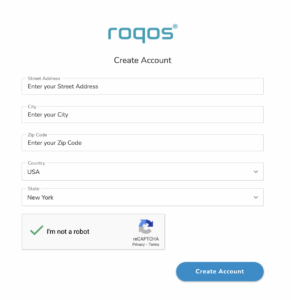
Roqos Enter Address

6. You have now created your Roqos account. In a new tab proceed to open the email from Roqos and click the Activate account button.
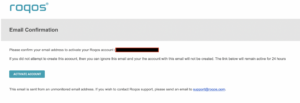
Roqos email activation

Activate your Roqos Internet

1. From the Account created page click Next to begin the Internet Setup of the Roqos.
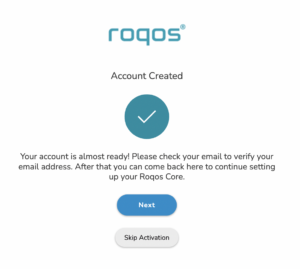
Roqos Account Created

2. Select the Roqos model Teal RC10-P. Click Next.
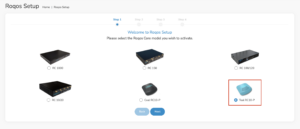
Roqos Model

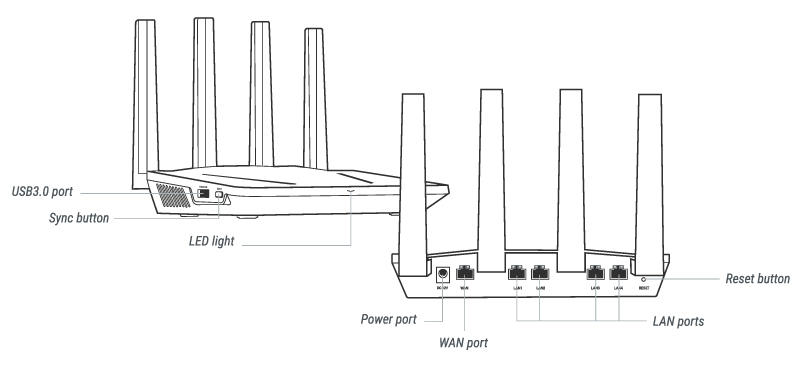
3. Connect the ethernet cable that came with your Roqos from the port labeled INTERNET on the back of your Roqos to an open ethernet port on your ISP Modem or other router in your network.
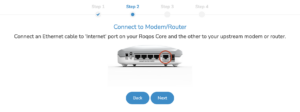
Roqos Wiring

4. Then connect the power adapter that came with the Roqos to the back of the Roqos. Wait for the light on the Roqos to begin blinking blue. Once your see the blinking blue lights on the Roqos click Next.
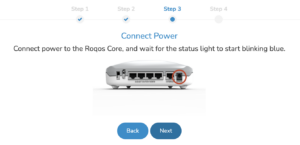
Roqos Power On

If your Roqos lights does not begin blinking blue after a long while please see the steps in this article and contact us.

5. Enter in the Roqos serial number found on the bottom of the device exactly as it appears there. Click Next.
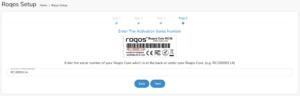
Roqos Activation Code

Setup your Roqos Network

1. Enter in a name that you would like to call the Roqos. This is just the Roqo’s device name and it is not the WiFi network name. Click Next.

Roqos Device Name

2. Select the Time Zone of your actual location from the dropdown. Click Next.

Roqos Time Zone

3. Set the WiFi name and password for the Roqos. The WiFi name should be unique and not a duplicate of an existing wireless network. This will be the name that appears in your wireless devices available network list and the password to join the devices to the network. Click Next.
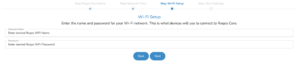
Roqos Set WiFi Name and Password

4. Select the custom alert settings as you best see fit using the toggle switches. We typically recommend having the first two toggles selected for Email Alerts and Consolidate Security Alerts. Click Next.
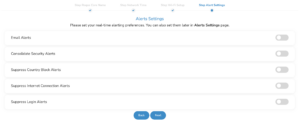
Begin connecting your devices to the Roqos network

You are now done setting up your Roqos to connect to the Internet and can begin joining your wireless devices to the Roqos network and exploring the Roqos Core Features.

Roqos Setup Done

TROUBLESHOOTING

Still having issues? Visit the VPN Troubleshooting section.

Troubleshoot Here

Flint/Slate GL.iNet Internet Setup

TeamFlashRouters · Apr 3, 2023 ·

Follow this article when you receive your new Flint or Slate GL.iNet router to connect it to the Internet.

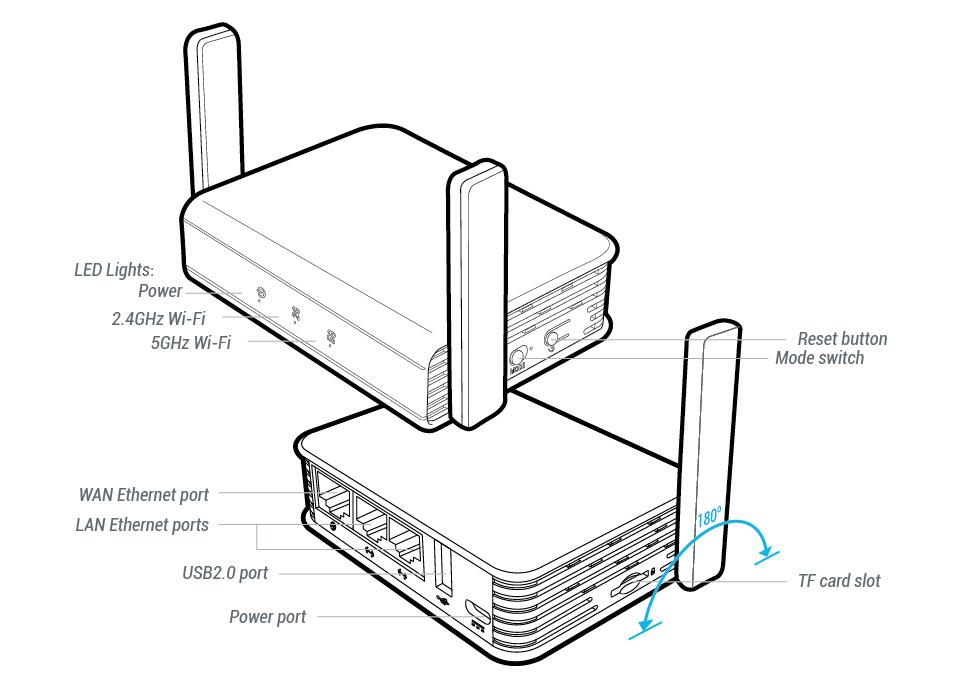
1. Connect the ethernet cable that came with the router from an open LAN ethernet port on your ISP modem or other router to the WAN port of the Flint or Slate GL.iNet router.

Flint Internet
Slate Internet

2. Connect the power to the router and wait about 2 minutes for the router to fully boot up.

3. Connect your computer, phone, or tablet to the GL.iNet router via wireless (FlashRouter24 / FlashRouter50) or via ethernet cable to one of the LAN ports on the router.

The FlashRouter WiFi password is printed on the sheet that came with the router and is set to Wireless#[First 5 characters of your router MAC]. The router MAC can be found on the bottom of your router if you cannot locate the sheet. For e.g. if your MAC is 1459C07E70A8 then your WiFi password is Wireless#1459C

Be sure to capitalize the W.

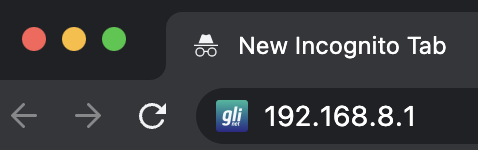
4. Once connected via wireless or ethernet on your device open your browser and go to 192.168.8.1

GL.iNet router access

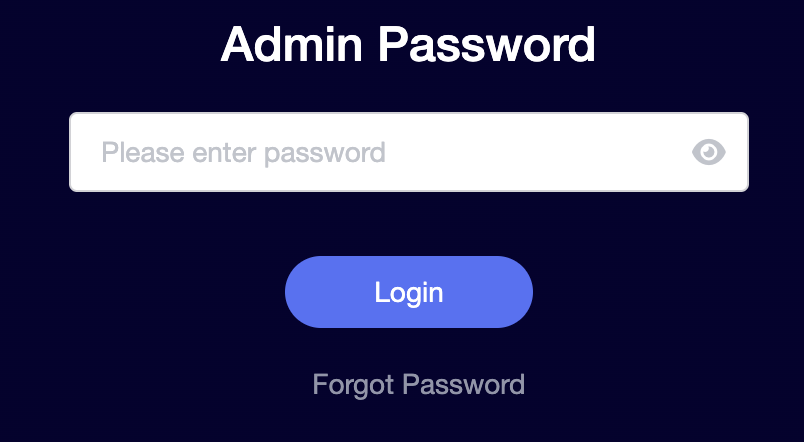
5. Enter openwrt as the admin password to access the GL.iNet firmware settings.

GL.iNet admin password enter

6. Verify that your Flint/Slate GL.iNet router is receiving a WAN IP Address and webpages are loading while connected to its network.

GL.iNet WAN Settings

TROUBLESHOOTING

Still having issues? Visit the VPN Troubleshooting section.

Troubleshoot Here

PPPoE Internet Setup

TeamFlashRouters · Mar 21, 2019 ·

Most ISPs do not require PPPoE credentials. If you are certain this is an ISP requirement in your setup, we kindly ask that you get in touch with your ISP to verify that they do in fact require PPPoE authentication and to provide you with the correct credentials to enter into your FlashRouter.

Before you enter your PPPoE credentials, you should have already setup your FlashRouter in a Single Router Setup with correct wiring. Once you enter PPPoE credentials you should then be able to connect to the internet.

If you are using a Dual Router Setup there is no need to enter PPPoE credentials if they are already entered in the existing router. You can disregard this article.

Enter your PPPoE credentials

DD-WRT Firmware

Navigate to Setup > Basic Setup

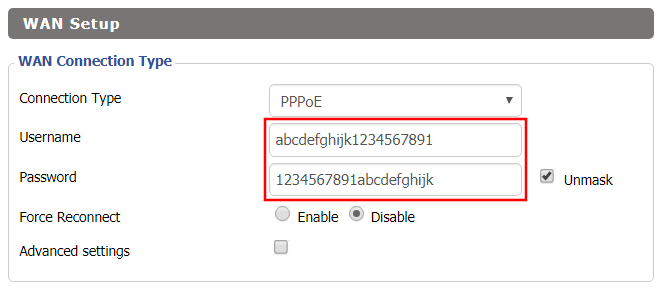
Access FlashRouters DD-WRT Admin Settings - Enter PPPOE Username and Password
  1. Set the Connection Type dropdown to PPPoE.
  2. Enter your ISP assigned PPPoE username and password.
  3. Click Apply Settings.

Power cycle your network devices

  1. Power off your ISP modem and the FlashRouter.
  2. Power on the ISP modem and wait for it to fully boot up.
  3. Power on the FlashRouter.

Verify a successful Internet connection

Once the FlashRouter is booted up connect one of your devices to the FlashRouter via Ethernet or Wireless.

Visit any website and make sure the page fully loads. Once you have verified a successful Internet connection, begin connecting your network devices to the FlashRouter via wired or WiFi.

Please be aware that our support is not able to replicate PPPoE issues on our end, which makes them challenging to troubleshoot. In the event of an issue we recommend using a Dual Router Setup.

Privacy Hero Activation and Setup

TeamFlashRouters · Feb 8, 2023 ·

Follow this article when you receive your new Privacy Hero router to create your Privacy Hero account, connect your Privacy Hero to the Internet, and customize your network so it is ready to use.

Your Privacy Hero router uses Cloud Based router management which means you can access the router settings from anywhere on any device that has an internet connection. You can follow these steps while connected to your phone or your other Wi-Fi network.

Create your Privacy Hero account

1. From any device that has a browser such as a computer, smartphone, or tablet visit app.privacyhero.com

App.PrivacyHero.com

2. Select Create Account.

Privacy Hero create Account

3. Enter the Email address you want to set for your Privacy Hero account. This will be your login to the Privacy Hero settings moving forward. Click Create Account.

Privacy Hero Enter account email

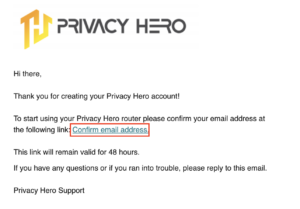
4. Go to your Email inbox and check for an email from Privacy Hero and click the Confirm email address link. This email may be in your Promotions or Spam inbox if it is not appearing in your main inbox.

Privacy Hero Confirm Email

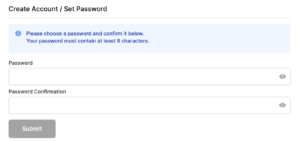
5. Enter the password that you want to use for your Privacy Hero account. Be sure to note this in a secure location so you do not forget. Click Submit.

Privacy Hero create password

6. You have now created your Privacy Hero account. You will use this login to access the Privacy Hero router settings.

Activate your Privacy Hero Internet and setup Wi-Fi

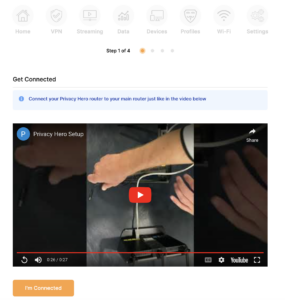
1. You will then be taken to the Router Activation steps. Connect the ethernet cable that the Privacy Hero came with from an open Ethernet port on your ISP modem or other router to the WAN/Internet (blue) port of the Privacy Hero.

Then power the Privacy Hero device on by connecting the power supply. This is shown in the video on the page as well. Wait about a minute or so for the Privacy Hero router to fully boot up and then click I’m Connected.

Wire Up Privacy Hero

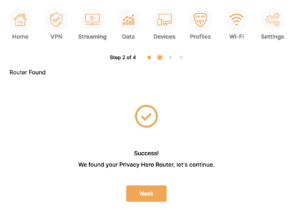
2. The next page may say Router Found or ask you to enter the Activation Code. If it asks for the Activation Code that will be the code printed on the bottom of the Privacy Hero. Enter this code and click Next.

Privacy Hero Router Found

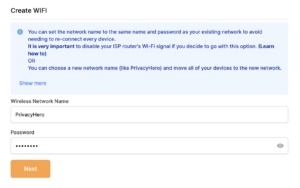
3. Set the Wi-Fi name and password for connecting your devices to the Privacy Hero network. Make sure it is not a duplicate name of an existing Wi-Fi network. Click Next.

Privacy Hero Set wifi name and password

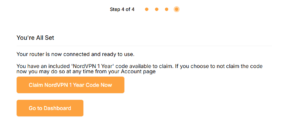
4. To activate your 1 Year NordVPN code:

Click on Claim NordVPN 1 Year Code Now

NordVPN Claim Code

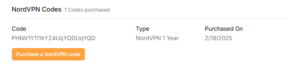
Go to the Account section of your router settings.

Copy the NordVPN code shown under Claim NordVPN 1 Year Code.

PH Nord Code

Go to the NordVPN activation page.

This code can be used with a new or existing NordVPN account.

NordVPN Activate Page

5. You are now all set to begin joining your devices to the new Privacy Hero network with the Wi-Fi name and password you entered and setting up some of the Privacy Hero features.
TROUBLESHOOTING

Still having issues? Visit the VPN Troubleshooting section.

Troubleshoot Here

My 5.0GHz network is not showing up

TeamFlashRouters · May 2, 2019 ·

Verify the device supports 5GHz

5.0GHz networks are not compatible with all devices so first make sure that you device’s wireless adapter supports 5GHz wireless frequencies.
If you are not sure, find out if your device support 5 GHz via Google search or by looking in the wireless hardware details in the device’s network settings. If you see Wireless a/b/g/n support then you have a compatible device. If you are missing the Wireless a then this means there is no 5 GHz support.
Enter the recommended wireless settings

Our team has tested the wireless functionality for each FlashRouter that we offer and shared our recommended wireless settings in our Wifi Setup area. Replicate the settings for your FlashRouter model found on that page.

Lower the wireless channel

Some devices do support 5.0GHz connections but not the higher channels that DD-WRT firmware offers.

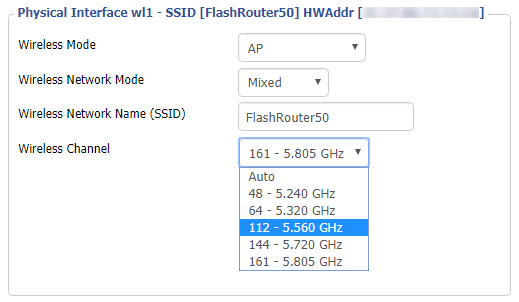
Navigate to Wireless > Basic Settings

Lower the wireless channel setting for the 5.0GHz band that is not showing. Based on our tests the most broadly compatible channels are 36, 48 and 161.

CLICK APPLY SETTINGS

Refresh your device's network adapter

The easiest way to accomplish this is by rebooting your device as the settings to reset your adapter may vary on all types of internet connected devices.

Review wireless Status

Navigate to Status > Wireless

The readouts on this page can help tell if there are errors with the FlashRouter’s wireless. View our article on how to read the Wireless Status page for more information.

My 2.4GHz network is not showing up

TeamFlashRouters · May 2, 2019 ·

If you ever have an issue with WiFi, you can always wire directly into the FlashRouter to verify and/or update your current WiFi settings.

Enter the recommended wireless settings

Our team has tested the wireless functionality for each FlashRouter that we offer and shared our recommended wireless settings in our Wifi Setup area. Replicate the settings for your FlashRouter model found on that page if the 2.4GHz is not showing.

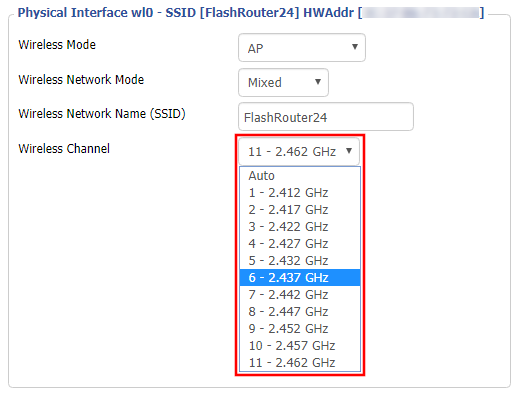
Change the wireless channel

Navigate to Wireless > Basic Settings

Change the wireless channel setting for the 2.4GHz band that is not appearing. The most broadly compatible channels are 6 and 11.

CLICK APPLY SETTINGS

Refresh your device's network adapter

In rare instances the wireless adapter for your device may stop picking up WiFi networks and must be reset. This will be different for each device, that is why the best way to refresh your wireless adapter is to simply reboot any device in question and see if the adapter now picks up your WiFi networks.

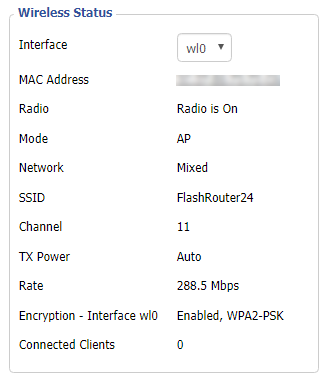
Review wireless Status

Navigate to Status > Wireless

The readouts on this page can help tell if there are errors with the FlashRouter’s wireless. View our article on how to read the Wireless Status page for more information.

Cudy Internet Setup

TeamFlashRouters · Feb 26, 2024 ·

Follow this article when you receive your new Cudy FlashRouter to connect it to the Internet.

1. Connect the ethernet cable that came with the router from an open LAN ethernet port on your ISP modem or other router to the WAN port if you purchased a Cudy AX3000 or to ethernet port #1 of the device marked Primary if you purchased a Cudy M1800 or Cudy M3000.

Cudy Mesh internet wiring

2. Connect the power to the router and wait about 2 minutes for the router to fully boot up.

3. Connect your computer, phone, or tablet to the Cudy router via wireless (FlashRouter24 / FlashRouter50) or via ethernet cable to one of the LAN ports on the router.

The FlashRouter WiFi password is printed on the sheet that came with the router and is set to Wireless#[First 5 characters of your router MAC]. The router MAC can be found on the bottom of your router if you cannot locate the sheet. For e.g. if your MAC is 1459C07E70A8 then your WiFi password is Wireless#1459C

Be sure to capitalize the W.

4. Once connected via wireless or ethernet on your device open your browser and go to 192.168.10.1

Cudy local IP access

5. Enter openwrt as the admin password to access the Cudy firmware settings.

Cudy router access

6. Verify that your Cudy FlashRouter is reporting as Internet and WAN Connected.

Cudy Verify Internet

6. Verify that your Cudy FlashRouter is reporting as Internet and WAN Connected.

7. If you purchased a Cudy M1800 or Cudy M3000 mesh package you can now take the unit labeled Node to the location you want it connecting from and power it up. It will connect to the Primary network that was just setup automatically. You will then see the Mesh Units number increase according to the number that you have purchased shortly.

Cudy Verify Mesh connection

TROUBLESHOOTING

Still having issues? Visit the VPN Troubleshooting section.

Troubleshoot Here

ExpressVPN/Aircove FlashRouter Internet Setup and Activation

TeamFlashRouters · Mar 16, 2022 ·

Follow this article when you receive your new ExpressVPN FlashRouter to connect your FlashRouter to the Internet via ExpressVPN and customize your network so it is ready to use.

Obtain your ExpressVPN Activation Code

If you are not already an ExpressVPN user Sign Up Now.

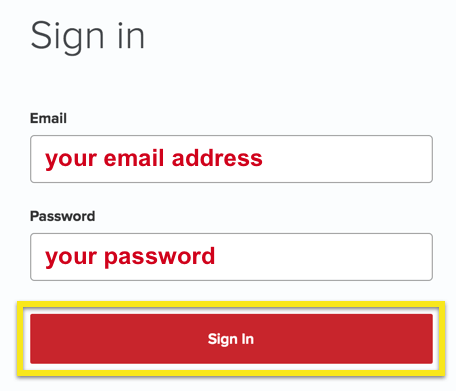
1. Visit ExpressVPN’s website login page.

ExpressVPN on FlashRouters Privacy App Setup - Sign Into ExpressVPN Dashboard

2. Copy your ExpressVPN Activation code and paste it into a document or leave this page open while you proceed with the instructions.

Access Router Settings

1. Connect to the FlashRouter’s network via ethernet cable or wireless.

The wireless network will appear as “Aircove”, “Linksys##”, “Netgear##”, or “Asus” and the password to join the network will be the default wireless password printed on the bottom of the router.

2. Open your web browser and enter expressvpnrouter.com or 192.168.132.1 in the URL.

ExpressVPNrouter.com
192.168.132.1

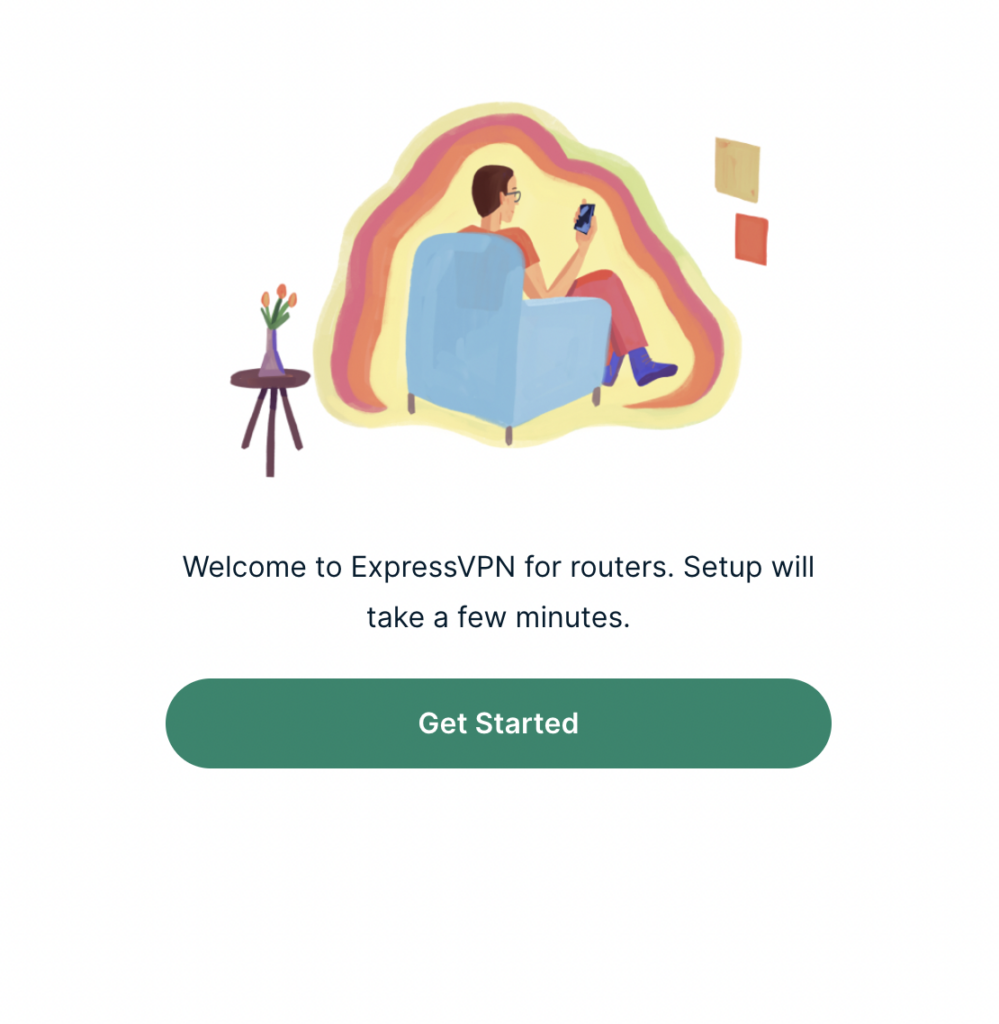
3. Click Get Started on the ExpressVPN page that is displayed.

ExpressVPN Get Started

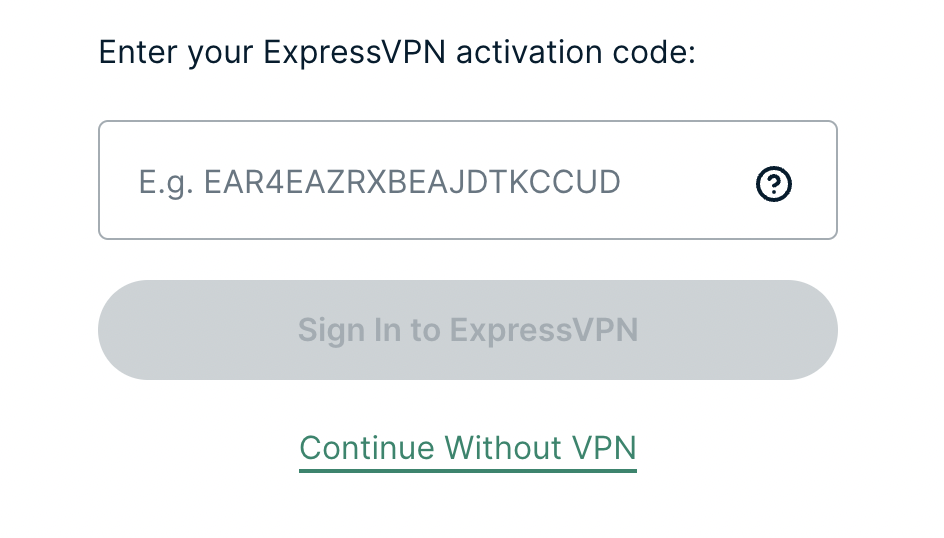
4a. If your FlashRouter is wired to the Internet correctly then you will be prompted to enter your ExpressVPN Activation Code found in your ExpressVPN account. Paste that in and click Sign in to ExpressVPN.

ExpressVPN Activation Code

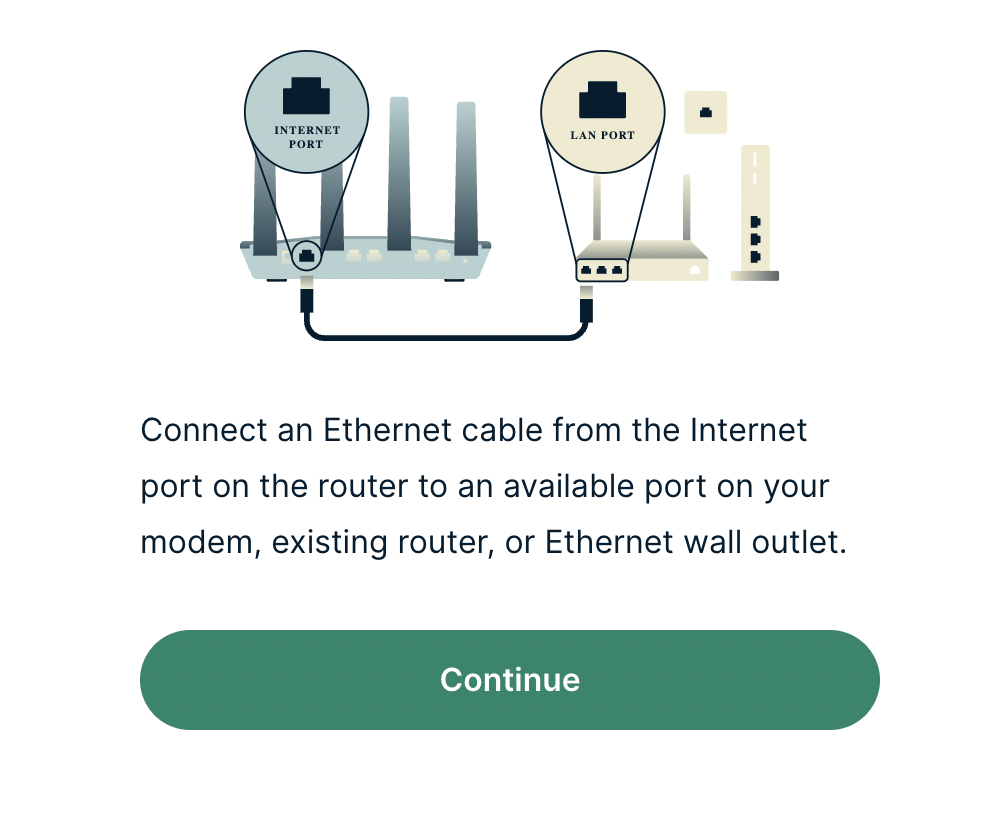
4b. If your FlashRouter is not wired correctly or is not receiving Internet properly make sure you are wired as detailed in the diagram that appears. If you are stuck at this screen we recommend powering off your ISP modem and any other router that the ExpressVPN FlashRouter is wired to and then powering them back up one by one.

Proceed with step “4a” above once the router is receiving Internet and you are prompted to enter the Activation Code.

ExpressVPN Wiring

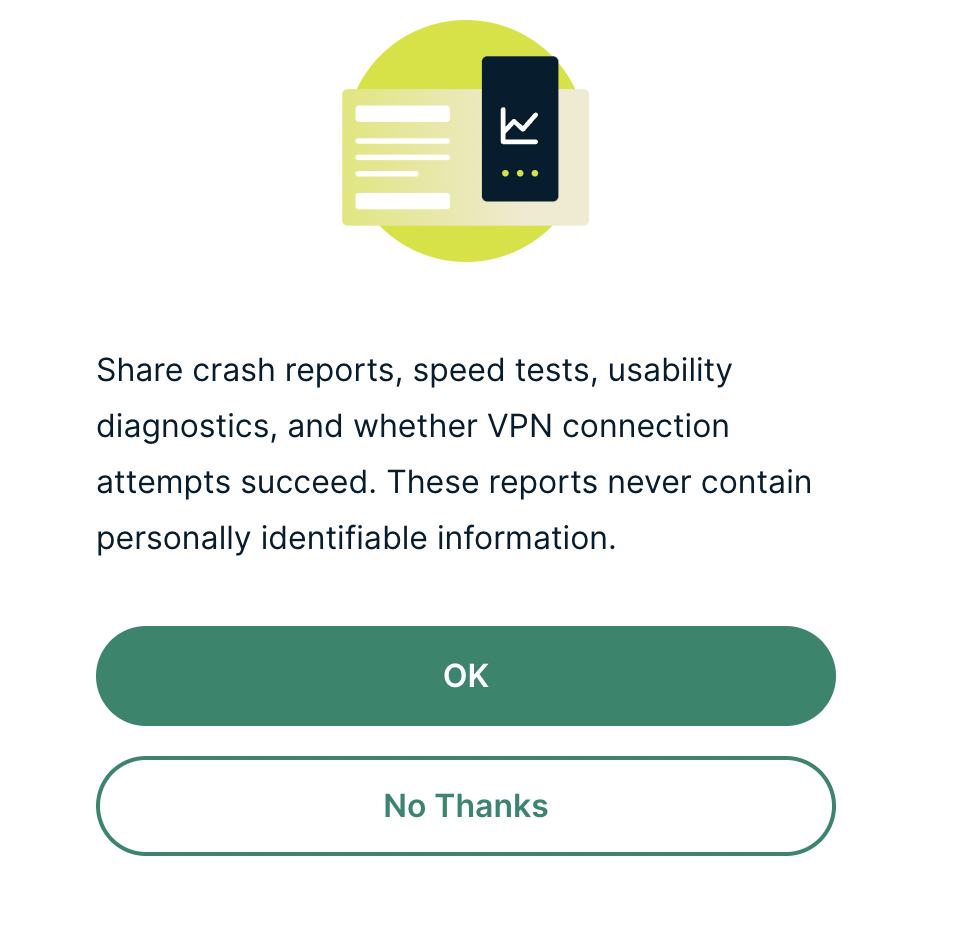
5. Select if you want to share anonymous crash report data with ExpressVPN to help them improve the firmware for future releases.

ExpressVPN Share Crash Report

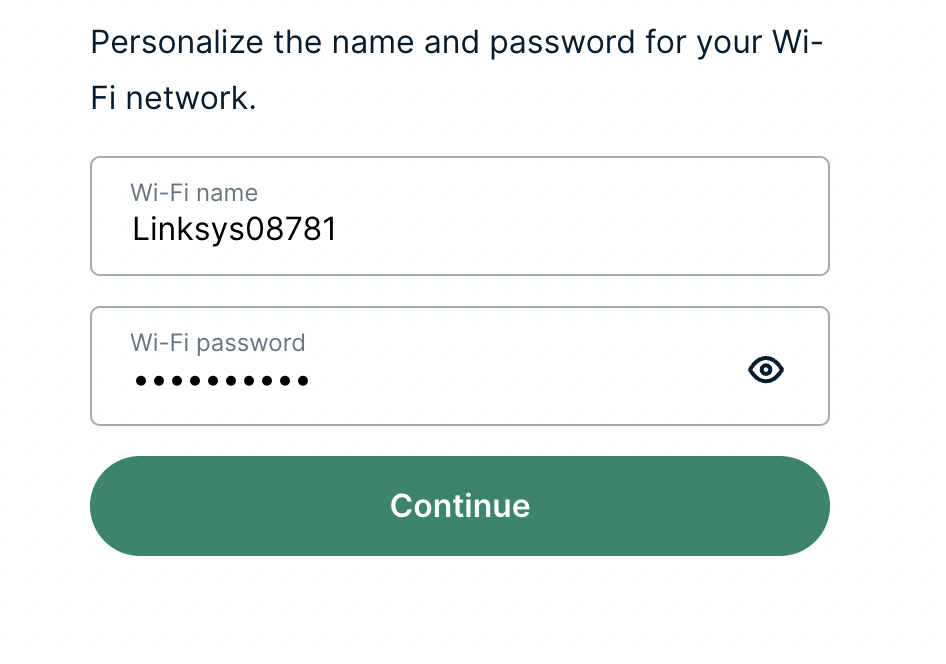
6. Set the WiFi name and password your wireless devices will use to connect to the FlashRouter’s network. Make sure the WiFi name is unique and not a duplicate of an existing WiFi name if you change it. You can also leave it as the default information if you like. Click Continue.

ExpressVPN Set WiFi Name and Password

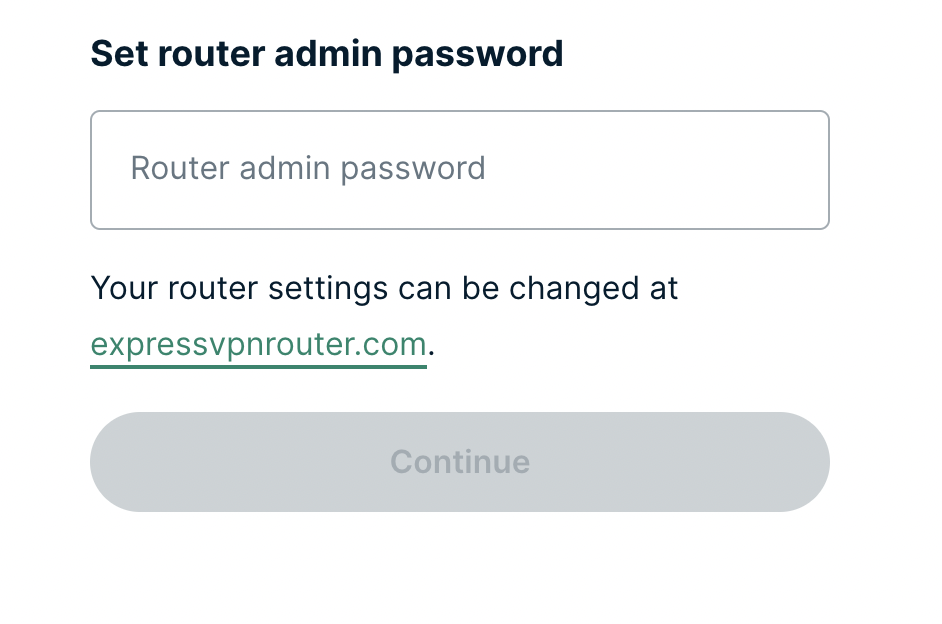
7. Enter the admin password you will use to access the ExpressVPN router settings. Be sure to TYPE CAREFULLY when setting the admin password as a typo will result in needing to reset the router again. Note this password in a secure location or commit it to memory.

ExpressVPN admin password

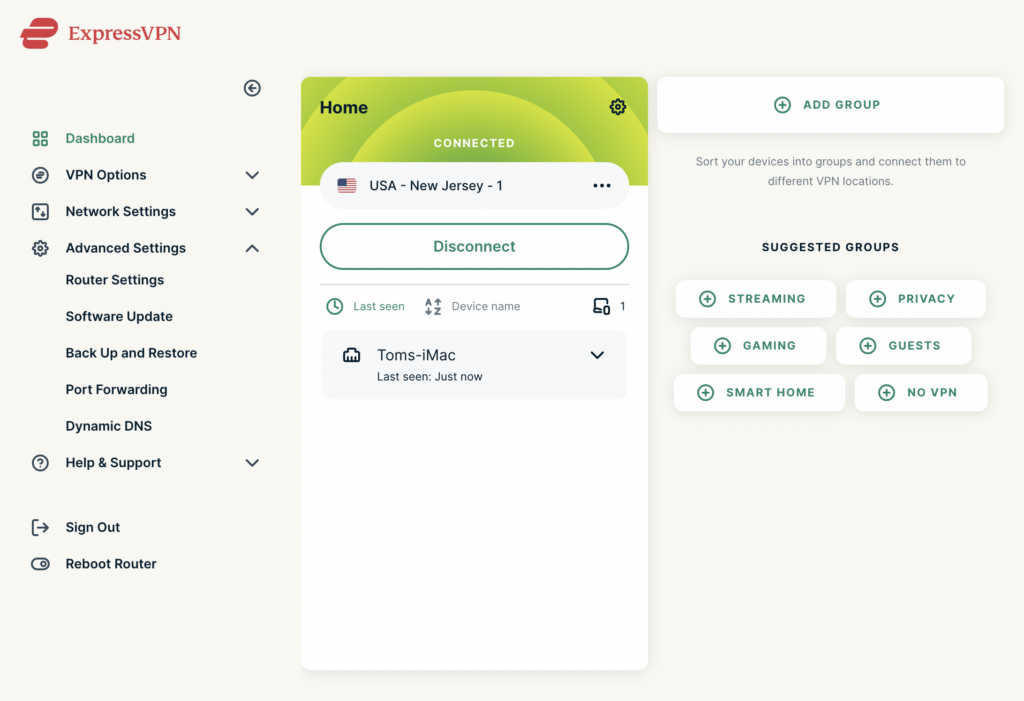
8. Your ExpressVPN FlashRouter is now fully setup!

ExpressVPN Connected

TP-Link Internet Setup

TeamFlashRouters · Apr 11, 2024 ·

Follow this article when you receive your new TP-Link FlashRouter to connect it to the Internet.

1. Connect the ethernet cable that came with the router from an open LAN ethernet port on your ISP modem or other router to the WAN port of the TP-Link.

2. Connect the power to the router and wait about 2 minutes for the router to fully boot up.

3. Connect your computer, phone, or tablet to the TP-Link router via wireless (FlashRouter24 / FlashRouter50) or via ethernet cable to one of the LAN ports on the router.

The FlashRouter WiFi password is printed on the sheet that came with the router and is set to Wireless#[First 5 characters of your router MAC]. The router MAC can be found on the bottom of your router if you cannot locate the sheet. For e.g. if your MAC is 1459C07E70A8 then your WiFi password is Wireless#1459C

Be sure to capitalize the W.

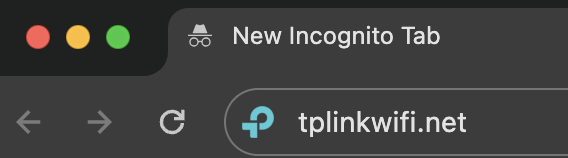
4. Once connected via wireless or ethernet on your device open your browser and go to tplinkwifi.net

TP-Link URL Access

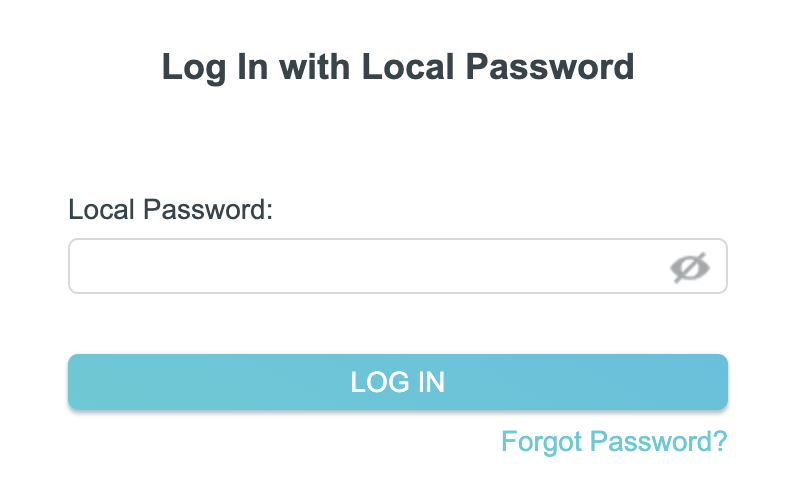
5. Enter tp-link as the admin password to access the TP-Link firmware settings.

TP-Link admin password

6. Verify that your TP-Link FlashRouter is reporting as Internet and WAN Connected.

TP-Link Internet Connected

TROUBLESHOOTING

Still having issues? Visit the VPN Troubleshooting section.

Troubleshoot Here

What are some extra steps I can take to secure my network?

TeamFlashRouters · May 30, 2019 ·

DD-WRT open source firmware removes many firmware vulnerabilities and backdoor access issues that may cause problems in stock firmware. DD-WRT is also updated more frequently than stock firmware, so be sure to always check with the FlashRouter support team to see which DD-WRT build we recommend for the highest level of security for your router at any time.

Aside from avoiding common issues and flaws with stock firmware, DD-WRT give you more control over the firmware settings and allows you to take some extra steps to really lock down your network security. In this article we highlight additional options for WiFi network security and also preventative measures for remote execution attacks.

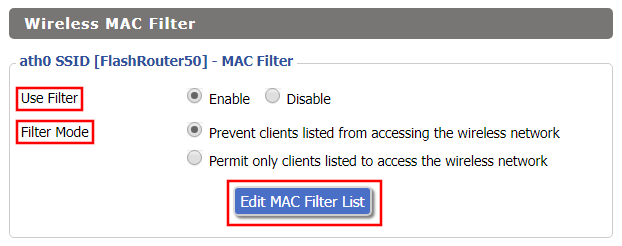
Wireless MAC Filtering

Navigate to Wireless > MAC Filter

Access FlashRouters DD-WRT Admin Enable MAC Filtering
  1. Set Use Filter to Enable.
  2. Select either Prevent or Permit
    • Choose Prevent to add MAC addresses that you don’t want to join your network.
    • Choose Permit to add MAC addresses that you do want to join your network, automatically blocking all others.
  3. Select Edit MAC Filter List.
  4. Add the MAC Address of the wireless devices you want to prevent or permit. Be sure to use the xx:xx:xx:xx:xx:xx format. Hint: You can see a list of connected devices MAC Address by clicking Wireless Client MAC List.
  5. Click Save.
  6. Replicate the steps above for each wireless band.
  7. Click Apply Settings.

Disable Remote Access

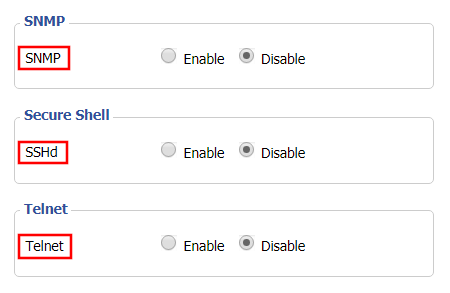
Navigate to Services > Services

Access FlashRouters DD-WRT Admin Settings and Disable Remote Access
  1. Set SNMP to Disable – this setting disables Simple Network Management Protocol, which prevents software from polling your network for information about connected devices.
  2. Set SSHd to Disable – disabling the Secure Shell is a simple way to prevent root access and brute force attacks on your network.
  3. Set Telnet to Disable – Telnet is a less secure version of SSH to manage your local router network via command line.
  4. Click Apply Settings.

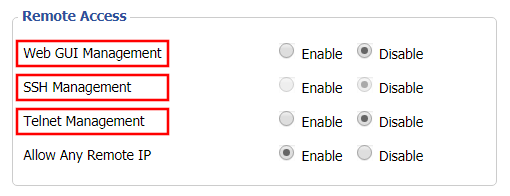
Navigate to Administration > Management

Access FlashRouters DD-WRT Admin Settings and Disable Remote Access 2
  1. Set Web GUI Management to Disable.
  2. Set SSH Management to Disable.
  3. Set Telnet Management to Disable.
  4. Set Allow Any Remote IP to Enable – Even though this setting is set to Enable there is no remote access because Web GUI Management is already set to Disable. 
  5. Click Apply Settings.

Primary Sidebar

  • Troubleshooting
  • Router Access
  • Internet Connection Issues
  • WiFi Connectivity
  • General VPN Issues
  • TeamViewer Remote Support
  • DD-WRT Firmware
  • Facebook
  • Twitter
  • Instagram
  • Pinterest
  • YouTube

Footer