• Skip to primary navigation
  • Skip to main content
  • Skip to primary sidebar
  • Skip to footer

FlashRouters Support Portal

Prioritizing Privacy

  • SETUP GUIDES
    • DD-WRT Router Setup Guide
    • AsusWRT-Merlin Router Setup Guide
    • ExpressVPN Router Setup Guide
    • GL.iNet Router Setup Guide
    • Privacy Hero Router Setup Guide
    • Roqos Core Router Setup Guide
  • TROUBLESHOOTING
    • Router Access
    • WiFi Connectivity
    • Internet Connection Issues
    • General VPN Issues
    • FR Privacy App
    • DD-WRT Firmware
    • TeamViewer Remote Support
  • FAQs
    • Router FAQs
    • VPN FAQs
    • Warranty and Returns FAQs
    • Sales FAQs
    • Shipping FAQs
    • Service Plan FAQs
  • Show Search
Hide Search

Roqos Core VPN Setup

NordVPN Setup on Roqos

TeamFlashRouters · Dec 24, 2021 ·

Preparing for NordVPN Setup

Obtain your NordVPN manual Username and Password

If you are not already a NordVPN user Sign Up Now.

1. Log in to your account on the NordVPN website.
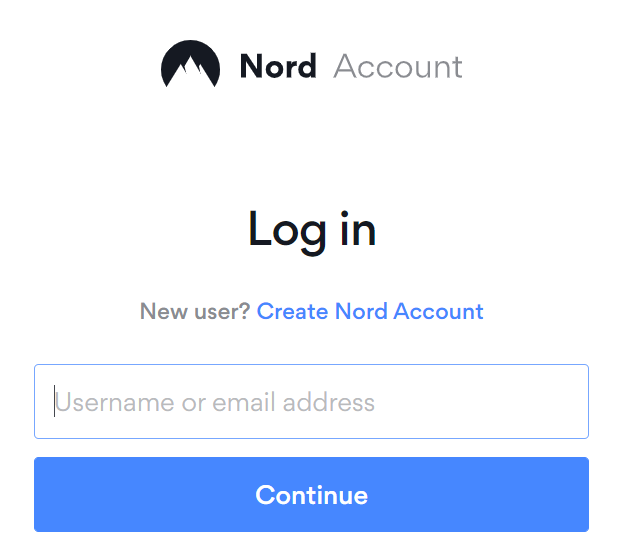
NordVPN login

2. Click NordVPN on the left hand side and then click Setup NordVPN manually.
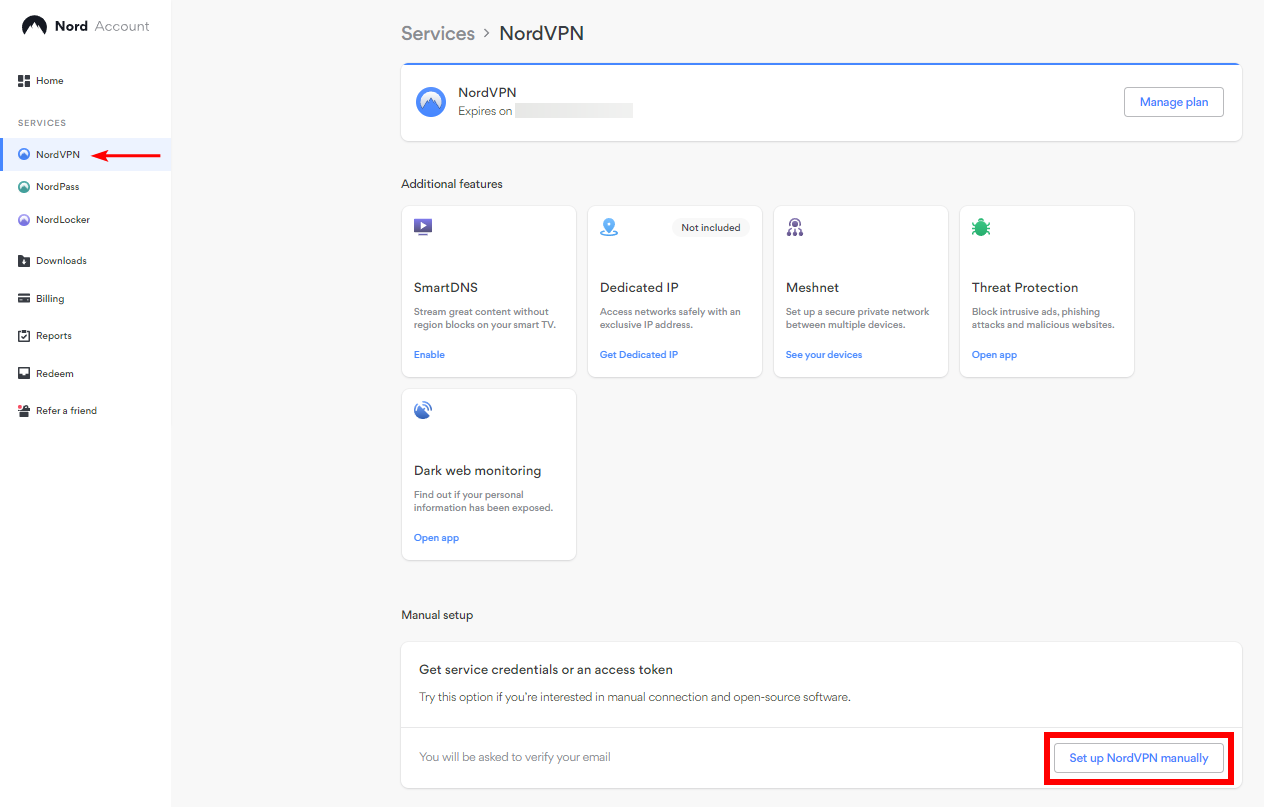
NordVPN setup manually

3. Enter in the verification code that was sent to your email.
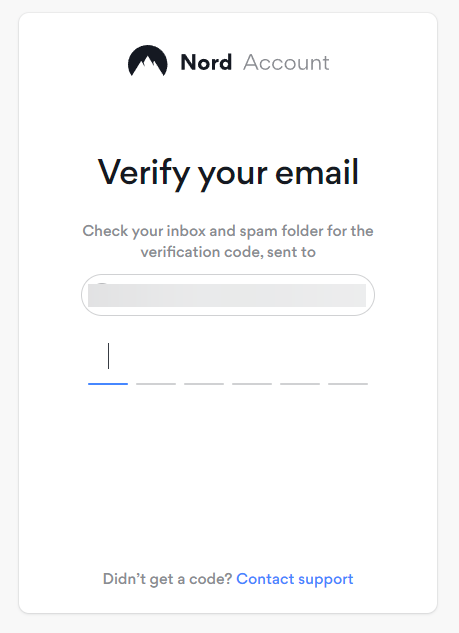
NordVPN verify code

4. Copy and paste your NordVPN manual username and password to a secure location. This is the username and password you will enter into the router settings to connect to NordVPN.
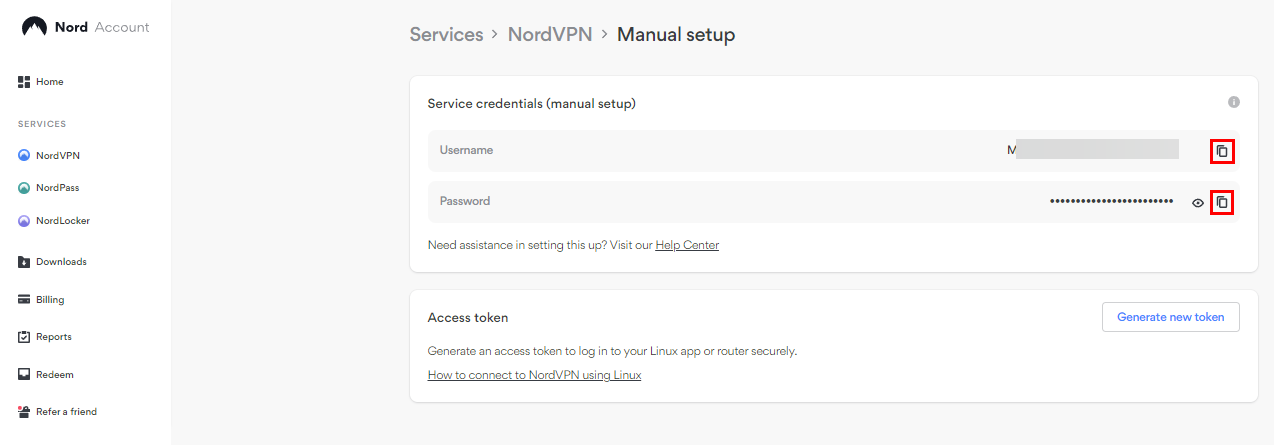
NordVPN credentials

Connecting to NordVPN in the Roqos Core

Access the Roqos Core UI

1. Login to the Roqos Core web app in a browser on any computer or smart device.

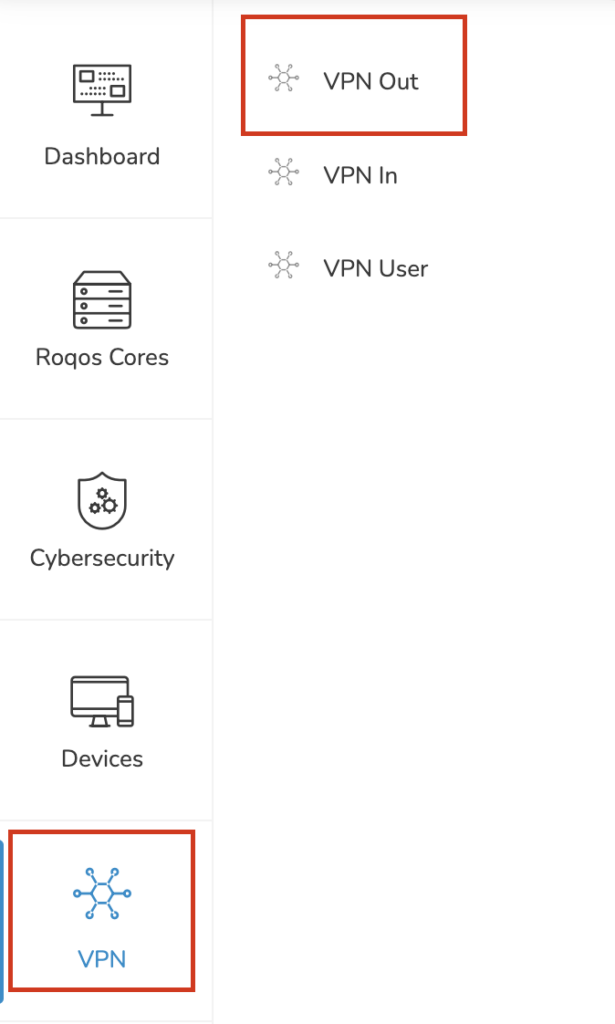
2. Click VPN from the navigation menu and then click VPN OUT.
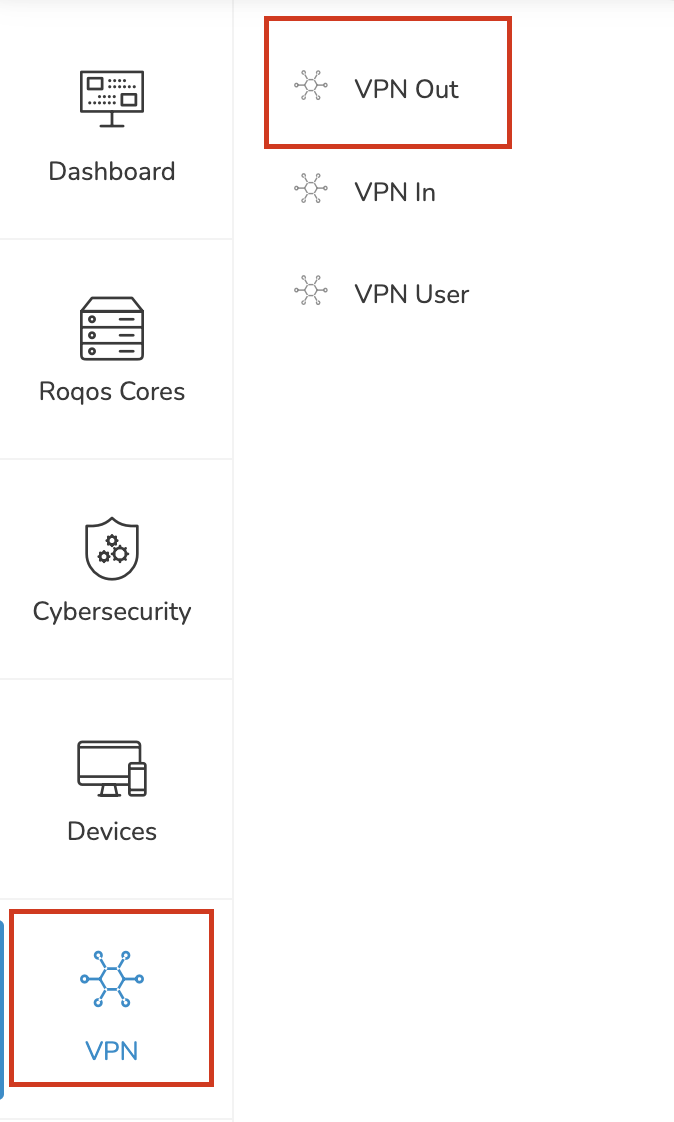
Roqos VPN Out

3. Click the Connect to box.

Roqos NordVPN Connect to

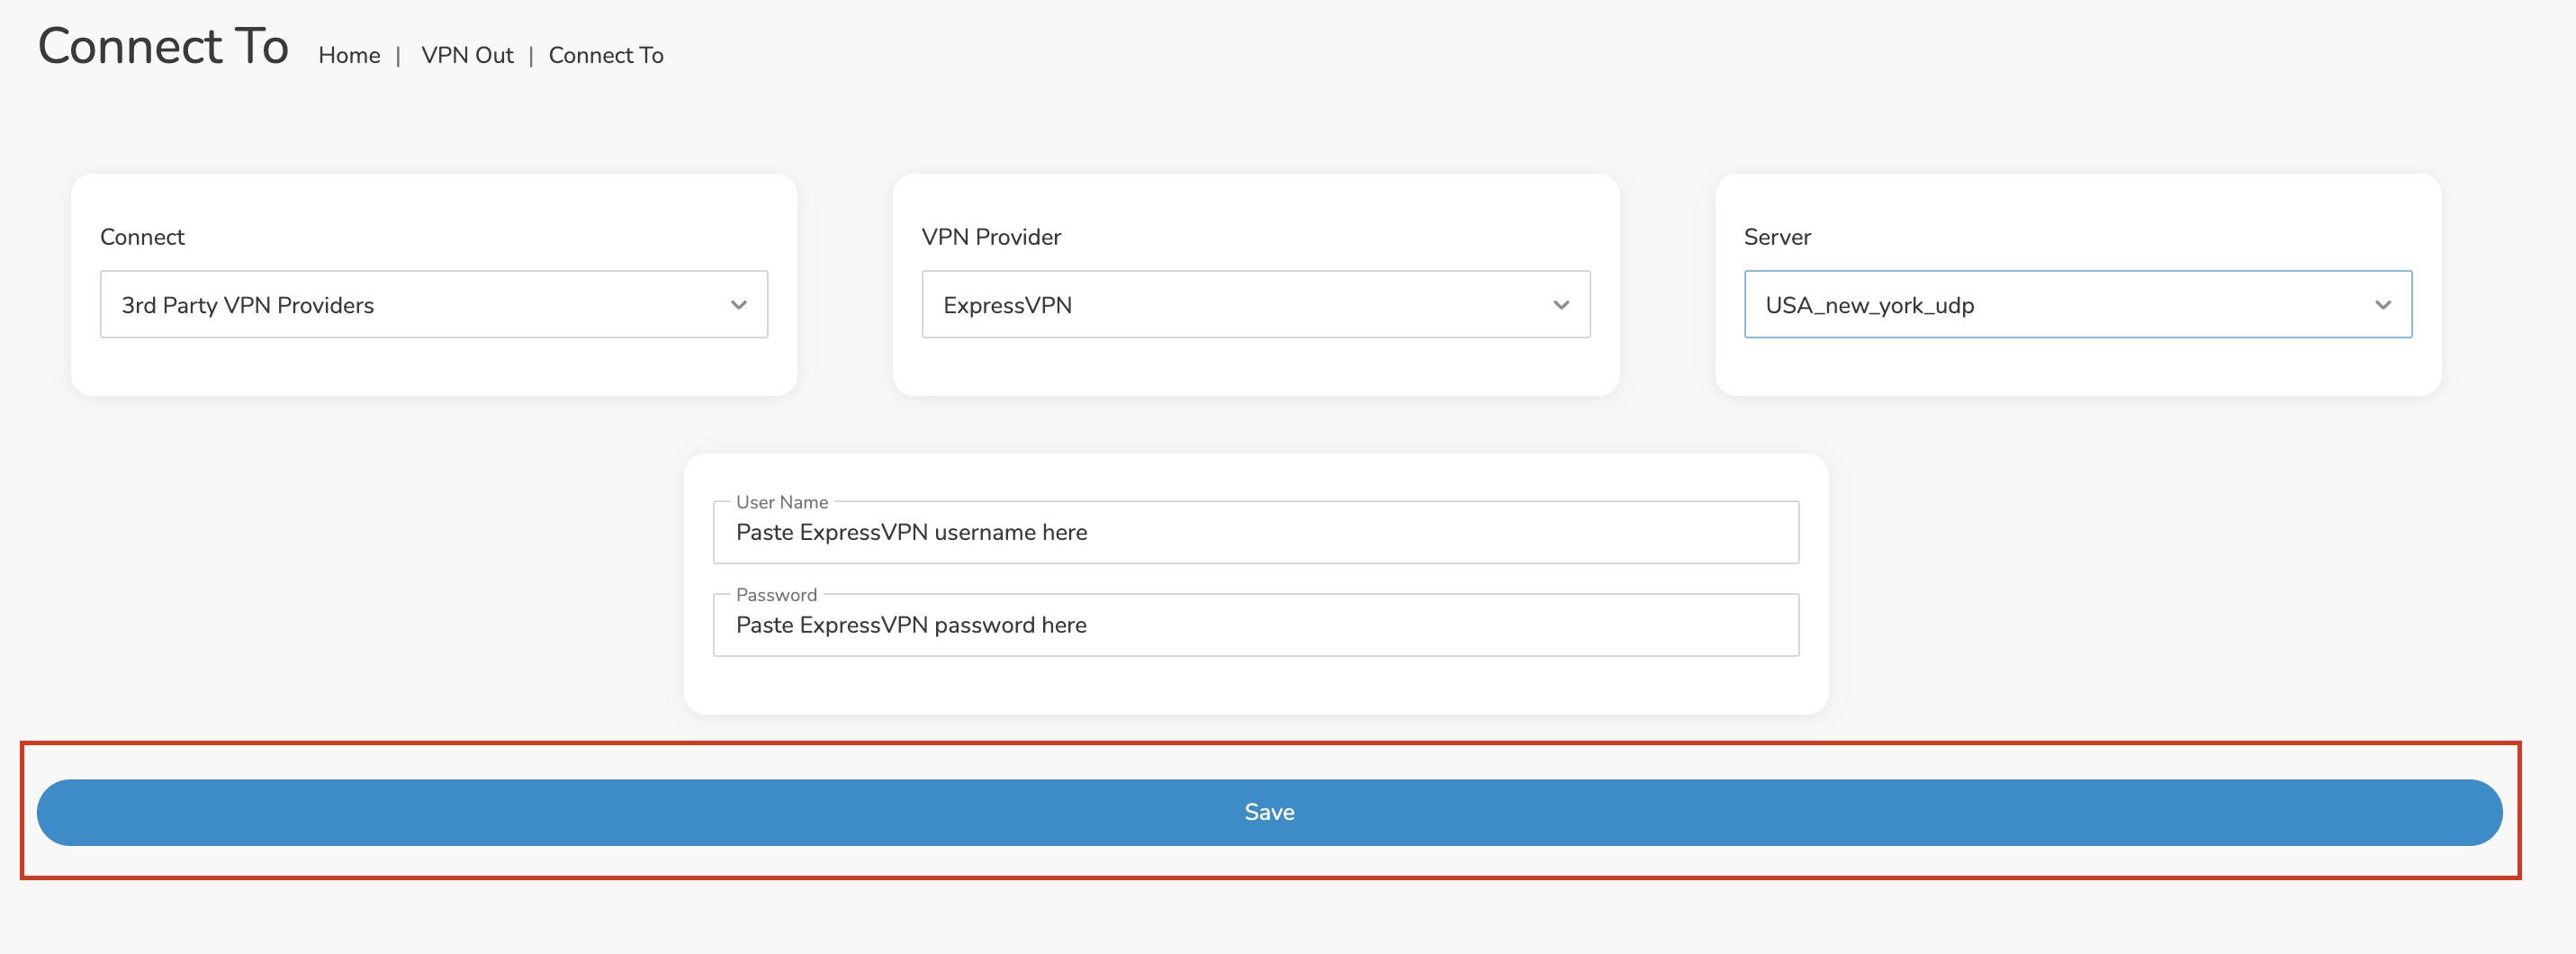
4. In the Connect dropdown choose 3rd Party VPN Providers and for the VPN Provider dropdown choose NordVPN.
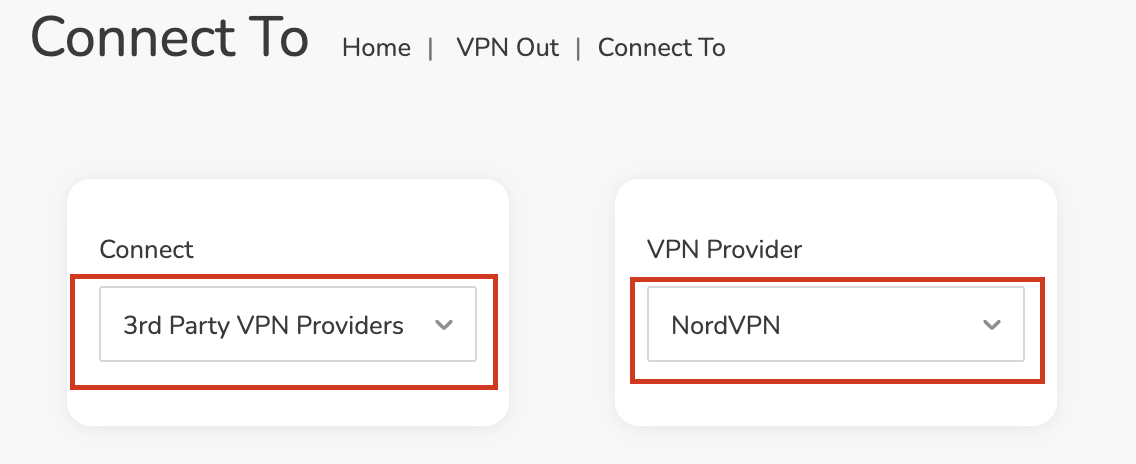
Roqos NordVPN select provider

Enter your NordVPN information

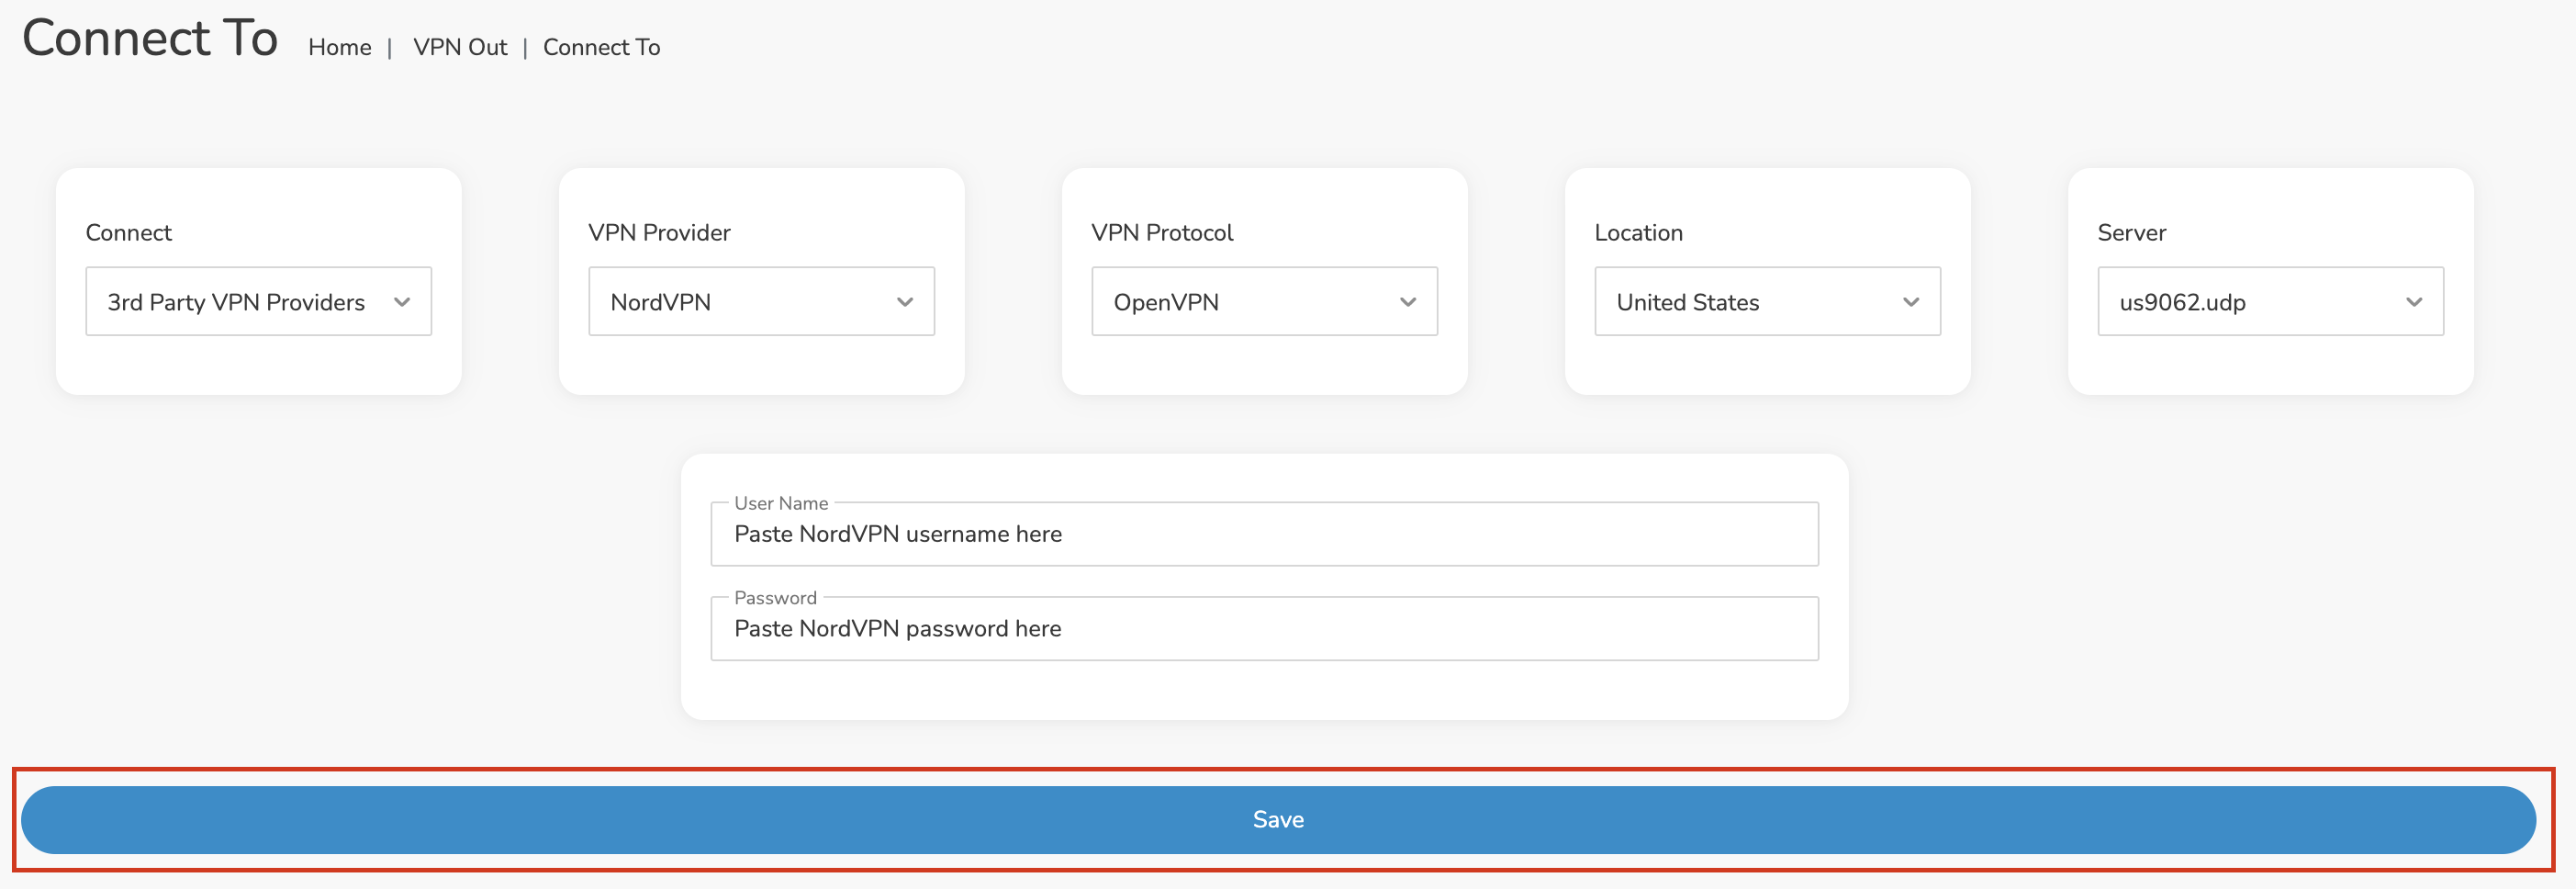
In the Username and Password field enter the NordVPN OpenVPN Username and Password that you obtained.

NordVPN credentials
Roqos NordVPN enter username and password

Select a NordVPN server

Navigate to NordVPN server recommendation page. Click Recommended server and select the country you want to connect to and note the server number that appears.

Click the Location dropdown and type in or scroll to the preferred server country.
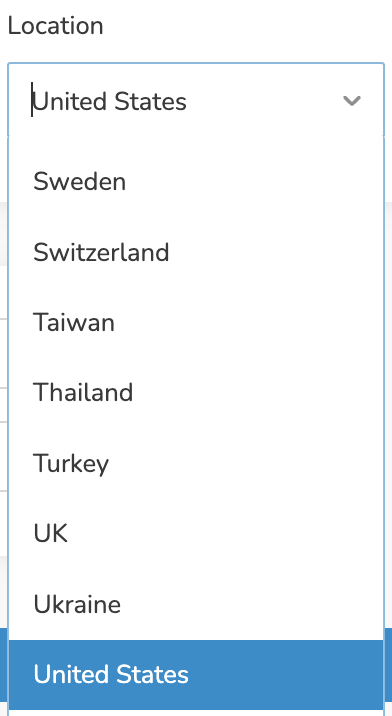
Roqos NordVPN Select Location

Click the Server dropdown and type in or scroll to the server number that was recommended. Select the UDP version of the server.
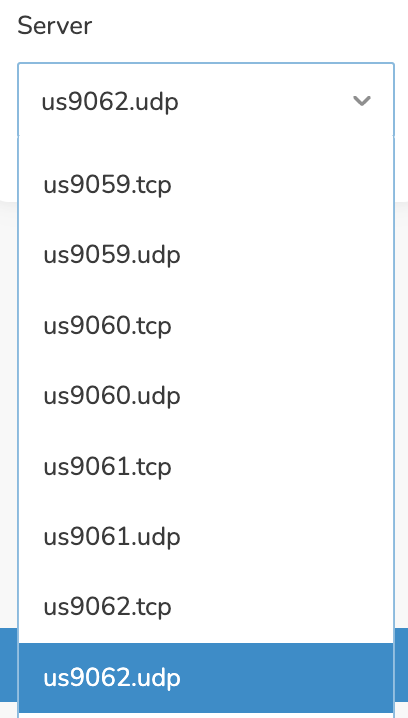
Roqos NordVPN select server number

Click the Save button.

Roqos NordVPN Save Settings

Connect to NordVPN

Once you click Save you will be returned to the VPN OUT menu.

Click the Connect button to start your NordVPN connection. Please be patient as the router connects your entire network through VPN.

Roqos VPN Connect

Assign devices to connect to VPN

By default there are no devices assigned to the VPN tunnel. Click Included Devices. From this page you can choose if all devices should connect to NordVPN or only certain devices.

Roqos NordVPN Included Devices

From the dropdown select Include all devices if you want every device that connects to the Roqos to connect to NordVPN. Then click Save.

Roqos VPN Include All Devices

If you only want specific devices to connect to NordVPN while others bypass the VPN connection select Include selected devices from the dropdown and then toggle the sliders for the devices you want connected to VPN. Click Save.

Roqos VPN Include Selected devices

Verify a successful NordVPN connection

Make sure you are connected to the Roqos network via WiFi or ethernet connection on your device.

Visit NordVPN’s website to verify your new IP Address and Protected Status at the top of the page.

You should see Connected at the top of the page underneath NordVPN.

Connect to a different NordVPN server

To change your server click Disconnect on the VPN OUT page then return to the Connect To section to select a new server from the Server dropdown and click Save. Now click Connect once again on the VPN Out page.

Disconnect from NordVPN

To disconnect from NordVPN click the Disconnect button.
TROUBLESHOOTING

Still having issues? Visit the FR Privacy App Troubleshooting section.

Troubleshoot Here

PrivateInternetAccess (PIA) Setup on Roqos

TeamFlashRouters · Dec 24, 2021 ·

Preparing for PIA Setup

Obtain your PIA login information

If you are not already an PIA user Sign Up Now.

1. Visit PIA’s website login page.

PIA login

2. Successfully log in with your account information.

Connecting to PIA in the Roqos Core

Access the Roqos Core UI

1. Login to the Roqos Core web app in a browser on any computer or smart device.

2. Click VPN from the navigation menu and then click VPN OUT.

Roqos VPN Out

3. Click the Connect to box.

Roqos PIA Connect to

4. In the Connect dropdown choose 3rd Party VPN Providers and for the VPN Provider dropdown choose Private_Internet_Access.

Roqos PIA select provider

Enter your PIA information

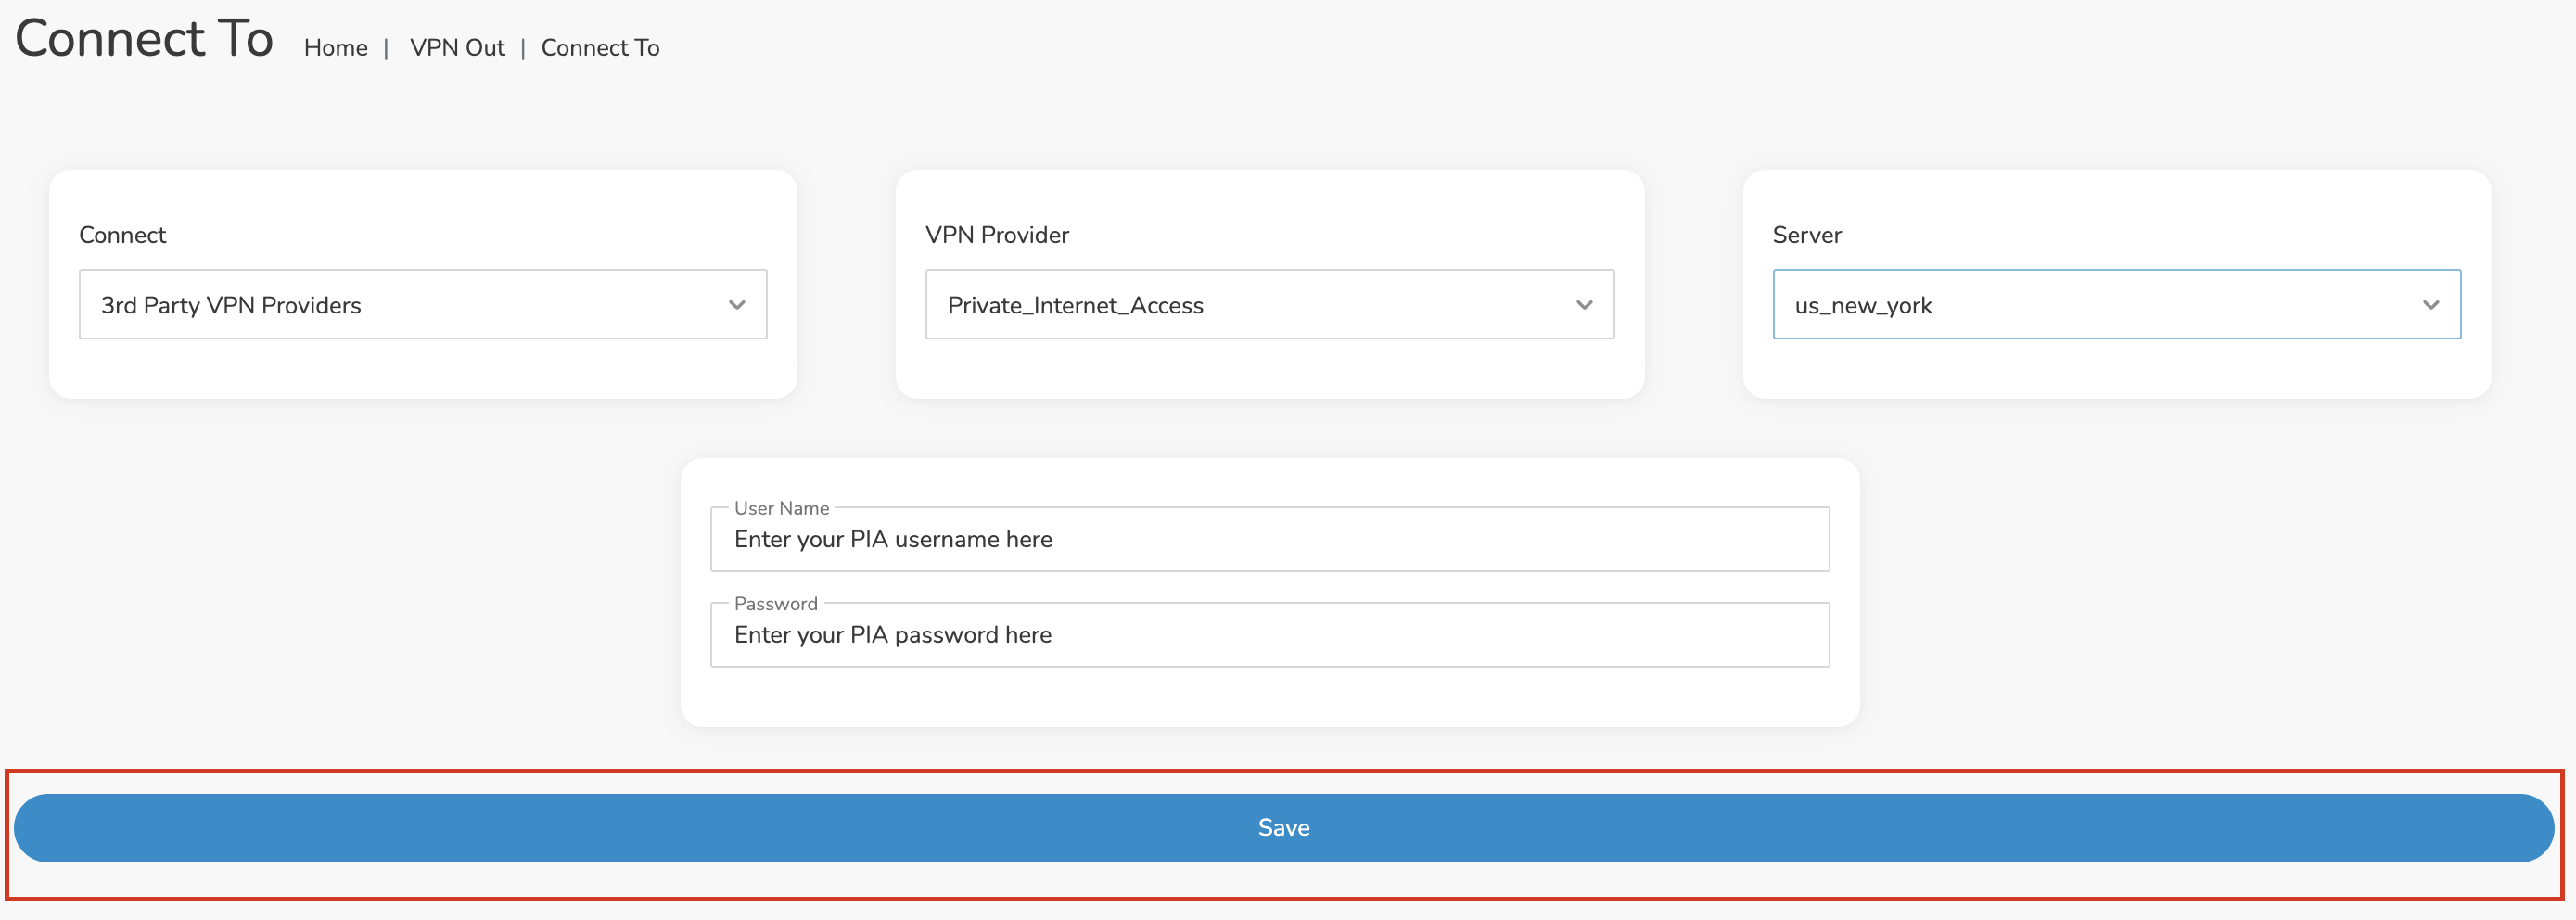
In the Username and Password field enter the PIA Username and Password that you logged in with.

Roqos PIA enter username and password

Select a PIA server

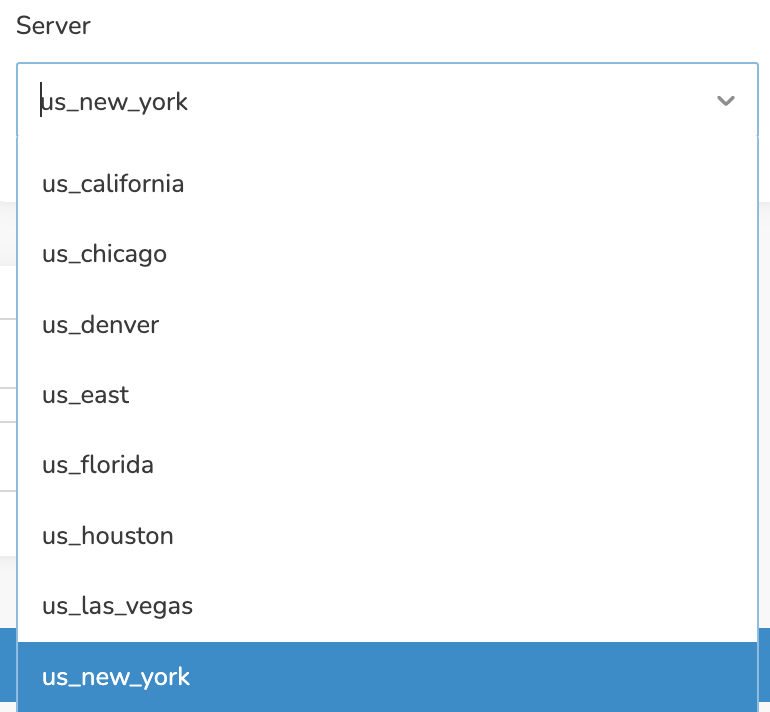
Click the Server dropdown and type in or scroll to your preferred server location.

Roqos PIA server select

Click the Save button.

Roqos PIA Save Settings

Connect to PIA

Once you click Save you will be returned to the VPN OUT menu.

Click the Connect button to start your PIA connection. Please be patient as the router connects your entire network through VPN.

Roqos VPN Connect

Assign devices to connect to VPN

By default there are no devices assigned to the VPN tunnel. Click Included Devices. From this page you can choose if all devices should connect to PIA or only certain devices.

Roqos PIA Included Devices

From the dropdown select Include all devices if you want every device that connects to the Roqos to connect to PIA. Then click Save.

Roqos VPN Include All Devices

If you only want specific devices to connect to PIA while others bypass the VPN connection select Include selected devices from the dropdown and then toggle the sliders for the devices you want connected to VPN. Click Save.

Roqos VPN Include Selected devices

Verify a successful PIA connection

Make sure you are connected to the Roqos network via WiFi or ethernet connection on your device.

Visit PIA’s IP Check to verify your new IP Address and virtual location.

You should see Connected at the top of the page underneath Private_Internet_Access.

Connect to a different PIA server

To change your server click Disconnect on the VPN OUT page then return to the Connect To section to select a new server from the Server dropdown and click Save. Now click Connect once again on the VPN Out page.

Disconnect from PIA

To disconnect from PIA click the Disconnect button.

TROUBLESHOOTING

Still having issues? Visit the FR Privacy App Troubleshooting section.

Troubleshoot Here

ExpressVPN Setup on Roqos

Dave · Dec 16, 2021 ·

Preparing for ExpressVPN Setup

Obtain your ExpressVPN login information

If you are not already an ExpressVPN user Sign Up Now.

1. Visit ExpressVPN’s website login page.

ExpressVPN login page

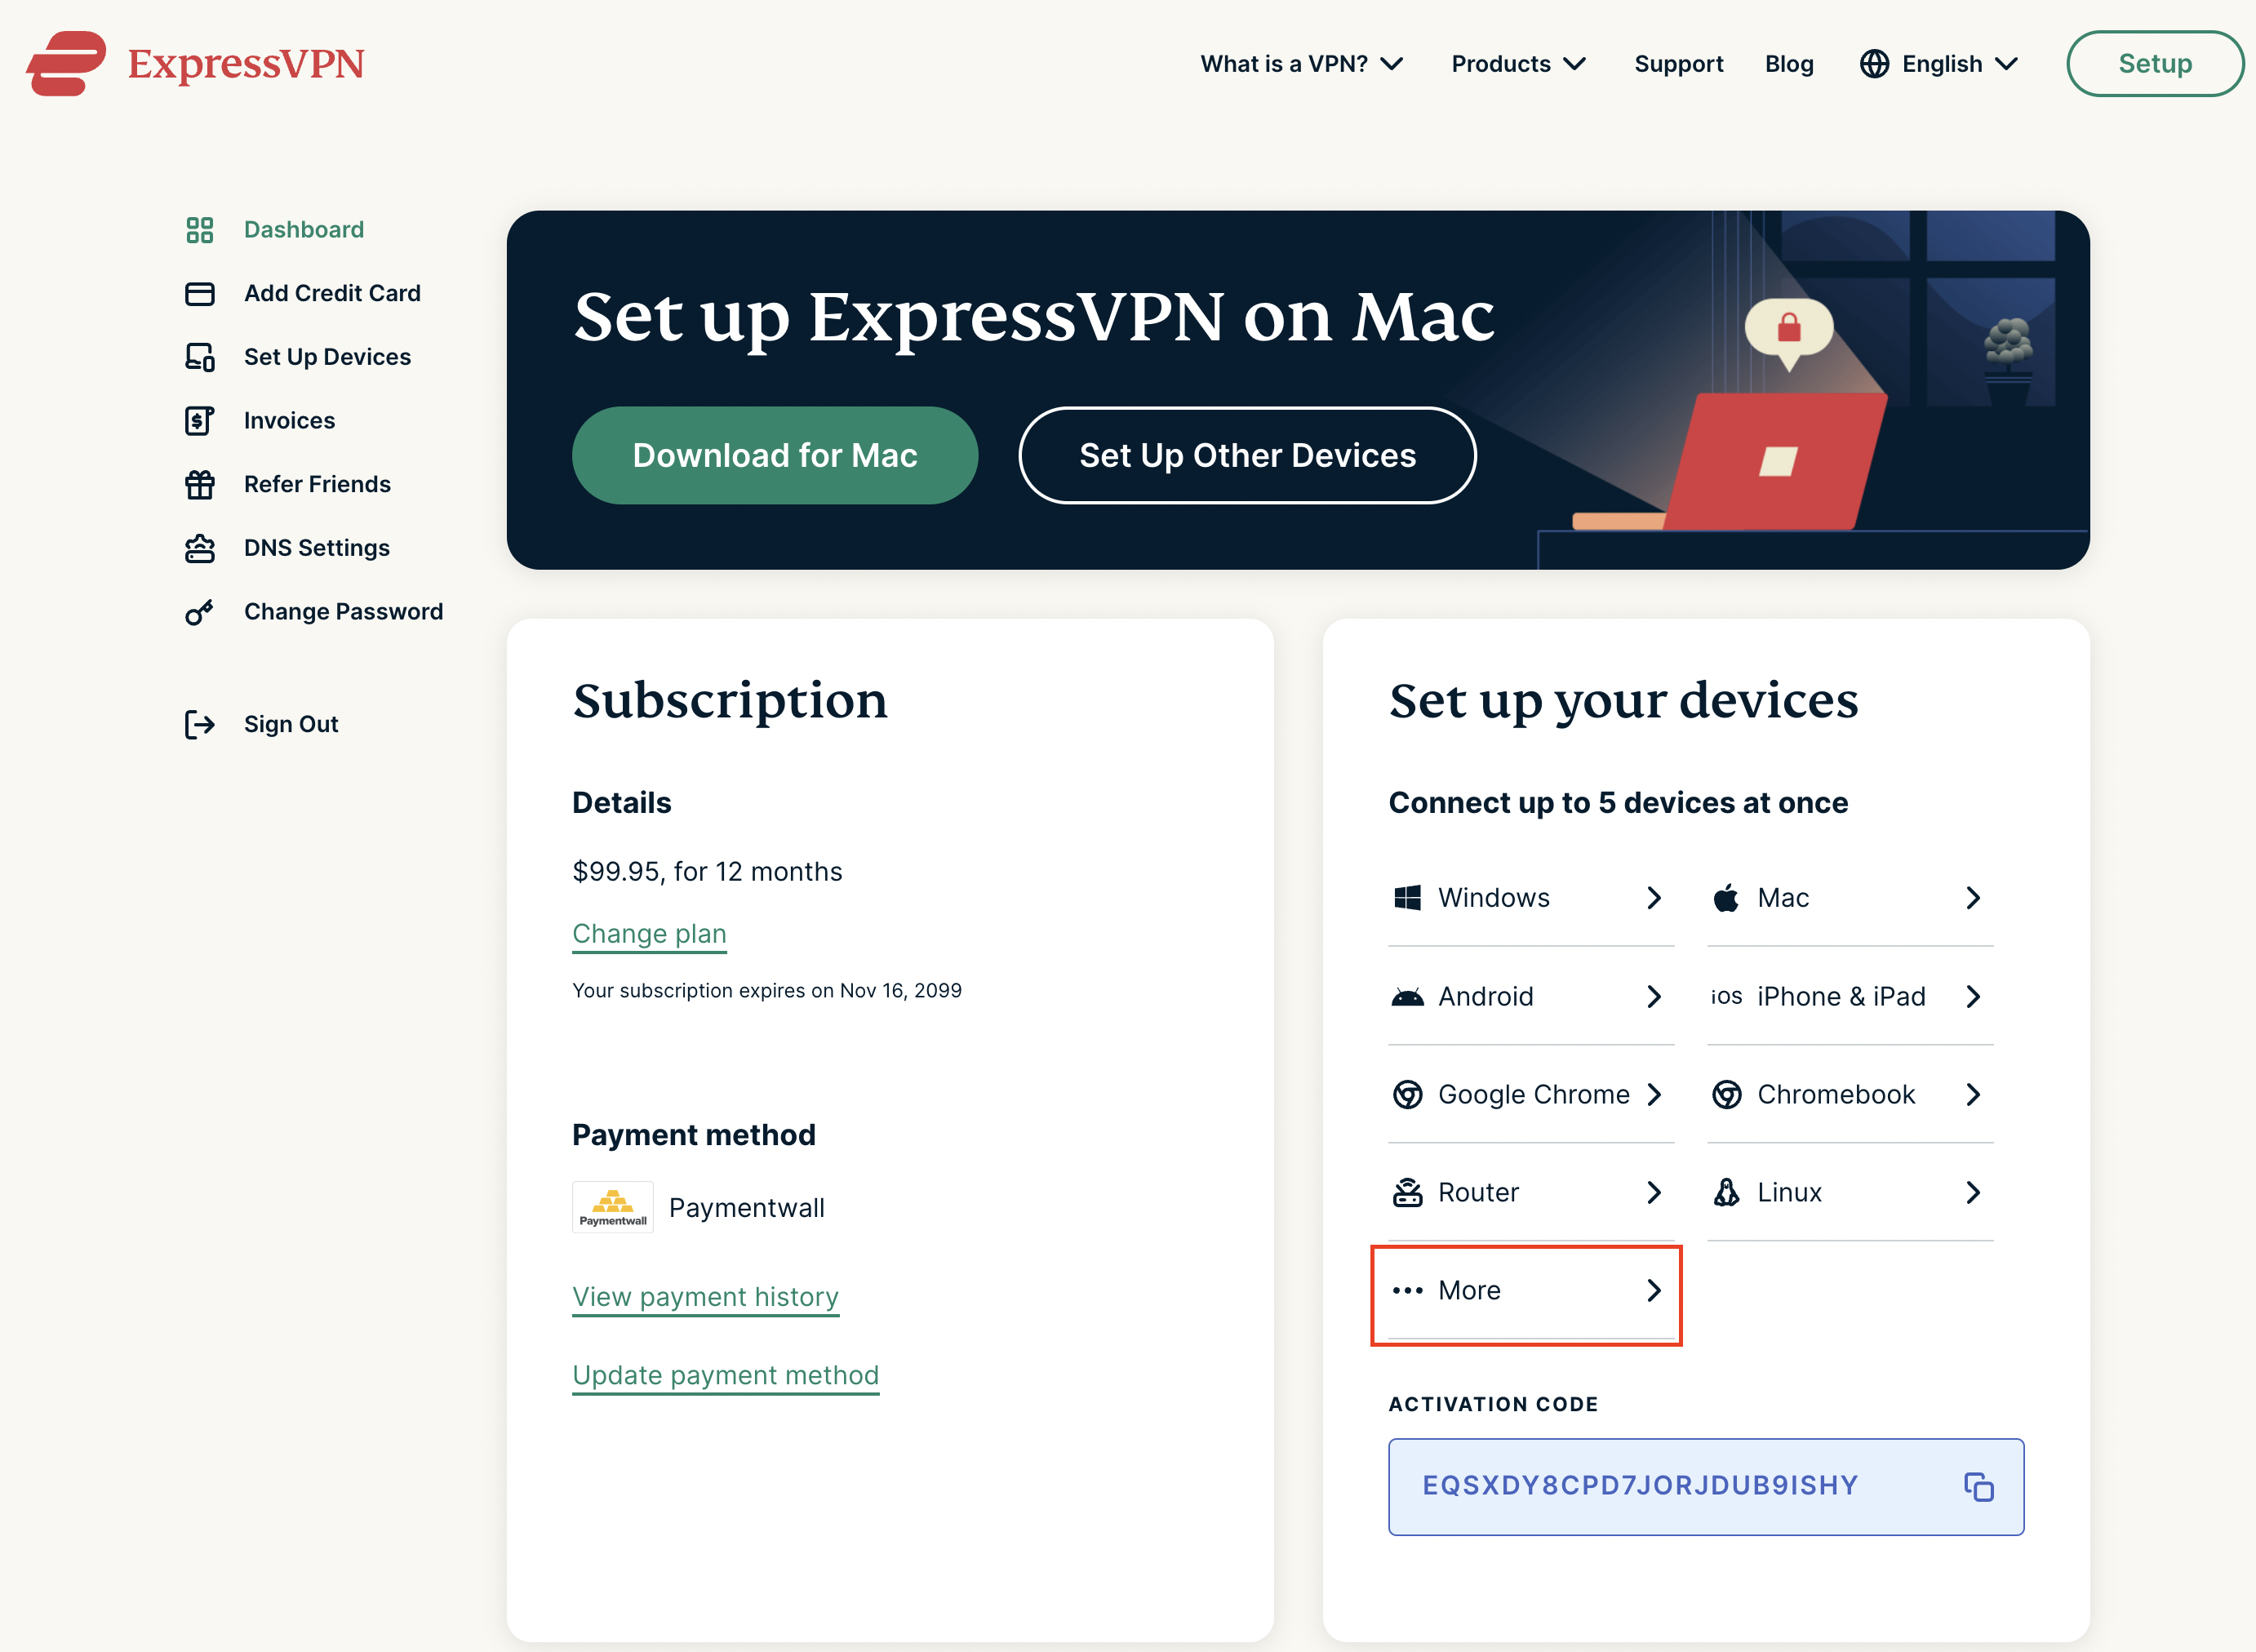
2. Successfully log in with your account information. Select More.

ExpressVPN account page

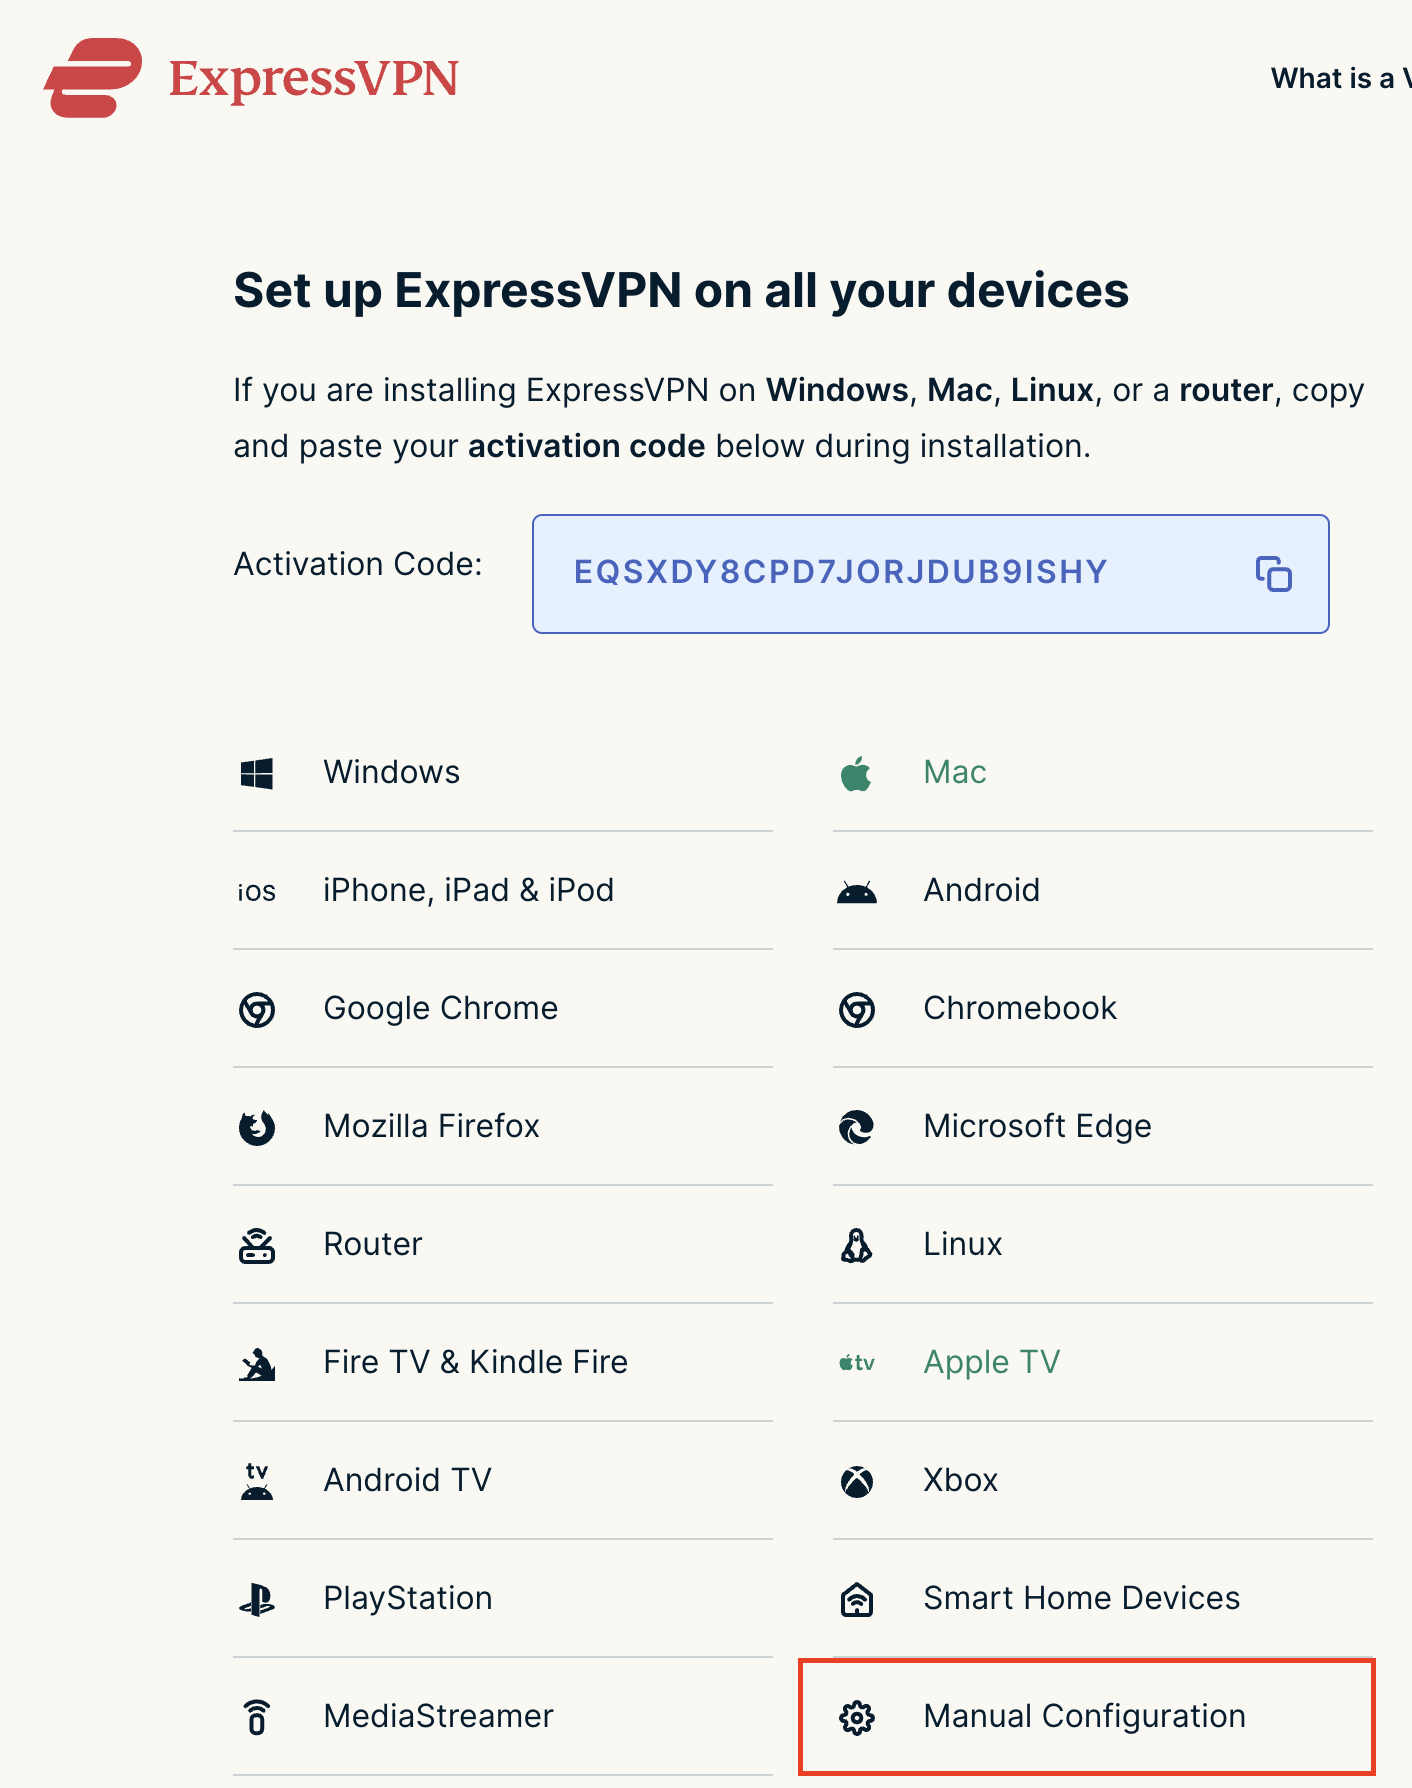
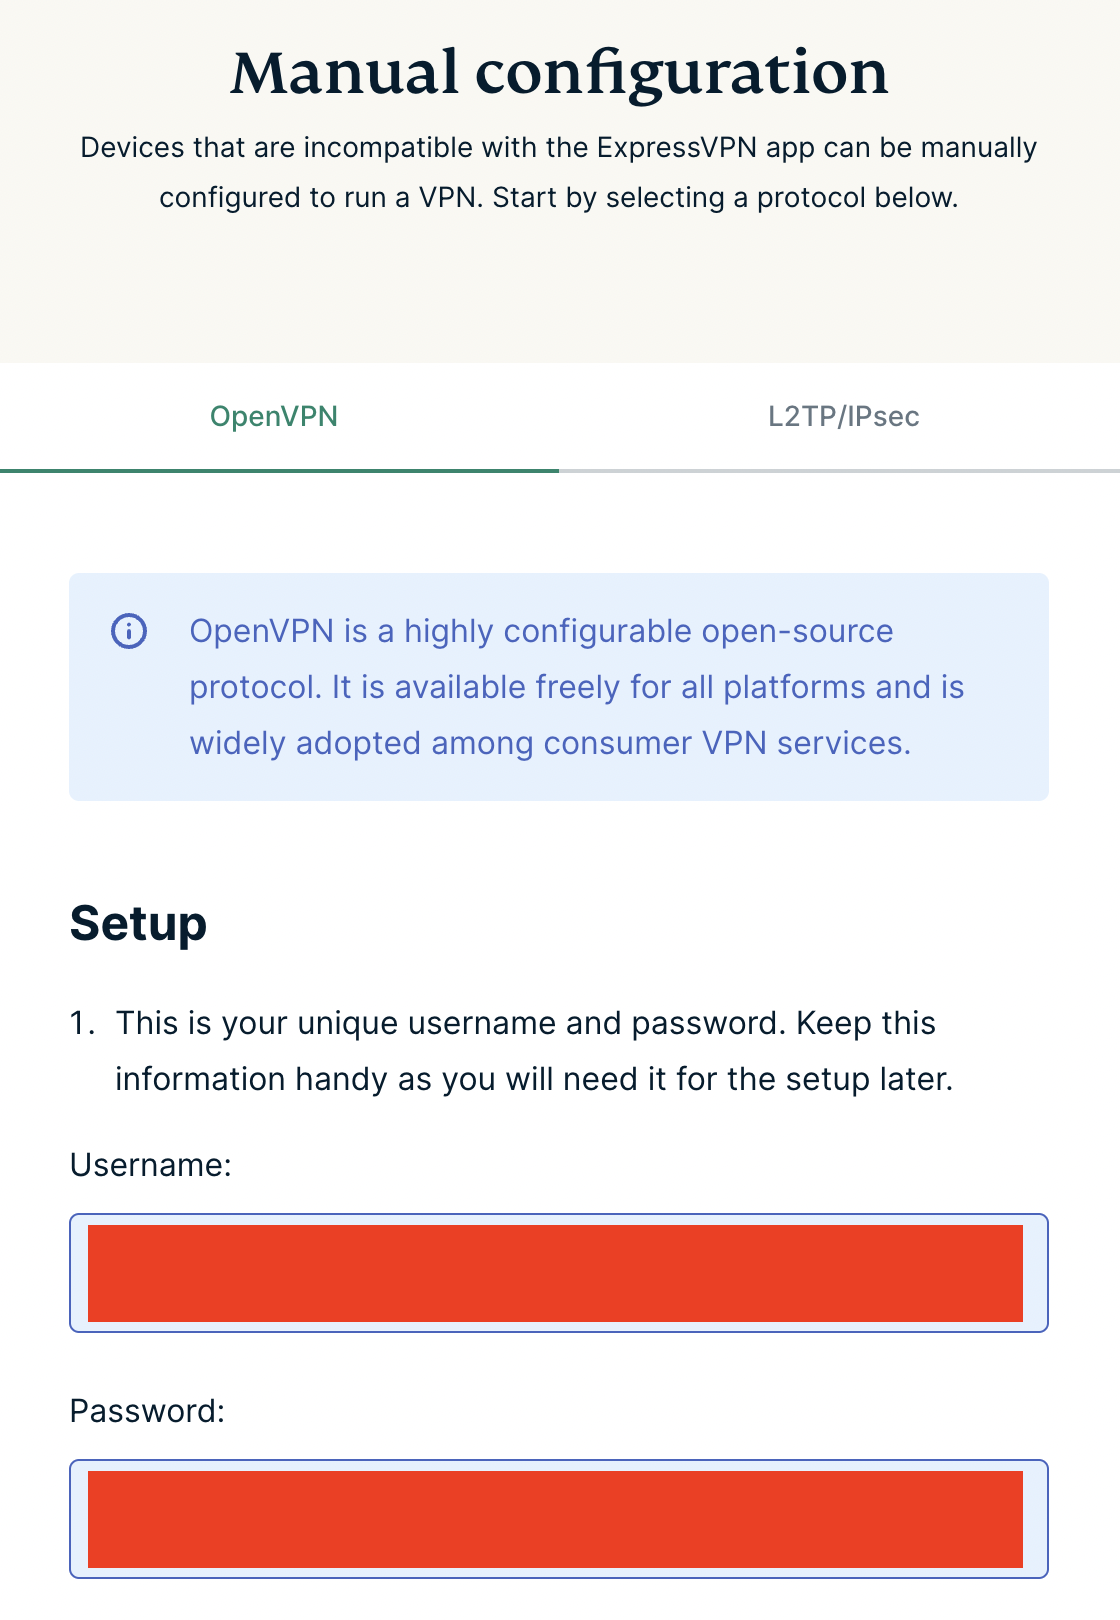
3. Select Manual Configuration and copy the Username and Password that are displayed on the right hand side of the screen.

ExpressVPN Manual Configuration
ExpressVPN username and password

Connecting to ExpressVPN in the Roqos Core

Access the Roqos Core UI

1. Login to the Roqos Core web app in a browser on any computer or smart device.

2. Click VPN from the navigation menu and then click VPN OUT.

Roqos VPN Out

3. Click the Connect to box.

Roqos VPN Connect to

4. In the Connect dropdown choose 3rd Party VPN Providers and for the VPN Provider dropdown choose ExpressVPN.

Roqos ExpressVPN select provider

Enter your ExpressVPN information

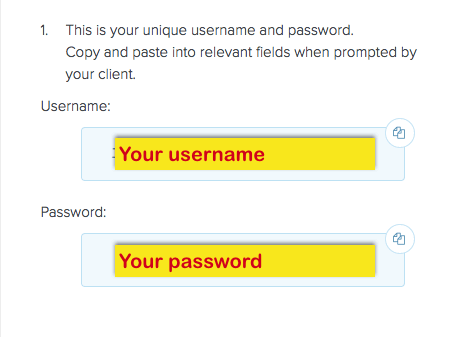
In the Username and Password field enter the ExpressVPN OpenVPN Username and Password that you obtained.

ExpressVPN on FlashRouters Privacy App Setup - OpenVPN Specific Username and Password
Roqos VPN ExpressVPN enter username and password

Select an ExpressVPN server

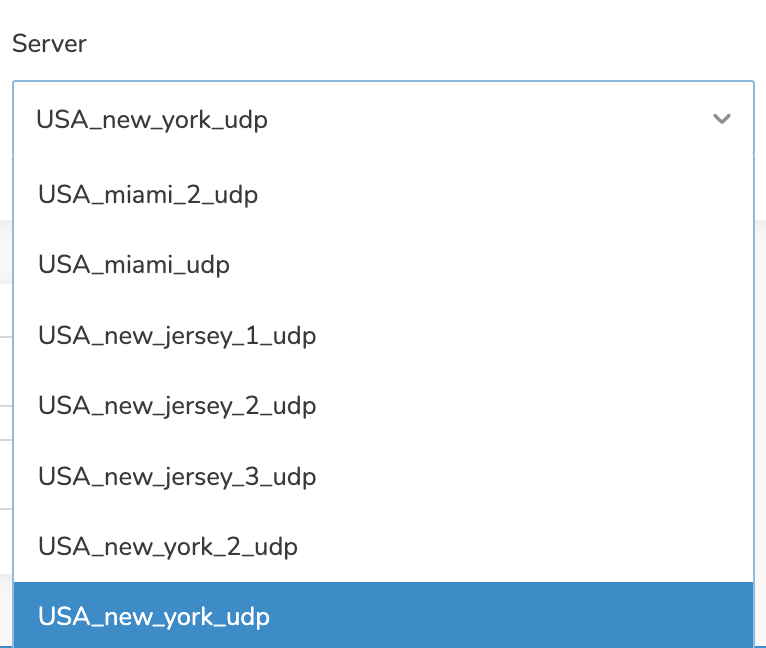
Click the Server dropdown and type in or scroll to your preferred server location.

Roqos VPN ExpressVPN select server

Click the Save button.

Roqos VPN Save Settings

Connect to ExpressVPN

Once you click Save you will be returned to the VPN OUT menu.

Click the Connect button to start your ExpressVPN connection. Please be patient as the router connects your entire network through VPN.

Roqos VPN Connect

Assign devices to connect to VPN

By default there are no devices assigned to the VPN tunnel. Click Included Devices. From this page you can choose if all devices should connect to ExpressVPN or only certain devices.

Roqos VPN Included Devices

From the dropdown select Include all devices if you want every device that connects to the Roqos to connect to ExpressVPN. Then click Save.

Roqos VPN Include All Devices

If you only want specific devices to connect to ExpressVPN while others bypass the VPN connection select Include selected devices from the dropdown and then toggle the sliders for the devices you want connected to VPN. Click Save.

Roqos VPN Include Selected devices

Verify a successful ExpressVPN connection

Make sure you are connected to the Roqos network via WiFi or ethernet connection on your device.

Visit ExpressVPN’s IP Check to verify your new IP Address and virtual location.

You should see Connected at the top of the page underneath ExpressVPN.

Connect to a different ExpressVPN server

To change your server click Disconnect on the VPN OUT page then return to the Connect To section to select a new server from the Server dropdown and click Save. Now click Connect once again on the VPN Out page.

Disconnect from ExpressVPN

To disconnect from ExpressVPN click the Disconnect button.
TROUBLESHOOTING

Still having issues? Visit the FR Privacy App Troubleshooting section.

Troubleshoot Here

Roqos VPN Connected, but my device IP is unchanged

TeamFlashRouters · Mar 8, 2022 ·

If your VPN Out page in your Roqos settings is reporting that you are Connected to your VPN provider but your IP Address and location have not changed when you visit What is my IP address? follow the below checklist.

Double check that your device is connected to the Roqos network

Since the Roqos UI is being accessed securely via the cloud you can change the settings while your device is not connected to the Roqos network. This would result in your IP Address not updating when you connect to VPN.

Make sure that you are connected to your Roqos WiFi network or from an ethernet port on the back of the Roqos directly to your device and not another network.

Assign Devices To Connect To VPN in the Roqos

By default there are no devices assigned to the VPN tunnel. To assign devices to the Roqos’ VPN connection.

1. Login to your Roqos UI.

2. Select the VPN tab on the left hand menu and select VPN Out.

Roqos VPN Out

3. Click Included Devices. From this page you can choose if all devices should connect to VPN or only certain devices.

Roqos VPN Included Devices

4. From the dropdown select Include all devices if you want every device that connects to the Roqos to connect to VPN or if you only want specific devices to connect to VPN while others bypass the VPN connection select Include selected devices from the dropdown and then toggle the sliders for the devices you want connected to VPN. Click Save.

Turn off VPN device applications

Connecting to VPN via a device application or browser extension at the same time while connecting via your Roqos is not recommended. Doubling up on VPN connections can cause issues with speeds and stability.

When you are connected to the Roqos VPN network at home you should leave all VPN applications and extensions disconnected and unopened.

Obtain your NordVPN manual Username and Password for OpenVPN

TeamFlashRouters · Aug 14, 2024 ·

Obtain your NordVPN manual Username and Password

If you are not already an NordVPN user Sign Up Now.

1. Log in to your account on the NordVPN website.

NordVPN login

2. Click NordVPN on the left hand side and then click Setup NordVPN manually.

NordVPN setup manually

3. Go to the Service Credentials section and click Verify email. Enter in the verification code that was sent to your email.

Nord Email Verification
NordVPN verify code

4. Copy and paste your NordVPN manual username and password to a secure location. This is the username and password you will enter into the router settings to connect to NordVPN OpenVPN.

NordVPN OpenVPN Credentials

TROUBLESHOOTING

Still having issues? Visit the VPN Troubleshooting section.

Troubleshoot Here

Primary Sidebar

Roqos Core Router Setup Guide
  • Internet Setup
  • WiFi Setup
  • VPN Setup
  • Roqos Features
  • View Full Setup Guide
  • Facebook
  • Twitter
  • Instagram
  • Pinterest
  • YouTube

Footer