• Skip to primary navigation
  • Skip to main content
  • Skip to primary sidebar
  • Skip to footer

FlashRouters Support Portal

Prioritizing Privacy

  • SETUP GUIDES
    • DD-WRT Router Setup Guide
    • AsusWRT-Merlin Router Setup Guide
    • ExpressVPN Router Setup Guide
    • GL.iNet Router Setup Guide
    • Privacy Hero Router Setup Guide
    • Roqos Core Router Setup Guide
  • TROUBLESHOOTING
    • Router Access
    • WiFi Connectivity
    • Internet Connection Issues
    • General VPN Issues
    • FR Privacy App
    • DD-WRT Firmware
    • TeamViewer Remote Support
  • FAQs
    • Router FAQs
    • VPN FAQs
    • Warranty and Returns FAQs
    • Sales FAQs
    • Shipping FAQs
    • Service Plan FAQs
  • Show Search
Hide Search

glinet

Flint/Slate GL.iNet Access Router Settings

TeamFlashRouters · Feb 26, 2024 ·

Follow this guide to access the router settings of your GL.iNet FlashRouter.

1. Connect your computer, phone, or tablet to the GL.iNet router via wireless (FlashRouter24 / FlashRouter50) or via ethernet cable to one of the LAN ports on the router.

The FlashRouter WiFi password is printed on the sheet that came with the router and is set to Wireless#[First 5 characters of your router MAC]. The router MAC can be found on the bottom of your router if you cannot locate the sheet. For e.g. if your MAC is 1459C07E70A8 then your WiFi password is Wireless#1459C

Be sure to capitalize the W.

2. Once connected via wireless or ethernet on your device open your browser and go to 192.168.8.1

GL.iNet router access

3. Enter openwrt as the admin password to access the GL.iNet firmware settings.
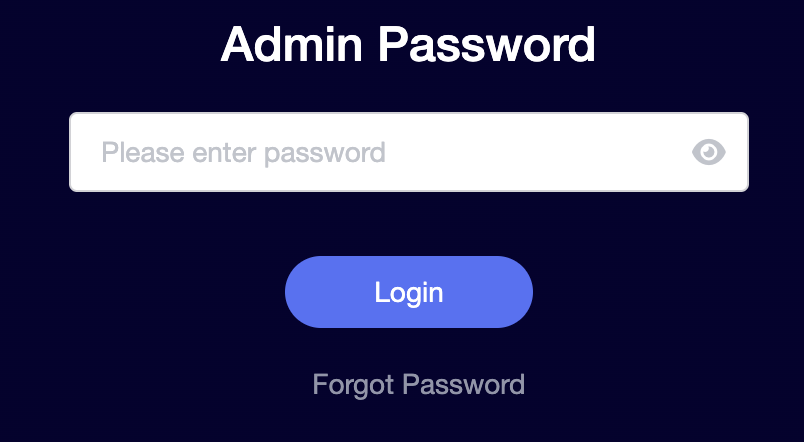
GL.iNet admin password enter

TROUBLESHOOTING

Still having issues? Visit the VPN Troubleshooting section.

Troubleshoot Here

Flint/Slate GL.iNet Guest Network Setup

TeamFlashRouters · Apr 20, 2023 ·

Follow this guide to setup a Guest Network on your GL.iNet FlashRouter. Devices connected to the guest network will be on a separate subnet and will not have access to the router settings or be able to talk to devices on the main network.

1. Connect your computer, phone, or tablet to the GL.iNet router via wireless (FlashRouter24 / FlashRouter50) or via ethernet cable to one of the LAN ports on the router.

The FlashRouter WiFi password is printed on the sheet that came with the router and is set to Wireless#[First 5 characters of your router MAC]. The router MAC can be found on the bottom of your router if you cannot locate the sheet. For e.g. if your MAC is 1459C07E70A8 then your WiFi password is Wireless#1459C

Be sure to capitalize the W.

2. Once connected via wireless or ethernet on your device open your browser and go to 192.168.8.1

GL.iNet router access

3. Enter openwrt as the admin password to access the GL.iNet firmware settings.
GL.iNet admin password enter

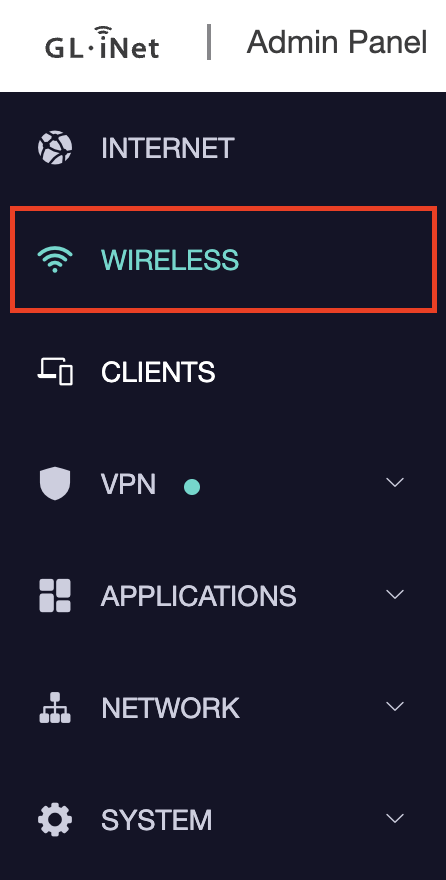
4. Click Wireless.

GL.iNet Click Wireless

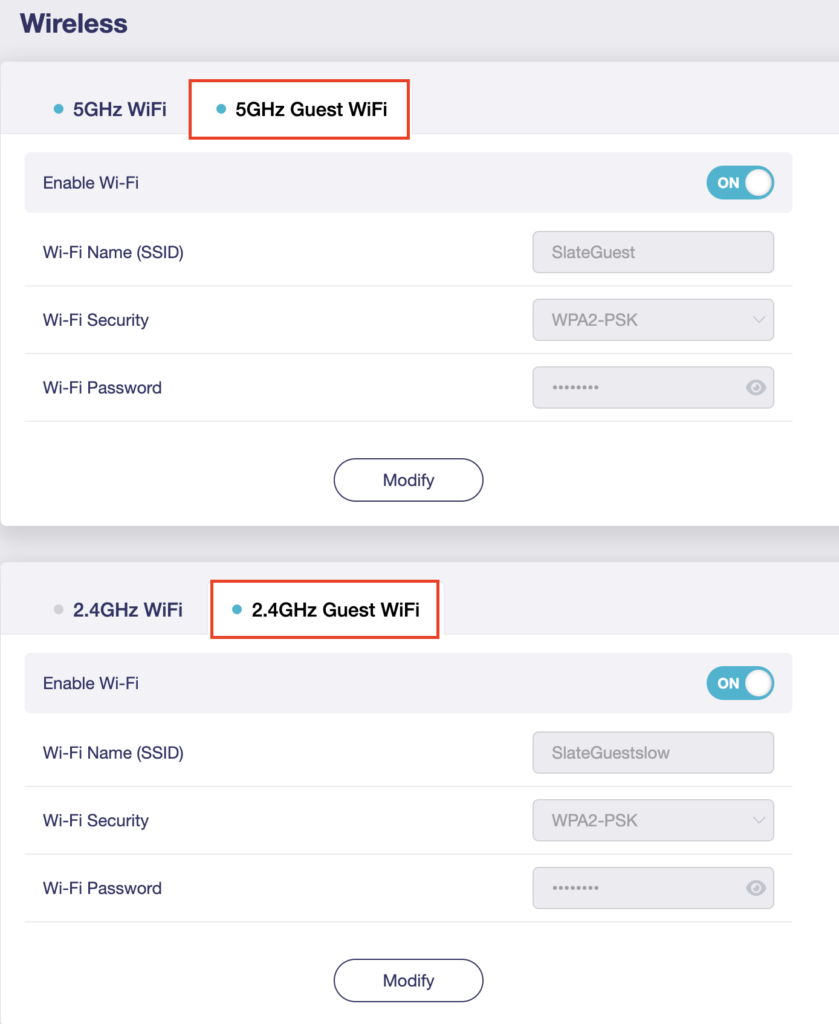
5. Click 5GHz Guest Wi-Fi or 2.4GHz Guest Wi-Fi.

GL.iNet Select Guest Wifi

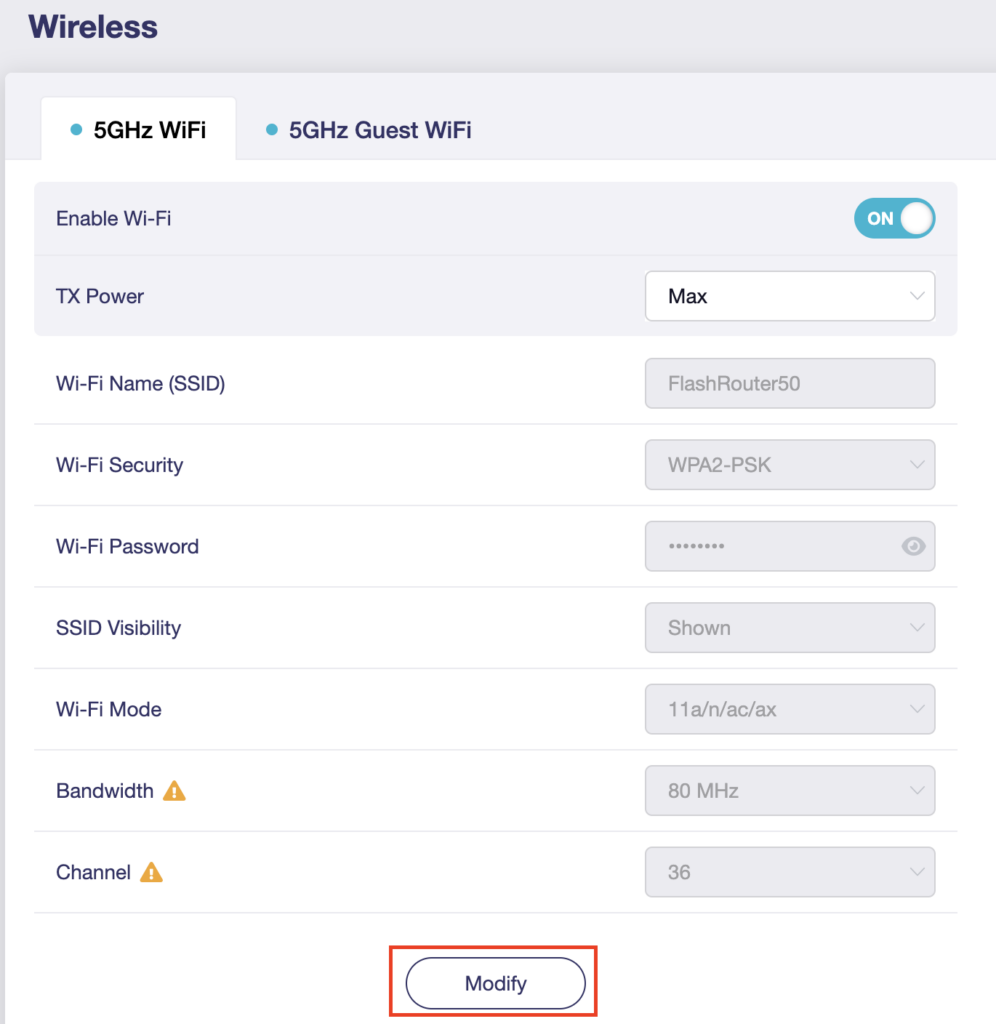
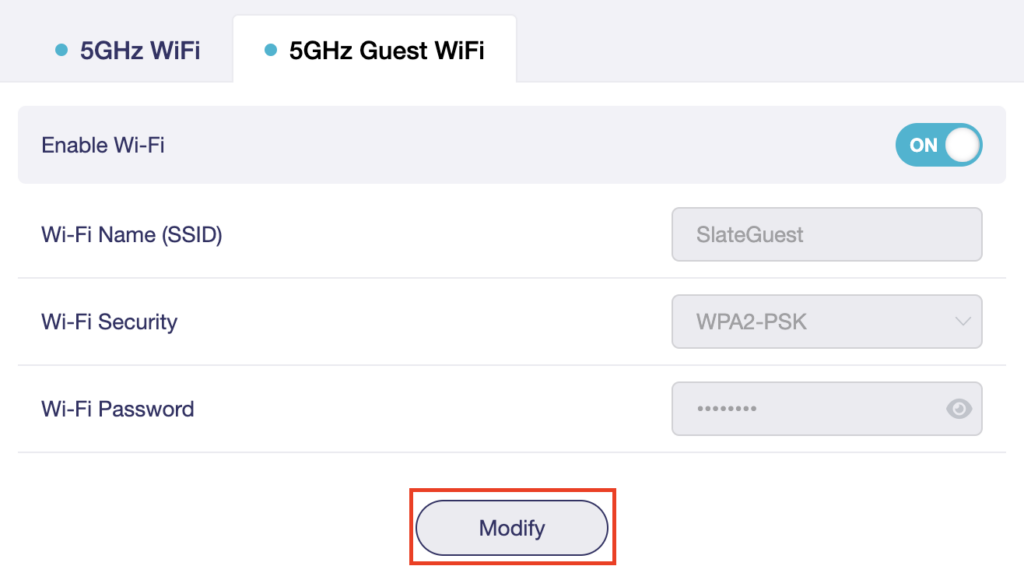
6. Click Modify.

GL.iNet Guest Modify

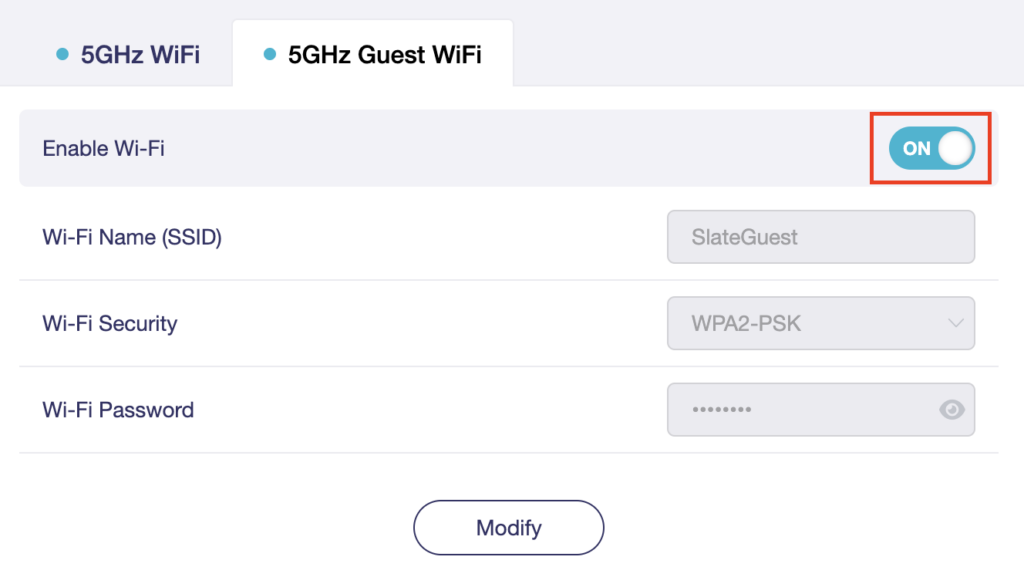
7. Set the Enable Wi-Fi toggle to the ON position.

GL.iNet Enable Guest Wifi

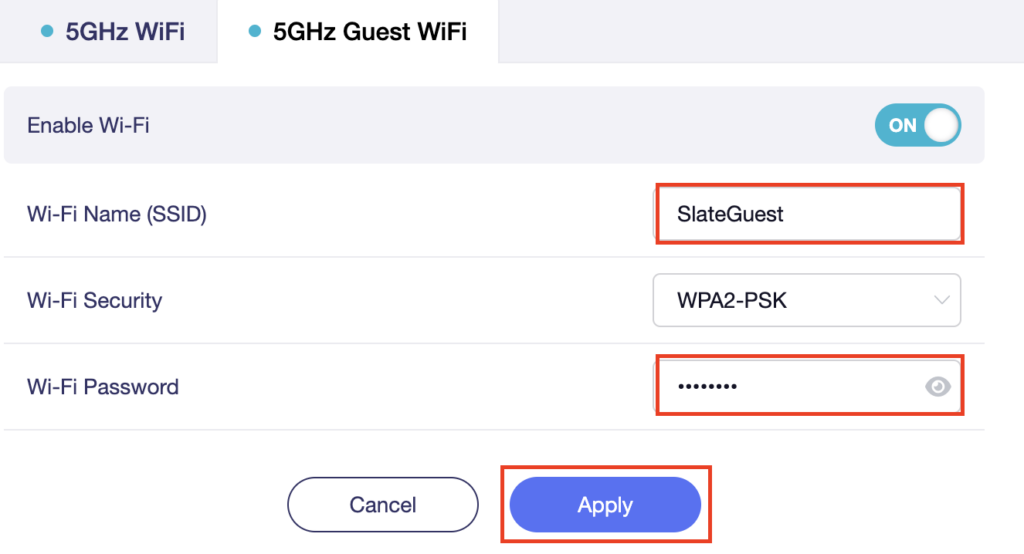
8. Change the Wi-Fi Name (SSID) and Wi-Fi Password fields to what you want to use. The SSID should be unique and NOT a duplicate of an existing network. Click Apply.

GL.iNet Guest change wifi name and pass

9. Connect your devices to the new guest wireless network.

TROUBLESHOOTING

Still having issues? Visit the VPN Troubleshooting section.

Troubleshoot Here

Flint/Slate GL.iNet Disable Wi-Fi

TeamFlashRouters · Apr 20, 2023 ·

Follow this guide to disable Wi-Fi network on your GL.iNet FlashRouter.

1. Connect your computer, phone, or tablet to the GL.iNet router via wireless (FlashRouter24 / FlashRouter50) or via ethernet cable to one of the LAN ports on the router.

The FlashRouter WiFi password is printed on the sheet that came with the router and is set to Wireless#[First 5 characters of your router MAC]. The router MAC can be found on the bottom of your router if you cannot locate the sheet. For e.g. if your MAC is 1459C07E70A8 then your WiFi password is Wireless#1459C

Be sure to capitalize the W.

2. Once connected via wireless or ethernet on your device open your browser and go to 192.168.8.1

GL.iNet router access

3. Enter openwrt as the admin password to access the GL.iNet firmware settings.
GL.iNet admin password enter

4. Click Wireless.

GL.iNet Click Wireless

5. Click Modify under the 5GHz or 2.4GHz band.

GL.iNet Modify Wifi

The 5GHz and 2.4GHz bands must be disabled at separate times. Keep in mind that if you are connected to wireless when disabling one band you may need to reconnect with the other band to disable it. Also make sure you have a device that has ethernet capabilities so you can still access the settings with wireless disabled.

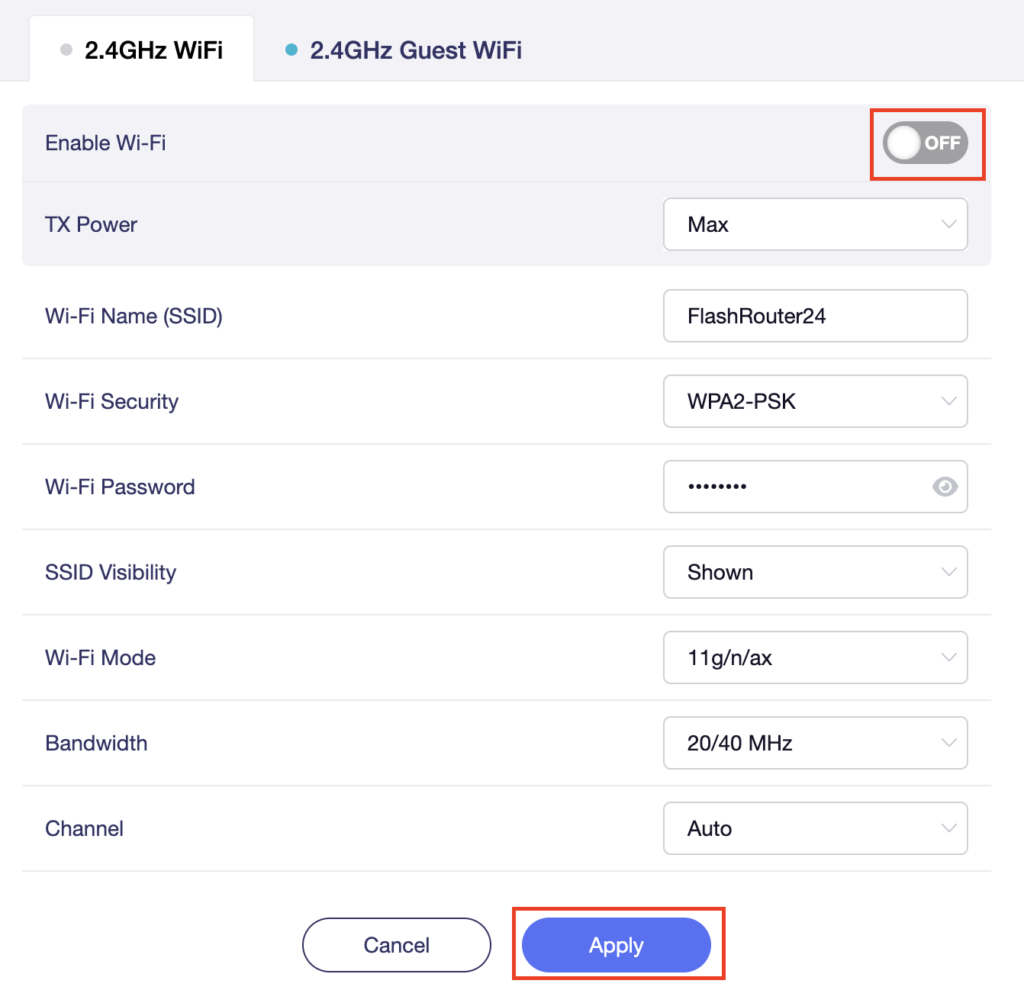
6. Set the Enable Wi-Fi toggle to the OFF position and click Apply.

GL.iNet Disable Wifi

TROUBLESHOOTING

Still having issues? Visit the VPN Troubleshooting section.

Troubleshoot Here

Flint/Slate GL.iNet Change Wi-Fi name and password

TeamFlashRouters · Apr 20, 2023 ·

Follow this guide to change the Wi-Fi name and password on your GL.iNet FlashRouter.

1. Connect your computer, phone, or tablet to the GL.iNet router via wireless (FlashRouter24 / FlashRouter50) or via ethernet cable to one of the LAN ports on the router.

The FlashRouter WiFi password is printed on the sheet that came with the router and is set to Wireless#[First 5 characters of your router MAC]. The router MAC can be found on the bottom of your router if you cannot locate the sheet. For e.g. if your MAC is 1459C07E70A8 then your WiFi password is Wireless#1459C

Be sure to capitalize the W.

2. Once connected via wireless or ethernet on your device open your browser and go to 192.168.8.1

GL.iNet router access

3. Enter openwrt as the admin password to access the GL.iNet firmware settings.
GL.iNet admin password enter

4. Click Wireless.

GL.iNet Click Wireless

5. Click Modify under the 5GHz or 2.4GHz band.

GL.iNet Modify Wifi

The 5GHz and 2.4GHz information must be changed at separate times. Keep in mind that if you are connected to wireless when changing one band you may need to reconnect with the new info you set to be on the network again to make changes to the other band.

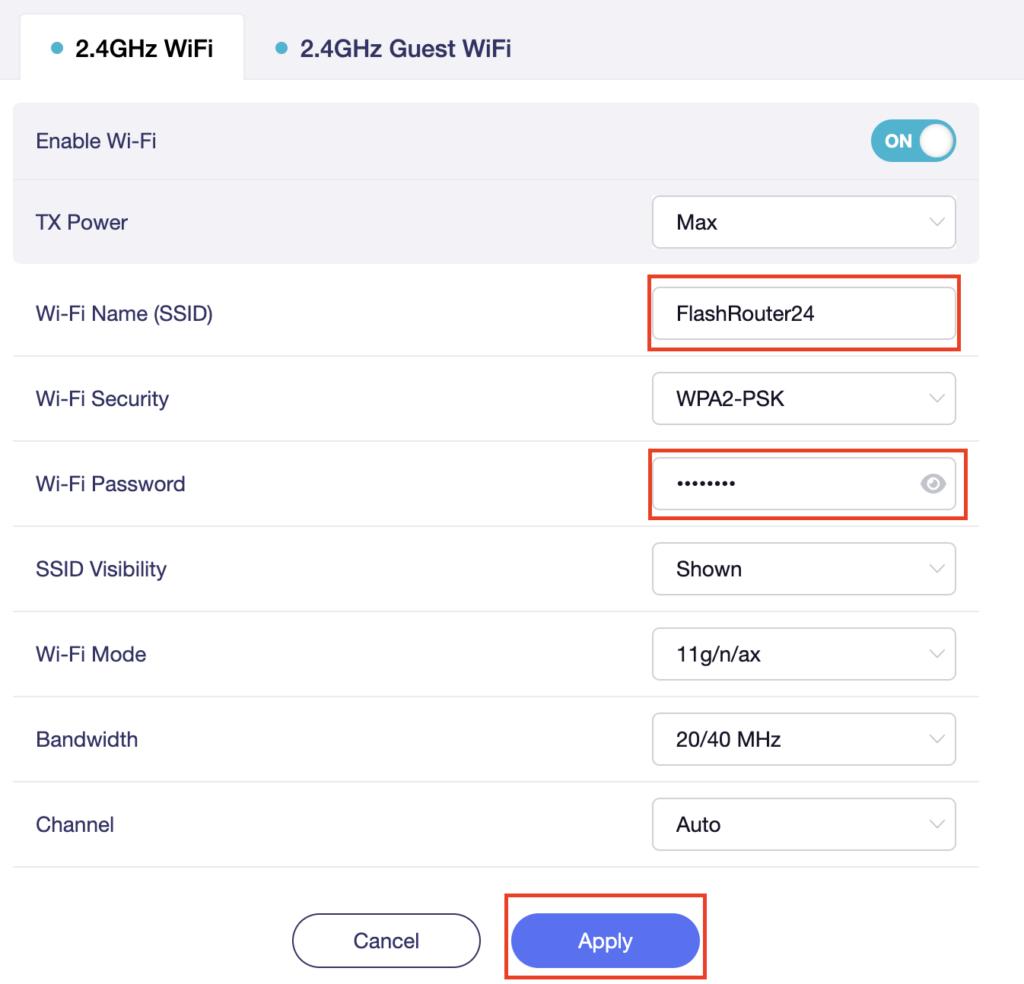
6. Change the Wi-Fi Name (SSID) and Wi-Fi Password fields to what you want to use. The SSID should be unique and NOT a duplicate of an existing network. Click Apply.

GL.iNet change Wifi name and password

7. Connect your devices to the new wireless network.

TROUBLESHOOTING

Still having issues? Visit the VPN Troubleshooting section.

Troubleshoot Here

Flint/Slate GL.iNet Firmware Upgrade Router Settings

TeamFlashRouters · Apr 3, 2023 ·

Follow this guide to upgrade the firmware of your GL.iNet FlashRouter.

1. Connect your computer, phone, or tablet to the GL.iNet router via wireless (FlashRouter24 / FlashRouter50) or via ethernet cable to one of the LAN ports on the router.

The FlashRouter WiFi password is printed on the sheet that came with the router and is set to Wireless#[First 5 characters of your router MAC]. The router MAC can be found on the bottom of your router if you cannot locate the sheet. For e.g. if your MAC is 1459C07E70A8 then your WiFi password is Wireless#1459C

Be sure to capitalize the W.

2. Once connected via wireless or ethernet on your device open your browser and go to 192.168.8.1

GL.iNet router access

3. Enter openwrt as the admin password to access the GL.iNet firmware settings.
GL.iNet admin password enter

3. If a new firmware upgrade is available the router settings will either display a banner when you first access the router or a header. Click Install or the Upgrade arrow depending on which appears for you.

GL.iNet Firmware Upgrade Banner
GL.iNet Firmware Upgrade Header

4. Make sure the Keep Settings toggle is pushed to the right so your router does not get reset. Click the Install button to begin the firmware upgrade.

GL.iNet Install Firmware Upgrade

5. The firmware update should take about 2-3 minutes. You may need to reconnect your wireless devices after the network comes back up in your available networks.

TROUBLESHOOTING

Still having issues? Visit the VPN Troubleshooting section.

Troubleshoot Here

Primary Sidebar

  • Facebook
  • Twitter
  • Instagram
  • Pinterest
  • YouTube

Footer