• Skip to primary navigation
  • Skip to main content
  • Skip to primary sidebar
  • Skip to footer

FlashRouters Support Portal

Prioritizing Privacy

  • SETUP GUIDES
    • DD-WRT Router Setup Guide
    • AsusWRT-Merlin Router Setup Guide
    • ExpressVPN Router Setup Guide
    • GL.iNet Router Setup Guide
    • Privacy Hero Router Setup Guide
    • Roqos Core Router Setup Guide
  • TROUBLESHOOTING
    • Router Access
    • WiFi Connectivity
    • Internet Connection Issues
    • General VPN Issues
    • FR Privacy App
    • DD-WRT Firmware
    • TeamViewer Remote Support
  • FAQs
    • Router FAQs
    • VPN FAQs
    • Warranty and Returns FAQs
    • Sales FAQs
    • Shipping FAQs
    • Service Plan FAQs
  • Show Search
Hide Search

Roqos Core Features

Set a Static IP for your connected devices on Roqos

TeamFlashRouters · Dec 21, 2021 ·

By assigning specific Static IP addresses to your devices you can better manage your network and make sure they connect with the same Local IP Address each time they connect to your Roqos.

Login to Roqos Core UI web app in a browser on any computer or smart device.

1. Click the navigation menu and select Basic Settings > LAN Settings.
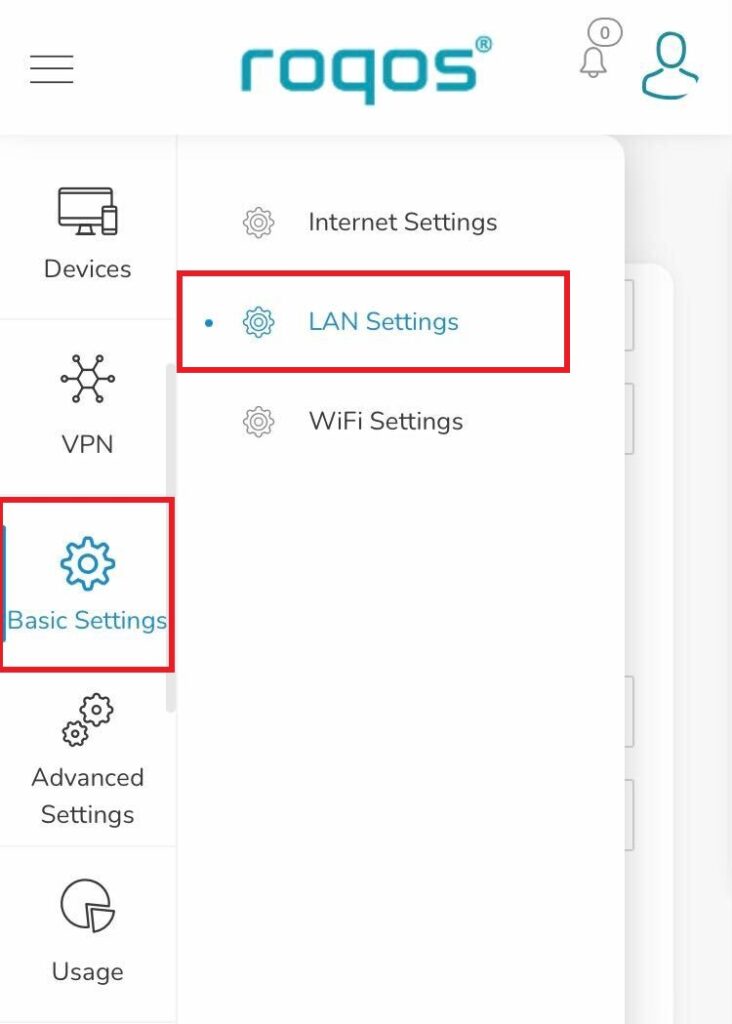
Roqos Basic Settings - LAN settings

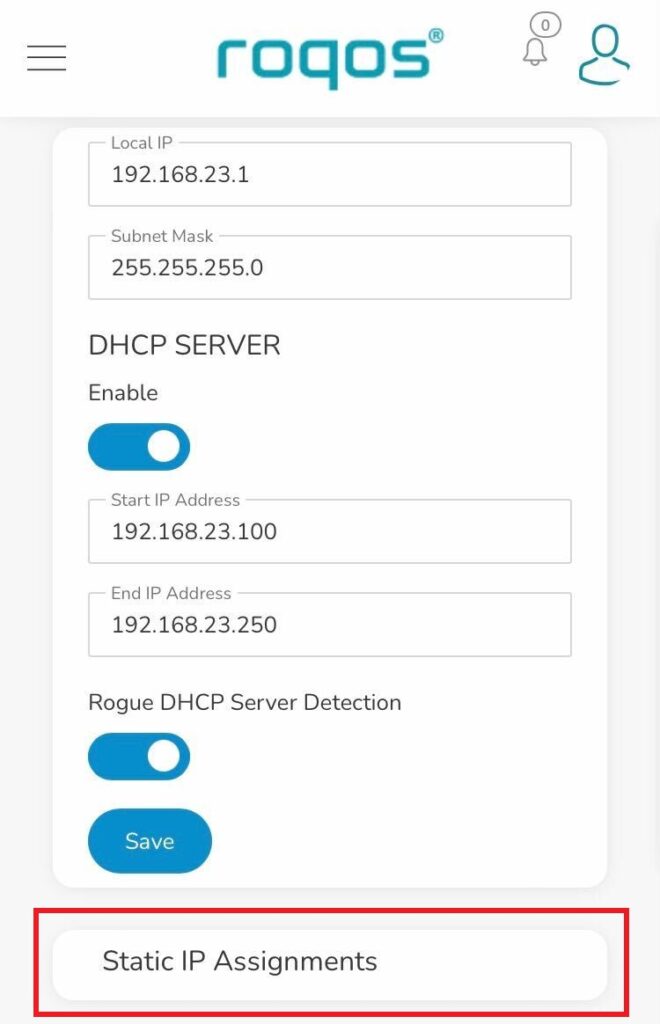
2. Click Static IP Assignments.

Roqos LAN settings - Static IP Assignments

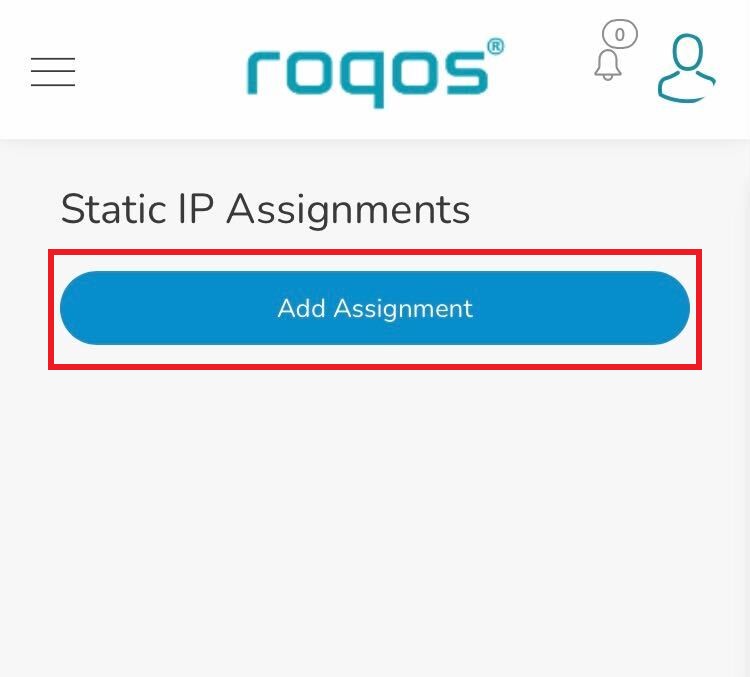
3. Click Add Assignment.

Roqos LAN settings - Add Assignment

4. Toggle the device hat you want to set a Static IP for and then enter 192.168.23.x with x being any number between 2 and 254. Click Save.

Now, every time the device connects to the Roqos network it will be assigned the same Static IP address on the Local network.
VPN Kill Switch on Roqos

Dave · Dec 16, 2021 ·

The VPN Kill Switch disables the Internet connection on your Roqos Core in the even that your VPN disconnects. Internet access of all your devices will be blocked when the kill switch is enabled – except for the ones you have excluded from VPN Out.

Login to Roqos Core UI web app in a browser on any computer or smart device.

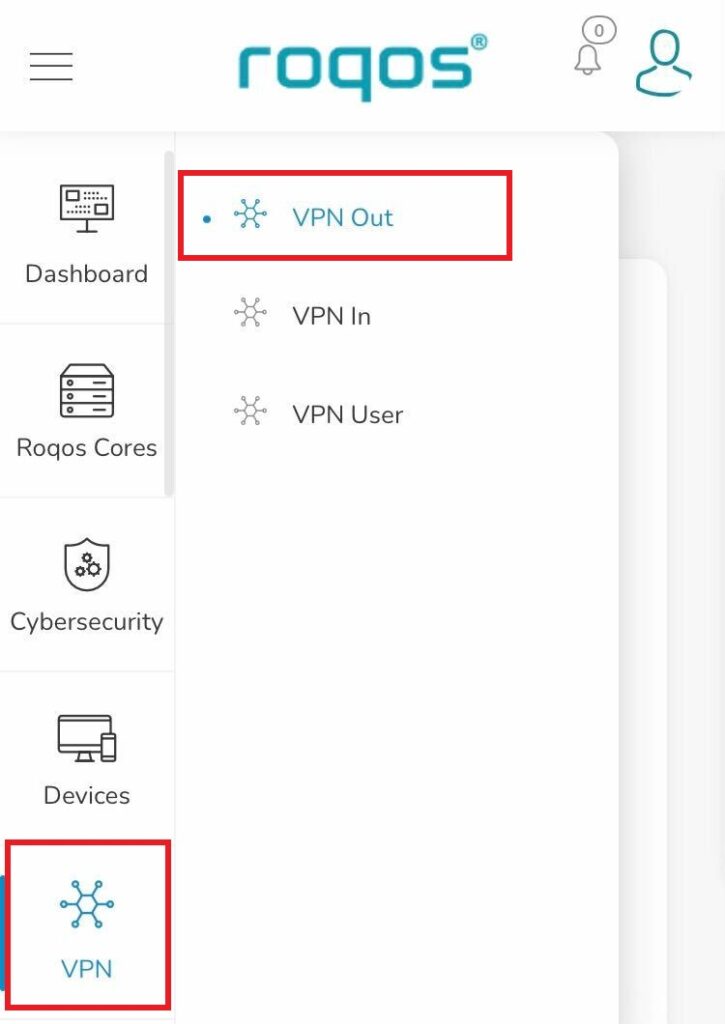
1. Click the navigation menu and select VPN  > VPN Out.

Roqos VPN - VPN Out

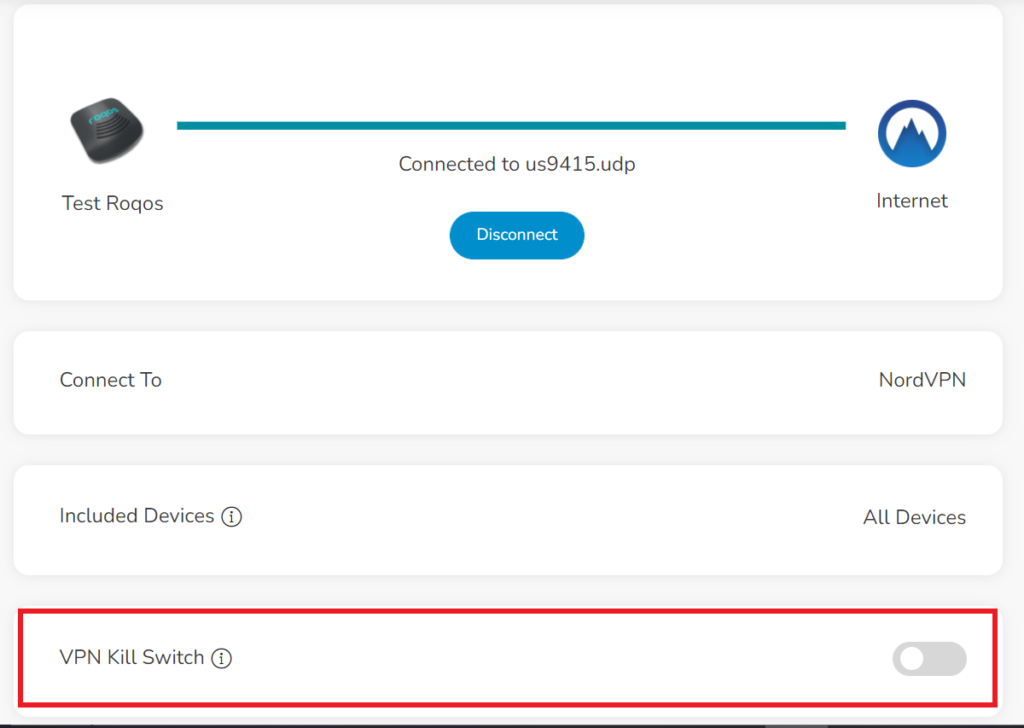
2. Toggle the VPN Kill Switch to enable this feature.

Roqos VPN - VPN Kill Switch

Managing User Profiles on Roqos

Dave · Dec 16, 2021 ·

User Profiles allow you to organize your devices connected to the Roqos Core. This allow you to see a user profile’s usage history, set a schedule when devices are allowed to connect to the Internet, and filter out specific content such as explicit websites and games.

Login to Roqos Core UI web app in a browser on any computer or smart device.

Adding new User Profile

1. Click the navigation menu and select Users.

2. To add a new User Profile click Add User.

3. In the Name field enter the name for the User Profile. You can add an image for the User Profile here as well.

4. You will see a list of devices connected to the Roqos Core at the bottom of the page. Check the box of the devices that you would like to add to this User Profile. Then click Save.

Tracking Usage History

1. Click the User Profile that you want to review.

2. Select Usage History.

3. On the new page you can view usage by Top Visited, All Activity, and Activity Graph.

Schedule Pauses

1. Click the User Profile that you want to review.

2. Select Scheduled Pauses.

3. Click Add Schedule.

4. From here you can set the name of the schedule, the days that the schedule will be in effect, and if the schedule should be applied all day or during specific hours. Click Save.

Filters

1. Click the User Profile that you want to review.

2. Select Filters.

3. From here you can use the toggle to Block explicit websites and Block explicit search results.

4. In the Safe Youtube dropdown you can select None, Moderate, or Strict.

5. The Blocked Content area allows you to block specific services such as Games and Social Media.

6. Add specific websites to the Block Sites list if the above policies did not cover them.

7. Add specific websites to the Allowed Sites list if you want to block all websites except for a few.

Cybersecurity and Intrusion Prevention on Roqos

Dave · Dec 16, 2021 ·

Intrusion Prevention analyzes your network traffic against the latest security threats and automatically blocks any suspicious activity.

Login to Roqos Core UI web app in a browser on any computer or smart device.

1. Click the navigation menu and select Cybersecurity > Intrusion Prevention.

Roqos Cybersecurity - Intrusion Prevention

2. Set Intrusion Prevention to Enabled.

Roqos Cybersecurity - Enable Intrusion Prevention

Block Websites by Country on Roqos

Dave · Dec 16, 2021 ·

Country Block allows you to select countries that you identify to be an unsafe and block internet traffic between your network and those countries.

Login to Roqos Core UI web app in a browser on any computer or smart device.

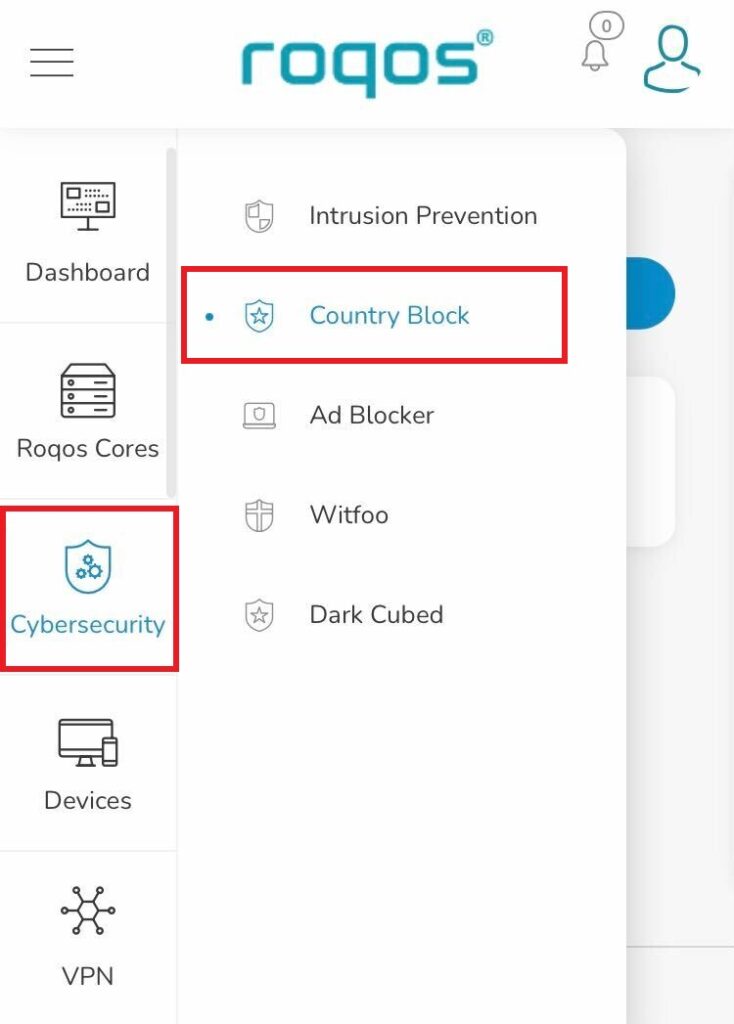
1. Click the navigation menu and select Cybersecurity > Country Block.

Roqos Cybersecurity - Country Block

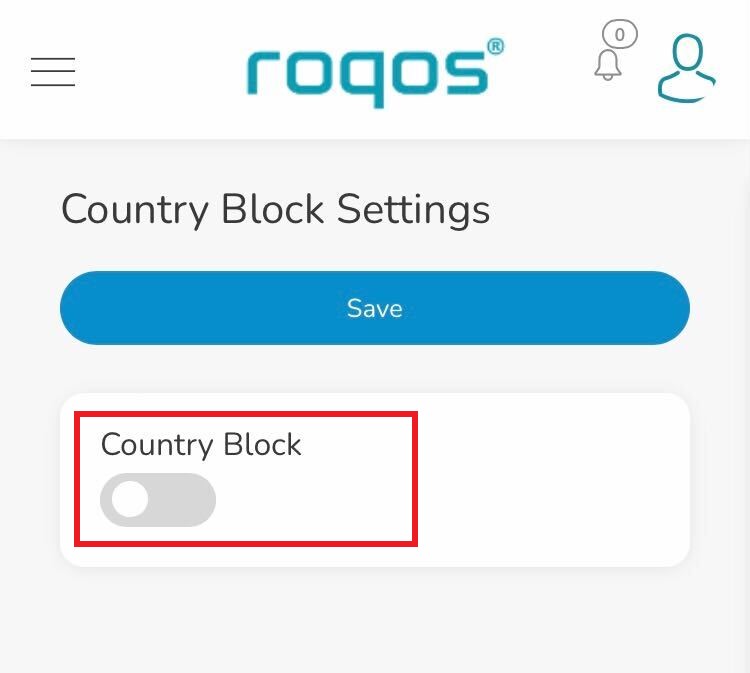
2. Toggle the Country Block setting.

Roqos Cybersecurity - Enable Country Block

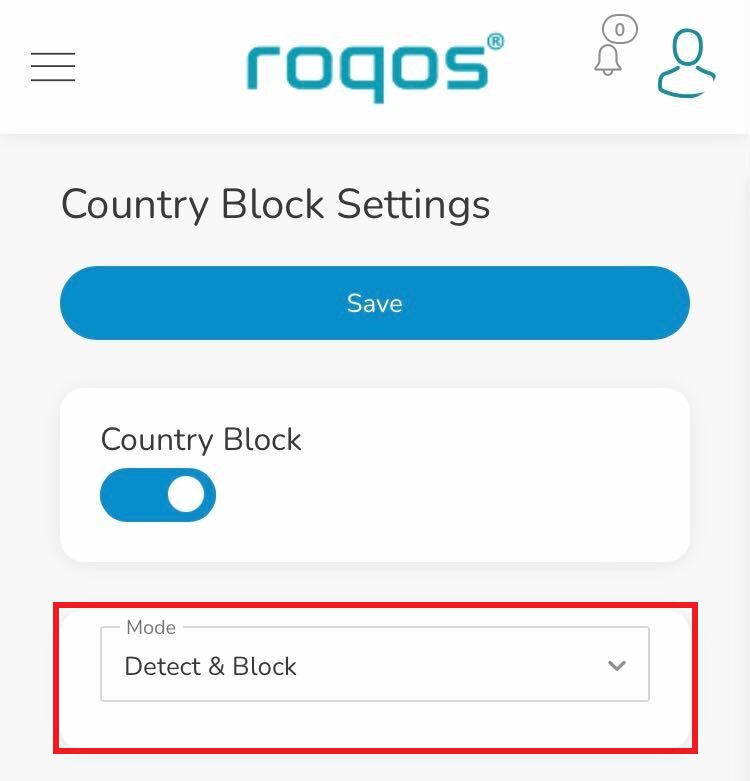
3. In the Mode dropdown select Detect & Block or Detect Only.

Roqos Cybersecurity - Country Block Mode

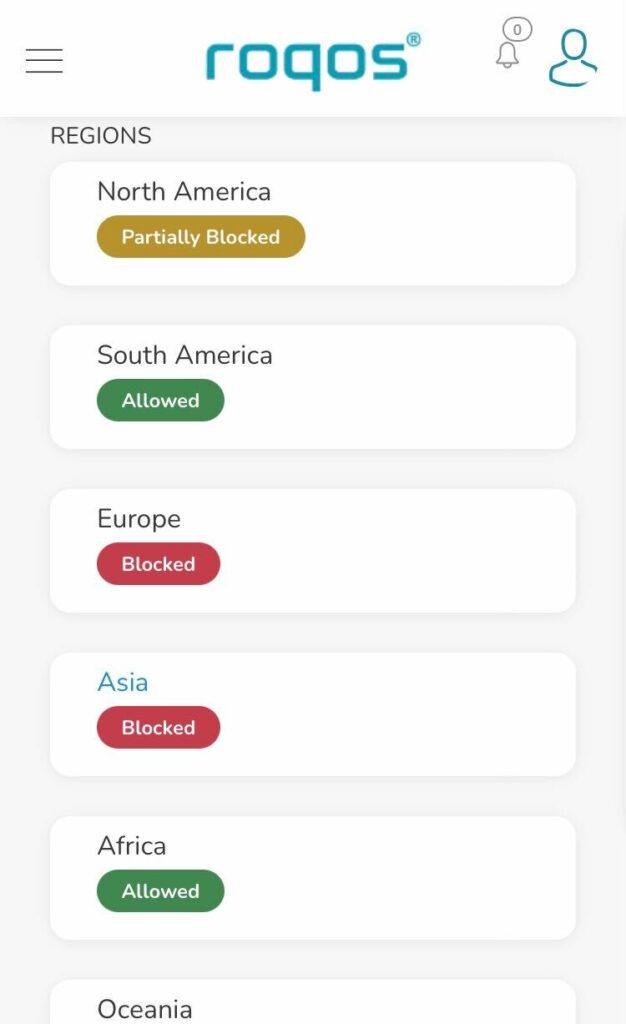
4. Under Regions you can select the regions you want to block or specific countries within that region. Once your selections are made click Save.

Roqos Cybersecurity - Select Blocked Countries

Ad blocking on Roqos

Dave · Dec 16, 2021 ·

Enable Ad blocking on your Roqos Core so you are not inundated with ads across the internet.

Login to Roqos Core UI web app in a browser on any computer or smart device.

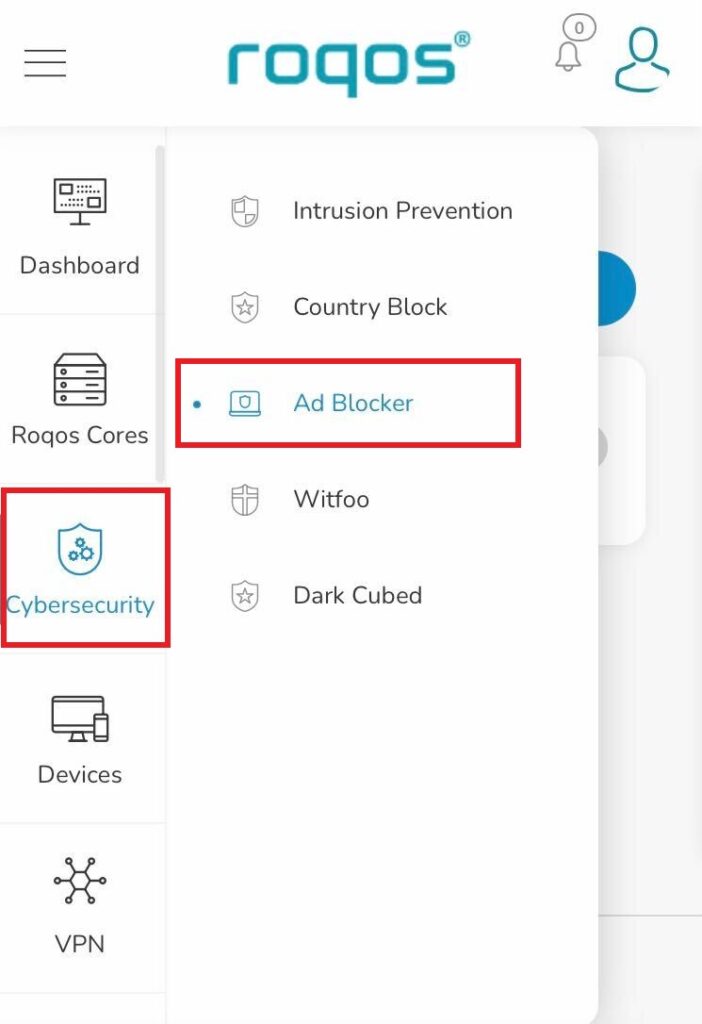
1. Click the navigation menu and select Cybersecurity > Ad blocker.

Roqos Cybersecurity - Ad blocker

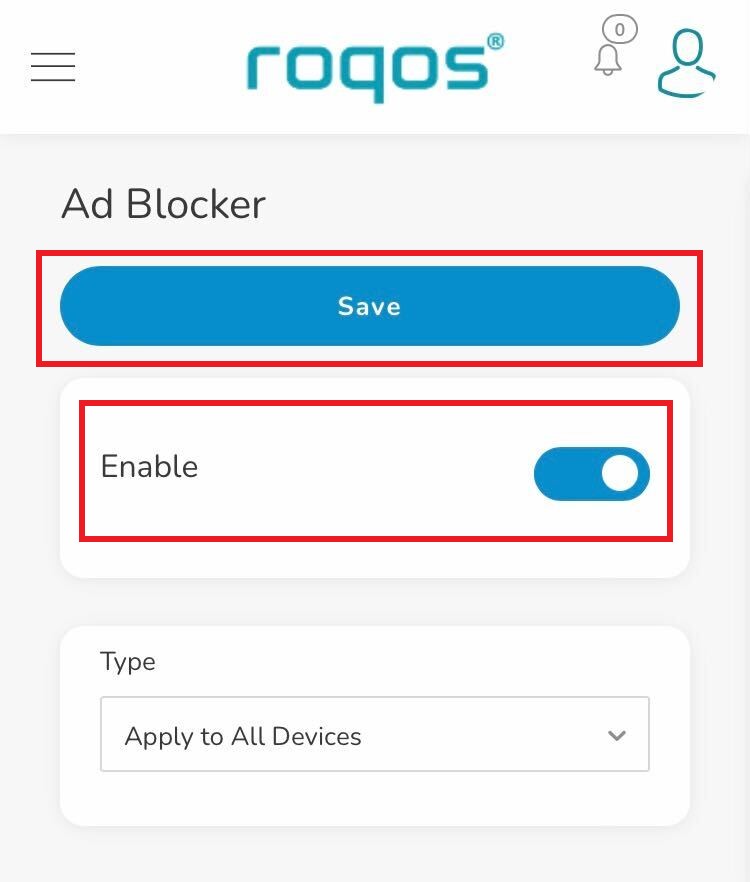
2. Toggle the Enable slider and select if you want to apply Ad blocking to all devices or only select profiles and click Save.

Roqos Cybersecurity - Enable Ad blocker

Parental Controls on Roqos

Dave · Dec 16, 2021 ·

The Roqos Core includes a suite of user access settings which can be used as Parental Controls.
You can create individual user profiles and assign specific devices. Using these profiles you can restrict access, block certain content, or even monitor internet usage if you choose to do so.

Create User Profiles

  1. Using the navigation pane on the left of the screen, select USERS.
  2. Select the ADD USER button at the top of the menu.
  3. Create a name to identify the user. You may also add a photo or picture to associate with this user however this is optional.
  4. Select the SAVE button at the bottom of the menu.

Assign Devices

  1. Once you have created a user, you must assign one or more devices to the user.
  2. Using the navigation pane on the left of the screen, select USERS. Choose a user from the list.
  3. You are now in the USER/GROUP PROFILE menu.
  1. Select DEVICES.
  2. Select ADD DEVICE.
  1. The ADD DEVICES menu lists all devices which are currently or previously connected to the Roqos. You cannot assign a device to a user unless it has been connected to the Roqos. 
  2. Use the check box to select one or more devices and then select the SAVE button to assign the device to the user.

A device can only be assigned to one user. Access restrictions you place on a user such as scheduled internet access or content restriction will apply to all devices assigned to that user regardless of who in your home is actually using the device at that time.

Turn Off Internet Access

  1. Using the navigation pane on the left of the screen, select USERS. Choose a user from the list
  2. You are now in the USER/GROUP PROFILE menu
  3. Use the PAUSE button next to the user’s name to halt all internet access to the devices assigned to this user. Conversely, you can restore internet access by pushing the PLAY button here as well.

Schedule Internet Access

  1. Using the navigation pane on the left of the screen, select USERS. Choose a user from the list.
  2. You are now in the USER/GROUP PROFILE menu.
  3. Select SCHEDULE PAUSES. You can create multiple schedules for each user to pause their internet access on a daily recurring basis for every day of the week.

Enable Content Filters

  1. Using the navigation pane on the left of the screen, select USERS. Choose a user from the list.
  2. You are now in the USER/GROUP PROFILE menu.
  3. Select FILTER. Use existing category and content filters provided by Roqos and customize with your own blocked and allowed site lists.
  4. Select SAVE.

Monitor Internet Usage

  1. Using the navigation pane on the left of the screen, select USERS. Choose a user from the list.
  2. You are now in the USER/GROUP PROFILE menu.
  3. Select USAGE HISTORY. Access usage data for all devices assigned to this user. This includes websites visited and activity times.

Please note that in order to collect device information, you must enable this functionality on your Roqos. It is disabled by default.

  1. Using the navigation pane on the left of the screen, select ADVANCED SETTINGS.
  2. Select MISCELLANEOUS.
  3. Activate the COLLECT USER INTERNET USAGE and COLLECT DEVICE DATA USAGE options.

TROUBLESHOOTING

Still having issues? Visit our Troubleshooting section to diagnose common problems here.

Troubleshoot Here

Wireless Repeater – WiFi as WAN on Roqos

Dave · Dec 16, 2021 ·

WiFi as WAN is a feature of the Roqos software which allows you to use an existing WiFi network as the Internet source for the Roqos router instead of an ethernet cable connection. This is a great solution for travelling users who do not have access to the modem/router in their hotel or AirBnB.

Login to Roqos Core UI web app in a browser on any computer or smart device.

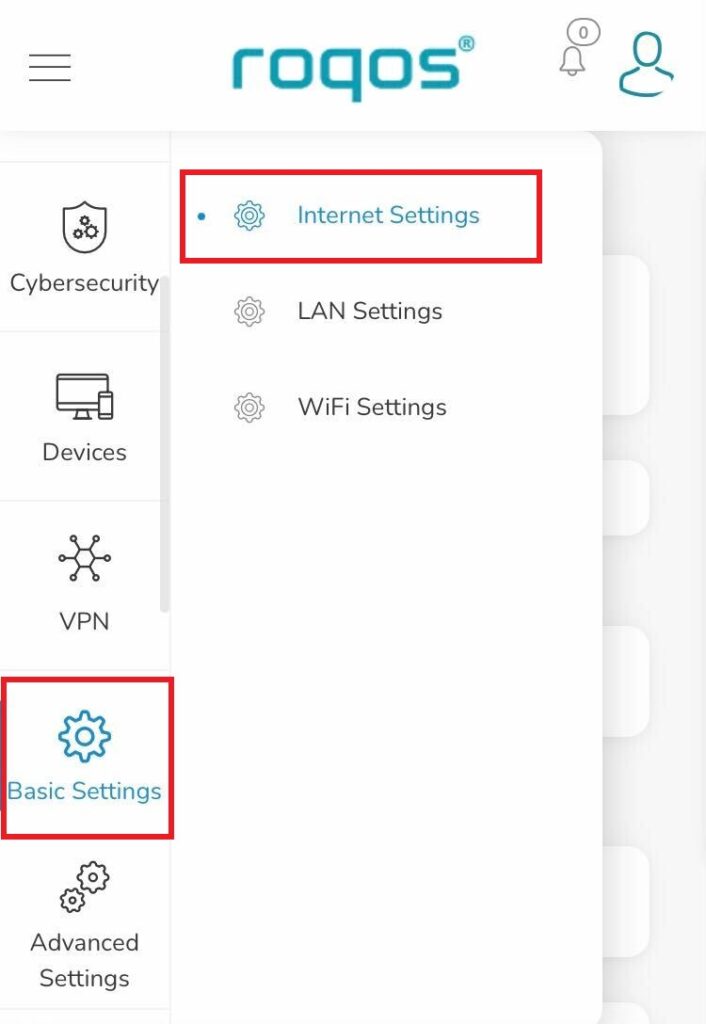
1. Click the navigation menu and select Basic Settings > Internet Settings.

Roqos Basic Settings - Internet Settings

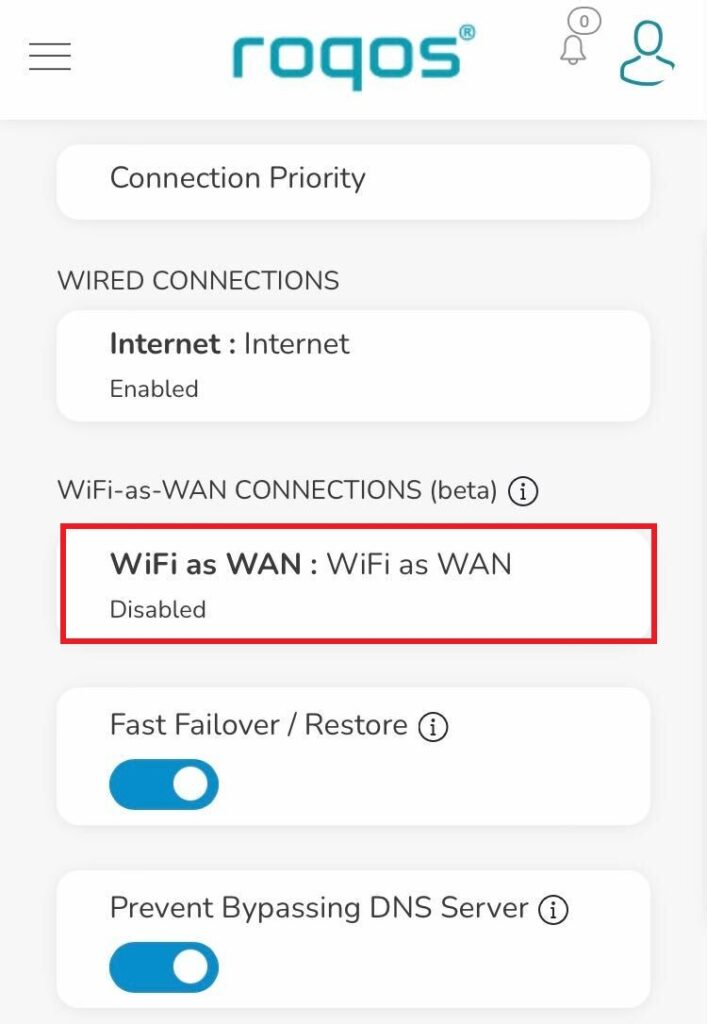
2. Click WiFi as WAN.

Roqos Internet Settings - WiFi as WAN

3. Scroll down and select the existing WiFi network you wish to use for WAN/Internet from the Nearby Wireless Networks list.

4. Enter the correct password for the existing WiFi network and click Connect.

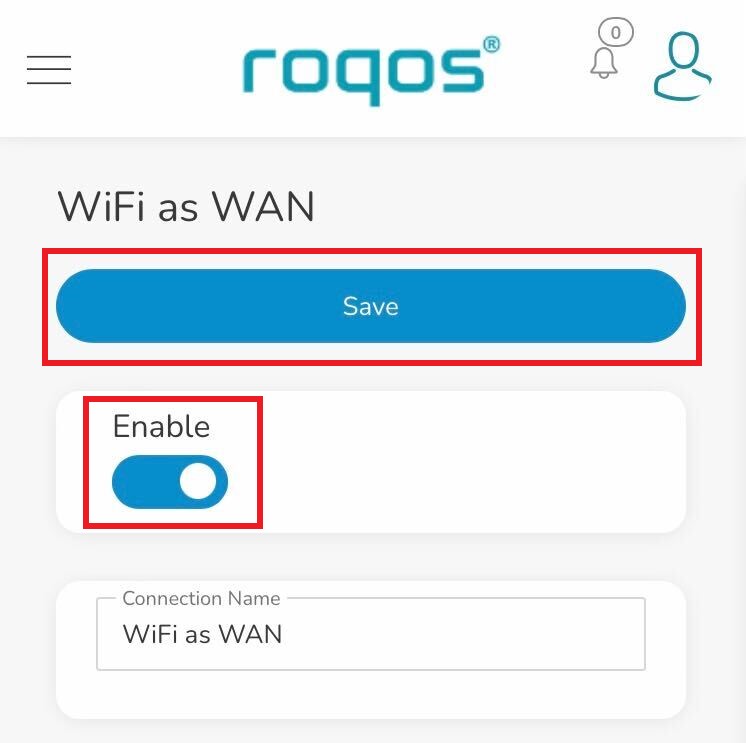
5. Toggle the Enable slide and click Save.

Roqos WiFi as WAN - Enable and Save

Be patient as the connection is made. It usually takes 30 seconds to a minute to connect. Then test that your Internet is working while connected to the Roqos network.

What do the lights on my Roqos Core mean?

TeamFlashRouters · Mar 3, 2022 ·

  1. White (looks blueish white on Teal colored Roqos Cores): System startup
  2. Solid Red: System is up, but there is no internet connection. Roqos Core cannot detect a network link either.
  3. Flashing Red: System is up and there is an ethernet cable connected to Internet port, however Roqos Core is unable to reach the internet. Usually happens with bad ethernet cable, or cable modem/ISP modem not giving IP address to Roqos Core due to ISP provisioning issues, or some other type of network setting blocking Roqos Core’s access to the internet. First thing to try in this scenario is to reboot the ISP router/modem upstream of Roqos Core.
  4. Flashing Blue: Roqos Core is up and connected to the internet, but it is not yet activated. Brand new Roqos Cores, or Roqos Cores that are factory reset will show this behavior when they are ready to be activated again.
  5. Blue (deep blue color, different from #1): Roqos Core is up and activated, everything is normal.

Primary Sidebar

Roqos Core Router Setup Guide
  • Internet Setup
  • WiFi Setup
  • VPN Setup
  • Roqos Features
  • View Full Setup Guide
  • Facebook
  • Twitter
  • Instagram
  • Pinterest
  • YouTube

Footer