• Skip to primary navigation
  • Skip to main content
  • Skip to primary sidebar
  • Skip to footer

FlashRouters Support Portal

Prioritizing Privacy

  • SETUP GUIDES
    • Privacy Hero Router Setup Guide
    • ASUS-WRT Router Setup Guide
    • AsusWRT-Merlin Router Setup Guide
    • DD-WRT Router Setup Guide
    • ExpressVPN Router Setup Guide
    • GL.iNet Router Setup Guide
    • Roqos Core Router Setup Guide
  • TROUBLESHOOTING
    • Router Access
    • WiFi Connectivity
    • Internet Connection Issues
    • General VPN Issues
    • DD-WRT Firmware
    • TeamViewer Remote Support
  • FAQs
    • Router FAQs
    • VPN FAQs
    • Warranty and Returns FAQs
    • Sales FAQs
    • Shipping FAQs
    • Service Plan FAQs
  • Show Search
Hide Search

Search Results for: here are my ans

Which DD-WRT wireless extender setup should I be using?

TeamFlashRouters · Jun 11, 2019 ·

FlashRouters supports four unique DD-WRT wireless extender setups – options similar to an open source Mesh network. Each different wireless extender configuration serves a different purpose. Read below to see which guide fits your configuration requirements!

Wireless Repeater

Why should I choose Wireless Repeater Setup?

  1. If you have a MiFi wireless only internet connection or other type of WiFi internet where there is no access to any ethernet port for a wired internet connection, then you can setup a wireless repeater network to both extend WiFi and add wired connection capabilities.
  2. If you have a large home or office area that requires additional WiFi coverage can use a wireless repeater setup to extend the existing network.
  3. If you want to create a separate VPN WiFi network in your home without placing the FlashRouter in the same room as your primary router you can use wireless repeater to establish a WiFi internet connection and then connect to VPN on your WiFi repeater network.
  4. If you want a wireless Dual Router setup option where you can have local ISP IP address through your main router WiFi network and your VPN IP address through your FlashRouter Wireless Repeater WiFi network, both available for you to connect at all times. Each network is on a unique subnet.

View the FlashRouter Wireless Repeater Setup Guide.

Wireless Repeater Bridge

Use Cases

Wireless Repeater Bridge Setup

  1. Anyone that needs all their devices connected to the same local network.
  2. Anyone with a MiFi internet connection that does not have an ethernet port and has no need for VPN.
  3. Anyone with a large wireless area that requires additional coverage.

Wireless Client Bridge

Use Cases

Wireless Client Bridge Setup

  1. Anyone with a MiFi internet connection that needs wired access.
  2. Anyone that needs additional wired ports instead of using a switch.
  3. Anyone with wired only devices in their home that are too far from your main router.

Wireless Access Point DHCP Forwarder

Use Cases

Wireless Access Point DHCP Forwarder Setup

  1. Anyone that needs their devices connected to the same local network and wants lossless LAN to LAN speeds via wireless and ethernet connection.
  2. Anyone that wants to use their main router to provide DHCP to their router instead of having an additional DHCP server.


ProtonVPN Setup Guide for Privacy Hero

TeamFlashRouters · Sep 17, 2025 ·

Your Privacy Hero router uses Cloud Based router management which means you can access the router settings from anywhere on any device that has an internet connection. You can follow these steps while connected to your phone, other Wi-Fi network, or the Privacy Hero network.

ProtonVPN Wireguard Setup for Privacy Hero (recommended)

1. From any device that has a browser such as a computer, smartphone, or tablet visit app.privacyhero.com.

App.PrivacyHero.com

2. Enter your Privacy Hero account email and password. Click Login.

Privacy Hero Access Settings

3. Click the VPN symbol.

Privacy Hero Setup VPN

4. Click the Change button and select Custom from the dropdown and choose the Wireguard option.

Privacy Hero Change VPN Providers

5. In a new tab login to your ProtonVPN account.

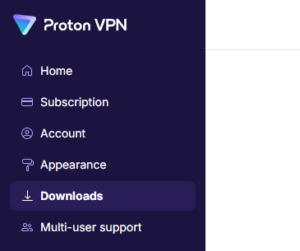
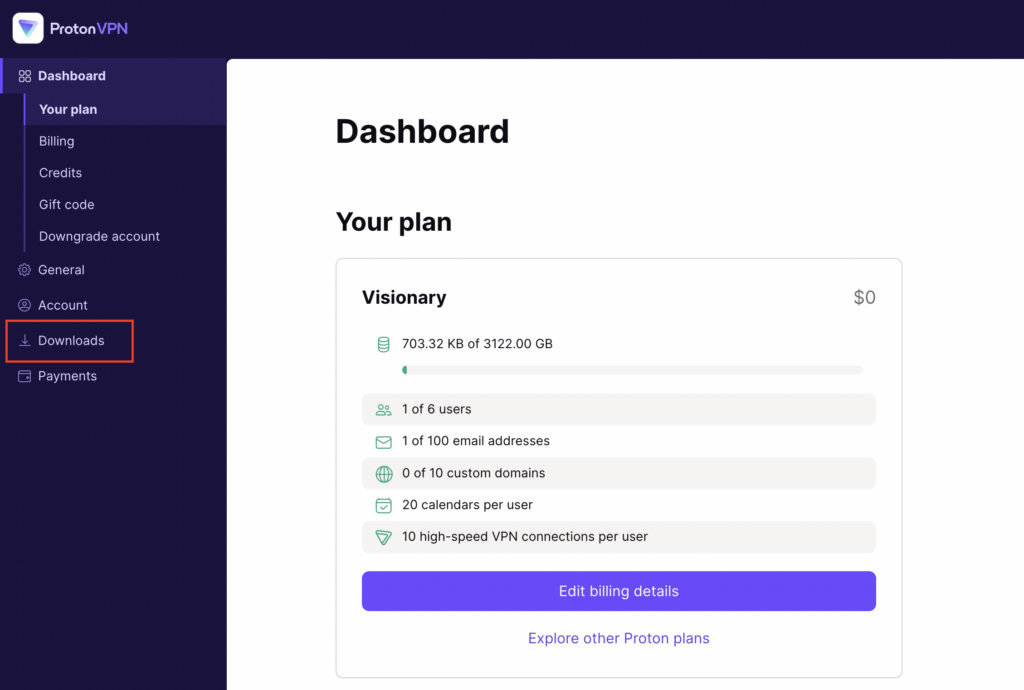
6. Go to the Downloads section of your ProtonVPN account page.

7. Scroll down to find the WireGuard configuration section. Name your configuration and then select Router as the platform, and select Standard server configs.

8. Click on the country name that you want to choose, and Download any of the available server files from the list.

9. Drag and drop or click to Upload the server file into the Custom box on your Privacy Hero settings page. Then press Save.

10. Your Privacy Hero settings should now show a Connected message, indicating you have successfully signed in to your ProtonVPN server!

Wireguard connection

ProtonVPN OpenVPN Setup for Privacy Hero

1. From any device that has a browser such as a computer, smartphone, or tablet visit app.privacyhero.com.

App.PrivacyHero.com

2. Enter your Privacy Hero account email and password. Click Login.

Privacy Hero Access Settings

3. Click the VPN symbol.

Privacy Hero Setup VPN

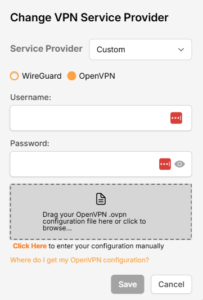
4. Click the Change button and select Custom from the dropdown and choose the OpenVPN option.

Privacy Hero Change VPN Providers

5. In a new tab login to your ProtonVPN account.

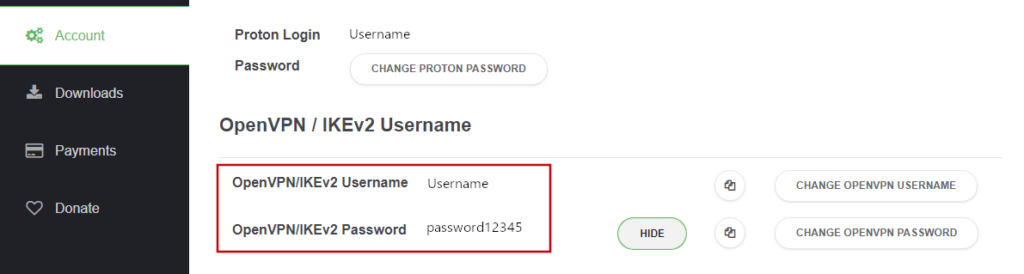
6. Navigate to the Account tab and find your OpenVPN specific Username and Password.

FlashRouters DD-WRT Privacy APP ProtonVPN OpenVPN Specific Username and Password

7. Copy and paste the username and password from previous step into the Custom box on your Privacy Hero settings page.

8. Go to the Downloads section of your ProtonVPN account page.

9. Scroll down to find the OpenVPN Configuration Files section. Then select “Router” as the platform, and select “Standard Server Configs.”

10. Click on the country name that you want to choose, and Download any of the available server files from the list.

11. Drag and drop or click to Upload the server file into the Custom box on your Privacy Hero settings page. Then press Save.

12. Your Privacy Hero settings should now show a Connected message, indicating you have successfully signed in to your ProtonVPN server!

Privacy Hero’s cloud based router settings access makes it so you can change settings while not connected to the Privacy Hero network. Visit the ProtonVPN IP Check to verify your VPN IP address. If it has not changed be sure to double check that you are indeed connected to the Privacy Hero network.

Keep in mind that the VPN connection will not change the location of the streaming services listed in the Streaming Relocation area of the Privacy Hero settings if the Streaming Relocation feature is Enabled.

TROUBLESHOOTING

Still having issues? Contact our Support Team.

Troubleshoot Here

ProtonVPN WireGuard Setup

TeamFlashRouters · Jun 15, 2022 ·

Preparing for ProtonVPN WireGuard Setup

Verify your ProtonVPN login information

If you are not already a ProtonVPN user Sign Up Now.

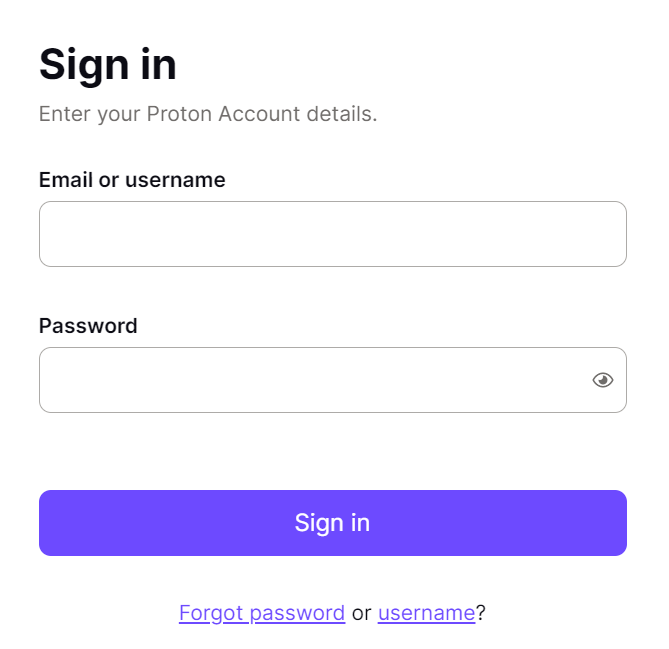
Log in to your account on the ProtonVPN website.

ProtonVPN Account login

1. On the left hand side select Downloads.

ProtonVPN Downloads

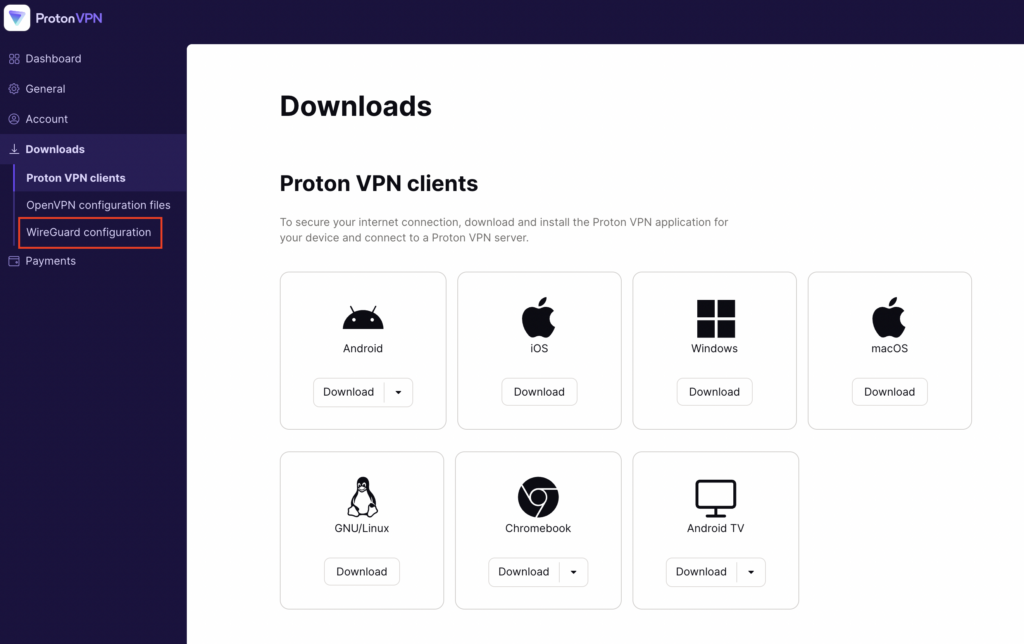
2. Then select WireGuard Configuration.

ProtonVPN WireGuard Configuration

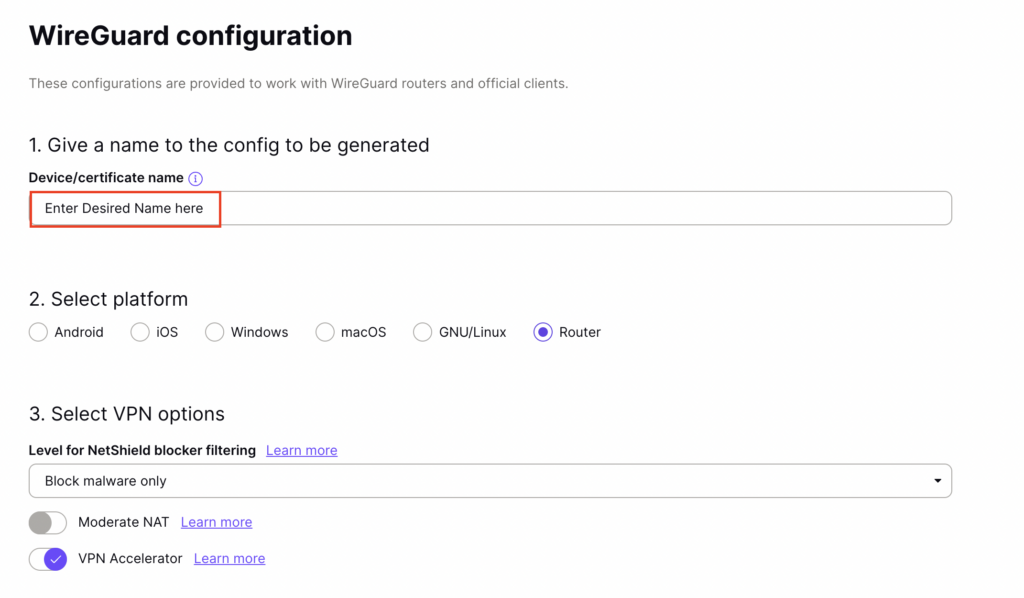
3. Enter the Device Name to assign the FlashRouter to identify it among your ProtonVPN connections.

ProtonVPN WireGuard Desired Name

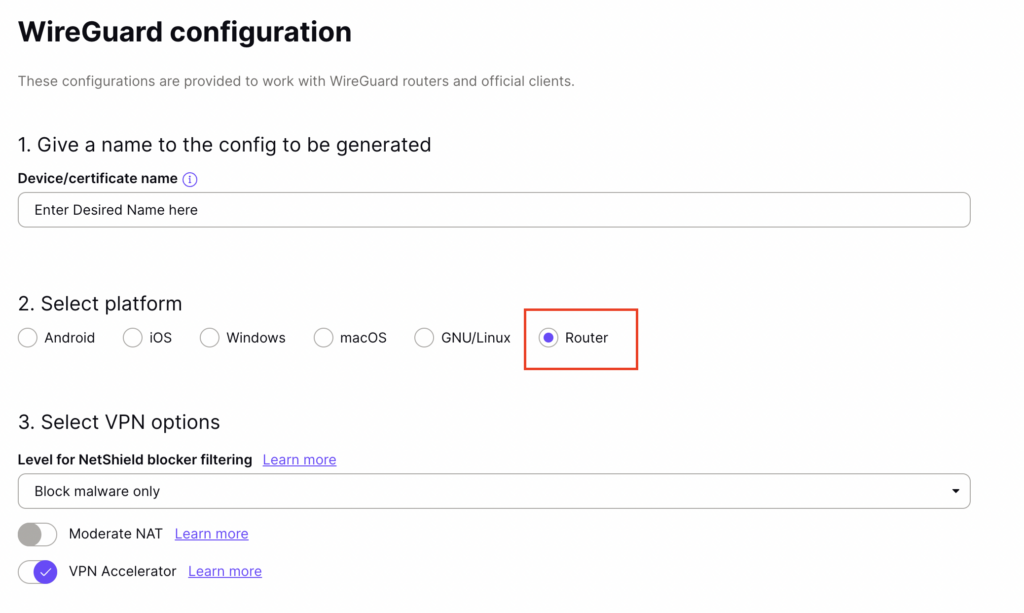
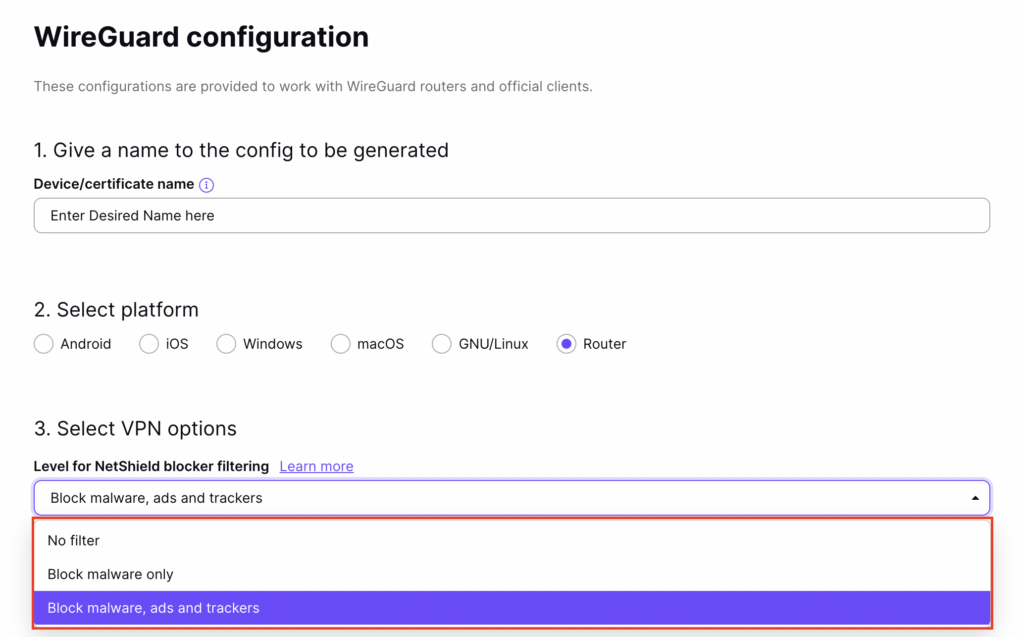
4. Set the Device platform as Router.
ProtonVPN WireGuard select Router

5. Select the VPN Options that you would like to connect with.

ProtonVPN WireGuard VPN Options

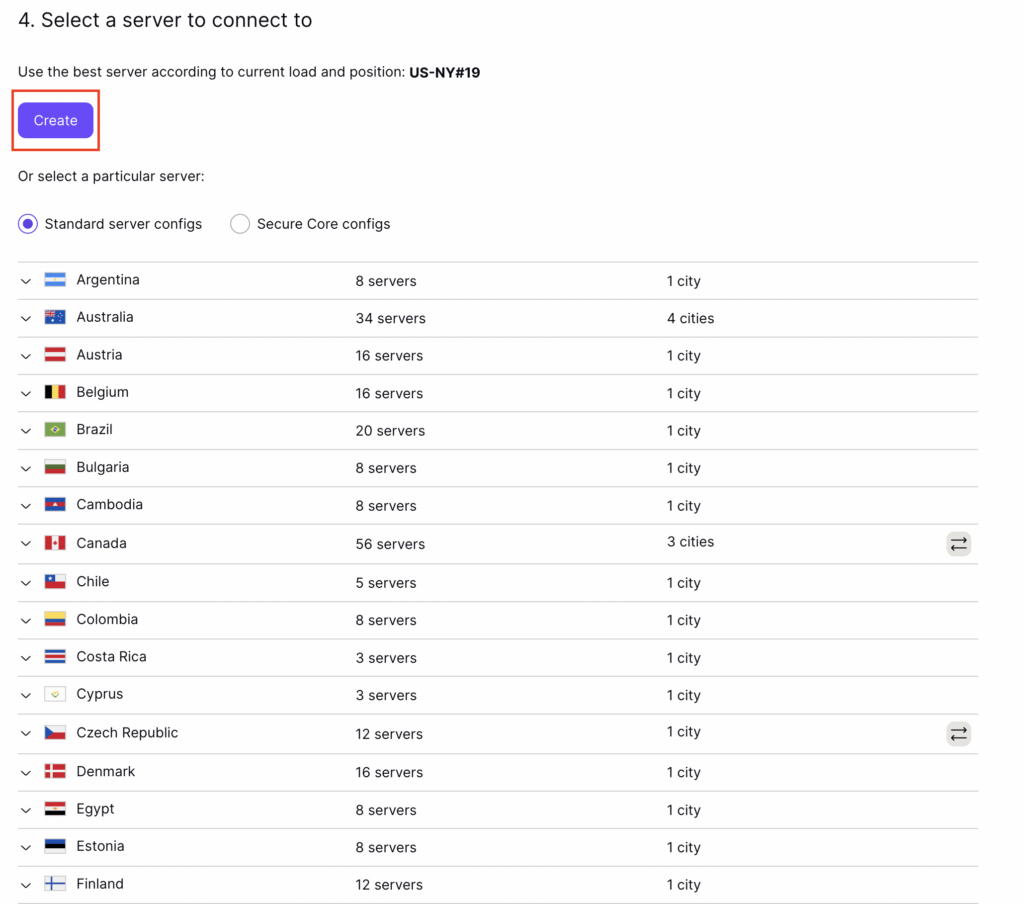
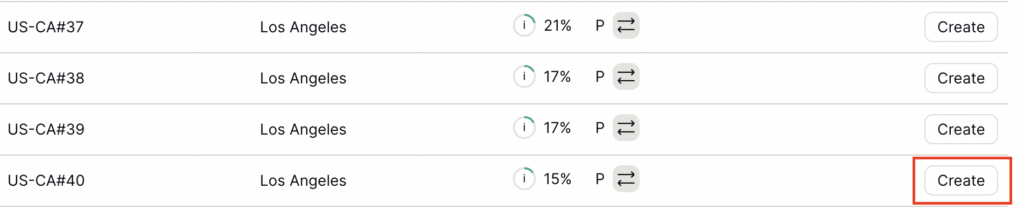
6. ProtonVPN will recommend the ideal server for you to connect to based on your location. Click Create or scroll down and select the server you wish to connect to and click Create next to the server number.

ProtonVPN WireGuard select server
ProtonVPN WireGuard select servers

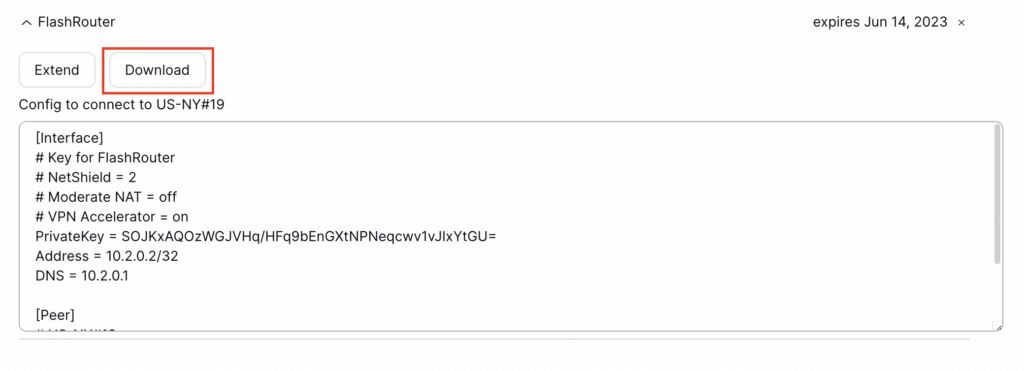
7. Click Download to download the .conf file of the server you selected.

ProtonVPN WireGuard download configuration

DD-WRT Router Setup for ProtonVPN WireGuard

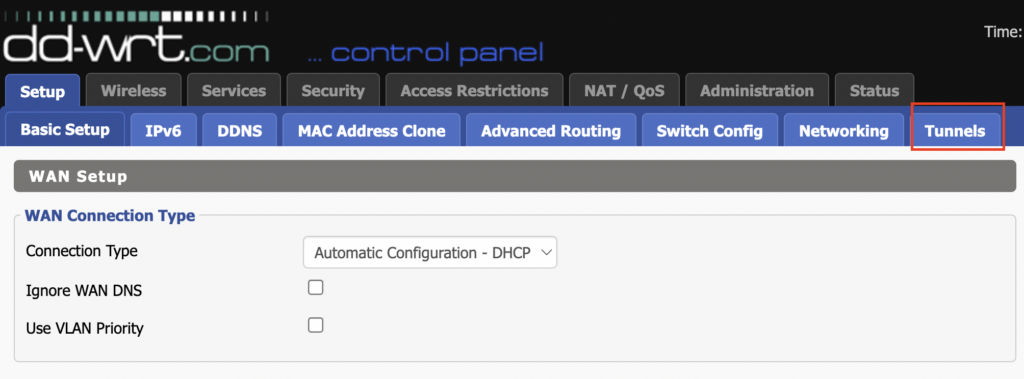
Navigate to Setup > Tunnels 

ProtonVPN WireGuard DD-WRT Tunnels

Enter ProtonVPN WireGuard settings

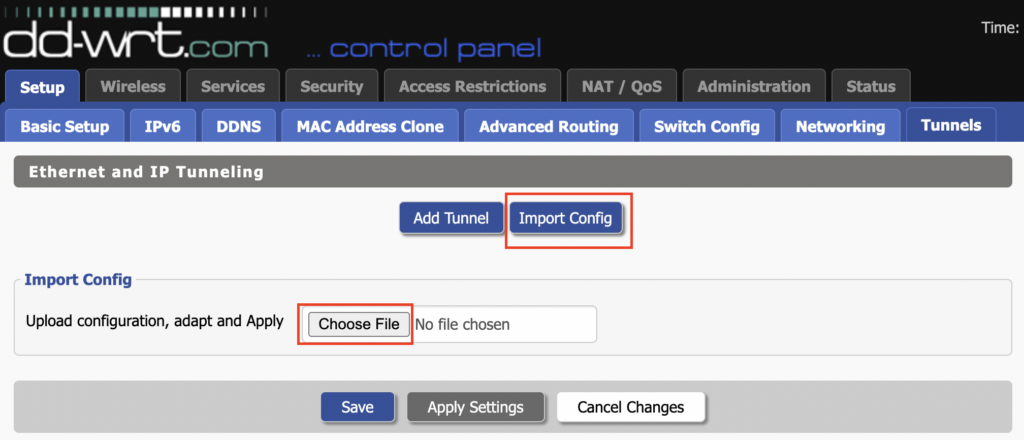
1. Click Import Config and then select Choose file. Select the .conf file that was downloaded earlier.

ProtonVPN WireGuard Import Config and Choose File

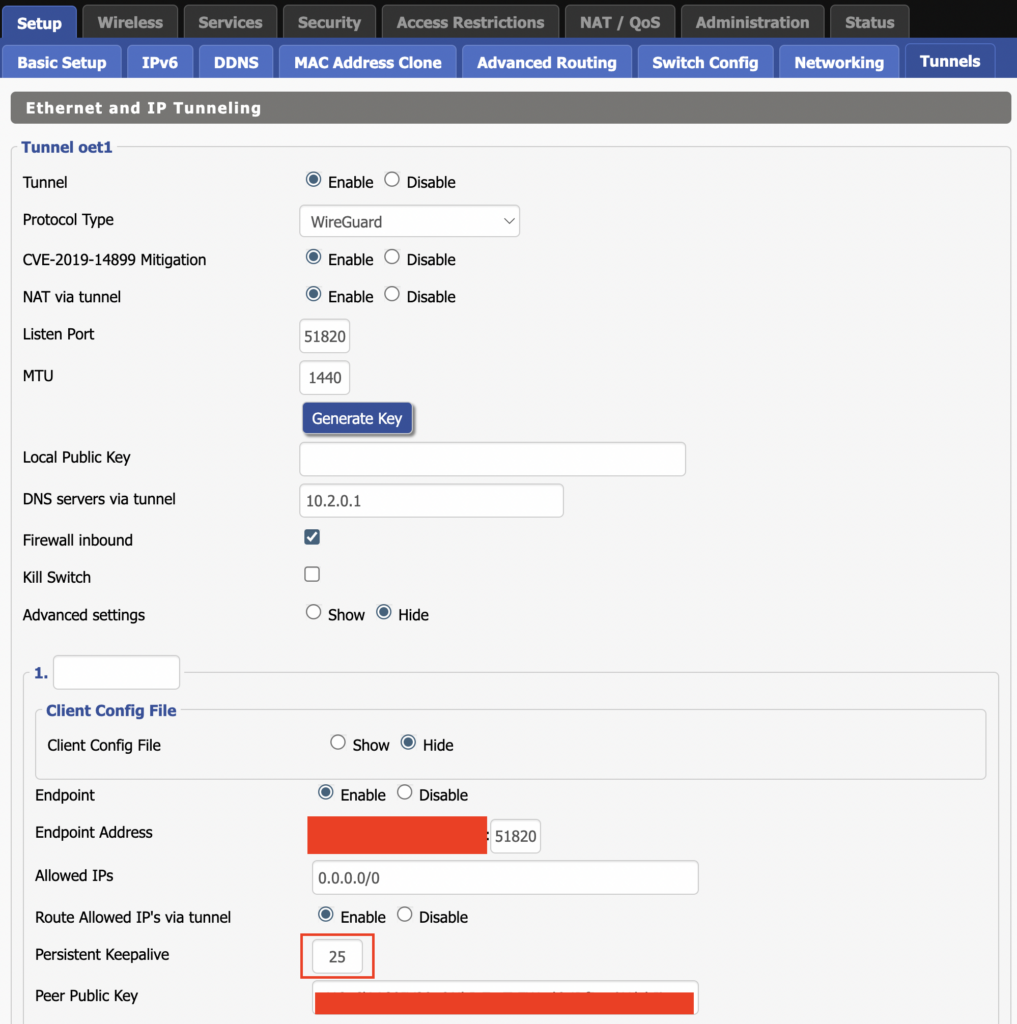
2. All settings will be loaded into the DD-WRT firmware the only field that needs to be adjusted is setting Persistent Keepalive to 25.

ProtonVPN WireGuard Persistent Keep Alive

3. Click Apply Settings at the bottom of the page.

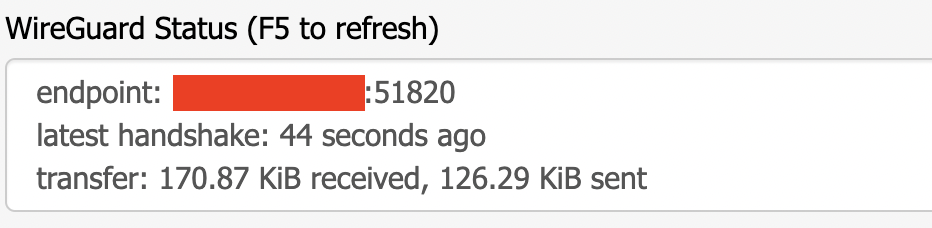
4. After 30 seconds or so refresh the page until you see the WireGuard Status on the page is populated as seen below.

ProtonVPN WireGuard Status

Verify a successful ProtonVPN connection

Navigate to Setup > Tunnels

  1. You should Endpoint, Latest handshake, and Transfer in the WireGuard status area.
  2. Visit whatismyipaddress.com to verify your status as using ProtonVPN.

Back up your settings

Navigate to Administration > Backup

  1. Click the Backup button.
  2. A file named nvrambak.bin will be saved to your computer.
  3. You can load nvrambak.bin to restore your settings in the event of a reset.

TROUBLESHOOTING

Still having issues? Visit the VPN Troubleshooting section.

Troubleshoot Here

DNS Setup for DD-WRT FlashRouters

TeamFlashRouters · Apr 3, 2019 ·

The Domain Name System (DNS) is the phonebook of the Internet. DNS resolves website domain names (www.website.com) to IP Addresses so you don’t have to remember the IP Address of every site you visit.

We setup each FlashRouter with Google DNS (8.8.8.8 , 8.8.4.4) and/or OpenDNS (208.67.220.220 , 208.67.222.222) to prevent your ISP DNS from leaking when connected to the FlashRouter.

By using a trusted DNS server like those listed below, or from your trusted VPN service provider, you can prevent ISP’S from compiling your browsing data and selling it to third parties without your consent.

Recommended DNS servers

GoogleDNS

Primary DNS: 8.8.8.8

Secondary DNS: 8.8.4.4

OpenDNS

Primary DNS: 208.67.220.220

Secondary DNS: 208.67.222.222

Cloudfare

Primary DNS: 1.1.1.1

Secondary DNS: 1.0.0.1

Level 3

Primary DNS: 209.244.0.3

Secondary DNS: 209.244.0.4

How to change the DNS on your FlashRouter

We preset each FlashRouter with GoogleDNS and OpenDNS so there is no need to change the DNS servers unless you have reset the FlashRouter or want to use different DNS servers.

Navigate to Setup > Basic Setup

DNS Setup on DD-WRT FlashRouters
  1. Scroll down to Network Address Server Settings (DHCP).
  2. Enter in any combination of valid DNS servers into Statict DNS fields 1, 2, and 3.
  3. Click Apply Settings at the bottom of the page.
  4. Power cycle your FlashRouter off and back on.

DNS Leak Test

We recommend checking to see if your DNS is leaking when using VPN.

Should I be using my computer/phone/tablet VPN app while connected to the FlashRouter?

TeamFlashRouters · Jun 4, 2019 ·

  1. Do NOT connect to your VPN provider’s computer, phone, or tablet app while connected to the FlashRouter’s network. This may cause issues with access to your DD-WRT router settings as well as your internet connection.
  2. Connect any device in your home network to VPN by joining the FlashRouter’s network.

Change VPN Protocols on ExpressVPN/Aircove firmware

TeamFlashRouters · Mar 16, 2022 ·

Changing the VPN protocol your ExpressVPN FlashRouter is using can help with obtaining faster speeds while connected to VPN and connectivity issues in some regions of the world. A great advantage of using ExpressVPN firmware is the ability to use multiple protocols such as OpenVPN, IKEv2, and ExpressVPN’s own protocol Lightway.

1. Connect to the FlashRouter’s network via ethernet cable or wireless.

2. Open your web browser and enter expressvpnrouter.com or 192.168.132.1 in the URL.

ExpressVPNrouter.com
192.168.132.1

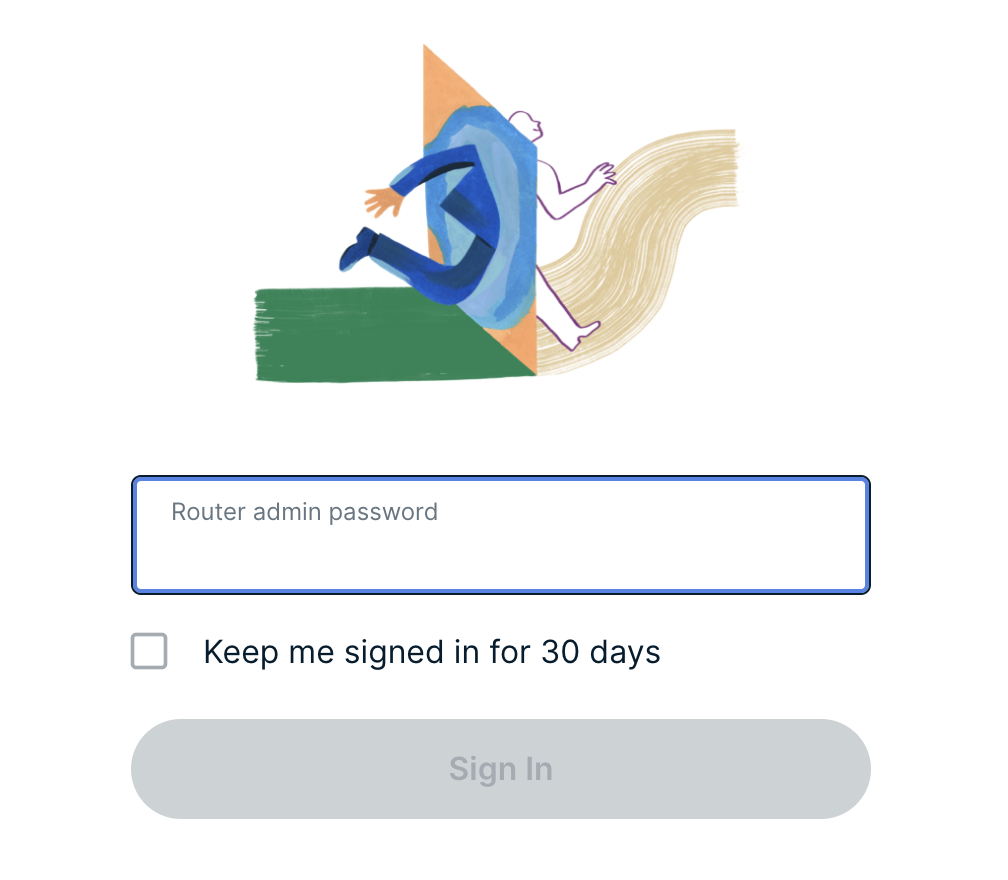
3. Login with your ExpressVPN FlashRouter admin password.

ExpressVPN Router admin login

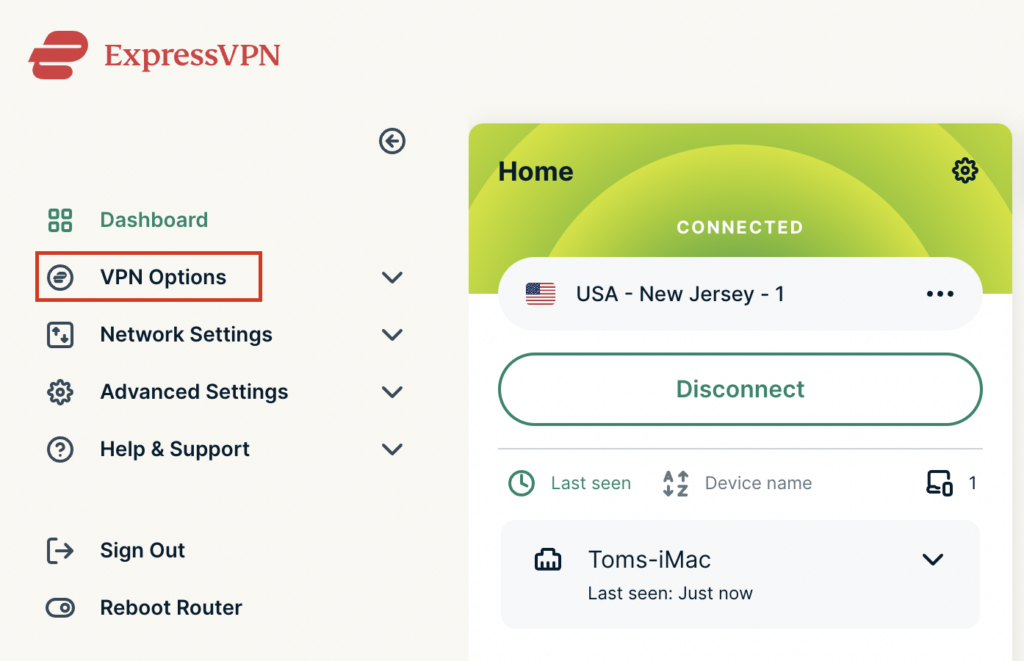
4. Select VPN Options on the left hand side of the menu.

ExpressVPN VPN Options

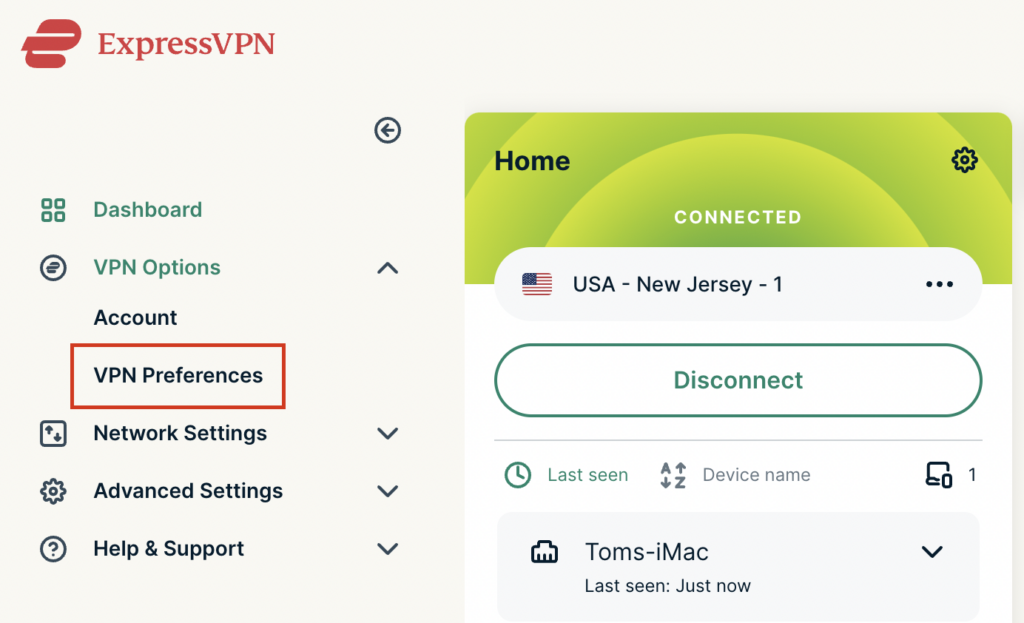
5. Select VPN Preferences on the left hand side of the menu.

ExpressVPN VPN Preferences

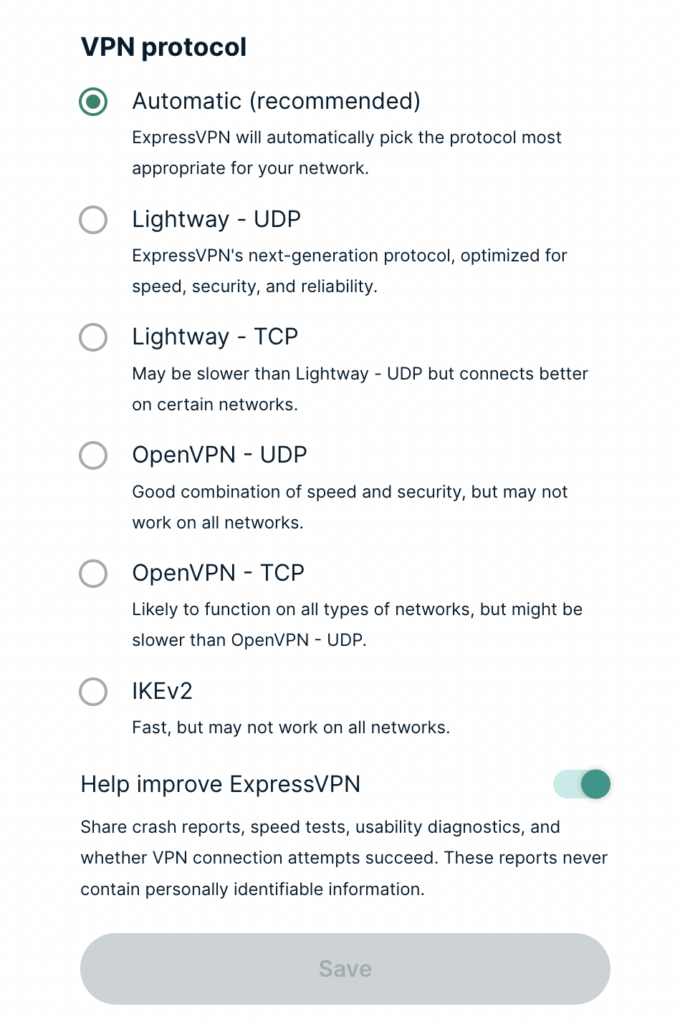
6. Choose the VPN protocol that best suits your needs. We typically see the fastest speeds while using the Lightway – UDP or IKEv2 protocols. Click Save.

ExpressVPN Protocols

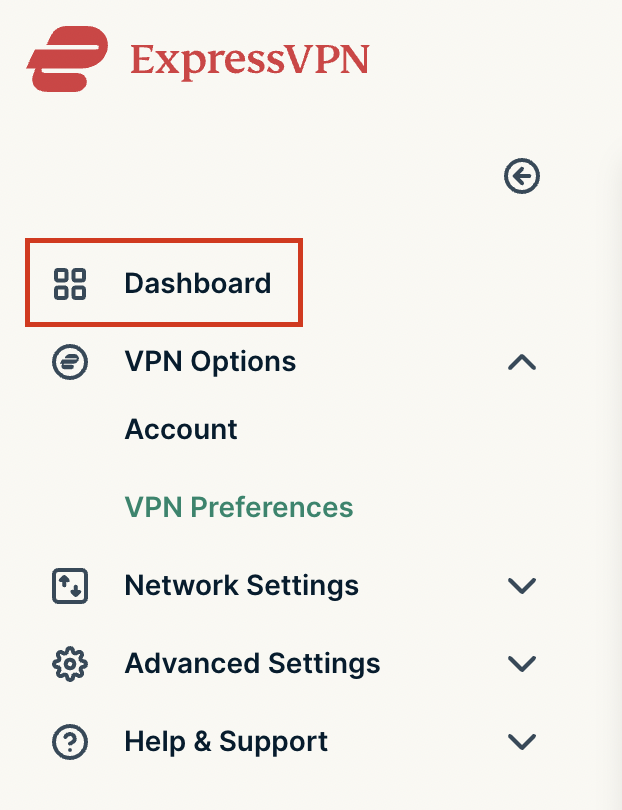
7. Click OK and then select Dashboard.

ExpressVPN Dashboard

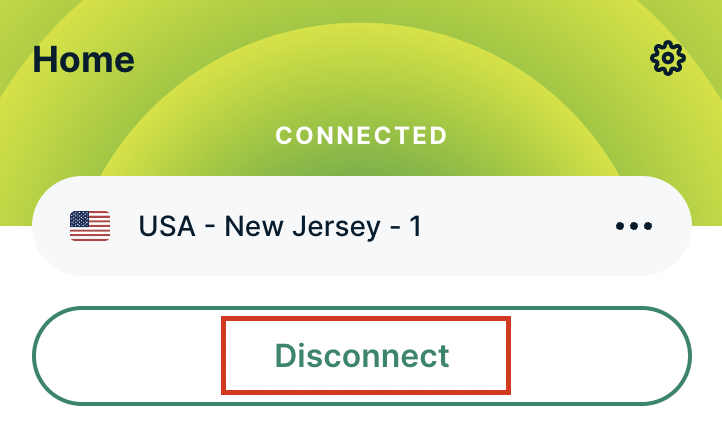
8. Click Disconnect to turn the VPN connection off.

ExpressVPN Disconnect

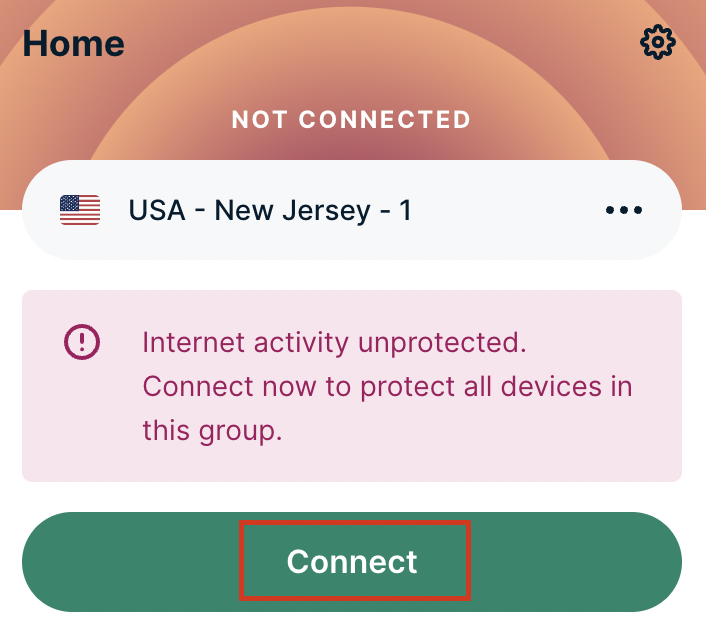
9. Click Connect to turn the VPN connection back on so it is using the new Protocol you selected.

ExpressVPN Connect

Change Wireless Channels on ExpressVPN/Aircove firmware

TeamFlashRouters · Mar 16, 2022 ·

Changing the wireless channel on your ExpressVPN FlashRouter can help with WiFi stability and allows you to use a wireless channel with less traffic in your local environment.

1. Connect to the FlashRouter’s network via ethernet cable or wireless.

2. Open your web browser and enter expressvpnrouter.com or 192.168.132.1 in the URL.

ExpressVPNrouter.com
192.168.132.1

3. Login with your ExpressVPN FlashRouter admin password.

ExpressVPN Router admin login

4. Select Network Settings on the left hand side of the menu.

ExpressVPN Network Settings

5. Select Wi-Fi Settings on the left hand side of the menu.

ExpressVPN WiFi Settings

6. Select Advanced Settings.

ExpressVPN WiFi Advanced Settings

7. Select the Channel Width and Main Channel you want your ExpressVPN FlashRouter to use. Note that higher 5GHz Wi-Fi channels will not be compatible with older devices. Click Save. Click Continue.

ExpressVPN WiFi Channels
« Previous Page

Primary Sidebar

  • Troubleshooting
  • Router Access
  • Internet Connection Issues
  • WiFi Connectivity
  • General VPN Issues
  • TeamViewer Remote Support
  • DD-WRT Firmware
  • Facebook
  • Twitter
  • Instagram
  • Pinterest
  • YouTube

Footer