Set up Proton VPN on an ASUS FlashRouter with AsusWRT VPN Fusion using WireGuard or OpenVPN. WireGuard imports a Proton VPN .conf configuration file. OpenVPN imports a server .ovpn file and uses Proton VPN’s separate OpenVPN username and password.
All configuration takes place in your ASUS router’s administration interface. You will need a working internet connection, an active Proton VPN subscription, and an ASUS router with the appropriate VPN Fusion protocol support.
Which Proton VPN Setup Method Should You Choose?
1. WireGuard (Recommended)
Download a Proton VPN WireGuard .conf file for your preferred server, then import it under VPN Type: WireGuard in ASUS VPN Fusion. The file contains the connection details, so you do not enter separate OpenVPN credentials.
2. OpenVPN
Download a Proton VPN OpenVPN .ovpn file for your server and enter the dedicated OpenVPN username and password from your Proton VPN account. Choose OpenVPN if you prefer it or want to test a different protocol while troubleshooting.
Option 1: Download a Proton VPN WireGuard Configuration
- Sign in to your Proton VPN account.
- Open Downloads > WireGuard configuration.
- Give the configuration a recognizable name, and choose Router as the platform.
- Choose your preferred available server or country and any VPN options supported by your plan.
- Select Create, then Download. Save the generated
.conffile. You will import it directly into ASUS VPN Fusion; do not open or edit it.
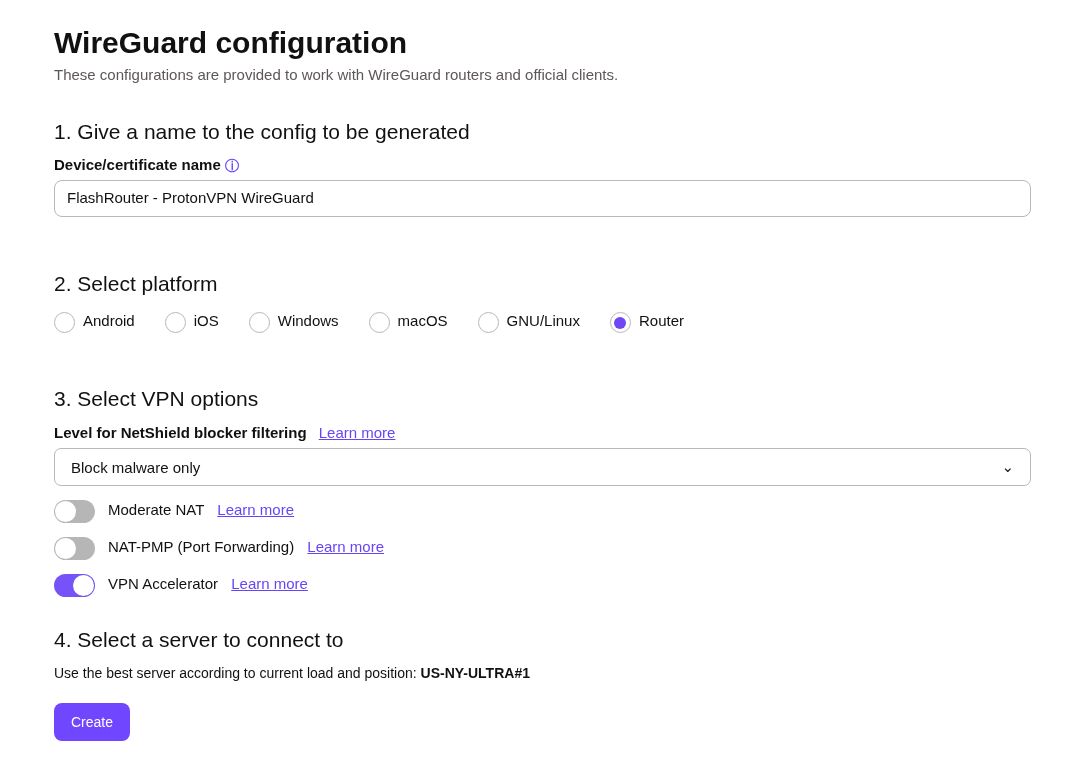
For the latest Proton VPN account screen, see Proton VPN: Download WireGuard Configuration Files.
Import the Proton VPN WireGuard File into ASUS VPN Fusion
- On your ASUS router, go to VPN > VPN Fusion > Add profile.
- Enter a clear Connection Name, such as Proton VPN – USA WireGuard, and select VPN Type: WireGuard.
- Select Upload Config (or Import config file, depending on firmware) and select the
.conffile downloaded from Proton VPN. - Wait for the import to finish and verify it reports Complete. The connection settings should populate automatically.
- Choose Apply to all devices or assign only selected devices, depending on the VPN Fusion options on your firmware.
- Click Apply and Enable and confirm the new profile connects.
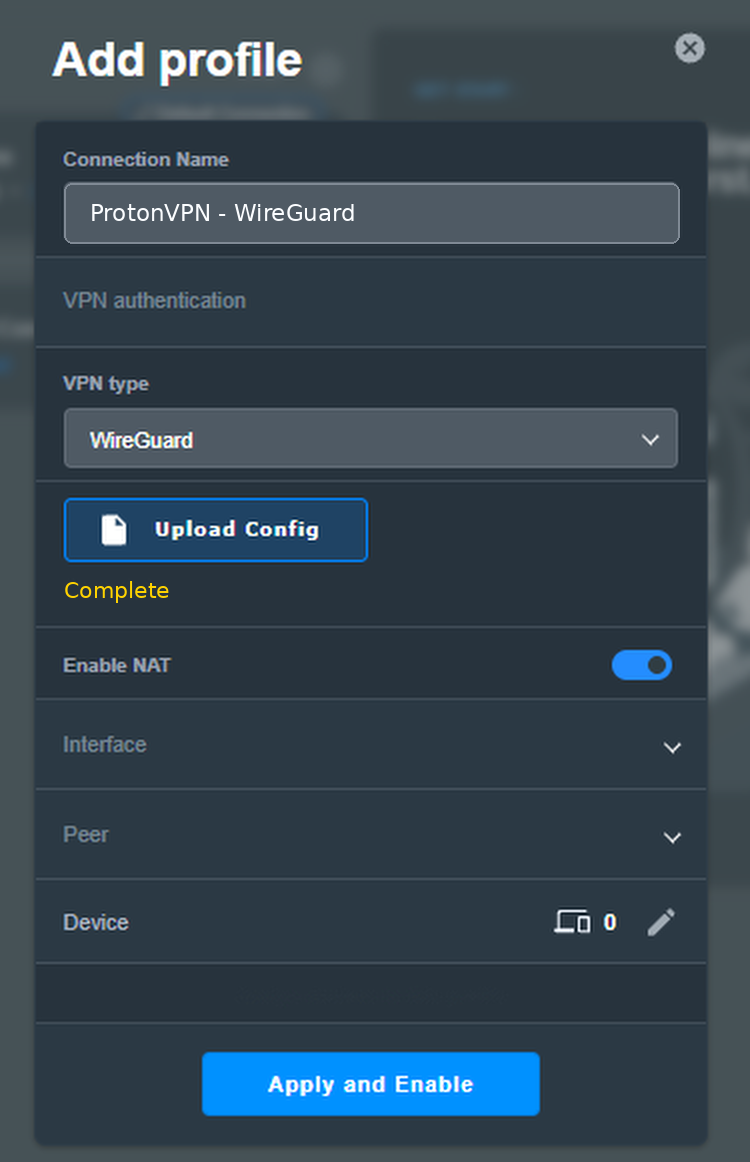
No OpenVPN login required: WireGuard authentication uses the keys already contained in the Proton VPN .conf file. Do not put a .ovpn file into the WireGuard upload field.
Option 2: Get Proton VPN OpenVPN Credentials and a Server File
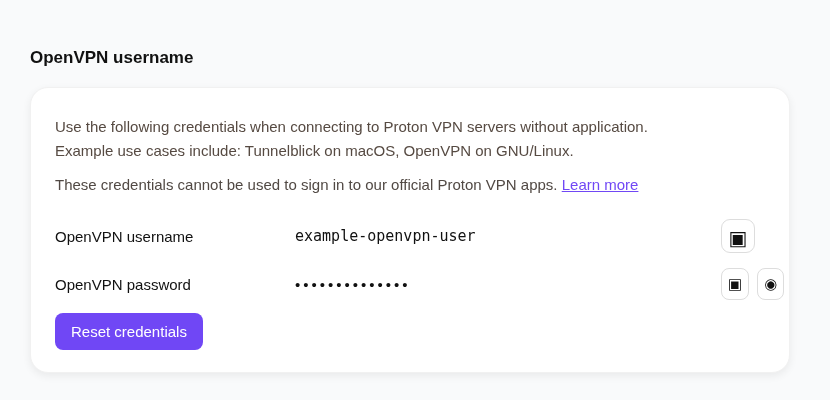
OpenVPN requires two separate items: the Proton VPN OpenVPN username/password and a server .ovpn configuration file. Your ordinary Proton account email and password are not the credentials for this router connection.
Find your OpenVPN username and password
- Sign in to your Proton VPN account.
- Open Account > OpenVPN username and locate the OpenVPN-specific username and password.
- Keep them available for the ASUS profile. Do not use the regular Proton website login.
Download an OpenVPN server configuration
- In Proton VPN, open Downloads > OpenVPN configuration files.
- Choose Router as the platform. Start with UDP; if your network blocks or disrupts UDP, you can later test a TCP file.
- Select an available country or server and click Download to save the matching
.ovpnfile.
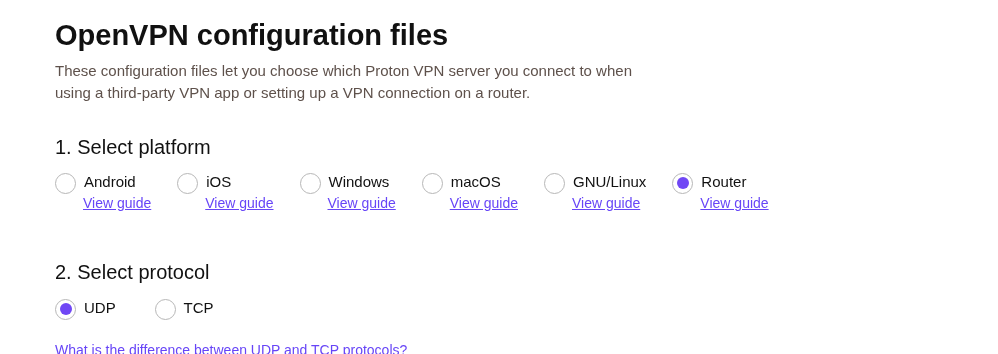
See Proton VPN: Download OpenVPN Configuration Files for current account download options.
Import the Proton VPN OpenVPN File into ASUS VPN Fusion
- Open VPN > VPN Fusion > Add profile on the ASUS router.
- Enter a recognizable connection name, such as ProtonVPN New York, and select VPN Type: OpenVPN.
- Select Import .ovpn file and upload the server configuration downloaded from Proton VPN. Wait for the import to show Complete.
- Enter the separate Proton VPN OpenVPN username and OpenVPN password from the Proton account page.
- Apply the profile to all devices or assign selected devices using VPN Fusion controls.
- Select Apply and Enable, then confirm that the profile connects.
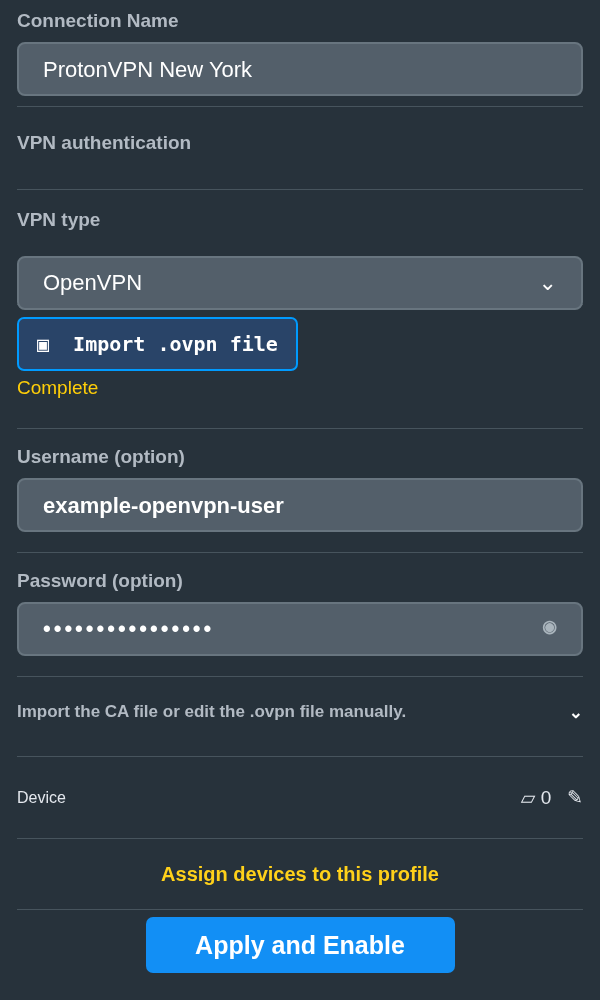
Changing countries: The imported .ovpn file determines which Proton VPN server is used. Changing only the profile’s display name does not change the server. To use another location, import a different Proton VPN server file.
Assign Devices, Verify the VPN, and Troubleshoot
Choose Which Devices Use the VPN
ASUS VPN Fusion can route all devices through Proton VPN or assign individual devices to the profile while other devices use normal ISP internet. The options and number of simultaneous VPN connections vary by router model and firmware. Follow How to Use ASUS VPN Fusion: Assign Devices and Multiple VPNs for detailed routing instructions. For an additional WiFi network with separate VPN routing, see ASUS Guest WiFi With or Without VPN.
Verify Your VPN Connection
- Confirm the Proton VPN profile shows Connected in ASUS VPN Fusion.
- Connect a phone or computer to the ASUS WiFi or LAN, and make sure it is assigned to the Proton VPN profile.
- Temporarily disable any VPN app, iCloud Private Relay, browser proxy, or similar service on the device while testing.
- Open Proton VPN’s IP Address Checker or IPLeak.net. The public IP should reflect the configured Proton VPN location rather than the normal ISP IP.
- If the IP still shows your ISP, check Apply to all devices and that device’s VPN Fusion assignment before changing server files.
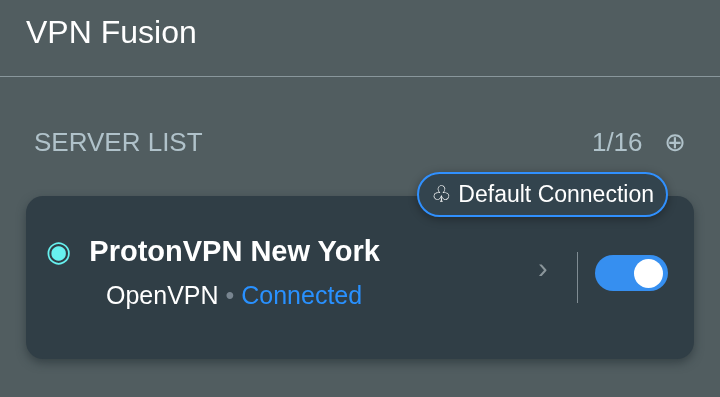
Troubleshooting Proton VPN
- Test the base internet connection. Disable the Proton VPN profile temporarily and confirm ASUS can access the internet without VPN.
- WireGuard: Check that VPN Type is WireGuard, import a freshly downloaded Proton VPN
.conffrom a different available server, and enable it again. - OpenVPN: Check that the separate OpenVPN username/password are correct and import a new
.ovpnserver file. Test TCP if UDP does not work. - Verify routing. Make sure your test device is assigned to the connected Proton profile and that another profile is not overriding its route.
- Check device interference. Review Device Settings That Can Interfere With Your Router VPN. For broader help, see General VPN Troubleshooting Guides.
Proton VPN’s own ASUS instructions are also available for WireGuard and OpenVPN.
Upgrade your ASUS router
Explore the Latest WiFi 7 ASUS FlashRouters
Looking for a newer ASUS router? Browse WiFi 7 models available from FlashRouters and compare features for your home or office.