• Skip to primary navigation
  • Skip to main content
  • Skip to primary sidebar
  • Skip to footer

FlashRouters Support Portal

Prioritizing Privacy

  • SETUP GUIDES
    • Privacy Hero Router Setup Guide
    • ASUS-WRT Router Setup Guide
    • AsusWRT-Merlin Router Setup Guide
    • DD-WRT Router Setup Guide
    • ExpressVPN Router Setup Guide
    • GL.iNet Router Setup Guide
    • Roqos Core Router Setup Guide
  • TROUBLESHOOTING
    • Router Access
    • WiFi Connectivity
    • Internet Connection Issues
    • General VPN Issues
    • DD-WRT Firmware
    • TeamViewer Remote Support
  • FAQs
    • Router FAQs
    • VPN FAQs
    • Warranty and Returns FAQs
    • Sales FAQs
    • Shipping FAQs
    • Service Plan FAQs
  • Show Search
Hide Search

Search Results for: next step

How to Access Your GL.iNet FlashRouter Settings

TeamFlashRouters · Feb 26, 2024 ·

This quick guide walk you through connecting to your GL.iNet FlashRouter (Flint, Slate, Beryl, or Marble) and logging into the admin settings page. You’ll use either WiFi or an Ethernet cable, then access the router dashboard through your browser.

Step 1. Connect Your Device to the Router

You can connect by WiFi or Ethernet:

  • WiFi: Look for a network name like FlashRouter24 or FlashRouter50
    • The WiFi password has been set to: Wireless#9483C
    • ⚠️ Be sure to capitalize the “W” in
  • Ethernet: Plug an Ethernet cable from your computer into one of the router’s LAN ports (usually marked or color-coded differently from the WAN port).

👉 Pro tip: Disconnect from any other WiFi networks during setup.

Step 2. Open the Router Login Page

  1. Open a web browser (Chrome, Safari, Firefox, Edge).
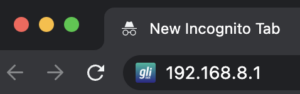
  2. In the address bar, type: 192.168.8.1
  3. Press Enter.
GL.iNet router access

This is the local router dashboard address (not a public website). If the page doesn’t load:

  • Try a different browser.
  • Clear your cache.
  • Ensure your device is connected to the FlashRouter network.

Step 3. Log In to the Router Settings

  • Default password: glopenwrt1 or openwrt
  • This is the factory default for all GL.iNet routers shipped by FlashRouters.
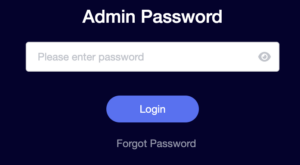
GL.iNet admin password enter

💡 Once you’re in, you can update your admin password in the settings for extra security.

Next Steps

Now that you’ve accessed your GL.iNet FlashRouter, you can:

  • Set up your VPN service
  • Customize your WiFi name and password
  • Adjust device controls and security settings

Check our support library for your specific VPN setup guide.
How to Access Your AsusWRT FlashRouter Settings

TeamFlashRouters · Oct 16, 2025 ·

This quick guide will walk you through connecting to your AsusWRT FlashRouter and logging into the admin settings page. You’ll use either WiFi or an Ethernet cable, then access the router dashboard through your browser.

Step 1. Connect Your Device to the Router

You can connect by WiFi or Ethernet:

  • WiFi: Look for a network name like FlashRouter24 or FlashRouter50.
    • The WiFi password is set to: Wireless#[First 5 characters of your router’s MAC]
    • Example: If your MAC is CC28A07E70A8, your WiFi password is Wireless#CC28A.
    • ⚠️ Be sure to capitalize the “W” in Wireless.
  • Ethernet: Plug an Ethernet cable from your computer into one of the router’s LAN ports (usually marked or color-coded differently from the WAN port).

👉 Pro tip: Disconnect from any other WiFi networks during setup.

Step 2. Open the Router Login Page

  1. Open a web browser (Chrome, Safari, Firefox, Edge).
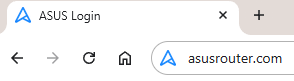
  2. In the address bar, type: 192.168.50.1 or go to asusrouter.com
  3. Press Enter.
Access Asus Router

This is the local router dashboard address (not a public website). If the page doesn’t load:

  • Try a different browser.
  • Clear your cache.
  • Ensure your device is connected to the FlashRouter network.

Step 3. Log In to the Router Settings

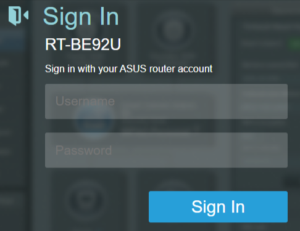
  • Default username: flashrouter
  • Default password: asuswrt-admin1
  • Some older devices may use: asuswrt1 or asuswrt
  • This is the factory default for AsusWRT routers shipped by FlashRouters.
Asus Router Login

💡 Once you’re in, you can update your admin password in the settings for extra security.

Next Steps

Now that you’ve accessed your AsusWRT FlashRouter, you can:

  • Set up your VPN service
  • Customize your WiFi name and password
  • Adjust device controls and security settings

Check our support library for your specific VPN setup guide.
ProtonVPN Setup Guide for GL.iNet Routers

Dave · Mar 23, 2026 ·

You can connect to ProtonVPN on your GL.iNet router using Wireguard or OpenVPN.

Quick Options

  • Wireguard: Download your preferred server .conf configuration file from the ProtonVPN website.

  • OpenVPN: Download your preferred server .ovpn configuration file from the ProtonVPN website.

:point_right: If you are not already a ProtonVPN user Sign Up Now.

ProtonVPN Wireguard Setup for GLiNet (Recommended)

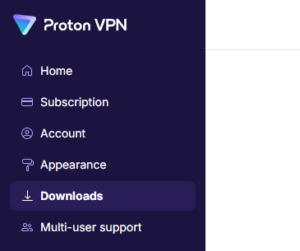
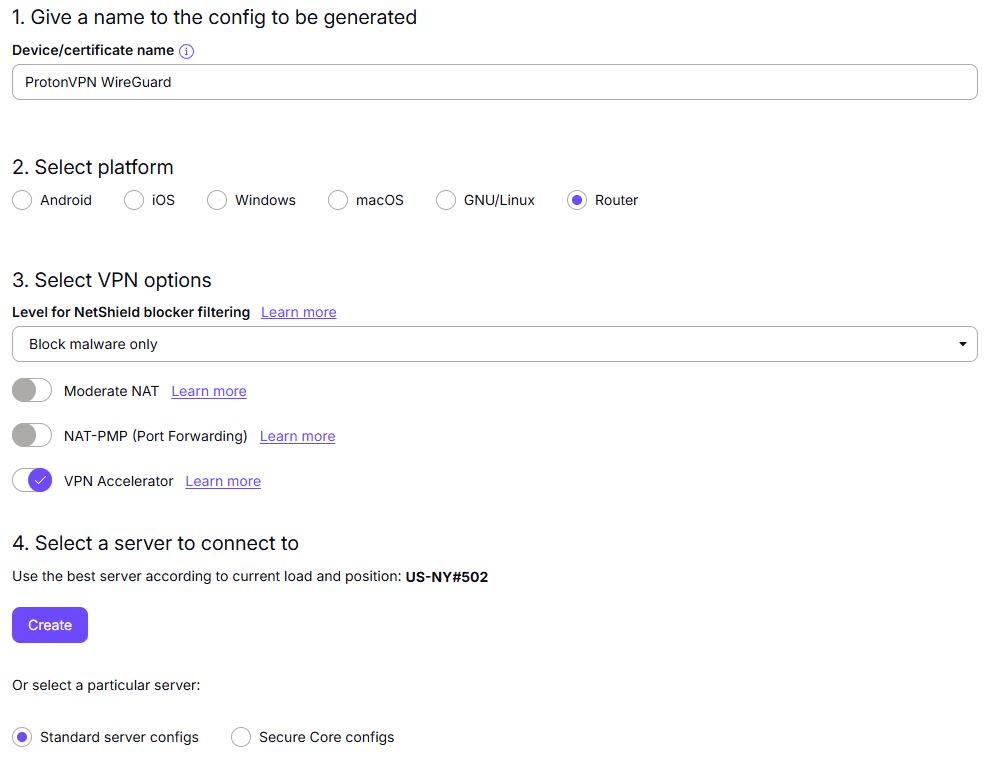
1. Login to your ProtonVPN account and go to the Downloads section of your ProtonVPN account page

2. Scroll down to find the WireGuard configuration section. Name your configuration and then select Router as the platform, and select Standard server configs.

3. Click Create button to choose the recommended server or scroll down to choose and Download any of the available server files from the list.

4.  Login to GL.iNet firmware settings (usually 192.168.8.1) in a browser on any computer or smart device connected to the GL.iNet FlashRouter’s network.

View our guide for more instructions on how to access GL.iNet firmware settings.

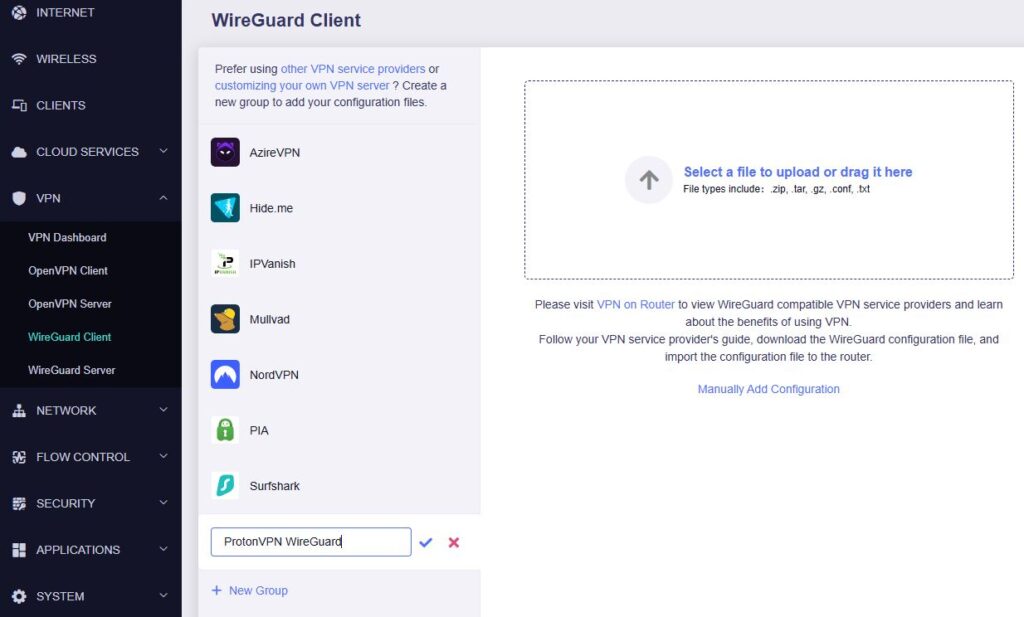
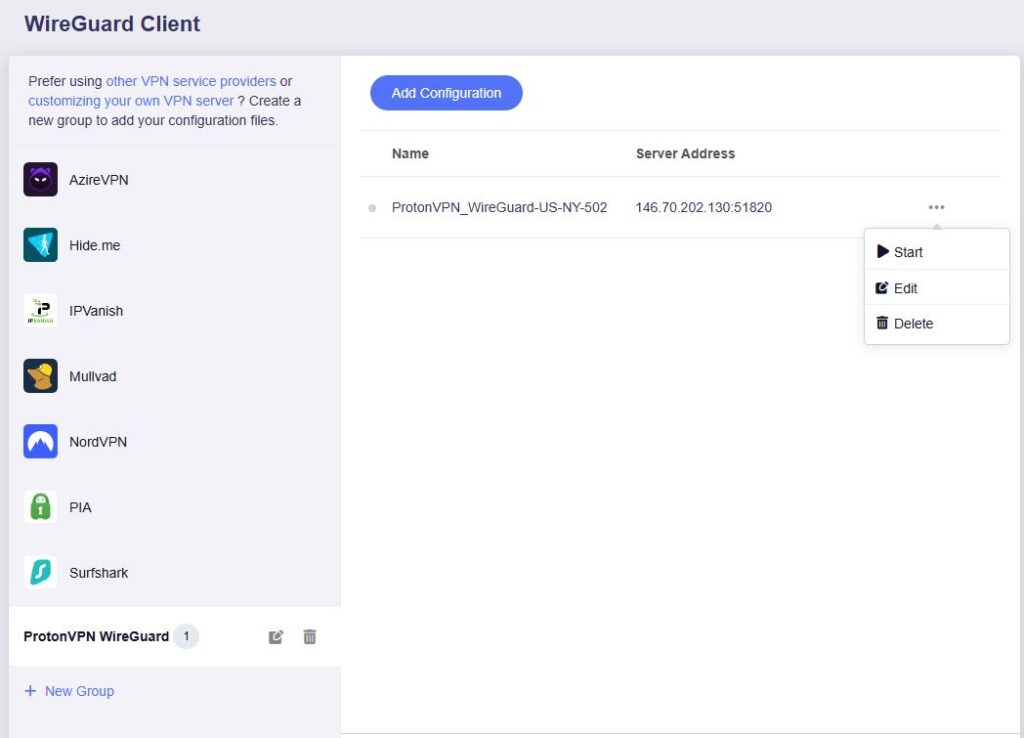
5. Navigate to the VPN tab and select WireGuard Client then click + New Group and name your connection and click the check to save.

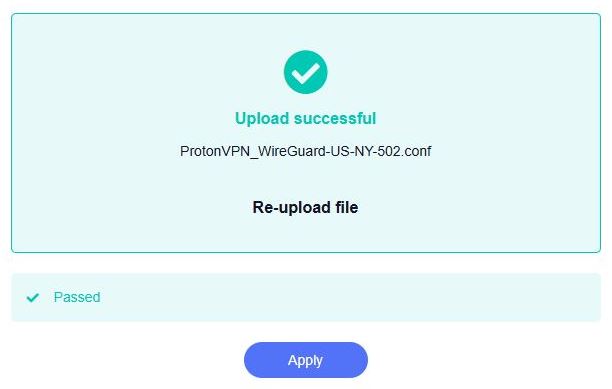
6. Upload the configuration file and click Apply.

7. Start a connection by clicking the 3 dots (…) > Start next to your chosen server.

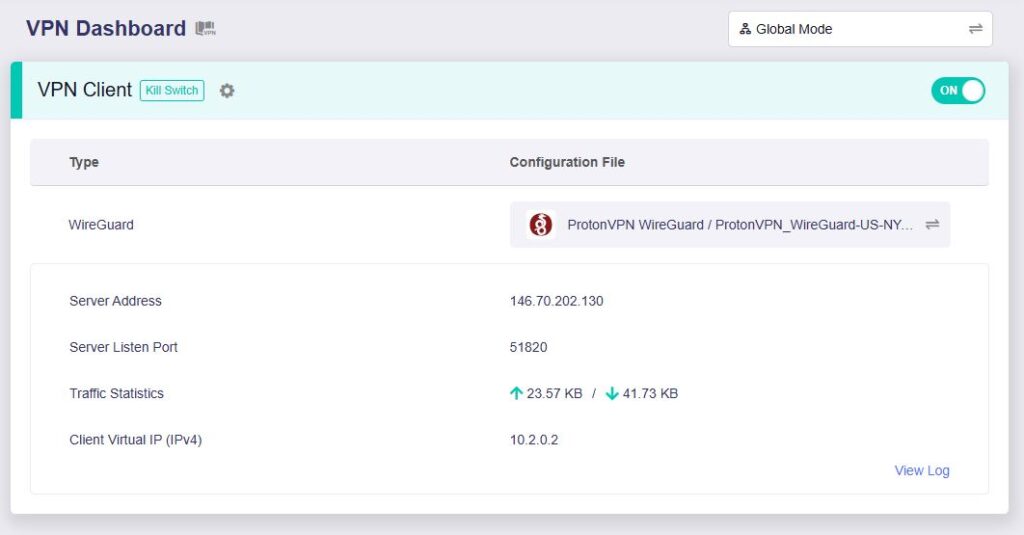
8. A green dot confirms success. You can also switch between Global Mode or Policy Mode for routing in the VPN Dashboard.

ProtonVPN OpenVPN Setup for GLiNet

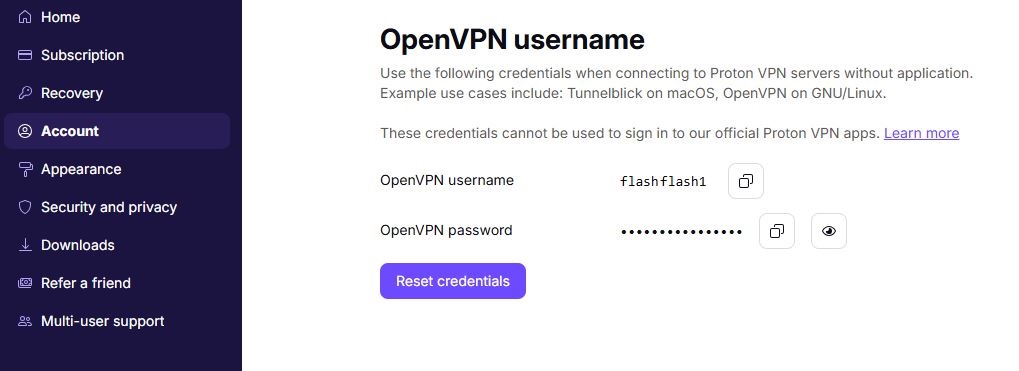
1. Log in to your ProtonVPN account and navigate to the Account tab. Scroll down to find your OpenVPN specific Username and Password.

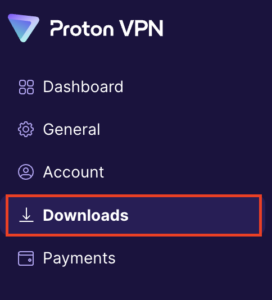
2. Go to the Downloads section of your ProtonVPN account page

ProtonVPN Downloads

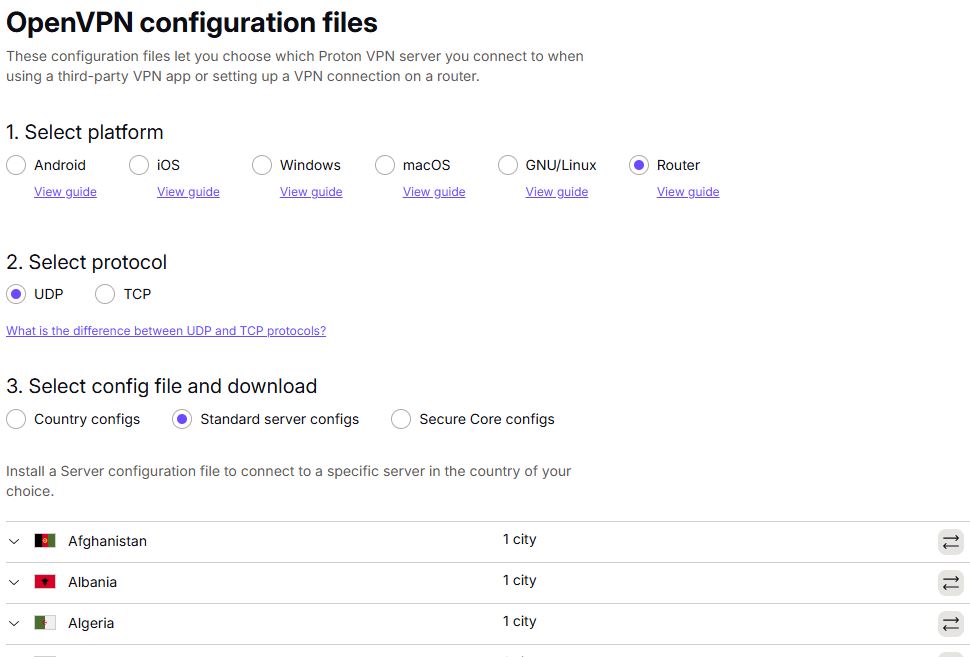
3. Scroll down to find the OpenVPN configuration Files. Select Router as the platform, UDP as the protocol, and select Standard server configs. Choose your preferred country and download the configuration file.

4. Login to GL.iNet firmware settings (usually 192.168.8.1) in a browser on any computer or smart device connected to the GL.iNet FlashRouter’s network.

View our guide for more instructions on how to access GL.iNet firmware settings.

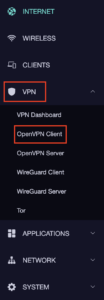
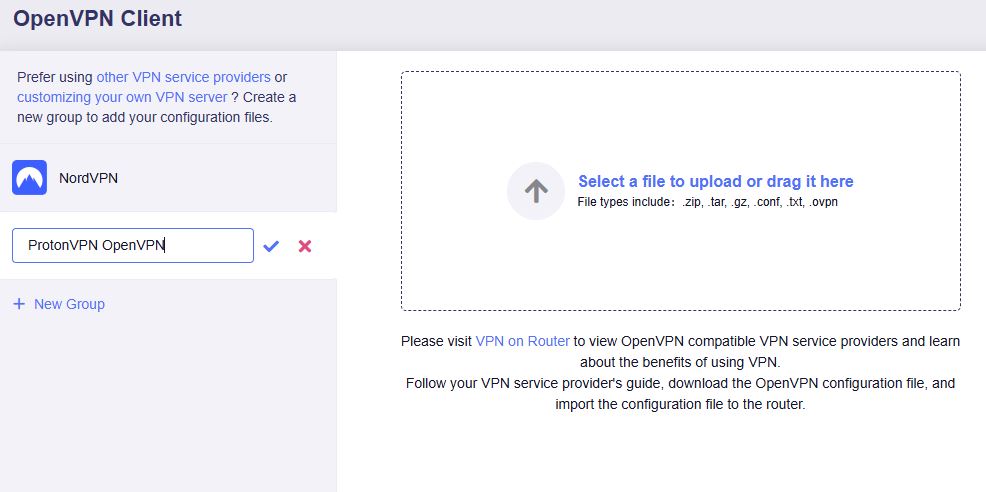
5. Navigate to the VPN tab and select OpenVPN Client.

GL.iNet VPN OpenVPN Client

6. Select Add Manually then click + New Group and name your connection and click the check to save.

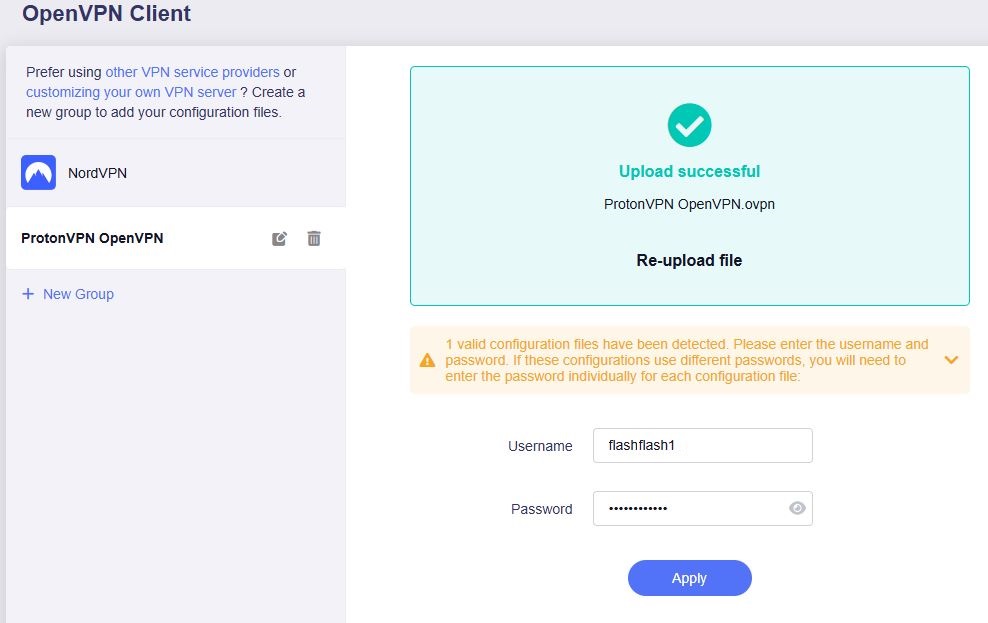
7. Upload the configuration file and input your username and password, click Apply.

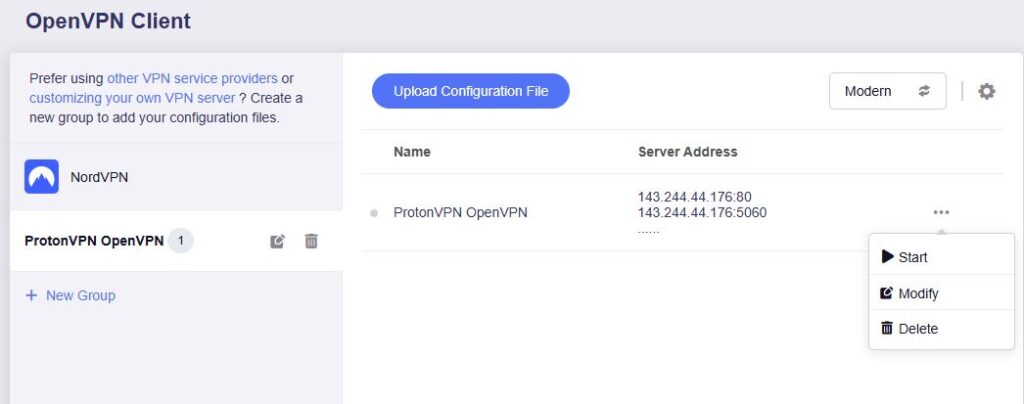
8. Start a connection by clicking the 3 dots (…) > Start next to your chosen server.

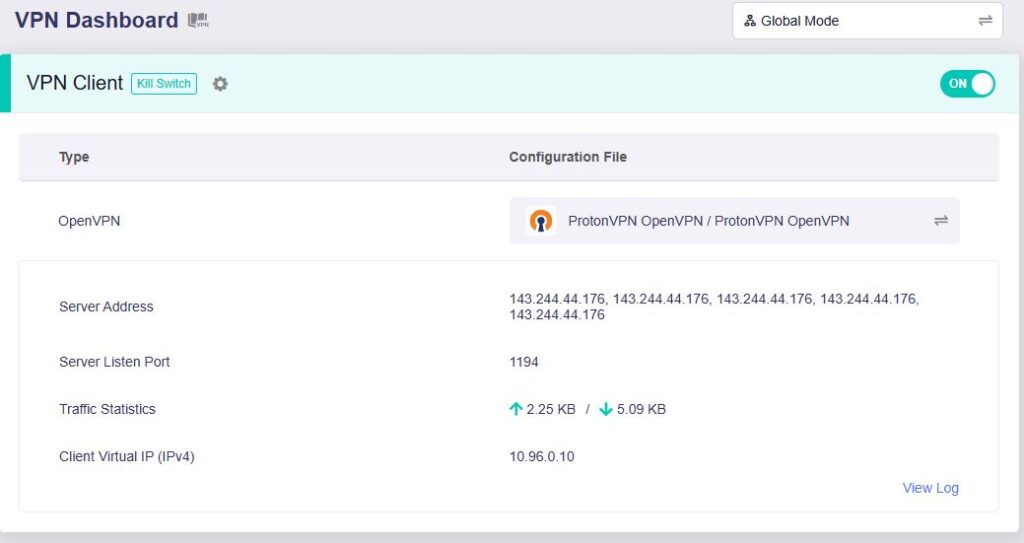
9. A green dot confirms success. You can also switch between Global Mode or Policy Mode for routing in the VPN Dashboard.

  1. You should now see information appear in the Server Address, Server Listen Port, Traffic Statistics, and Client Virtual IP areas.
  2. Visit ProtonVPN’s IP Check to verify your new IP address and virtual location.

In some cases you may notice that the location is not showing the same location as the server you have input in your router settings; this is because geo tracking tools are often tricked by VPN connections. As long as you see an IP address that is not the same as your normal Internet IP address then you are indeed connected to ProtonVPN.

🚫📱Do not run ProtonVPN apps on devices connected to your ProtonVPN router. Using the app at the same time as the router VPN may cause conflicts and connection issues.

Still having issues?

Feel free to submit a ticket and we will get back to you as soon as possible.

ExpressVPN Setup for AsusWRT Firmware Routers

TeamFlashRouters · Apr 29, 2024 ·

You can connect to ExpressVPN on your AsusWRT router using OpenVPN.

Quick Options

  • OpenVPN: Download your preferred server .ovpn configuration file from the ExpressVPN website.

:point_right: If you are not already a ExpressVPN user Sign Up Now.

EXPRESSVPN SETUP GUIDE FOR ASUSWRT

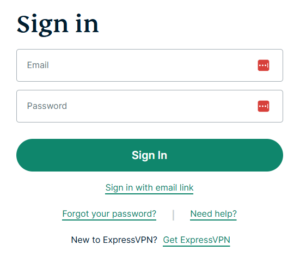
1. Log in to your account on the ExpressVPN website.

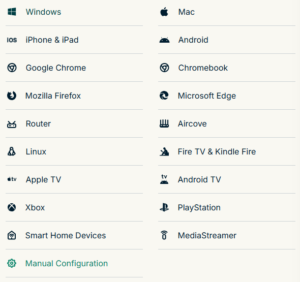
2. In the “Set up your devices” section, click More and select Manual Configuration from the menu options.

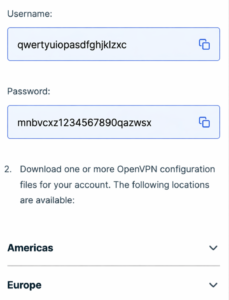
3. Copy the Username and Password that are displayed on the right

ExpressVPN Manual Service Credentials

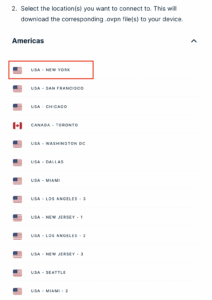
4. Download a server file from any of the available regions shown in the ExpressVPN Manual Configuration section (Americas, Europe, Asia Pacific, etc)

ExpressVPN Download .ovpn file

5. Log in to the Asus settings page by connecting to the Asus router’s WiFi (or wired LAN) on your computer. Then, enter 192.168.50.1 or asusrouter.com in the browser.

View our guide for more instructions on how to access AsusWRT firmware settings.

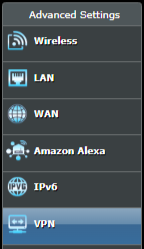
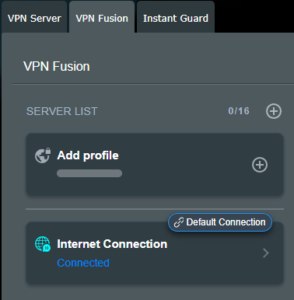
6. Navigate to the VPN tab and then click on the VPN Fusion tab, then click Add Profile

Click the VPN Button
VPN Fusion Add Profile

7.  Fill in your NordVPN information then click Apply and Enable.

  • Connection Name: Choose a name for your ExpressVPN OpenVPN connection.
  • VPN Type: Select OpenVPN
  • Import .ovpn File: Upload the OpenVPN file that you downloaded.
  • Username and Password: Copy and paste your ExpressVPN manual service credentials from step 3.

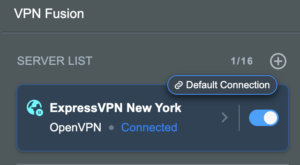
8. You should now see the Profile say Connected, indicating that the NordVPN server is successfully connected to your router.

Asus ExpressVPN Connected

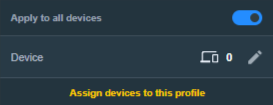
9. The VPN connection is automatically set to Apply to all devices.

If you only want certain devices to connect to the VPN, then turn off the VPN connection and switch off Apply to all devices.

Now click the pencil next to the Device section and select the devices (computer, phone, etc.) that you want to connect to VPN. Click OK and then click Apply all settings.

Apply VPN by Device
  1. Connect your devices to the Asus router network and visit the ExpressVPN website, at the top it should display Your Status: Protected.
  2. Visit ExpressVPN’s IP Check to verify your new IP address and virtual location.

🚫📱Do not run ExpressVPN apps on devices connected to your ExpressVPNrouter. Using the app at the same time as the router VPN may cause conflicts and connection issues.

TROUBLESHOOTING

Still having issues? Visit the VPN Troubleshooting section.

Troubleshoot Here

Primary Sidebar

  • Troubleshooting
  • Router Access
  • Internet Connection Issues
  • WiFi Connectivity
  • General VPN Issues
  • TeamViewer Remote Support
  • DD-WRT Firmware
  • Facebook
  • Twitter
  • Instagram
  • Pinterest
  • YouTube

Footer