• Skip to primary navigation
  • Skip to main content
  • Skip to primary sidebar
  • Skip to footer

FlashRouters Support Portal

Prioritizing Privacy

  • SETUP GUIDES
    • Privacy Hero Router Setup Guide
    • ASUS-WRT Router Setup Guide
    • AsusWRT-Merlin Router Setup Guide
    • DD-WRT Router Setup Guide
    • ExpressVPN Router Setup Guide
    • GL.iNet Router Setup Guide
    • Roqos Core Router Setup Guide
  • TROUBLESHOOTING
    • Router Access
    • WiFi Connectivity
    • Internet Connection Issues
    • General VPN Issues
    • DD-WRT Firmware
    • TeamViewer Remote Support
  • FAQs
    • Router FAQs
    • VPN FAQs
    • Warranty and Returns FAQs
    • Sales FAQs
    • Shipping FAQs
    • Service Plan FAQs
  • Show Search
Hide Search

Search Results for: next dm

Windscribe WireGuard Setup

TeamFlashRouters · Oct 13, 2021 ·

Preparing for Windscribe WireGuard Setup

Verify your Windscribe login information

If you are not already a Windscribe user Sign Up Now.

Log in to your account on the Windscribe website.
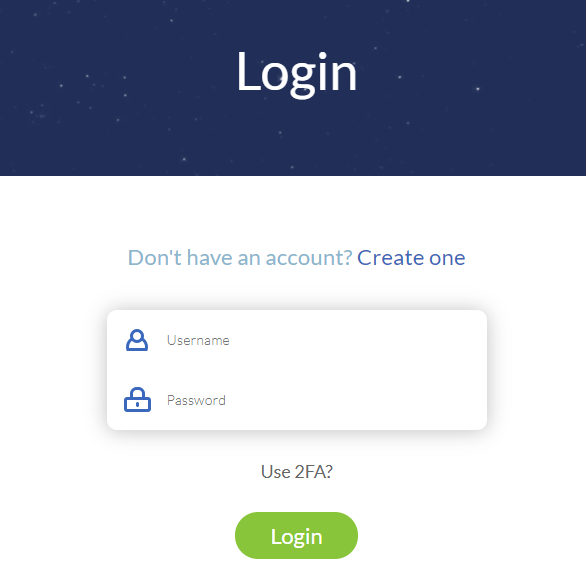
Windscribe Login

Go to the Windscribe WireGuard config generator page and select the Server location and Port you would like to use. Click Download Config.
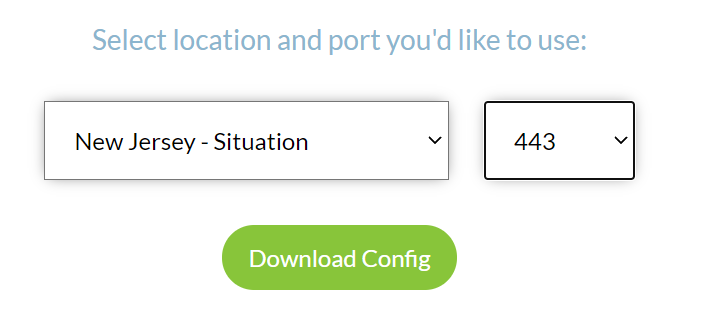
Windscribe Wireguard select server location

Open the .conf file that is downloaded using Notepad in Windows or TextEdit in Mac.

DD-WRT Router Setup for Windscribe WireGuard

Navigate to Setup > Tunnels 

Enter Winscribe WireGuard settings

1. Click Add Tunnel.

2. Set Tunnel to Enable.
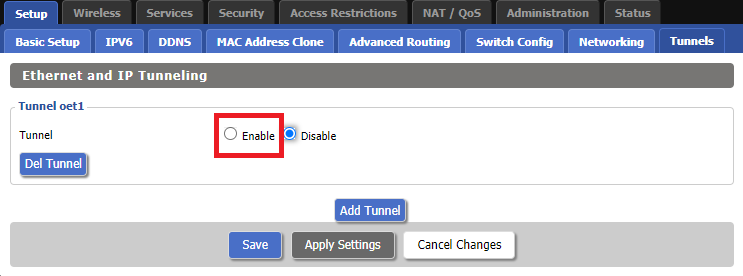
Setup - Tunnel - Enable Tunnel

3. Select Wireguard from the dropdown.
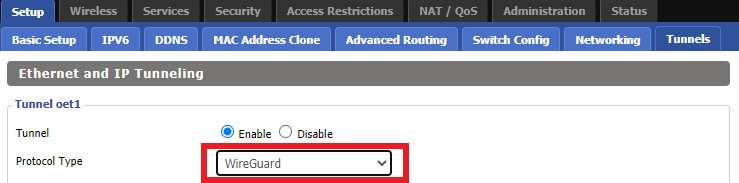
Setup - Tunnel - Select Wireguard

3. Set CVE-2019-14899 Mitigation to Enable. Set NAT via Tunnel to Enable. Set Local Port to 51820. Set MTU to 1420.
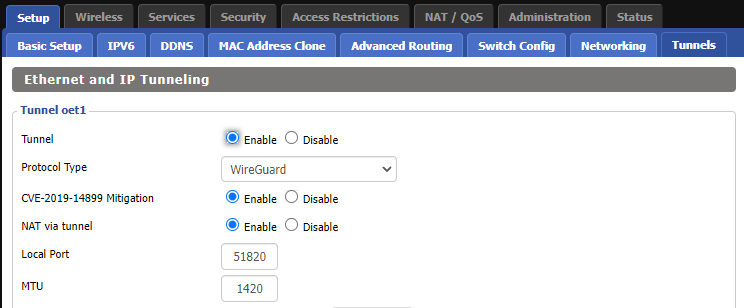
Windscribe Wireguard Basic Settings

4. Check Firewall inbound and Kill Switch.
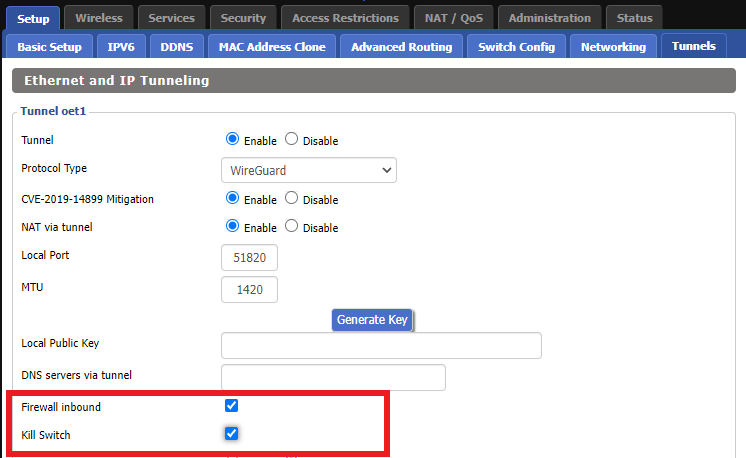
Windscribe Wireguard enable Firewall and Kill Switch

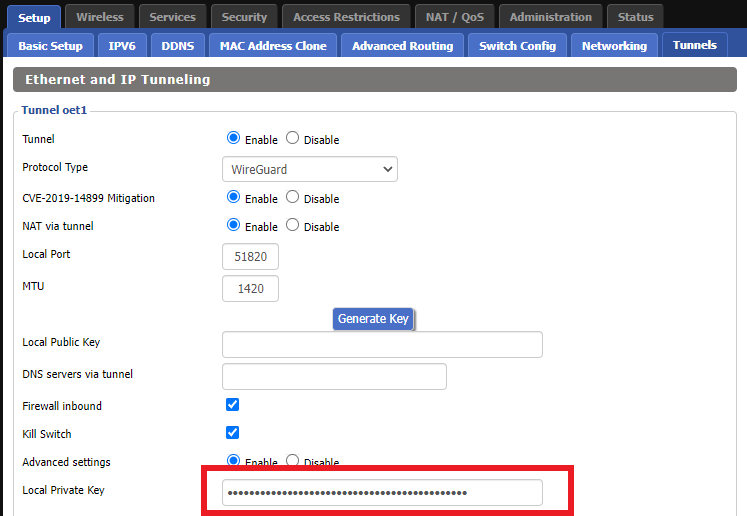
5. Set Advanced Settings to Enable and copy the PrivateKey from the .conf file and paste it into the Local Private Key field.
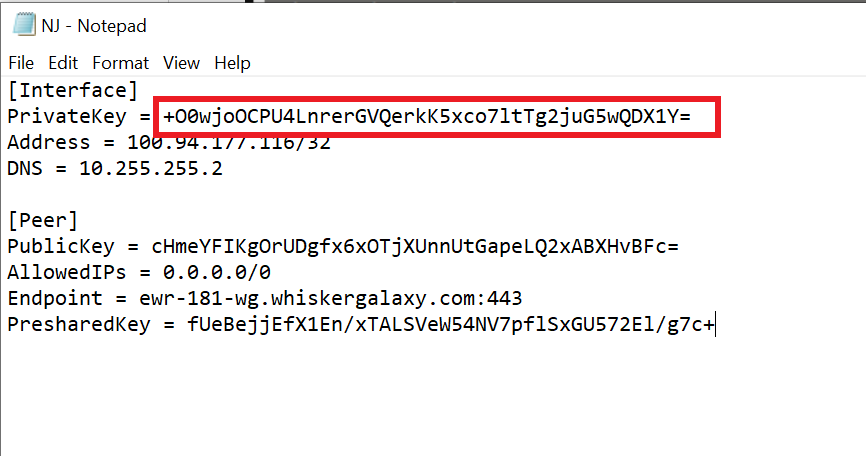
Windscribe Wireguard conf file PrivateKey
Windscribe Wireguard Local Private Key

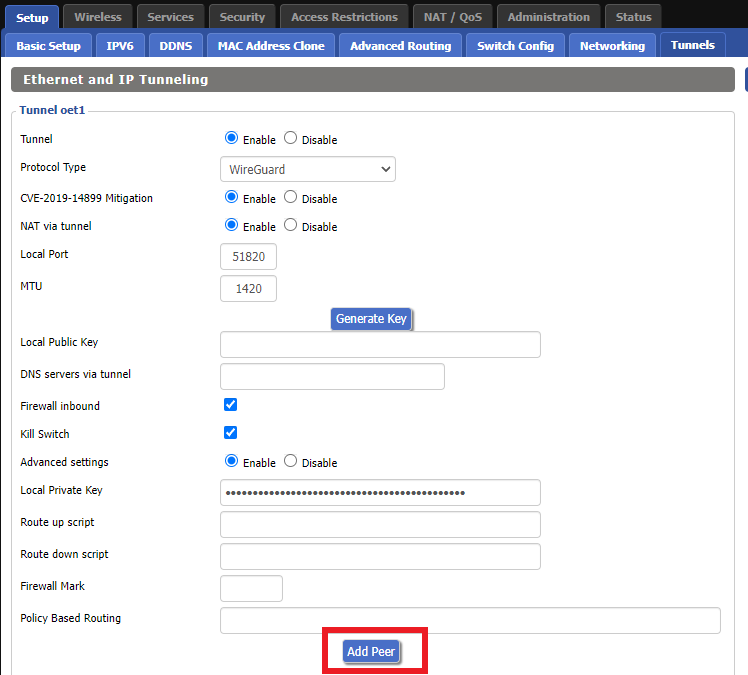
6. Click Add Peer.

Windscribe Wireguard Add Peer

7. Set Peer Tunnel IP to 0.0.0.0. Set Peer Tunnel DNS to the DNS found in the .conf file.
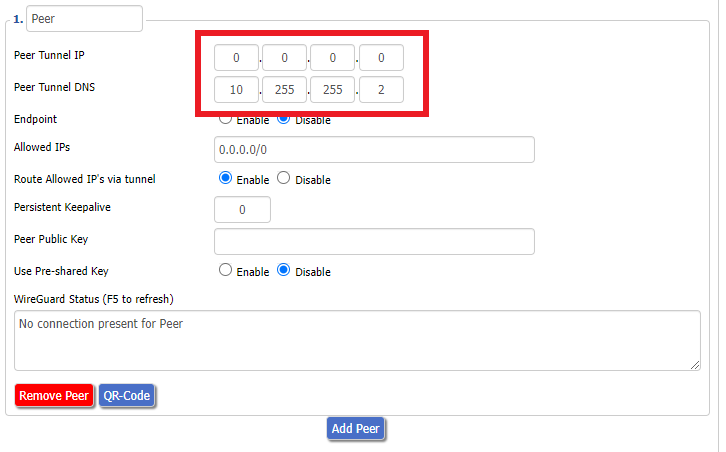
Windscribe Wireguard Peer Tunnel IP and DNS

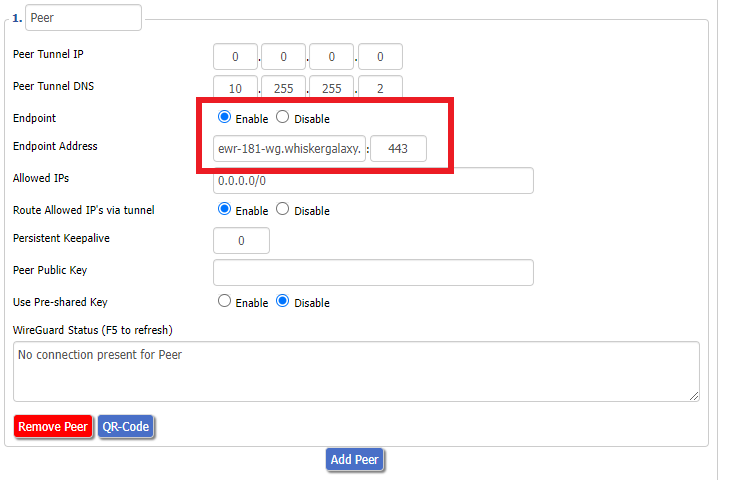
8. Set Endpoint to Enable. Copy and Paste the Endpoint from the .conf file and paste it into the Endpoint Address field. Enter the same Port that appears next to the Endpoint.
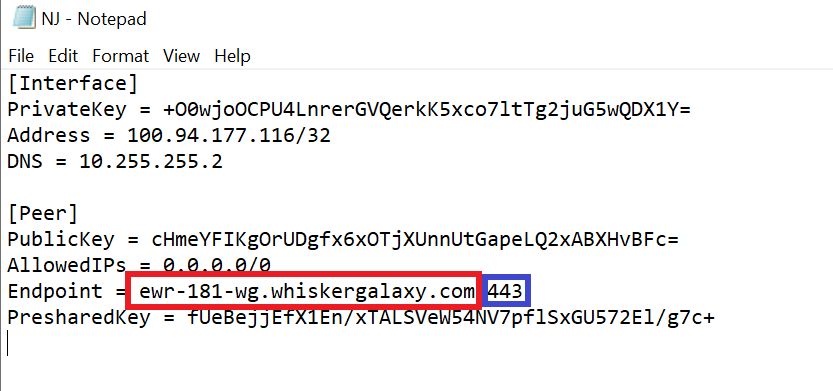
Windscribe Wireguard conf file Endpoint
Windscribe Wireguard paste Endpoint

9. Leave Allowed IPs as 0.0.0.0/0. Set Router Allowed IP’s via tunnel to Enable. Set Persistent Keep Alive to 25.
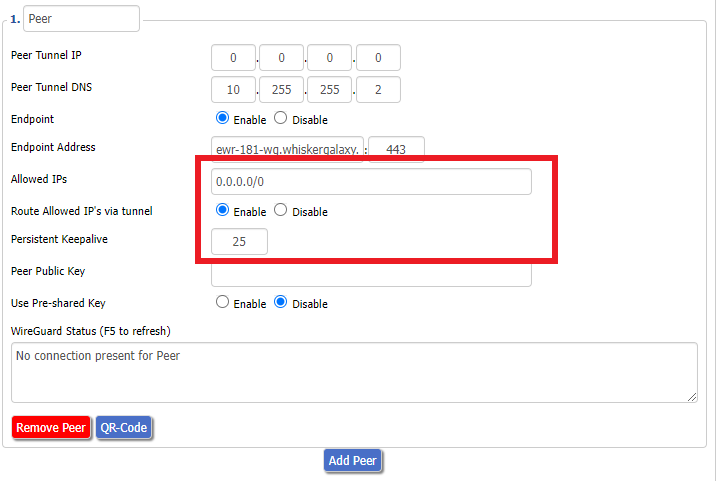
Windscribe Wireguard settings

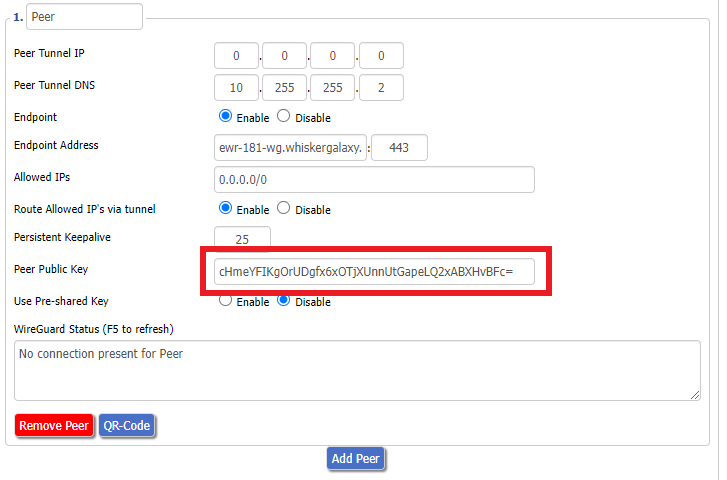
10. Copy and Paste the PublicKey from the .conf file and paste it into the Peer Public Key field.
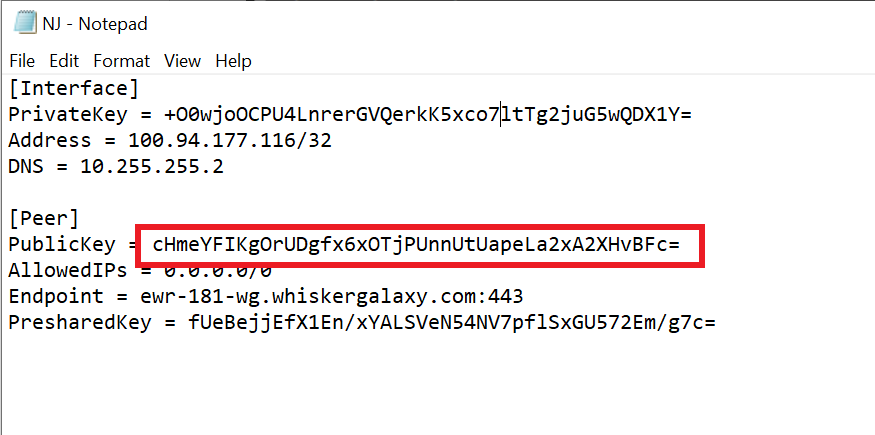
Windscribe Wireguard conf file PublicKey
Windscribe Wireguard Peer Public Key

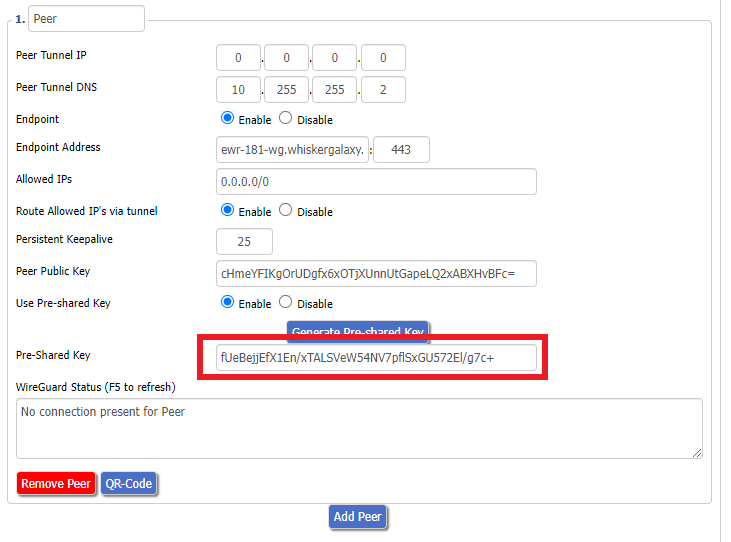
11. Set Use Pre-shared Key to Enable. Copy and Paste the Presharedkey from the .conf file and paste it into the Pre-Shared Key field.
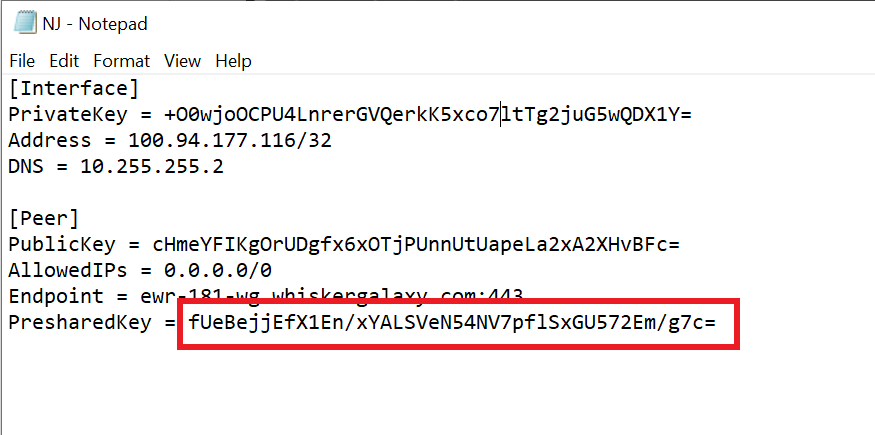
Windscribe Wireguard conf file PresharedKey
Windscribe Wireguard Pre-shared Key

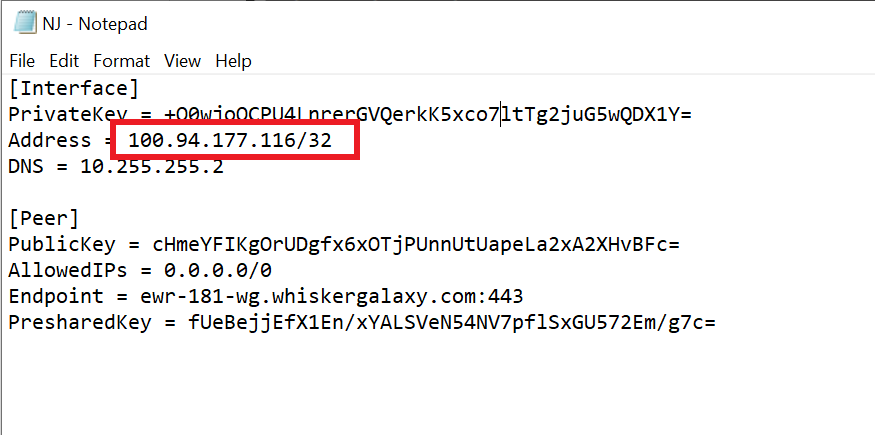
12. Copy the Address from the .conf file and paste it into the IP Addresses/Netmask(CIDR) field.
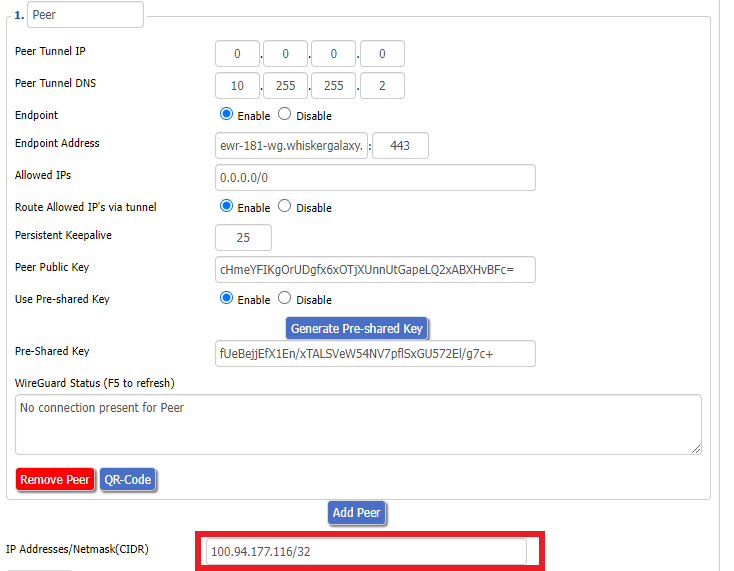
Windscribe Wireguard IP Address
Windscribe Wireguard conf file Address

Certain DD-WRT builds will show two separate fields here: IP Address and Subnet Mask. If that is the case set the IP Address field to the Address without the /32 added and set the Subnet Mask to 255.255.255.255

21. At the bottom of the page click Save and then click Apply Settings.

Verify a successful Winscribe connection

Navigate to Setup > Tunnels

  1. You should Endpoint, Latest handshake, and Transfer in the WireGuard status area.
  2. Visit whatismyipaddress.com to verify your status as using Winscribe.

Back up your settings

Navigate to Administration > Backup

  1. Click the Backup button.
  2. A file named nvrambak.bin will be saved to your computer.
  3. You can load nvrambak.bin to restore your settings in the event of a reset.

TROUBLESHOOTING

Still having issues? Visit the VPN Troubleshooting section.

Troubleshoot Here

Using Device Groups to connect to multiple VPN locations on ExpressVPN/Aircove firmware

TeamFlashRouters · May 12, 2022 ·

ExpressVPN offers a great feature of connecting the FlashRouter to multiple ExpressVPN servers at the same time. You can then assign your devices to the location that you wish.

1. Connect to the FlashRouter’s network via ethernet cable or wireless.

2. Open your web browser and enter expressvpnrouter.com or 192.168.132.1 in the URL.

ExpressVPNrouter.com
192.168.132.1

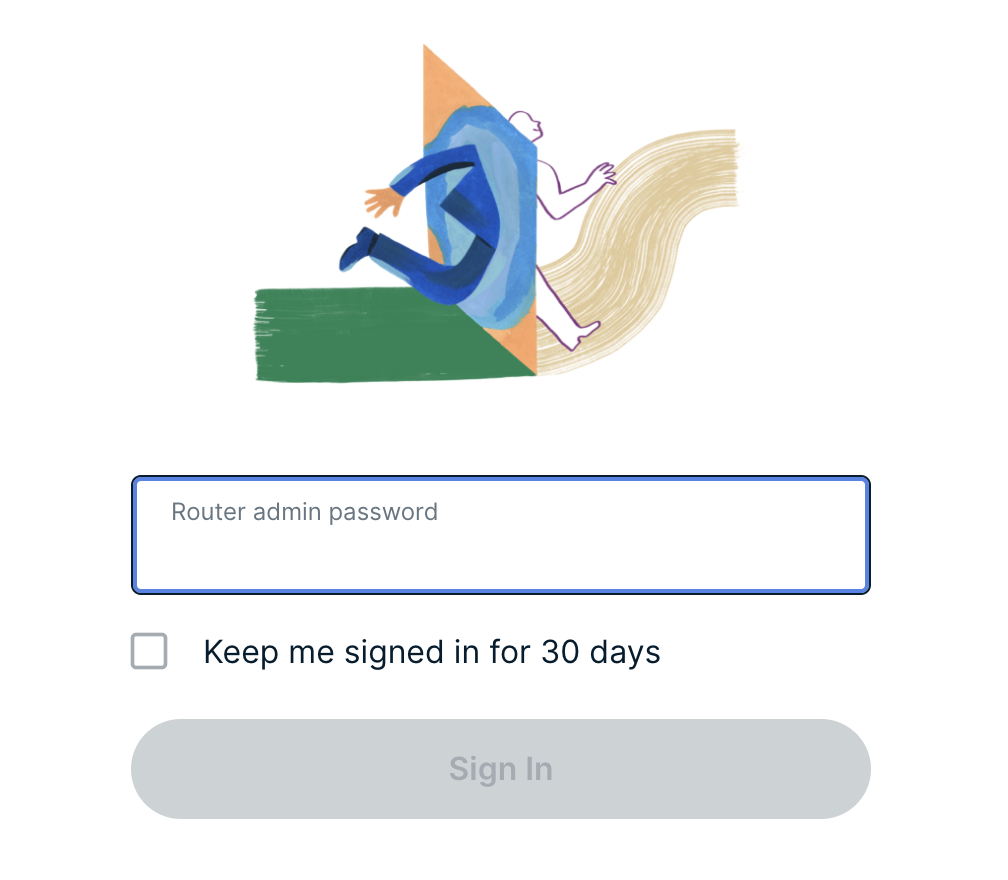
3. Login with your ExpressVPN FlashRouter admin password.

ExpressVPN Router admin login

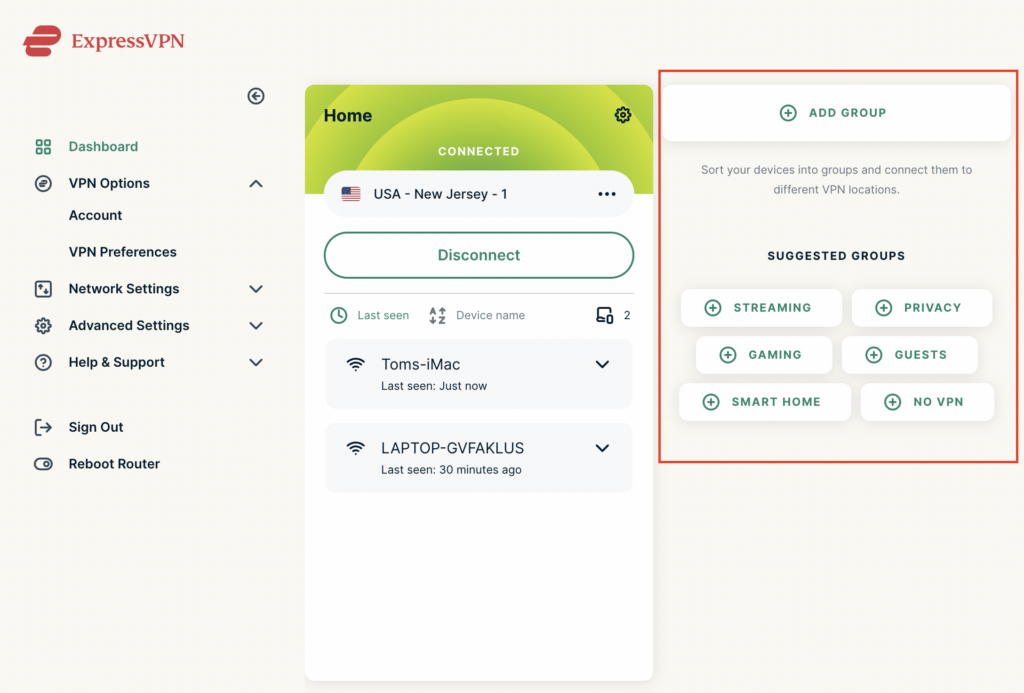
4. Select Add Group and name the new group or select one of the pre-named groups below.

ExpressVPN Add Group

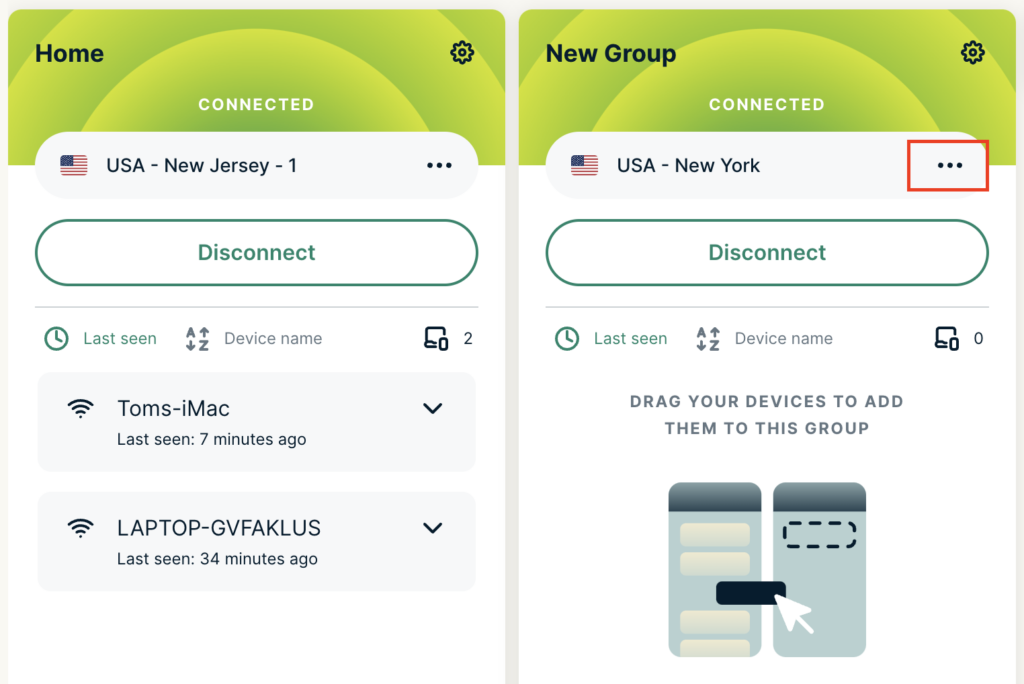
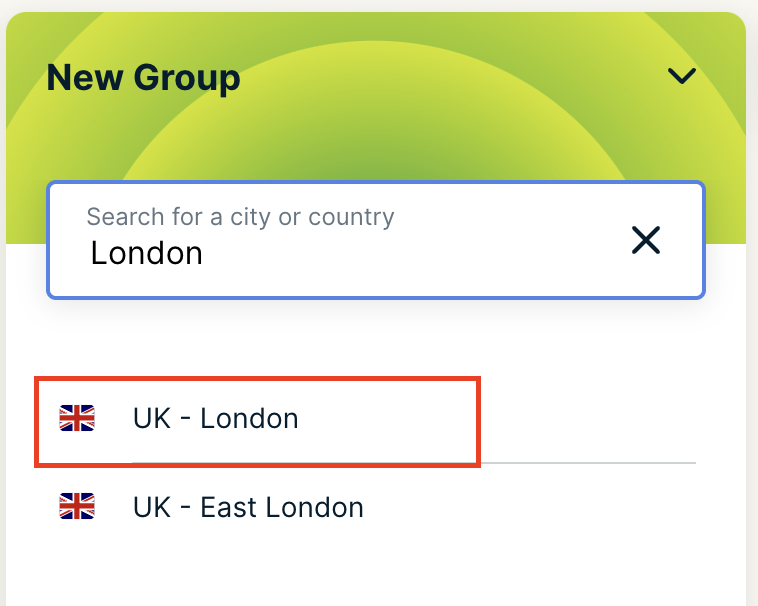
5. Click the three dots next to the new server location and type in the location you want to connect to. Click the new location to connect.

ExpressVPN Change server
ExpressVPN select new server

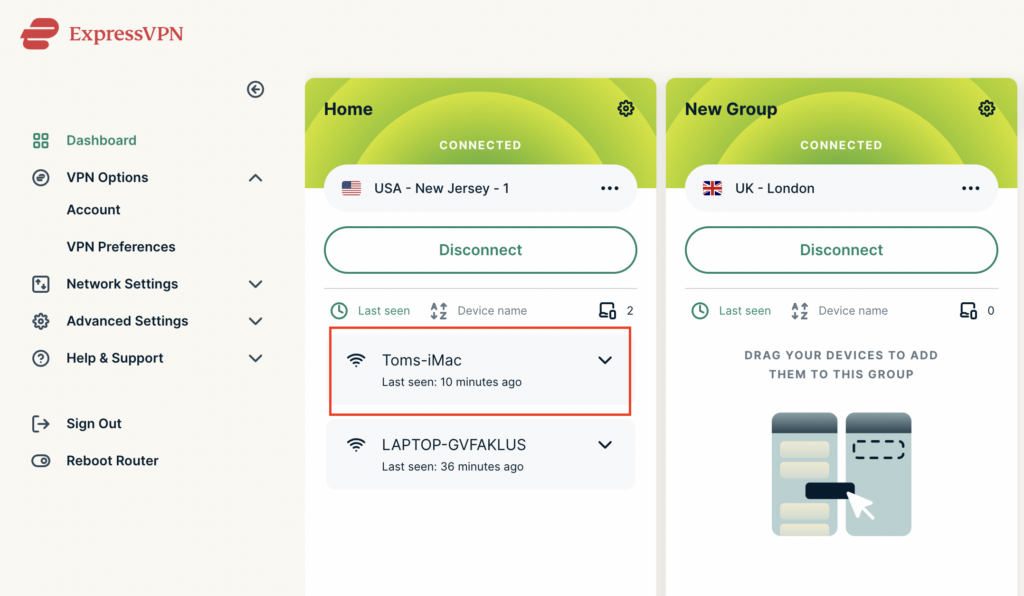
5. Click and drag the device that you want assigned to the VPN New Group.

ExpressVPN select device
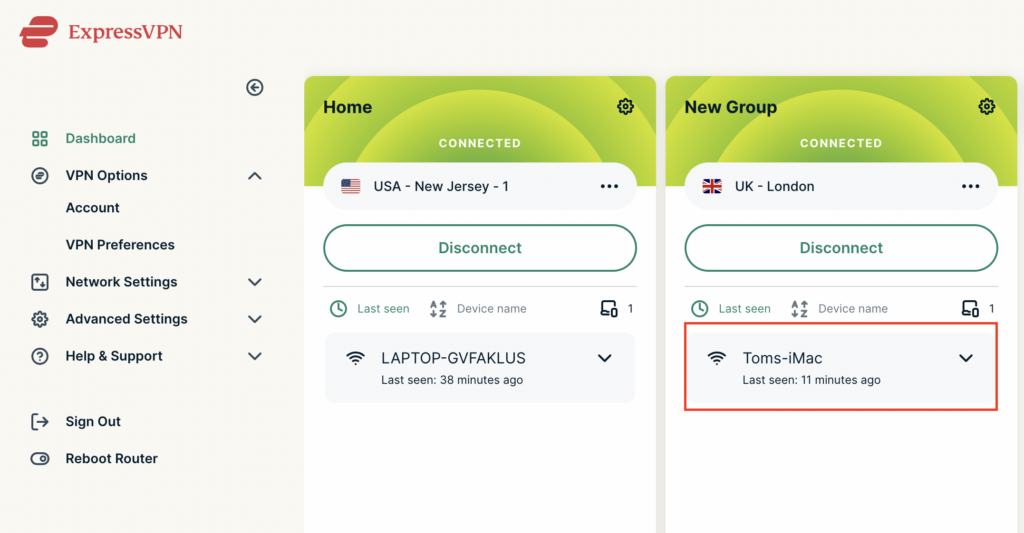
ExpressVPN device assigned

The devices assigned to new group will now connect to that location while the devices in the first VPN group will remain connected to the VPN server selected in that area.

Change server locations on ExpressVPN/Aircove firmware

TeamFlashRouters · May 12, 2022 ·

You can change the ExpressVPN server location at any time so your Internet connection appears as originating from that location.

1. Connect to the FlashRouter’s network via ethernet cable or wireless.

2. Open your web browser and enter expressvpnrouter.com or 192.168.132.1 in the URL.

ExpressVPNrouter.com
192.168.132.1

3. Login with your ExpressVPN FlashRouter admin password.

ExpressVPN Router admin login

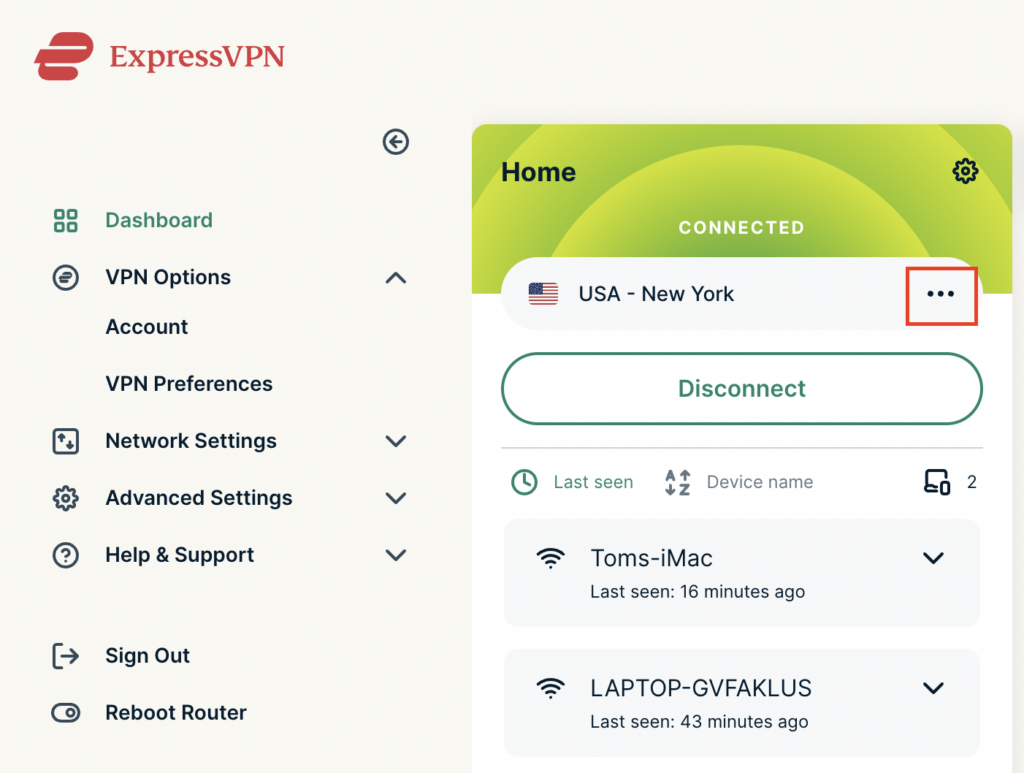
4. Click the three dots next to the server location.

ExpressVPN change server 1

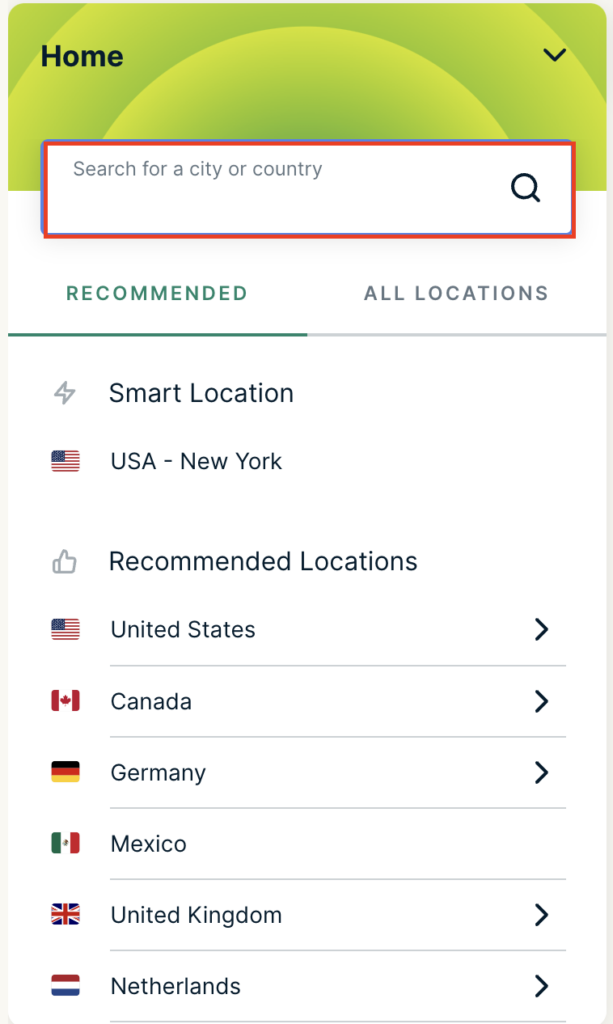
5. Type in the location you want to connect to. Click the new location to connect.

ExpressVPN change server 2

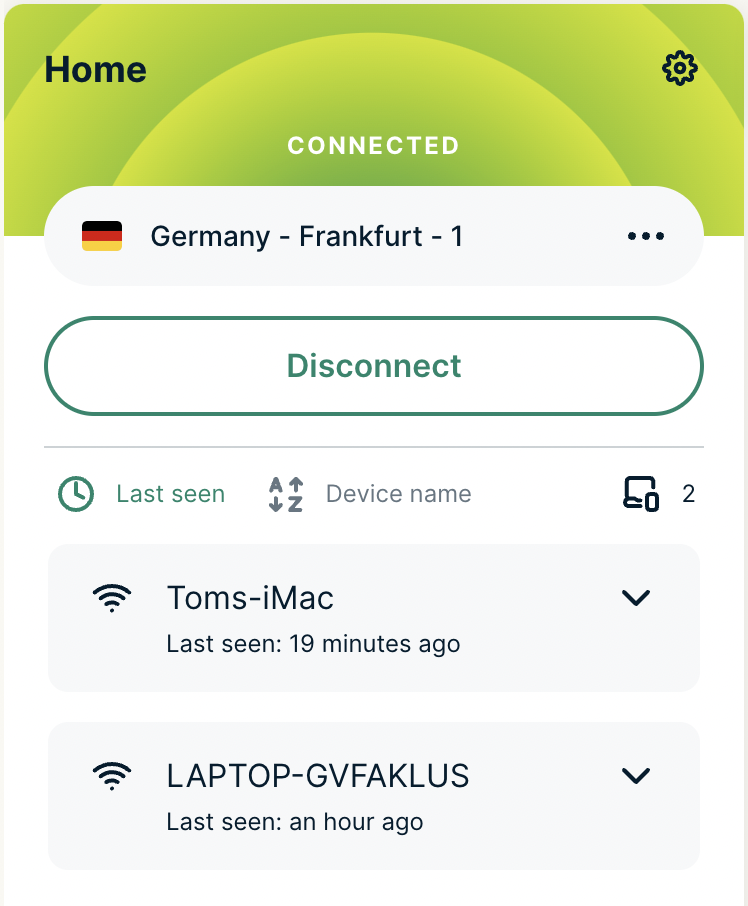
6. You are now connected to the new server location.

ExpressVPN change server 3

ExpressVPN offers servers in locations all over the world. Typically for speeds it is best to connect to the server closest to your actual location. Clicking a country instead of a city will connect you to the ideal city in that country.

How to Access Your AsusWRT FlashRouter Settings

TeamFlashRouters · Oct 16, 2025 ·

This quick guide will walk you through connecting to your AsusWRT FlashRouter and logging into the admin settings page. You’ll use either WiFi or an Ethernet cable, then access the router dashboard through your browser.

Step 1. Connect Your Device to the Router

You can connect by WiFi or Ethernet:

  • WiFi: Look for a network name like FlashRouter24 or FlashRouter50.
    • The WiFi password is set to: Wireless#[First 5 characters of your router’s MAC]
    • Example: If your MAC is CC28A07E70A8, your WiFi password is Wireless#CC28A.
    • ⚠️ Be sure to capitalize the “W” in Wireless.
  • Ethernet: Plug an Ethernet cable from your computer into one of the router’s LAN ports (usually marked or color-coded differently from the WAN port).

👉 Pro tip: Disconnect from any other WiFi networks during setup.

Step 2. Open the Router Login Page

  1. Open a web browser (Chrome, Safari, Firefox, Edge).
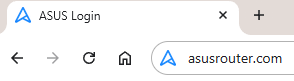
  2. In the address bar, type: 192.168.50.1 or go to asusrouter.com
  3. Press Enter.
Access Asus Router

This is the local router dashboard address (not a public website). If the page doesn’t load:

  • Try a different browser.
  • Clear your cache.
  • Ensure your device is connected to the FlashRouter network.

Step 3. Log In to the Router Settings

  • Default username: flashrouter
  • Default password: asuswrt-admin1
  • Some older devices may use: asuswrt1 or asuswrt
  • This is the factory default for AsusWRT routers shipped by FlashRouters.
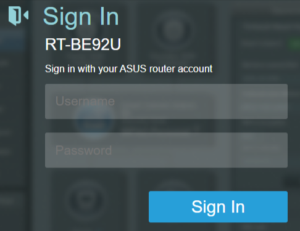
Asus Router Login

💡 Once you’re in, you can update your admin password in the settings for extra security.

Next Steps

Now that you’ve accessed your AsusWRT FlashRouter, you can:

  • Set up your VPN service
  • Customize your WiFi name and password
  • Adjust device controls and security settings

Check our support library for your specific VPN setup guide.

ProtonVPN WireGuard Setup

TeamFlashRouters · Jun 15, 2022 ·

Preparing for ProtonVPN WireGuard Setup

Verify your ProtonVPN login information

If you are not already a ProtonVPN user Sign Up Now.

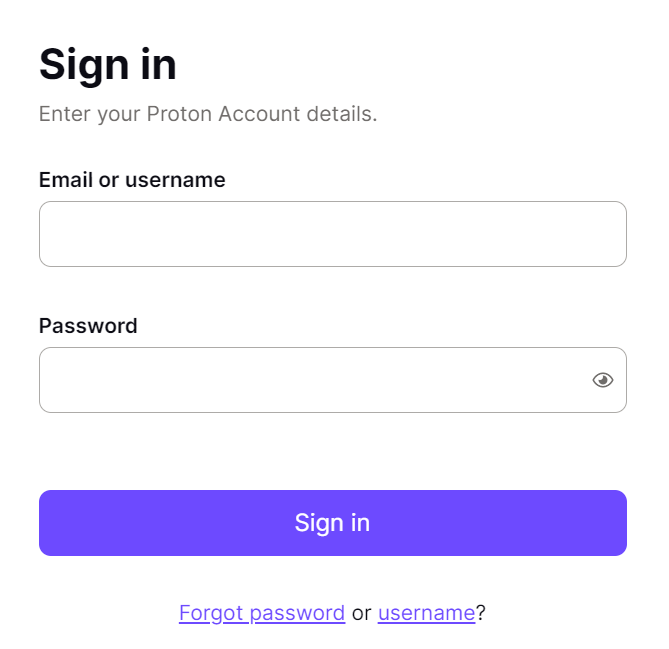
Log in to your account on the ProtonVPN website.

ProtonVPN Account login

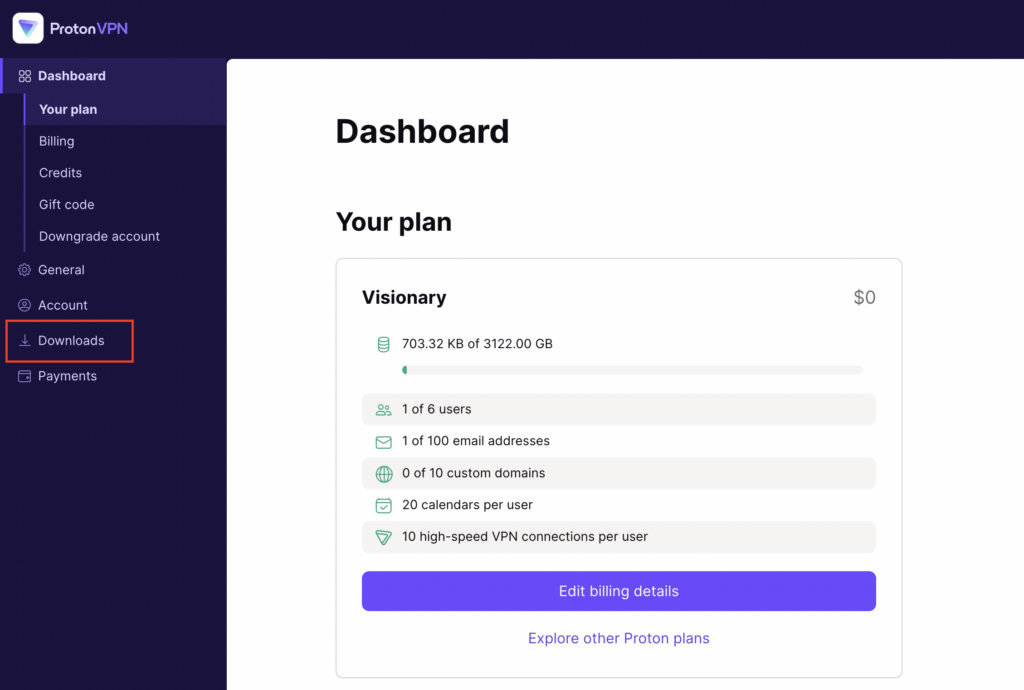
1. On the left hand side select Downloads.

ProtonVPN Downloads

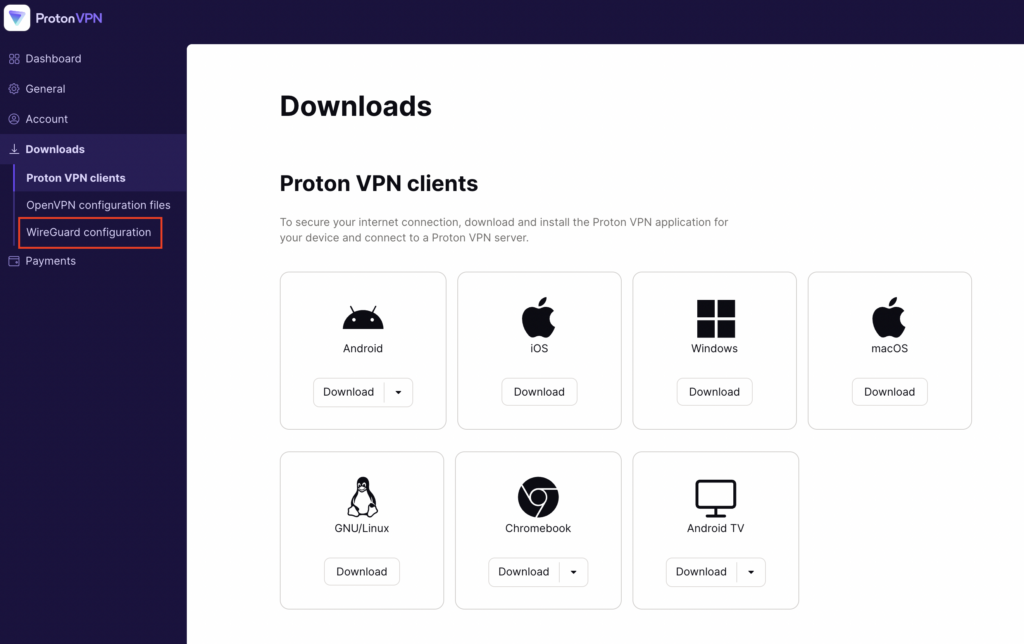
2. Then select WireGuard Configuration.

ProtonVPN WireGuard Configuration

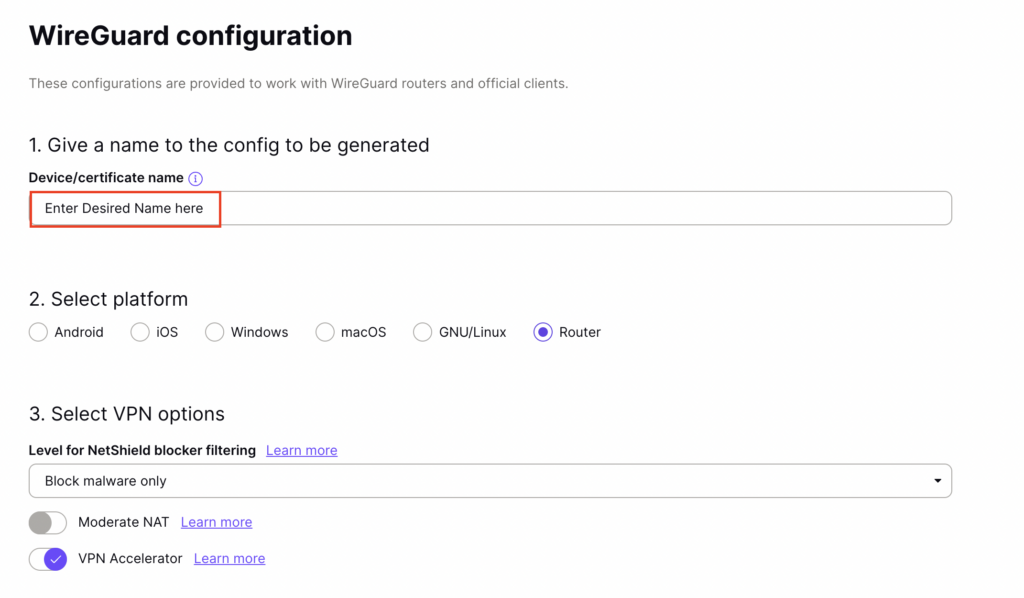
3. Enter the Device Name to assign the FlashRouter to identify it among your ProtonVPN connections.

ProtonVPN WireGuard Desired Name

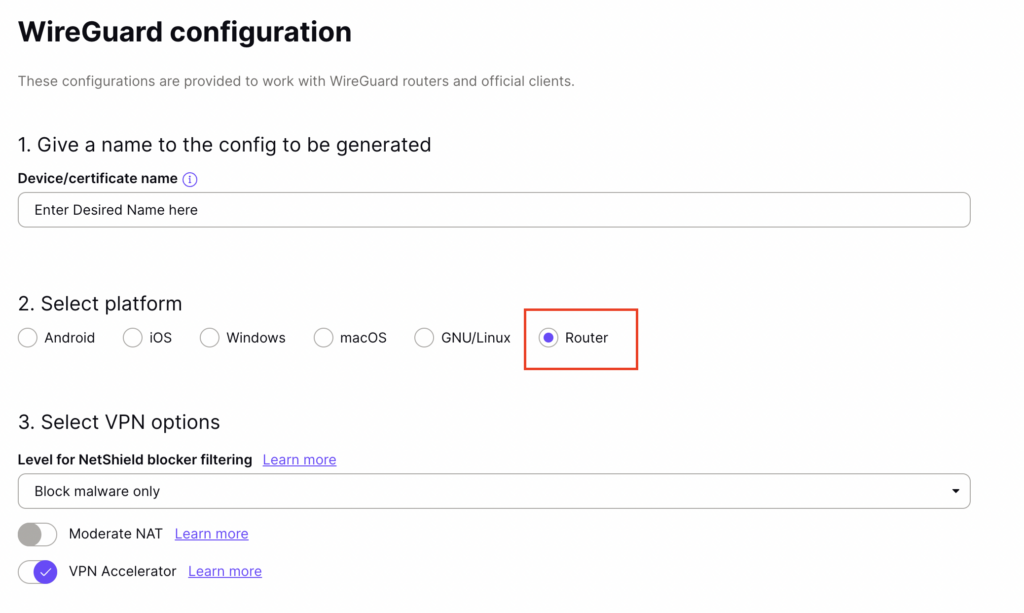
4. Set the Device platform as Router.

ProtonVPN WireGuard select Router

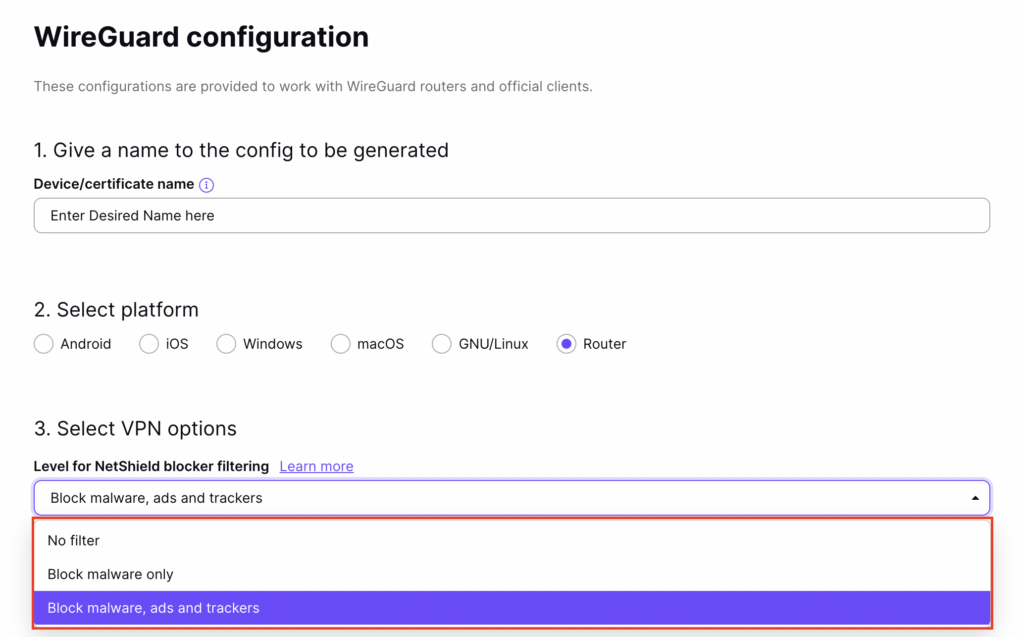
5. Select the VPN Options that you would like to connect with.

ProtonVPN WireGuard VPN Options

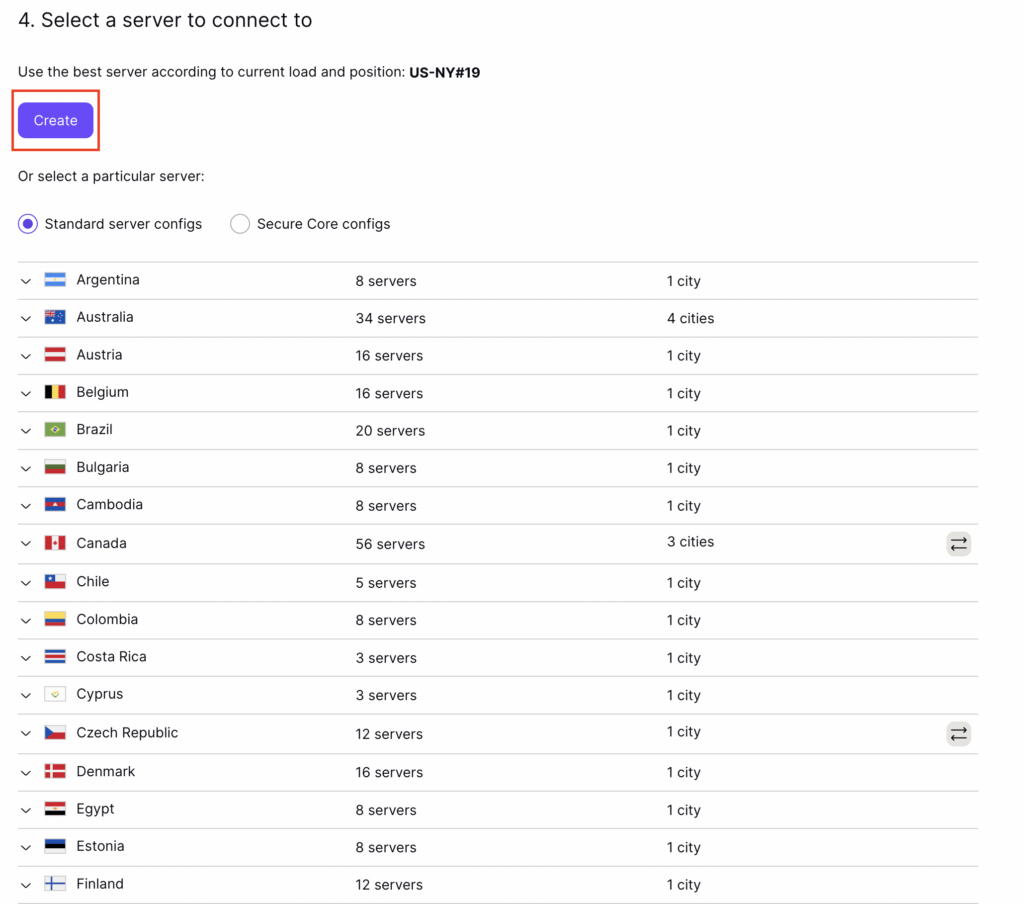
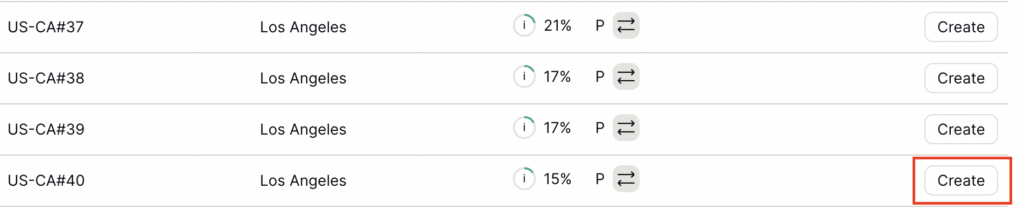
6. ProtonVPN will recommend the ideal server for you to connect to based on your location. Click Create or scroll down and select the server you wish to connect to and click Create next to the server number.

ProtonVPN WireGuard select server
ProtonVPN WireGuard select servers

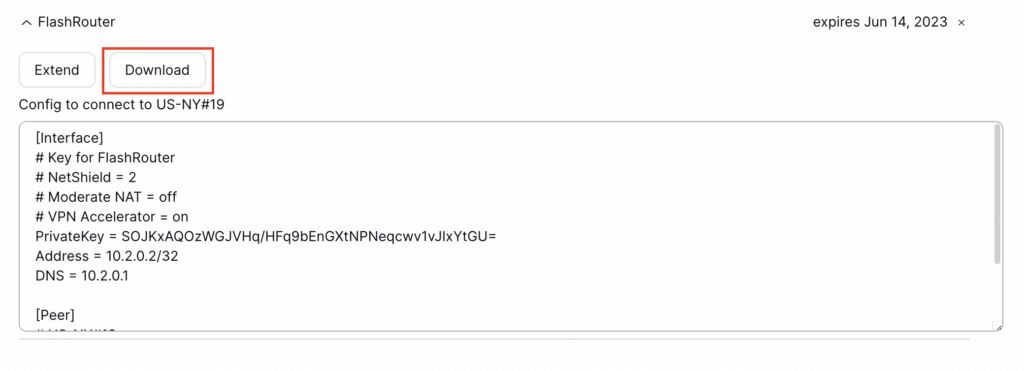
7. Click Download to download the .conf file of the server you selected.

ProtonVPN WireGuard download configuration

DD-WRT Router Setup for ProtonVPN WireGuard

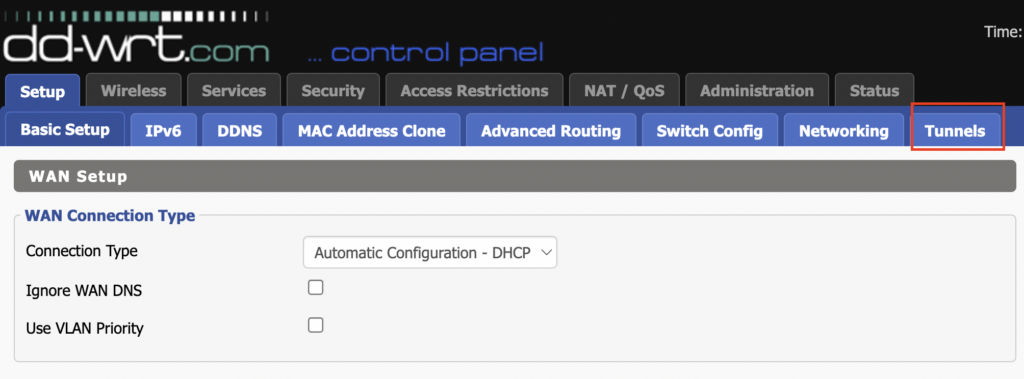
Navigate to Setup > Tunnels 

ProtonVPN WireGuard DD-WRT Tunnels

Enter ProtonVPN WireGuard settings

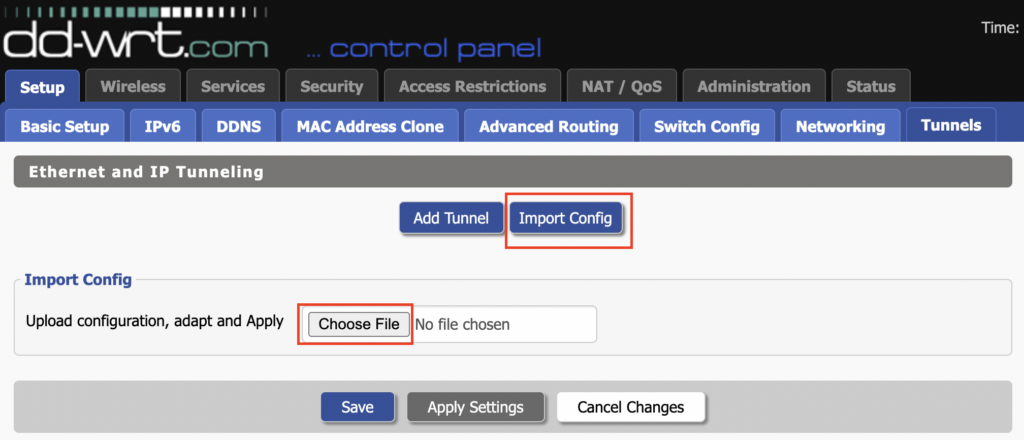
1. Click Import Config and then select Choose file. Select the .conf file that was downloaded earlier.

ProtonVPN WireGuard Import Config and Choose File

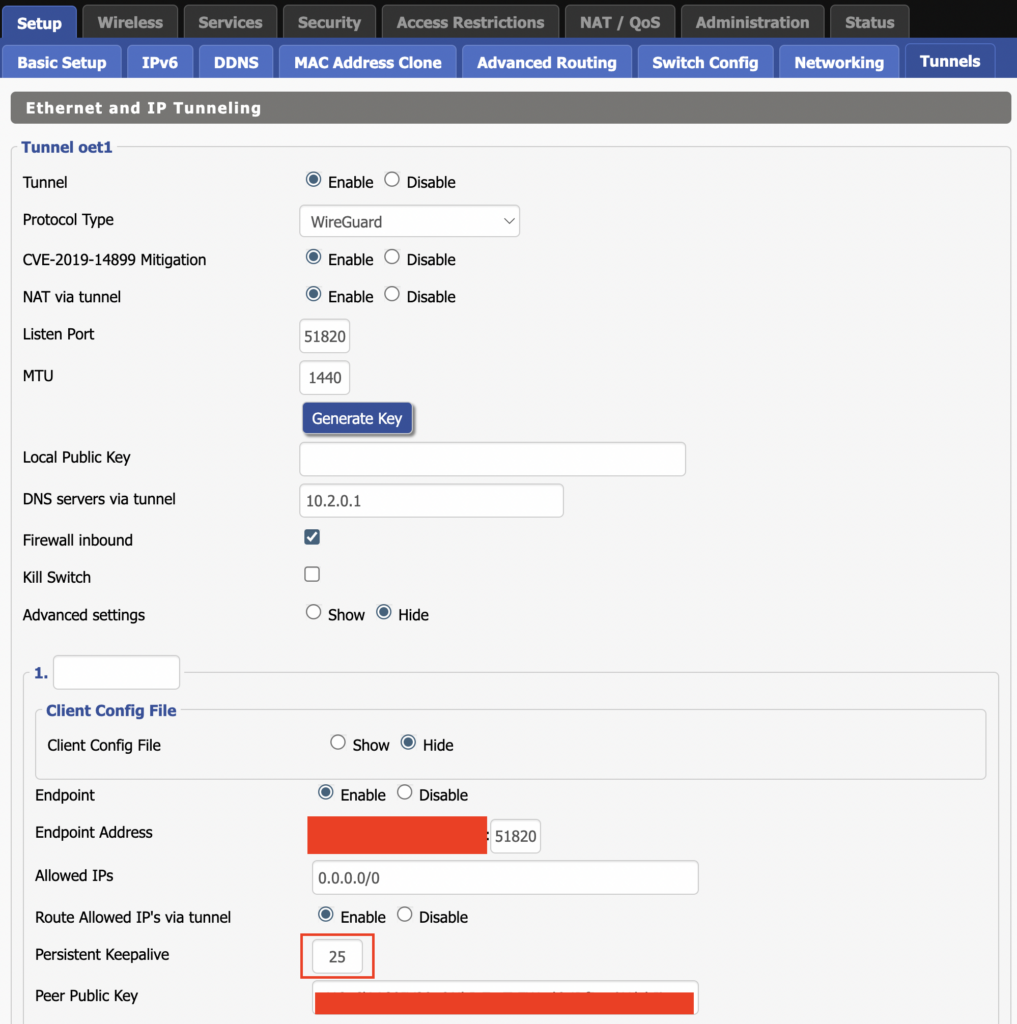
2. All settings will be loaded into the DD-WRT firmware the only field that needs to be adjusted is setting Persistent Keepalive to 25.

ProtonVPN WireGuard Persistent Keep Alive

3. Click Apply Settings at the bottom of the page.

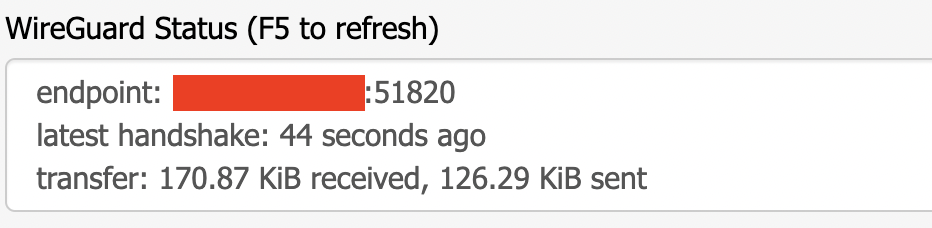
4. After 30 seconds or so refresh the page until you see the WireGuard Status on the page is populated as seen below.

ProtonVPN WireGuard Status

Verify a successful ProtonVPN connection

Navigate to Setup > Tunnels

  1. You should Endpoint, Latest handshake, and Transfer in the WireGuard status area.
  2. Visit whatismyipaddress.com to verify your status as using ProtonVPN.

Back up your settings

Navigate to Administration > Backup

  1. Click the Backup button.
  2. A file named nvrambak.bin will be saved to your computer.
  3. You can load nvrambak.bin to restore your settings in the event of a reset.

TROUBLESHOOTING

Still having issues? Visit the VPN Troubleshooting section.

Troubleshoot Here

ExpressVPN Setup for AsusWRT Firmware Routers

TeamFlashRouters · Apr 29, 2024 ·

You can connect to ExpressVPN on your AsusWRT router using OpenVPN.

Quick Options

  • OpenVPN: Download your preferred server .ovpn configuration file from the ExpressVPN website.

:point_right: If you are not already a ExpressVPN user Sign Up Now.

EXPRESSVPN SETUP GUIDE FOR ASUSWRT

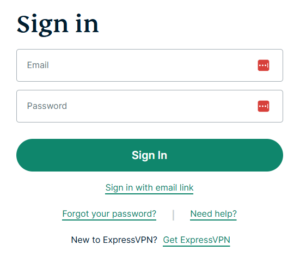
1. Log in to your account on the ExpressVPN website.

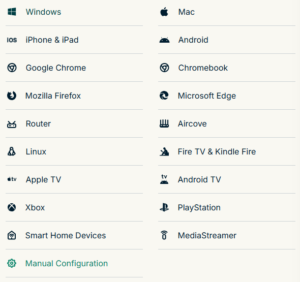
2. In the “Set up your devices” section, click More and select Manual Configuration from the menu options.

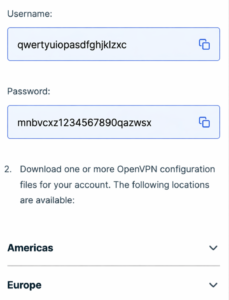
3. Copy the Username and Password that are displayed on the right

ExpressVPN Manual Service Credentials

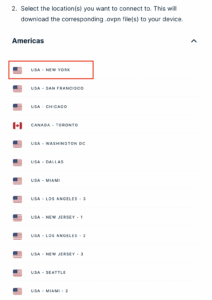
4. Download a server file from any of the available regions shown in the ExpressVPN Manual Configuration section (Americas, Europe, Asia Pacific, etc)

ExpressVPN Download .ovpn file

5. Log in to the Asus settings page by connecting to the Asus router’s WiFi (or wired LAN) on your computer. Then, enter 192.168.50.1 or asusrouter.com in the browser.

View our guide for more instructions on how to access AsusWRT firmware settings.

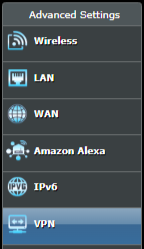
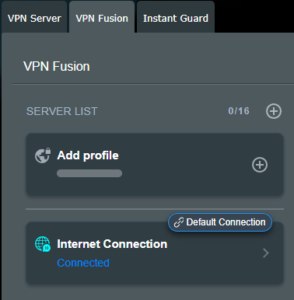
6. Navigate to the VPN tab and then click on the VPN Fusion tab, then click Add Profile

Click the VPN Button
VPN Fusion Add Profile

7.  Fill in your NordVPN information then click Apply and Enable.

  • Connection Name: Choose a name for your ExpressVPN OpenVPN connection.
  • VPN Type: Select OpenVPN
  • Import .ovpn File: Upload the OpenVPN file that you downloaded.
  • Username and Password: Copy and paste your ExpressVPN manual service credentials from step 3.

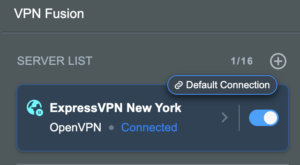
8. You should now see the Profile say Connected, indicating that the NordVPN server is successfully connected to your router.

Asus ExpressVPN Connected

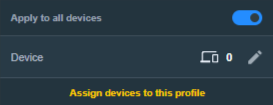
9. The VPN connection is automatically set to Apply to all devices.

If you only want certain devices to connect to the VPN, then turn off the VPN connection and switch off Apply to all devices.

Now click the pencil next to the Device section and select the devices (computer, phone, etc.) that you want to connect to VPN. Click OK and then click Apply all settings.

Apply VPN by Device
  1. Connect your devices to the Asus router network and visit the ExpressVPN website, at the top it should display Your Status: Protected.
  2. Visit ExpressVPN’s IP Check to verify your new IP address and virtual location.

🚫📱Do not run ExpressVPN apps on devices connected to your ExpressVPNrouter. Using the app at the same time as the router VPN may cause conflicts and connection issues.

TROUBLESHOOTING

Still having issues? Visit the VPN Troubleshooting section.

Troubleshoot Here
« Previous Page

Primary Sidebar

  • Troubleshooting
  • Router Access
  • Internet Connection Issues
  • WiFi Connectivity
  • General VPN Issues
  • TeamViewer Remote Support
  • DD-WRT Firmware
  • Facebook
  • Twitter
  • Instagram
  • Pinterest
  • YouTube

Footer