• Skip to primary navigation
  • Skip to main content
  • Skip to primary sidebar
  • Skip to footer

FlashRouters Support Portal

Prioritizing Privacy

  • SETUP GUIDES
    • Privacy Hero Router Setup Guide
    • ASUS-WRT Router Setup Guide
    • AsusWRT-Merlin Router Setup Guide
    • DD-WRT Router Setup Guide
    • ExpressVPN Router Setup Guide
    • GL.iNet Router Setup Guide
    • Roqos Core Router Setup Guide
  • TROUBLESHOOTING
    • Router Access
    • WiFi Connectivity
    • Internet Connection Issues
    • General VPN Issues
    • DD-WRT Firmware
    • TeamViewer Remote Support
  • FAQs
    • Router FAQs
    • VPN FAQs
    • Warranty and Returns FAQs
    • Sales FAQs
    • Shipping FAQs
    • Service Plan FAQs
  • Show Search
Hide Search

Search Results for: may i ask for o

Teamviewer FAQ and Setup

TeamFlashRouters · May 30, 2019 ·

We do NOT offer phone support here at FlashRouters. You will not receive a phone call to begin your session. Please read the information below for how to get connected during your session time.

What is a Teamviewer session?

A Teamviewer session is the most hands on method of receiving support from FlashRouters.

A support agent will connect directly to your computer and proceed to configure or troubleshoot your FlashRouter with you present.

We use Teamviewer sessions to troubleshoot any issue an eligible customer may have with a FlashRouter that was purchased from us or to configure a compatible router that your purchased independently along with a FlashRouters Support Plan.

In the session a chat window will appear so we can communicate directly with you in real time.

If you follow the information below prior to your session and all goes smoothly a Teamviewer session typically takes anywhere from 15 to 45 minutes.

Do I qualify for a Teamviewer session?

When purchasing a FlashRouter you are able to select a Quarterly or Yearly Bronze, Silver or Gold subscription plan.

Silver Yearly plan comes with one Teamviewer remote support session a year.

Gold Quarterly and Yearly plans come with one session per quarter.

If you support plan has expired or you are signed up for Bronze and you’d like to receive Teamviewer remote support assistance please email support@flashrouters.com

How do I schedule a Teamviewer session?

We are available for scheduled Teamviewer sessions from 10AM – 6:00PM ET Monday through Saturday.

To schedule a session with us open a support ticket or contact us via our live chat. We do not perform sessions that are not scheduled.

If we are available off hours we do our best to accommodate off hours session times with at least 24 hours notification.

Recommended computer and network setup

What computer should I use for Teamviewer?

Teamviewer sessions can not be performed on phones or tablets at this time. We require a Windows or Mac computer to successfully connect and configure your FlashRouter.

Below are the different scenarios from most ideal to least ideal.

I have a Dual Router Setup and a computer with WiFi and Ethernet

If you have an available wireless network NOT coming from the FlashRouter and have a computer that has wireless AND Ethernet capabilities you should be setup as follows:

  1. Connect via wireless to the other router.
  2. Once we have joined the session we will instruct you to wire from the FlashRouter to your computer.

I have a Dual Router Setup and a computer with WiFi only

If you have an available wireless network NOT coming from the FlashRouter and have a computer that has wireless only you should be setup as follows:

  1. Obtaining a USB to Ethernet adapter is ideal.
  2. If that is not possible connect to the FlashRouter’s network via wireless.

Session disconnects may occur with no backup Internet connection.

I have a Single Router Setup and a computer with WiFi and Ethernet

If the FlashRouter is your only wireless network and your computer has wireless and Ethernet capabilities you should be setup as follows:

  1. Connect an Ethernet cable from a numbered port on your FlashRouter directly to your computer.
  2. We may ask you during the session if your smartphone can broadcast an wireless hotspot we can connect to for backup Internet.

I have a Single Router Setup and a computer with WiFi only

If the FlashRouter if your only wireless network and your computer is wireless only you should be setup as follows:

  1. Obtaining a USB to Ethernet adapter is ideal.
  2. If that is not possible connect to the FlashRouter’s network via wireless.

Session disconnects may occur with no backup Internet connection.

How do I download Teamviewer?

Windows

  1. Download Teamviewer for Windows.
  2. Open the Teamviewer application.
  3. Email the User ID and Password (example displayed below) to your existing email thread or our live chat.
Access Teamviewer User ID and Password for FlashRouters Remote Support Session on Windows

Mac

  1. Download Teamviewer for Mac.
  2. Open the Teamviewer application.
  3. Email the User ID and Password (example displayed below) to your existing email thread or our live chat.
Access Teamviewer User ID and Password for FlashRouters Remote Support Session on Mac

When should I provide FlashRouters with my Teamviewer User ID and Password?

About 15 minutes before your scheduled session time update your support ticket e-mail the User ID and Password to your existing email thread, or send via our live chat.

Privacy Hero Activation and Setup

TeamFlashRouters · Feb 8, 2023 ·

Follow this article when you receive your new Privacy Hero router to create your Privacy Hero account, connect your Privacy Hero to the Internet, and customize your network so it is ready to use.

Your Privacy Hero router uses Cloud Based router management which means you can access the router settings from anywhere on any device that has an internet connection. You can follow these steps while connected to your phone or your other Wi-Fi network.

Create your Privacy Hero account

1. From any device that has a browser such as a computer, smartphone, or tablet visit app.privacyhero.com

App.PrivacyHero.com

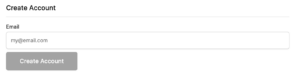
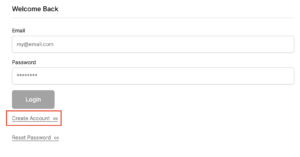
2. Select Create Account.

Privacy Hero create Account

3. Enter the Email address you want to set for your Privacy Hero account. This will be your login to the Privacy Hero settings moving forward. Click Create Account.

Privacy Hero Enter account email

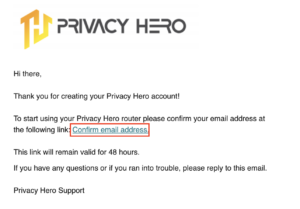
4. Go to your Email inbox and check for an email from Privacy Hero and click the Confirm email address link. This email may be in your Promotions or Spam inbox if it is not appearing in your main inbox.

Privacy Hero Confirm Email

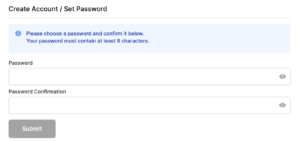
5. Enter the password that you want to use for your Privacy Hero account. Be sure to note this in a secure location so you do not forget. Click Submit.

Privacy Hero create password

6. You have now created your Privacy Hero account. You will use this login to access the Privacy Hero router settings.

Activate your Privacy Hero Internet and setup Wi-Fi

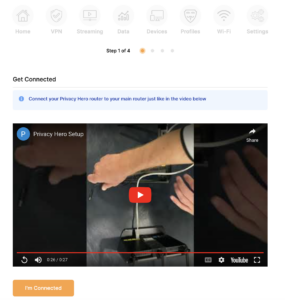
1. You will then be taken to the Router Activation steps. Connect the ethernet cable that the Privacy Hero came with from an open Ethernet port on your ISP modem or other router to the WAN/Internet (blue) port of the Privacy Hero.

Then power the Privacy Hero device on by connecting the power supply. This is shown in the video on the page as well. Wait about a minute or so for the Privacy Hero router to fully boot up and then click I’m Connected.

Wire Up Privacy Hero

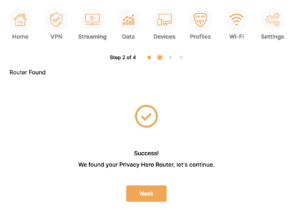
2. The next page may say Router Found or ask you to enter the Activation Code. If it asks for the Activation Code that will be the code printed on the bottom of the Privacy Hero. Enter this code and click Next.

Privacy Hero Router Found

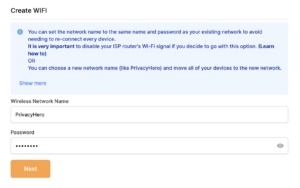
3. Set the Wi-Fi name and password for connecting your devices to the Privacy Hero network. Make sure it is not a duplicate name of an existing Wi-Fi network. Click Next.

Privacy Hero Set wifi name and password

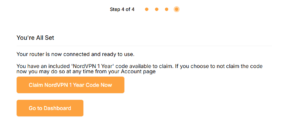
4. To activate your 1 Year NordVPN code:

Click on Claim NordVPN 1 Year Code Now

NordVPN Claim Code

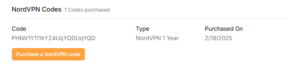
Go to the Account section of your router settings.

Copy the NordVPN code shown under Claim NordVPN 1 Year Code.

PH Nord Code

Go to the NordVPN activation page.

This code can be used with a new or existing NordVPN account.

NordVPN Activate Page

5. You are now all set to begin joining your devices to the new Privacy Hero network with the Wi-Fi name and password you entered and setting up some of the Privacy Hero features.

TROUBLESHOOTING

Still having issues? Visit the VPN Troubleshooting section.

Troubleshoot Here

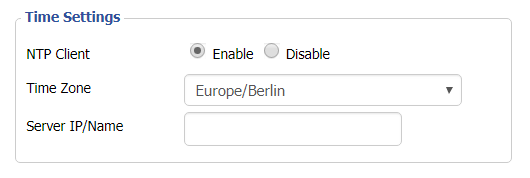
Why is my Time Zone set to Europe/Berlin?

TeamFlashRouters · May 30, 2019 ·

Europe/Berlin is the default Time Zone setting for DD-WRT firmware.

To change this to your location’s actual Time Zone do the following.

Navigate to Setup > Basic Setup

Select your actual Time Zone from the dropdown field. Leave the Server IP/Name field blank.

CLICK APPLY SETTINGS

The network may reboot for a moment. Simply reconnect when it is back up.

Disabling the NTP Client setting will result in the VPN connection not working so we ask that you please leave it enabled at all times.

Primary Sidebar

  • Troubleshooting
  • Router Access
  • Internet Connection Issues
  • WiFi Connectivity
  • General VPN Issues
  • TeamViewer Remote Support
  • DD-WRT Firmware
  • Facebook
  • Twitter
  • Instagram
  • Pinterest
  • YouTube

Footer