• Skip to primary navigation
  • Skip to main content
  • Skip to primary sidebar
  • Skip to footer

FlashRouters Support Portal

Prioritizing Privacy

  • SETUP GUIDES
    • Privacy Hero Router Setup Guide
    • ASUS-WRT Router Setup Guide
    • AsusWRT-Merlin Router Setup Guide
    • DD-WRT Router Setup Guide
    • ExpressVPN Router Setup Guide
    • GL.iNet Router Setup Guide
    • Roqos Core Router Setup Guide
  • TROUBLESHOOTING
    • Router Access
    • WiFi Connectivity
    • Internet Connection Issues
    • General VPN Issues
    • DD-WRT Firmware
    • TeamViewer Remote Support
  • FAQs
    • Router FAQs
    • VPN FAQs
    • Warranty and Returns FAQs
    • Sales FAQs
    • Shipping FAQs
    • Service Plan FAQs
  • Show Search
Hide Search

Search Results for: article about w

Flint/Slate GL.iNet Internet Setup

TeamFlashRouters · Apr 3, 2023 ·

Follow this article when you receive your new Flint or Slate GL.iNet router to connect it to the Internet.

1. Connect the ethernet cable that came with the router from an open LAN ethernet port on your ISP modem or other router to the WAN port of the Flint or Slate GL.iNet router.
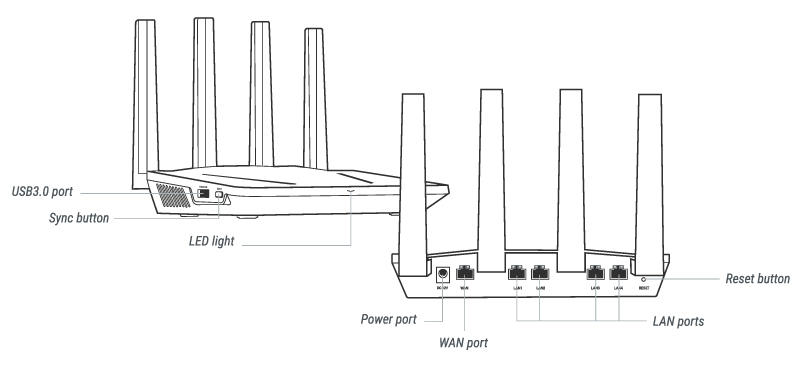
Flint Internet
Slate Internet

2. Connect the power to the router and wait about 2 minutes for the router to fully boot up.

3. Connect your computer, phone, or tablet to the GL.iNet router via wireless (FlashRouter24 / FlashRouter50) or via ethernet cable to one of the LAN ports on the router.

The FlashRouter WiFi password is printed on the sheet that came with the router and is set to Wireless#[First 5 characters of your router MAC]. The router MAC can be found on the bottom of your router if you cannot locate the sheet. For e.g. if your MAC is 1459C07E70A8 then your WiFi password is Wireless#1459C

Be sure to capitalize the W.

4. Once connected via wireless or ethernet on your device open your browser and go to 192.168.8.1
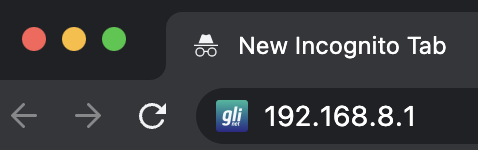
GL.iNet router access

5. Enter openwrt as the admin password to access the GL.iNet firmware settings.
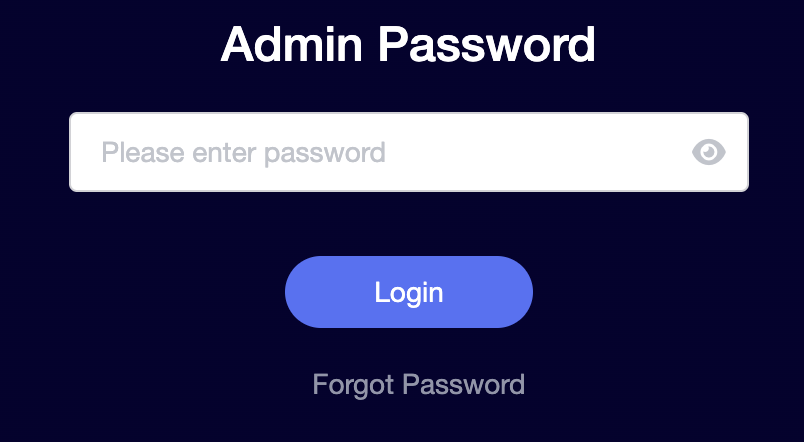
GL.iNet admin password enter

6. Verify that your Flint/Slate GL.iNet router is receiving a WAN IP Address and webpages are loading while connected to its network.
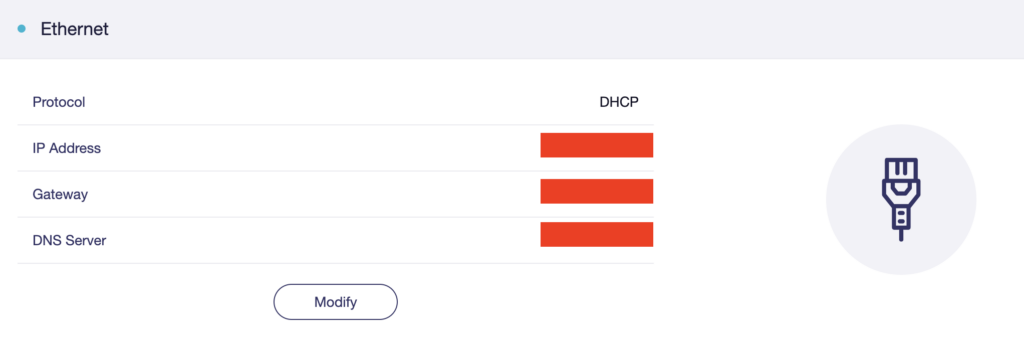

GL.iNet WAN Settings

TROUBLESHOOTING

Still having issues? Visit the VPN Troubleshooting section.

Troubleshoot Here

Privacy Hero Activation and Setup

TeamFlashRouters · Feb 8, 2023 ·

Follow this article when you receive your new Privacy Hero router to create your Privacy Hero account, connect your Privacy Hero to the Internet, and customize your network so it is ready to use.

Your Privacy Hero router uses Cloud Based router management which means you can access the router settings from anywhere on any device that has an internet connection. You can follow these steps while connected to your phone or your other Wi-Fi network.

Create your Privacy Hero account

1. From any device that has a browser such as a computer, smartphone, or tablet visit app.privacyhero.com

App.PrivacyHero.com

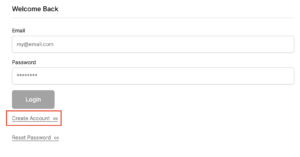
2. Select Create Account.

Privacy Hero create Account

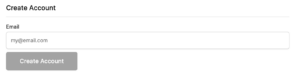
3. Enter the Email address you want to set for your Privacy Hero account. This will be your login to the Privacy Hero settings moving forward. Click Create Account.

Privacy Hero Enter account email

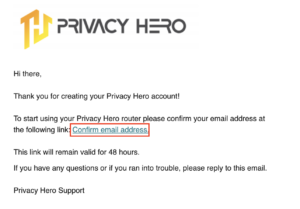
4. Go to your Email inbox and check for an email from Privacy Hero and click the Confirm email address link. This email may be in your Promotions or Spam inbox if it is not appearing in your main inbox.

Privacy Hero Confirm Email

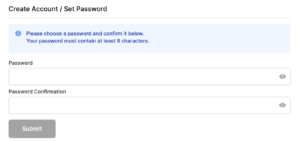
5. Enter the password that you want to use for your Privacy Hero account. Be sure to note this in a secure location so you do not forget. Click Submit.

Privacy Hero create password

6. You have now created your Privacy Hero account. You will use this login to access the Privacy Hero router settings.

Activate your Privacy Hero Internet and setup Wi-Fi

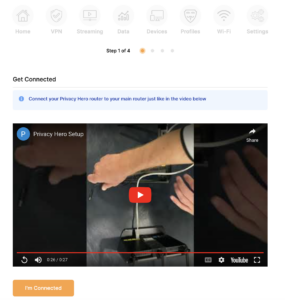
1. You will then be taken to the Router Activation steps. Connect the ethernet cable that the Privacy Hero came with from an open Ethernet port on your ISP modem or other router to the WAN/Internet (blue) port of the Privacy Hero.

Then power the Privacy Hero device on by connecting the power supply. This is shown in the video on the page as well. Wait about a minute or so for the Privacy Hero router to fully boot up and then click I’m Connected.

Wire Up Privacy Hero

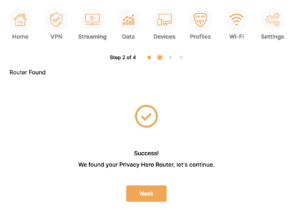
2. The next page may say Router Found or ask you to enter the Activation Code. If it asks for the Activation Code that will be the code printed on the bottom of the Privacy Hero. Enter this code and click Next.

Privacy Hero Router Found

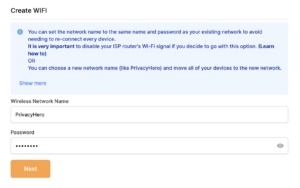
3. Set the Wi-Fi name and password for connecting your devices to the Privacy Hero network. Make sure it is not a duplicate name of an existing Wi-Fi network. Click Next.

Privacy Hero Set wifi name and password

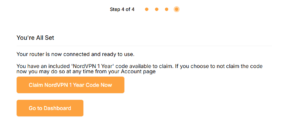
4. To activate your 1 Year NordVPN code:

Click on Claim NordVPN 1 Year Code Now

NordVPN Claim Code

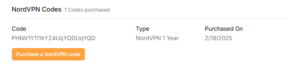
Go to the Account section of your router settings.

Copy the NordVPN code shown under Claim NordVPN 1 Year Code.

PH Nord Code

Go to the NordVPN activation page.

This code can be used with a new or existing NordVPN account.

NordVPN Activate Page

5. You are now all set to begin joining your devices to the new Privacy Hero network with the Wi-Fi name and password you entered and setting up some of the Privacy Hero features.

TROUBLESHOOTING

Still having issues? Visit the VPN Troubleshooting section.

Troubleshoot Here

Cudy Internet Setup

TeamFlashRouters · Feb 26, 2024 ·

Follow this article when you receive your new Cudy FlashRouter to connect it to the Internet.

1. Connect the ethernet cable that came with the router from an open LAN ethernet port on your ISP modem or other router to the WAN port if you purchased a Cudy AX3000 or to ethernet port #1 of the device marked Primary if you purchased a Cudy M1800 or Cudy M3000.

Cudy Mesh internet wiring

2. Connect the power to the router and wait about 2 minutes for the router to fully boot up.

3. Connect your computer, phone, or tablet to the Cudy router via wireless (FlashRouter24 / FlashRouter50) or via ethernet cable to one of the LAN ports on the router.

The FlashRouter WiFi password is printed on the sheet that came with the router and is set to Wireless#[First 5 characters of your router MAC]. The router MAC can be found on the bottom of your router if you cannot locate the sheet. For e.g. if your MAC is 1459C07E70A8 then your WiFi password is Wireless#1459C

Be sure to capitalize the W.

4. Once connected via wireless or ethernet on your device open your browser and go to 192.168.10.1

Cudy local IP access

5. Enter openwrt as the admin password to access the Cudy firmware settings.

Cudy router access

6. Verify that your Cudy FlashRouter is reporting as Internet and WAN Connected.

Cudy Verify Internet

6. Verify that your Cudy FlashRouter is reporting as Internet and WAN Connected.

7. If you purchased a Cudy M1800 or Cudy M3000 mesh package you can now take the unit labeled Node to the location you want it connecting from and power it up. It will connect to the Primary network that was just setup automatically. You will then see the Mesh Units number increase according to the number that you have purchased shortly.

Cudy Verify Mesh connection

TROUBLESHOOTING

Still having issues? Visit the VPN Troubleshooting section.

Troubleshoot Here

TP-Link Internet Setup

TeamFlashRouters · Apr 11, 2024 ·

Follow this article when you receive your new TP-Link FlashRouter to connect it to the Internet.

1. Connect the ethernet cable that came with the router from an open LAN ethernet port on your ISP modem or other router to the WAN port of the TP-Link.

2. Connect the power to the router and wait about 2 minutes for the router to fully boot up.

3. Connect your computer, phone, or tablet to the TP-Link router via wireless (FlashRouter24 / FlashRouter50) or via ethernet cable to one of the LAN ports on the router.

The FlashRouter WiFi password is printed on the sheet that came with the router and is set to Wireless#[First 5 characters of your router MAC]. The router MAC can be found on the bottom of your router if you cannot locate the sheet. For e.g. if your MAC is 1459C07E70A8 then your WiFi password is Wireless#1459C

Be sure to capitalize the W.

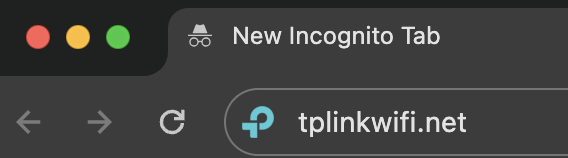
4. Once connected via wireless or ethernet on your device open your browser and go to tplinkwifi.net

TP-Link URL Access

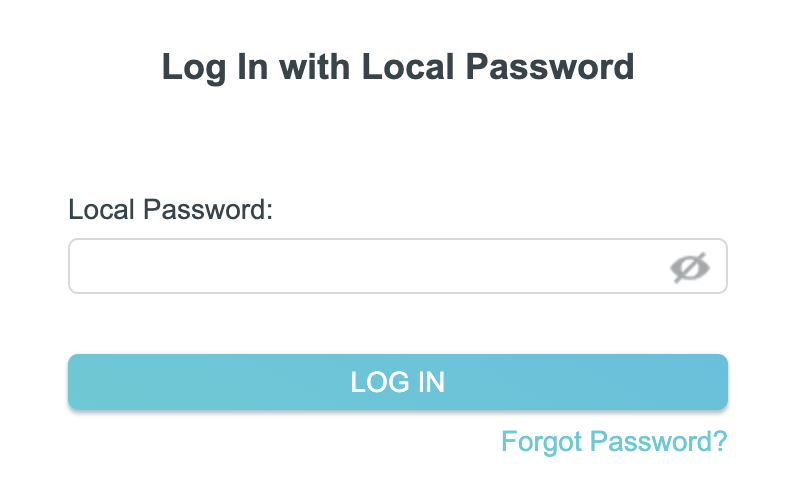
5. Enter tp-link as the admin password to access the TP-Link firmware settings.

TP-Link admin password

6. Verify that your TP-Link FlashRouter is reporting as Internet and WAN Connected.

TP-Link Internet Connected

TROUBLESHOOTING

Still having issues? Visit the VPN Troubleshooting section.

Troubleshoot Here

What are some extra steps I can take to secure my network?

TeamFlashRouters · May 30, 2019 ·

DD-WRT open source firmware removes many firmware vulnerabilities and backdoor access issues that may cause problems in stock firmware. DD-WRT is also updated more frequently than stock firmware, so be sure to always check with the FlashRouter support team to see which DD-WRT build we recommend for the highest level of security for your router at any time.

Aside from avoiding common issues and flaws with stock firmware, DD-WRT give you more control over the firmware settings and allows you to take some extra steps to really lock down your network security. In this article we highlight additional options for WiFi network security and also preventative measures for remote execution attacks.

Wireless MAC Filtering

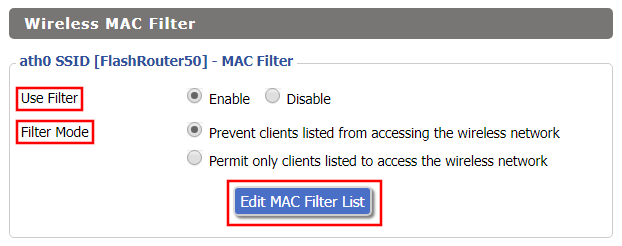
Navigate to Wireless > MAC Filter

Access FlashRouters DD-WRT Admin Enable MAC Filtering
  1. Set Use Filter to Enable.
  2. Select either Prevent or Permit
    • Choose Prevent to add MAC addresses that you don’t want to join your network.
    • Choose Permit to add MAC addresses that you do want to join your network, automatically blocking all others.
  3. Select Edit MAC Filter List.
  4. Add the MAC Address of the wireless devices you want to prevent or permit. Be sure to use the xx:xx:xx:xx:xx:xx format. Hint: You can see a list of connected devices MAC Address by clicking Wireless Client MAC List.
  5. Click Save.
  6. Replicate the steps above for each wireless band.
  7. Click Apply Settings.

Disable Remote Access

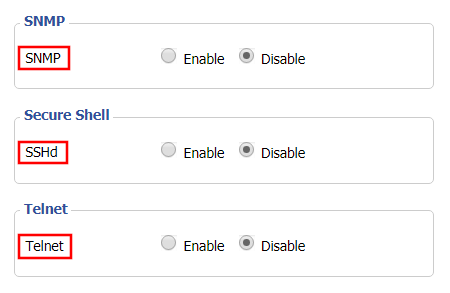
Navigate to Services > Services

Access FlashRouters DD-WRT Admin Settings and Disable Remote Access
  1. Set SNMP to Disable – this setting disables Simple Network Management Protocol, which prevents software from polling your network for information about connected devices.
  2. Set SSHd to Disable – disabling the Secure Shell is a simple way to prevent root access and brute force attacks on your network.
  3. Set Telnet to Disable – Telnet is a less secure version of SSH to manage your local router network via command line.
  4. Click Apply Settings.

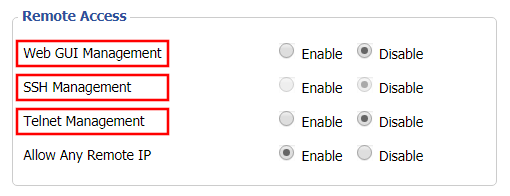
Navigate to Administration > Management

Access FlashRouters DD-WRT Admin Settings and Disable Remote Access 2
  1. Set Web GUI Management to Disable.
  2. Set SSH Management to Disable.
  3. Set Telnet Management to Disable.
  4. Set Allow Any Remote IP to Enable – Even though this setting is set to Enable there is no remote access because Web GUI Management is already set to Disable. 
  5. Click Apply Settings.

Primary Sidebar

  • Troubleshooting
  • Router Access
  • Internet Connection Issues
  • WiFi Connectivity
  • General VPN Issues
  • TeamViewer Remote Support
  • DD-WRT Firmware
  • Facebook
  • Twitter
  • Instagram
  • Pinterest
  • YouTube

Footer