Preparing for Windscribe WireGuard Setup
Verify your Windscribe login information
If you are not already a Windscribe user Sign Up Now.
Log in to your account on the Windscribe website.
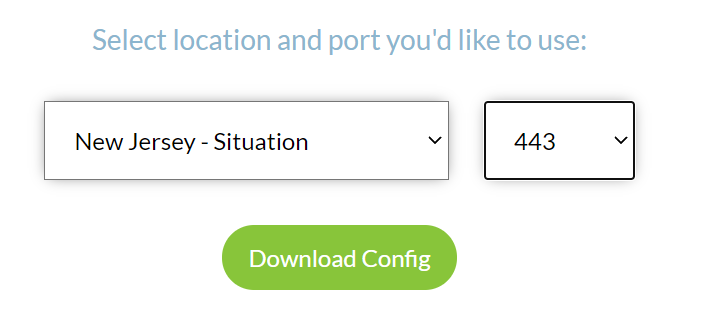
Go to the Windscribe WireGuard config generator page and select the Server location and Port you would like to use. Click Download Config.
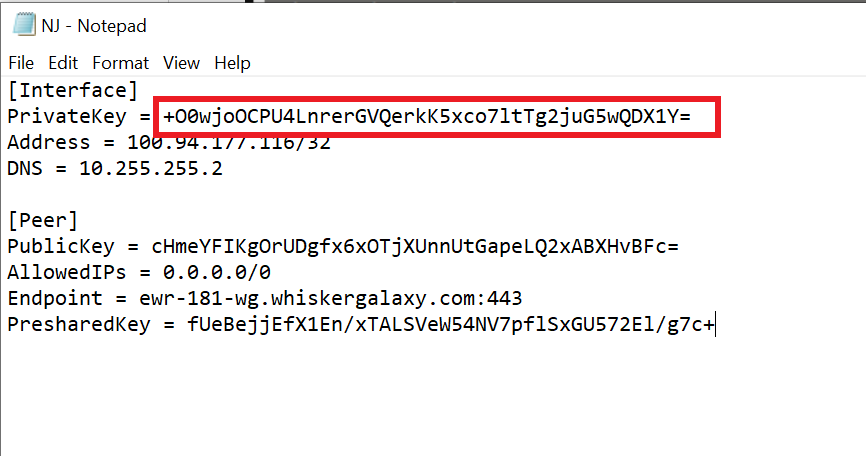
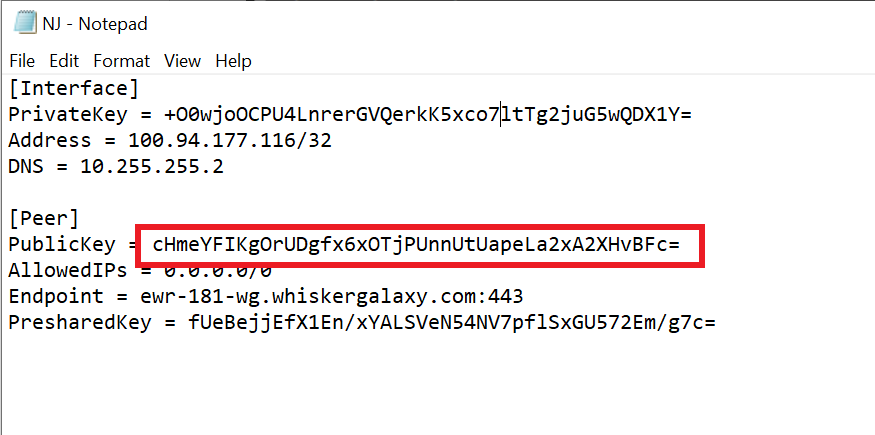
Open the .conf file that is downloaded using Notepad in Windows or TextEdit in Mac.
DD-WRT Router Setup for Windscribe WireGuard
Navigate to Setup > Tunnels
Enter Winscribe WireGuard settings
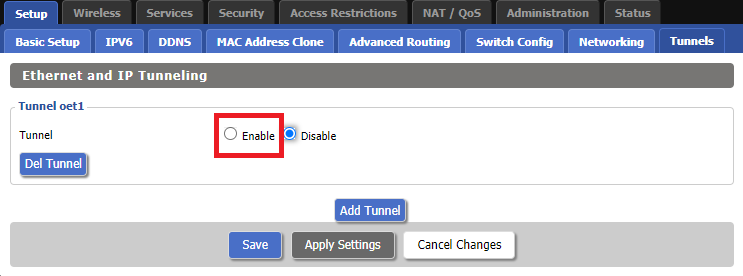
1. Click Add Tunnel.
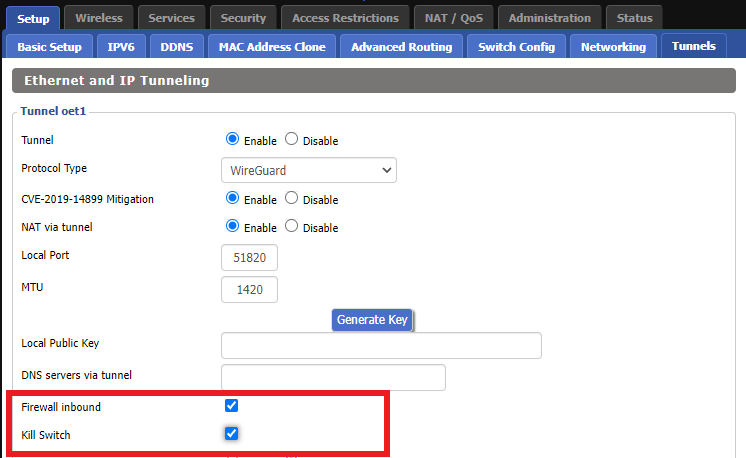
2. Set Tunnel to Enable.
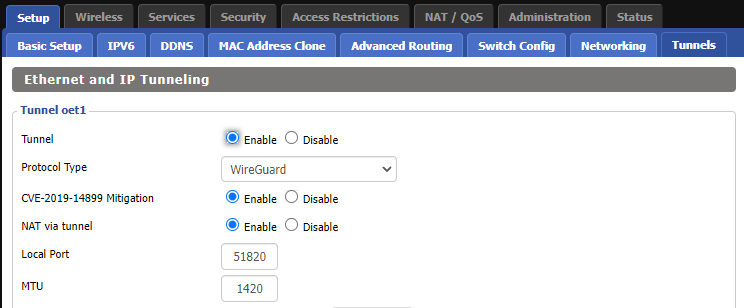
3. Select Wireguard from the dropdown.

3. Set CVE-2019-14899 Mitigation to Enable. Set NAT via Tunnel to Enable. Set Local Port to 51820. Set MTU to 1420.
4. Check Firewall inbound and Kill Switch.
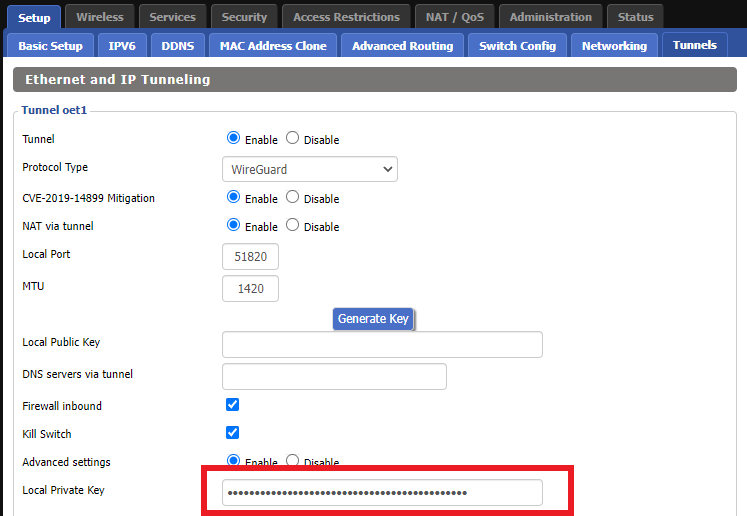
5. Set Advanced Settings to Enable and copy the PrivateKey from the .conf file and paste it into the Local Private Key field.
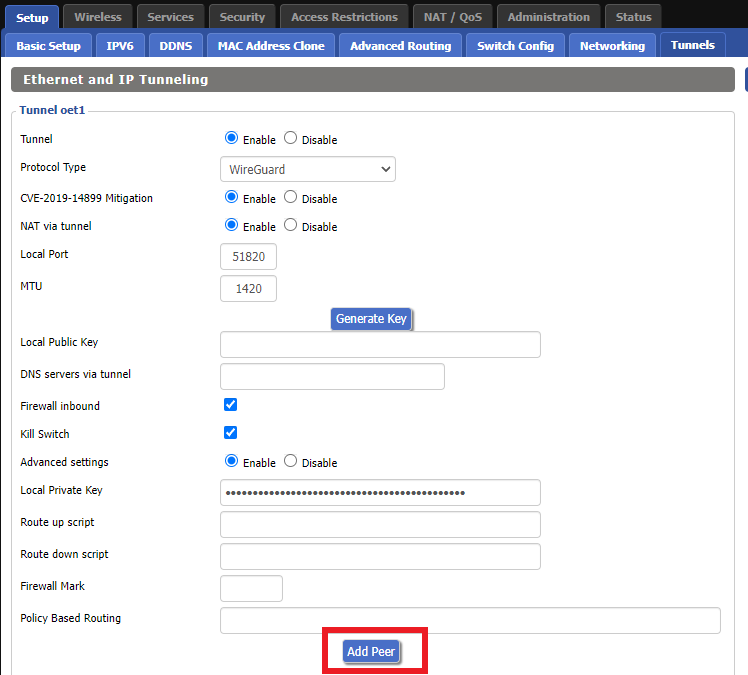
6. Click Add Peer.
7. Set Peer Tunnel IP to 0.0.0.0. Set Peer Tunnel DNS to the DNS found in the .conf file.
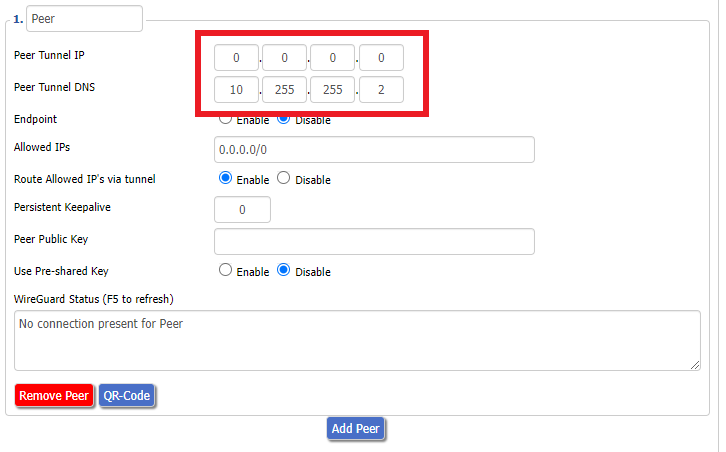
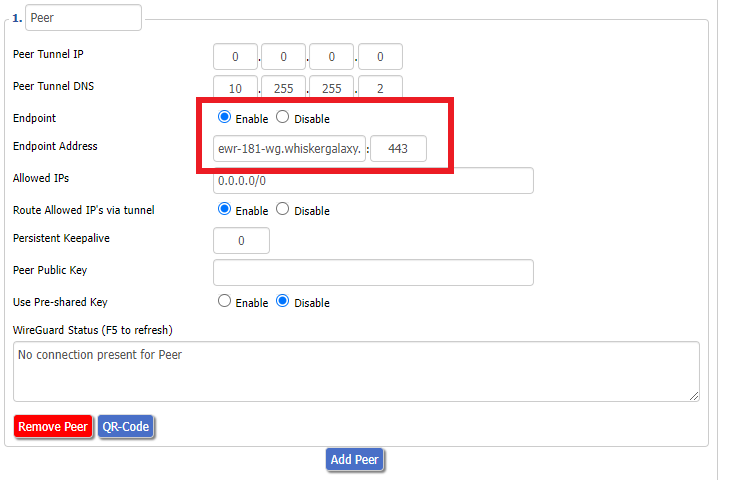
8. Set Endpoint to Enable. Copy and Paste the Endpoint from the .conf file and paste it into the Endpoint Address field. Enter the same Port that appears next to the Endpoint.
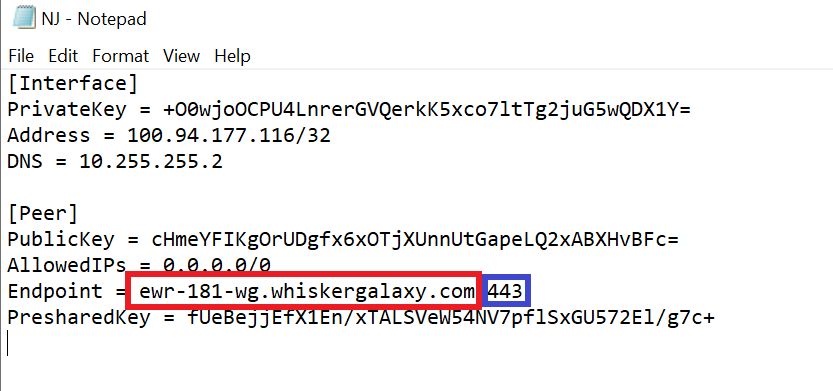
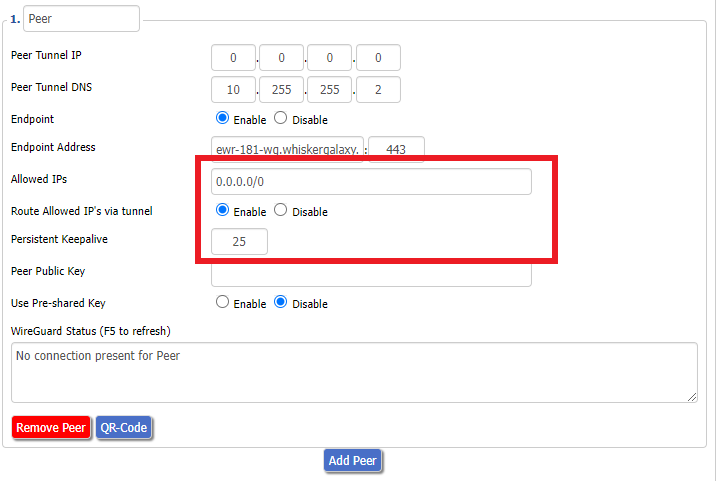
9. Leave Allowed IPs as 0.0.0.0/0. Set Router Allowed IP’s via tunnel to Enable. Set Persistent Keep Alive to 25.
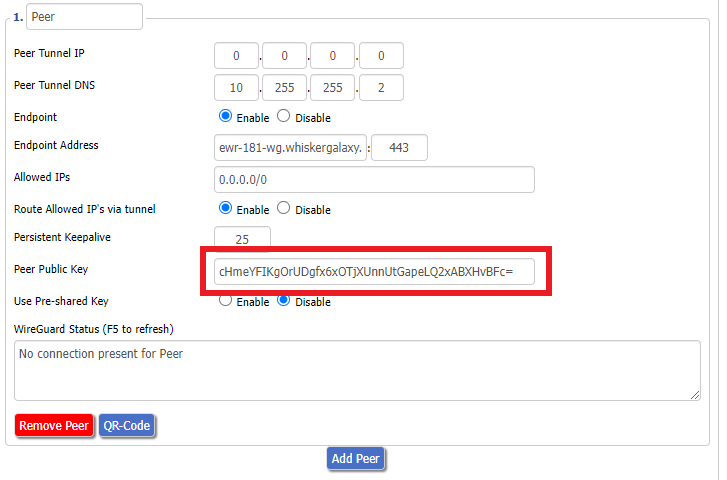
10. Copy and Paste the PublicKey from the .conf file and paste it into the Peer Public Key field.
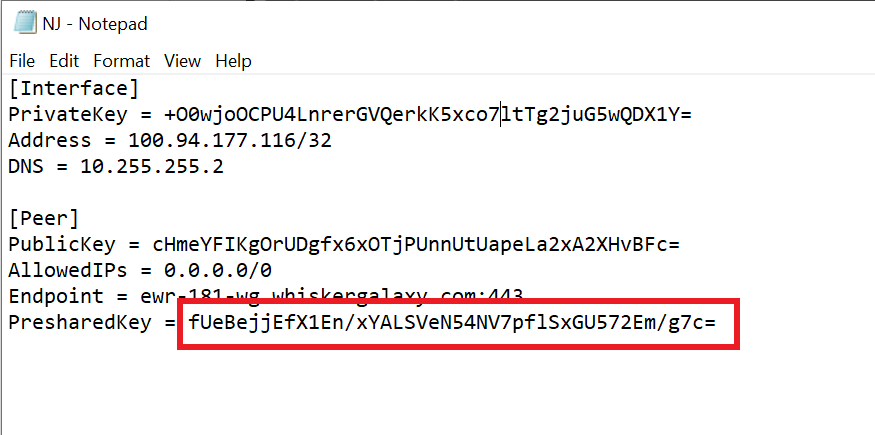
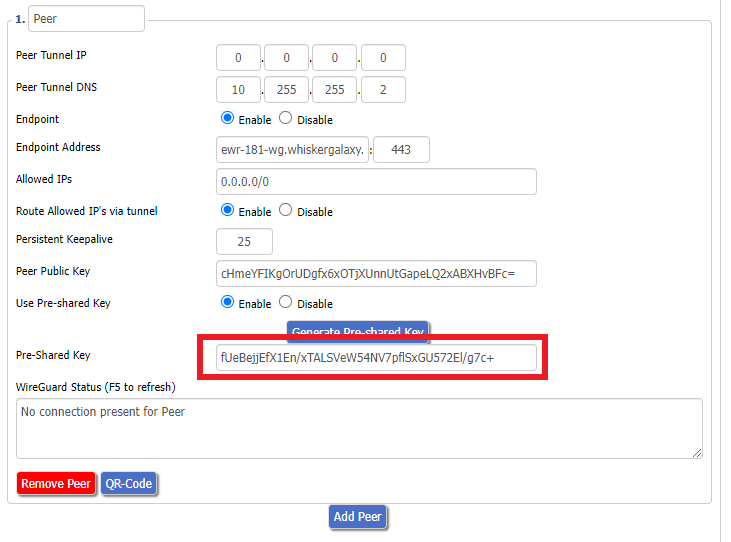
11. Set Use Pre-shared Key to Enable. Copy and Paste the Presharedkey from the .conf file and paste it into the Pre-Shared Key field.
12. Copy the Address from the .conf file and paste it into the IP Addresses/Netmask(CIDR) field.
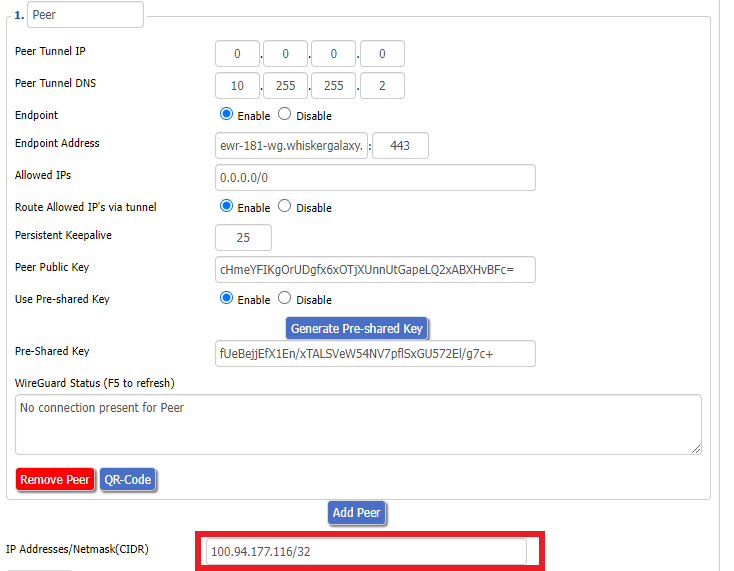
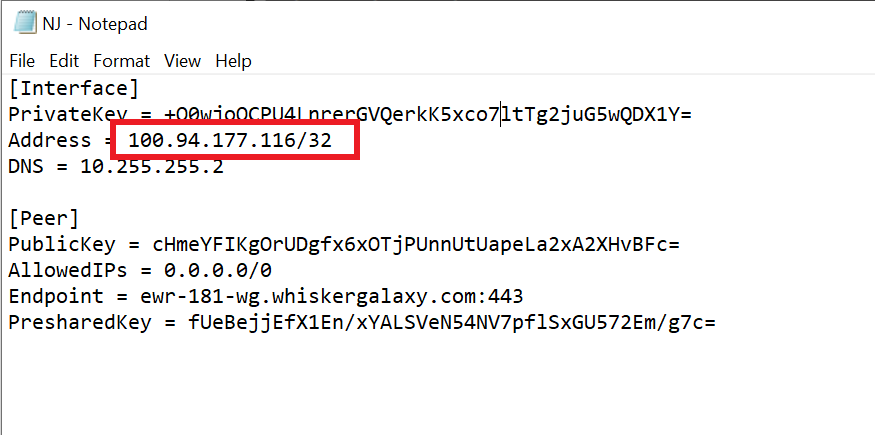
Certain DD-WRT builds will show two separate fields here: IP Address and Subnet Mask. If that is the case set the IP Address field to the Address without the /32 added and set the Subnet Mask to 255.255.255.255
21. At the bottom of the page click Save and then click Apply Settings.
Verify a successful Winscribe connection
Navigate to Setup > Tunnels
- You should Endpoint, Latest handshake, and Transfer in the WireGuard status area.
- Visit whatismyipaddress.com to verify your status as using Winscribe.
Back up your settings
Navigate to Administration > Backup
- Click the Backup button.
- A file named nvrambak.bin will be saved to your computer.
- You can load nvrambak.bin to restore your settings in the event of a reset.