Preparing for ProtonVPN WireGuard Setup
Verify your ProtonVPN login information
If you are not already a ProtonVPN user Sign Up Now.
Log in to your account on the ProtonVPN website.
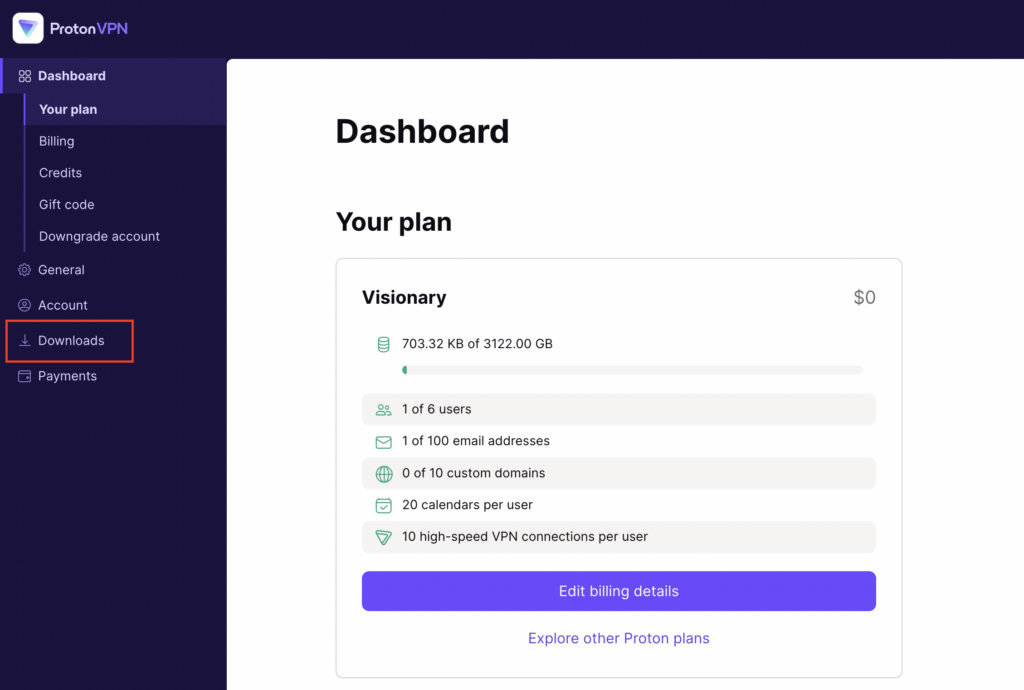
1. On the left hand side select Downloads.
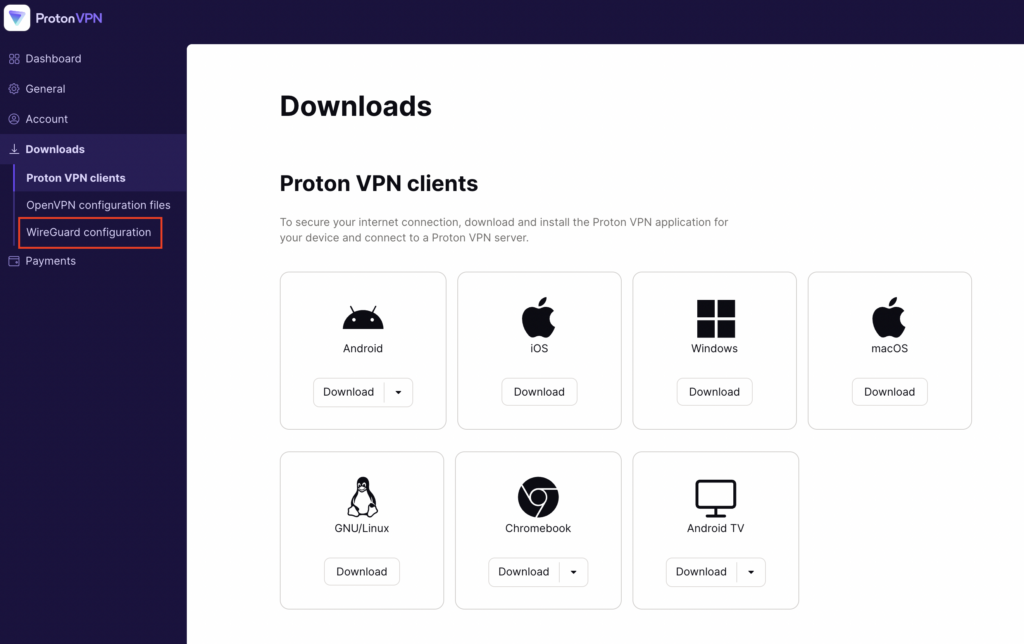
2. Then select WireGuard Configuration.
3. Enter the Device Name to assign the FlashRouter to identify it among your ProtonVPN connections.
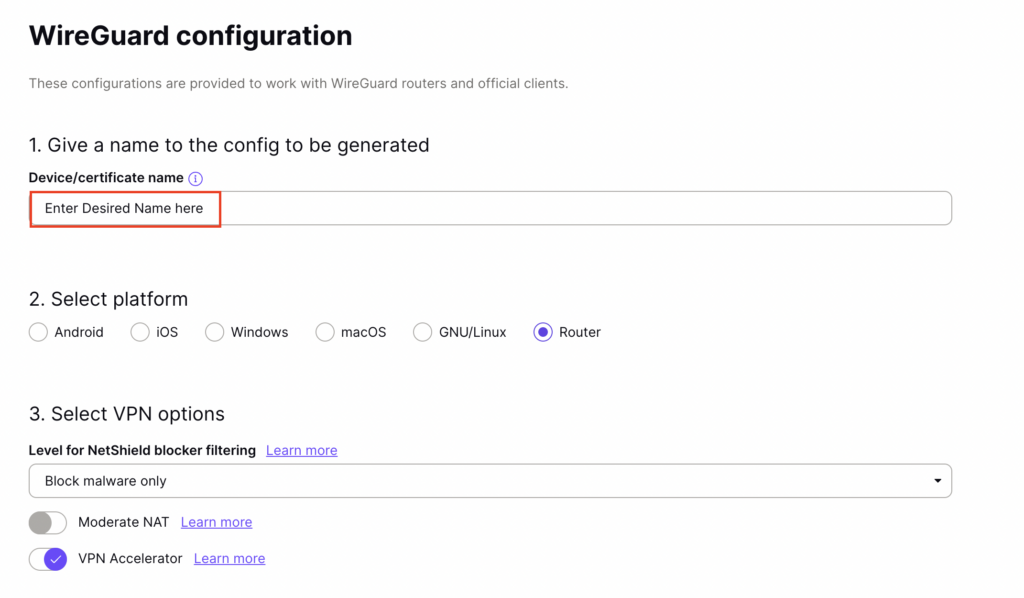
4. Set the Device platform as Router.
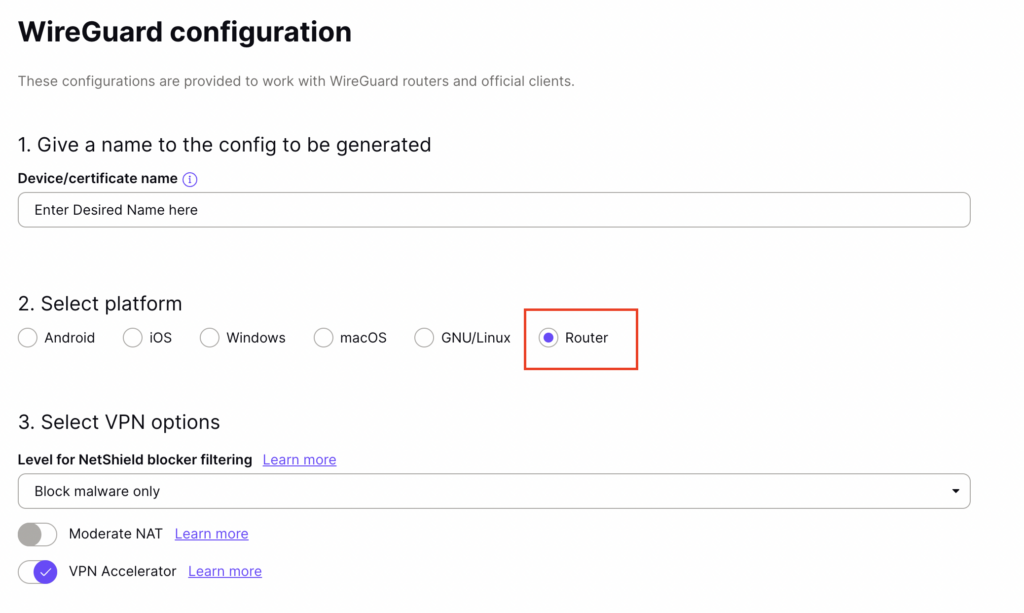
5. Select the VPN Options that you would like to connect with.
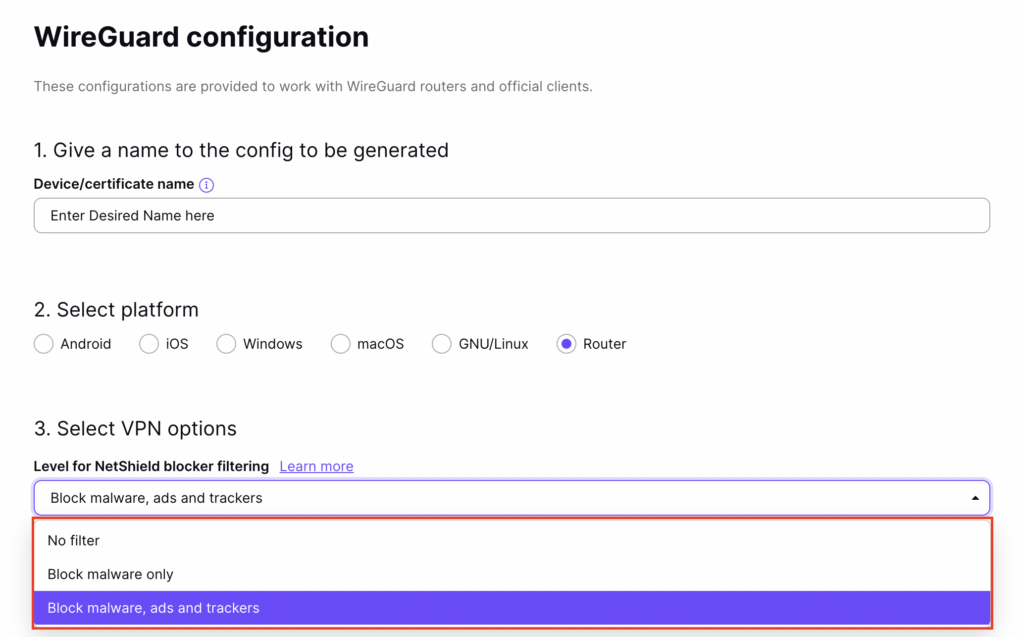
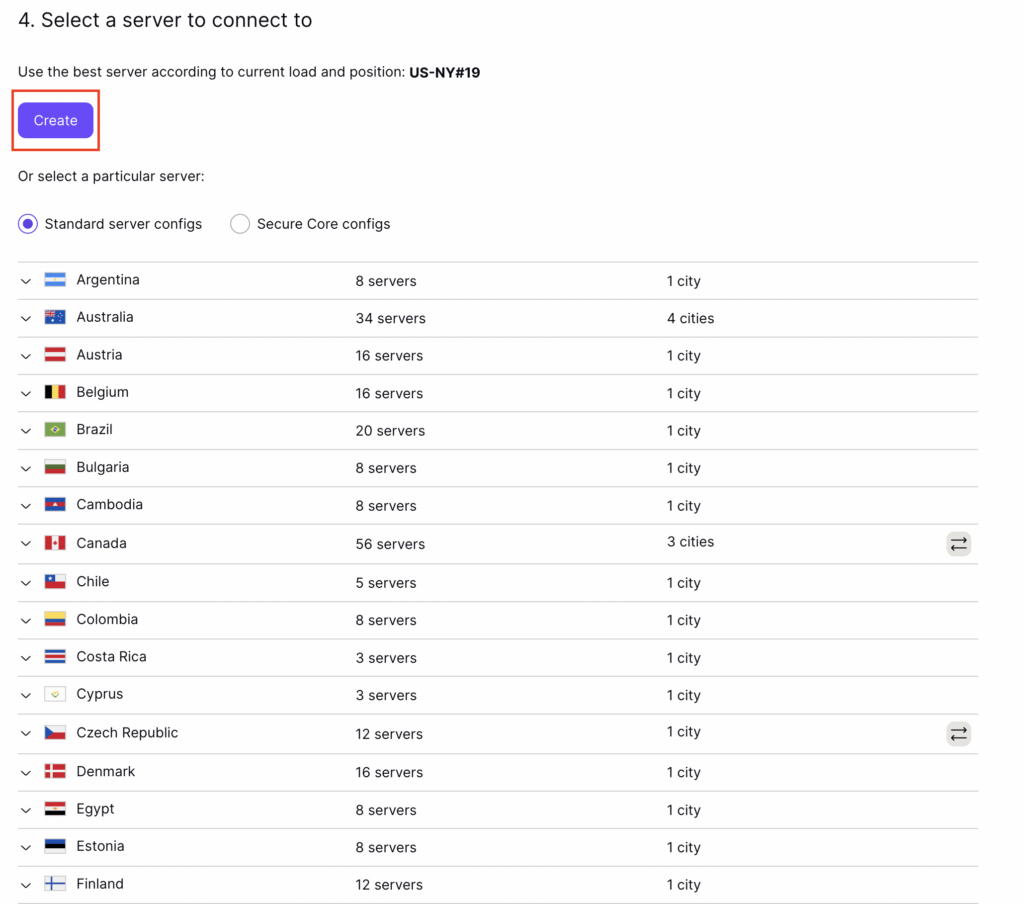
6. ProtonVPN will recommend the ideal server for you to connect to based on your location. Click Create or scroll down and select the server you wish to connect to and click Create next to the server number.

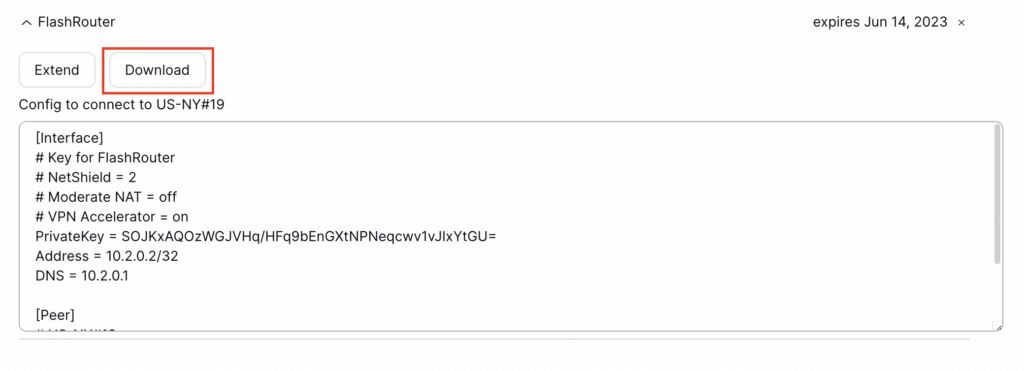
7. Click Download to download the .conf file of the server you selected.
DD-WRT Router Setup for ProtonVPN WireGuard
Navigate to Setup > Tunnels
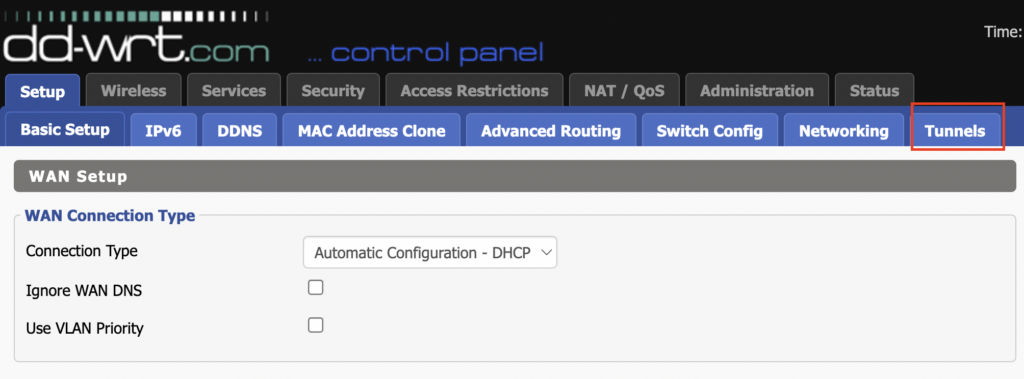
Enter ProtonVPN WireGuard settings
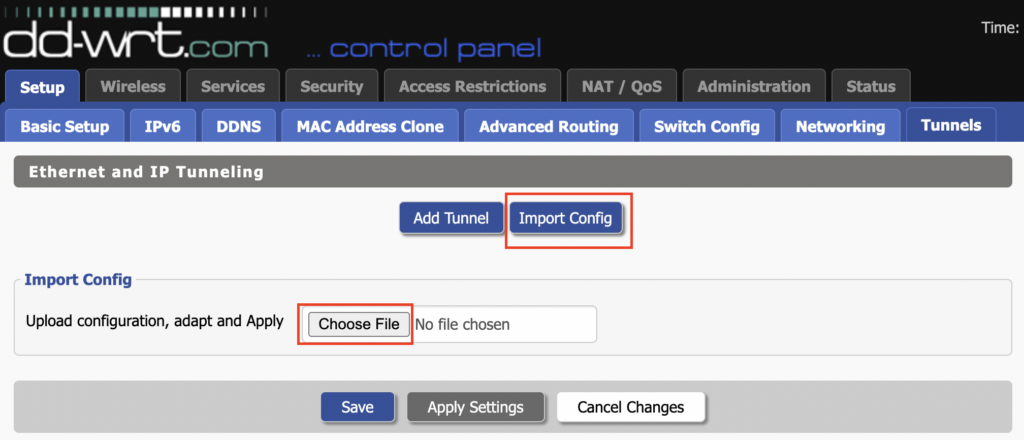
1. Click Import Config and then select Choose file. Select the .conf file that was downloaded earlier.
2. All settings will be loaded into the DD-WRT firmware the only field that needs to be adjusted is setting Persistent Keepalive to 25.
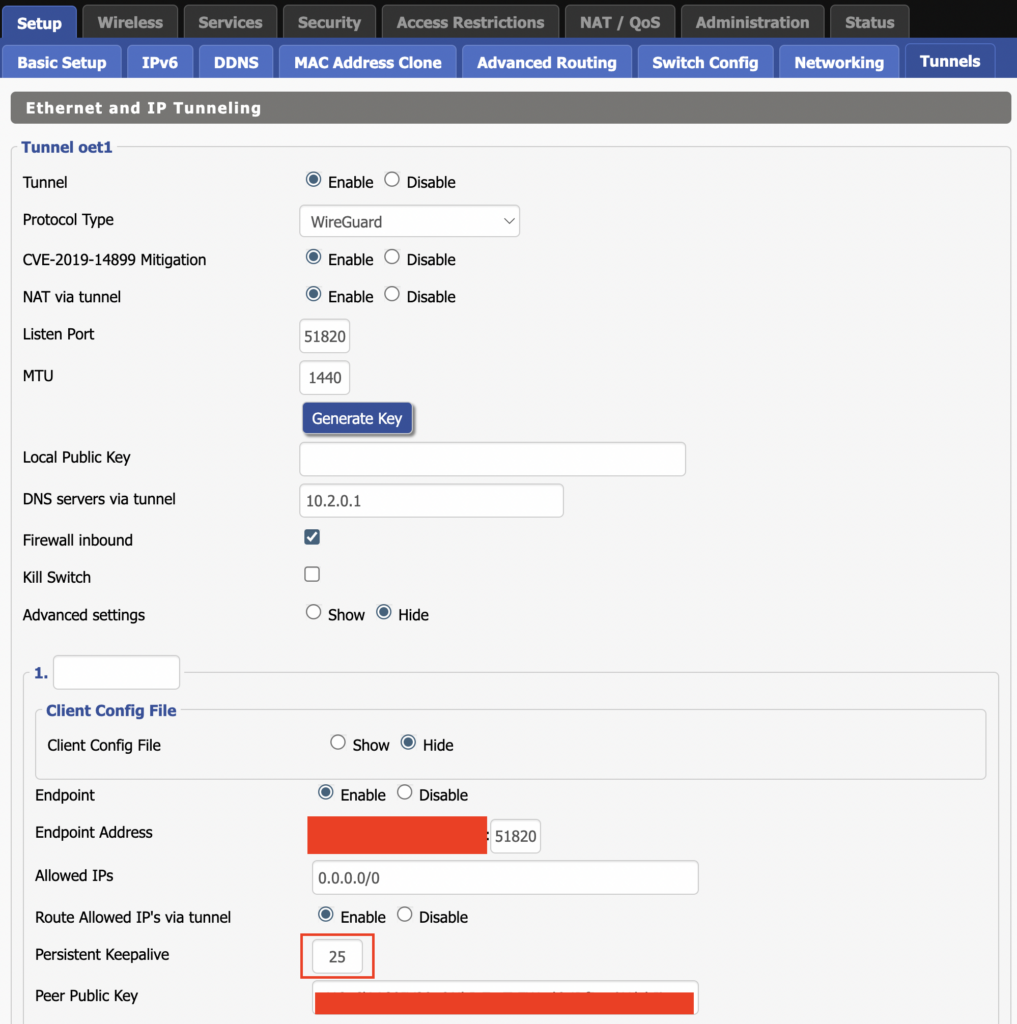
3. Click Apply Settings at the bottom of the page.
4. After 30 seconds or so refresh the page until you see the WireGuard Status on the page is populated as seen below.

Verify a successful ProtonVPN connection
Navigate to Setup > Tunnels
- You should Endpoint, Latest handshake, and Transfer in the WireGuard status area.
- Visit whatismyipaddress.com to verify your status as using ProtonVPN.
Back up your settings
Navigate to Administration > Backup
- Click the Backup button.
- A file named nvrambak.bin will be saved to your computer.
- You can load nvrambak.bin to restore your settings in the event of a reset.