You can connect to NordVPN on your AsusWRT router using NordLynx, OpenVPN, or a Dedicated IP.
Quick Options
-
NordLynx: Choose your preferred country from NordVPN’s server list
-
OpenVPN: Choose your preferred city or country from NordVPN’s server list.
-
Dedicated IP (optional): Enter your unique configuration file if you’ve been assigned a static NordVPN IP.
 If you are not already a NordVPN user Sign Up Now.
1. Get your NordVPN Access Token for NordLynx connections. Log in to your NordVPN account and select NordVPN from your list of Services.
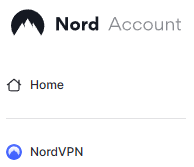
2. At the bottom of the page click Get Access token and you will receive a code via email. Enter this code to proceed.

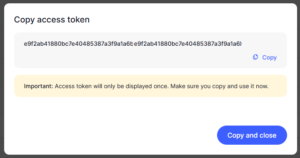
3. After you enter the email code select Generate new token and set it to Doesn’t expire. Copy this token.

4. Log in to the Asus settings page by connecting to the Asus router’s WiFi (or wired LAN) on your computer. Then, enter 192.168.50.1 or asusrouter.com in the browser.
View our guide for more instructions on how to access AsusWRT firmware settings.
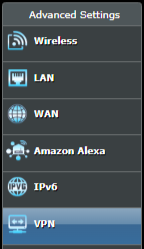
5. Navigate to the VPN tab and then select the VPN Fusion tab, then click Add profile.
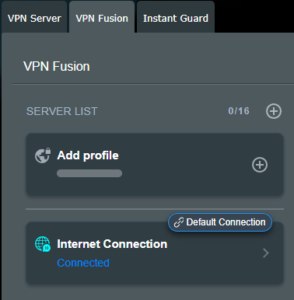
6. Fill in your NordVPN information, then click Apply and Enable.
- Connection Name: Choose a name for your NordLynx connection.
- VPN Type: Select NordVPN
- Region: Choose your VPN server location
- Token: Copy and paste your NordVPN token.
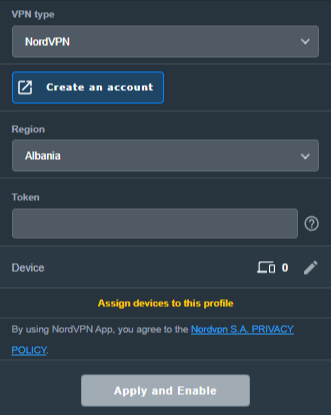
6. You should now see the Profile say Connected, indicating that the NordVPN server is successfully connected to your router!
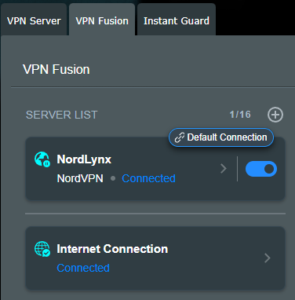
7. The VPN connection is automatically set to Apply to all devices.
If you only want certain devices to connect to the VPN, then turn off the VPN connection and switch off Apply to all devices.
Now click the pencil next to the Device section and select the devices (computer, phone, etc.) that you want to connect to VPN. Click OK and then click Apply all settings.

1. Get your NordVPN manual service credentials for OpenVPN connections. Log in to your NordVPN account and select NordVPN from your list of Services.

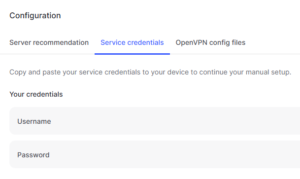
2. At the bottom of the page in the Manual Setup section click Setup NordVPN manually then under the Configuration section go to Service credentials. Click Verify email to receive a code via email and enter the code to view and copy your credentials.

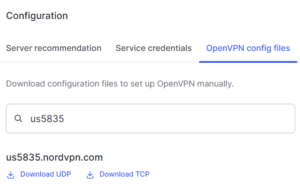
3. Click on OpenVPN config files. Search and download the server file for your preferred NordVPN location, UDP is recommended.
4. Log in to the Asus settings page by connecting to the Asus router’s WiFi (or wired LAN) on your computer. Then, enter 192.168.50.1 or asusrouter.com in the browser.
View our guide for more instructions on how to access AsusWRT firmware settings.
5. Navigate to the VPN tab and then click on the VPN Fusion tab, then click Add Profile.


6. Fill in your NordVPN information then click Apply and Enable.
- Connection Name: Choose a name for your NordVPN OpenVPN connection.
- VPN Type: Select OpenVPN
- Import .ovpn File: Upload the OpenVPN file that you downloaded.
- Username and Password: Copy and paste your NordVPN manual service credentials.
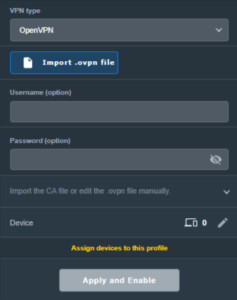
6. You should now see the Profile say Connected, indicating that the NordVPN server is successfully connected to your router!
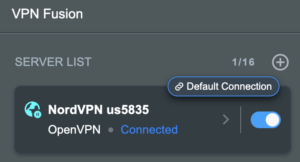
7. The VPN connection is automatically set to Apply to all devices.
If you only want certain devices to connect to the VPN, then turn off the VPN connection and switch off Apply to all devices.
Now click the pencil next to the Device section and select the devices (computer, phone, etc.) that you want to connect to VPN. Click OK and then click Apply all settings.

1. Get your NordVPN manual service credentials for OpenVPN connections. Log in to your NordVPN account and select NordVPN from your list of Services.

2. At the bottom of the page in the Manual Setup section click Setup NordVPN manually then under the Configuration section go to Service credentials. Click Verify email to receive a code via email and enter the code to view and copy your credentials.


3. Now download your Dedicated IP configuration file from the NordVPN website.
4. Log in to the Asus settings page by connecting to the Asus router’s WiFi (or wired LAN) on your computer. Then, enter 192.168.50.1 or asusrouter.com in the browser.
View our guide for more instructions on how to access AsusWRT firmware settings.
5. Navigate to the VPN tab then click on the VPN Fusion tab, then click Add Profile.


6. Fill in your NordVPN information then click Apply and Enable.
- Connection Name: Choose a name for your NordVPN Dedicated IP connection.
- VPN Type: Select OpenVPN
- Import .ovpn File: Upload the Dedicated IP OpenVPN file that you downloaded.
- Username and Password: Copy and paste your NordVPN manual service credentials.

6. You should now see the Profile say Connected, indicating that the NordVPN server is successfully connected to your router!

7. The VPN connection is automatically set to Apply to all devices.
If you only want certain devices to connect to the VPN, then turn off the VPN connection and switch off Apply to all devices.
Now click the pencil next to the Device section and select the devices (computer, phone, etc.) that you want to connect to VPN. Click OK and then click Apply all settings.

- Connect your devices to the Asus router network and visit the NordVPN website, at the top it should display Your Status: Protected.
- Visit NordVPN’s IP Check to verify your new IP address and virtual location.
🚫📱Do not run NordVPN apps on devices connected to your NordVPN router. Using the app at the same time as the router VPN may cause conflicts and connection issues.