Your Privacy Hero NordVPN Router uses cloud-based management, which means you can securely access and adjust your router settings from anywhere, on any device with an internet connection. Whether you’re connected through your phone, another Wi-Fi network, or directly to the Privacy Hero network, setup and management are always within reach.
Follow the steps below to connect your Privacy Hero to Surfshark WireGuard® or OpenVPN servers.
 Don’t have a Privacy Hero yet? Get your Privacy Hero Router for Surfshark here
1. From any device that has a browser such as a computer, smartphone, or tablet visit app.privacyhero.com.

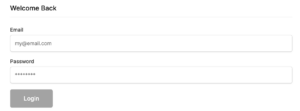
2. Enter your Privacy Hero account email and password. Click Login.

3. Click the VPN symbol.

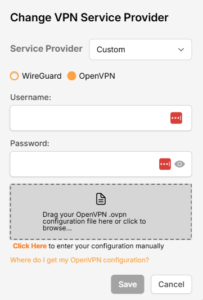
4. Click the Change button and select Custom from the dropdown and choose the Wireguard option.


5. In a new tab login to your Surfshark account.

6. Navigate to the VPN > Manual Setup tab.

7. Now choose Wireguard and go to the Router section.


8. Now go to Locations, and click on the server location you wish to use. Then, download the server file.

9. Drag and drop or click to Upload the server file into the Custom box on your Privacy Hero settings page. Then press Save.
10. Your Privacy Hero settings should now show a Connected message, indicating you have successfully signed in to your Surfshark VPN server!
1. From any device that has a browser such as a computer, smartphone, or tablet visit app.privacyhero.com.

2. Enter your Privacy Hero account email and password. Click Login.

3. Click the VPN symbol.

4. Click the Change button and select Custom from the dropdown and choose the OpenVPN option.


5. In a new tab login to your Surfshark account.

6. Navigate to the VPN > Manual Setup tab.

7. Now choose OpenVPN and go to the Router section.


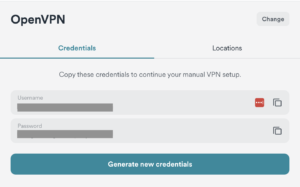
8. Now go to Credentials and find your OpenVPN specific Username and Password.

9. Copy and paste the username and password from previous step into the Custom box on your Privacy Hero settings page.
10. Now go back to the Surfshark account page, and press Locations.

11. Click on the country name that you want to choose, and Download any of the available server files from the list. (We recommend download the UDP version of the server file).

12. Drag and drop or click to Upload the server file into the Custom box on your Privacy Hero settings page. Then press Save.
13. Your Privacy Hero settings should now show a Connected message, indicating you have successfully signed in to your Surfshark VPN server!
Privacy Hero’s cloud based router settings access makes it so you can change settings while not connected to the Privacy Hero network. Visit the Surfshark IP Check to verify your VPN IP address. If it has not changed be sure to double check that you are indeed connected to the Privacy Hero network.
Keep in mind that the VPN connection will not change the location of the streaming services listed in the Streaming Relocation area of the Privacy Hero settings if the Streaming Relocation feature is Enabled.